11. Working Together with Adobe Programs
What You’ll Do
Open Compositions in Adobe Dreamweaver
Work with Adobe Digital Publishing Suite
Save Images from Adobe Photoshop
Save Graphics from Adobe Fireworks
Export Images from Adobe Illustrator
Save Artwork from Adobe Illustrator
Export Animations from Adobe Flash
Introduction
In addition to Edge Animate, Adobe also produces other programs that create digital media and content for print, mobile, and web-based applications. You can use this content in your compositions in Edge Animate to create a dynamic animation for use on the web or as content you can use back in these programs. It’s all a workflow of content in and out of programs to display information in an interactive world. In this chapter, you’ll work with several Adobe programs, including Dreamweaver, Muse, InDesign, Photoshop, Fireworks, Illustrator, and Flash Professional.
Dreamweaver creates and works with HTML documents, which means you can take your results from Dreamweaver, and then add animations to them in Edge Animate.
You can import a packaged composition from Edge Animate into a web site using Muse or a print or digital publication using InDesign. After you create a publication, you can use tools in InDesign to work with the Adobe Digital Publishing Suite (DPS), an integrated online service that allows you to create, optimize, and distribute content produced for mobile devices.
Photoshop, Fireworks, and Illustrator are best used for creating and modifying vector and bitmap graphics for website and print-based projects. The web graphics—including JPG/JPEG, PNG, SVG, and GIF files—you create using these Adobe programs can be added to your compositions in Edge Animate.
Flash Professional is a program for developing interactive content, animations, user interfaces, games, and mobile and web applications. Instead of using the built-in preloader assets provided by Edge Animate, you can create a custom animated GIF in Flash Professional and then export it for use in your composition.
Opening Compositions in Adobe Dreamweaver
Adobe Dreamweaver is a program that allows you to create web site and web programs for desktops, smartphones, and other devices. Dreamweaver uses the latest technologies: HTML/HTML5, CSS, JavaScript, PhoneGap, site management, FTP (File Transfer Protocol), CMS (Content Management Services) frameworks, and SVN (Subversion). Dreamweaver creates and works with HTML documents, which means you can take your results from Dreamweaver, and then add animations to them in Edge Animate, while still preserving the integrity of CSS-based layouts. You can use Dreamweaver to edit the HTML, CSS, and JavaScript code associated with your composition. For example, if you’re comfortable working with JavaScript/jQuery, you can open and edit the filename_edgeActions.js file that contains the actions and triggers in your composition. In addition, you can preview the animation in Live view and view the animation HTML code in Live Code view. However, you cannot edit the code in Live view; it’s read only.
Open an Edge Animate Composition in Dreamweaver
![]() Start Adobe Dreamweaver.
Start Adobe Dreamweaver.
![]() Click the File menu, click Open, navigate to and select the composition HTML file, and then click Open.
Click the File menu, click Open, navigate to and select the composition HTML file, and then click Open.
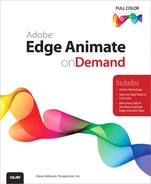
![]() Click the Split button on the Document toolbar.
Click the Split button on the Document toolbar.
This displays both Code view and Design view.
![]() Scroll through Code view.
Scroll through Code view.
You’ll notice references to Adobe Edge Runtime in the head section of the HTML code.
![]() Scroll through Design view.
Scroll through Design view.
You’ll notice the animation doesn’t appear at the top of the page.
![]() Click the Live button on the Document toolbar.
Click the Live button on the Document toolbar.
The animation created in Edge Animate appears in Design view.
Work with the HTML for an Animation in Dreamweaver
![]() Start Adobe Dreamweaver.
Start Adobe Dreamweaver.
![]() Click the File menu, click Open, navigate to and select the composition HTML file, and then click Open.
Click the File menu, click Open, navigate to and select the composition HTML file, and then click Open.
![]() Click the Split button on the Document toolbar.
Click the Split button on the Document toolbar.
![]() Click the Live button on the Document toolbar.
Click the Live button on the Document toolbar.
![]() Click the Live Code button on the Document toolbar, and then scroll through the code.
Click the Live Code button on the Document toolbar, and then scroll through the code.

You’ll notice the HTML code for your animation. The code is read only in Live Code view. The code doesn’t appear in Live view.
![]() Click the Live button on the Document toolbar to exit Live mode.
Click the Live button on the Document toolbar to exit Live mode.
Importing into Adobe Muse
Adobe Muse is a program that lets you create, design, and publish HTML web sites without writing code. You can design web-standard sites like you design print layouts. Muse takes advantage of Adobe services, much like Edge Animate does, such as TypeKit to integrate fonts, and Business Catalyst for creating and publishing web sites. You can drag and drop or import using the Place command the OAM file into an open Muse web site.
Import and Preview a Package into a Muse Web Site
![]() Start Adobe Muse, and then create a new site or open an existing site.
Start Adobe Muse, and then create a new site or open an existing site.
![]() In Plan view, double-click the name of the page where you want to add the animation.
In Plan view, double-click the name of the page where you want to add the animation.
![]() Click the File menu, and then click Place.
Click the File menu, and then click Place.
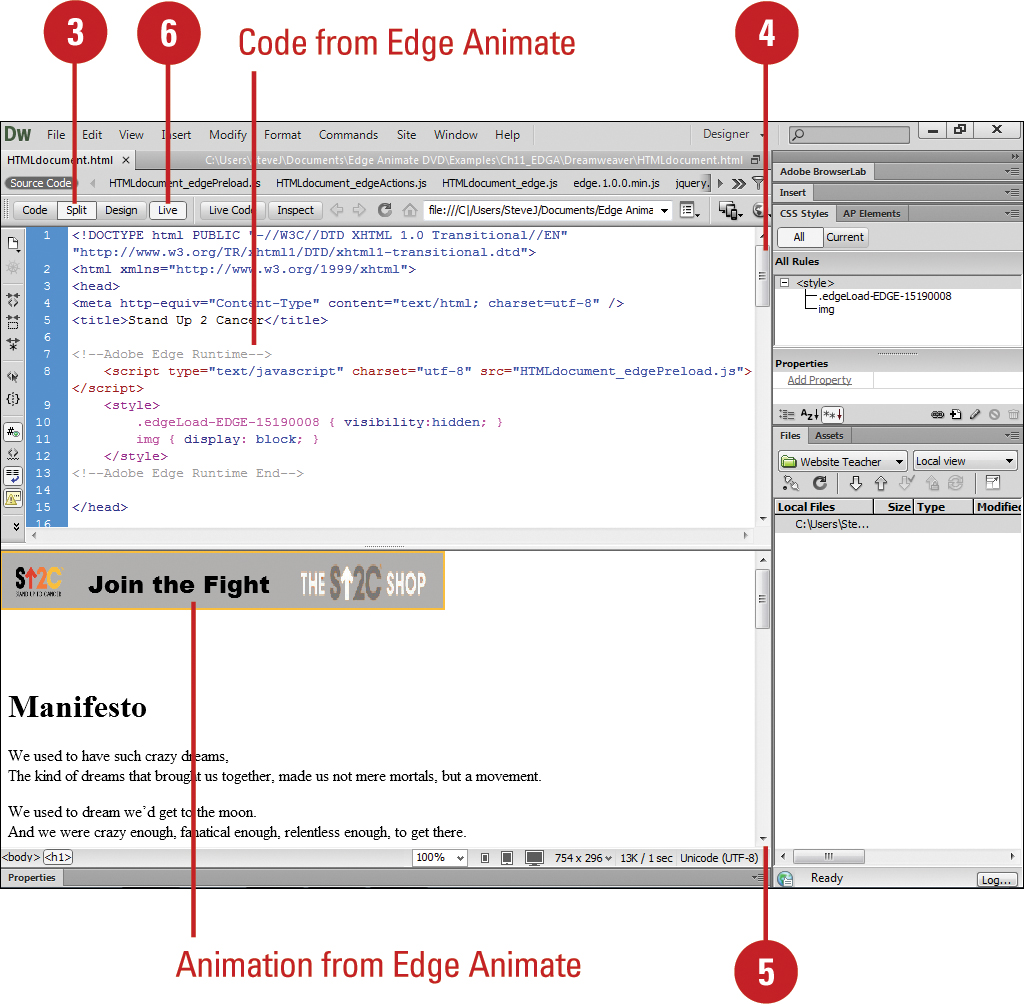
![]() Click the Save as Type list arrow (Win) or Format popup (Mac), and then click All Supported Formats.
Click the Save as Type list arrow (Win) or Format popup (Mac), and then click All Supported Formats.
![]() Navigate to and select the Edge Animate Deployment Package (.oam) file.
Navigate to and select the Edge Animate Deployment Package (.oam) file.
![]() Click Open.
Click Open.

The cursor loads with the imported content.
![]() Click in the document where you want to place the composition as you would a photo or any other imported file type.
Click in the document where you want to place the composition as you would a photo or any other imported file type.
![]() Click the Preview Mode button on the toolbar.
Click the Preview Mode button on the toolbar.
The animation from Edge Animate plays in Preview Mode.

Work with the Animation in Muse
![]() Start Adobe Muse, and then open the existing site with the imported OAM file.
Start Adobe Muse, and then open the existing site with the imported OAM file.
![]() To view the imported OAM file, click the Assets tab.
To view the imported OAM file, click the Assets tab.
• To view panels, click the Window menu, and then click Show Panels.
The imported OAM file appears in the Assets panel, where you can relink and update the file, just like any other file.
![]() Point to the imported OAM file to display a tooltip with information about the file.
Point to the imported OAM file to display a tooltip with information about the file.

![]() To work with the imported OAM file, right-click (Win) or control-click (Mac), and then click an option:
To work with the imported OAM file, right-click (Win) or control-click (Mac), and then click an option:
• Relink. Relinks the OAM file in a different location.
• Update Asset. Updates the OAM file with any changes; the command appears as needed.
• Go To Asset. Locates the OAM animation in the site.
• Reveal in Explorer (Win) or Reveal in Finder (Mac). Opens the folder with the OAM file in your operating system.
• Copy Full Path. Copies the full path location of the OAM file as a link to the Clipboard, where you can paste it in another location.

Importing into Adobe InDesign
Adobe InDesign is a program that allows you to design and pre-flight page layouts for print or digital distribution. You can drag and drop or import using the Place command the OAM file into an open InDesign document. In InDesign, you can create interactive documents and digital publication for use on mobile devices, such as an iPad or iPhone, as well as your desktop. You can create alternate layouts, one for print and another for tablet, to leverage the same content on multiple layouts. After you create a layout, you can apply Liquid Layout options to allow page content to adapt to different screen sizes. After you create a digital publication, you can use tools in InDesign, such as Folio Builder and Folio Overlay, to create a Folio publication for use with Adobe Digital Publishing Suite (DPS), an integrated online service that allows you to create, optimize, and distribute content produced for tablet devices.
Import a Package into Adobe InDesign CS6
![]() Start Adobe InDesign CS6, and then open the file you want to use.
Start Adobe InDesign CS6, and then open the file you want to use.
![]() Select the Selection Tool in the Tools panel, and then click a blank area off the page to deselect all elements.
Select the Selection Tool in the Tools panel, and then click a blank area off the page to deselect all elements.
![]() Click the File menu, and then click Place.
Click the File menu, and then click Place.
![]() Click the Save as Type list arrow (Win) or Format popup (Mac), and then click All Files.
Click the Save as Type list arrow (Win) or Format popup (Mac), and then click All Files.
![]() Navigate to and select the Edge Animate Deployment Package (.oam) file.
Navigate to and select the Edge Animate Deployment Package (.oam) file.
![]() Click Open.
Click Open.
The cursor loads with the imported content.
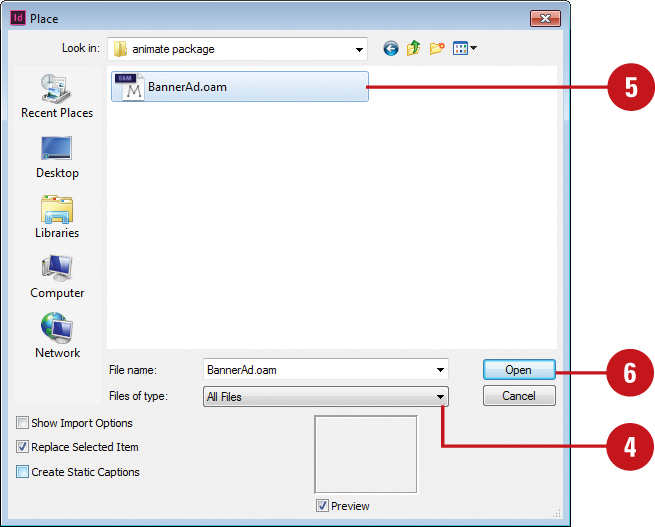
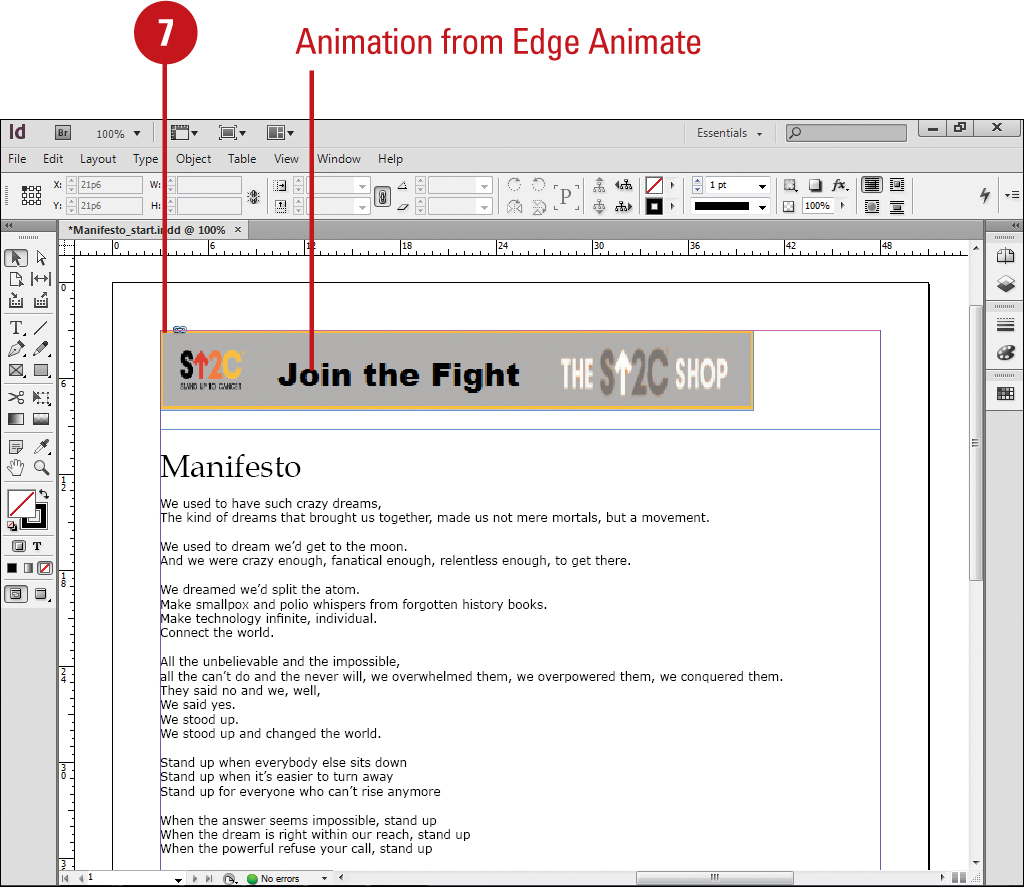
![]() Click in the document where you want to place the composition as you would a photo or any other imported file type.
Click in the document where you want to place the composition as you would a photo or any other imported file type.
The poster image for the animation appears in the document.
Work with Alternate and Liquid Layouts
![]() Select the Pages panel.
Select the Pages panel.
• Click the Window menu, and then click Pages.
![]() Click the Options menu, point to View Pages, and then click By Alternate Layout.
Click the Options menu, point to View Pages, and then click By Alternate Layout.
![]() Click the Layout Options menu, and then select from the following options:
Click the Layout Options menu, and then select from the following options:
• Create Alternate Layout. Select to creates a new alternate layout.
• Delete Alternate Layout. Select to delete the selected alternate layout.
• Delete Pages. Select to delete the selected pages in the alternate layout.
• HTML5 Pagination Options. Select to add or remove pages during the creation of folio and EPUB files.
• Split Window to Compare Layouts or Unsplit Window. Select to display alternate layouts in side-by-side windows.
![]() Select the layout you want to adjust in the Pages panel.
Select the layout you want to adjust in the Pages panel.

![]() Click the Layout menu, and then click Liquid Layout.
Click the Layout menu, and then click Liquid Layout.
![]() Click the Liquid Page Rule list arrow, select a rule, and then select other content and object constraint options, if available.
Click the Liquid Page Rule list arrow, select a rule, and then select other content and object constraint options, if available.

Working with Adobe Digital Publishing Suite
Adobe Digital Publishing Suite (DPS) is a set of tools used by larger publishers to create, distribute, and sell interactive publications for tablet devices. The DPS fee-based solution is available at www.adobe.com under Products; the Single Edition allows for publishing to iPad. DPS tools are integrated into InDesign by using the Folio Overlays and Folio Builder panels. The Folio Overlays panel allows you to create the interactive content, while the Folio Builder panel assembles (in a container) all of the necessary files into a format compatible with tablets. You can create local or online publications. For online publications, you need an Adobe ID (available free) to access Adobe DPS and the Adobe Cloud, where documents are stored and distributed to tablets. As an InDesign user, you can use DPS to create one free online publication to try it out and share it with as many people as you want. Before you can get started, you need to download Folio Producer tools (Folio Overlays panel, Digital Publishing plug-in, and Content Viewer for Desktop) and the Folio Builder panel update for InDesign CS6 or later, and install them on your computer. When you sign in to DPS with your Adobe ID on a tablet, it allows you to download and view it.
Get Started with DPS
![]() Start Adobe InDesign CS6, and then open the file with the imported Edge Animate Deployment Package (.oam).
Start Adobe InDesign CS6, and then open the file with the imported Edge Animate Deployment Package (.oam).
![]() Click the Help menu, and then click Update.
Click the Help menu, and then click Update.
![]() Update the DPS Tools to get the latest version, and then exit it.
Update the DPS Tools to get the latest version, and then exit it.
• You can also download DPS Tools from www.adobe.com.
![]() Select the Folio Builder and Folio Overlay panels; click the Window menu, and then select a panel.
Select the Folio Builder and Folio Overlay panels; click the Window menu, and then select a panel.
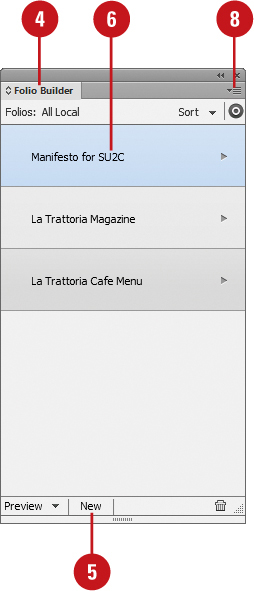
![]() Click New on the Folio Builder panel, specify settings, and then click OK.
Click New on the Folio Builder panel, specify settings, and then click OK.
![]() To add articles/content, double-click a folio, click Add, specify settings, and then click OK.
To add articles/content, double-click a folio, click Add, specify settings, and then click OK.
![]() To add interactivity, click options on the Folio Overlay panel.
To add interactivity, click options on the Folio Overlay panel.
![]() To access DPS on the web, click the Options menu on the Folio Builder panel, and then click Folio Producer.
To access DPS on the web, click the Options menu on the Folio Builder panel, and then click Folio Producer.

Preview the Animation with DPS and Adobe Content Viewer
![]() Start Adobe InDesign CS6, and then open the file with the imported Edge Animate Deployment Package (.oam).
Start Adobe InDesign CS6, and then open the file with the imported Edge Animate Deployment Package (.oam).
![]() Select the Folio Builder panel.
Select the Folio Builder panel.
• Click the Window menu, and then click Folio Builder.
![]() Select the folio or article you want to preview.
Select the folio or article you want to preview.
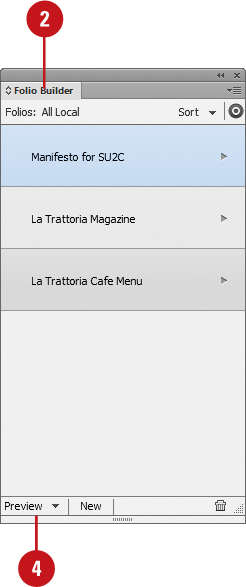
![]() Click Preview on the Folio Builder panel, and then click Preview on Desktop.
Click Preview on the Folio Builder panel, and then click Preview on Desktop.
Adobe Content Viewer opens, displaying the folio publication.
To set folio preview settings, continue.
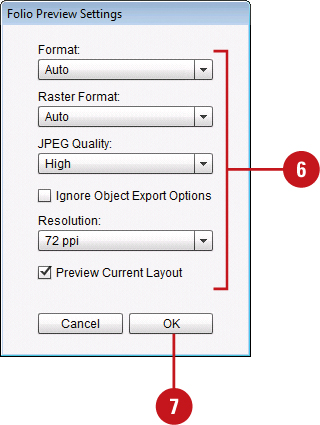
![]() Click the File menu, and then click Folio Preview Settings.
Click the File menu, and then click Folio Preview Settings.
![]() Specify options:
Specify options:
• Format. Select Auto to use document setting, Liquid, or Static.
• Raster Format. Select Auto to use document setting, or a graphic format.
• JPEG Quality. Select a quality; higher the quality, better the display, bigger the file size.
• Ignore Object Export Options. Select to ignore option.
• Resolution. Select a resolution best for the device: OS & web is 72 or 96, tablets are 150, and iPhone is 300.
• Preview Current Layout. Select to preview the current layout.
![]() Click OK.
Click OK.
Saving Images from Adobe Photoshop
Adobe Photoshop is a powerful high-end image editor that allows you to create and modify bitmap graphics for print and web-based projects. The Save for Web command in Photoshop is a dream come true for preparing images for the Internet. You can open any Photoshop document, and convert it into a web-friendly format, such as GIF, JPEG, or PNG. In the Save for Web dialog box, you can even try different optimization settings or compare different optimizations using the 2-Up or 4-Up panes. In addition, the dialog area below each image provides optimization information on the size and download time of the file. You can create graphics, such as backgrounds, buttons, or images, which you can import into Edge Animate. For example, you can create and save an image for use as a custom poster image in Edge Animate.
Save an Image from Photoshop in a Web Format
![]() Start Adobe Photoshop, and then open or create an image.
Start Adobe Photoshop, and then open or create an image.
• Check Image Size. Before you get started, it’s important to check the image size to make sure it’s the resolution you want for use on the Stage in Edge Animate. Click the Image menu, and then click Image Size.
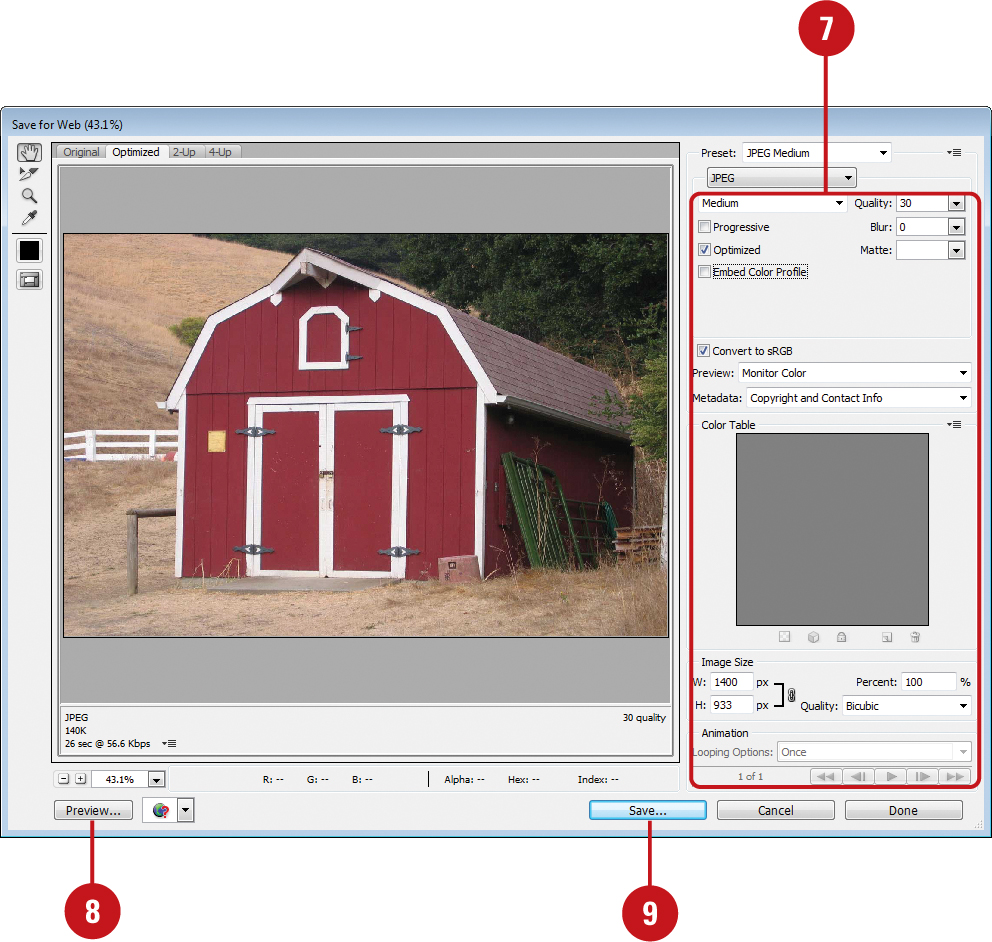
![]() Click the File menu, and then click Save for Web.
Click the File menu, and then click Save for Web.
![]() Click the Original, Optimized, 2-Up, or 4-Up tabs to view the document using different layouts.
Click the Original, Optimized, 2-Up, or 4-Up tabs to view the document using different layouts.
![]() Click one of the sample images to change its default format.
Click one of the sample images to change its default format.
![]() Click the Preset list arrow. Use Original or select a template from the available options, if you want to use some timesaving default options.
Click the Preset list arrow. Use Original or select a template from the available options, if you want to use some timesaving default options.
![]() Click the Optimized File Format list arrow, and then select from the following options:
Click the Optimized File Format list arrow, and then select from the following options:
• GIF. The Graphics Interchange Format is useful for clip art, text, or images that contain a large amount of solid color. GIF uses lossless compression.

• JPEG. The Joint Photographic Experts Group format is useful for images that contain a lot of continuous tones, like photographs. JPEG uses lossy compression.
• PNG-8. The Portable Network Graphics 8-bit format functions like the GIF format. PNG uses lossless compression.
• PNG-24. The Portable Network Graphics 24-bit format functions like the JPEG format. PNG-24 uses lossless compression.
![]() Specify the options you want for the selected format; the options vary depending on the format.
Specify the options you want for the selected format; the options vary depending on the format.
![]() To view in the default browser, click the Preview button.
To view in the default browser, click the Preview button.
• Click the Browser list arrow to select another browser.
![]() Click Save, enter a name, select a location, and then click Save.
Click Save, enter a name, select a location, and then click Save.
![]() Enter a name, and then select a location to save the file.
Enter a name, and then select a location to save the file.
![]() Click Save.
Click Save.
You can now import the image into Edge Animate.
See Also
See “Importing Graphics” on page 85 and “Adding Graphics” on page 86 for information on importing graphics into a composition in Edge Animate.
Saving Graphics from Adobe Fireworks
Adobe Fireworks is a powerful high-end image editor that allows you to create, modify and optimize bitmap and vector graphics for web-based projects. You can create web interfaces, effects, and elements—such as rollovers, pop-up menus, and hotspots—image slices, layers, symbols, and optimize graphics to reduce their file size. With the Save As command, you save an image as a PNG, JPG/JPEG, GIF, or Animated GIF, and then import the file into Edge Animate. The default file format for Fireworks is PNG (Portable Network Graphic). You can import PNG files into Edge Animate as bitmap images. When you import a PNG file as a bitmap image, the file, including any vector data, is flattened, or rasterized, and converted to a bitmap. Along with the graphics, you can also save HTML files containing HTML tables and JavaScript code so you can use them on the web, which you can open in Edge Animate.
Save Graphics from Fireworks
![]() Start Adobe Fireworks, and then open or create an image.
Start Adobe Fireworks, and then open or create an image.
![]() Click the File menu, and then click Save As.
Click the File menu, and then click Save As.
![]() Click the Save as Type list arrow (Win) or Format popup (Mac), and then select a format:
Click the Save as Type list arrow (Win) or Format popup (Mac), and then select a format:
• Fireworks PNG (*.PNG). PNG format with slices and layers.
• Flattend PNG (*.PNG). PNG with everything flattend into one layer.
• GIF (*.GIF). Bitmap with lossless compression.
• Animated GIF (*.GIF). A sequence of GIF image frames to create an animation.
• JPEG (*.JPG, *JPEG). Bitmap with lossy compression.
![]() Enter a name, and then select a location to save the file.
Enter a name, and then select a location to save the file.
![]() For the default Fireworks PNG file format, select the Append.fw.png check box to add .fw to the file name to distinguish it from a flattened PNG file extension.
For the default Fireworks PNG file format, select the Append.fw.png check box to add .fw to the file name to distinguish it from a flattened PNG file extension.
![]() Click Save.
Click Save.
You can now import the image into Edge Animate.

Export as an HTML Document and Images from Fireworks
![]() Start Adobe Fireworks, and then open or create an image.
Start Adobe Fireworks, and then open or create an image.
![]() Click the File menu, and then click Export.
Click the File menu, and then click Export.
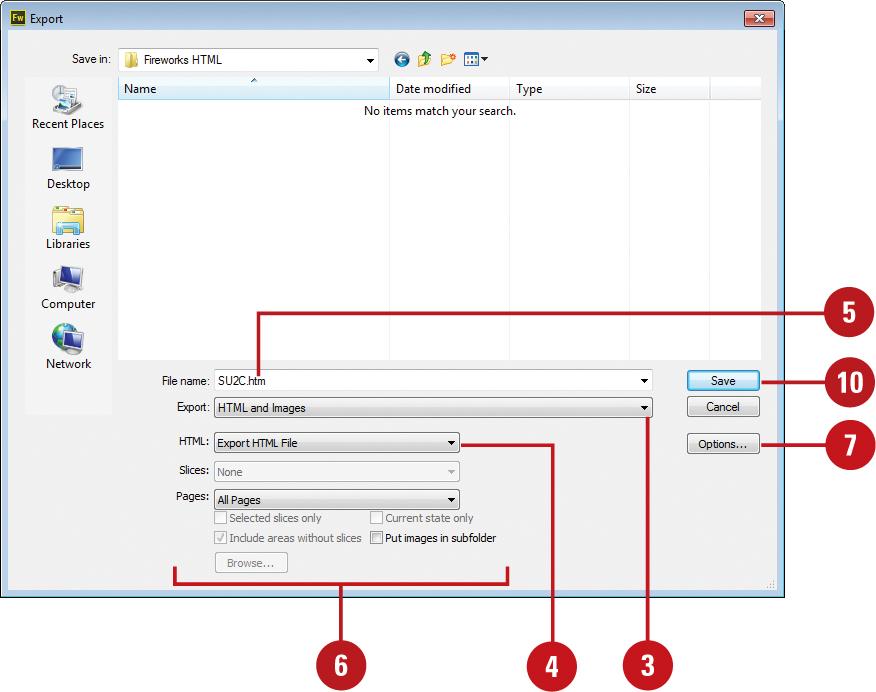
![]() Click the Export list arrow (Win) or Format popup (Mac), and then click HTML and Images.
Click the Export list arrow (Win) or Format popup (Mac), and then click HTML and Images.
![]() Click the HTML list arrow, and then click Export HTML File.
Click the HTML list arrow, and then click Export HTML File.
![]() Enter a name, and then select a location to save the file.
Enter a name, and then select a location to save the file.
![]() Specify the following options:
Specify the following options:
• Slices. Select options for any slices in the image.
• Pages. Select the pages you want to include in the HTML file.
![]() Click Options.
Click Options.
![]() Some important options include:
Some important options include:
• HTML Style. Select an HTML style for use in Edge Animate: Dreamweaver XHTML or HTML, Generic HTML, or jQuery HTML.
• Write CSS to an external file. Creates an external CSS file for the formatting and positioning of content.
![]() Click OK.
Click OK.
![]() Click Save.
Click Save.
You can now open the HTML file in Edge Animate.

See Also
See “Importing Graphics” on page 85 and “Adding Graphics” on page 86 for information on importing graphics into a composition in Edge Animate.
Exporting Images from Adobe Illustrator
Adobe Illustrator is a powerful high-end illustration and image editor that allows you to create and modify vector and bitmap graphics for print and web-based projects. If you have an image that you want to post on the web, you can export it as a PNG or JPEG file. PNG and JPEG are a compressed format with high quality, so it’s a common file format for the web. The Export command for PNG and JPEG give you options to specify image resolution and use anti-alias to smooth jagged edges for text and images. For PNG, you can also set options to use a transparent background. For JPEG, you can also set options to specify the color model, quality, and compression as well as embed an ICC color profile.
Export Artwork as a PNG Image from Illustrator
![]() Start Adobe Illustrator, and then open or create artwork.
Start Adobe Illustrator, and then open or create artwork.
![]() Click the File menu, and then click Export.
Click the File menu, and then click Export.
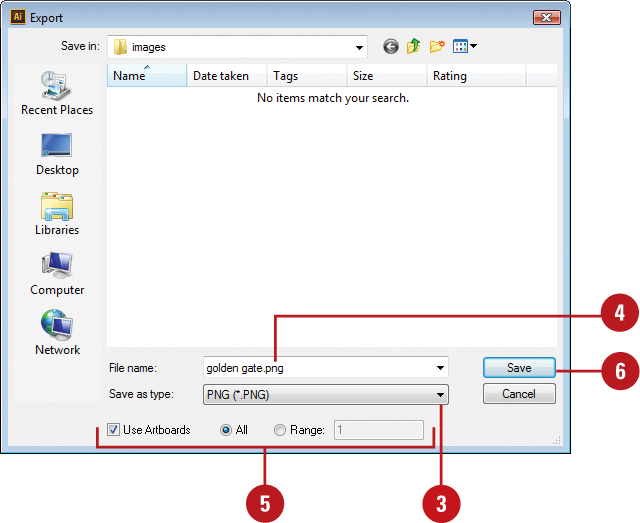
![]() Click the Save as Type list arrow (Win) or Format popup (Mac), and then click PNG (*.PNG).
Click the Save as Type list arrow (Win) or Format popup (Mac), and then click PNG (*.PNG).
![]() Enter a name, and then select a location to save the file.
Enter a name, and then select a location to save the file.
![]() To preserve artboards, select the Use Artboards check box (if available), and then select the All or Range option. If you selected the Range option, enter a range.
To preserve artboards, select the Use Artboards check box (if available), and then select the All or Range option. If you selected the Range option, enter a range.
![]() Click Save.
Click Save.
![]() Specify the following options:
Specify the following options:
• Resolution. Select a resolution option in ppi (pixels per inch).
• Anti-aliasing. Select to smooth out the edges of text or artwork.
• Interlaced. Select to load/display the image from top to bottom.
![]() Click the Background Color list arrow, and then specify an option: Transparent, Black, White, or a custom color.
Click the Background Color list arrow, and then specify an option: Transparent, Black, White, or a custom color.
![]() Click OK.
Click OK.

Export Artwork as a JPEG Image from Illustrator
![]() Start Adobe Illustrator, and then open or create artwork.
Start Adobe Illustrator, and then open or create artwork.
![]() Click the File menu, and then click Export.
Click the File menu, and then click Export.
![]() Click the Save as Type list arrow (Win) or Format popup (Mac), and then click JPEG (*.JPG).
Click the Save as Type list arrow (Win) or Format popup (Mac), and then click JPEG (*.JPG).
![]() Enter a name, and then select a location to save the file.
Enter a name, and then select a location to save the file.
![]() To preserve artboards, select the Use Artboards check box (if available), and then select the All or Range option. If you selected the Range option, enter a range.
To preserve artboards, select the Use Artboards check box (if available), and then select the All or Range option. If you selected the Range option, enter a range.
![]() Click Save.
Click Save.

![]() Specify the following options:
Specify the following options:
• Color Model. Select a color mode: RGB, CMYK, or Grayscale.
• Quality. Select a balance between file size and quality.
![]() Specify the following options:
Specify the following options:
• Compression Method. Select a method: Standard (used by most browsers), Optimized for color and size, and Progressive display for a series of scans.
• Resolution. Select a resolution option in ppi (pixels per inch).
• Anti-aliasing. Select to smooth out the edges of text or artwork.
• Imagemap. Select to generate code for image maps.
![]() Select the Embed ICC Profile check box to attach the color profile of the document to the image.
Select the Embed ICC Profile check box to attach the color profile of the document to the image.
![]() Click OK.
Click OK.

Saving Artwork from Adobe Illustrator
SVG (Scalable Vector Graphics) is a vector based format, like the Illustrator AI format, that describes images as shapes, paths, text and filter effects. Vector images can be resized without sacrificing sharpness and clarity. The SVG format is XML-based, which allows you to add code (XML and JavaScript) so that the web graphic can respond to user actions. Things to remember when you save a document to SVG, each layer is converted to a group (<g>) element, objects appear transparent based on opacity, use slices, image maps, and scripts to add web links, and symbols and paths improve performance.
Save Artwork as a SVG from Illustrator
![]() Start Adobe Illustrator, and then open or create artwork.
Start Adobe Illustrator, and then open or create artwork.
![]() Click the File menu, and then click Save As.
Click the File menu, and then click Save As.
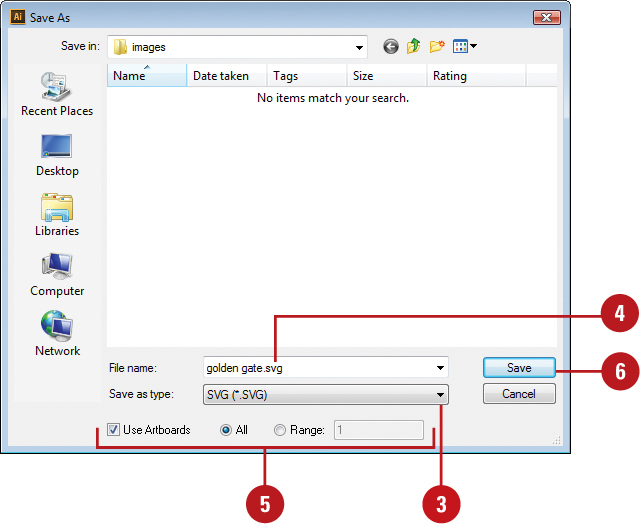
![]() Click the Save as Type list arrow (Win) or Format popup (Mac), and then click SVG (*.SVG) or SVG Compressed (*.SVGZ).
Click the Save as Type list arrow (Win) or Format popup (Mac), and then click SVG (*.SVG) or SVG Compressed (*.SVGZ).
![]() Enter a name, and then select a location to save the file.
Enter a name, and then select a location to save the file.
![]() To preserve artboards, select the Use Artboards check box, and then select the All or Range option. If you selected the Range option, enter a range.
To preserve artboards, select the Use Artboards check box, and then select the All or Range option. If you selected the Range option, enter a range.
![]() Click Save.
Click Save.
![]() Click the SVG Profiles list arrow, and then select a SVG specification by version number.
Click the SVG Profiles list arrow, and then select a SVG specification by version number.
![]() Specify the following font options:
Specify the following font options:
• Type. Select a font display option: Adobe CEF has the best display, yet not as widely supported; SVG is the most supported; and Convert to Outline provides the smallest size, yet lowest quality.
• Subsetting. Select the set of font characters you want to include in the file.
![]() Click the Embed or Link option to specify where you want the image location (embedded in or external), and then select the check box if you want to preserve Illustrator editing capabilities for future revisions.
Click the Embed or Link option to specify where you want the image location (embedded in or external), and then select the check box if you want to preserve Illustrator editing capabilities for future revisions.
![]() To specify additional options, click More Options.
To specify additional options, click More Options.
The button changes to Less Options.
![]() Specify the following Advanced Options:
Specify the following Advanced Options:
• CSS Properties. Select an option to create CSS properties.
• Optimize for Adobe SVG Viewer. Select to optimize for the best performance with the Adobe SVG Viewer.
• Include Slicing Data. Select to include slicing locations and settings.
• Include XMP. Select to include XMP metadata information.
• Output fewer <tspan> elements. Select to reduce the file size by ignoring kerning position.
• Use <textPath> element for Text on Path. Select to use <textPath> tag for path text, which creates more compact XML; deselect to use <text> tag.
![]() If you want to view the SVG code in a web browser, click SVG Code.
If you want to view the SVG code in a web browser, click SVG Code.
![]() Click OK.
Click OK.

Exporting Animations from Adobe Flash
Adobe Flash Professional is a program for developing interactive content, animations, user interfaces, games, and mobile and web applications that allow designers and developers to integrate video, text, audio, and graphics into rich experiences. Flash Professional uses the following technologies: ActionScript, Flash Player, AIR for desktop and mobile devices. Instead of using the built-in preloader assets provided by Edge Animate, you can create a custom animated GIF in Flash Professional and then export it for use in your composition. The preloader assets are simple animated GIF files. When you create a custom animated GIF be sure to keep the animation simple and small in size, so it doesn’t take a long time to load and defeat the purpose of the preloader.
Create a Simple Animated GIF as a Custom Preloader
![]() Start Adobe Flash Professional, and then click ActionScript 3.0 to create a new movie.
Start Adobe Flash Professional, and then click ActionScript 3.0 to create a new movie.
![]() Select the Text Tool on the Tools panel.
Select the Text Tool on the Tools panel.
![]() Create a text box, add some text, such as LOADING, and then use the Properties panel to format it.
Create a text box, add some text, such as LOADING, and then use the Properties panel to format it.
![]() Click the Window menu, and then click Motion Presets to open the panel.
Click the Window menu, and then click Motion Presets to open the panel.
![]() Select a preset, such as pulse, in the Motion Presets panel.
Select a preset, such as pulse, in the Motion Presets panel.
![]() Click Apply.
Click Apply.
![]() Click the File menu, and then click Save As.
Click the File menu, and then click Save As.


![]() Click the Save as Type list arrow (Win) or Format popup (Mac), and then click Flash CS6 Document (*.fla).
Click the Save as Type list arrow (Win) or Format popup (Mac), and then click Flash CS6 Document (*.fla).
![]() Enter a name, and then select a location to save the file.
Enter a name, and then select a location to save the file.
![]() Click Save.
Click Save.
You can now export the movie as an animated GIF for use in Edge Animate.
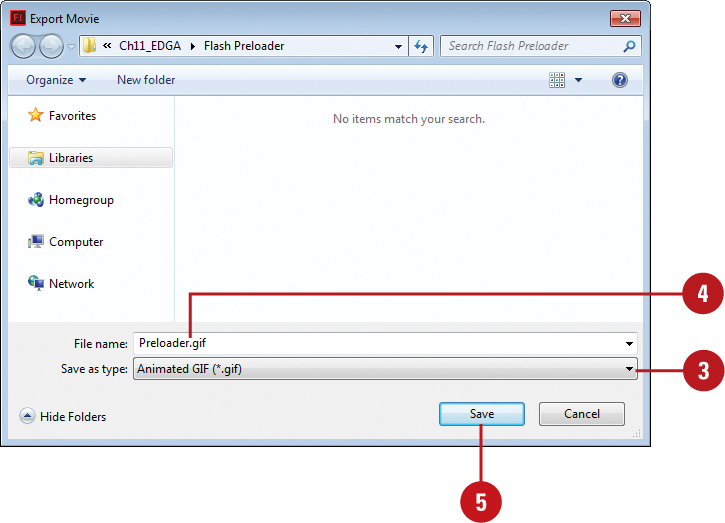
Export an Animated GIF from Flash as a Custom Preloader
![]() Start Adobe Flash Professional, and then open or create a movie.
Start Adobe Flash Professional, and then open or create a movie.
![]() Click the File menu, point to Export, and then click Export Movie.
Click the File menu, point to Export, and then click Export Movie.
![]() Click the Save as Type list arrow (Win) or Format popup (Mac), and then click Animated GIF (*.gif).
Click the Save as Type list arrow (Win) or Format popup (Mac), and then click Animated GIF (*.gif).
![]() Enter a name, and then select a location to save the file.
Enter a name, and then select a location to save the file.
![]() Click Save.
Click Save.
![]() Specify the following options:
Specify the following options:
• Width and Height. Specify an image width and height.
• Resolution. Specify a DPI (Dots Per Inch); typically 72.
• Colors. Select a color palette (4 to 256); smaller the better.
• Transparent. Select to output transparent pixels.
• Interlace. Select to interlace horizontal rows.
• Smooth. Select to apply a smoothing effect.
• Dither solid Colors. Select to dither when approximating colors.
• Animation. Specify the number of loops; 0 repeats forever.
![]() Click OK.
Click OK.
You can now import the animated GIF into Edge Animate.
An animated GIF works well as a custom animation on the Preloader Stage.
