5. Working with Text
What You’ll Do
Introduction
In addition to the shape tools, the Tools panel includes a text tool for creating text elements in your animations. The Text Tool creates a text box container for holding text. Just like shapes and graphics, text elements are composed of attributes that you can change in the Properties panel. Edge Animate uses CSS (Cascading Style Sheet) text properties—such as font family, size, color, weight, italic, underline, alignment, and line spacing—to format the text. In addition to the text properties, you can also use the Transform and Clipping Tools on the Tools panel or attributes in the Properties panel, just like shapes and graphics, to scale, rotate, skew, clip (crop), and shadow a text box for use in an animation or to create a special effect.
In addition to the standard list of fonts that comes with Edge Animate, you can also add web fonts to your compositions. A web font is a font that is optimized for use in web pages and resides on a web server instead of the user’s local computer. Web fonts are available from font providers, such as Adobe, Google, Typekit, Fontsquirrel.com, and Fonts.com. Adobe provides a free online service called Edge Web Fonts with hundreds of web fonts for you to use in your projects. Edge Web Fonts are powered by Typekit, a premium web font service from Adobe that provides access to a library of commercial web fonts.
With Edge Animate, you can assign standard HTML tags to text. This is useful to help you format text consistently. When you create a text box, Edge Animate automatically assigns an HTML division <div> tag, however, you can change it to other text specific tags, such as paragraph <p> and headings <h1>...<h6>.
Creating Text Boxes
Along with the shape tools, the Tools panel includes a text tool for creating text elements in your animations. The Text Tool creates a text box container for holding text. When you click and drag on the Stage to create a text box, Edge Animate opens a separate Text window, where you enter and edit text for the text box. Text elements are composed of attributes—such as font family, size, color, weight, italic, underline, alignment, and line spacing—that you can change in the Properties panel. The size of the text box is determined by W (width) and H (height) and not by the text within it, so you might need to adjust it on the Stage or in the Properties panel.
Create a Text Box
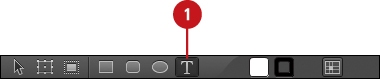
![]() Click the Text Tool on the Tools panel.
Click the Text Tool on the Tools panel.

Timesaver
Press T to select the Text Tool.
![]() Position the pointer on the Stage where you want to start drawing the text box.
Position the pointer on the Stage where you want to start drawing the text box.
The pointer becomes a crosshair that you can drag on the Stage.
![]() Drag to create a text box.
Drag to create a text box.
Important
If Smart Guides are enabled on the Modify menu, alignment guides appear when working with multiple elements.
When you release the mouse, a separate Text window appears for entering text.

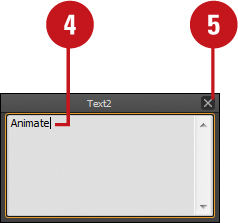
![]() In the Text window, enter the text you want. As you type, text wraps within the window.
In the Text window, enter the text you want. As you type, text wraps within the window.
• You can press Enter (Win) or Return (Mac) in the window to start text on the next line.
• You can modify the text in the window like you’re in an editor.
![]() When you’re done, click the Close button or click off the window.
When you’re done, click the Close button or click off the window.
![]() If the text displays below the bottom edge of the bounding box, you can drag a bottom resize handle to modify the size.
If the text displays below the bottom edge of the bounding box, you can drag a bottom resize handle to modify the size.
Adding Text
In addition to creating a text box and entering text, you can also add text to a text box by copying text from another file, such as a word processing document, and pasting text from the Clipboard in the open Text window. If you have an existing web page with text already in it that was created from another HTML editor or web development tool, such as Adobe Dreamweaver, you can open the HTML document in Edge Animate and use the existing text boxes on the page in an animation. When you open the HTML document, you lose any text formatting, however, any links within the text are preserved. Edge Animate displays all the text you enter whether it fits within the size of the text box or not. If the text doesn’t fit, the text extends out past the bottom. You can drag a resize handle on the text box on the Stage or change the W (width) and H (height) attributes in the Properties panel.
Paste Text into a Text Box
![]() Open the program and file with the text you want, copy the text, and then exit it.
Open the program and file with the text you want, copy the text, and then exit it.
![]() Start or switch to Edge Animate, and then open the composition where you want to add text.
Start or switch to Edge Animate, and then open the composition where you want to add text.
![]() Click the Text Tool on the Tools panel.
Click the Text Tool on the Tools panel.

![]() Drag to create a new text box or click an existing text box.
Drag to create a new text box or click an existing text box.
A separate Text window appears for entering or pasting text.
Timesaver
With the Selection Tool, you can double-click a text box to edit its contents.
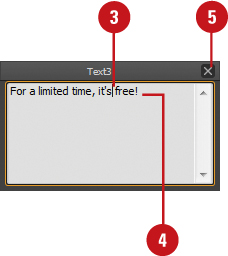
![]() Click to place the insertion point in the Text window where you want to paste the text.
Click to place the insertion point in the Text window where you want to paste the text.
![]() Press Ctrl+V (Win) or
Press Ctrl+V (Win) or ![]() +V (Mac) to paste the text from the Clipboard into the Text window.
+V (Mac) to paste the text from the Clipboard into the Text window.
![]() When you’re done, click the Close button or click off the window.
When you’re done, click the Close button or click off the window.
![]() If the text displays below the bottom edge of the bounding box, you can drag a bottom resize handle to modify the size.
If the text displays below the bottom edge of the bounding box, you can drag a bottom resize handle to modify the size.


Editing Text
Before you can edit text, you need to open the Text window for an existing text box. You can do this by clicking the text box with the Text Tool or double-clicking the text box with the Selection Tool. In the Text window, you can delete, replace, move (cut), or copy text within different text boxes or between compositions or other documents even if they’re from different programs. In either case, the steps are the same. Text you cut or copy is temporarily stored in the Clipboard.
Edit Text
![]() Click the Text Tool on the Tools panel.
Click the Text Tool on the Tools panel.

![]() Click an existing text box.
Click an existing text box.
A separate Text window appears for entering or pasting text.

Timesaver
With the Selection Tool, you can double-click a text box to edit its contents.
![]() Click to place the insertion point or drag to select text in the Text window.
Click to place the insertion point or drag to select text in the Text window.
![]() Perform one of the following editing commands:
Perform one of the following editing commands:
• To delete text, press the Backspace key or the Delete key.
• To replace selected text, type your text.
• To cut selected text, press Ctrl+X (Win) or ![]() +X (Mac).
+X (Mac).
• To copy selected text, press Ctrl+C (Win) or ![]() +C (Mac).
+C (Mac).
![]() When you’re done, click the Close button or click off the window.
When you’re done, click the Close button or click off the window.
![]() If the text displays below the bottom edge of the bounding box, you can drag a bottom resize handle to modify the size.
If the text displays below the bottom edge of the bounding box, you can drag a bottom resize handle to modify the size.
Dictating Text
If you’re using Edge Animate with OS X Mountain Lion (v10.8) or later, you can use the Start Dictation command to dictate the text into the Text window. Before you get started, make sure a microphone is available on or connected to your computer, and then enable the dictation option in Dictation & Speech preferences. You can start the dictation in a place that accepts text by selecting the Start Dictation command from the Edit menu or specifying a keyboard shortcut for easy access when you need it. After you start, a Dictation box appears at the insertion point. At this point, dictate your text, and then click Done to convert it to type. Dictation understands basic commands, such as new line or punctuation (period, comma, etc.) in the current language. If you don’t want it converted or it’s taking too long, click Cancel.
Start and Use Dictation
![]() In Edge Animate (Mac), click the Text Tool on the Tools panel.
In Edge Animate (Mac), click the Text Tool on the Tools panel.
![]() Create a new text box or click an existing text box to open the Text window.
Create a new text box or click an existing text box to open the Text window.

![]() Click to place the insertion point or drag to select text in the Text window.
Click to place the insertion point or drag to select text in the Text window.
![]() Start the dictation using any of the following:
Start the dictation using any of the following:
• Click the Edit menu, and then click Start Dictation.
• Use the shortcut specified in Dictation preferences.
If prompted, click OK, and then click Enable Dictation.
Trouble?
Dictation is only available with OS X Mountain Lion (v10.8) or later.
![]() Dictate the text you want converted into type on the screen.
Dictate the text you want converted into type on the screen.
![]() Click Done in the Dictation box.
Click Done in the Dictation box.
• To stop the conversion, click Cancel in the Dictation box.
The text is converted to type.
![]() When you’re done, click the Close button or click off the window.
When you’re done, click the Close button or click off the window.


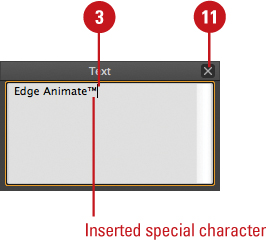
Inserting Special Characters
If you’re using Edge Animate with Mac OS X, you can insert special characters such as ©, ™, or ® that don’t appear on your keyboard into the Text window using an accessory called Character. Character is available in Mac applications and displays all the characters that are available for each of the fonts on your computer. You can insert special characters in a variety of symbol fonts, including arrows, punctuations, currency symbols, pictographs, bullets/stars, math symbols, letter like symbols, emoji (emoticons), and latin. Each one of the fonts also includes style variations.
Insert a Special Character
![]() In Edge Animate (Mac), click the Text Tool on the Tools panel.
In Edge Animate (Mac), click the Text Tool on the Tools panel.

![]() Create a new text box or click an existing text box to open the Text window.
Create a new text box or click an existing text box to open the Text window.
![]() Click in the text to place the insertion point where you want to insert a special character.
Click in the text to place the insertion point where you want to insert a special character.
![]() Click the Edit menu, and then click Special Characters.
Click the Edit menu, and then click Special Characters.
Timesaver
Press Option+ ![]() +T to open the Character program.
+T to open the Character program.
![]() Select a category, click Recently Used, or click Favorites to select from your favorites, and then click a subcategory, if available.
Select a category, click Recently Used, or click Favorites to select from your favorites, and then click a subcategory, if available.
![]() Click the special character you want to insert.
Click the special character you want to insert.
![]() Click a font variation, if desired.
Click a font variation, if desired.
![]() To add the character to a favorites list, click Add To Favorites.
To add the character to a favorites list, click Add To Favorites.
![]() To insert a special character into a document, double-click the character.
To insert a special character into a document, double-click the character.
![]() Click the Close button to exit the Character program.
Click the Close button to exit the Character program.
![]() When you’re done, click the Close button or click off the window.
When you’re done, click the Close button or click off the window.

Examining Text Properties
When you create a text box, Edge Animate uses CSS (Cascading Style Sheet) text properties to format the text. You change the CSS text properties in the Properties panel.
• Font Family. Specifies the font typeface in the order of availability. The default is Arial, Helvetica, sans-serif.
If a user your animation doesn’t have the selected font, their web browser will substitute it with another one. The Font Family list displays the order of substitution. In the case of the default, it tries Arial, then Helvetica, and then any sans-serif font.
There are three main categories of fonts: serif, sans-serif, and monospace. Serif fonts use extra bars and strokes at the ends of letters. Sans-serif fonts don’t use the extra bars and strokes. Sans-serif is taken from the French and means without serifs. Monospace fonts use the same space horizontally for each character.
• Font Size. Specifies the font size in pixels (px), percentage (%), or ems (em). The font size is a relative measure instead of a fixed point size because you can change the font display in a web browser. Pixels use the resolution of the screen; percentage uses browser preferences; and em uses browser preferences and the font size of its parent element (for nested elements). For most browsers, 16px = 1em. The default is 24 pixels.
When you change the units for the Font Size, it changes the units for other text attributes, such as letter spacing, word spacing, line height, and line indent.
• Font Color. Specifies the color of the text. The default is black (#000000).
• Font Weight. Specifies how bold the text displays. The weight is assigned from 100 (lightest) to 900 (boldest). The default is 400 (Normal).
• Font Style. Specifies whether the font is italic or normal. The default is italic style off (normal).
• Font Decoration. Specifies whether the font is underline or normal. The default is underline style off (normal).
• Text Align. Specifies whether the text is align left, center, or right. The default is left align.
• Letter Spacing. Specifies the spacing between letters in pixels (px) or ems (em). The default is zero pixels (normal font spacing).
• Word Spacing. Specifies the spacing between words in pixels (px) or ems (em). The default is zero pixels (normal font spacing).
• Line Height. Specifies the line height between words in pixels (px) or percentage (%). The default is 29 pixels.
• Line Indent. Specifies whether to indent the first line of text in pixels (px) or percentage (%). The default is zero pixels (no indent).
Changing Text Properties
After you create a text box with the Text Tool on the Tools panel, you can change the text properties to format the text in the Properties panel. When you select a text box, the Text panel appears in the Properties panel with text-specific attributes. Edge Animate uses CSS (Cascading Style Sheet) text properties to format the text. The text properties are similar to the ones in many word processing programs, however the terminology and the use of fonts and sizes are a little different. For example, italic is denoted as text-style and underline is denoted as text-decoration. The Font Family includes a list of alternate fonts in case one or more fonts is not available on the web, and the font size is specified in relative sizes using pixels (px), percentage (%), or ems (em) instead of a fixed point size in case the web browser window size changes.
Change Text Properties
![]() Select the text box with the text you want to change.
Select the text box with the text you want to change.

![]() In the Properties panel under Text, view and change any of the following:
In the Properties panel under Text, view and change any of the following:
• Font Family. Select a font typeface. The font family list includes alternate fonts. The default is Arial, Helvetica, sans-serif.
• Font Size. Specify the font size in pixels (px), percentage (%), or ems (em). The units are a relative size instead of a fixed one. The default is 24 pixels. For most browsers, 16px = 1em.
Important
When you change the units, it also changes the units for other text attributes.
• Font Color. Select a font color on the color palette. The default is black (#000000).
• Font Weight. Select a boldness attribute from 100 (lightest) to 900 (boldest). The default is 400 (Normal).
• Font Style. Click the button to turn on (enable) or off (disable) the italic style. The default is italic style off (normal).
• Font Decoration. Click the button to turn on (enable) or off (disable) the underline style. The default is underline style off (normal).
• Text Align. Click the Left, Center, or Right Align button to align the text. The default is left align.
![]() Click the Expand double-arrow button at the bottom of the Text pane.
Click the Expand double-arrow button at the bottom of the Text pane.
This displays additional options. The button toggles to expand and collapse the extended pane.
![]() In the Properties panel under Text in the extended pane, view and change any of the following:
In the Properties panel under Text in the extended pane, view and change any of the following:

• Letter Spacing. Specify the spacing between letters in pixels (px) or ems (em). The default is zero pixels (normal font spacing).
• Word Spacing. Specify the spacing between words in pixels (px) or ems (em). The default is zero pixels (normal font spacing).
• Line Height. Specify the line height between words in pixels (px) or percentage (%). The default is 29 pixels.
• Line Indent. Specify indent spacing for the first line of text in pixels (px) or percentage (%). The default is zero pixels (normal font spacing).
Getting Web Fonts
In addition to the standard list of fonts that comes with Edge Animate, you can also add web fonts to your compositions. A web font is a font that is optimized for use in web pages and resides on a web server instead of the user’s local computer. Web fonts are available from font providers, such as Adobe, Google, Typekit, Fontsquirrel.com, and Fonts.com. Adobe provides a free online service called Edge Web Fonts with hundreds of web fonts for you to use in your projects. Edge Web Fonts are powered by Typekit, a premium web font service from Adobe that provides access to a library of commercial web fonts. Edge Web Fonts and other providers use a web site to provide embed code for you to copy and paste into your HTML. The embed code tells a browser where to find the web fonts. If a browser is not connected to the web, the web fonts won’t be available for use. If you use a lot of web fonts, you can slow down your web pages, so only use the font styles that you actually need on your web pages.
Get Edge Web Fonts
![]() In your web browser, go to html.adobe.com/edge.
In your web browser, go to html.adobe.com/edge.
![]() Click the Edge Web Fonts icon.
Click the Edge Web Fonts icon.
![]() Scroll to the Preview Edge Web Fonts area of the page.
Scroll to the Preview Edge Web Fonts area of the page.
![]() Click the Font list arrow, and then select the font you want.
Click the Font list arrow, and then select the font you want.
The web site displays the embed code you need to paste into the head of your HTML, and then font-family name you need in your CSS.
![]() Select the embed code for the selected web font.
Select the embed code for the selected web font.
![]() Right-click (Win) or Control-click (Mac), and then click Copy.
Right-click (Win) or Control-click (Mac), and then click Copy.
The embed code is copied to the Clipboard.
Now, you’re ready to add the web font to your Edge Animate project; see the next topic for details.
![]() When you’re done, close your web browser.
When you’re done, close your web browser.

Get Google Web Fonts
![]() In your web browser, go to www.google.com/webfonts.
In your web browser, go to www.google.com/webfonts.
![]() Locate the fonts you want to use.
Locate the fonts you want to use.
![]() Click Add to Collection for each one you want to use.
Click Add to Collection for each one you want to use.
![]() Click Review to preview the fonts.
Click Review to preview the fonts.
![]() Click Use, and then select the check boxes with the fonts you want to use.
Click Use, and then select the check boxes with the fonts you want to use.

![]() Click the Standard tab.
Click the Standard tab.
![]() Select the embed code for the selected web font.
Select the embed code for the selected web font.
![]() Right-click (Win) or Control-click (Mac), and then click Copy.
Right-click (Win) or Control-click (Mac), and then click Copy.
The embed code is copied to the Clipboard.
Now, you’re ready to add the web font to your Edge Animate project; see the next topic for details.
![]() When you’re done, close your web browser.
When you’re done, close your web browser.

Adding Web Fonts
Before you can use a web font, you need to copy its embed code from a web font provider, such as Adobe, Google, Typekit, Fonts.com, and Fontsquirrel.com. Many of them provide web fonts for free. After you copy a web font’s embed code, you paste it in the Add Web Fonts dialog box where you can use it from the Font list in Edge Animate. The embed code tells a browser where to find the web fonts. If a browser is not connected to the web, the web fonts won’t be available for use. To fix the problem, you provide a substitute font for use when the specified web font is not available. The web fonts are only available for the compositions in which you add them.
Add Edge Web Fonts
![]() Open the composition that you want to add web fonts.
Open the composition that you want to add web fonts.
![]() In the Library panel, click the Add Web Fonts button (+).
In the Library panel, click the Add Web Fonts button (+).
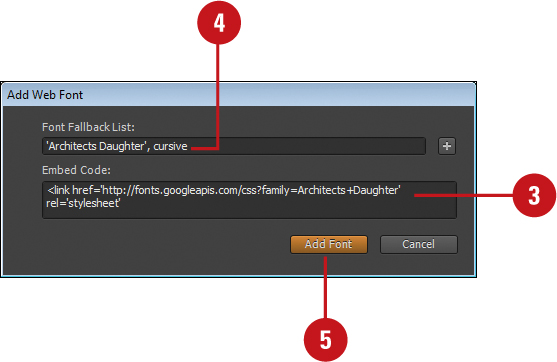
![]() Paste the embed code in the Embed Code text box.
Paste the embed code in the Embed Code text box.
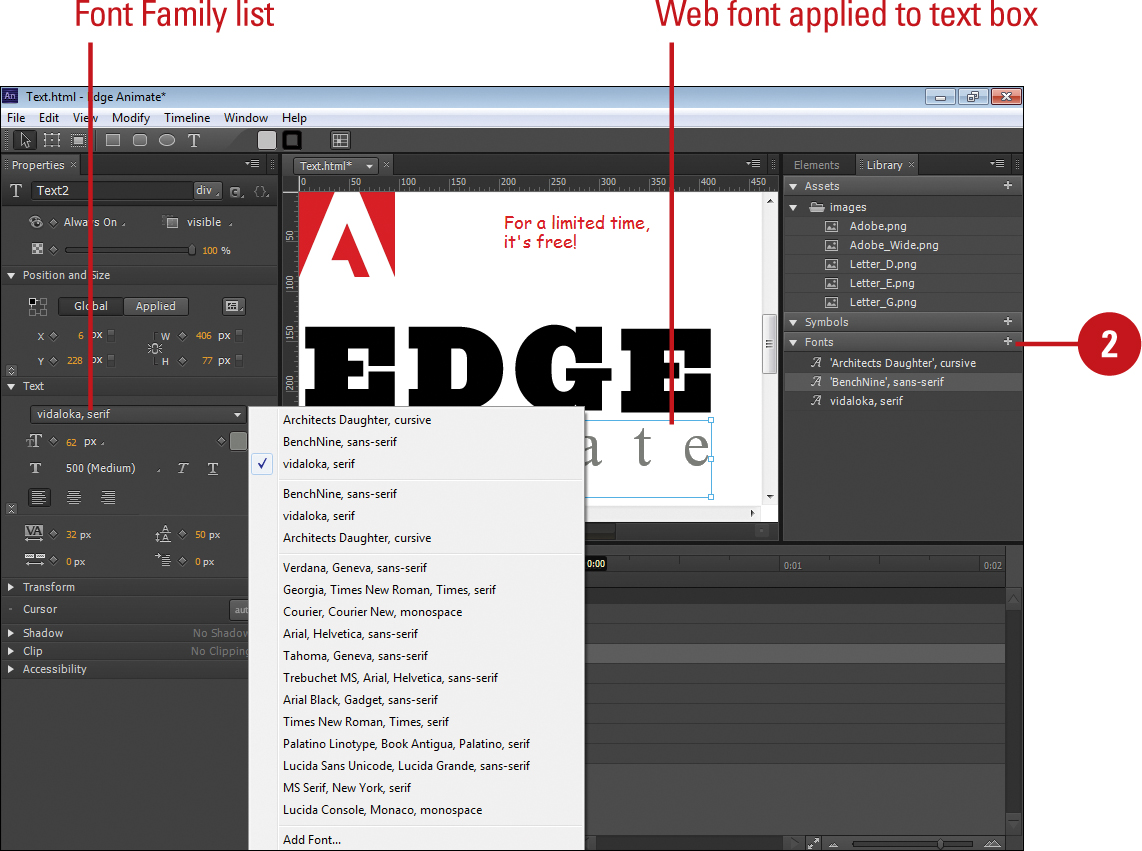
![]() Type the name of the font along with the fonts (separated by commas) that should be used if the web font is not available.
Type the name of the font along with the fonts (separated by commas) that should be used if the web font is not available.
![]() Click Add Font.
Click Add Font.
You can select the font from the Font list from use in your project.

If the font doesn’t take effect, continue with the following steps.
![]() Start an HTML editor, such as Adobe Edge Code.
Start an HTML editor, such as Adobe Edge Code.
Adobe Edge Code is a program you can download and install from the Edge Tools & Services web site.
![]() Open the HTML document for the composition.
Open the HTML document for the composition.
![]() Paste the embed code (copied from the web font site; see the previous page for details) within the Head code, anywhere between <head> and </head>.
Paste the embed code (copied from the web font site; see the previous page for details) within the Head code, anywhere between <head> and </head>.
![]() Save and close the HTML file and exit the HTML editor program.
Save and close the HTML file and exit the HTML editor program.
Add Google or Other Web Fonts
![]() Open the composition that you want to add web fonts.
Open the composition that you want to add web fonts.
![]() In the Library panel, click the Add Web Fonts button (+).
In the Library panel, click the Add Web Fonts button (+).

![]() Paste the embed code in the Embed Code text box.
Paste the embed code in the Embed Code text box.
![]() Type the name of the font along with the fonts (separated by commas) that should be used if the web font is not available.
Type the name of the font along with the fonts (separated by commas) that should be used if the web font is not available.
![]() Click Add Font.
Click Add Font.
You can select the font from the Font list from use in your project.
Did You Know?
You can delete a web font. To delete a web font, right-click (Win) or control-click (Mac) the web font in the Fonts section of the Library panel, and then click Delete.
Resizing Text Boxes
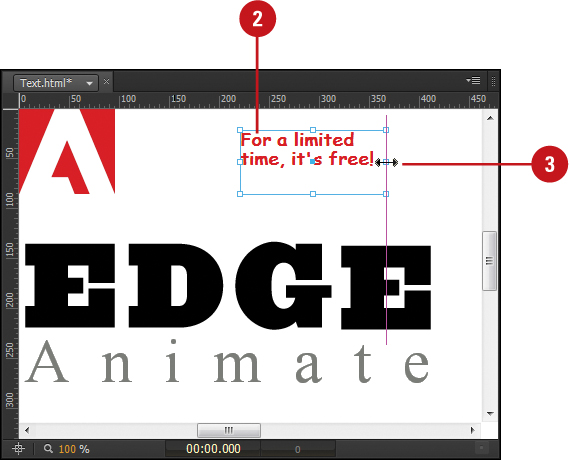
As you enter and edit text, you may see a situation where the text within a text box displays below the bottom edge of the bounding box. The size of the text box is determined by W (width) and H (height) attributes and not by the text within it, so you might need to adjust it on the Stage or in the Properties panel. You can resize it on the Stage by dragging a resize handle with the Selection Tool on the Tools panel or by setting specific W (width) and H (height) values in the Properties panel. When you change the W value, the text within the text box wraps to the adjusted right edge. As it wraps, all the text within the text box reflows to display on the Stage.
Resize a Text Box
![]() Click the Selection Tool on the Tools panel.
Click the Selection Tool on the Tools panel.

![]() Select the text box you want to change.
Select the text box you want to change.
![]() Position the pointer over a black square handle (cursor changes to a double arrow) on the right side, and then drag to the size you want.
Position the pointer over a black square handle (cursor changes to a double arrow) on the right side, and then drag to the size you want.
• Proportional. Hold down the Shift key, and then drag a black handle.
• Horizontal or Vertical. Drag a middle black handle on a horizontal or vertical edge.
![]() To set specific size values in the Properties panel, click the Size W or H value, enter a value in pixels or percentages, and then press Enter (Win) or Return (Mac), or drag (scrub) the Size W or H value to the one you want.
To set specific size values in the Properties panel, click the Size W or H value, enter a value in pixels or percentages, and then press Enter (Win) or Return (Mac), or drag (scrub) the Size W or H value to the one you want.
• Constrain/Unconstrain. Click the Link/Unlink icon to toggle on and off.
Clipping Text
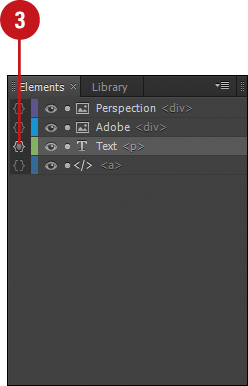
A clipping area describes the portion of an element’s bounding box that is visible. The Clip property is like a mask or cropping. It allows you to mask the content of an element in a bounding box. This is useful for animating a text box from a clipped position to full display. To clip an element, you can use the Clipping Tool on the Tools panel to resize the clipping area or the Properties panel to specify exact values—left, top, right, and bottom—in pixels relative to the element. When you clip an element, a clip icon appears to the right of the name in the Element panel as an indicator of the element change.
Change Text Box Clipping with the Clipping Tool
![]() Click the Clipping Tool on the Tools panel.
Click the Clipping Tool on the Tools panel.
![]() Select the text box you want to change.
Select the text box you want to change.
When you select an element, the bounding box appears in green instead of blue.
![]() To change the size of the clipping area, drag the resize handle on the green bounding box to change the clipping area.
To change the size of the clipping area, drag the resize handle on the green bounding box to change the clipping area.
As you drag the resize handle, a black bounding box might appear for the text box. The black bounding box is the size of the text box. You can drag the resize handle for the black bounding box to resize the text box itself.

![]() To remove clipping from an element, right-click (Win) or control-click (Mac) the clipped element, and then click Remove Clip.
To remove clipping from an element, right-click (Win) or control-click (Mac) the clipped element, and then click Remove Clip.
See Also
See “Changing Element Clipping” on page 118 for more information on changing element clipping in the Properties panel.
Transforming Text
With the Transform Tool on the Tools panel or attributes in the Transform area of the Properties panel, you can scale, rotate, and skew a text box for use in an animation or to create a special effect. If you want to set an exact value to scale, rotate, or skew a text box, you change values in the Properties panel. However, if you want to scale, rotate, or skew a text box on the Stage, you can drag handles using the Transform Tool. When you select a text box with the Transform Tool, you can position the pointer over or near a black handle to Transform it. Before you transform a text box, you need to specify the origin point, or the new center position where the scale, rotate, or skew takes place.
Transform a Text Box in the Properties Panel
![]() Click the Selection Tool on the Tools panel.
Click the Selection Tool on the Tools panel.
![]() Select the text box you want to change.
Select the text box you want to change.

![]() If you want to adjust the origin point, specify Transform Origin X or Y values by percentage in the Properties panel under Transform.
If you want to adjust the origin point, specify Transform Origin X or Y values by percentage in the Properties panel under Transform.
![]() In the Properties panel under Transform, change any of the following:
In the Properties panel under Transform, change any of the following:

• Scale. Click the Scale X or Y value, enter a value in percentages, and then press Enter (Win) or Return (Mac), or drag (scrub) the Scale X or Y value to the one you want.
• Skew. Click the Skew X or Y value, enter a value in degrees, and then press Enter (Win) or Return (Mac), or drag (scrub) the Skew X or Y value to the one you want.
• Rotate. Drag the Rotate (z) slider to the degree you want, or enter or scrub (drag) a Rotate (z) value in degrees, either positive (right) or negative (left).
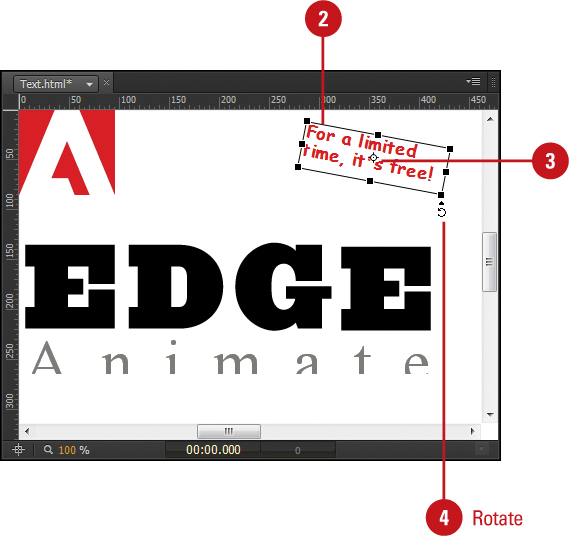
Transform a Text Box with the Transform Tool
![]() Click the Transform Tool on the Tools panel.
Click the Transform Tool on the Tools panel.

![]() Select the text box you want to change.
Select the text box you want to change.
![]() If you want to adjust the origin point, drag the Transform origin point in the text box on the Stage.
If you want to adjust the origin point, drag the Transform origin point in the text box on the Stage.
![]() On the Stage, use any of the following:
On the Stage, use any of the following:
• Scale. Position the pointer over a black square handle (cursor changes to a double arrow), and then drag to the scale size you want.
• Proportional. Hold down the Shift key, and then drag a black handle.
• Horizontal or Vertical. Drag a middle black handle on a horizontal or vertical edge.
• Skew. Position the pointer outside a corner point (cursor changes to a double arrow in opposite directions), and then drag to skew the element.
• Rotate. Position the pointer outside a corner point (cursor changes to an arrow with a circle), and then drag to rotate the element.
Adding Shadows to Text
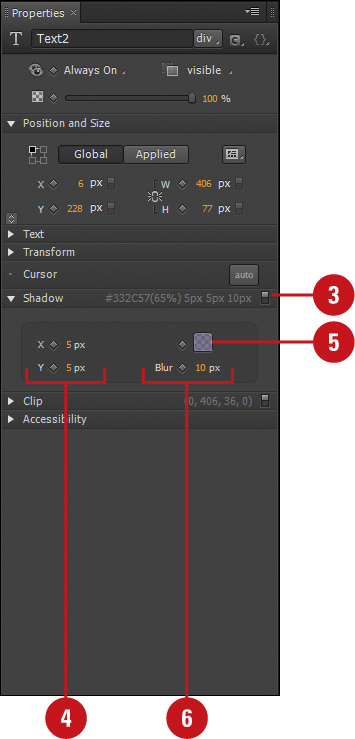
You can add a shadow to text within a text box in Edge Animate. After you add a shadow, you can specify the X and Y position, color and blur in the Properties panel. The blur value specifies the amount of shadow edge feathering you want. You can add or remove a shadow to a text box by dragging the slider to on (enable) or off (disable) on the Shadow header bar in the Properties panel. When you turn it on and off, the shadow settings for the text box remain in tact, so you don’t have to reset them.
Add Shadows to a Text Box in the Properties Panel
![]() Click the Selection Tool on the Tools panel.
Click the Selection Tool on the Tools panel.
![]() Select the text box you want to change.
Select the text box you want to change.

![]() In the Properties panel under Shadow, drag the slider on the header bar to turn it on.
In the Properties panel under Shadow, drag the slider on the header bar to turn it on.
![]() Click the X or Y value, enter a value, and then press Enter (Win) or Return (Mac), or drag (scrub) the X or Y value to the one you want.
Click the X or Y value, enter a value, and then press Enter (Win) or Return (Mac), or drag (scrub) the X or Y value to the one you want.
![]() Click the Color box, and then select a color for the shadow.
Click the Color box, and then select a color for the shadow.
![]() Click the Blur value, enter a value, and then press Enter (Win) or Return (Mac), or drag (scrub) the Blur value to the one you want.
Click the Blur value, enter a value, and then press Enter (Win) or Return (Mac), or drag (scrub) the Blur value to the one you want.
![]() To turn the Shadow property off, drag the slider on the header bar to turn it off.
To turn the Shadow property off, drag the slider on the header bar to turn it off.
Changing Text Tags
With Edge Animate, you can assign standard HTML tags to text. This is useful to help you format text consistently. When you create a text box, Edge Animate automatically assigns an HTML division (DIV) tag and creates CSS code based on the attributes set in the Properties panel. A DIV tag is an HTML element that defines generic containers or sections within the content of a web page. Defining an element with a content specific HTML tag provides information and predefined attributes to help your web browser more accurately display the content of the web page. Some content specific tags, such as the heading tags, are used by search engines to index the structure and content of your web pages. So, it’s a good idea to define HTML elements using appropriate HTML tags whenever possible.
Change Text Tags
![]() Click the Selection Tool on the Tools panel.
Click the Selection Tool on the Tools panel.
![]() Select the text box you want to change.
Select the text box you want to change.
![]() In the Properties panel, click the Tag list arrow, and then select an element specific tag.
In the Properties panel, click the Tag list arrow, and then select an element specific tag.

• div. Defines a general way to define an element in HTML; it’s not based on its content.
• address. Defines contact information for the author of a document/article.
• article. Defines self-contained content, like a news article or blog post; new tag in HTML5. It specifies content that might be from another source.
• blockquote. Defines a section that is quoted from another source.
• p. Defines a paragraph.
• h1 - h6. Defines HTML headings.
• pre. Defines preformatted text. It retains defined white space, which usually gets ignored by HTML.
• code. Defines a piece of computer code, which typically uses a monospaced font.
Adding Links to Text
With Edge Animate, you can add links to your compositions in two ways. One way is to add an action script using a code snippet to open a URL. Another way is to open an existing HTML document with code to add a link using the <a> and </a> tags. For example, <a href="http://www.perspection.com"> ww.perspection.com</a>. After you have a text box with a link, you can animate it just like another element in a composition. At this time, Edge Animate doesn’t allow you to edit HTML code. However, you can use Adobe Edge Code or another HTML editor to do the job. You can even have both programs and HTML files open at the same time and go back and forth between them making changes.
Add Links to Text
![]() Create a text box with the text you want to use as the link.
Create a text box with the text you want to use as the link.
![]() In the Properties panel, click the Cursor button, and then click the Pointer cursor.
In the Properties panel, click the Cursor button, and then click the Pointer cursor.

![]() In the Elements panel, click the Open Actions button next to the Text box element.
In the Elements panel, click the Open Actions button next to the Text box element.
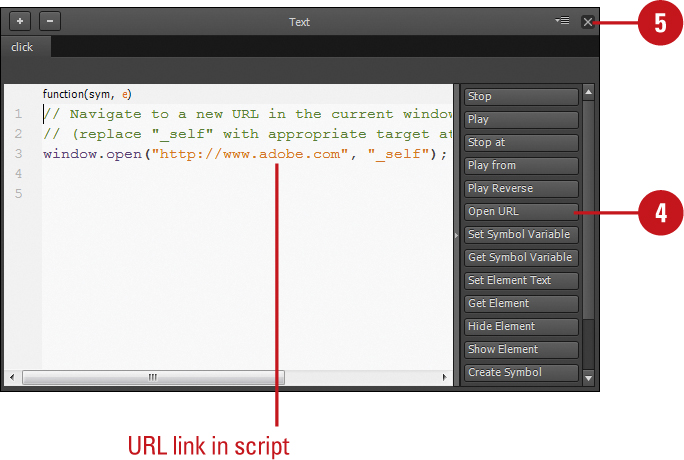
![]() In the Snippets panel, click the Open URL button.
In the Snippets panel, click the Open URL button.
The code to open a link appears in the window. The default link is set to www.adobe.com, which you can select and change.
![]() Click the Close button.
Click the Close button.
![]() Click the File menu, and then click Preview In Browser.
Click the File menu, and then click Preview In Browser.
Your default web browser opens displaying the composition.
![]() Point to the text to display the pointer, and then click to open the web page.
Point to the text to display the pointer, and then click to open the web page.
See Also
See “Using the Open URL Snippet” on page 210 for more information on creating a URL using a snippet or HTML code.
Add HTML Links to Text with an HTML Editor
![]() Start Adobe Edge Code or another HTML editor.
Start Adobe Edge Code or another HTML editor.
![]() Click the File menu, and then click Open.
Click the File menu, and then click Open.
![]() Navigate to and select the HTML file that you want to add a link.
Navigate to and select the HTML file that you want to add a link.
![]() Click Open.
Click Open.
![]() Within the
Within the <body> and </body> tags of the HTML code, add the following code:
<a href="http://www.perspection.com">ww.perspection.com</a>
![]() Click the File menu, and then click Save.
Click the File menu, and then click Save.
![]() Click the Close button to exit the HTML editor.
Click the Close button to exit the HTML editor.

![]() Start or switch back to Edge Animate.
Start or switch back to Edge Animate.
If the HTML file is already open in Edge Animate, click Yes to update and reload it.

![]() If the HTML file is not already open, click the File menu, click Open, select the HTML file, and then click Open.
If the HTML file is not already open, click the File menu, click Open, select the HTML file, and then click Open.
![]() Click the File menu, and then click Preview In Browser.
Click the File menu, and then click Preview In Browser.
Your default web browser opens displaying the composition.
![]() Point to the text to display the pointer, and then click to open the web page.
Point to the text to display the pointer, and then click to open the web page.

See Also
See “Downloading Edge Animate and Tools” on page 282 for more information on downloading Adobe Edge Code.