1. Getting Started with Word
What You’ll Do
Use the Ribbon and Choose Commands
Save a Document with Different Formats
Introduction
Microsoft Word 2010 is a powerful word-processing program that enables you to easily compose and edit documents for print or online use. Word contains new tools specifically designed to improve the way you interact with the program, and the way you collaborate with one another in preparing documents.
This chapter introduces you to the terminology and the basic Word skills you use in the program. In Word, files are called documents. Each new document is similar to a blank page. As you type and add additional text and other objects, your document gets longer. Unlike looking at a piece of paper, Word provides many views, such as the Reading Layout view, that helps you see the document in the best possible way for the task at hand.
With the results-oriented visual interface, you navigate through various tasks with a click of the mouse, or by using shortcut keys on your keyboard. Microsoft Word is set up with a tab-based Ribbon and dialog boxes that provide you with the tools you need when you need them to get the job done. The customizable Quick Access Toolbar gives you easy access to commonly-used commands, such as Save and Print. When working with your documents, you can view more than one document, or resize the window to compare data. Moving around in your document is made easy by the browsing function in Word. With a click of a button, you are on your way to browsing your document in various ways—by footnote, graphic, or comments, to name a few.
When you finish the design of your document, you can save it in the default XML-based format or another format; a Web page for example, to use in another office program. Microsoft also offers the Office.com Online Web site, a resource to check for updates and information on Word.
Starting Word
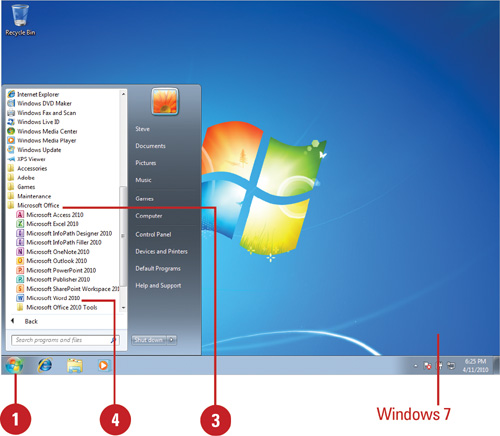
The two quickest ways to start the Microsoft Word 2010 program are to select it on the Start menu or double-click a shortcut icon on the desktop. By providing different ways to start a program, Office lets you work the way you like and start programs with a click of a button. When you start Word, a program window opens, displaying a blank document, where you can begin working immediately.
Start Word
![]() Click the Start button on the taskbar.
Click the Start button on the taskbar.
![]() Point to All Programs.
Point to All Programs.
![]() Click Microsoft Office.
Click Microsoft Office.
![]() Click Microsoft Word 2010.
Click Microsoft Word 2010.
If Microsoft Office asks you to activate the program, follow the instructions to complete the process.
TIMESAVER To change the product key later, click the File tab, click Help, click the Change Product Key link, enter the product key, and then click Continue.
Did You Know?
You can create a program shortcut from the Start menu to the desktop.
Click the Start menu, point to All Programs, click Microsoft Office, right-click Microsoft Word 2010, point to Send To, and then click Desktop (Create Shortcut).
You can start Word and open a document from Windows Explorer. Double-clicking any Word document icon in Windows Explorer opens that file and Word.
For Power Users
Need More Word 2010 Computing Power
If you’re a power user or analyst that needs to create bigger, more complex Word documents, you should use the 64-bit version of Microsoft Word 2010 (New!). The 64-bit version of Word 2010 is built specifically for 64-bit computers. If you’re using the 32-bit version, Word 2010 significantly boosts performance levels (New!) over previous versions for importing, filtering, sorting, copying, and pasting large amounts of data as well as opening and saving large files.
Viewing the Word Window
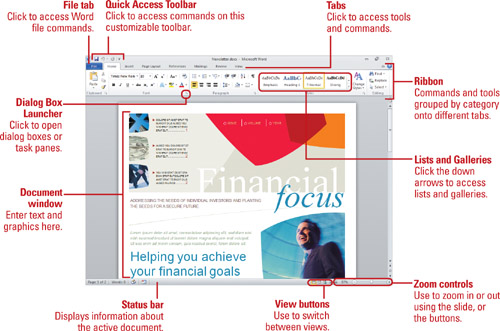
Using the Ribbon
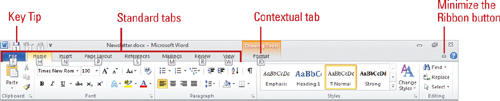
The Ribbon is a results oriented way of working in Word 2010. It replaces menus, toolbars, and most of the task panes found in Word 2003. The Ribbon is located at the top of the document window and is comprised of tabs that are organized by task or objects. The controls on each tab are organized into groups, or subtasks. The controls, or command buttons, in each group execute a command, or display a menu of commands or a drop-down gallery. Controls in each group provide a visual way to quickly make document changes. The Office button in Office 2007 has been replaced by the File tab (New!), which displays Backstage view, where you can access file-related commands.
TIMESAVER To minimize the Ribbon, click the Minimize the Ribbon button (Ctrl+F1) (New!) or double-click the current tab. Click a tab to auto display it (Ribbon remains minimized). Click the Expand the Ribbon button (Ctrl+F1) or double-click a tab to maximize it.
If you prefer using the keyboard instead of the mouse to access commands on the Ribbon, Microsoft Word provides easy to use shortcuts. Simply press and release the ![]() or
or ![]() key to display KeyTips over each feature in the current view, and then continue to press the letter shown in the KeyTip until you press the one that you want to use. To cancel an action and hide the KeyTips, press and release the
key to display KeyTips over each feature in the current view, and then continue to press the letter shown in the KeyTip until you press the one that you want to use. To cancel an action and hide the KeyTips, press and release the ![]() or
or ![]() key again. If you prefer using the keyboard shortcuts found in previous versions of Microsoft Word, such as Ctrl+P (for Print), all the keyboard shortcuts and keyboard accelerators work exactly the same in Microsoft Word 2010. Word 2010 includes a legacy mode that you can turn on to use familiar Word 2003 keyboard accelerators.
key again. If you prefer using the keyboard shortcuts found in previous versions of Microsoft Word, such as Ctrl+P (for Print), all the keyboard shortcuts and keyboard accelerators work exactly the same in Microsoft Word 2010. Word 2010 includes a legacy mode that you can turn on to use familiar Word 2003 keyboard accelerators.
Tabs
Word provides three types of tabs on the Ribbon. The first type is called a standard tab—such as Home, Insert, Review, View, and Add-Ins—that you see whenever you start Word. The second type is called a contextual tab—such as Picture Tools, Drawing, or Table—that appear only when they are needed based on the type of task you are doing. Word recognizes what you’re doing and provides the right set of tabs and tools to use when you need them. The third type is called a program tab—such as Print Preview—that replaces the standard set of tabs when you switch to certain views or modes.
Live Preview
When you point to a gallery option, such as WordArt, on the Ribbon, Word displays a live preview of the option change so that you can see exactly what your change will look like before committing to it.
Choosing Commands
Word commands are organized in groups on the Ribbon, Quick Access Toolbar, and Mini-Toolbar. Commands are available as buttons or options on the Ribbon, or as menus on button or option arrows or the File tab (New!). The Quick Access Toolbar and Mini-Toolbar display frequently used buttons that you may be already familiar with from Word 2003, while the File tab on the Ribbon displays file related menu commands in Backstage view. In addition to the File tab, you can also open a shortcut menu with a group of related commands by right-clicking an element.
Choose a Menu Command Using the File Tab
![]() Click the File tab on the Ribbon.
Click the File tab on the Ribbon.
![]() Click the command you want.
Click the command you want.
TIMESAVER You can use a shortcut key to choose a command. Press and hold down the first key and then press the second key. For example, press and hold the Ctrl key and then press S (or Ctrl+S) to select the Save command.

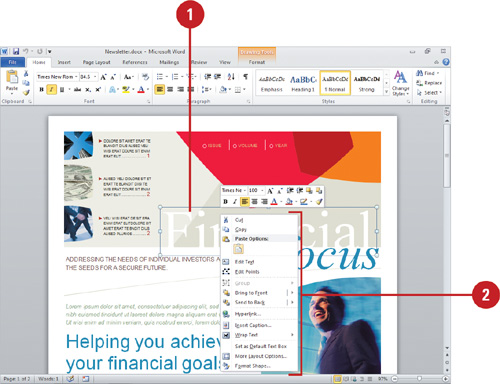
Choose a Menu Command from a Shortcut Menu
![]() Right-click an object (a cell or graphic element).
Right-click an object (a cell or graphic element).
TIMESAVER Press Shift+F10 to display the shortcut menu for a selected command.
![]() Click a command on the shortcut menu. If the command is followed by an arrow, point to the command to see a list of related options, and then click the option you want.
Click a command on the shortcut menu. If the command is followed by an arrow, point to the command to see a list of related options, and then click the option you want.
Working with Toolbars
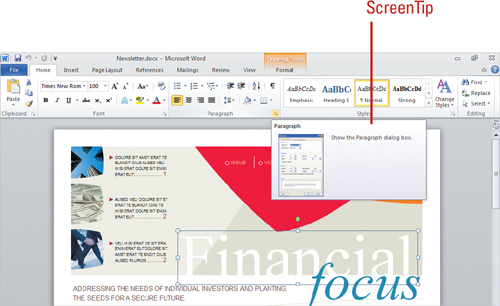
Word includes its most common commands, such as Save and Undo, on the Quick Access Toolbar. Click a toolbar button to choose a command. If you are not sure what a toolbar button does, point to it to display a ScreenTip. When Word starts, the Quick Access Toolbar appears at the top of the window, unless you’ve changed your settings. You can customize the Quick Access Toolbar or Ribbon (New!) by adding command buttons or groups to it. You can also move the toolbar below or above the Ribbon so it’s right where you need it. In addition to the Quick Access Toolbar, Word also displays the Mini-Toolbar when you point to selected text. The Mini-Toolbar appears above the selected text and provides quick access to formatting tools.
Choose a Command Using a Toolbar or Ribbon
![]() Get command help. If you’re not sure what a button does, point to it to display a ScreenTip. If the ScreenTip includes Press F1 for more help, press F1.
Get command help. If you’re not sure what a button does, point to it to display a ScreenTip. If the ScreenTip includes Press F1 for more help, press F1.
![]() Choose a command. Click the button, or button arrow, and then click a command or option.
Choose a command. Click the button, or button arrow, and then click a command or option.
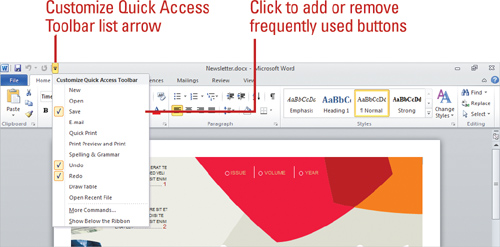
Add or Remove Items from the Quick Access Toolbar
![]() Add or remove a common button.
Add or remove a common button.
Click the Customize Quick Access Toolbar list arrow, and then click a button name (checked item appears on the toolbar).
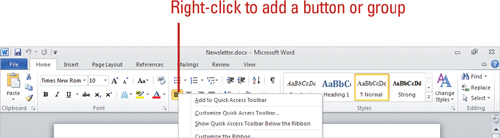
![]() Add a Ribbon button or group.
Add a Ribbon button or group.
Right-click the button or group name on the Ribbon, and then click Add to Quick Access Toolbar.
![]() Remove a button or group. Right-click the button or group name on the Quick Access Toolbar, and then click Remove from Quick Access Toolbar.
Remove a button or group. Right-click the button or group name on the Quick Access Toolbar, and then click Remove from Quick Access Toolbar.
Customize the Ribbon or Quick Access Toolbar
![]() Click the File tab, and then click Options.
Click the File tab, and then click Options.
![]() Click the Customize Ribbon (New!) or Quick Access Toolbar.
Click the Customize Ribbon (New!) or Quick Access Toolbar.
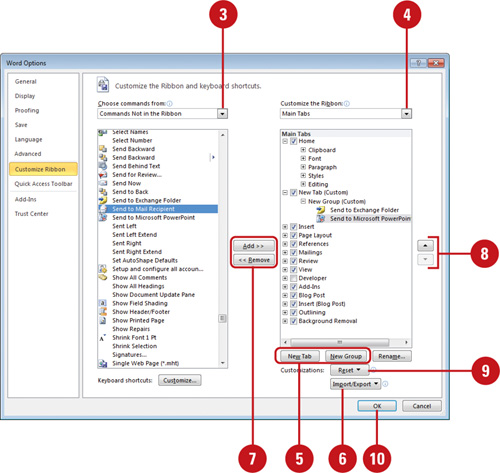
![]() Click the Choose commands from list arrow, and then click All Commands or a specific Ribbon.
Click the Choose commands from list arrow, and then click All Commands or a specific Ribbon.
![]() Click the list arrow (right column), and then select the tabs or toolbar you want to change.
Click the list arrow (right column), and then select the tabs or toolbar you want to change.
![]() For the Ribbon, click New Tab to create a new tab, or click New Group to create a new group on the selected tab (right column).
For the Ribbon, click New Tab to create a new tab, or click New Group to create a new group on the selected tab (right column).
![]() To import or export a customized Ribbon or Quick Access Toolbar, click the Import/Export list arrow, select a command, and then select an import file or create an export file.
To import or export a customized Ribbon or Quick Access Toolbar, click the Import/Export list arrow, select a command, and then select an import file or create an export file.
![]() Click the command you want to add (left column) or remove (right column), and then click Add or Remove.
Click the command you want to add (left column) or remove (right column), and then click Add or Remove.
![]() To insert a separator line between buttons in the Quick Access Toolbar, click <Separator>, and then click Add.
To insert a separator line between buttons in the Quick Access Toolbar, click <Separator>, and then click Add.
![]() Click the Move Up and Move Down arrow buttons to arrange the order.
Click the Move Up and Move Down arrow buttons to arrange the order.
![]() To reset the Ribbon or Quick Access Toolbar, click the Reset list arrow, and then select a reset option.
To reset the Ribbon or Quick Access Toolbar, click the Reset list arrow, and then select a reset option.
![]() Click OK.
Click OK.
For Your Information
Moving Toolbars and the Ribbon
You can move the Quick Access Toolbar to another location. Click the Customize Quick Access Toolbar list arrow, and then click Show Below The Ribbon or Show Above The Ribbon. You can minimize the Ribbon (New!). Click the Minimize The Ribbon (Ctrl+F1) button on the right side of the Ribbon (to the left of the Help button). Click the Expand The Ribbon button to maximize it. When the Ribbon is minimized, you can click a tab to auto maximize it. When you click an option or in the document, the Ribbon minimizes again. Just like an auto-hide option.
Changing ScreenTips
You can turn off or change ScreenTips. Click the File tab, click Options, click General, click the ScreenTip Style list arrow, click Don’t Show Feature Descriptions In ScreenTips or Don’t Show ScreenTips, and then click OK.
Choosing Dialog Box Options
A dialog box is a window that opens when you click a Dialog Box Launcher. Dialog Box Launchers are small icons that appear at the bottom corner of some groups. When you point to a Dialog Box Launcher, a ScreenTip with a thumbnail of the dialog box appears to show you which dialog box opens. A dialog box allows you to supply more information before the program carries out the command you selected. After you enter information or make selections in a dialog box, click the OK button to complete the command. Click the Cancel button to close the dialog box without issuing the command. In many dialog boxes, you can also click an Apply button to apply your changes without closing the dialog box. Rather than clicking to move around a dialog box, you can press the Tab key to move from one box or button to the next. You can also use Shift+Tab to move backward, or Ctrl+Tab and Ctrl+Shift+Tab to move between dialog box tabs.
Choose Dialog Box Options
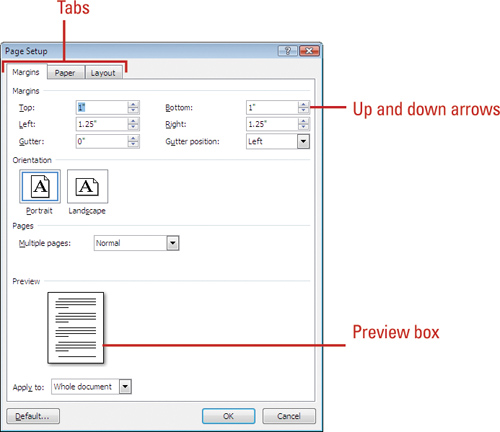
All dialog boxes contain the same types of options, including the following:
![]() Tabs. Each tab groups a related set of options. Click a tab to display its options.
Tabs. Each tab groups a related set of options. Click a tab to display its options.
![]() Option buttons. Click an option button to select it. You can usually only select one.
Option buttons. Click an option button to select it. You can usually only select one.
![]() Up and down arrows. Click the up or down arrow to increase or decrease the number, or type a number in the box.
Up and down arrows. Click the up or down arrow to increase or decrease the number, or type a number in the box.
![]() Check box. Click the box to turn on or off the option. A checked box means the option is selected; a cleared box means it’s not.
Check box. Click the box to turn on or off the option. A checked box means the option is selected; a cleared box means it’s not.
![]() List box. Click the list arrow to display a list of options, and then click the option you want.
List box. Click the list arrow to display a list of options, and then click the option you want.
![]() Text box. Click in the box and type the requested information.
Text box. Click in the box and type the requested information.
![]() Button. Click a button to perform a specific action or command. A button name followed by an ellipsis (…) opens a dialog box.
Button. Click a button to perform a specific action or command. A button name followed by an ellipsis (…) opens a dialog box.
![]() Preview box. Many dialog boxes show an image that reflects the options you select.
Preview box. Many dialog boxes show an image that reflects the options you select.

Using the Status Bar
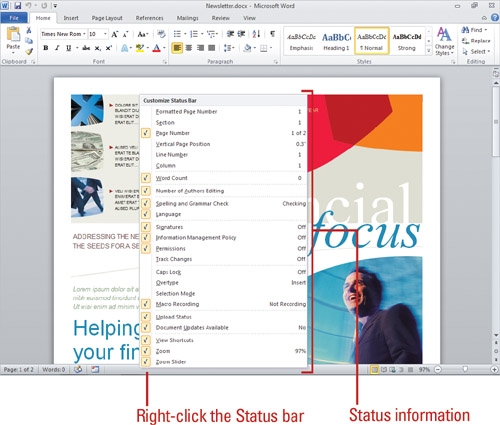
The Status bar appears across the bottom of your screen and displays document information—such as word count, page numbers, language, and current display zoom percentage—and some Word program controls, such as view shortcut buttons, zoom slider, and Fit To Window button. With the click of the mouse, you can quickly customize exactly what you see on the Status bar. In addition to displaying information, the Status bar also allows you to check the on/off status of certain features, such as Signatures, Permissions, Selection Mode, Page Number, Caps Lock, Num Lock, Macro Recording and Playback, and much more.
Add or Remove Items from the Status Bar
![]() Add Item. Right-click the Status bar, and then click an unchecked item.
Add Item. Right-click the Status bar, and then click an unchecked item.
![]() Remove Item. Right-click the Status bar, and then click a checked item.
Remove Item. Right-click the Status bar, and then click a checked item.
See Also
See “Recording a Macro” on page 411 or “Adding a Digital Signature to a Macro Project” on page 416 for information on changing the status of items on the Status bar.
Using Task and Window Panes
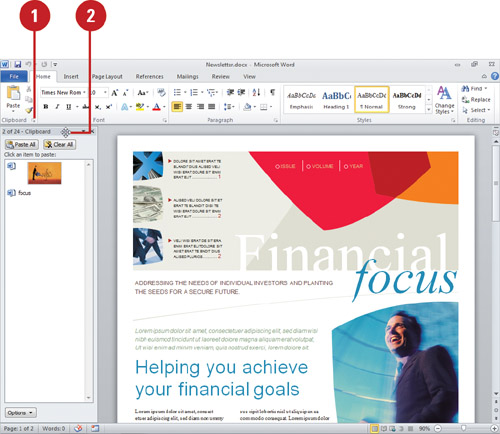
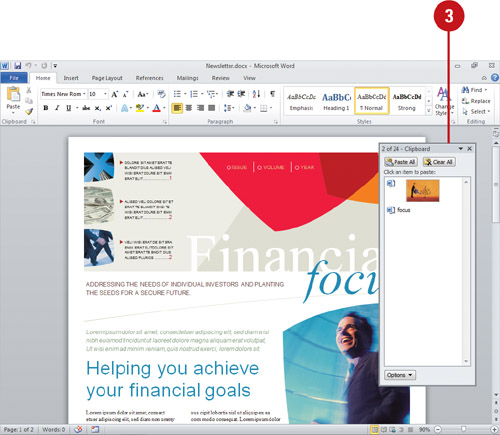
Task panes are separate windows that appear when you need them, such as Navigation pane, or when you click a Dialog Box Launcher icon, such as Clipboard and Clip Art. A task pane displays various options that relate to the current task. Window panes are sections of a window, such as a split window. If you need a larger work area, you can use the Close button in the upper-right corner of the pane to close a task or window pane, or move a border edge (for task panes) or splitter (for window panes) to resize it.
Work with Task and Window Panes
![]() Open a Task Pane. It appears when you need it or when you click a Dialog Box Launcher icon.
Open a Task Pane. It appears when you need it or when you click a Dialog Box Launcher icon.
![]() Close a Task or Window Pane.
Close a Task or Window Pane.
Click the Close button in upper-right corner of the pane.
![]() Resize a Task Pane. Point to the Task Pane border edge until the pointer changes to double arrows, then drag the edge to resize it.
Resize a Task Pane. Point to the Task Pane border edge until the pointer changes to double arrows, then drag the edge to resize it.
![]() Resize a Window Pane. Point to the window pane border bar until the pointer changes to a double bar with arrows, then drag the edge to resize it.
Resize a Window Pane. Point to the window pane border bar until the pointer changes to a double bar with arrows, then drag the edge to resize it.
Did You Know?
You can insert window panes. Click the View tab, click the Split button in the Window group.


![]() Open the task pane you want to move.
Open the task pane you want to move.
![]() Point to the title bar.
Point to the title bar.
The cursor changes to a 4-headed arrow.
![]() Drag the task pane to a new location.
Drag the task pane to a new location.
The task pane becomes undocked.
![]() To redock a task pane, drag the task pane to the left or right side of the program window. Keep dragging until the task pane snaps into place.
To redock a task pane, drag the task pane to the left or right side of the program window. Keep dragging until the task pane snaps into place.
Opening an Existing Document
You can open a Word document and start Word simultaneously, or you can open a Word document or file created in another program after you start Word. You can open an existing Word document by using the File tab (New!). On the File tab, you can choose the Open command to locate and select the document you want or choose a recently used document from the Recent Documents or Recent Places list on the Recent screen (New!). Similar to the Windows Start menu, the Recent Documents or Recent Places list allow you to pin documents to the list that you want to remain accessible regardless of recent use. The Pin icon to the right of the file name on the File tab makes it easy to pin or unpin as needed.
Open a Document from the Program Window
![]() Click the File tab, and then click Open.
Click the File tab, and then click Open.
![]() If you want to open a specific file type, click the Files of type list arrow, and then click a file type.
If you want to open a specific file type, click the Files of type list arrow, and then click a file type.
![]() If the file is located in another folder, click the Look In list arrow, and then navigate to the file.
If the file is located in another folder, click the Look In list arrow, and then navigate to the file.
![]() Click the Word file you want, and then click Open, or click the Open button arrow, and then click one of the following options:
Click the Word file you want, and then click Open, or click the Open button arrow, and then click one of the following options:
![]() Open Read-Only to open the selected file with protection.
Open Read-Only to open the selected file with protection.
![]() Open as Copy to open a copy of the selected file.
Open as Copy to open a copy of the selected file.
![]() Open in Browser to open the selected Web file in a browser.
Open in Browser to open the selected Web file in a browser.
![]() Open with Transform to open the selected XML file with transform.
Open with Transform to open the selected XML file with transform.
![]() Open in Protected View to open the selected file in protected view (New!).
Open in Protected View to open the selected file in protected view (New!).
![]() Open and Repair to open the damaged file.
Open and Repair to open the damaged file.

For Your Information
Using the Office Program Viewer
An Office program Viewer—PowerPoint, Word, and Excel—is a program used to open and view Office documents on computers that don’t have Microsoft Office installed. The Office program Viewer is available for download from the Microsoft Office Online Web site in the downloads section. Check the Microsoft Web site for software requirements.
Open a Recently Opened Document
![]() Click the File tab, and then click Recent.
Click the File tab, and then click Recent.
![]() Click the document you want to open in the Recent Documents list or a folder in the Recent Places list.
Click the document you want to open in the Recent Documents list or a folder in the Recent Places list.
![]() Pin a document/folder. Click the Pin icon (right-side) to display a green pin (document is pinned) on the Recent Documents or Recent Places list (New!).
Pin a document/folder. Click the Pin icon (right-side) to display a green pin (document is pinned) on the Recent Documents or Recent Places list (New!).
![]() Unpin a document/folder. Click the Pin icon (right-side) to display a grey pin on the Recent Documents or Recent Places list (New!).
Unpin a document/folder. Click the Pin icon (right-side) to display a grey pin on the Recent Documents or Recent Places list (New!).
Did You Know?
You can add recently used documents to the File tab (New!). Click the File tab, click Recent, select the Quickly Access This Number Of Recent Documents check box, and then specify the number of documents you want to display.
You can change the number of recently opened files that appear on the File tab. Click the File tab, click Options, click Advanced, change the Show This Number Of Recent Documents list, and then click OK.
You can change the default file location of the Open dialog box. Click the File tab, click Options, click Save, enter a new location in the Default File Location box, and then click OK.

For Your Information
Managing Files in the Open or Save Dialog
When you open the Open or Save As dialog box, you can manage files directly in the dialog box. You can delete or rename a file in a dialog box. In the Open or Save As dialog box, click the file, click the Tools list arrow (XP) or the Organize button (7 or Vista), and then click Delete or Rename. You can also quickly move or copy a file in a dialog box. In the Open or Save As dialog box, right-click the file you want to move or copy, click Cut or Copy, open the folder where you want to paste the file, right-click a blank area, and then click Paste.
Opening Files of Different Types
Word recognizes and can open files created in a wide variety of other programs including, but not limited to: OpenDocument, WordPerfect, Microsoft Works, Text Files, Rich Text Format, XML, and Web pages. When you open a document that was created in an older version of Word, Word opens it automatically into the current version.
Open a File in a Non-Word Format
![]() Click the File tab‚ and then click Open.
Click the File tab‚ and then click Open.
![]() Click the Files of type list arrow, and then select the type of file that you want to open.
Click the Files of type list arrow, and then select the type of file that you want to open.
![]() Click the Look in list arrow, and then navigate to the file.
Click the Look in list arrow, and then navigate to the file.
![]() Select the document file you want to open.
Select the document file you want to open.
![]() Click Open.
Click Open.

Converting an Existing Document
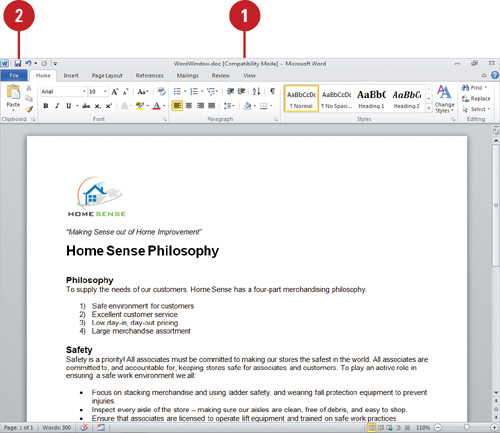
When you open a document from Word 97-2003 or Word 2007, Word 2010 goes into compatibility mode (New!)—indicated on the title bar—where it disables new features that cannot be displayed or converted well by previous versions. When you save a document, Word 2010 saves Word 97-2003 or 2007 files in their older format using compatibility mode. The document stays in compatibility mode until you convert it to the Word 2010 file format. Word 2007 and Word 2010 use the same file extensions, however there may be feature differences between the two versions.
Convert a Word 97-2003 or 2007 Document to Word 2010
![]() Open the Word document 97-2003 or 2007 you want to convert to the Word 2010 file format.
Open the Word document 97-2003 or 2007 you want to convert to the Word 2010 file format.
The Word document opens in compatibility mode.
![]() Click the File tab, and then click Info.
Click the File tab, and then click Info.
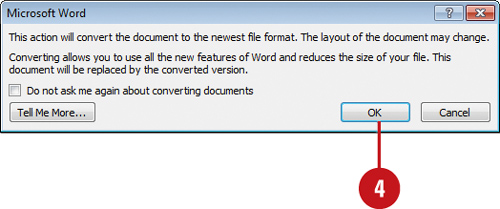
![]() Click Convert.
Click Convert.
![]() Click OK to convert the file to the Word 2010 format.
Click OK to convert the file to the Word 2010 format.
Word exits compatibility mode, which is only turned on when a previous version is in use.
Did You Know?
You can display extensions in the Save and Open dialog boxes and Recent Documents list. Changing the Windows option also changes Word. In the Folder Options dialog box on the View tab, clear the Hide Extensions For Known File Types check box, and then click OK.

Changing Document Views
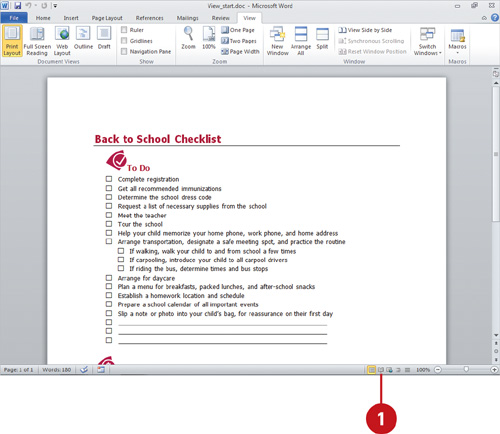
Word displays the contents of a document in different ways to help you work efficiently with your content. The available views include: Print Layout, Full Screen Reading, Web Layout, Outline, and Draft. You can change the window view from the View tab, or you can click a Document view button at the bottom right corner of the Word window.
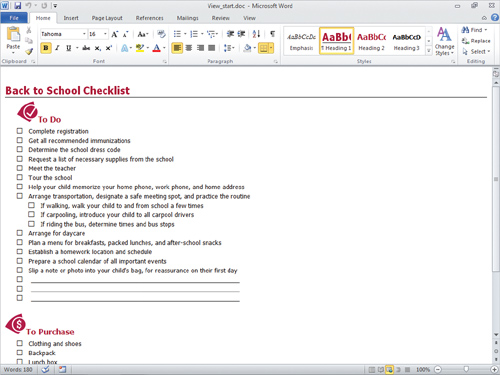
Print Layout view displays a gray gap between each page to clearly delineate where each actual page break occurs. Word displays each new document in Print Layout view by default. This view is best for previewing your work before printing, and it works well with the Zoom feature on the View tab to increase and decrease the page view size and display multiple pages of the same document simultaneously onscreen.
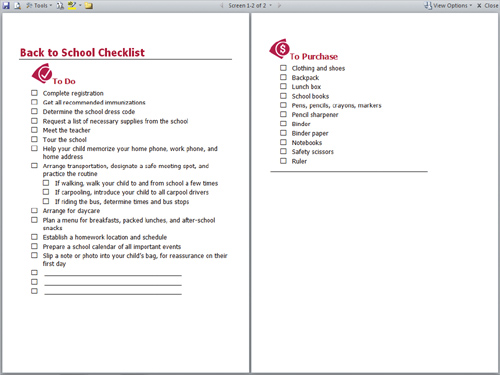
Full Screen Reading view displays the full screen and removes distracting screen elements to provide a more comfortable view to read your documents. You can also display the Navigation pane (New!) to quickly jump to different parts of your document. When you’re done, you can use the Close button.
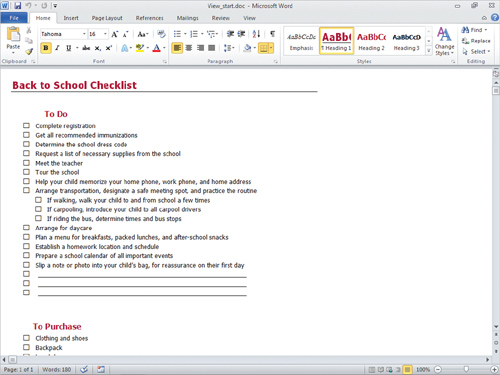
Web Layout view displays the document as it will appear on the Web. You can save documents as HTML code to make Web content creation easy.
Outline view displays the document as an outline with headings and subheadings. When you shift to Outline view, each heading has a clickable plus or minus sign next to it to expand or collapse the content under the heading. You can drag a plus, or minus sign to move the heading and all of its associated text.
Draft view displays the document as a single, long piece of “paper,” divided into pages by perforation marks. This view is fine for composition but inadequate for editing or previewing your work prior to printing or other publication.
Print Layout view

Outline view Draft view
Web Layout view

Draft view
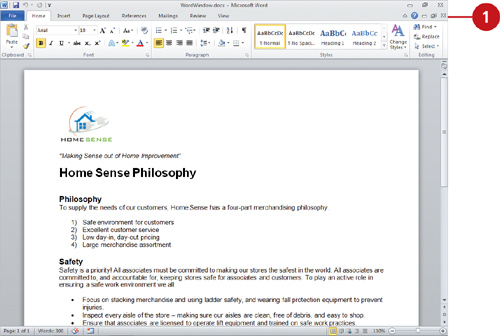
Reading a Document
You can avoid eye strain when you want to read a document with the Full Screen Reading view. The Full Screen Reading view is designed with tools optimized for reading a document. Word changes the screen size and removes distracting screen elements to provide a more comfortable view for reading your documents. In the Full Screen Reading view, you can display the Navigation pane (New!) with the Browse Heading or Browse Pages tab to quickly jump to different parts of your document. You can also save, print, access tools, highlight text, and insert comments. If you have a Tablet PC, you can write comments and changes directly on the page using the tablet’s stylus.
Read a Document
![]() Click the Full Screen Reading View button.
Click the Full Screen Reading View button.
![]() The Full Screen Reading View button is also available on the View tab.
The Full Screen Reading View button is also available on the View tab.
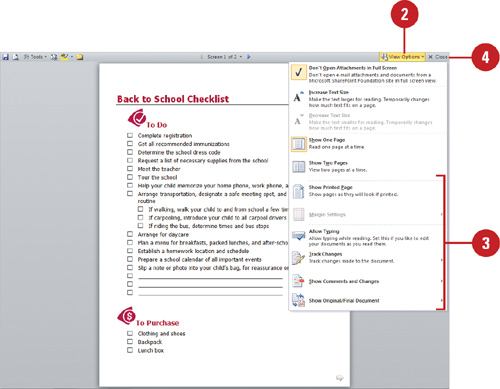
![]() To display the text in a larger or smaller size, click the View Options button, and then click Increase Text Size or Decrease Text Size.
To display the text in a larger or smaller size, click the View Options button, and then click Increase Text Size or Decrease Text Size.
![]() To display two pages at once or a single page, click the View Options button, and then click Show One Page or Show Two Pages.
To display two pages at once or a single page, click the View Options button, and then click Show One Page or Show Two Pages.
TIMESAVER Press Esc to deselect the document, type a number, and then press Enter to go to a page.
![]() When you’re done, click the Close button.
When you’re done, click the Close button.
Did You Know?
You can disable open e-mail attachments in Full Screen Reading view.
Click the File tab, click Options, click General, clear the Open E-mail Attachments In Full Screen Reading View check box, and then click OK.

![]() Click the Full Screen Reading View button.
Click the Full Screen Reading View button.
![]() Click the Navigation button, and then click Navigation Pane.
Click the Navigation button, and then click Navigation Pane.
![]() Click the Browse Headings or Browse Pages tab.
Click the Browse Headings or Browse Pages tab.
![]() Click a heading name or thumbnail of a page to display it.
Click a heading name or thumbnail of a page to display it.
![]() To close the Navigation pane, click the Close button on the pane.
To close the Navigation pane, click the Close button on the pane.
![]() When you’re done, click the Close button.
When you’re done, click the Close button.

Change Full Screen Reading View Options
![]() Click the Full Screen Reading View button.
Click the Full Screen Reading View button.
![]() Click the View Options buttons.
Click the View Options buttons.
![]() Click the view you want to display.
Click the view you want to display.
![]() Don’t Open Attachments in Full Screen.
Don’t Open Attachments in Full Screen.
![]() Show Printed Page.
Show Printed Page.
![]() Margin Settings.
Margin Settings.
![]() Allow Typing.
Allow Typing.
![]() Track Changes.
Track Changes.
![]() Show Comments and Changes.
Show Comments and Changes.
![]() Show Original/Final Document.
Show Original/Final Document.
![]() When you’re done, click the Close button.
When you’re done, click the Close button.
Getting Help While You Work
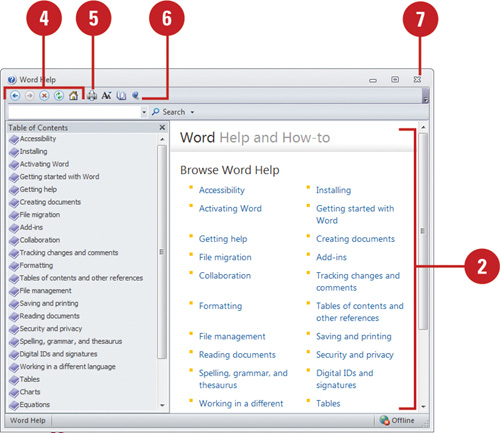
At some time, everyone has a question or two about the program they are using. The Office Help Viewer provides the answers and resources you need, including feature help, articles, tips, templates, training, and downloads. By connecting to Microsoft Office Online, you not only have access to standard product help information, but you also have access to updated information over the Web without leaving the Help Viewer. The Web browser-like Help Viewer allows you to browse an extensive catalog of topics using a table of contents to locate information, or ask a question or enter phrases to search for specific information. When you use any of these help options, a list of possible answers is shown to you with the most likely answer or most frequently-used at the top of the list.
Use the Help Viewer to Get Answers
![]() Click the Help button on the Ribbon.
Click the Help button on the Ribbon.
TIMESAVER Press F1.
![]() Locate the Help topic you want.
Locate the Help topic you want.
![]() Click a Help category on the home page, and then click a topic (? icon).
Click a Help category on the home page, and then click a topic (? icon).
![]() Click the Show/Hide Table of Contents button on the toolbar, click a help category (book icon) and then click a topic (? icon).
Click the Show/Hide Table of Contents button on the toolbar, click a help category (book icon) and then click a topic (? icon).
![]() Read the topic, and then click any links to get Help information.
Read the topic, and then click any links to get Help information.
![]() Click the Back, Forward, Stop, Refresh, and Home buttons on the toolbar to move around in the Help Viewer.
Click the Back, Forward, Stop, Refresh, and Home buttons on the toolbar to move around in the Help Viewer.
![]() If you want to print the topic, click the Print button on the toolbar.
If you want to print the topic, click the Print button on the toolbar.
![]() To keep the Help Viewer window (not maximized) on top or behind, click to toggle the Keep On Top button (pin pushed in) and Not On Top button (pin not pushed in) on the toolbar.
To keep the Help Viewer window (not maximized) on top or behind, click to toggle the Keep On Top button (pin pushed in) and Not On Top button (pin not pushed in) on the toolbar.
![]() When you’re done, click the Close button.
When you’re done, click the Close button.

![]() Click the Help button on the Ribbon.
Click the Help button on the Ribbon.
![]() Click the Search button list arrow below the toolbar, and then select the location and type of information you want.
Click the Search button list arrow below the toolbar, and then select the location and type of information you want.
![]() Type one or more keywords in the Search For box, and then click the Search button.
Type one or more keywords in the Search For box, and then click the Search button.
![]() Click a topic.
Click a topic.
![]() Read the topic, and then click any links to get information on related topics or definitions.
Read the topic, and then click any links to get information on related topics or definitions.
![]() When you’re done, click the Close button.
When you’re done, click the Close button.

Check Help Connection Status
![]() Click the Help button on the Ribbon.
Click the Help button on the Ribbon.
![]() Click the Connection Status at the bottom of the Help Viewer.
Click the Connection Status at the bottom of the Help Viewer.
![]() Click the connection option where you want to get help information:
Click the connection option where you want to get help information:
![]() Show content from Office.com to get help from this computer and the internet (online).
Show content from Office.com to get help from this computer and the internet (online).
![]() Show content only from this computer to get help from this computer only (offline).
Show content only from this computer to get help from this computer only (offline).
This setting is maintained for all Office 2010 program Help Viewers.
![]() When you’re done, click the Close button.
When you’re done, click the Close button.

Saving a Document
When you create a Word document, save it as a file on your computer so you can work with it later. When you save a document for the first time or if you want to save a copy of a file, use the Save As command. When you want to save an open document, use the Save button on the Quick Access Toolbar. When you save a document, Word 2010 saves 97-2003 files in an older format using compatibility mode and 2007-2010 files in an XML (Extensible Markup Language) based file format. The XML format significantly reduces file sizes, provides enhanced file recovery, and allows for increased compatibility, sharing, reuse, and transportability. A Word 97-2003 or 2007 document stays in compatibility mode—indicated on the title bar—until you convert it to the 2010 file format. Compatibility mode disables new features that cannot be displayed or converted well by previous versions.
Save a Word 2010 Document
![]() Click the File tab, and then click Save As.
Click the File tab, and then click Save As.
TIMESAVER Press Ctrl+S to save a document in its current format.
![]() Click the Save in list arrow, and then click the drive or folder where you want to save the file.
Click the Save in list arrow, and then click the drive or folder where you want to save the file.
![]() Type a document file name.
Type a document file name.
![]() Click the Save as type list arrow, and then click Word Document.
Click the Save as type list arrow, and then click Word Document.
![]() Click the Authors or Tags box to enter Document Properties.
Click the Authors or Tags box to enter Document Properties.
![]() Click Save.
Click Save.
Did You Know?
You can access options from the Save dialog box. In the Save dialog box, click Tools, and then click the command option you want, either General, Web, or Compress Pictures.

Save a Word 97-2003 or 2007 Document in Compatibility Mode
![]() Open the Word 97-2003 or 2007 document you want to continue to save in the 97-2003 or 2007 format.
Open the Word 97-2003 or 2007 document you want to continue to save in the 97-2003 or 2007 format.
The Word document opens in compatibility mode.
![]() Click the Save button on the Quick Access Toolbar, or click the File tab, and then click Save.
Click the Save button on the Quick Access Toolbar, or click the File tab, and then click Save.
Word stays in compatibility mode.
Did You Know?
You can use the Format tab under Text Box Tools in Compatibility mode. The Format tab under Text Box Tools has been integrated into the Format tab under Drawing Tools in Word 2010. However, in Compatibility mode, the Format tab under Text Box Tools is available.
Set Save Options
![]() Click the File tab, and then click Options.
Click the File tab, and then click Options.
![]() In the left pane, click Save.
In the left pane, click Save.
![]() Set the save options you want:
Set the save options you want:
![]() Default Save Format. Click the Save files in this format list arrow, and then click the default format you want.
Default Save Format. Click the Save files in this format list arrow, and then click the default format you want.
![]() Default File Location. Specify the complete path to the folder location where you want to save your document.
Default File Location. Specify the complete path to the folder location where you want to save your document.
![]() Click OK.
Click OK.

Saving a Document with Different Formats
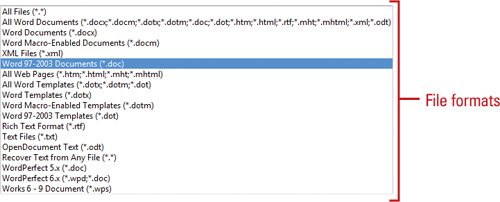
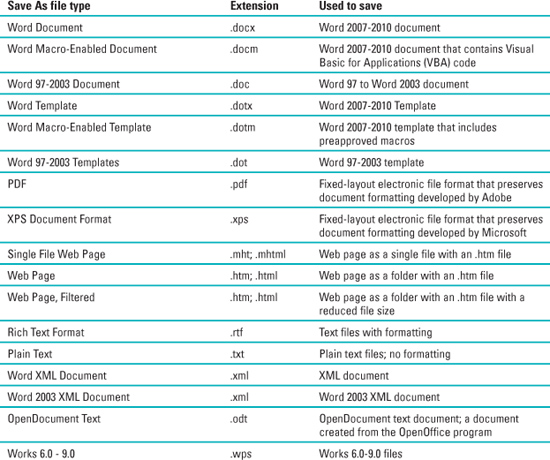
Word is a versatile suite of programs that allow you to save your documents in a variety of different formats—see the table on the following page for a complete list and description. For example, you might want to save your document as a Web page that you can view in a Web browser. Or you can save a document in an earlier 97-2003 version in case the people you work with have not upgraded to Word 2010. If you save a document to 97-2003, some new features and formatting are converted to uneditable pictures or not retained. The format is compatible with Office 2003, Office XP, and Office 2000 with a software patch. However, for best results, if you’re creating a document for someone with Word 97 to Word 2003, it’s better to save it with the .doc file format.
Save a Document with Another Format
![]() Click the File tab, and then click Save & Send.
Click the File tab, and then click Save & Send.
![]() Click Change File Type.
Click Change File Type.
![]() Click the file type you want.
Click the file type you want.
![]() Click the Save As button.
Click the Save As button.
The Save As dialog box opens with the selected file type.
![]() You can also click the File tab, click Save As, and then select a file format.
You can also click the File tab, click Save As, and then select a file format.
![]() Click the Save in list arrow, and then select the location where you want to save the file.
Click the Save in list arrow, and then select the location where you want to save the file.
![]() Type a file name.
Type a file name.
![]() Click Save.
Click Save.
See Also
See “Creating a PDF Document” on page 376 or “Creating an XPS Document” on page 377 for information on using and saving a file with different formats.

Word 2010 Save File Formats
Checking Compatibility
The Compatibility Checker identifies the potential loss of functionality between a Word 2010 document and a Word 97-2003 or 2007 document. The Compatibility Checker generates a report that provides a summary of the potential losses and the number of occurrences in the document. You can also specify what versions to show (New!) compatibility issues. Use the report information to determine what caused each message and for suggestions on how to change it. If the loss is due to a newer feature in Word 2010—such as custom layouts or Quick Styles applied to shapes, pictures, and WordArt—you might be able to simply remove the effect or feature. In other cases, you might not be able to do anything about it. To maintain a visual appearance, SmartArt graphics and other objects with new effects are converted to bitmaps to preserve their overall look and cannot be edited. In Word 2010, the Format tab under Text Box Tools has been integrated with the Format tab under Drawing Tools. However, if you’re working with a document in compatibility mode, the Format tab under Text Box Tools is still available.
Check Compatibility
![]() Click the File tab, and then click Info.
Click the File tab, and then click Info.
![]() Click the Check For Issues button, and then click Check Compatibility.
Click the Check For Issues button, and then click Check Compatibility.
Word checks compatibility of the document for non supported features in earlier versions of the Word program.
![]() Click the Select versions to show list arrow, and then select one or more versions to check (New!).
Click the Select versions to show list arrow, and then select one or more versions to check (New!).
![]() View the compatibility summary information, so you can make changes, as necessary.
View the compatibility summary information, so you can make changes, as necessary.
![]() To have the compatibility checker review the Office document when the Office program saves the file, select the Check compatibility when saving documents check box.
To have the compatibility checker review the Office document when the Office program saves the file, select the Check compatibility when saving documents check box.
![]() Click OK.
Click OK.

Checking Accessibility
The Accessibility Checker (New!) identifies potential difficulties that people with disabilities might have reading or interactive with an Office document. The Accessibility Checker generates a list of errors and warning and possible fixes in the Accessibility Checker panel. Use the information to determine what caused each issue and for suggestions on how to fix it. In addition to the Accessibility Checker, you can also add alternative text (also known as alt text) (New!) to objects and other items to provide information for people with visual impairments who may be unable to easily or fully see it. Alternative text also helps people with screen readers understand the content in a document. You can create alternative text for shapes, pictures, charts, tables, SmartArt graphics, or other objects. When you point to an object with alternative text in a screen reader or DAISY (digital Accessible Information System) or in most browsers, the alternative text appears.
Check Accessibility and Add Alternative Text
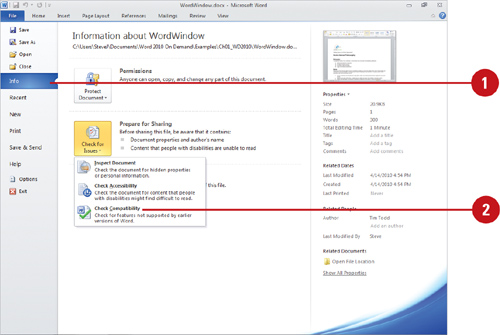
![]() Click the File tab, and then click Info.
Click the File tab, and then click Info.
![]() Click the Check For Issues button, and then click Check Accessibility.
Click the Check For Issues button, and then click Check Accessibility.
Office checks compatibility for content that people with disabilities might find difficult to read.
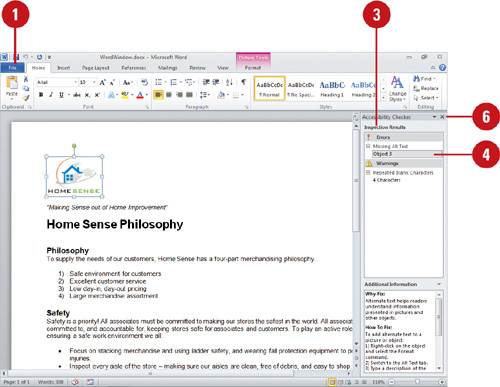
![]() View the compatibility summary information of errors and warnings in the Accessibility Checker panel.
View the compatibility summary information of errors and warnings in the Accessibility Checker panel.
![]() Select an issue under Inspection Results to find out how to fix it under Additional Information.
Select an issue under Inspection Results to find out how to fix it under Additional Information.
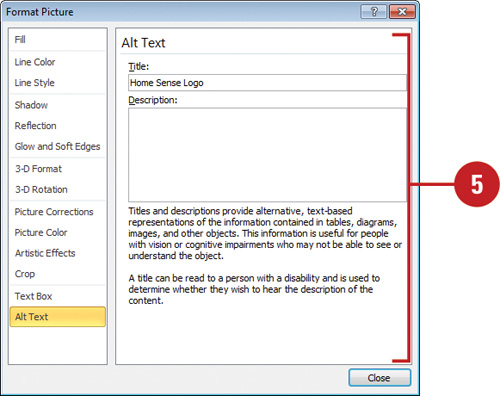
![]() To add alternative text, right-click the object or item, point to a command (varies depending on the object or item), such as Format, click Alternative Text or Alt Text, enter a title and description, and then click OK.
To add alternative text, right-click the object or item, point to a command (varies depending on the object or item), such as Format, click Alternative Text or Alt Text, enter a title and description, and then click OK.
![]() When you’re done with the Accessibility Checker panel, click the Close button on the panel.
When you’re done with the Accessibility Checker panel, click the Close button on the panel.
Documenting Properties
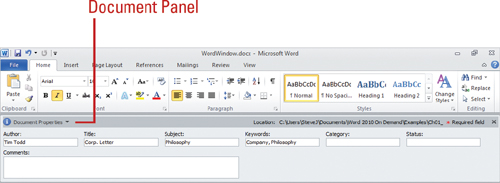
Word automatically documents properties while you work—such as file size, save dates, and various statistics—and allows you to document other properties, such as title, author, subject, keywords, category, and status. You can view or edit standard document properties or create advanced custom properties by using the Document Information Panel, which is an XML-based Microsoft InfoPath form hosted in the Office program. You can use document properties—also known as metadata—to help you manage and track files; search tools can use the metadata to find a document based on your search criteria. If you associate a document property to an item in the document, the document property updates when you change the item.
View and Edit Document Properties
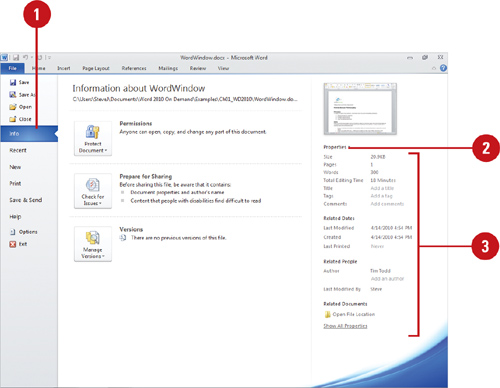
![]() Click the File tab, and then click Info.
Click the File tab, and then click Info.
![]() To display other properties, click the Properties button, and then select an option:
To display other properties, click the Properties button, and then select an option:
![]() Show Document Panel. Shows Document panel in the document.
Show Document Panel. Shows Document panel in the document.
![]() Advanced Properties. Displays the Properties dialog box.
Advanced Properties. Displays the Properties dialog box.
![]() Enter the standard properties, such as author, title, subject, keywords, category, status, and comments.
Enter the standard properties, such as author, title, subject, keywords, category, status, and comments.
![]() Show All Properties. Click the link to displays more options.
Show All Properties. Click the link to displays more options.
Did You Know?
You can view or change document properties when you open or save a file. In the Open or Save As dialog box, select the document you want, click the arrow next to the Views, and then click Details to view file size and last changed date, or click Properties to view all information. If you want to insert or change author names or keywords, click the Authors box or Tags box, and then type what you want.
Zooming the View In and Out
Working with the Zoom tools gives you one more way to control exactly what you see in a Word document. The Zoom tools are located in the bottom-right corner of the window. Large documents are difficult to work with and difficult to view. Many documents, when viewed at 100%, are larger than the maximized size of the window. When this happens, viewing the entire worksheet requires reducing the zoom.
Change the View
![]() Use any of the following zoom options available on the Status bar:
Use any of the following zoom options available on the Status bar:
![]() Zoom Out. Click to zoom out (percentage gets smaller).
Zoom Out. Click to zoom out (percentage gets smaller).
![]() Zoom In. Click to zoom in (percentage gets larger).
Zoom In. Click to zoom in (percentage gets larger).
![]() Slider. Drag to zoom out or in to the percentage you want.
Slider. Drag to zoom out or in to the percentage you want.
![]() Zoom Level. Click to display the Zoom dialog box, where you can select the magnification you want.
Zoom Level. Click to display the Zoom dialog box, where you can select the magnification you want.
![]() For additional zoom options, click the View tab, and then use any of the following options:
For additional zoom options, click the View tab, and then use any of the following options:
![]() Zoom. Click to display the Zoom dialog box, where you can select the magnification you want.
Zoom. Click to display the Zoom dialog box, where you can select the magnification you want.
This is the same as Zoom Level above.
![]() 100%. Click to display the view at 100%.
100%. Click to display the view at 100%.
![]() One Page. Click to display one page at a time.
One Page. Click to display one page at a time.
![]() Two Pages. Click to display two pages at at time.
Two Pages. Click to display two pages at at time.
![]() Page Width. Click to display the page to the current window width.
Page Width. Click to display the page to the current window width.


Recovering a Document
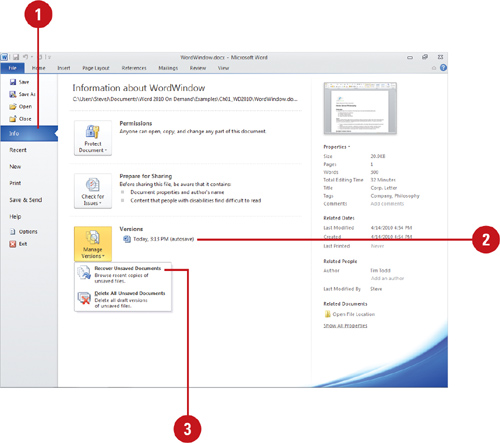
If Word encounters a problem and stops responding, the program automatically tries to recover the file. The recovered files are stored and managed by Word. You can use the Manage Versions button (New!) on the Info screen under the File tab to open any available recovered unsaved files. If you have a lot of recovered files, you can also delete all file versions to save disk space. To use the AutoRecover option, you need to enable it in the Save category of the Options dialog box. You can set AutoRecover options to periodically save a temporary copy of your current file, which ensures proper recovery of the file and allows you to revert to an earlier version of a file. In addition, if you didn’t save your changes when you closed a document, you can select an AutoRecover option to save your work as a safe guard (New!).
Recover or Revert a Document
![]() Click the File tab, and then click Info.
Click the File tab, and then click Info.
![]() To open a recovered or previous version, click a file from the available list.
To open a recovered or previous version, click a file from the available list.
![]() Click the Manage Versions button, and then click Recover Unsaved Documents.
Click the Manage Versions button, and then click Recover Unsaved Documents.
TIMESAVER Click the File tab, click Recent, and then click Recover Unsaved Documents folder icon.
![]() Select the file version you want to recover.
Select the file version you want to recover.
![]() Click Open.
Click Open.
Did You Know?
You can delete all draft versions of unsaved files. Click the File tab, click Info, click the Manage Versions button, click Delete All Unsaved Documents, and then click Yes to confirm the deletions.
![]() Click the File tab, and then click Options.
Click the File tab, and then click Options.
![]() In the left pane, click Save.
In the left pane, click Save.
![]() Select the Save AutoRecover information every x minutes check box.
Select the Save AutoRecover information every x minutes check box.
![]() Enter the number of minutes, or click the Up and Down arrows to adjust the minutes.
Enter the number of minutes, or click the Up and Down arrows to adjust the minutes.
![]() Select the Keep the last Auto Recovered file if I close without saving check box as a safe guard to save your work if you don’t save it (New!).
Select the Keep the last Auto Recovered file if I close without saving check box as a safe guard to save your work if you don’t save it (New!).
![]() Specify the complete path to the folder location where you want to save your AutoRecover file.
Specify the complete path to the folder location where you want to save your AutoRecover file.
![]() Click OK.
Click OK.

Maintaining and Repairing Office
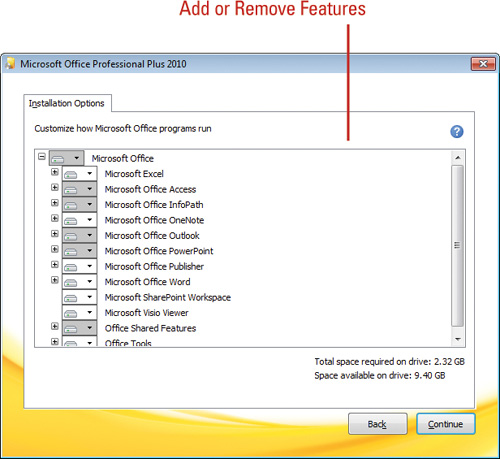
At times you may determine that Word or another Office program is not working as efficiently as it once did. This sometimes happens when you install new software or move files into new folders. Office does the work for you with the Repair option, which locates, diagnoses, and fixes any errors in the program itself. Note that this feature does not repair personal files like documents, presentations, or workbooks. If the Repair option does not fix the problem, you might have to reinstall Word or Office. If you need to add or remove features, reinstall Word or Office, or remove it entirely, you can use Office Setup’s maintenance feature.
Perform Program Maintenance
![]() Insert the Office disc in your drive or navigate to the folder with the setup program.
Insert the Office disc in your drive or navigate to the folder with the setup program.
![]() In Windows Explorer, double-click the Setup icon.
In Windows Explorer, double-click the Setup icon.
![]() Click one of the following maintenance buttons.
Click one of the following maintenance buttons.
![]() Add or Remove Features to change which features are installed or remove specific features.
Add or Remove Features to change which features are installed or remove specific features.
![]() Remove to uninstall Microsoft Office 2010 from this computer.
Remove to uninstall Microsoft Office 2010 from this computer.
![]() Repair to repair Microsoft Office 2010 to its original state.
Repair to repair Microsoft Office 2010 to its original state.
![]() Enter a Product Key to type the product registration key (located in the product packaging) for Office 2010.
Enter a Product Key to type the product registration key (located in the product packaging) for Office 2010.
![]() Click Continue, and then follow the wizard instructions to complete the maintenance.
Click Continue, and then follow the wizard instructions to complete the maintenance.
See Also
See “Working with Office Safe Modes” on page 332 for information on fixing problems with a Microsoft Office 2010 program.

Getting Updates on the Web
Microsoft offers a quick and easy way to update Word and any other Office program with new software downloads that improve the stability and security of the program. From the Help screen on the File tab, simply click the Check for Updates button to connect to the Microsoft Update Web site to have your computer scanned for necessary updates, and then choose which Office updates you want to download and install.
Get Office Updates on the Web
![]() Click the File tab, and then click Help.
Click the File tab, and then click Help.
![]() Click Check for Updates to open the Microsoft Update Web site.
Click Check for Updates to open the Microsoft Update Web site.
![]() Click one of the update buttons to find out if you need updates, and then choose the updates you want to download and install.
Click one of the update buttons to find out if you need updates, and then choose the updates you want to download and install.
Did You Know?
You can contact Microsoft for help.
You can get support over the phone, chat, or e-mail messages. To get online help, click the File tab, click Help, and then click Contact Us.
You can get better help information. At the bottom of a help topic, click Yes, No, or I Don’t Know to give Microsoft feedback on the usefulness of a topic.


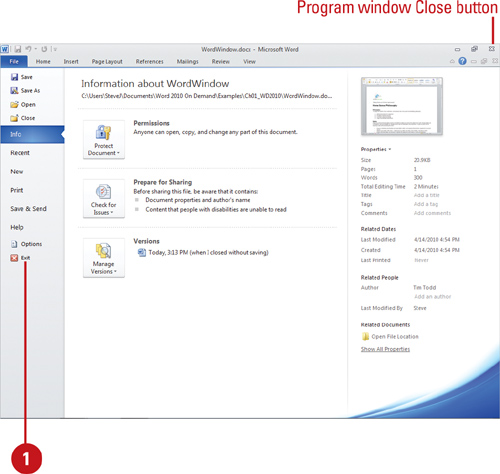
Closing a Document and Exiting Word
After you finish working on a document, you can close it. Closing a document makes more computer memory available for other activities. Closing a document is different from exiting, or quitting, a program; after you close a document, the program is still running. When you’re finished using the program, you should exit it. To protect your files, always save your documents and exit before turning off the computer.
Close a Document
![]() Click the File tab, and then click Close, or click the Close button on the Document window (available when documents not all shown on taskbar).
Click the File tab, and then click Close, or click the Close button on the Document window (available when documents not all shown on taskbar).
TIMESAVER Press Ctrl+W.
![]() If you have made changes to any open files since last saving them, a dialog box opens, asking if you want to save changes. Click Yes to save any changes, or click No to ignore your changes.
If you have made changes to any open files since last saving them, a dialog box opens, asking if you want to save changes. Click Yes to save any changes, or click No to ignore your changes.
Exit Word
![]() Click the File tab, and then click Exit, or click the Close button on the Program window (when documents not all shown on taskbar or for the last open document).
Click the File tab, and then click Exit, or click the Close button on the Program window (when documents not all shown on taskbar or for the last open document).
![]() If you have made changes to any open files since last saving them, a dialog box opens asking if you want to save changes. Click Yes to save any changes, or click No to ignore your changes.
If you have made changes to any open files since last saving them, a dialog box opens asking if you want to save changes. Click Yes to save any changes, or click No to ignore your changes.