
Lesson 6. Keeping in Touch with Your World Using Dashboard
Time
This lesson takes approximately 10 minutes to complete.
Goals
To learn how to set up different “widgets,” so they’ll automatically provide information you need from the Internet, along with other time-saving mini-applications to help you accomplish everyday tasks more efficiently.
The Internet is an amazing place for gathering information. It’s especially useful for giving you instant access to commonly sought-after information, such as what the weather will be like today, how your stocks are doing right this minute, whether your flight’s on time, and referencing online dictionaries and phonebooks. If you wind up doing at least some of these things every day (I know I do), you’re going to spend a lot of your life staring at your Safari Web browser (the application we use on Macs to visit different websites). Well, rather than seeking out this information every day, and going to all these different websites, what if there was a way for this information to find you? For example, what if the weather report for your hometown was already waiting for you when you went to your Mac? And what if you also already had the weather for the cities your kids live in (providing, of course, that you have kids and they’ve moved out)? And what if your stock portfolio was already updated and all you had to do was glance at it? Wouldn’t that be helpful? Too bad that kind of thing doesn’t exist. Okay, I was baiting you. It does exist in Mac OS X Tiger’s Dashboard. But Dashboard is more than just having your hand-picked Internet information waiting for you—it’s also one-click access to other parts of your world, like your Address Book, calendars, a lightning-fast dictionary and thesaurus, and even iTunes. Best of all, these mini-applications (Apple calls them “widgets”) are just one click away (or one keystroke away, depending on just how lazy you want to be).

STEP ONE (Getting to Your Dashboard):
There are two ways to get to Dashboard, and you can choose whichever one is easiest for you. You can get to Dashboard directly from the Dock at the bottom of your screen by clicking on the Dashboard icon (it looks similar to a gauge on a car’s dashboard), or by pressing the F12 key on your keyboard (the Function keys are those keys that appear at the very top of your keyboard, and they start on the left with F1, F2, etc.).

STEP TWO (Your First Look at Dashboard):
When you click on the Dashboard Dock icon (or press F12), Dashboard immediately zooms into view, with some of Dashboard’s “widgets” (that’s Apple’s name for these mini-applications) already open (as shown above). We’re going to start by looking at the Calculator widget on the left, which is probably the simplest of all widgets. It’s pretty much just what it looks like—a calculator. It’s handy for doing simple calculations, by either using the mouse and clicking on the calculator buttons, or you can use the numeric keypad on your keyboard (it’s up to you). You can move the Calculator widget anywhere onscreen, so if you want it out of the way somewhere, click on any part of the calculator that isn’t a button and drag it where you want it onscreen. Now, it will always appear in that spot (unless you decide to move it later). That’s basically how you move widgets around—click on something other than their buttons, then drag them where you want them. So, if you want to take a moment to tidy up your widgets, I don’t mind waiting.
STEP THREE (Closing Widgets You Don’t Want):
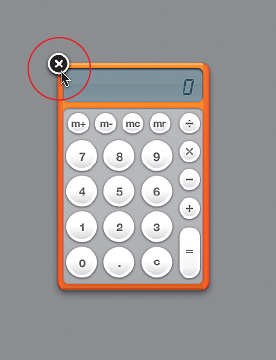
Okay, let’s say you don’t want that Calculator widget to appear at all (after all, there is a more powerful calculator in your Applications folder if you really need to do some serious calculations). To close a widget, hold the Option key (it’s along the bottom-left side of your keyboard), then move your mouse over the widget you want to close (in this case, the Calculator). As soon as your cursor moves over the Calculator, a little circle with an X on it will appear just outside the top-left corner of the widget. That’s the Close button, so just move your mouse onto the Close button and click (while still pressing the Option key). That’s it—you closed a widget.

STEP FOUR (Getting More Widgets):
When you first open Dashboard, a few of the Dashboard widgets appear onscreen, but they’re just a sample—actually there are more of them. To see the collection of widgets that come with Mac OS X Tiger, just click the little plus sign (+) button in the bottom-left corner of your screen (you’ll only see this button when Dashboard is open) and a row of widgets (called the Widget Bar) will pop up across the bottom of your screen (well, they don’t actually pop up; they kind of push everything else on your screen up an inch or two to temporarily make room for them). At least one long row of widgets will appear, and depending on the width of your Mac’s monitor, there may be another row that’s hidden off to the side. If that’s the case, you’ll see a right-facing arrow on the far-right side of the Widget Bar. Click on it, and the second row of widgets will appear (remember, you’ll only see this second row if your monitor isn’t wide enough to display them all at once, which is the case with most PowerBooks and iBooks).

STEP FIVE (Trying Out Widgets):
We’ve tried out one of the most basic widgets (the Calculator); now let’s move onto something cooler. With the Widget Bar open, click once on the Unit Converter widget (it shows a ruler, a grid, and a gold bar stacked together) and it will appear onscreen. (When widgets appear, they arrive using a very slick little effect that kind of looks like a pond ripple.) The Unit Converter is one of those widgets that works fine for most things without being connected to the Internet (for example, it will convert miles per hour into kilometers per hour, gallons into liters, yards into meters, etc.). But if you’re connected to the Internet, it can do some really handy stuff, so make sure you’re connected to the Internet before we go any further.
In the top center of the Unit Converter widget is a pop-up menu to the right of the word “Convert” that lets you choose what you want to convert. Click once on this pop-up menu and choose Currency. As you know, currency prices fluctuate every day, but since you’re connected to the Internet, when you ask it to convert dollars (by choosing US Dollar from the left pop-up menu) to Euros (by choosing Euro from the right pop-up menu), you’re going to get an accurate conversion based on the latest currency rates. That’s mighty cool stuff. This example gives you just a hint of how widgets can bring information from the Web right to your fingertips—without having to search for it using your Web browser.
STEP SIX (Setting Up Your Hometown Weather):
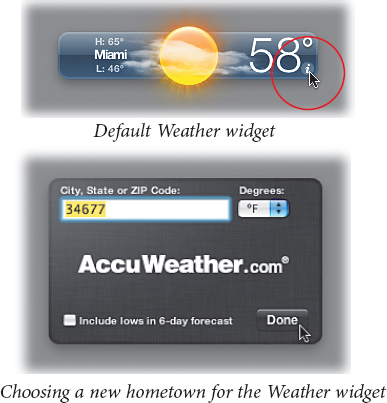
One of my favorite widgets is the Weather widget. It’s one of the widgets already open when you first opened Dashboard (it looks like a dark blue vertical rectangle—well, it does now, anyway). For this Weather widget to give you the local forecast, you need to tell it where you live. You do this by clicking on the tiny, lowercase “i” icon that appears in the bottom right-hand corner when you move your mouse over the Weather widget. Click on that little “i” and your widget will “flip” around (like turning over a card), and on the back there’s a text field where you enter your city, state, or ZIP code. Since we’re setting this up for you, you probably know your own ZIP code (please tell me you know your own ZIP code), so click in the text field, enter your ZIP code, and then click the Done button in the bottom-right corner of the widget. (If you’re connected to the Internet, your local forecast will immediately appear.) Best of all, your Weather widget will remember your ZIP code, so each day your weather forecast will be waiting for you.
STEP SEVEN (Finding Even More Widgets):
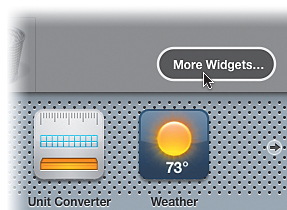
Although Mac OS X Tiger comes with its own collection of widgets, you can download even more widgets for free, directly from Apple. All you have to do is click the plus sign (+) button in the left-hand corner of your screen (while Dashboard is open) to make the Widget Bar visible. Then, once the Widget Bar appears (or should I say “it moves into place”), look just above the bar on the far-right corner of your screen and you’ll see a little button named More Widgets. Click once on that button. Your Web browser will launch (most likely Safari), and if you’re connected to the Internet, it will take you directly to a special page on Apple’s website where you’ll find even more cool widgets that you can download. Once you download new widgets, they will appear in your Widget Bar when you relaunch Dashboard.
STEP EIGHT (Using Other Widgets):
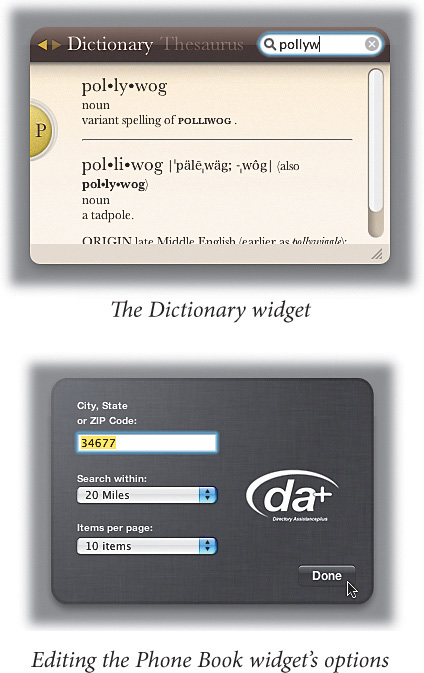
Most of the widgets that come with Mac OS X Tiger are fairly easy to figure out on your own (like the Calculator, for example). The Dictionary widget is fairly easy to figure out too—just click on the Dictionary widget in the Widget Bar, then start typing the word you want to define and press the Return key. After you’ve searched for one word, it starts to work much like Mac OS X Tiger’s Spotlight search, because as soon as you start typing again in the Search field, it starts looking for a match. By the time you get all (or most) of the word typed, the definition is already there waiting for you. If you want to switch to a thesaurus, just click once directly on the word “Thesaurus” that appears to the right of the word “Dictionary.” The Phone Book widget works pretty much the same way as the Dictionary widget (and you open it from the Widget Bar as well). Take a few minutes to try out each widget in the Widget Bar.
STEP NINE (Tips for Widgets):
When you’re trying out widgets, remember these three tips:
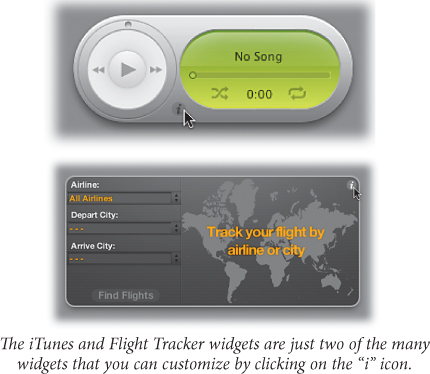
1. There may be more to a widget than meets the eye (meaning, you can tweak how it works or add some custom information to suit your needs) if you move your cursor over the widget and a tiny “i” icon appears somewhere on the widget. Click the “i” icon to access the options that will allow you to customize the widget to your liking.
2. Some widgets can’t work properly unless your Mac is connected to the Internet (like the one that tracks your stocks, for example), so make sure you’re online when you start trying these out.
3. To close a widget, press-and-hold the Option key and then move your cursor over the widget you want to close. When an X button appears in the widget’s top-left corner, click on it to close it.