
Lesson 1. How to Set Up Your Address Book
Time
This lesson takes approximately 10 minutes to complete.
Goals
To get all names, addresses, phone numbers, and other contact info for your friends and family into your Mac’s Address Book, so you can retrieve them anytime in just seconds.
When you first considered getting a computer, I’m sure you probably thought about sending email, getting on the Internet, etc., and I’ll bet you also thought about having all your software “work together,” right? Right. Believe it or not, one of the cornerstones of making everything work together is to set up your Address Book (and by that I mean entering the name, address, phone number, and other contact info for your friends, relatives, companies you do business with, etc.). Luckily, there’s an application that comes with Mac OS X Tiger called (surprisingly enough) Address Book. It does a wonderful job of managing all your addresses, and best of all, it shares this information with other software applications that you’ll be using to simplify and organize your life (well, as far as your computing life goes, anyway). Now, don’t worry if there seems to be a lot of steps to set up your Address Book—it’s really simple and only takes a few minutes (unless, of course, you have hundreds of friends, in which case it’ll take longer, but at least you’ll have the consolation of knowing that you’re obviously very popular).

STEP ONE:
Using your mouse, click once on the Address Book icon in the Dock at the bottom of your computer screen (its icon looks like a little brown book with a large white @ symbol on it).

STEP TWO:
The Address Book window will appear. The first time you launch Address Book, you’ll see Apple Computer’s contact info (just to give you an example of how a listing in your Address Book will look once you add your own entries). Besides Apple’s contact info, you might also see a second name: “Admin User,” or your own name. You can ignore that for now.
STEP THREE:
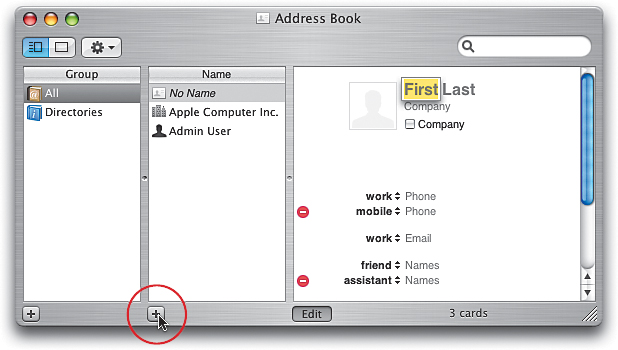
Now let’s add someone to your Address Book. How ’bout me? Just in case you ever want to call. If you do, wait until after 10 p.m. EST when I’m sound asleep. To add me to your Address Book, start by clicking on the plus sign (+) button found just below the Name column near the left side.
STEP FOUR:
This brings up a blank Name page, and if you look in the capture shown above, you’ll see that the word “First” is highlighted for you. That’s telling you to enter the person’s first name (remember, for your first person you’re entering my name, so using your keyboard type “Scott”). If you type the wrong letter, press the Delete key on your keyboard to erase your mistake.

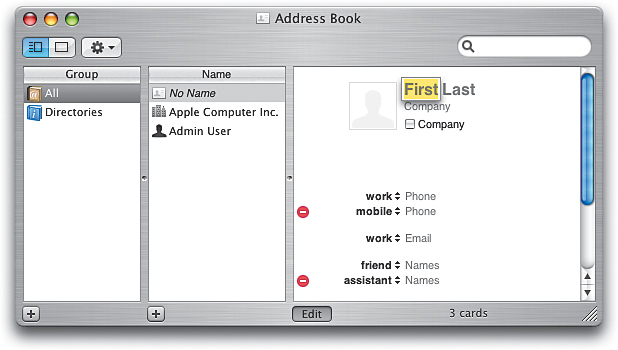
STEP FIVE:
Once my first name is entered, press the Tab key on your keyboard to jump over to where you’ll enter my last name (you can see the word “Last” highlighted in the capture shown above). Now type my last name, “Kelby.” Again, if you make a mistake, press the Delete key to erase any wrong letters.
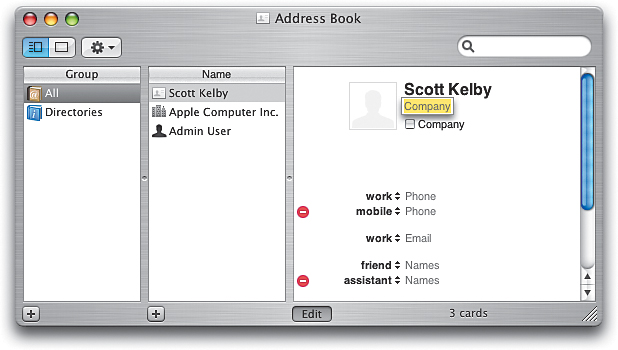
STEP SIX:
Once you’ve entered my first and last name, press the Tab key on your keyboard to move to the next entry—Company. Type “KW Media Group,” then press Tab to jump to the Work Phone field.
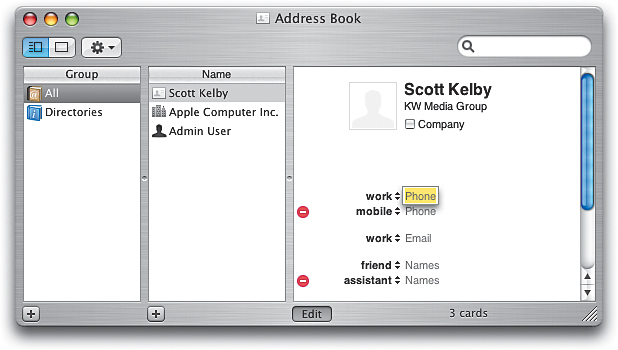
STEP SEVEN:
Now, let’s type my work number: “813-433-5000.” Once you’ve entered it, press the Tab key to jump down one field, in which you’ll enter my cell phone number.

STEP EIGHT:
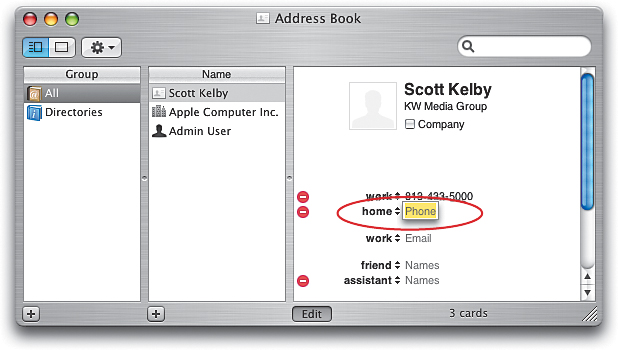
Apple set up the next line so you could enter the person’s mobile (cellular) number, but what if you’d like to enter a person’s home number first? (For our example, let’s assume that you want my home number to appear directly below my work number.) To do that, just click once directly on the word “Mobile”—a menu listing alternate choices will appear.
STEP NINE:
Using your mouse, move your arrow cursor up until “Home” is highlighted, then click the mouse button to select Home as the new name for this field. So, from now on, if you see a field and you want to change its name, you’ll know what to do.
STEP TEN:
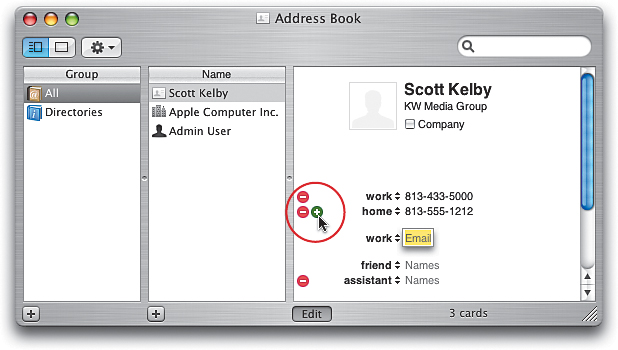
Once the field name has been changed to Home, enter my home number: “813-555-1212,” and press the Tab key. Now the Work Email field is highlighted, and there’s no mobile phone field (we replaced it with Home in the previous steps). So, to add an extra field (in this case, a field for my cell phone number), click on the green plus sign (+) button (shown circled above).

STEP ELEVEN:
When you click that button, a new Mobile Phone field is added directly below the Home Phone field. Personally, I never refer to my cell phone as my “mobile phone,” so if you’re like me, you’ll want to change the name of this new field to Cell. Just click once on the word “Mobile” and choose Custom from the menu that appears.

STEP TWELVE:
When you choose Custom, a little naming dialog pops down from the top of the Address Book window. Just type the new name (in this case, type the word “Cell”) and click on the OK button. Now, this new field will be named Cell. Go ahead and type my cell number: “727-555-1214,” and then press the Tab key to jump to the Work Email field.
STEP THIRTEEN:
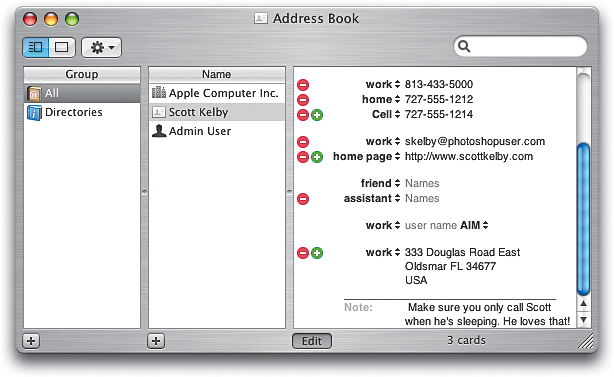
By now, I’m sure you see what comes next: You’ll press the Tab key to get from line to line, typing in information. If you don’t like the label for a field, you’ll change it by clicking on the name and choosing a new one from the pop-up menu (or by choosing Custom from the pop-up menu and making your own). Fill in the rest of the card using the info I’ve entered above (you’re doing this just to get the hang of it).

STEP FOURTEEN:
What if you decide you want to delete a field—then what? You do that by clicking on the little red minus button (–) to the left of the field. For example, let’s say I asked you never to call me on my cell. You would delete my cell phone number by clicking on the red minus button to the left of the Cell Phone field. Note: You may not be able to delete some fields entirely because they’re required by default. Fields with both a green plus and red minus sign can be deleted entirely by clicking on the red minus sign; otherwise, when you click the red minus sign, only the information in that field will be deleted.

STEP FIFTEEN:
By the way, if you scroll to the top of the Name page (drag the blue gel-like bar on the right), you’ll see a gray silhouette of a person’s head in a box that appears to the immediate left of the person’s name. This is where you can place a photo of that person. If you have a person’s photo on your computer, find the photo on your hard disk, then click directly on it and drag-and-drop it right onto that little square. A little round green plus sign next to your pointer lets you know that the photo is being added.

STEP SIXTEEN:
When you drag-and-drop your photo on that square, a little window appears that shows you a preview of how that photo will look when it’s shown in your Address Book. The slider underneath the preview makes the photo larger or smaller, so you can drag that slider to determine how the photo will fill the frame. Once the photo looks the way you want it to, click on the Set button.

STEP SEVENTEEN:
Now that you’ve added a photo, click the Edit button (shown circled above) to see how your final Address Book card will look. Now, you’re going to repeat this same process to add all the people and companies that you want to appear in your Address Book. Once they’re all added, you can put your Address Book to work.
STEP EIGHTEEN:
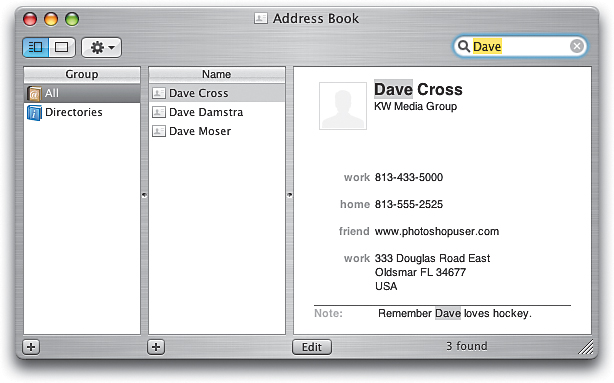
Once you have a number of people added to your Address Book, finding them can be as easy as clicking on their name in the Name list in the center column. But if you’ve got more than 15 or 20 names, it’s quicker to use the Search feature, found in the top-right corner of the Address Book window. Just type the first few letters of the person’s name (or company name) in the Search field, and their name (along with anyone else with a similar name) will appear in the Name column.

STEP NINETEEN:
Once you have a lot of contacts added to your Address Book, you can make finding people (and companies) easier by grouping things together (like one group with the phone numbers of all your favorite restaurants or one with all your co-workers). To do that, you start by clicking on the plus sign (+) button at the bottom of the first column (shown circled above).

STEP TWENTY:
This adds a listing to the Group column (it’s the first column from the left), and its current name, “Group Name,” is already highlighted, meaning all you have to do is start typing your new name (in our example, I’m creating a group of my co-workers). After you’ve typed it in, press the Enter key on your keyboard to confirm your naming is complete.

STEP TWENTY-ONE:
You’ll want to add your co-workers’ cards to that group. First, click on the All group (which appears at the very top of the Group column). This lists all of your address cards (you can see them listed in the Name column).

STEP TWENTY-TWO:
Now you just scroll through the Names column (by clicking-and-dragging the little blue pill-shaped button up and down) until you find the name of a co-worker. When you find a co-worker’s name in the list, click-and-drag it to the Co-workers group that we created in the Group column, then release your mouse button.

STEP TWENTY-THREE:
Once you’ve added all your co-workers to your Co-workers group, click directly on that group in the Group column. Then you’ll see why creating groups is so handy—now only your co-workers’ cards are listed in the center Name column, making it easier to find the co-worker you’re looking for. Now, in that Name column, just click on the co-worker’s name to see that person’s card (with phone number, address, picture, etc.).