
CHAPTER 19
Understanding the Environment
At this point in the book, you have learned about security vulnerabilities and solutions at three general levels: Physical Security, Local Host Security, and Local Network Security. These three levels apply to computing devices, network connectivity devices, network servers, and networking media that is controlled by an owner. This chapter is the last general security chapter in this book, and it deals with Internet security. In this chapter, you’ll learn to:
- Identify the types of players associated with the uncontrolled Internet environment
- Identify the components associated with different IP addressing techniques
- Relate basic port numbers with regard to network security
- Identify key Internet security organizations and standards
The Basics of Internet Security
In the early days of the Internet, security was mostly about passwords. In many cases, passwords were birthdays or pet names and used a few different technologies. We were impressed with the wonderful interconnected world in which we lived. However, there were those individuals who were intent on causing mischief or hacking networks, but back then this was mostly mischievous rather than malicious.
Hacking was mostly just cracking, which utilized software that looped and guessed at passwords until access was gained. The little real hacking that took place involved direct access or placing malicious code on a floppy disk.
The use of the Internet grew at an amazing rate. In just a few short years, almost every business was using it and even a large percentage of residential users were sending email, shopping, or just probing for knowledge on a daily basis. Access speeds and collaborative software were improving so much that the overall experience became compelling to almost everyone. As networks grew and became the norm, the features used to interact became the norm as well.
Network professionals had to deal with some security issues and some more significant security challenges, giving birth to the cybersecurity industry. Hackers could access lists of email addresses or even guess them and send carefully crafted software that could annoy and inconvenience unsuspecting recipients. We trusted most of our email, blindly clicked on attachments, and essentially were easy prey.
The real shift in security awareness came when the first computer viruses started making the rounds. A single user could run a piece of malicious code and impact an entire company network. A victim could be complicit in furthering that virus’s spread by unknowingly sharing that virus with every one of their contacts.
Microsoft wanted to have the most powerful web browser on the market, one that could revolutionize the way we communicated. They built those capabilities into their operating system and amazed us with what we could accomplish using those technologies.
It wasn’t long before hackers focused on this new power and created exploit after exploit aimed at those capabilities. Almost immediately, as businesses rushed to adopt newer technology, it was too late to protect against malicious exploits. The world was dependent on interaction and communication. As Microsoft and others rushed to patch new holes that were being discovered almost daily, it became very clear: Internet security is a big deal!
Today, there are so many different software and hardware technologies using the Internet that security needs to be everyone’s concern. We can’t simply rely on the operating system vendors or the application vendors to keep us safe. We must all be vigilant and make sure security measures are in place. Even the home user who only communicates with their grandchildren via email must have some awareness of security.
After the local hosts and the local area network have been secured, the connection to the Internet must be secured. With this in mind, Internet security involves four primary objectives and three main forms of Internet security to consider:
- Understanding the boundary between the local internal network and the Internet environment. There are many ways to connect to and use the Internet. The goal is to understand how it works so data can be secured against malicious Internet users accessing data on a local computer or accessing it as it moves across the Internet.
- Securing the local hardware. Physical security simply involves securing physical access to the local network hardware.
- Securing the network. Network security includes securing the hardware that controls the transmission of data as well as providing authentication, authorization, and protection.
- Protecting the data. Data security includes protecting the data stored or transmitted over the network.
Cybersecurity is as much a discipline as it is a skill set. A little security paranoia is probably a good thing; but rather than let security concerns influence your health, it is far better to have a strong backup plan so that network resources are preserved and can be redeployed reasonably in even the worst case.
Part IV will cover the basic concepts of Internet security listed here and apply them to several protocols and services to help you understand how to approach Internet security even when relating to a new or tangential technology.
Understanding the Environment
Networks are collections of devices that can exchange information freely, and the Internet is really nothing more than a collection of networks that can exchange information as well. How freely that exchange occurs varies, but the easy exchange of information is what is so compelling about the Internet. It is also what makes the Internet so dangerous.
The Internet has been around in some form for decades, evolving from a government and university concept to the worldwide standard for information exchange as networking has become more mainstream and practical. It wasn’t until the creation of the World Wide Web and the web browser that this concept moved into the home and became something both young and old desired and eventually essentially had to have.
To fully understand the Internet environment, you must understand the types of players who reside in the Internet. Individual users typically encounter five types of players involved in Internet activities:
- Service providers
- Businesses that want to advertise and sell
- People and businesses that want to exchange information
- Users who want to access information or use services located on the Internet
- Bad people who want to access computers to steal information, spy on people, or disable their communications
On the other hand, for most businesses, there are typically five types of players on the Internet to consider (as illustrated in Figure 19.1):

FIGURE 19.1 Internet Players
- Potential customers who can view their websites and potentially order products over the Internet
- Remote employees who need to access their internal network through the Internet
- Trusted businesses with which they can efficiently exchange information using the Internet
- Internal users who want to access information or use services located in the Internet
- Bad people who want to access their network to steal from them, disrupt their operations, or disable their communications
Many people think of the Internet as being nothing more than email and the Web. There have always been many other protocols, and more and more are created every day. In Part III, you were introduced to the OSI networking model where there are seven layers in a system, with each layer interacting only with the layer beneath or above it. We don’t really think about these layers that much in network management, but they are the key to understanding that there are different ways to deal with interconnection in a network using different protocols. Many different protocols are involved in typical Internet activities. But the core protocol suite involved (and the most important one to understand) is the Internet protocol suite commonly referred to as TCP/IP. As the title of the suite indicates, TCP/IP includes the two protocols Transmission Control Protocol (TCP) and the Internet Protocol (IP), which are the most important protocols in the Internet model. We know that data is transmitted over any network in chunks of data referred to as datagrams, packets, or segments, depending on what layer the data is moving through. TCP/IP is organized into four layers of its own and specifies how data should be packetized (link layer), addressed (Internet layer), transmitted (transport layer), and received and processed (application layer). We’re not going to spend a lot of time discussing OSI layers in this chapter, but it is common for network technicians to refer to Layer 2 and Layer 3 networking, so we need to make sure you understand what they are referring to. Recall from Part III that a networking protocol might involve more than one layer. In a local area network, packets are most commonly transported using Ethernet. This protocol can support up to 10 gigabit speeds, meaning that up to 10 gigabits of data can be transmitted per second over fiber-optic or twisted-pair cable. Fiber Distributed Data Interface (FDDI) is also used in LANs where greater distances are covered and is similar to the older Token Ring protocol. There is a great deal of overlap between network and Internet security because the Internet, as we mentioned, is merely a collection of interconnected networks. Virtually every security concept appropriate for a network should be applied to these interconnected networks as well. However, we will be less concerned with physical layer or data link layer technologies in this chapter, mainly focusing on concepts unique to Internet connectivity. There are two kinds of Internet Protocol traffic: Transmission Control Protocol (TCP) and User Datagram Protocol (UDP). When a TCP connection is established, data can be sent bidirectionally. This connection is highly reliable and features error-checking but adds some bulk to the transmission. UDP is a much simpler, connectionless protocol where multiple messages are sent as packets in data chunks, without waiting to verify they’re received. UDP is great for servers dealing with queries from a large volume of clients or for games where speed is critical. There is no error-checking function with UDP, so there is no real guarantee that transmitted packets will actually arrive at their destinations. Instead, with UDP, data is sent as “best effort.” As we have seen, data can be transmitted in a variety of ways using a variety of technologies. At some level, each technology may include some basic security concepts, but the protocols of the Internet Protocol suite (or TCP/IP) are where most security efforts are focused. What we are most concerned with is simply host-to-host communication. To facilitate this type of communication, we can use many different protocols depending on what needs to be communicated. For example, which application layer protocol should be used depends on exactly what type of information is being communicated. Email is communicated using the Simple Mail Transfer Protocol (SMTP), and Hypertext Transfer Protocol (HTTP) is the main web protocol. As the TCP protocol accepts data, it divides it into chunks and adds a TCP header to each chunk creating a TCP segment, as illustrated in Figure 19.2. That segment is then encapsulated by the Internet Protocol (IP) into a datagram known most commonly as a TCP packet. The TCP header contains 10 required fields and an optional extension field. Together these fields provide the information needed to ensure proper and reliable delivery of the data that follows the header. FIGURE 19.2 TCP Segment Structure The TCP/IP packet provides the backbone of Internet communications (as well as most local area network strategies). Conversely, it also provides the vehicle for most types of cyber attacks. These attacks manipulate the source and destination addresses in different ways to change or hide the origin or destination of messages. The TCP protocol keeps strict track of all data so that any jumbled or lost packets can be retransmitted or even reordered to maintain reliability. The network device that receives these packets must buffer this data until it can process it. So the protocol must facilitate an agreement between hosts to limit the size of unacknowledged data that can be transmitted at a time. This is known as the TCP window size and is found in the TCP header. To optimize this, TCP uses a flow control protocol where a receiving host might change that window size as it receives data in order to compensate for higher loads. If the receiving host no longer has any buffer space available to process data, it will set that window size to zero. When this occurs, the sender will stop transmitting and start a persistent timer. When that timer expires, the sender will send another small packet to hopefully obtain a new window size. On the other hand, UDP simply sends packets without most of the complexity and overhead. This results in lower latency (delays). However, this means packets can be lost or even received out of order. UDP provides for port numbers and an optional checksum to verify integrity so applications can be configured to use UDP for lossless data transmission at a faster rate than with TCP. UDP is used with many other protocols such as:
Unicast messaging is the sending of messages to a single network address. Broadcast messaging refers to sending messages to all possible destinations. Multicast messaging sends messages using special address assignments to a specific group of addresses. The differences between unicast, broadcast, and multicast are illustrated in Figure 19.3. FIGURE 19.3 Network Messaging Types With multicasting, the source only has to send packets once regardless of how many addresses will be receiving it. Network nodes then replicate the packet as needed to reach multiple addresses. Multicast is used for multimedia and content delivery networks. Often UDP is used in multicasts so providers must add error-detection and retransmission schemes to make multicast reliable. In addition to the network address, many protocols may also specify a port or a port number. A protocol or application may respond to specific ports in different ways. For example, a web server typically responds to HTTP requests over port 80 but responds to HTTPS requests on port 443. Ports are seemingly arbitrary conventions, and a large range of port numbers are not generally associated with any particular service so they can be used for a particular application. If a port number is added to a host name or IP address in a web browser, for example, you can create a way to access a particular application or service or even just regular web content. A port number is a 16-bit number. The first 1,024 port numbers are reserved by convention to identify specific services. Both TCP and UDP protocols use ports. A few common ports and their descriptions are given in Table 19.1. TABLE 19.1 A Few Common Ports and Their Uses Port numbers from 1024 to 49151 are registered ports assigned by the Internet Assigned Numbers Authority (IANA). For example, Microsoft SQL Server uses ports 1433 and 1434. Microsoft Windows Internet Name Service (WINS) uses port 1512, etc. Private ports are those from 49152 through 65535. Understanding ports is critical in managing network security. The easiest way to minimize unwanted scans or restrict access is by monitoring specific ports and port blocking. For example, if you are operating a server that is only a web server, you can restrict outside network access so it can only occur through port 80 and maybe port 443. This way, if someone from outside the network tries to access port 22 or 23 attempting to break in, that request will be blocked. Routing is simply the process of selecting the best pathway for transmitting data over a network or between networks, as illustrated in Figure 19.4. A router is a complex device that will route data between networks; a router can be hardware, software, or a combination. Routers mostly deal with IP addresses, which can be used as another way of restricting access. Much of the time a human does not know the IP address of the server they want to access, but instead will know the host name and the domain name. FIGURE 19.4 Routing Operations Domains are unique realms assigned by an agent, known as a registrar, which has been authorized by the Internet Corporation for Assigned Names and Numbers (ICANN). Some of larger registrars include Network Solutions, GoDaddy, and eNom. Domains are registered for a renewable period of time, and a root authority can be queried so you can learn the name servers in charge of routing that domain. These name servers will respond to queries with the IP associated with various protocols, and you can learn most of the protocols associated with a domain with a specific type of query. A top-level domain (TLD) is essentially the domain extension, as shown in Figure 19.5. TLDs are established for countries (for example, FIGURE 19.5 TLD Organization Most companies and residential users subscribe to Internet access services from an Internet Service Provider (ISP) and will connect to the Internet through the ISP, as shown in Figure 19.6. This service is typically contracted for a specific service level or potential transfer speed and at least one IP address. However, the service level may also include email, web hosting, some security services, or even a larger block of public IP addresses. FIGURE 19.6 ISP Position and Services Many Internet access services are asymmetrical, meaning the download potential is different from the upload potential. While most Internet services are full duplex, some services may be half duplex, meaning that data can only be transmitted in one direction at a time. These service differences are not relevant to security measures, but it is important to be aware of the differences and what type of connection you have when dealing with many security issues. In addition to controlling the amount of data that may flow through an Internet connection and assigning customers IP addresses, an ISP may provide certain more transparent services about which you should be aware. Many ISPs will proxy your web connections through caching servers or caching devices to minimize bandwidth utilization. Some ISPs will also block certain ports in a misguided attempt to minimize the impact of malware, viruses, and worms. For example, many cable and DSL providers block port 25 unless the request is directed at their mail servers. If an infected user becomes part of a distributed spam botnet and begins to spew spam, their email will be blocked from using third-party mail servers. This allows the ISP to prevent a major spam outbreak without any sophisticated scanning techniques. It also forces users of that ISP to set their mail software to an alternative port if they want to use a third-party mail provider. The ISP may also provide customers with certain network hardware. It is important that you understand exactly what this hardware does. Some ISPs provide their customers with a modem that also acts as a router, being the border between the Internet and the local network. In some cases, that router may have been preconfigured with certain settings that could conflict with what the local area network administrator is trying to do. This can all be dealt with, but you must understand how your connection is set up so that you can properly configure your network. The ISP assigns the modem a single public IP address that may be dynamically assigned using Dynamic Host Configuration Protocol (DHCP). Using DHCP does not necessarily mean the network will get a different IP address every time you access the network, or even when the network’s gateway device is rebooted. But it also does not guarantee the modem’s IP address is fixed, as is the case when assigned a static IP address. A DHCP server hands out an IP address, one from a pool of available addresses. That IP is associated to a modem’s MAC address, for a specified period of time. DHCP can also be used to assign addresses in an internal network as we will discuss later. Internet services are offered using a variety of technologies, and each technology might impact how you approach security. Dial-up and slower ISDN or cellular connections are not likely ways someone might intrude upon your network simply because of their speeds. The intruder must really want to get into that specific network to have the patience to penetrate it in this way. The Internet would be like the old Wild West of America if it were not for some rules that dictate how everything should work. As with anything else, there are different standards organizations that oversee some of the protocols. But another, somewhat less formal tool helps guide how these protocols should work. RFCs, or Request for Comments, are notes submitted to the Internet Engineering Task Force (IETF), the main standards organization for the Internet. An RFC can be submitted by anyone. If the IETF deems the note worthy, the RFC is given a unique number and once published is never revised without a new number given to it. If this RFC attracts enough interest and a consensus emerges, it may evolve into an Internet standard; however, many RFCs are essentially the de facto standards for most Internet protocols. The name might imply that it is a work in progress—and to some extent it is—but these RFCs are often as important as any technical manual when you need to understand a protocol. A number of organizations are involved in maintaining network vulnerability resources not dissimilar from virus and malware resources. A variety of commercial entities have grown to serve this vital need, but there are also many public resources and standards available about which you should be aware:
While the Open Checklist Interactive Language (OCIL) has uses beyond security, it provides a conceptual framework for representing nonautomated questions for security checks and is now part of SCAP.Basic Internet Concepts
IP Traffic

The Drawbacks of TCP/IP Packets
Unicasts, Broadcasts, and Multicasts

Ports
Port
Protocols
Description
20
TCP/UDP
FTP
22
TCP/UDP
SSH
23
TCP/UDP
Telnet
25
TCP/UDP
SMTP (Simple Mail Transfer Protocol)
80
TCP/UDP
HTTP (Hypertext Transfer Protocol)
88
TCP/UDP
Kerberos authentication system
110
TCP
POP3 (Post Office Protocol v3)
118
TCP/UDP
SQL (Structured Query Language) Services
143
TCP
IMAP (Internet Message Access Protocol)
443
TCP/UDP
HTTPS (Hypertext Transfer Protocol over TLS/SSL)
631
TCP/UDP
Internet Printing Protocol (IPP)
Routing

Domains
US), descriptive groups (.people, .rocks, .attorney, and so on), and generic TLDs (such as .com, .net, .edu, and .gov). Each TLD might have different requirements and could even require that you use a specific registrar to register a domain. The .edu domains and some country-code domains often have specific requirements before you can register a domain in that TLD, such as being an actual learning institution or be located in that country. However, most domains are readily available to anyone and can be quickly and inexpensively registered for a period of one or more years through a registrar.
Internet Services

Standards and RFCs
Security Organizations and Standards
scap.nist.gov.cve.mitre.org.www.first.org/cvss.scap.nist.gov/specifications/cpe/.oval.mitre.org.
Hands-On Exercises
Objectives
- Describe the security options available with Internet Explorer.
- Learn about protecting the system and users from Internet browsing hazards.
- Apply security and privacy options to secure the browser.
Resources
- PC-compatible desktop/tower computer system
- Windows 10 Professional installed
- Internet access through a network connection
Discussion
Because the browser is the portal to the wider outside world, its security settings are a very important part of securing the local host. If the physical device has been secured at the inner and outer perimeters, the browser becomes one of the main points of access for attackers.
In addition, other Internet tools on the machine may rely on browser components to perform their functions. These applications may bring with them enhancements that create additional vulnerabilities. Such features should be evaluated and turned off if they do not contribute to the operation of the system.
Procedures
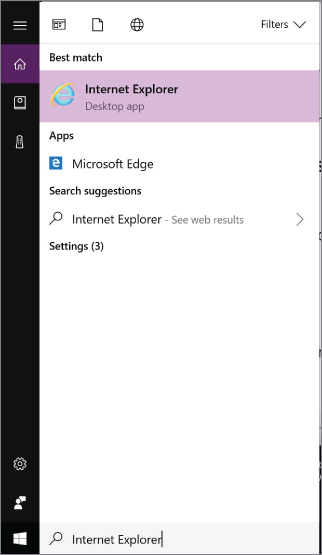
The Internet Explorer security settings for Windows 10 Pro can be managed in several different ways. In this lab, you will learn where these settings are located and how to adjust them to your specific needs. You will also learn how to control the privacy settings to further control security issues that are often overlooked.
FIGURE 19.7 Locating Internet Explorer FIGURE 19.8 Accessing Internet Options
The General tab allows you to change the settings affecting items such as the Home page, browsing history, search defaults, tab displays, and the appearance of various displayed web pages. Browsing History includes cookies, cached web pages, and the history of websites you have visited, provided the Delete Browsing History On Exit box is unchecked. Keep in mind that the tabs related to Internet Security options are labeled General, Security, and Privacy.
FIGURE 19.9 Website Data Settings This window includes the settings that control how often the system checks for newer versions of visited websites and the location of accumulated web page files. Saving these items helps to load previously visited web pages faster. There is also a setting that controls how much disk space is allocated for saving this information, which can be adjusted for systems where disk space is limited. Notice that you can also change the location of the folder used to store files or to view the files currently contained in it.
FIGURE 19.10 Delete Browsing History Window This section does far more than just delete your browsing history. In this window, the options for deleting Internet-related content include: Temporary Internet files, Cookies, Download History, and Passwords. Note that some of the content categories are selected by default. All of this information can be useful to an intruder who is attempting to collect data on a user. For instance, if a malicious user were able to access the Internet Explorer information on your stored Form Data or Passwords, the process of stealing your identity to access resources on the network could begin. TABLE 19.2 Delete Browsing History Options
FIGURE 19.11 Security Tab of Internet Options This window allows you to assign websites to various security zones.
With the exception of the zone reserved for the Internet, you can include the sites you choose with the Sites button. TABLE 19.3 Internet Explorer Security Zones
Were you able to adjust it?
Keep in mind that adding sites to the Restricted Sites zone does not block them. However, it prevents them from running programs or any active content. Protected mode can be enabled for both the Internet and Restricted Sites zones, although dong so requires restarting the browser. If you choose to Enable Protected Mode, it will become more difficult for malicious software to be installed on your computer. Internet Explorer will warn you in the event that a malicious program attempts to install or run itself outside of protected mode.
The security zones are a quick and efficient way to broadly define how your browser reacts to various sites, add-ons, programs, and downloads. You have the opportunity, however, to be specific in your choices. You will now test this by adding a website to the Restricted Sites zone, and viewing the results.
You are now located at the Restricted Sites, Add Website window shown in Figure 19.12. FIGURE 19.12 Restricted Sites Window
The same approach can be used to add sites to any of the other types of zones as well.
Does the site look different? Figure 19.13 illustrates what FIGURE 19.13 The msn.com Website as a Restricted Site
These settings control how Internet Explorer handles various objects associated with web pages, such as ActiveX controls and Java Scripting. Keep in mind that web pages can contain malicious objects designed to damage your system. Restricting how these objects interact with your system can help prevent viruses, Trojans, or malicious scripts from being downloaded to your system without your knowledge. FIGURE 19.14 Security Settings – Restricted Sites Zone Window
Is the Privacy controls for Internet Explorer can help you manage how websites monitor your online activities. You have the opportunity to block all monitoring; however, your online resources will become limited. Beyond malicious software, marketing firms and online shopping outlets use monitoring to make your experience easier and faster.
FIGURE 19.15 The Privacy Tab in Internet Options An attacker only needs to employ a packet sniffing utility to monitor the network traffic and capture a cookie in order to gain access to your credentials (username, password, network address, and so on). With this information in hand, the attacker has the ability to imitate you when they access other sites. The attacker can also use a technique called cross-site scripting to cause the returning cookie to be redirected to a third-party server operated by the attacker. The attacker can then use the stolen cookie to spoof the original site posing as the original user. The redirection is typically accomplished by simply hiding the script on the site and using social engineering techniques to trick you into clicking on the code. When you do, your cookie is transmitted to the third-party location specified by the attacker.
Selecting Block will prevent all websites from placing cookies on the machine. However, this may cause problems with websites that require enabled cookies for proper functioning. Selecting Prompt will cause Internet Explorer to ask permission before allowing any cookie to be placed on the system. Recall that session cookies are cleared when the browser is closed, whereas persistent cookies will remain on the computer until the specified expiration date is reached. You have the option of Always Allow Session Cookies.
Were you prompted to allow or block a cookie? Were any cookies from a source that was not Allow or block the cookies at your discretion. Recognize that even this one site uses multiple cookies. They can be hard to manage, keep track of, and a nuisance if prompted continuously. For this reason, they are allowed. Attackers know this, and that makes cookies a great target for collecting information.
Websites will often request this information to keep track of your physical location, in order to provide customized results for local services or searches. Unfortunately, they are provided your IP address or MAC address, along with your signal strength if you are on a mobile device. FIGURE 19.16 Pop-Up Blocker Settings The last check box is to Disable toolbars and extensions when InPrivate Browsing starts. InPrivate Browsing prevents Internet Explorer from leaving a trail for others to see. This means items such as cookies, temporary Internet files, and history will not be saved. Leaving this check box marked eliminates possible vulnerabilities that toolbars and extensions bring with them.
This list requires a more advanced knowledge of how the Internet works as a network. As you work through this book and continue learning about networks, return to these Advanced Security Settings and review the capabilities of each setting.
This area of options gives you a common, quick-access list to enable or disable certain features. TABLE 19.4 Options
Accessing the Security Settings in Internet Explorer

Examining Browsing History Options


Option
Function
Comparing Security Zones

Zone
Description
Level
Details
Internet
Local Intranet
Trusted Sites
Restricted Sites
Applying Security Zones to Sites
www.msn.com.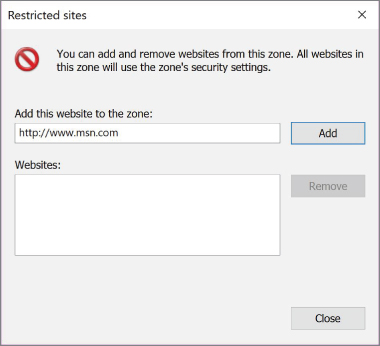
msn.com, has not changed. Click the Refresh button located to the right of the URL or press the F5 button.msn.com looks like as a restricted site.
msn.com from the Restricted Sites zone. Select msn.com and then click Remove. Click Close.

msn.com website back to normal?Applying Privacy Controls

msn.com by selecting the Refresh icon to the right of the URL.msn.com?

Exploring Security Settings
Options
Lab Questions
- List the four types of zones into which websites must categorically fall.
- Which security zone allows for only one level, and what is that level?
- By default, Internet Explorer is set to accept ____________ cookies.
- What does InPrivate Browsing accomplish?
- What is collected when a website requests your physical location?
Lab Answers
- Internet, local intranet, trusted sites, restricted sites
- Restricted sites, High
- All
- Items such as cookies, temporary Internet files, and history will not be saved.
- They are provided your IP address or MAC address, along with your signal strength if you are on a mobile device.