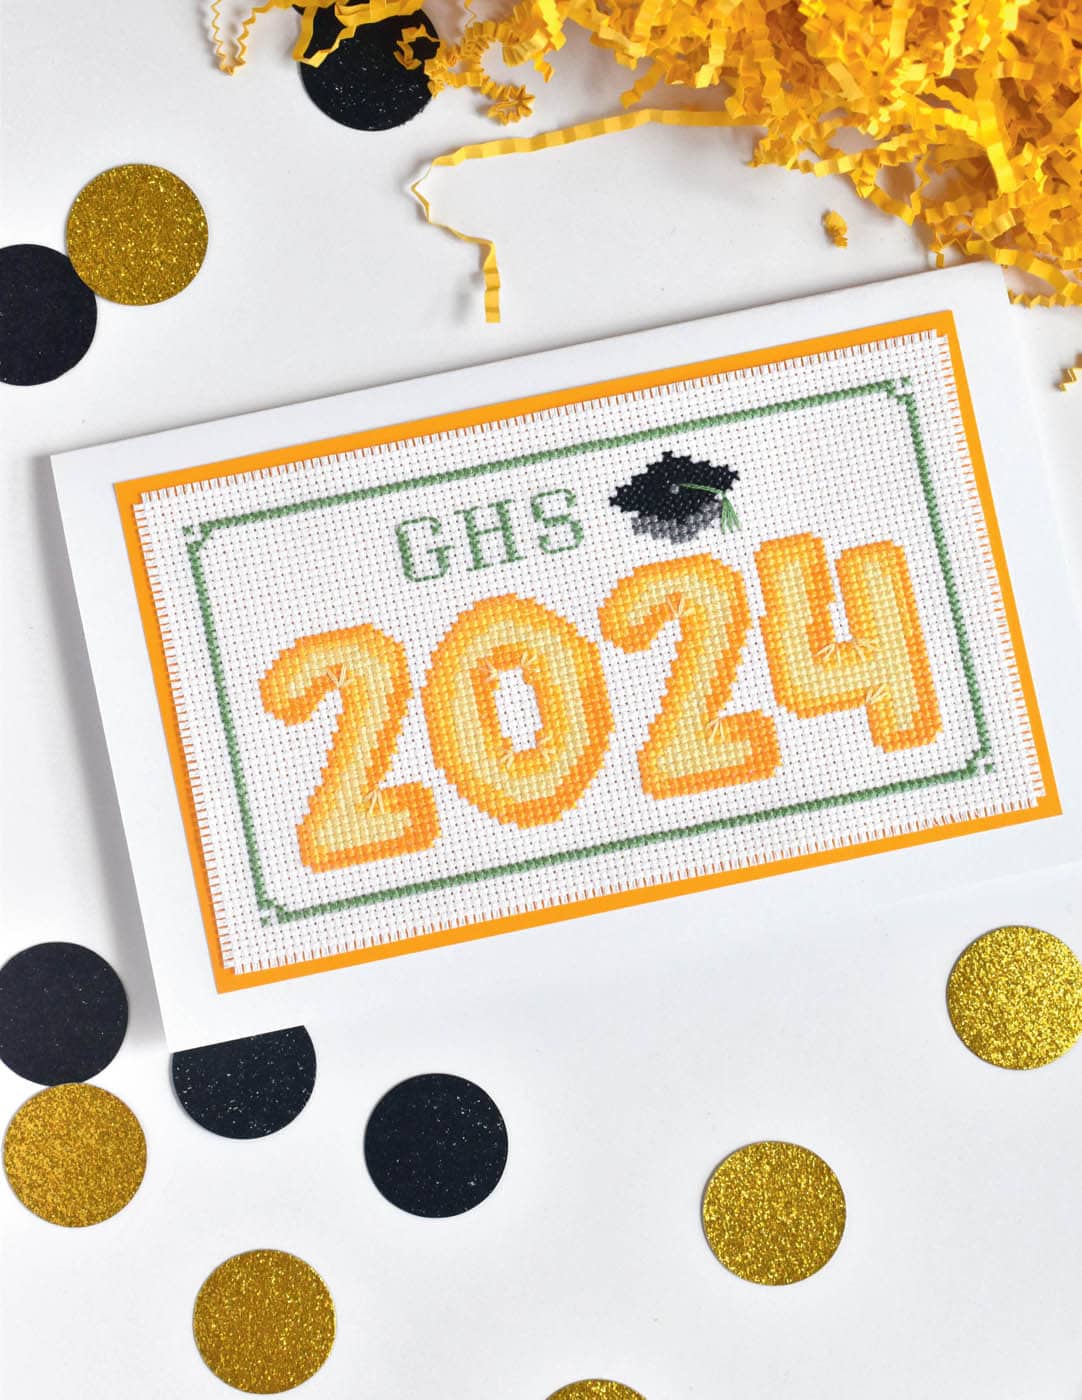
GREETING CARD
Cross stitching a greeting isn’t “just a card.” A custom hand-stitched piece is often treasured long after other cards go in the recycling bin. This finished grad card can be displayed on a shelf or tucked into an album as a reminder of the celebration!
|
|
|
|
|
|
|
|
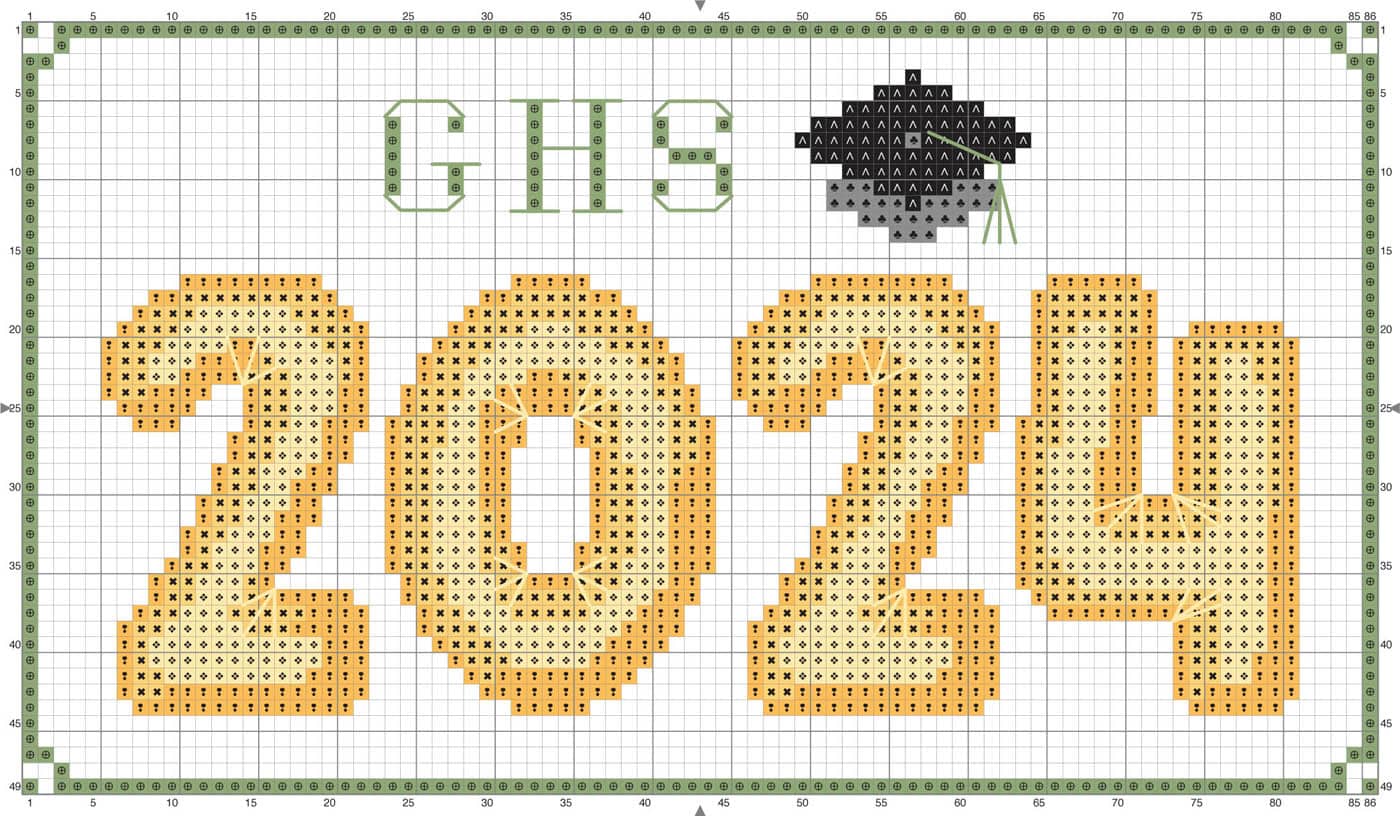
 745 (DMC)
 04 (DMC)
 743 (DMC)
 310 (DMC)
 742 (DMC)
 989 (DMC)
About the Sample Design
This project uses the Extra-Large Numbers (here) styled like mylar balloons. Above the graduation year, it has Serif Alphabet (here) school initials. Next to the letters is the graduation cap mini motif (here) with the tassel color-matched to the green in the rest of the design. To hold the whole design together, the card has a simple, single line of stitches for a border, with decorative corners.
STEP 1
Create and stitch the design for the front of the cross-stitch card. After you stitch the design, wash and iron your cross stitch.

STEP 2
Trim the fabric down so there are 5 rows of Aida on each side around the border. Pull and remove the threads from the first row on each side around the fabric. This will prevent the fabric from fraying.

STEP 3
Cut a piece of colored cardstock to measure ¼" larger than the total size of the cross-stitched fabric. Cut a piece of white cardstock to 8" x 10".

STEP 4
Mark the center of the 10-inch side of the white piece of cardstock and use a ruler and a scissor blade to score the card stock. This makes it easier to fold. When folded it will be 8 x 5 inches.
STEP 5
Attach the fabric to the colored cardstock with double-sided cross-stitch tape.

STEP 6
Attach the fabric and cardstock piece to the center of the folded card. You can use standard double-sided tape for this, as it isn’t holding fabric.