
MAIN DESIGNS
Not all graduation projects need a main design that symbolizes education or graduation, but having a focal point can really make your cross stitch shine. The charts in this section include classic motifs like a graduation cap and scroll, graduates in several poses, books and a computer, and a medal of achievement. No matter who you’re stitching for, you can find a pattern that suits them and then you can customize it to make it truly special.
Size & Placement
Because these patterns are designed to be feature elements, they will take up a large area of your overall stitched piece. Some are a little taller or wider, but all fit within a 60 x 60 block, with a bit of space around them already included. Depending on the size and direction of your project (horizontal, vertical, square, etc.), you can decide to either center the pattern or position it closer to one side, the top, or the bottom.

Ways to Adapt the Patterns
You can use any of the charts in this section exactly as they are, but most are ready for some special touches to make them unique. The best place to start is with the colors because school colors are a great way to show school pride! Look to the “Planning Your Design” section for help with color families.

Graduates
You can customize the three graduates in a variety of ways. The most obvious is to match the skin and hair colors, as well as the graduation robe and hat color. But you can also change the hairstyles, leg and shoe designs, and length of the robe, or add in a sash or cord.
All of the heads are the same size, so to change the hair, start by stitching the head and hair. Add the rest of the graduate pattern around this. The same goes for adding a sash or cord. Using the planning grid on this page will help as you make these changes.

Designs with Open Spaces
The books, laptop, and medal all have an open space that is there to hold a custom element. Any of the mini motifs will fit in those spaces, so you can choose one to add. If you’d prefer, you can add initials or the graduation year—or something else entirely! You can leave the area around the mini motif or letters/numbers unstitched or you can fill it in with stitches as a background.
If you don’t want to add anything specific to the open areas of these patterns, each design has a tip on how to make use of that area.

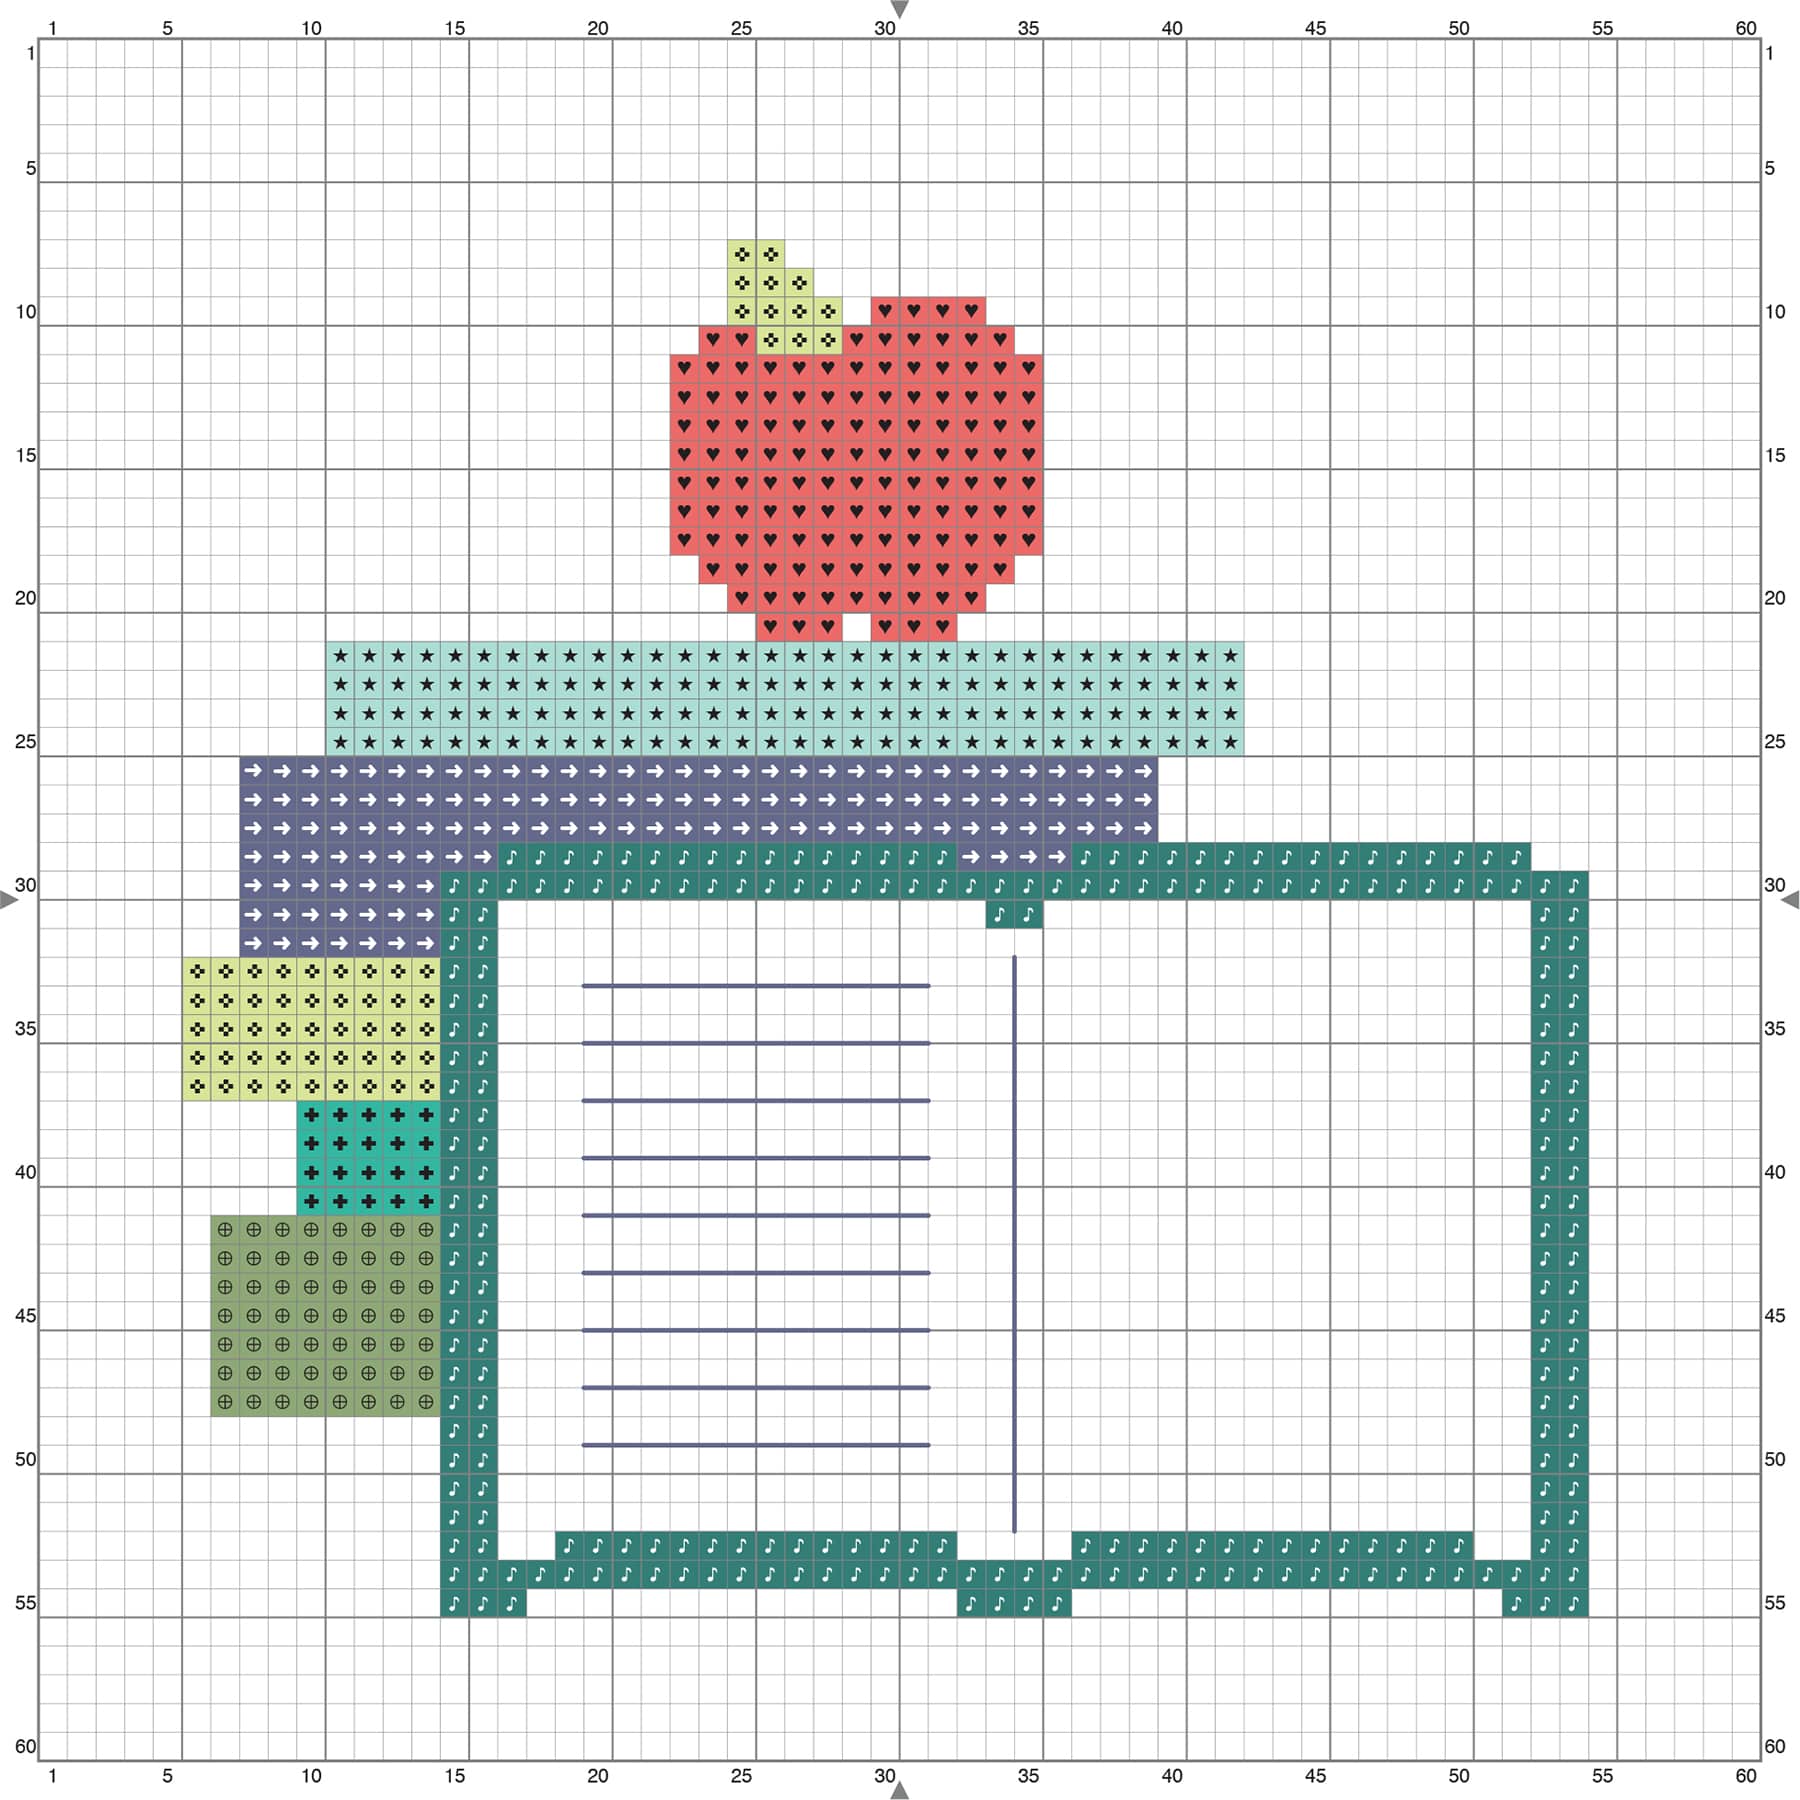
Graduation Cap & Scroll


Instructions
 Find and mark the fabric at the center to ensure that the cap and scroll are in the correct place based on your project plan.
 Start stitching at the top of the hat and use two strands of embroidery floss throughout the design.
 Stitch each color and part of the design at a time, carefully adding the stitches between rows of already worked stitches.

|
|
|
|
|
|
 310 (DMC)
 352 (DMC)
 04 (DMC)
 743 (DMC)
 351 (DMC)
 745 (DMC)
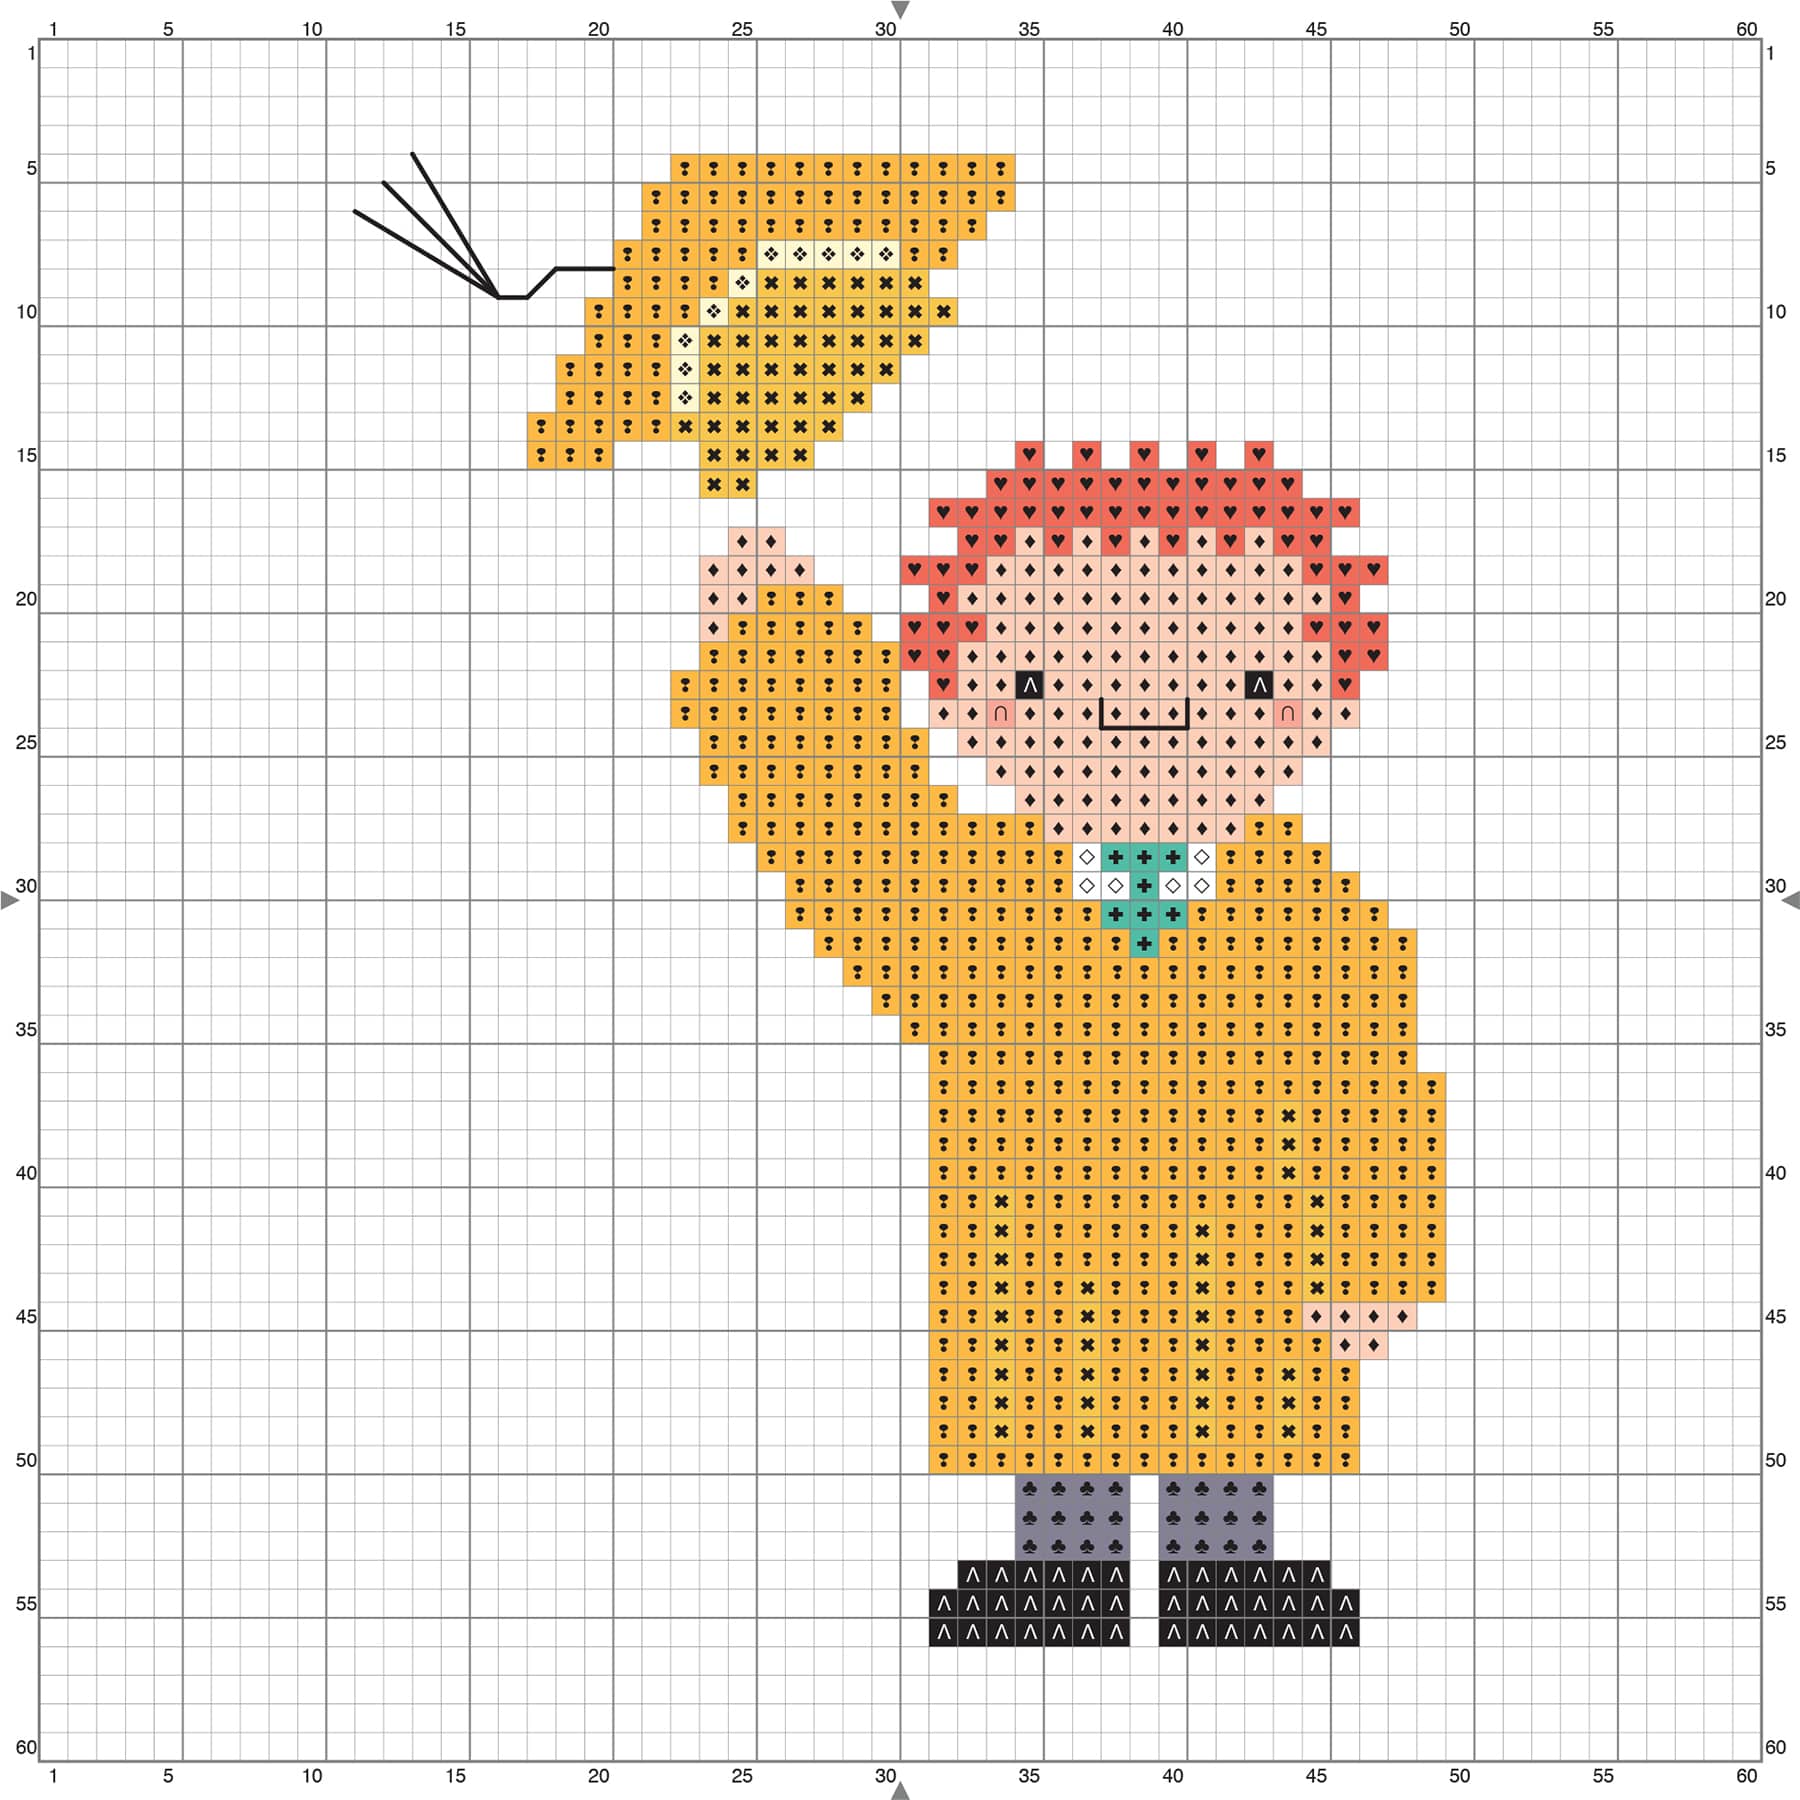
Standing Graduate


Instructions
 Find the center of your project layout and mark the Aida cloth to make it easier to count the squares and find where to begin.
 Start by stitching the head. This is especially important if you’re making any hairstyle changes. Use two strands of embroidery floss throughout the design.
 Continue stitching the rest of the design.
 To add the face details, use two strands of black embroidery floss to backstitch around the eyes. This makes the eyes more solid around the Xs. Backstitch the mouth at the same time, being careful not to pull these stitches too tight.
 For the tassel, use long backstitches for each line on the chart.

|
|
|
|
|
|
|
|
 840 (DMC)
 156 (DMC)
 3807 (DMC)
Sitting Graduate


Instructions
 Mark the center of the cross stitch area to use as a counting reference as you start your stitching.
 With two strands of embroidery floss, start stitching the graduate’s head. Make any changes to the hair as needed.
 Next, stitch the rest of the pattern, working with one color at a time.
 Stitch around the eyes with two strands of black embroidery floss and backstitch. This fills in around the Xs so the eyes are more solid. Stitch the mouth with backstitch, keeping the threads visible on the surface of the stitching.

|
|
|
|
|
|
|
|
|
|
 433 (DMC)
 02 (DMC)
 437 (DMC)
 436 (DMC)
Graduate Tossing Hat

Instructions
 Mark the center of your cross stitch layout on your fabric so you can accurately count where to start the graduate design. Because the arm and hat are extended on the left side, the center of the pattern may not look centered. Plan the placement accordingly.
 Using two strands of embroidery floss throughout, start stitching the head, including any adjustments you want to make.
 Working with one color at a time, cross stitch the rest of the design.
 Stitch the face, adding backstitch around the eyes to make them more solid. Use two strands of black embroidery floss and take care to keep the stitches loose enough on the mouth so they show on top of the cross stitch.
 Finish with the tassel worked with long backstitches for each line marked on the chart.

|
|
|
|
|
|
|
|
|
|
|
|
 353 (DMC)
 958 (DMC)
 B5200 (DMC)
 742 (DMC)
Books

Instructions
 Mark your Aida cloth at the center of the project layout so you can find where to start stitching the books.
 Start stitching at the top of the design and use two strands of embroidery floss throughout the entire pattern.
 Next, backstitch the lines on the open book. If you don’t want to add a design to the blank page, repeat the backstitch lines from the opposite book page.
 To customize the book, choose a mini motif and center it on the blank page. Several serif alphabet letters will also fit.
|
|
|
|
|
|
|
|
 989 (DMC)
 3847 (DMC)
 472 (DMC)
 964 (DMC)
Laptop

Instructions
 Find and mark the Aida cloth at the center of your layout. Use this to help count where to start the design.
 Use two strands of embroidery floss for the entire design. Start stitching at the top of the laptop, and then work the rest of the design.
 When stitching the keyboard, it helps to stitch one row of keys at a time, stitching all the gray in a line and then all the black. You can leave the extra threads “parked” and hanging on the front of your work as you alternate between the colors.
 To customize the laptop, choose a mini motif (see here) and center it on the screen. Several letters will also fit.
 If you don’t want to add a design to the screen, fill in the area with a background color or a few squares to represent open windows.

|
|
|
|
|
|
|
|
|
|
 03 (DMC)
 208 (DMC)
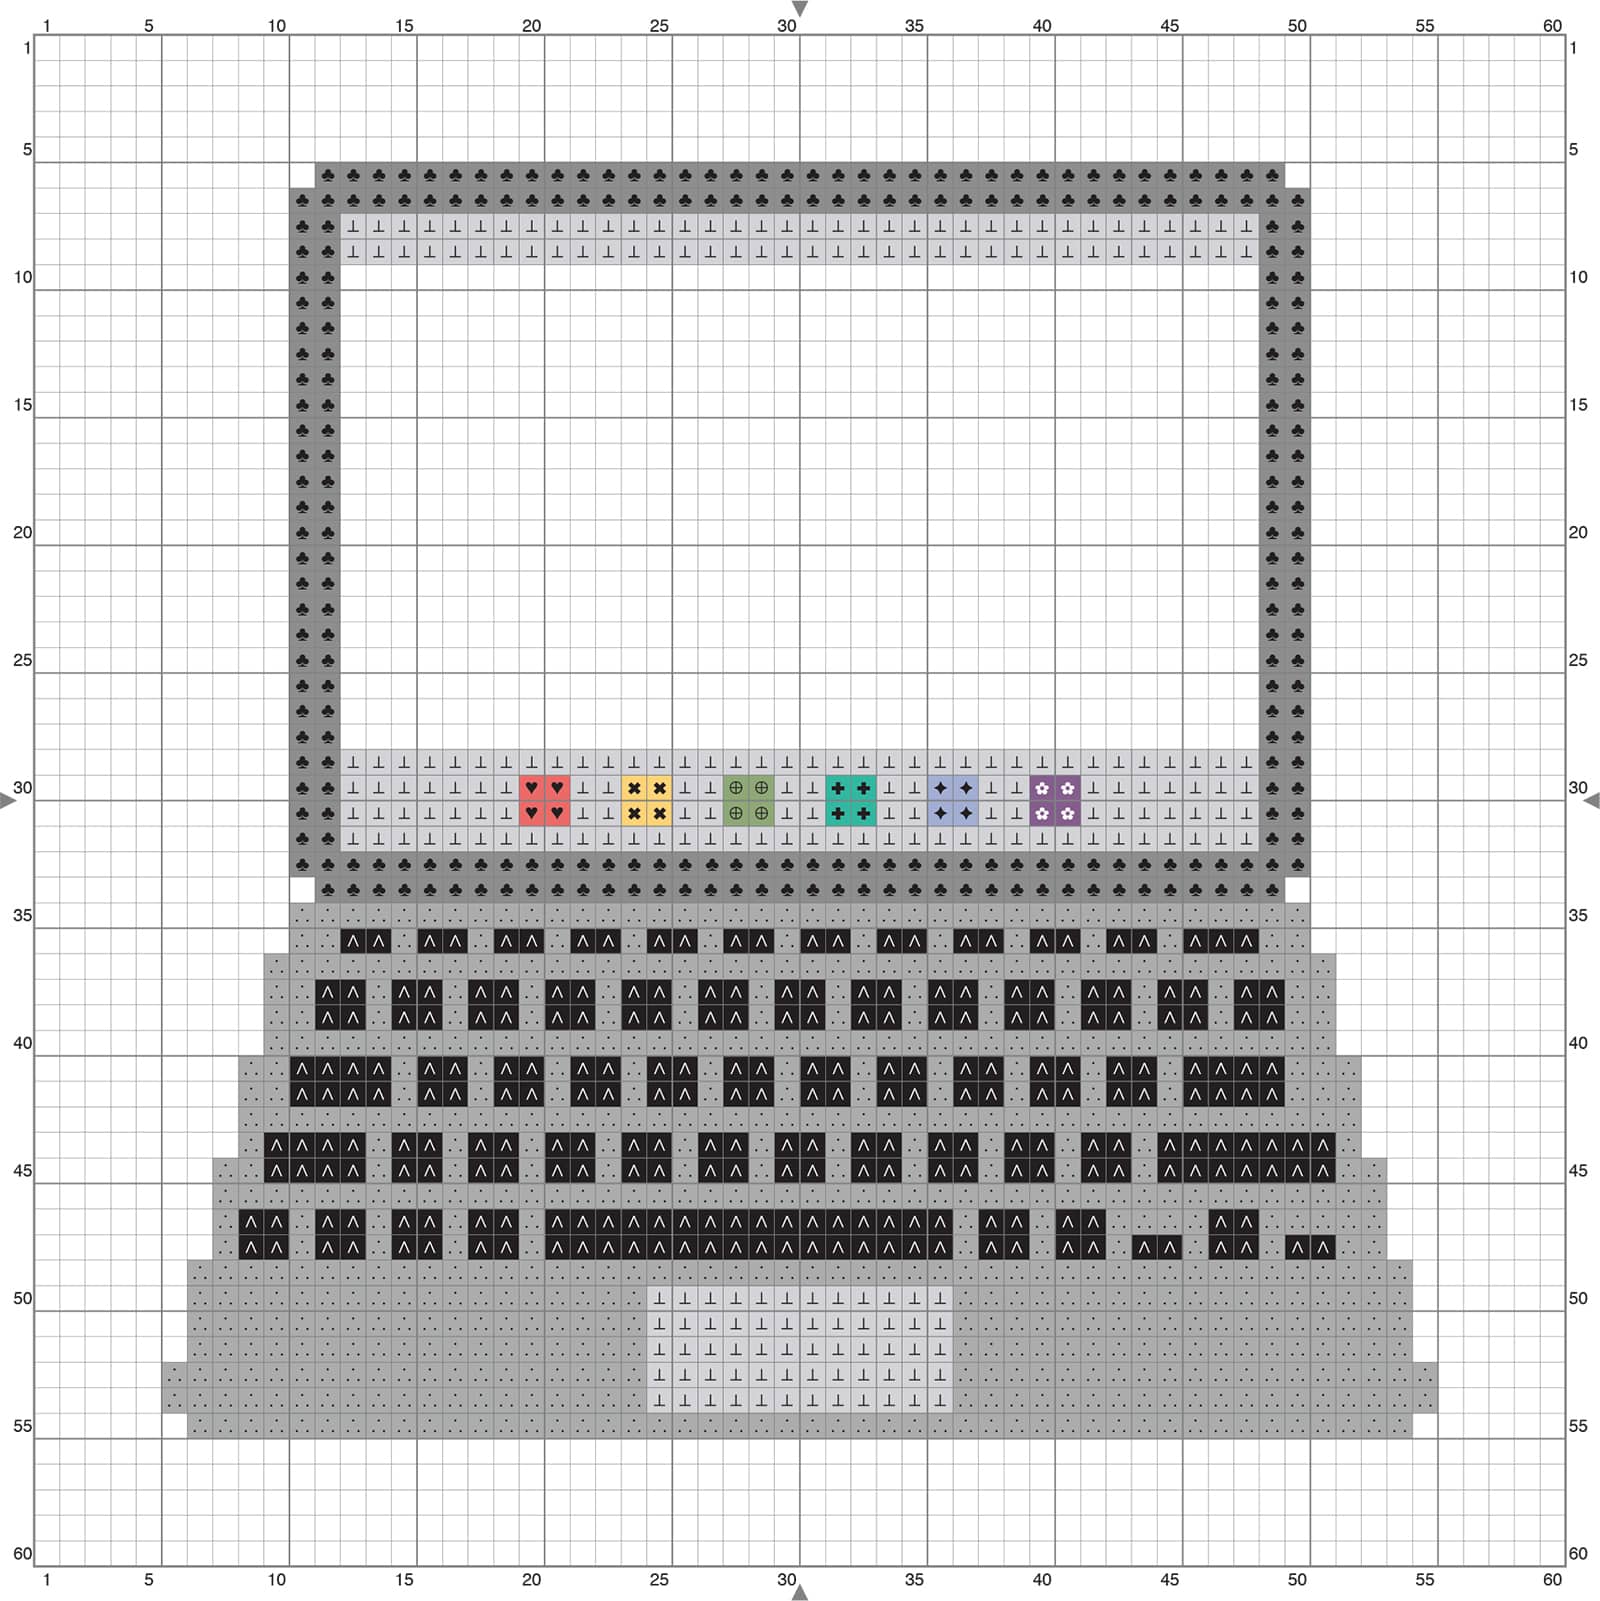
Medal


Instructions
- Prepare your fabric by finding and marking the center of your overall project.
- Using two strands of embroidery floss throughout, begin stitching the leaves on the medal. Fill in around the leaves for the rest of the medal, then add the ribbon.
- If you want to leave the center plain, fill in the circle with medium yellow.
- To add a custom element to the medal, select a mini motif or a letter or two and stitch them in the open center. Fill in around the design with medium yellow.

|
|
|
|
|
|