
BORDER PATTERNS
Borders are an excellent way to add a decorative element to your graduation design while also defining an area. Sometimes even a single line of a border is all you need for your celebration stitching!
The border patterns in this collection include books, confetti sparkles, graduation tassels, a ribbon, celebration streamers, and a fancy border inspired by degrees and diplomas. Choose a design that best celebrates your graduate and the other elements you’re using, then customize it to pull the whole piece together.
Size & Sections
When you use 14-count Aida cloth (or 28-count evenweave linen), each of the full border charts will measure around 8 x 10 inches. You can stitch them either vertically or horizontally. The single-line border designs are about 8 inches wide and work well for various uses, for example, at the top and bottom of a layout, on their own, or repeated around a square.
Most of the borders can easily be altered in length by adding to or removing a section or two. For example, the books are a simple repeat pattern that you can make any size you want, while the fancy scroll repeats its pattern every 10 squares. If you want to make the confetti sparkles or celebration streamers a square border, simply remove the 30 squares in the middle of the long edge. Even the ribbon can become longer by extending the center section—perfect for stitching a longer name on it!
Ways to Adapt the Patterns
Remember, one goal of this book is to help you feel comfortable using cross stitch patterns to design a unique creation, and that includes borders. This might mean changing the size or repeats, but there are other ways to make these stitched frames your own. Just remember to test any big changes on paper before you get too far. Keeping notes will save on headaches!
School colors are a way of showing school pride and they are an excellent way to customize these borders. Match the main thread color on the tassel border to the actual tassel for your graduate, or stitch all of the streamers in the colors of your school. Of course, you can also make the books less colorful and more collegiate!
Both the ribbon and the tassel are ready and waiting for extra elements to make them unique for your project. They each include a set of numbers perfectly sized to add in a year. You could also use one of the smaller alphabets to stitch a name on the ribbon.

Sparkle Confetti

Instructions
 Mark the outline of the grid on your fabric, as shown in the Counting Stitches section under “Planning Your Design”.
 Using two strands of embroidery floss throughout, start stitching at the top left corner of the border. It’s best to stitch all of the medium yellow first.
 After stitching the top border, stitch the two sides, and then the bottom.
 Go back to the top and add in the lighter and darker yellow, one at a time. Because this is confetti, there is a fair amount of jumping around. Do your best to stitch along a path without too many long stretches of thread on the back.

 745 (DMC)
 743 (DMC)
 742 (DMC)
Celebration Streamers

Instructions
 Mark your fabric to show the full area of your project, as shown in the Counting Stitches section under “Planning Your Design”.
 Use two strands of embroidery floss throughout the whole design. Work your way around the border, stitching one streamer section at a time.
 Stitch the dominant color of a streamer first, and then add the lighter or darker color.
|
|
|
|
|
|
|
|
|
|
 211 (DMC)
 352 (DMC)
 989 (DMC)
 472 (DMC)
 209 (DMC)
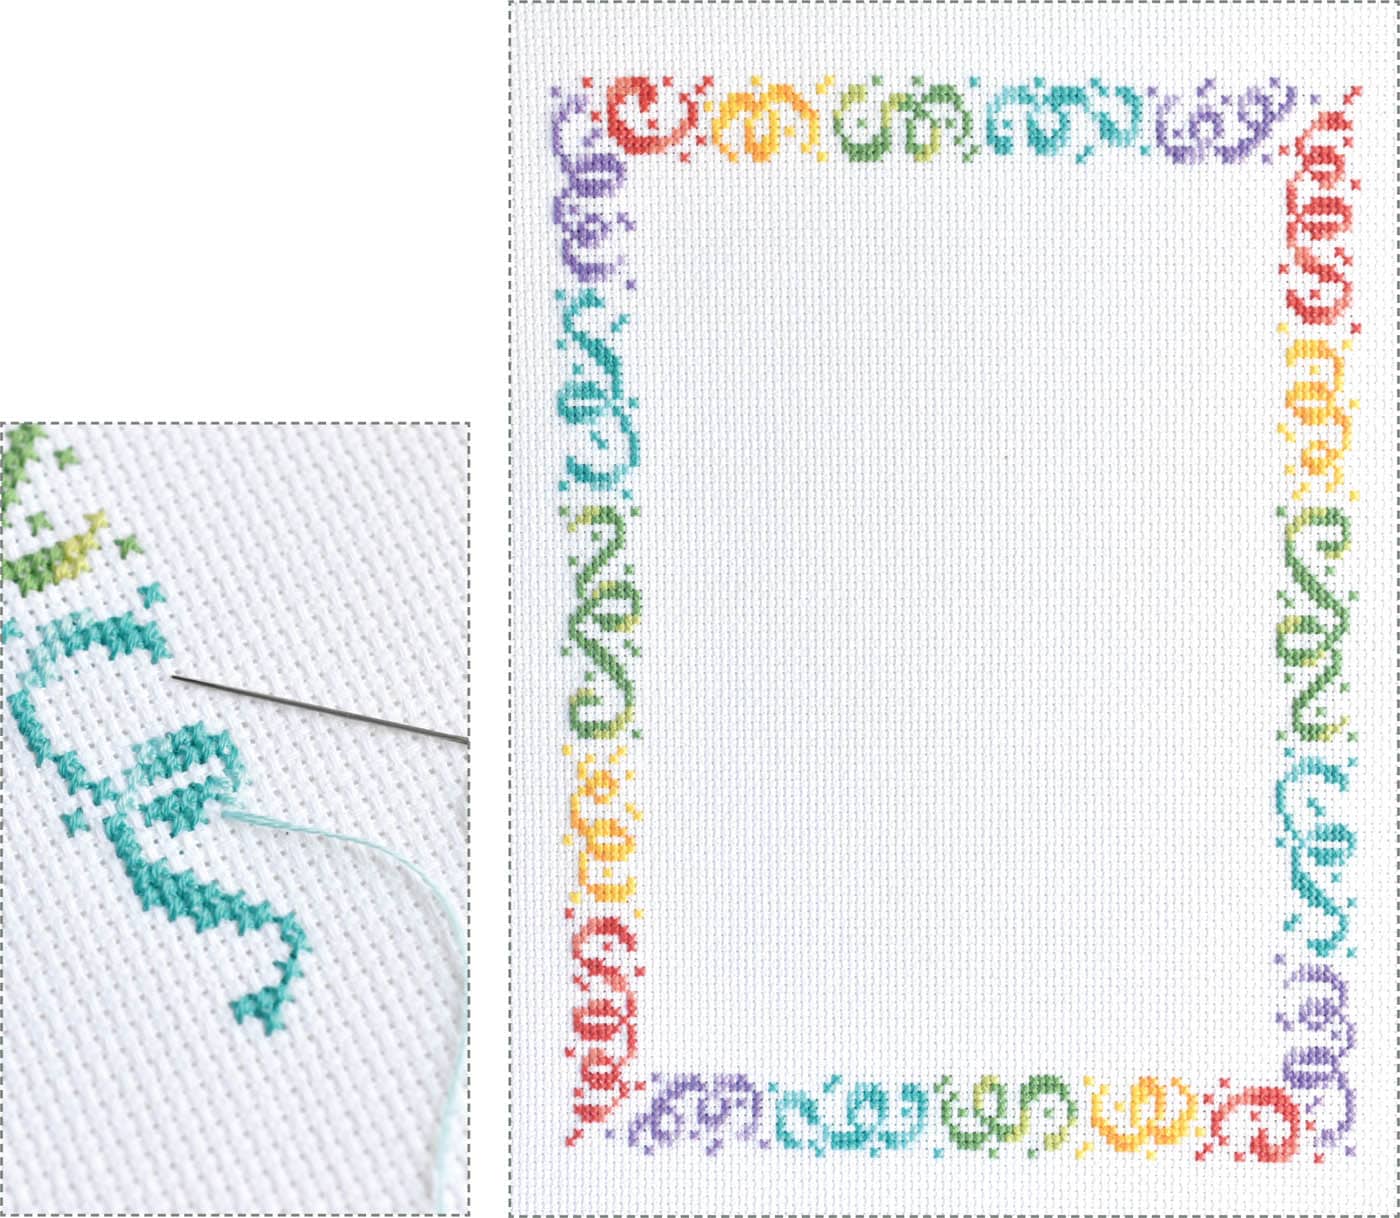
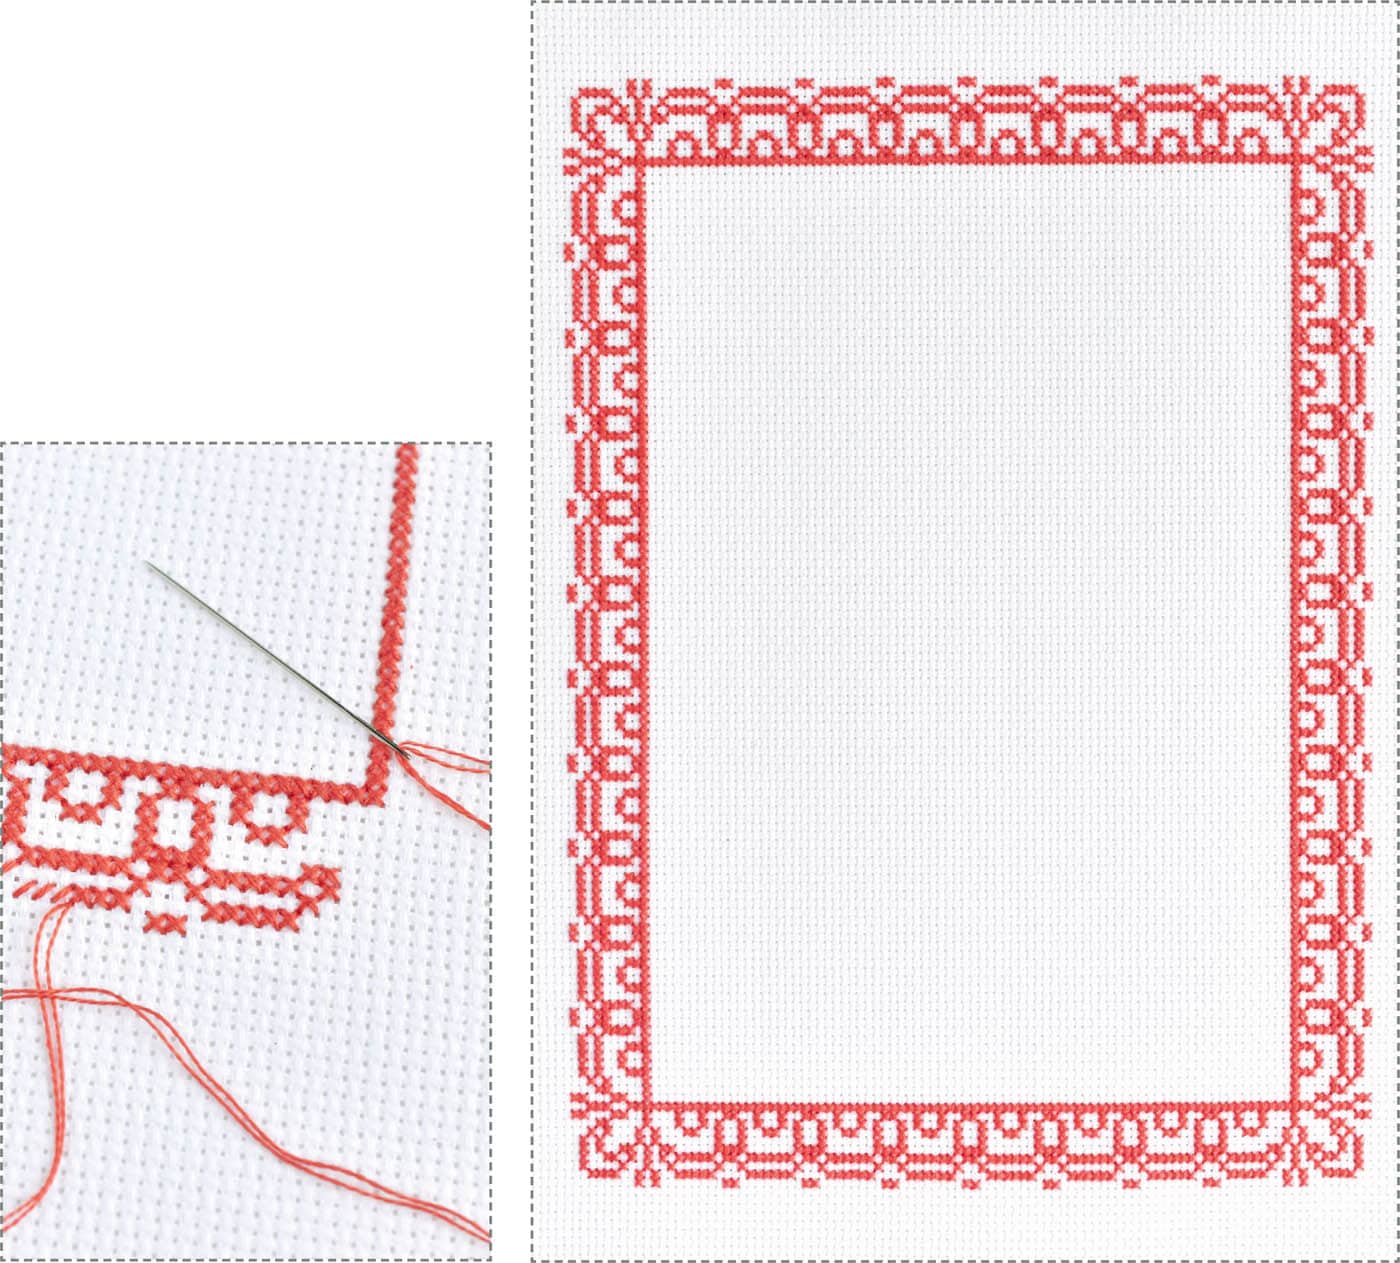
Fancy Scroll

Instructions
 Use thread to mark the outside edge of the entire project area. This makes it easier to keep count of the stitches and pattern repeats.
 Work with two strands of embroidery floss for everything in this design, and start by stitching the solid line on the inside of the border.
 Beginning at the top left and making your way around the border, follow a path that works for you, making sure all the stitches go in the same direction. You can stitch across from left to right and back again or work in sections (the corners and the 10 x 10 stitch repeat).
 351 (DMC)
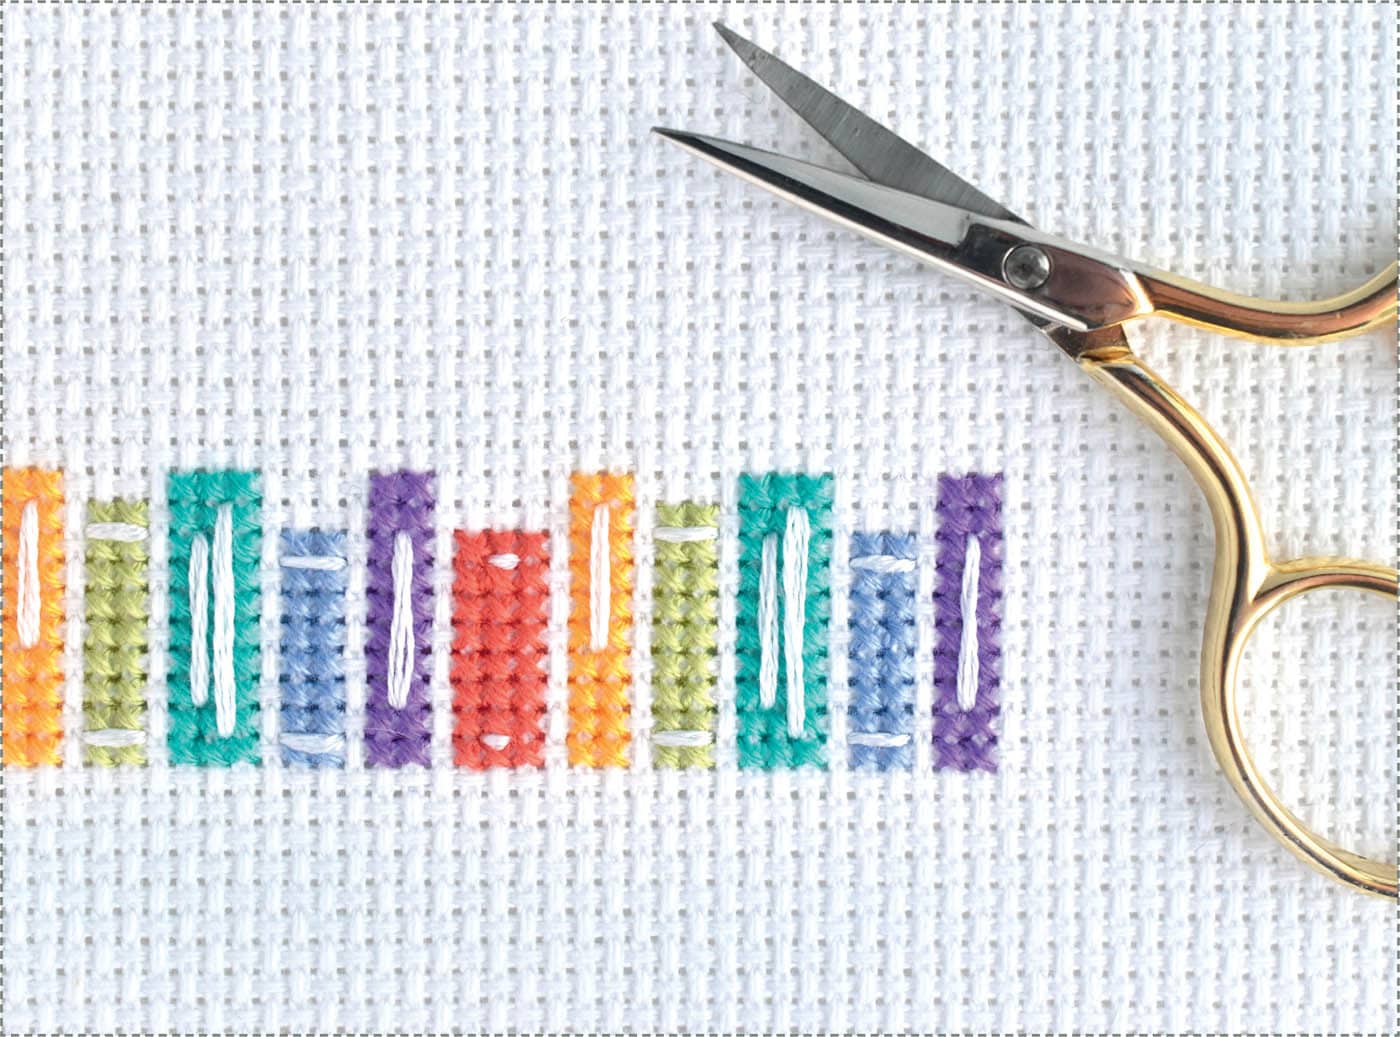
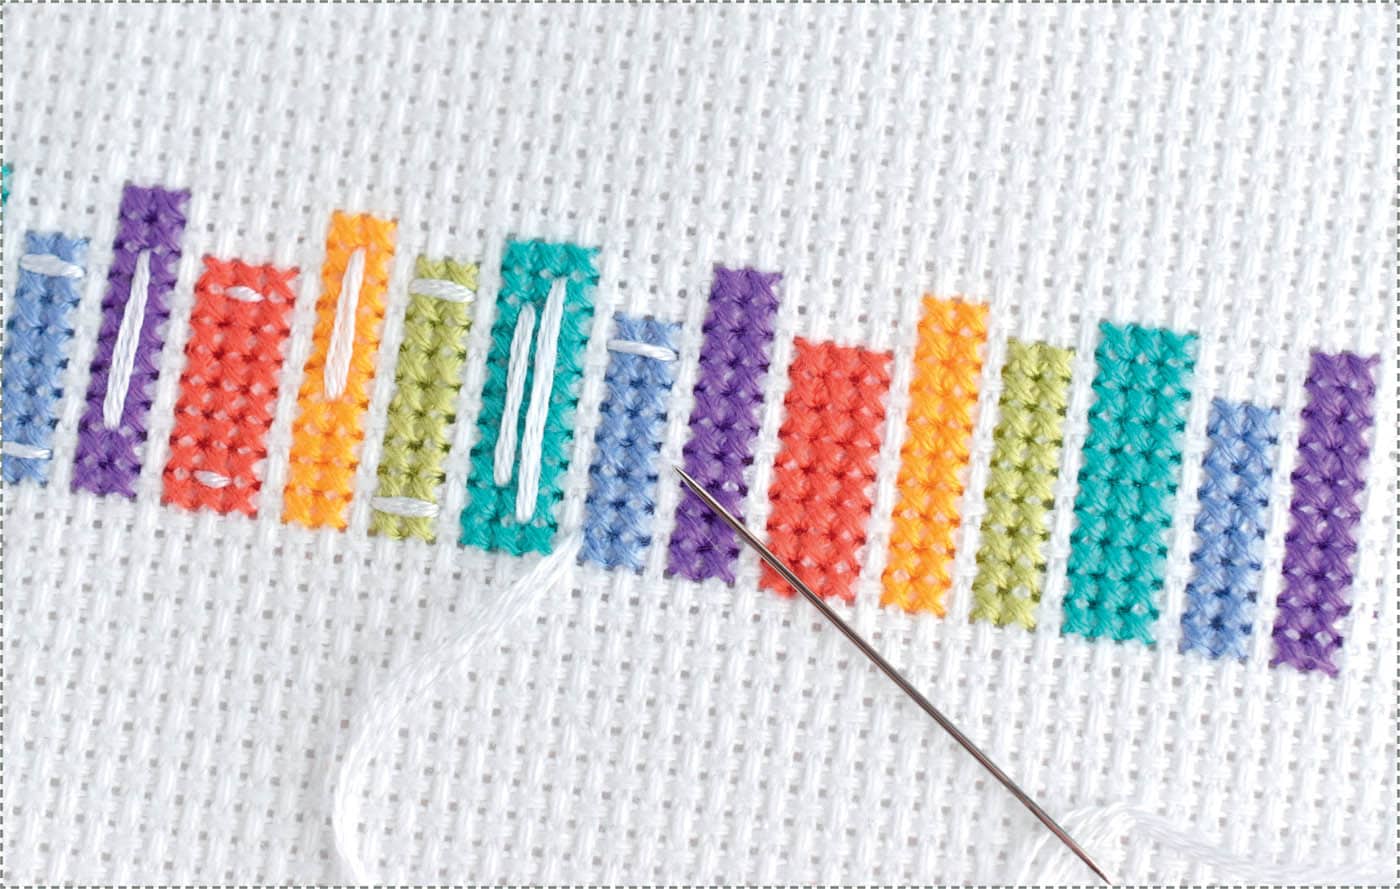
Books

Instructions
 Prepare your fabric by marking the overall area of your cross stitch project, as shown in the “Planning Your Design”.
 Use two strands of embroidery floss and begin stitching the books, working from left to right. Unless you are making all the books the same color, it’s best to work with shorter strands so you can stitch one book at a time.
 With four strands of white, stitch the lines on the book spines with backstitch, working each line segment as one stitch.
 When using two book borders, you may want to flip the chart for the second border to add some variety to the look.

|
|
|
|
|
|
|
|
 156 (DMC)
 208 (DMC)
Tassels


745 (DMC)

Instructions
- Mark your fabric with thread to show the overall area of your project. This ensures the correct placement of the tassel border(s).
- Start stitching at the far left of each border design and use two strands of embroidery floss throughout the pattern. Work your way through the design one color at a time.
- If you want to add a year to the charm, stitch the numbers first, then add the rest of the charm around it.

|
|
|
|
|
|
 3747 (DMC)
 3807 (DMC)
Ribbon


743 (DMC)

Instructions
 Stitch the project outline of the grid on your fabric with a single strand of thread, as shown in the Counting Stitches section under “Planning Your Design”.
 Use two strands of embroidery floss throughout the pattern.
 If you want to add a year, name, or word to the ribbon, stitch that first, then add the rest of the ribbon around it. Any 8-stitch tall or smaller alphabet will work!
 Start stitching the ribbon at the top of the design. Work your way through the design, filling in around the numbers or letters if you’re using them.


 964 (DMC)
 958 (DMC)
 3847 (DMC)