
In the previous chapter, you learned how to create a theme with one basic Loop in each template file. In this chapter, you'll see how the Loop can be modified to display slightly different information: only one category, or all the categories except one, or even showing pages instead of posts.
To create a more advanced layout, you may need more than one Loop. In this chapter, you'll learn several ways of using multiple Loops. You'll also see how to add extra scripts and stylesheets to your theme and how to create an options form that allows your users to choose different layouts or color schemes from a few predefined choices.
Normally, the Loop generates a list of posts based on the context of the page being viewed (home page, archive, search results) and your Reading settings. To modify what the Loop displays, you need to change the invisible database query that defines your Loop. The query_posts() function, when called before your Loop, lets you do just that. This function has a huge set of possible parameters:
post_type
post_status
offset
showposts [deprecated; use posts_per_page]
posts_per_page
paged
caller_get_posts [excludes stickies if true]
post_parent
order
orderby
year
monthnum
w [week number, 0–53]
day
hour
minute
second
post__in [ar
ray]
p [post ID]
name
page_id
pagename
author
author_name
cat
category_name
category__in [array]
category__not_in [array]
category__and [array]
tag
tag__and [array]
tag__in [array]
tag_slug__and [array]
tag_slug__in [array]
meta_key
meta_value
meta_compare [operator]
You can combine most of these arguments to further customize your Loops. I'll demonstrate a handful of the most common Loop modifications. Hopefully, these examples will give you the foundation you need to create your own custom Loops. For more information about query_posts() and all its possible arguments, see codex.wordpress.org/Template_Tags/query_posts.
In order to modify the existing Loop rather than creating a new one from scratch, you need to preserve the original query and then add something to it. Listing 7-1 shows how to remove one category (with an ID of 7) from $query_string ( the variable that holds the original query) by placing a minus sign before the category ID. Keep in mind that this query string assigns values to variables. It doesn't perform comparisons, so remember not to use the more familiar comparison syntax, such as cat!=7, in a query string.
In this case, you combine query_posts() with the is_home() conditional you saw in the previous chapter to make sure that the posts from category 7 are excluded only on the home page. You wouldn't want to run this on the archive for category 7!
Perhaps instead of excluding a category, you want to show only one category. That's easy, too, as Listing 7-2 shows.
Example 7-2. Showing only one category
<?php if ( is_home() ) {
        query_posts( '&cat=7' );
}
// your usual Loop can go here
?>
The difference between Listing 1 and Listing 2 is tiny! In the previous example, you used −7 to remove category 7 from the home page. Here, by removing the minus sign, you ensure that only category 7 is displayed.
Be careful, and proofread your Loops!
One of the possible arguments of query_posts() is post_type. You can use this to retrieve pages instead of posts. Listing 7-3 shows a home page template that displays the five most recent pages. The query_posts() line is in bold. Pages are usually sorted alphabetically, so you explicitly set the orderby parameter to date. The default order is descending, and it is not changed here; you could change it to ascending if you wish by adding &order=asc to the query string.
Example 7-3. Showing the five most recent pages on the home page
<?php
/*
Template Name: Home Page
*/
?>
<?php get_header(); ?>

<div id="main">
<?php query_posts( 'post_type=page&orderby=date&posts_per_page=5' ); ?>

<?php if (have_posts()) : while (have_posts()) : the_post(); ?>
<div class="post" id="<?php echo $post->post_name; ?>">
         <h2><a href="<?php the_permalink(); ?>"
                  title="<?php the_title_attribute(); ?>"><?php the_title(); ?></a>
         </h2>

         <?php the_content(); ?>

</div><!-- .post -->
<?php endwhile; ?>
<?php else: ?>
         <p>Sorry, these posts could not be found.</p>
<?php endif; ?>
</div><!-- #main -->
<?php get_sidebar(); ?> <?php get_footer(); ?>
As you'll see in Chapter 12, you can use the post_type attribute to list custom post types as well as pages or attachments.
This query illustrates how to combine several arguments. Here, you want to list pages instead of posts, so use post_type to grab those. You don't want all the pages, just the children of page ID 1364, so use the post_parent attribute. Then you need to sort them by menu_order, an attribute unique to pages, and list them in ascending order, rather than the default descending. Finally, to make sure you get all the children of 1364 without bumping into the per-page limit set in the Reading Settings screen, set posts_per_page to −1. Setting posts_per_page to a negative value removes the per-page limit, thus showing all the posts at once.
Example 7-4. A home page template file with a Loop showing children of page ID 1364
<?php /* Template Name: Home Page */ ?> <?php get_header(); ?> <div id="main"><?php query_posts('post_type=page&orderby=menu_order&order=asc&post_parent=1364&posts_per_page=-1' );?> <?php if (have_posts()) : while (have_posts()) : the_post(); ?> <div class="post" id="<?php echo $post->post_name; ?>"> <h2><a href="<?php the_permalink(); ?>" title="<?php the_title_attribute(); ?>"><?php the_title(); ?></a> </h2> <?php the_content(); ?> </div><!-- .post --> <?php endwhile; ?> <?php else: ?> <p>Sorry, these posts could not be found.</p> <?php endif; ?> </div><!-- #main --> <?php get_sidebar(); ?> <?php get_footer(); ?>
You might find that you need to create an empty parent page as a placeholder in the hierarchy. I often add the extra code in Listing 7-5 to my page template Loops. First, I use get_the_content(), which returns the post content for use in PHP functions rather than echoing it to the screen. If get_the_content() returns nothing, a linked list of its child pages will be shown instead. Here, since I just want to print a linked list rather than a complete Loop, I've used wp_list_pages() instead of query_posts(). I'm also returning the list to a variable, $children, so I can check to see whether the list is empty before printing the surrounding markup.
Example 7-5. Listing children of the current page if the content is empty
<?php
/*
Template Name: Home Page
*/
?>
<?php get_header(); ?>
<div id="main">
<?php
query_posts(
'post_type=page&orderby=menu_order&order=asc&post_parent=1364&posts_per_page=-1' );
?>
<?php if (have_posts()) : while (have_posts()) : the_post(); ?>
<div class="post" id="<?php echo $post->post_name; ?>">
<h2><a href="<?php the_permalink(); ?>"
title="<?php the_title_attribute(); ?>"><?php the_title(); ?></a>
</h2>
<?php
$content = get_the_content();
if (empty($content)) {
$children = wp_list_pages(
'title_li=&depth=1&child_of='.$post->ID.'&echo=0&sort_column=menu_order' );
if ($children) { ?>
<ul id="childpages">
<?php echo $children; ?>
</ul>
<?php }
}
else {
the_content();
}
?>
</div><!-- .post -->
<?php endwhile; ?>
<?php else: ?>
<p>Sorry, these posts could not be found.</p>
<?php endif; ?>
</div><!-- #main -->
<?php get_sidebar(); ?>
<?php get_footer(); ?>You could use similar code to list the page's attached media files.
You can display all the attached files of a post without going to the trouble of inserting each one into the post content. The required code looks very much like a second Loop, as shown in Listing 7-6. This could be placed inside the main Loop, perhaps just after the_content().
Example 7-6. Listing a post's attached files inside the Loop
<?php
    $attachments = get_children(array(
        'post_type' => 'attachment',
        'numberposts' => −1,
        'post_status' => null,
        'post_parent' => $post->ID
        ));
    if ($attachments) { ?>
       <ul class="attachments"> <?php
        foreach ($attachments as $attachment) {
                if (substr($attachment->post_mime_type, 0, 5) != 'image') {
                        $type = str_replace('/', '-', $attachment->post_mime_type);
                        echo "<li class='$type'>";
                        the_attachment_link($attachment->ID, false);
                        echo '</li>';
                }
        }
    ?> </ul>
<?php } ?>
The get_children() function can also be used to display child pages, but here you've used the post_type argument to limit the list to attachments. Setting the numberposts argument to −1 ensures that you get all attachments, and the post_parent argument is set to the current post's ID so that you get only those attachments that were uploaded to this particular post.
As you loop through the returned attachment objects, you need to skip over the images, since those will work better with the [gallery] shortcode shown in Chapter 4. (You could use a similar if() statement to exclude any other type of file.) For the rest of the attached files, you need to clean up the MIME type a little bit for use with CSS. You use the attachment's MIME type as the list item class, which allows you to style each link with a file icon background image. In order to get a valid class name, however, you replace the slash in the original MIME type (e.g. application/pdf) with a dash using PHP's str_replace() function.
You separate the_attachment_link() instead of placing it in the echo statement because it echoes by default.
Listing 7-7 provides a few examples of the CSS you might use to style the attachment links, assuming a 16-pixel icon such as FamFamFam's free Mini set (www.famfamfam.com/lab/icons/mini/). The end result is shown in Figure 7-1.
Example 7-7. CSS for Listing 7-6
ul.attachments li {
        list-style: none;
}
ul.attachments li a {
        padding-left: 20px;
        line-height: 18px;
        background-position-top: 0;
        background-position-left: .5em;
        background-repeat: no-repeat;
        background-image: url(img/icons/attachment.gif);  /* default */
}
ul.attachments li.application-pdf a {
        background-image: url(img/icons/pdf.gif);
}
ul.attachments li.application-zip a {
        background-image: url(img/icons/zip.gif);
}
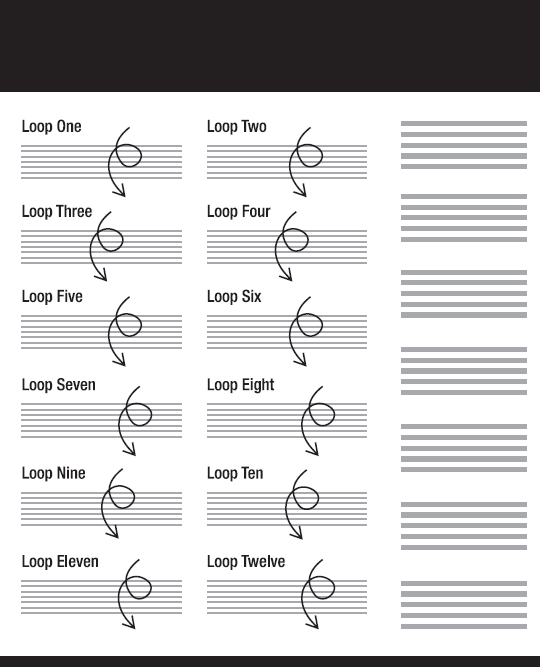
Now that you know how to create specialized Loops, the next logical step is to display several of these loops on your home page. Showing multiple, modified Loops is the key to "magazine" layouts, like the Magazeen theme shown in Figure 7-2. Most of these layouts treat categories like departments or columns in magazines and newspapers. Each category gets its own section of the page. I'll show you how to do this, but first, let's reset the Loop query.

Once you've modified a Loop query, it stays modified! Therefore, before you start a new Loop, you need to reset the query. Otherwise, your new modifications will operate on the posts already returned by your first query—and that leads to some very unpredictable results. Fortunately, resetting the query takes just one line of code, as shown in Listing 7-8.
That's it! Remember to reset the query in between each of your Loops to avoid strange errors in your advanced layouts.
Earlier, I showed you how to preserve the original query while adding your modifications. If you want to save the original query for use after your new queries, save it to a variable (like $original_query), then reassign it when you're done, as shown in Listing 7-9.
Example 7-9. Preserving the original query
<?php
$original_query = $query_string;
       // query from Listing 7-3
       query_posts( 'post_type=post&orderby=date&posts_per_page=5' );

       if (have_posts()) : while (have_posts()) : the_post(); ?>
           // the contents of your Loop goes here
       <?php endwhile; endif; ?>

<?php

wp_reset_query();

// Another Loop could go here.
// query_posts($original_query);

?>
This technique will be important when you try to fetch post information outside the Loop later in this chapter.
Now that you've reset your query, it's time to create that magazine layout. There are various ways to accomplish this, depending on how you've set up your content. Perhaps you've created a hierarchy of pages, and you want to show those instead. For the moment, however, let's assume that you're using categories to segregate your posts into different departments, since this is the most common scenario. Once you see how this works, you should be able to adapt this code to your needs using some of the other Loop examples in this chapter.
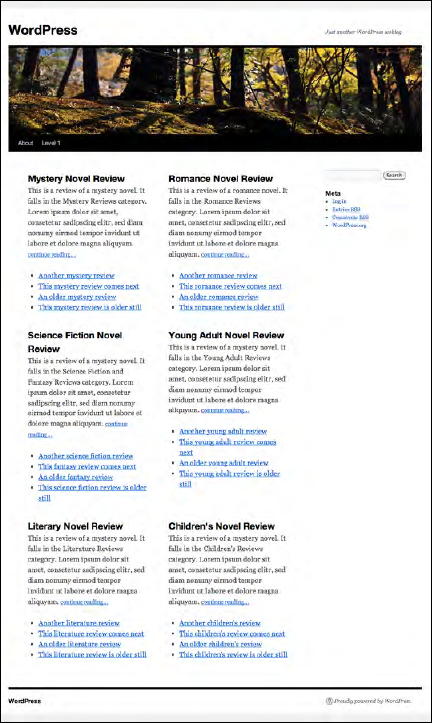
You could use get_all_category_ids() to fetch an array of IDs, and then loop through each one. However, this is not a very flexible solution. If you have a deep hierarchy of categories, it's unlikely that you actually want to loop through every one of them on your home page. More likely, you really want a box for every top-level category, as illustrated in Figure 7-3.
In order to better control which categories you'll work with, use the get_categories() function instead, as shown in Listing 7-10. This will require a bit more code, since this function returns an array of category objects rather than simple IDs, but that's OK. You can make use of that object data, and if you really need to pass the ID as a parameter to some other function, hey, that's part of the object, too.
Example 7-10. Creating a Loop for each top-level category
<?php
       $categories = get_categories();

       foreach ($categories as $cat) : ?>
       <div class="category_box">
       <?php
       // get most recent post in cat
       query_posts('posts_per_page=1&cat='.$cat->cat_ID);
       if (have_posts()) : while (have_posts()) : the_post();
        ?>
       <h2><a href="<?php the_permalink(); ?>" title="<?php the_title_attribute(); ?>"><?php
the_title(); ?></a></h2>
       <?php the_content('continue reading...'), ?>
        <?php
                  endwhile;
                  endif;
                  wp_reset_query();
                  // get 4 most recent posts in cat offset by 1
                  query_posts('posts_per_page=4&offset=1&cat='.$cat->cat_ID);
                  if (have_posts()) : ?>
                          <ul class="more-stories">
                          <?php
                          while (have_posts()) : the_post();
                            ?>
                          <li><a href="<?php the_permalink(); ?>" title="<?php
the_title_attribute(); ?>"><?php the_title(); ?></a></li>
                   <?php
                  endwhile; ?>
                  </ul> <!-- .more-stories -->
                  <?php
                  endif;
                  wp_reset_query();
                  ?>
        </div> <!-- .category_box -->
        <?php endforeach; ?>
In this example, you use get_categories() to retrieve a list of all the categories. This function can take a number of arguments to limit the list it returns, but in this case you want the complete list. The function returns the categories as objects, so you use the object notation (object->property) to get the category IDs for the query function.
As you loop through each category, call another Loop with the query set to show only posts in that category. Inside this Loop, print the title and excerpt of the first post only. Then you perform yet another query to get the next four posts, skipping the first. (Note that it might be more efficient to get all five posts in one query and use a true/false flag to determine whether the surrounding markup is a paragraph or a list item, but for now, the multiple query demonstration is more important than efficiency.)
You could, of course, modify the above code to create a Loop for all the children of a certain category, or any other scenario you can think of. See codex.wordpress.org/Function_Reference/get_categories for all the possible arguments of the get_categories() function.
In Twenty Ten, there's a footer in single.php that displays the author's Gravatar, bio, and a link to all their posts. You can enhance this to show a list of the author's most recent posts using the code shown in Listing 7-11. The results are shown in Figure 7-5.
Example 7-11. Displaying the post author's five most recent other posts inside the Loop
<?php
$original_query = $query_string;

query_posts( 'post_type=post&orderby=date&posts_per_page=5&exclude'.$post->ID.'&author='.$post->post_author );

if (have_posts()) : ?>
<ul class="authorposts">
        <?php while (have_posts()) : the_post(); ?>
        <li><a href="<?php the_permalink() ?>" rel="bookmark" title="'Permanent link to <?php
the_title_attribute(); ?>">
                <?php the_title(); ?></a></li>
                <?php endwhile; ?>
</ul>
<?php endif;

wp_reset_query();
?>
Most of the post-related template tags seen in the previous chapter (the_title(), the_content(), and so on) are available only inside the Loop. So what do you do when you need to access information outside the Loop? Use global variables! WordPress has a number of globals that store information about the current state of the application: the current post or page, user, database, and more. All these variables are available to you in your own functions and theme files.
You can access post data using the $post global. Listing 7-12 shows how to display the post's tags in a single post template's sidebar, outside the Loop.
Example 7-12. Setting up post data to use template tags outside the Loop
<div id="sidebar">
<?php
setup_postdata($post);
?>
<h3><a href="<?php the_permalink(); ?>"><?php the_title(); ?></a></h3>
<p class="post-tags"><?php the_tags(); ?></p>
</div>
Here, you can see how important it is to make sure that you have properly reset your query after modifying your Loops. If you didn't, the information you collect outside the Loop will refer to the last post returned by your modified Loop query, not the original query! For example, let's say you listed the author's four most recent posts at the bottom of a single post archive and didn't reset the query afterward. In your sidebar (which will come after this query in the code), you then try to display related posts based on the current post's categories and tags. If you didn't reset your query, you'll get the related posts of the author's fifth most recent rather than the one currently displayed by your single archive template.
If you aren't sure whether you're inside the Loop or not, you can use the in_the_loop() conditional tag to check. If you are inside the Loop, this function will return true, as shown in Listing 7-13.
Because the CSS-based theme system encourages standards-based design, and because most themes use proper HTML heading tags for post and page titles, WordPress sites tend to do well in search engine rankings. Of course, there are improvements you can make to your own themes. In this section I'll go over four common concerns: title tags, meta descriptions, meta keywords, and canonical URLs.
In many WordPress themes, the title tag looks something like Listing 7-14.
Example 7-14. The usual title tag and its output
<title><?php wp_title(); ?><?php bloginfo('name'), ?></title>
<title>example.com » Howdy, stranger.</title>Good SEO dictates that the more specific information—the post title—should come first, followed by the site name. You can switch the order (and in the process, change the style and position of the separator) using the code in Listing 7-15 instead.
Example 7-15. The revised title tag and its output
<title><?php wp_title('|', true, 'right'), ?><?php bloginfo('name'), ?></title>

<title>Howdy, stranger. | example.com</title>
The wp_title() function prints various things depending on the context. For posts and pages, it prints the title. For categories and tags, it prints the name. On the 404 error page, it prints "Page not found."
Titles can be altered using filters—custom functions in plugins or theme functions files. Chapter 9 covers filters and how they work.
If you need to add meta keywords to your single post archive template, you have all the data you need: your categories and tags. All you have to do is get a combined list, separated by commas.
In this example, you first use a conditional tag to make sure this code is used only on single post archives. (Pages don't have categories or tags, and the get_the_tags() and get_the_category() functions won't work correctly on archive pages containing multiple posts.) Then, for each tag and category, you force the name to all lowercase and add it to an array of keywords. As you print the <meta> tag, you remove duplicates from the array with array_unique() and convert the array to a comma-separated string using implode().
Listing 7-16 shows how to build the array of keywords and print it as the content of the <meta> tag.
Example 7-16. Creating meta keywords tag from post categories and tags in header.php
<?php if (is_single()) {
  foreach((get_the_tags()) as $tag) {
    $keywords[] = strtolower($tag->name);
  }
  foreach((get_the_category()) as $category) {
    $keywords[] = strtolower($category->cat_name);
  }
?>
<meta name="keywords" content="<?php echo implode(", ", array_unique($keywords)); ?>" />
<?php } ?>Listing 7-17 shows how to use the excerpt as the meta description tag for single posts and pages. Since the_excerpt() prints directly to the screen and can't be passed to other PHP functions, you can't wrap it in the esc_attr() function, as you normally would when using a template tag as an HTML attribute. Instead, you use the_excerpt_rss(). This function formats the excerpt for RSS feeds, but in this case it will work equally well in your description attribute, since excerpts can't contain HTML.
Those long URLs containing your post titles are great for improving your search results, but they're awfully long! If you're sharing links on social media networks, e-mailing them, or including them in printed documents, you're probably interested in ways to shorten your links.
The default permalink structure always works, even if you've changed your permalinks to some other structure. Listing 7-18 shows how to include the default permalink in your Loop using the new the_shortcode() tag in 3.0, the results of which are shown in Figure 7-6. If you have installed the WordPress.com Stats plugin, you can take advantage of the wp.me link shortener feature. There are a number of other link shortener plugins you can install if neither of these appeals to you.
Example 7-18. Displaying the default permalink in a Loop
<?php if (have_posts()) : while (have_posts()) : the_post(); ?>
<h2><a href="<?php the_permalink(); ?>"
        title="<?php the_title_attribute(); ?>"><?php the_title(); ?></a>
</h2>
<?php the_content(); ?>
<p>Sharing this post? <?php the_shortlink(); ?></p>
<?php endif; ?>
Google sometimes penalizes sites for duplicating content. However, a single post on your WordPress site might appear on the home page, a date-based archive, a category archive, and the single post archive. It might also have three or four valid URLs if you're using a short link format. To resolve the duplicate content problem, Google recommends that you specify a canonical URL for each post—its home base, where all the archived copies will lead. As of version 2.9, WordPress automatically adds a canonical URL header as part of the wp_head() function. As of 3.0, it also adds the shortlink, as shown in Listing 7-19.
WordPress includes several popular JavaScript libraries, including jQuery and Prototype. It's easy to integrate plugins for these libraries, as long as you're careful to avoid conflicts. You also need to use the built-in functions to add scripts and stylesheets to your themes rather than simply hard-coding the <script> and <style> tags in your header file.
WordPress includes a number of JavaScript libraries because it uses those libraries in the administration screens. They're available for you to use in your themes and plugins as well. The libraries include jQuery, Prototype, Scriptaculous, SWFUpload, and Thickbox. See codex.wordpress.org/Function_Reference/wp_enqueue_script for a complete list of the scripts available, along with their handles.
Listing 7-20 shows how to add the built-in jQuery and UI core libraries to your theme.
Example 7-20. Including jQuery
<?php
function add_jquery() {
        wp_enqueue_script('jquery'),
        wp_enqueue_script('jquery-ui-core'),
}
add_action('wp_head', 'add_jquery'),
?>
Using jQuery in WordPress is a bit tricky. Most jQuery scripts rely on a dollar sign function. For example, $("div.main").addClass("wide"); would add the wide class to a div that already had the main class. However, several other libraries, including Prototype, use this same convention. Because WordPress also uses Prototype, the jQuery library is loaded in "no conflict" mode (docs.jquery.com/Using_jQuery_with_Other_Libraries).
You have two options. You can use 'jQuery' in place of the dollar sign function ('$') throughout your script, or you can wrap your script in an extra function. Both methods are shown in Listing 7-21.
When you need to add a JavaScript file to your theme, it's tempting to simply paste the <script> tag into header.php, dust off your hands, and move on to your next task. However, this is the wrong way to add scripts to a WordPress theme. You might recall from Chapter 3 that you can specify the location of the wp-content directory. If someone who has moved wp-content() tries to use this theme, the scripts will never load.
Adding the <script> tags via the wp_head() action, as shown in Listing 7-22, is also not a good idea.
Example 7-22. How not to link scripts
function slider_scripts() { ?>
    <script type="text/javascript" src="<?php bloginfo('url'), ?>/wp-content/themes/test-theme/jquery.js"></script>
    <script type="text/javascript" src="<?php bloginfo('url'), ?>/wp-content/themes/test-theme/jquery-slider.js"></script>
<?php }
add_action('wp_head', 'slider_scripts'),
This will get the job done, but it's inefficient. You might have a plugin that has already called the jQuery library; now it will be included twice. It's also a bad idea to hard-code the path to the theme directory.
The correct way to add scripts is to use the wp_enqueue_scripts() function. This function adds your script to the header using the wp_head() hook. Listing 7-23 shows how to enqueue a script in the header using a small function and an action hook in functions.php.
Example 7-23. Enqueueing scripts
function add_header_scripts() {
        wp_enqueue_script('header-script', <?php bloginfo('stylesheet_directory'),
?>'/js/header-script.js', array('jquery'), '1.0', false);
}
add_action('wp_head', 'add_header_scripts'),
The wp_enqueue_scripts() function requires several arguments. First, you need to give your script a unique handle, or name. This allows you to refer to it later and ensures that only one script of that name will be included in the page. Next, you need to provide the URL to your script file. Third, if your script relies on any libraries (like jQuery), you need to provide the handles of those dependencies in an array. Fourth, if you need to call a specific version, provide its number. (To use the most recent version, use an empty string for this argument.) Finally, you need to tell WordPress whether the script should be loaded in the footer via wp_footer(). In this case, you want to load the script in the header, so this argument should be false (or blank).
The wp_enqueue_scripts() function will add your script to every page on your site. What if it's a large script and you want to include it only if a shortcode or some other text is present in the post or page content? One of my favorite theme tricks is to include a script that stripes table rows and turns the table headers into links that trigger a sort function. However, I want to include it only if the post or page content contains a table tag. Listing 7-24 shows how it works.
Example 7-24. Adding sortable.js if the content contains a table
function add_sortable($posts) {
        if (empty($posts)) return $posts;
        $found = false;
        foreach ($posts as $post) {
                if (stripos($post->post_content, '<table') === false) {
                        $found = true;
                        break;
                }
        }
        if ($found) {
                wp_enqueue_script('sortable',
get_bloginfo('stylesheet_directory').'/js/sortable.js'),
        }
        return $posts;
}
add_filter('the_posts', 'add_sortable'),
Here, I've used the filter the_posts(), which lets me pass the array of posts to my function. Then I can loop through the posts, checking to see if the opening table tag is present. If it is, I queue up the table script.
WordPress developer Joost de Valk recently published an updated version of Stuart Langridge's classic table sort script. It turns <th> tags into links. Clicking a heading sorts the table rows, alphabetically or numerically, according to the contents of that column. The updated version of the script also adds alternate row background colors. You can download it at yoast.com/articles/sortable-table/.
If you need to add stylesheets other than your theme's main style.css file, enqueuing is the proper method for many of the same reasons. The wp_enqueue_style() function is shown in Listing 7-25. Notice that it's very similar to the one you used for scripts.
Example 7-25. Enqueuing styles
function add_header_styles() {
        wp_enqueue_style( 'print-styles',
get_bloginfo('stylesheet_directory').'/css/pring.css', false, false, 'print'),
}
add_action('wp_head', 'add_header_styles'),
The arguments for the function are: a handle for the stylesheet, the file's URL, any dependencies, the version number, and the media type for which this stylesheet should be added. In this case, there are no dependencies or version numbers, so you used false for both arguments.
There are also a few files that live outside the theme directory but still affect how your site looks at times. For example, you can create a file called db-error.php in your wp-content directory and use it to style your database connection error message, as shown in Listing 7-26.
Example 7-26. Basic db-error.php file
<html>
<head>
<title>Database Error | MySite.com</title>
</head>
<body>
<h1>Database Error</h1>
<p>The database is not responding, and this site is unavailable. We're sorry! Please try again later.</p>
</body>
</html>
You can dress this up to match the rest of your site by copying the contents of your theme's header.php, sidebar.php, and footer.php files into the appropriate locations, but remember to remove any WordPress-specific functions, since they won't work if the database is unavailable. You can also link directly to the stylesheet in your theme directory; just remember to change it if you switch themes.
You can also customize your maintenance mode file, maintenance.php (Listing 7-27). This is also located in your wp-content directory and is shown to your visitors while you're upgrading WordPress core files or plugins. Note that it's a hidden file on UNIX-based operating systems, so you might have trouble seeing it in some applications unless you turn on the option to view hidden files (if there is one).
Example 7-27. Maintenance mode file
<?php
$protocol = $_SERVER["SERVER_PROTOCOL"];
if ( 'HTTP/1.1' != $protocol && 'HTTP/1.0' != $protocol )
        $protocol = 'HTTP/1.0';
header("$protocol 503 Service Unavailable", true, 503 );
header('Content-Type: text/html; charset=utf-8' );
?>
<html>
<head>
<title>Down for Maintenance | MySite.com</title>
</head>
<body>
<h1>Down for Maintenance</h1>
<p>This site is temporarily unavailable due to scheduled maintenance. Please try again later.</p>
</body>
</html>
<?php die(); ?>Many themes include options allowing the user to select layouts, color schemes, or other alternatives to the theme's default settings. I'll demonstrate using the Simplex Flex theme I created as a demo for this chapter.
Theme options work just like plugin options, so you'll see many of the same concepts again in Chapter 9. You can also refer to codex.wordpress.org/Settings_API for more details on storing options in the WordPress database.
If you want to add options to your theme, you need to add a page in the Appearance section of the navigation menu and construct the form itself. Unless otherwise noted, all of the following code examples should be placed in the theme's functions.php file.
First, add the options screen to the admin navigation menu, as shown in Listing 7-28.
Example 7-28. Adding a theme options page to the admin menu
function simplex_menu() {
        add_theme_page('Simplex Flex Options', 'Simplex Options', 'edit_theme_options',
__FILE__, 'simplex_options_page'),
}
add_action('admin_menu', 'simplex_menu'),
Actually, that's really all it takes! The simplex_menu() function will contain several other things in just a moment, but for now it holds only the add_theme_page() function. This function requires several arguments:
The title of the options page, to be used in the
<title>tagThe title of the page as it will appear in the menu
The capability users should have in order to access this page (see Chapter 10 for more on roles and capabilities); either
edit_themesormanage_optionswould be a good choice for a theme options page.The path to the file containing the options page (in this case, it'll be this file)
The name of the function containing the options form
Once that's done, you have to add your simplex_menu() function to the admin menu. There's an action hook for that, so all you have to do is call add_action().
Note that you haven't created the simplex_options_page() function yet. That's OK; the menu option will show up without it, and will take you to a blank page. Before you fill in the form, you need to think about what options your theme will have.
For the purposes of this chapter, Simplex Flex has four options: width (fixed or flexible), columns (two or three, and in which order), whether the site title and description will be shown in addition to the custom header image, and an option to manually enter additional CSS rules.
You'll have to register your option with WordPress or it won't get saved. You should also set some default values. For now, I'll just mention which lines are essential in order to get your options saved and updated correctly in the database.
Listing 7-29 shows the expanded function; it now registers your settings and creates some default values. The changes from the previous listing are in bold. You store all four theme options in a single database field by using an array. This is the best practice for saving theme and plugin options; it's bad form to use a separate database field for each of your options.
Example 7-29. Registering a setting and saving the default values
function simplex_menu() {
        add_theme_page('Simplex Flex Options', 'Simplex Options', 'edit_theme_options',
__FILE__, 'simplex_options_page'),
        register_setting('simplex_options', 'simplex_options'),
        // set defaults
        $options = array(
                           'width' => 'fixed',
                           'cols' => '3',
                           'sitename' => 'yes',
                           'css' => '',
        );
        add_option('simplex_options', $options, '', 'yes'),
}
add_action('admin_menu', 'simplex_menu'),
The register_setting() function shown here has two arguments. First, you have to assign your setting to a group. When you begin building the form, you call each group in turn. In this case, since you have just a few options, you use just one group, with the same name as the option itself. The second argument is the name of the option that will be stored to the database.
Once you registered the setting, you need to save some default values. You create the $options array to hold the four values. Then you can use the add_options() function to store your array. The first argument is, again, the name of the option field in the database. The second argument is the array containing the options to be stored. The third argument should always be empty; it's a deprecated argument that's still present for backward compatibility. The fourth argument, the autoload value, determines whether or not these options will be cached on each page load. This should almost always be "yes."
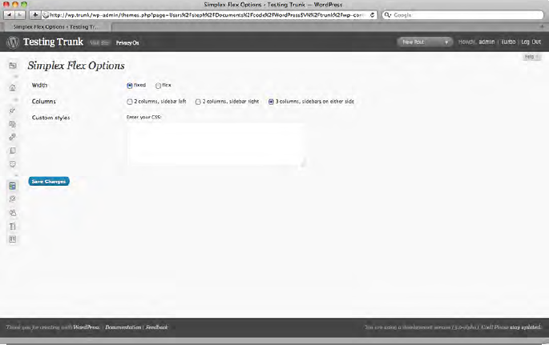
Now that you have your options in place, you need to build the form that will let users edit them. Figure 7-7 shows the form for Simplex Flex. The code to create this form is shown in Listing 7-30.
Example 7-30. The theme options form
function simplex_options_page() { ?>
  <div class="wrap">
  <h2>Simplex Flex Options</h2>
  <form method="post" action="options.php">
        <?php settings_fields('simplex_options'), ?>
        <?php $options = get_option('simplex_options'), ?>
  <table class="form-table">
  <tr valign="top">
  <th scope="row">Width</th>
  <td><label><input type="radio" name="simplex_options[width]" <?php checked('fixed',
$options['width']); ?> value="fixed" /> Fixed</label>
                <label><input type="radio" name="simplex_options[width]" <?php checked('flex',
$options['width']); ?> value="flex" /> Flex</label>
        </td>
  </tr>
<tr valign="top">
  <th scope="row">Columns</th>
  <td><label><input type="radio" name="simplex_options[cols]" <?php checked('left2', $options['cols']); ?> value="left2" /> 2 columns, sidebar left</label>
<label><input type="radio" name="simplex_options[cols]" <?php checked('right2',
$options['cols']); ?> value="right2" /> 2 columns, sidebar right</label>
<label><input type="radio" name="simplex_options[cols]" <?php checked('col3',
$options['cols']); ?> value="col3" /> 3 columns, sidebars on either side</label>
</td>
</tr>
<tr valign="top">
<th scope="row">Header text and image</th>
<td><label><input type="checkbox" name="simplex_options[sitename]" <?php checked('yes',
$options['sitename']); ?> value="yes" />
Display site name and description superimposed over the header image?</label>
</td>
</tr>
<tr valign="top">
<th scope="row">Custom styles</th>
<td><label>Enter your CSS:</label><br />
<textarea name="simplex_options[css]"><?php echo $options['css']; ?></textarea>
</td>
</tr>
</table>
<p class="submit">
<input type="submit" class="button-primary" value="Save Changes" />
</p>
</form>
</div>
<?php }
// the ?> should be at the end of the functions.php fileFirst, you wrap your form in a <div> tag with the wrap class. This is standard for all the options pages in WordPress, and you'll see it again when you create plugin option pages. Next, you open the <form> tag. The ID is optional, but the action must be options.php so your registered settings will be processed and saved to the database.
Inside the form, the first item should be the title of your options page. Then you call the settings_fields() function to make sure your options are handled correctly and to set up the necessary security checks. Also, you need to get the stored options using get_option() so you can populate the fields with any values that have already been saved.
The markup of the form fields is up to you. The table shown here matches the built-in WordPress settings screens. Be sure to follow accessibility practices with your form fields; use labels appropriately.
You'll see the checked() function again in Chapter 9. It can be used to print the appropriate checked attribute for checkboxes and radio buttons. Its first argument is the value you want to match; the second argument is the variable containing your stored option. For dropdown boxes, you could use the similar selected() function.
Listing 7-31 shows one instance of the checked() function used in the Simplex Flex theme options, then shows the longer version of the same code that would be needed if you were to use an if() statement instead.
Example 7-31. Using checked() vs if
<label><input type="radio" name="simplex_options[cols]" <?phpchecked('left2',$options['cols']);?> value="left2" /> 2 columns, sidebar left</label> <label><input type="radio" name="simplex_options[cols]" <?phpif ($options['cols'] == 'left2'){ ?> value="left2" <?php }?> /> 2 columns, sidebar left</label>
As you can see, the second version is somewhat harder to read.
You could use a separate name for each field, but by using the name of the single registered option and putting the individual field names in brackets, you've taken advantage of a handy PHP shortcut: all those fields will be saved as an array called $simplex_options—exactly the thing you want to store in the database. You don't have to do any processing at all, since the form's handler, options.php, will automatically save those fields to the array and update the database option.
To take advantage of this shortcut, always use a common name for your form fields and put their unique identifiers in brackets, as shown in Listing 7-32.
Example 7-32. Using common form field names to store values in an array
<label><input type="checkbox" name="simplex_options[sitename]" <?php checked('yes',
$options['sitename']); ?> value="yes" />
        Display site name and description superimposed over the header image?</label>

<label>Enter your CSS:</label><br />
        <textarea name="simplex_options[css]"><?php echo $options['css']; ?></textarea>
Sometimes you need to add styles to your options pages. You could do everything with inline styles, but that's hardly efficient!
Listing 7-33 shows the function that will display the styles in the options page's <head> area. In this case, you have very little to add, so you won't go to the trouble of creating a separate stylesheet for Simplex Flex. However, it would be easy to do so; just include a link to a separate stylesheet, admin-styles.css, which would be located in the simplex-flex theme directory.
Example 7-33. Styles for the options page
function simplex_flex_admin_css() { ?>
        <style type="text/css">
               textarea { width: 32em; height: 8em; }
        </style>
        <link rel="stylesheet" type="text/css" src="<?php bloginfo('stylesheet_directory'),
?>/admin-styles.css">
<?php
}
Now you have to add this function to the admin pages somehow. You could use the admin_head() hook, but that puts the styles on every page. It would be much better to add it only to the theme options page.
In addition to admin_head(), there's another hook that's specific to each page, admin_head-filename. The filename should include the extension. For example, if you wanted to add a stylesheet to the Dashboard, the hook would be called admin_head-index.php.
Now you just need the name of the current theme options page, without the preceding path that you'd get with the __FILE__ constant. As it turns out, that's easy. The add_theme_page() function returns the file name of the theme page that gets added. In Listing 7-29, you didn't need the returned value, but now you can make use of it.
Listing 7-34 shows the necessary changes to the simplex_menu() function.
Example 7-34. Adding a stylesheet to the options page
function simplex_menu() {
        $file = add_theme_page('Simplex Flex Options', 'Simplex Options',
'edit_theme_options', __FILE__, 'simplex_options_page'),
        add_action("admin_head-$file", 'simplex_flex_admin_css'),
        register_setting('simplex_options', 'simplex_options'),
        // set defaults
        $options = array(
                'width' => 'flex',
                'cols' => '3',
                'sitename' => 'yes',
                'css' => ''
        );
        add_option('simplex_options', $options, '', 'yes'),
}
add_action('admin_menu', 'simplex_menu'),Listing 7-35 shows the complete theme options code, which results in the screen in Figure 7-7. In Simplex Flex, this code appears in functions.php, along with the widget definitions, header and background image support, and other theme functions.
Example 7-35. A complete theme options page
<?php
function simplex_menu() {
        $css = add_theme_page('Simplex Flex Options', 'Simplex Options', 'edit_theme_options',
__FILE__, 'simplex_options_page'),
        add_action("admin_head-$css", 'simplex_flex_admin_css'),
        register_setting('simplex_options', 'simplex_options'),
        // set defaults
        $options = array(
                'width' => 'flex',
                'cols' => '3',
'sitename' => 'yes',
'css' => ''
);
add_option('simplex_options', $options, '', 'yes'),
}
add_action('admin_menu', 'simplex_menu'),
function simplex_options_page() { ?>
<div class="wrap">
<h2>Simplex Flex Options</h2>
<form method="post" action="options.php">
<?php settings_fields('simplex_options'), ?>
<?php $options = get_option('simplex_options'), ?>
<table class="form-table">
<tr valign="top">
<th scope="row">Width</th>
<td><label><input type="radio" name="simplex_options[width]" <?php checked('fixed',
$options['width']); ?> value="fixed" /> Fixed</label>
<label><input type="radio" name="simplex_options[width]" <?php checked('flex',
$options['width']); ?> value="flex" /> Flex</label>
</td>
</tr>
<tr valign="top">
<th scope="row">Columns</th>
<td><label><input type="radio" name="simplex_options[cols]" <?php checked('left2',
$options['cols']); ?> value="left2" /> 2 columns, sidebar left</label>
<label><input type="radio" name="simplex_options[cols]" <?php checked('right2',
$options['cols']); ?> value="right2" /> 2 columns, sidebar right</label>
<label><input type="radio" name="simplex_options[cols]" <?php checked('col3',
$options['cols']); ?> value="col3" /> 3 columns, sidebars on either side</label>
</td>
</tr>
<tr valign="top">
<th scope="row">Header text and image</th>
<td><label><input type="checkbox" name="simplex_options[sitename]" <?php checked('yes',
$options['sitename']); ?> value="yes" />
Display site name and description superimposed over the header image?</label>
</td>
</tr>
<tr valign="top">
<th scope="row">Custom styles</th>
<td><label>Enter your CSS:</label><br />
<textarea name="simplex_options[css]"><?php echo $options['css']; ?></textarea>
</td>
</tr>
</table>
<p class="submit">
<input type="submit" class="button-primary" value="<?php _e('Save Changes') ?>" />
</p>
</form></div> <?php } ?>
Be sure your theme works correctly with the default options! Many users will activate the theme and go on their merry way without ever looking at the options screen.
There are a number of advanced WordPress themes that allow users to build very customized layouts by choosing options rather than writing code. They also provide a solid framework for developers to build complex sites. These theme frameworks are all different, but they have a few things in common. They use theme options pages to make choices simpler for users. They take advantage of the template file hierarchy, which you learned about in the previous chapter, to create rich context in archives. They include their own widgets or even full plugins using the theme functions file. They use child themes to let site owners customize the themes while maintaining the originals separately, allowing the developers to offer upgrades without destroying those modifications.
A framework could provide a good basis for your project, or you might just look into their inner workings for inspiration. Some of these frameworks are not free, and not all of them comply with the WordPress GPL license. Paid ("premium") themes are marked with the $ symbol. Other frameworks might be free to download, but require payment for support.
Carrington:
carringtontheme.com/Genesis ($):
www.studiopress.com/themes/genesis/Hybrid:
themehybrid.com/themes/hybrid/Sandbox:
www.plaintxt.org/themes/sandbox/Thematic:
wordpress.org/extend/themes/thematic/Thesis ($):
diythemes.com/thesis/Whiteboard:
plainbeta.com/2008/05/20/whiteboard-a-free-wordpress-theme-framework/
If you want to publish your theme on the official theme repository at WordPress Extend, you need to make sure your theme meets a long list of requirements (see the checklist below). You also need to localize your theme so it can be translated. I'll talk about localization and internationalization in Chapter 9 in the context of plugins. The process of localizing themes is very similar, so I won't repeat it here. Also in Chapter 9, I'll explain how to use Subversion to maintain different versions of your theme.
The theme developer center at wordpress.org includes an extensive checklist (codex.wordpress.org/Theme_Development_Checklist). If you prefer, there's an interactive checklist at www.wplover.com/lab/theme-development-checklist where you can check off each item as you go and keep track of your progress, as shown in Figure 7-8. If you don't plan to distribute your theme to the public, don't sweat over each and every one of the 146 items on the checklist! Just glance at it to make sure you haven't overlooked anything essential.
As of this writing, neither checklist has been updated to include the new features in version 3.0. You should check to see whether your theme includes:
wp_nav_menu()in the theme templates andadd_theme_support('nav-menus')infunctions.php.(Seecodex.wordpress.org/Function_Reference/wp_nav_menu)add_custom_background()infunctions.phpif you want to allow the user to upload her own background image. (Seecodex.wordpress.org/Function_Reference/add_custom_background)the_shortlink()somewhere inside the Loop if you want to publicize it. (Seecodex.wordpress.org/Template_Tags/the_shortlink)comment_form()instead of the<form>tag and its contents incomments.php. (Seecodex.wordpress.org/Template_Tags/comment_form)

In this chapter, you've learned all the essential steps to creating a complex theme. I've shown you how to modify the Loop and run multiple Loops per page—the key to complicated "magazine" layouts such as Mimbo and Magazeen. I've shown you how to access post information outside the Loop, which is especially useful in your sidebars (and widgets, in the next chapter). I've also gone over some changes you can make to your theme's header file to improve search engine optimization. I've discussed the proper way to include scripts and extra stylesheets in your themes, including how to use the built-in jQuery library. I've also shown you how to create options pages for advanced themes.
In the next chapter, you'll learn how to create custom widgets that could be included with your theme.