WordPress is famous for its five-minute installation. Many commercial web hosts offer one-click installation from their account control panels. If your host does not, you can upload the WordPress files to your web directory. You can complete the installation using the web interface, or you can create a configuration file based on the sample included in the WordPress download.
WordPress's requirements are modest. At minimum, your server should support:
Your host should list these features and version numbers in the description of hosting plans or the support area (or both). Note that PHP 4 reached its end of life in 2008 and is no longer supported by its developers. While WordPress will run on these older versions, I highly recommend using a web host that supports PHP 5.
A number of web hosts offer one-click installation of WordPress via the control panel, usually using the Fantastico application installer. In actuality, it really takes about half a dozen clicks, so I'll walk you through it. (If your host doesn't offer Fantastico or another one-click option, you'll need to see the "Installation using the Web Interface" section of this chapter.)
First, locate the Fantastico icon in your host's control panel. You'll see a list of applications that Fantastico can install for you; WordPress is in the blogs category. Once you've chosen WordPress, you'll see an informational screen letting you know how much disk space is required and that one of your MySQL databases will be used.
On the following screen, you'll be asked to fill in some information. Fantastico will create a database and user for you, but you still need to specify which of your domains (if you have more than one) you want WordPress to be installed on. You also need to specify the administrator account username, email address, and password you want to use for WordPress. Finally, you'll be asked to give your new site a name and a description. All of these things can be changed later in the WordPress settings, so it's OK if you aren't sure yet. Just make up something!
When you're ready, press Install WordPress, and in a moment you'll see a confirmation screen. Make sure you know the password (or copy it to your clipboard), then proceed to the Logging In section later in this chapter.

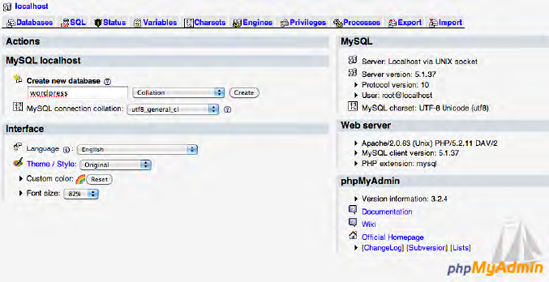
To install WordPress without a one-click installer like Fantastico, you'll need to create a database, upload the files, and run the installer. I'll walk through the most common ways to accomplish these tasks. First, you'll need to set up a database for WordPress to use. If your host has already created one for you, simply locate the database name, username, password, and host you were provided (usually in the welcome e-mail you received when you signed up). Otherwise, create a new database according to your host's instructions. Figure 2-2 shows how to do this in PHPMyAdmin (the MySQL web interface most commonly used by commercial hosting companies). If you are asked to specify a character set, choose UTF-8, which will support any language. If you are asked to specify a collation, choose utf8-general-ci. These are the language and character settings WordPress expects, but some older MySQL installations use more restrictive character sets. If you'll be importing content, see Chapter 5 for more detail on these settings.
If you have the option to create a new database user, you should do so. Be sure to grant the new user all permissions on your database, as shown in Figure 2-3.
Once you have your database credentials in hand, you're ready to install WordPress.

Download the installation package from wordpress.org and upload the files to your web host using FTP client software. Simply place the files where you want your WordPress site to be located; that is, if you want the site to be located at mysite.com, upload the files to your web root folder. If you want the site to be located at mysite.com/blog, create a folder called blog and upload the WordPress files to that folder instead.

Once you have uploaded the files, visit the site in a web browser. You will immediately be presented with an install screen. Fill in the requested information as shown in Figure 2-5 and press Submit to complete the installation.


Once the installation is complete, you'll have the opportunity to create your account, as shown in Figure 2-6. In previous versions, the first user was always called 'admin,' but as of version 3.0, you can choose your own username for this account.
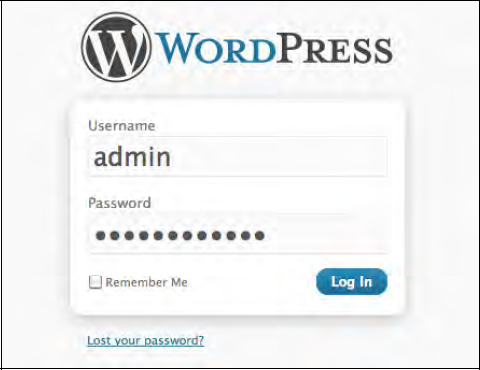
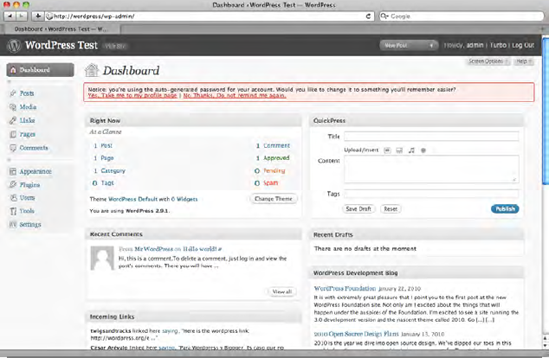
Log in using the password you just created (Figure 2-7). You should see your Dashboard with a message at the top prompting you to choose a more easily remembered password (Figure 2-8). We'll go over the Dashboard and the rest of the WordPress settings in the next chapter.
If you prefer to edit configuration files rather than rely on the web-based installer, or if you need to use some of the extra configuration options (a default language other than English, for example), you can create the configuration file by hand. Download the installation package from wordpress.org. Unzip it and rename wp-config-sample.php to wp-config.php. Open wp-config.php in a text editor. The sample file contains comments instructing you how to fill in the necessary values. See Listing 2-1 for a completed example. You should fill in:
The name of your database
Your database user name
Your database password
The database host name
If you were given a port number as well as a host name, you should include the port in the host definition, separated by a colon, like so: define('DB_HOST', 'localhost:3303'),
If your WordPress database will be shared with other installations or applications, you might need to change the default table prefix from 'wp_' to something less generic. For example, if your web hosting plan allows you just one MySQL database, but you need to create two independent WordPress sites on that account, you'll need to choose another table prefix for one or both of those installations.
There are many translations available for WordPress. You can change the language setting by entering a language code in the WPLANG line. However, you'll also need to download the corresponding language file. For a complete list of available languages and instructions on installing the files, see http://codex.wordpress.org/Installing_WordPress_in_Your_Language.,
Once you have filled in all the required values, your completed file should look something like Listing 2-1.
Example 2-1. The completed wp-config.php
// ** MySQL settings - You can get this info from your web host ** //
/** The name of the database for WordPress */
define('DB_NAME', 'my_wp_db'),

/** MySQL database username */
define('DB_USER', 'my_wp_db_user'),

/** MySQL database password */
define('DB_PASSWORD', 'my_wp_db_pass'),

/** MySQL hostname */
define('DB_HOST', 'localhost'),

/** Database Charset to use in creating database tables. */
define('DB_CHARSET', 'utf8'),

/** The Database Collate type. Don't change this if in doubt. */
define('DB_COLLATE', ''),
/**#@+
* Authentication Unique Keys.
*
* Change these to different unique phrases!
* You can generate these using the {@link https://api.wordpress.org/secret-key/1.1/
WordPress.org secret-key service}
* You can change these at any point in time to invalidate all existing cookies. This will force all users to have to log in again.
*
* @since 2.6.0
*/
define('AUTH_KEY', '%DX<0oKh8Docq=$l6k&+Fy2`J-@qELUUr(U-2BvjS|xu}n=bf;9aPkt5&.FDP@,y'),
define('SECURE_AUTH_KEY', '[3Y7|1jK8?iUyK_VSr5W+!xl_O0v8vG|V1+[^E4I+Ealw@<T@S?:AWK?3m#zT)bD'),
define('LOGGED_IN_KEY', '4q-TS=Y+}hgM9j(bw.[C!j1!zcj{3M8:u@:STF(N R.7E6u1]Ouci FYr.$0~FJK'),
define('NONCE_KEY', 'UdXil[`Wff0[|+Hh*+RR&{z4l4U!T_HS/8oH{SpKe#m!Z6;I2Y,% @mW4ucSfuIQ'),
/**#@-*/
/**
* WordPress Database Table prefix.
*
* You can have multiple installations in one database if you give each a unique
* prefix. Only numbers, letters, and underscores please!
*/
$table_prefix = 'wp_';
/**
* WordPress Localized Language, defaults to English.
*
* Change this to localize WordPress. A corresponding MO file for the chosen
* language must be installed to wp-content/languages. For example, install
* de.mo to wp-content/languages and set WPLANG to 'de' to enable German
* language support.
*/
define ('WPLANG', ''),
/* That's all, stop editing! Happy blogging. */
/** WordPress absolute path to the Wordpress directory. */
if ( !defined('ABSPATH') )
define('ABSPATH', dirname(__FILE__) . '/'),
/** Sets up WordPress vars and included files. */
require_once(ABSPATH . 'wp-settings.php'),On most web hosts, PHP errors are logged rather than printed to the screen. This is good security; it prevents you from accidentally exposing your database password or other sensitive information if you mess up your code. However, this feature also prevents you from seeing what's gone wrong if there was a problem during your installation. Instead of a login screen, you'll just see a blank white page.
If you know where your PHP error log is, you can check it to see what the problem was. If you don't know where the log is, you can check your web host's documentation to find out, or you can simply turn on the error display until you resolve the problem. WordPress will not display your database connection information even if there is an error.
To display errors, add the WP_DEBUG constant to your wp-config.php file, as shown in Listing 2-2. You can put it anywhere, but I like to keep it at the top.
Example 2-2. Debugging with wp-config.php (partial)
define('WP_DEBUG', true);

// ** MySQL settings - You can get this info from your web host ** //>
/** The name of the database for WordPress */
define('DB_NAME', 'my_wp_db'),

/** MySQL database username */
define('DB_USER', 'my_wp_db_user'),
Visit your site again, and you should see the problem. Ignore any warnings and notices, and look for fatal errors. Is there an unknown function? Look for a missing file, or simply re-upload the entire WordPress package. Figure 2-9 shows the error messages you would see if one of the files from wp-includes were missing–in this case, capabilities.php. The first message, a warning, could be safely ignored, but in this case it provides us with a clue as to why the second error occurred. The fatal error is the showstopper. Resolve that problem, and WordPress should work correctly.
When you've solved the problem, switch the value of WP_DEBUG to false, as shown in Listing 2-3.

Once you have WordPress installed, you'll want to make it look good! You can change themes at any time. The new 2010 default theme in WordPress 3.0 is excellent. However, if you want something different, visit www.wordpress.org/extend/themes.
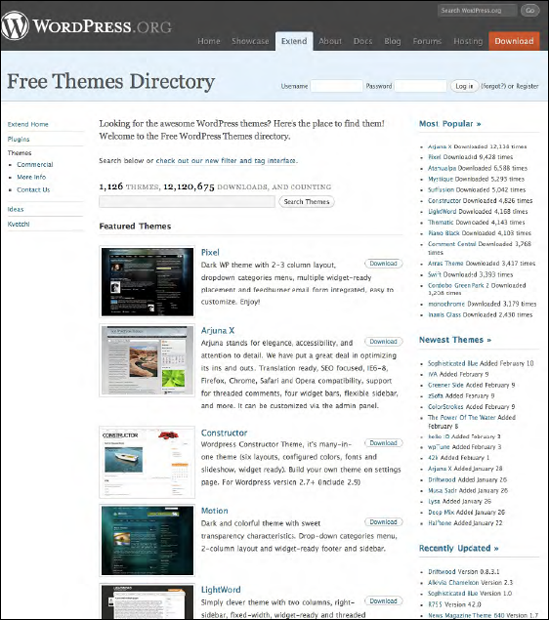
You can download the theme files and upload them to your wp-content/themes folder if you wish, or you can use the automatic theme installer. From your Dashboard, visit Appearance


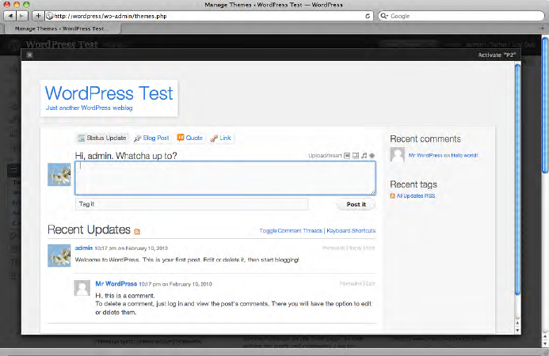
Once the themes have been installed, they'll appear in your list of themes under Appearance. Click the theme's thumbnail image to see a preview of the theme on your site. If you like it, you can activate the theme by clicking Activate in the upper right corner (Figure 2-13).
Click Visit Site (next to your site's title at the top of the screen) to see how the theme looks.
While WordPress includes most of the features you would want in a basic site, sooner or later you'll probably find that you want something more. Visit www.wordpress.org/extend/plugins to see all the things–over 9,000!–you can add to your site.

You can download the plugin files and upload them to your wp-content/plugins folder, just as you did with themes. However, there is also an automatic plugin installer. From your Dashboard, visit Plugins

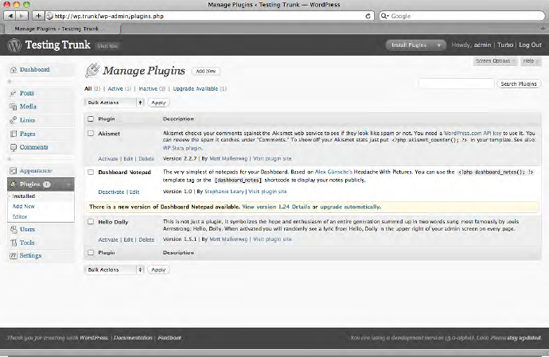
Once a plugin has been installed, it will appear in your plugin list. You'll see a brief description of what the plugin does, a link to its home page, and a link to activate it.
Try activating Hello Dolly, the sample plugin that comes with WordPress. When the plugin list reloads, you'll get a message confirming the activation. You should also see a lyric from "Hello, Dolly" in the upper right corner of your screen, as shown in Figure 2-16.

Some plugins will not activate. They might contain coding errors, or they might conflict with something else you've installed, or they might not run properly with your version of PHP. When a plugin will not activate, you'll see a message containing the PHP error that caused the problem, as shown in Figure 2-17.

There are some things every WordPress site should have:
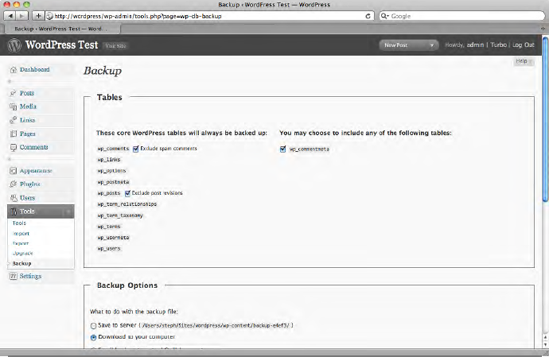
DB Backup provides a button to quickly back up specified database tables and can be scheduled to back up to a specified directory. I recommend that you create a backup of your database before importing content or upgrading WordPress to a new version.
Maintenance Modedisplays a simple maintenance message to everyone except administrators. At times throughout this book, I'll recommend that you put your site into maintenance mode while performing operations on the database or filesystem. While it's possible to do so without a plugin, this plugin gives you a simple button to turn maintenance mode on and off.
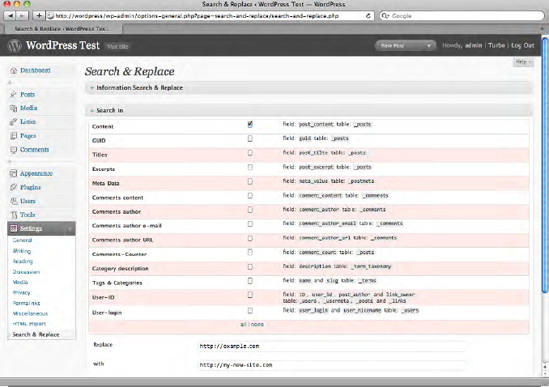
Search & Replace allows you to replace text in chosen database fields. This plugin is especially useful after importing content (see Chapter 5).
Google XML Sitemaps generates XML sitemaps (optionally gzipped) according to the
sitemaps.orgspecification.If you use another traffic monitoring service, chances are there's a WordPress plugin for it. Google Analytics for WordPress (
http://yoast.com/wordpress/google-analytics/) includes the Google Analytics code in your footer and provides checkboxes for advanced Analytics options, such as tracking file downloads and outbound links. It also shows a basic traffic graph on your Dashboard.Wordpress.comStats provides a graph of visitors and search queries as a Dashboard graph.Akismet provides spam filtering for your comments. The plugin comes with WordPress but requires a key to use. You can get a free key at
wordpress.com.Contact Form 7 allows you to create e-mail contact forms with Akismet spam protection.
Note
All the plugins mentioned in this book are listed in Appendix 1, Plugin Directory. Plugins hosted in the official plugin repository at wordpress.org/extend/plugins are referenced by name only, and you can find them by searching the repository for the plugin name. URLs are provided for any plugins that are not part of the repository or have names too generic to search.
New versions of plugins are released often. They'll contain new features, security improvements, or compatibility with newer versions of WordPress. When newer versions of your plugins are available, you'll see a number next to the plugin menu item on every administration screen and automatic upgrade links in your plugin list, as shown in Figure 2-18.
You can upgrade the plugins one at a time, or you can use the bulk upgrade feature to do them all at once.
If you have several plugins that need to be upgraded, you can process them all at once. Put a checkmark next to the plugins' names, then choose Upgrade from the Bulk Actions dropdown at the top of the plugin list (Figure 2-19). WordPress will place your site into maintenance mode automatically, then upgrade each plugin in turn. You'll see a running status report as each plugin is upgraded, and when they're all finished, WordPress will take your site out of maintenance mode.

It's important to stay current with the new releases. In addition to providing you with new features, the updated version often includes corrections for newly discovered security problems. Keeping your installation up to date is the most important thing you can do to prevent your site from being hacked.
When a new version of WordPress is available, you'll see a banner message on every administration screen. You'll also see an announcement in the WordPress blog, which appears in one of the Dashboard widgets.

If you don't log in to your WordPress site very often, you might want to subscribe to the RSS feed or the e-mail announcement list for new releases. You can find both at wordpress.org/development/. The WordPress blog includes general news as well as release announcements. If you want alerts about new versions only, subscribe to the Releases category instead, at wordpress.org/development/category/releases/feed/.
WordPress can upgrade itself automatically, or you can download the files and upload them to your web server.
Automatic upgrades couldn't be simpler. The banner announcement includes a link to upgrade automatically. Follow it, and you'll be taken to the core upgrade screen (also available under Dashboard |TRA Update). Here, you'll be reminded to make a backup of your database and files before upgrading. If you have installed WP-DB-Backup, you should use it now (Figure 2-21). Otherwise, use your web host's database administration tool (such as PHPMyAdmin) to make a complete dump (structure and data) of your MySQL database. To back up your files, you'll need to use your favorite FTP client. You can back up your entire WordPress installation if you wish, or you can just copy the files that are unique to your site: wp-config.php and the wp-content directory.
In order for the automatic upgrades to work, all the files in your WordPress installation must be owned by the same user Apache runs under. If you're prompted to enter connection information when you try to upgrade, you can enter the information and let WordPress upgrade through an FTP or SSH connection, or you can change the file owner.
Changing the owner might not be the best choice if you're on a shared server, and it will be a hassle: you'll have to create a group that includes you and the Apache user so you can still write to the directory, and you'll have to make sure to change the owner again on any new files you upload.
However, if you simply fill in the requested information on the upgrade screen, it won't be saved, and you'll have to enter it again every time you upgrade the WordPress core, a theme, or a plugin.
A far better option is to save your connection information in your wp-config.php file, as shown in Listing 2-4. With your connection settings saved, WordPress won't have to prompt you every time you upgrade. You'll need to fill in the full path to your WordPress installation as well as your wp-content and plugin directories.
Example 2-4. FTP connection settings in wp-config.php
define('FTP_BASE', '/home/user/wordpress/'),
define('FTP_CONTENT_DIR', '/home/username/wordpress/wp-content/'),
define('FTP_PLUGIN_DIR', '/home/username/wordpress/wp-content/plugins/'),
define('FTP_USER', 'username'),
define('FTP_PASS', 'password'),
define('FTP_HOST', 'ftp.example.com:21'),
define('FTP_SSL', false);
If your files are no longer visible to the public after you upgrade using FTP, ask your host if default permissions are set on newly uploaded files when using FTP. On many servers, a umask setting is in place. This is a way of adjusting permissions on newly uploaded files. If this is the case on your server, you'll need to ask the host to change this setting for you, or you'll need to upgrade WordPress through some other method.
If the SSH library for PHP is available on your server, the upgrade screen will give you an option to use SSH instead of FTP. To use SSH, leave the password field blank. Instead, generate a pair of keys: one public, one private. Place both files on your server, and fill in their locations to your configuration file, as shown in Listing 2-5. See www.firesidemedia.net/dev/wordpress-install-upgrade-ssh/ for more details on generating SSH keys for use in WordPress.
Example 2-5. SSH connection settings
define('FTP_BASE', '/home/user/wordpress/'),
define('FTP_CONTENT_DIR', '/home/username/wordpress/wp-content/'),
define('FTP_PLUGIN_DIR', '/home/username/wordpress/wp-content/plugins/'),
define('FTP_USER', 'username'),
define('FTP_PUBKEY', '/home/username/.ssh/id_rsa.pub'),
define('FTP_PRIKEY', '/home/username/.ssh/id_rsa'),
define('FTP_HOST', 'ftp.example.com:21'),
define('FTP_SSL', false);
Tip
Pass phrase protected keys do not work properly in WordPress. You should generate your SSH keys without a pass phrase.
If you can't get automatic upgrades to work, or if you're uncomfortable letting WordPress doctor its own innards, you can always upgrade your files manually. Simply download the new version, unzip it, and transfer the files to your host, just as you did when you first installed WordPress.
To make sure I don't accidentally overwrite my themes, plugins, and uploaded media files, I always delete the wp-content directory from the downloaded package before I upload the files to my web server.
Even though it's faster to use my FTP client's synchronize feature to upload only the files that have changed, I usually delete all the standard WordPress files from the server–everything except wp-config.php and the wp-content directory–before uploading the new copies. Otherwise, strange errors can occur due to duplicated functions, as files are sometimes eliminated and functions deprecated between versions. If a function has been deprecated (and therefore moved to wp-includes/deprecated.php) but you still have the original function in an old copy of its original file, you'll get fatal errors when you visit the site because the function has been declared twice within WordPress.
Tip
Make sure the wp-includes and wp-admin/includes directories are completely uploaded. When things don't work correctly in the administration screens (menus don't appear, widgets can't be moved, Quick Edit doesn't work) after an upgrade, the problems are almost always caused by missing or corrupted files in these two directories.
If you ever need to move your WordPress installation from one server to another, start by reversing the installation process.
Step 1: Download the WordPress files from your server. Make sure you have a complete copy of your wp-config.php and .htaccess files and your wp-content directory.
Step 2: Export your database. If you have installed any plugins that create new tables, be sure to include them in your backup. They will share the prefix (e.g. 'wp_') you specified during the installation. You can install Austin Matzko's WP-DB-Backup plugin or use your host's control panel (e.g. PHPMyAdmin) to export your WordPress database.
Step 3: Put your old site into maintenance mode so your visitors can't continue to submit comments and trackbacks to your old database. Michael Wöhrer's Maintenance Mode plugin works well.
Step 4: Edit your wp-config.php file. Change the database connection settings to correspond with the values on your new server. You should also define your site and blog URLs in the configuration file, as shown in Listing 2-4. This will override the settings in your database so you can log in on your new server. (Otherwise, WordPress would constantly redirect you to your old site!) See codex.wordpress.org/Editing_wp-config.php for details on these and other advanced configuration settings.
Example 2-6. Overriding database values for your site URLs in wp-config.php
define('WP_SITEURL', 'http://example.com);
define('WP_HOME', 'http://example.com'),
Step 5: Upload your files, including the modified wp-config.php, to your new web server.
Step 6: Import the database backup you made in Step 2 to your database on your new server using your new web host's control panel tools.
Step 7: Log in to your WordPress site at its new location (e.g.example.com/wp-admin).
Step 8: If you changed your site's URL, your posts and pages probably contain many hardcoded paths to your uploaded media files. Use the Search and Replace plugin to change these to your new URL, as shown in Figure 2-22.
In this chapter, you've learned how to install and upgrade WordPress. I've talked about things that can go wrong and how you can correct the problems, and I've shown you a few ways to make your WordPress site more secure. You've also learned how to install themes and plugins. Lastly, I've shown you how to move a WordPress installation from one site to another.
You're ready to begin building your site! In the next chapter, I'll go over the options that will determine how your site will work.