
C H A P T E R 5
![]()
Solving Installation Problems
There's a very good chance that your Ubuntu installation will go smoothly, and you'll find yourself with a first-rate operating system up and running within just a few minutes. However, issues do sometimes arise, so we've drawn together a list of common problems alongside their solutions, which should get you out of any tight spot. These problems are organized by when they occur: (A) before you start Ubuntu's live distro mode; (B) while running the installation program; and (C) after the installation, when you boot for the first time. The final section of the chapter describes how to configure the graphical subsystem with the X.org configuration utility, which can be useful if graphical glitches arise. The latest version of Ubuntu has an all-encompassing recovery mode, which should assist in solving many problems.
A. Preinstallation Problems
Some problems might arise before you even boot Ubuntu's live distro mode in order to run the installation program. This section addresses such issues.
The Disc Doesn't Boot
When I boot from the Ubuntu DVD-ROM, the drive spins up as if something is happening, but I see either nothing or strange graphics on the screen.
Solution
The DVD-ROM disc might be either dirty or faulty. Examine its surface for scratches or try removing dust from it with a soft, lint-free cloth. A typical indicator of a dirty or damaged disc is that the drive spins up and then instantly spins down several times in succession—listen to the whir of the drive's motor to tell whether this is the case.
If the disc seems okay, it might be that your computer is not set to boot from the DVD or is unable to display the Ubuntu boot menu. In the former case, you'll need to redefine the boot order in the computer's BIOS, as covered in Chapter 4. To get around the latter problem, when you see the blank screen or graphical corruption, press the Escape key twice. Then press Enter. You'll see the word boot: at the top left of the screen, along with a prompt where you can enter commands. Type live and press Enter.
The Computer Is Having a Kernel Panic
The DVD starts to boot, but then the computer freezes and eventually displays a message along the lines of “Kernel Panic.”
Solution
Kernel Panic errors occur when Ubuntu cannot continue to load for various reasons. In this context, it's likely that either the DVD is faulty (or dirty) or that the PC has a hardware problem.
First, check to make sure that the DVD is clean and not scratched. If possible, try it on a different computer. If it works, then it's clearly not at fault, and your computer most likely has a hardware issue. In particular, bad memory can cause problems. Does the computer already have an operating system installed? Does it run without problems? If not, consider replacing your memory modules.
To thoroughly test your computer's memory, boot from the Ubuntu DVD, press any key when you first see an Ubuntu logo, and select the Test Memory option on the menu (use the arrow keys to move up or down in the list, and press Enter to make a selection). This will run the Memtest86 program, and any problems with your memory will be reported in the Errors column on the right side of the program screen. For more details about how to use Memtest86, see www.memtest86.com.
The DVD Starts to Boot, but the Screen Goes Blank or Corrupted
Soon after the DVD starts to boot, the computer looks like it has crashed—the screen goes blank or the display looks scrambled!
Solution
Your graphics card may be incompatible with either the framebuffer graphical mode used by Ubuntu's boot routine, or the new kernel-mode-setting technology which is now enabled by default on most common video chipsets. You can overcome these problems by following these steps:
- Reboot the computer. As soon as you see the purple background, with two small icons at the bottom of the screen —a keyboard and an accessibility symbol—press any key to access the boot menu. Choose your language and then press F6. This will bring up a list of kernel boot options. Press Escape to dismiss this menu.
- You should then see a cursor at the end of a line of text which starts with the words
Boot Options. Using the Backspace key to deletequiet splashfrom the end of the line, as shown in Figure 5-1. Then press Enter.
If the problem persists, reboot, press a key to access the boot menu, choose your language, and press F6 again to bring up the boot options. This time use the arrow and spacebar/Enter keys to select nomodeset from the list. Press Escape, and then Enter.
Additional boot options which you can try adding manually include:
i915.modeset=0(for older Intel graphics adapters)
xforcevesafb=false

Figure 5-1. Pressing F6 in the boot menu gives you the chance to choose from a menu of kernel options or edit the options manually.
The Computer Freezes During Installation
After I've selected the Install Ubuntu option on the menu, the status bar appears, but then the computer freezes.
Solution
It's possible that the power-saving feature or the advanced programmable interrupt controller (APIC) in your computer is causing problems. Boot the DVD again, and as soon as you see the purple background, with two small icons at the bottom of the screen—a keyboard and an accessibility symbol—press any key. Choose your language and then press F6 to bring up a list of kernel boot options. Using the arrow keys to navigate, and spacebar/Enter to select or deselect options, make sure that the following three options are selected:
acpi=offnoapic
nolapic
Then press Escape to dismiss the boot options menu, and Enter to boot Ubuntu.
Installer “Unrecoverable Error” Message
Booting the DVD fails with the message “The installer encountered an unrecoverable error. A desktop session will now be run so that you may investigate the problem or try installing again.”
Solution
Two solutions which can fix this problem are:
- Ubuntu's release notes suggest that you reboot the DVD, access the boot menu by pressing any key at the splash screen (when you see the two small icons at the foot of the screen), select “Try Ubuntu without installing,” and then use the “Install Ubuntu 10.04” icon when the live Desktop appears.
- Go into your computer's BIOS settings and disable the floppy disk. Alternatively, if your computer has a floppy disk controller but no floppy disk drive connected, and you may want to use that ancient technology occasionally, install a floppy disk drive and reboot.
My Notebook Display Looks Corrupted During Installation
I'm attempting to install Ubuntu on a notebook computer. After I select the Install Ubuntu option and press Enter, the screen is filled with graphical corruption, and it looks like Ubuntu has crashed. (Alternatively, the screen looks squashed, or some elements are off-center or off the edge of the screen.)
Solution
When the Ubuntu boot menu appears, press the Escape key twice and then press Enter. At the boot: prompt, type live vga=771. Then press Enter. This starts the live mode in a safe, VGA resolution. You should be able to change the resolution after the system has loaded.
I'm Using a KVM, and the Screen Looks Wrong
I'm using the same keyboard, mouse, and monitor across several computers, courtesy of a keyboard, video, and mouse (KVM) switch. When Ubuntu boots, the resolution is wrong and the graphics are corrupted. (Also, my keyboard or mouse doesn't work correctly.)
Solution
A KVM switch may not allow Ubuntu to correctly probe the attached hardware. Consider attaching the keyboard, monitor, and mouse directly to the computer for the duration of the installation. After installation is accomplished, you can reintroduce the KVM, and things should be fine.
NONE OF THESE SOLUTIONS WORK!
B. Installation Problems
After the DVD-ROM has booted in live distro mode, and you've run the installation program, you may get error messages or experience other difficulties. This section offers some solutions to common installation problems.
I'm Offered Only a Text Login
I've partitioned my disk and clicked to start the installation, after which the Installing System progress bar appears. However, it stops at a certain percentage with an error message. If I click the Continue button, everything continues, and at the end I'm offered the chance to reboot into the new installation. However, when I reboot, the Ubuntu Desktop doesn't appear. Instead, all I see is a black screen with a text-mode login prompt.
Solution
For some reason, vital Ubuntu software hasn't been correctly copied to the machine. Make sure the DVD is in your computer's drive and, at the aforementioned text-mode login prompt, type your username and press Enter. Type your password when it's requested and press Enter. Note that you will not see any characters, masked or otherwise, as you type your password. Then, at the command prompt, type the following, pressing Enter or Return after each line:
sudo apt-get update

    [At this point you'll need to type your password; do so]

sudo apt-get –f install

sudo apt-get install ubuntu-desktop
If this doesn't work, follow the instructions in the “None of These Solutions Work!” sidebar, and install Ubuntu using the Alternate Installer.
The Computer Can't Find My Hard Disk
When the Ubuntu installation program gets to the Prepare Disk Space stage, it reports that it can't find any hard disk in my computer.
Solution
There are many possible reasons for this, but here are three potential solutions that you might try in sequence:
- Select “Specify partitions manually” and click the Forward button. You should see a list of hard disks with each of its partitions displayed, and you should then be able to follow the instructions under the “Manually Edit the Partition Table” heading in Chapter 4.
- Ensure that the jumpers are set correctly on the hard disk (consult the hard disk's documentation if necessary). This is particularly worth checking if you have more than one hard disk installed in your computer. If this doesn't solve the problem, and your second hard disk is nonbootable (that is, it's used only for data storage), try temporarily removing it and then installing Ubuntu. Reconnect it after installation has completed.
- See the “None of These Solutions Work!” sidebar to learn how to use the Alternate Installer. This contains an older installation program that many consider more reliable on some problematic computers.
I See Lots of Hard Disks in the Partitioner
When I try to install Ubuntu, the Prepare Partitions screen shows one (or several) additional small hard disks, usually identified as /dev/sda or similar, followed by a number.
Solution
If you have a USB memory stick inserted, or a memory card reader with a card in it, it will be identified by the Ubuntu installer in this way. You can ignore this or, if you want to avoid confusion, quit the installer, remove the memory stick or card reader, and restart the installer program. Note that many computers that ship with Windows Vista or Windows 7 may have a System Restore partition on the main hard disk, which will also show up here.
I Have Too Many Partitions
When manually partitioning, I see an error message to the effect that I can't have more than four primary partitions.
Solution
This is a limitation in how hard disks work, not an issue with Ubuntu. A hard disk can contain only four primary partitions, but this can be extended by subdividing these further into logical partitions, as covered in Chapter 4. To resolve the problem, when creating a new partition, select Logical as the type of partition.
For more details about primary and extended hard disk partitioning, see http://en.wikipedia.org/wiki/Disk_partitioning.
C. Postinstallation Problems
Problems might also occur after you install Ubuntu. This section addresses several possible postinstallation problems. This section covers only problems that appear immediately after installation—those that prevent Ubuntu from working correctly immediately after its first boot. Issues surrounding the configuration of hardware or software are dealt with in Chapter 7.
My Monitor Resolution Is Not Recognized
I use a widescreen monitor (or a widescreen notebook). When I boot to the desktop, the resolution is set too low. When I try to switch resolutions (by clicking System ![]() Preferences
Preferences ![]() Monitors), the resolution my monitor usually runs at isn't available in the list.
Monitors), the resolution my monitor usually runs at isn't available in the list.
Solution
In a minority of cases, the open source drivers for ATI and Nvidia cards can't support certain resolutions on particular monitors, especially widescreen ones. One solution is to install proprietary graphics drivers, as discussed in Chapter 7, although you should also update your system online as soon as possible (see Chapter 8) to see if the open source graphics drivers have been updated and improved. In both cases, you'll need to configure your computer to go online, which is also explained in Chapter 7.
My Keyboard or Mouse Isn't Working
After booting up, my USB mouse and/or USB keyboard are not recognized.
Solution
Try unplugging the keyboard and/or mouse, and then reattaching them. You might also try cleaning the connections with a dry cloth or compressed air. If you find they now work, log in to Ubuntu and perform an online system upgrade. See Chapter 8 for more information about this task.
If that fails to solve the problem, you can configure your BIOS to pretend your mouse and keyboard are traditional PS/2-style devices, as follows:
- Enter the BIOS setup program by pressing Delete during the initial stages of your computer boot routine (while memory testing and drive identification are still taking place). Some computers might use a different key combination to enter BIOS setup, such as Ctrl+Insert, but that information will be displayed on your screen.
- Use the arrow keys to navigate to the Integrated Peripherals section and then look for an entry along the lines of USB Legacy Support. Set it to Enabled.
- Press Escape to return to the main menu, and opt to save the changes.
- Reboot the computer.
The Computer No Longer Boots
When I boot for the first time, I see an error message along the lines of “No operating system could be found on the hard disk.”
Solution
It seems that, for whatever reason, the Grub boot loader wasn't installed correctly. Boot from the DVD-ROM and select Try Ubuntu Without Any Change to Your Computer when prompted. When the Ubuntu desktop appears, click Applications ![]() Accessories
Accessories ![]() Terminal. This opens a command-prompt window. Type the following command:
Terminal. This opens a command-prompt window. Type the following command:
sudo grub-install sda
You will be prompted for your password. Type it and press Enter. Almost immediately you will be returned to the command prompt. You can then close the Terminal window and restart Ubuntu (click the power button icon in the top right corner of the screen and choose Shut Down). Ensure that you remove the DVD-ROM when prompted. You should find that the Ubuntu boot menu now appears when you boot.
Ubuntu Is Working, but Windows Won't Boot
After I've installed Ubuntu, Windows will no longer boot, although Ubuntu works fine. After I select Windows from the boot menu, the Windows boot procedure either freezes when “Starting Windows …” appears or the boot status bar is shown, but the Desktop never appears.
Solution
Try repairing your Windows disk by using the Windows command-line tool chkdsk. This can be done from the recovery mode of the Windows installation CD/DVD, but the instructions for how to do this vary depending on whether you're running Windows Vista or XP.
Windows Vista and Windows 7
If you're running Windows Vista or 7, follow these steps to run chkdsk:
- Insert the Windows Vista or 7 installation DVD and select to boot from it. For details on how to configure your computer to boot from the DVD, see stage 2 of the Ubuntu installation guide in Chapter 4.
- You'll see the message “Windows is Loading Files,” along with a progress bar. After this has cleared, select your language/locale settings from the Install Windows dialog box, and then click Next.
- On the next screen, don't click the Install Now button. Instead, click the Repair Your Computer link at the bottom-left corner of the window.
- In the System Recovery Options dialog box, select your Windows Vista or Windows 7 partition and then click Next.
- On the next screen, select Command Prompt.
- In the command-prompt window that appears, type the following (this assumes Vista or 7 is installed on drive
C:):chkdsk c: /R - Wait until the check has completed, and then type exit at the prompt.
- Back in the System Recovery Options dialog box, click Restart. This will reboot your computer. Be sure to eject the Windows Vista DVD before doing so.
Windows XP
If you're running Windows XP, follow these steps to run chkdsk:
- Insert the Windows XP installation CD and select to boot from it. For details of how to configure your computer to boot from the CD, see stage 2 of the Ubuntu installation guide in Chapter 4.
- You'll see status messages that Windows is loading driver files. Eventually, the Windows Setup menu will appear. Press R to start the Recovery Console.
- You'll be asked to confirm which Windows installation you would like to boot into; do so.
- You're then prompted for the administrator's password. If you don't have one, simply press Enter.
- At the command prompt, type the following:
chkdsk c: /R - Wait until the check has completed, and then type exit at the prompt. This will reboot your computer. Be sure to eject the Windows XP CD before rebooting.
You can also use Super Grub Disk (www.supergrubdisk.org) to boot the computer and examine the boot process to find and fix the problem.
I Can See Only a Text Login Prompt
When I boot for the first time, all I see is a black screen with some text at the top reading, “Ubuntu 10.04 LTS [hostname] tty1” and beneath that, “[hostname] login:.”
Solution
For some reason, the automatic configuration of your graphics card failed during installation. See the following section for instructions on configuring your GUI manually.
Graphical Problems
Although Ubuntu is extremely adept at automatically detecting and configuring your PC's graphics hardware, it sometimes gets things wrong. Such problems are characterized by one of the following:
- Ubuntu freezes when the Desktop would usually appear.
- You see onscreen graphical corruption of either text or graphics.
- The resolution is set too low or too high, and you can't change it to the correct resolution because it isn't offered.
- You see a black screen with only a text login prompt.
![]() Tip If the Desktop is off-center, and the menus can't be accessed to change the resolution, right-click somewhere on the panel and temporarily add a new main menu applet. You'll then be able to access the Preferences section from this.
Tip If the Desktop is off-center, and the menus can't be accessed to change the resolution, right-click somewhere on the panel and temporarily add a new main menu applet. You'll then be able to access the Preferences section from this.
Troubleshooting graphical problems has never been as easy as in the latest versions of Ubuntu. Ubuntu has added a system component which ensures that X.org (Ubuntu's graphical subsystem, often referred to simply as X) will run in low-graphics mode should X.org fail to start with the current display settings. In other words, it's a lot like Safe Mode that you might be used to with Microsoft Windows.
Low-graphics mode uses 640×480 or 800×600 resolution, 16 or 256 colors, and a VESA driver to operate the graphics card. Obviously, these are not optimal settings for using the Desktop, but they're chosen for their wide compatibility with most graphics hardware.
Ubuntu also features a recovery mode that will attempt to fix common problems such as poor graphics performance and broken packages. Normally when Ubuntu boots on a computer with only one operating system installed, the Grub boot loader menu is hidden from you. To use recovery mode, you will have to access the boot menu, which you do by holding down the Shift key as soon as your computer's BIOS screen has finished displaying. From the boot menu, use the arrow keys to select the second Ubuntu option, labeled Recovery Mode, and press Enter. The Linux kernel will start up in text mode, after which a Recovery Menu will appear, on a blue background. For graphics issues, choose the fourth option on the list, failsafeX. This will present you with options to run Ubuntu in low-graphics mode temporarily, reconfigure your graphics settings, and troubleshoot the error.
![]() Note On a technical level, Lucid uses the latest version of X.org, 7.5. This version of X.org is able to autodetect and autoconfigure monitors, graphic cards, and mice, which means manual customization of display settings—long the bane of Linux users around the world—is rarely necessary.
Note On a technical level, Lucid uses the latest version of X.org, 7.5. This version of X.org is able to autodetect and autoconfigure monitors, graphic cards, and mice, which means manual customization of display settings—long the bane of Linux users around the world—is rarely necessary.
Additionally, if your computer utilizes a recent Nvidia or ATI 3D graphics card, you can try installing the proprietary drivers. This is best done when the system is up and running, so follow the instructions here to get a workable graphical system and then follow the instructions in the “Installing 3D Drivers and Activating Desktop Visual Effects” section of Chapter 7. Installing a proprietary driver might be the only way to get visual desktop effects working and utilize the full resolution of a widescreen monitor.
In Ubuntu's Monitors settings (System ![]() Preferences
Preferences ![]() Monitors), you can experiment with different resolutions for your monitor, as shown in Figure 5-2. Table 5-1 shows the most common monitor resolutions. Note that flat (LCD) screens generally have only one “native” resolution at which the display is sharp, in contrast to the old CRT monitors, which can support a variety of resolutions.
Monitors), you can experiment with different resolutions for your monitor, as shown in Figure 5-2. Table 5-1 shows the most common monitor resolutions. Note that flat (LCD) screens generally have only one “native” resolution at which the display is sharp, in contrast to the old CRT monitors, which can support a variety of resolutions.

Figure 5-2. You can experiment with different resolutions in the Monitor Preferences section.
Table 5-1. Typical Monitor Resolutions
| LCD Screens | Resolution |
| 15 inches | 1024×768 |
| 17 inches | 1280×1024 |
| 19 inches | 1280×1024, 1366×768 (widescreen), 1440×900 (widescreen) |
| 20 inches | 1600×900 (widescreen), 1680×1050 (widescreen) |
| 21 inches | 1600×1200 |
| 22 inches | 1680×1050 (widescreen), 1920×1080 (widescreen) |
| 23 inches | 1920×1080 (widescreen) |
| 23 inches | 1920×1200 (widescreen) |
| 24 inches | 1920×1200 (widescreen), 1920×1080 (widescreen) |
| 26 inches | 1366×768 (widescreen), 1920×1200 (widescreen) |
| 27 inches | 1920×1080 (widescreen), 1920×1200 (widescreen) |
| 28 inches | 1920×1200 (widescreen) |
| 30 inches | 2560×1600 (widescreen) |
| 40 inches | 1366×768 (widescreen) |
Note that if you've installed proprietary drivers for an Nvidia or ATI graphics card, you'll see a different display configuration screen. The Nvidia options are shown in Figure 5-3.
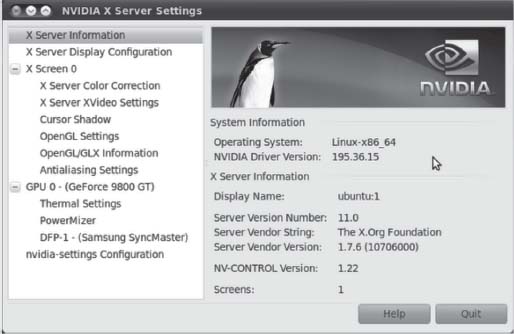
Figure 5-3. Nvidia users see a different set of options for configuring displays.
Summary
This chapter's goal was to address problems that might occur during the installation of Ubuntu. It discussed preinstallation, installation, and postinstallation issues. It also covered some of the graphical problems you may encounter.
You should now have Ubuntu installed. The next part of this book focuses on helping you get everything up and running. You'll learn essential skills and become a confident Linux user.