
C H A P T E R 22
![]()
Optimizing Your System
You'll soon find out that Ubuntu offers great performance and relatively few stability problems, especially as compared to some other operating systems. (For instance, Linux file systems generally don't need to be defragmented, unless you have NTFS or FAT32 partitions to take care of). But you can always make it even better. If you still run into any performance issues, or if you simply want to get the most out of your system, this chapter is for you. You don't have to apply the topics it discusses; by default Ubuntu already works great without applying any optimizations to it, so you can skip it if you're satisfied with how your system runs. More often than not, the chapter discusses hacks—clever methods of making things work in a nonstandard fashion. But as your experience of Ubuntu might have already taught you, such hacks are the lifeblood of Linux. One of the strengths of Linux is the ability to delve under the hood and change absolutely any aspect of the way it works. So even if the topics in this chapter are not essential, we recommend that you read the chapter carefully and consider applying its tips.
Speeding Up Booting
Since Ubuntu 6.10 (Edgy Eft), Ubuntu has been using a boot routine called Upstart that effectively optimizes itself. Upstart is responsible for starting services and has been greatly enhanced with the release of 10.04. You can learn more about Upstart at http://upstart. ubuntu.com. However, you can still tweak performance by enabling startup scripts to run in parallel instead of one after the other. This works well for multithreaded, multicore processors like Intel's Core 2 Duo and AMD's Athlon 64 X2. It won't make the computer start instantly, but it will save a few seconds each time you boot.
To configure running startup scripts in parallel, you need to edit the /etc/init.d/rc file. You can load this file into the Gedit text editor by typing the following in a terminal window:
gksu gedit /etc/init.d/rc
Look for the line that begins with CONCURRENCY near the top of the file, as shown in Figure 22-1, and change the value from none to shell. Save the file and reboot the computer. If you see no improvement in boot speed, you can change this value back to CONCURRENCY=none if you want.
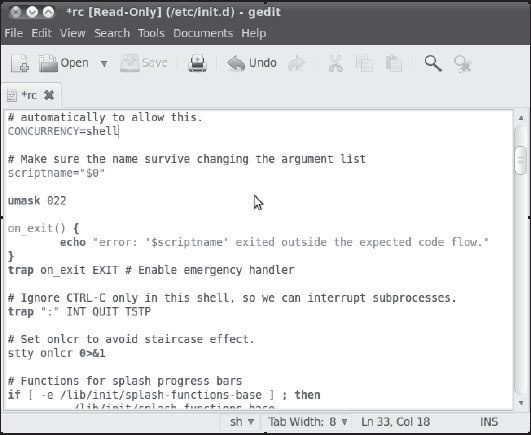
Figure 22-1. Parallel execution of scripts in the boot process can be enabled by editing the /etc/init.d/rc file.
Reducing the Boot Menu Delay
Getting rid of the Grub boot menu delay can save some waiting around in the early stages of the boot process. The delay can be reduced to 1 second or even eradicated completely. Of course, if you do that you won't be able to choose which kernel you want to load—or which operating system if you're dual-booting with Windows (but why would you want to?). Even if Ubuntu is the only OS on your computer, without the boot menu delay, you won't have the chance to boot into recovery mode or a previously installed Linux kernel from the Grub menu. So you need to consider whether this is a worthwhile time-saving measure.
The boot menu delay is stated in the /etc/default/grub file. You can load this into the Gedit text editor by typing the following in a terminal window:
gksu gedit /etc/default/grub
Look for the line that begins with GRUB_TIMEOUT and change the value to whatever you want. The units are counted in seconds, so a value of 3 equates to 3 seconds. A value of 0 (zero) will mean the boot menu won't appear at all, which is not recommended, for the reasons just mentioned. Generally speaking, a delay of 1 second (1) gives you just enough time to press a key at the appropriate time. This will cancel the countdown, meaning the boot menu will stay on your screen until you select an option.
Managing GNOME Sessions
Under Windows, you might be used to controlling which programs start up at the same time as the Desktop, by adding or deleting entries in the Start menu's Startup program group. When running Ubuntu, you can control which system applets are started automatically, as well as your personal choice of Desktop applications.
To control which programs start up with the GNOME Desktop, use the Startup Applications Preferences dialog box (gnome-session-properties). To run the program, click System ![]() Preferences
Preferences ![]() Startup Applications.
Startup Applications.
Clicking the Startup Programs tab shows the programs that start when GNOME does. You can disable a startup program in the list by unchecking the check box beside it. You definitely should have a thorough look at the applications that are started by default, as it is quite likely that you'll find some that are of no use to you at all.
You should see most or all of the following entries, though our test system had some additional elements added by other applications and services.
Bluetooth Manager: This program is responsible for the Bluetooth applet that can be used to send and receive files, browse other Bluetooth devices, set up Bluetooth services, and manage Bluetooth service settings. You can disable this applet if your system is not Bluetooth-enabled or if you just don't want to use Bluetooth at all.
Certificate and Key Storage: When using secured tools on a local network or the Internet, you'll often receive a certificate that is used to prove the identity of the remote host. You'll receive encryption keys as well. This applet allows you to store all those items in a secure place. So you had better leave it on.
Check for New Hardware Drivers: This tool scans your hardware devices and checks whether new third-party proprietary drivers can be used with them. If a new driver is compatible, this tool provides a facility to download, install, and configure the driver in your computer. If your hardware devices are working perfectly without third-party drivers, or you're uncomfortable using proprietary software, it is safe to disable this program. Otherwise, keep the tool enabled so you can receive driver bug fixes and updates.
Disk Notifications: Your hard disk by default is monitored by the SMART utility. If the current disk state is degrading, SMART will tell you about it. So it makes sense to leave the Disk Notifications option on to make sure that you are updated as soon as something goes wrong on your hard drive. And if you want to switch this option off, use System
Administration
Evolution Alarm Notifier: As its name suggests, this utility ties into Evolution's calendar function in order to notify you of events, such as an appointment that you don't want to forget. If you don't use Evolution or don't use its calendar function, this applet can be disabled.
GNOME Login Sound: As you might have guessed, this plays the Ubuntu welcome music that you hear whenever the GNOME Desktop appears. It can be disabled without causing any problems.
Network Manager: This applet manages your wi-fi, Ethernet, and VPN connections. This is useful for laptop users who connect to several wi-fi networks on the go, as discussed in Chapter 8. You should not disable this program.
NVidia X Server Setting: This program helps you to configure settings for an Nvidia graphics card. As you would have guessed, this program can only be used for Nvidia graphics cards. If you leave it on, you can use this program to change graphics display settings in a convenient way. This is in particular useful if you have to change graphics display settings often—for example, if you regularly use your computer with an external projector.
Personal File Sharing: This application allows users to enable file sharing with other users. This is a convenient program that makes it easy to work together with other users, but at the same time it's also a potential security risk. For that reason, you might want to switch this program off unless you really need it.
Power Manager: This program controls all aspects of GNOME's power management, including the useful hibernate feature that can save the contents of the system's RAM to provide quicker startup. If your computer is a notebook, this tool should be considered essential. If you have a desktop PC and are looking to save power by using hibernate, suspend, or screen blanking after a period of inactivity, you won't want to disable Power Manager. Disabling it will remove the Suspend and Hibernate options from the System
Print Queue Applet: This applet provides an interface for you to cancel or repeat printer jobs. It is also responsible for automatically setting up a printer for use when you plug in a printer. You can disable this applet if you will never print from your computer.
Remote Desktop: This background service allows other computers to connect to your computer, after an invitation has been issued (see Chapter 33). If you have no intention of remotely accessing your computer, this service can be disabled.
Secret Storage Service: This is a background component necessary for the application that generates and stores encryption keys. If you do not encrypt files and/or e-mails, this service can be disabled.
Ubuntu One: This item gives access to Ubuntu One, the Ubuntu cloud solution offered by Canonical. Switch it on if you intend to use this service.
Update Notifier: This is the Update Manager tool. You shouldn't disable this applet, because it performs the essential task of checking whether any system updates are available. It runs in the background after it is started and hardly impacts startup time at all. However, if you absolutely must prune valuable milliseconds from startup, you can disable it. You can then check for updates manually, whenever you desire, by clicking System
User Folders Update: This tool pops up during the start of your session if you have recently changed the default language (System
/homedirectory to the new default language. You can disable this tool if you don't change your language settings.Visual Assistance: This utility runs assistive technologies such as the Orca screen reader, magnifier, and Braille application if these tools were enabled in the Assistive Technologies Preferences window (System
The Options tab contains a single item labeled Automatically Remember Running Applications When Logging Out, and this is designed to get you back exactly where you started next time you launch the computer. The system has been problematic in previous versions of Ubuntu, but the developers appear to have sorted things out. The exception is Wine-based Windows applications. These didn't seem to automatically start on our test system, but everything else, including KDE applications, worked fine.
![]() Tip The Startup Programs tab of the Startup Applications Preferences dialog box contains an Add button, which lets you add any program you like to the GNOME startup. You could add Evolution, for example, so that it starts automatically whenever you log in. But it's easier to add currently running applications by using the option on the Options tab.
Tip The Startup Programs tab of the Startup Applications Preferences dialog box contains an Add button, which lets you add any program you like to the GNOME startup. You could add Evolution, for example, so that it starts automatically whenever you log in. But it's easier to add currently running applications by using the option on the Options tab.
STOP WAITING FOR AN ADDRESS
If you use an Ethernet or wi-fi connection to access your network, you might find that Ubuntu spends a few seconds during each boot acquiring an Internet address. This is characterized by a long pause while nothing seems to be happening. Therefore, one way to provide an instant speed boost is to give your computer a static IP address. Chapter 8 explains how to configure your network interface.
However, to assign a static address, you'll need to find out what IP address range your router (or other DHCP server) uses. You can discover this by looking at the router's configuration software. Sometimes this is accessed via a web browser. Look for the section of the web interface called DHCP Configuration or something similar.
![]() Note Before you start assigning a static IP address, bear in mind that static IP addresses are cool if you don't connect to other networks frequently. If you do want to switch easily between networks, don't apply this tip.
Note Before you start assigning a static IP address, bear in mind that static IP addresses are cool if you don't connect to other networks frequently. If you do want to switch easily between networks, don't apply this tip.
Normally, IPv4 local area network addresses are in the 192.168.x.x range, where x.x can be any series of numbers from 0.0 to 255.255. For instance, you may find that your router uses the 192.168.1.2-255 range. In this case, assigning a static IP address that will work with the router is simply a matter of choosing an IP address in this range. However, this router may hand out addresses sequentially from 2 upward, so it's best to choose an address it's unlikely to reach, even if you happen to have many computers connected to the network. Starting at 50 is a good idea, so you could assign the address 192.168.1.50.
Don't forget that when defining static IP addresses, you need to manually supply the gateway, subnet, and DNS addresses. In the example, the gateway would be 192.168.1.1 (the address of the LAN interface on the router), and the subnet would be 255.255.255.0. The DNS address on a small home network will probably be the same as the gateway address, because the router will usually be set to forward DNS requests by default. This isn't always the case, though, so be sure to check.
BUILD YOUR OWN READAHEAD PROFILE
Prelinking
A lot of Ubuntu software relies on other pieces of code to work. These are sometimes referred to as libraries, which is a good indicator of their purpose: to provide functions that programs can check in and out whenever they need them, as if they were borrowing books from a library.
Whenever a program starts, it must look for these other libraries and load them into memory so they're ready for use. This can take some time, particularly with larger and more-complicated programs. Because of this, the concept of prelinking was invented. By a series of complicated tricks, the prelink program makes each bit of software you might run aware of the libraries it needs, so that memory can be better allocated.
Prelinking claims to boost program startup times by up to 50 percent or more, but the problem is that it's a hack—a programming trick designed to make your system work in a nonstandard way. Because of this, some programs are incompatible with prelinking. In fact, some might simply refuse to work unless prelinking is deactivated. At the time of this writing, such programs are in the minority. However, keep in mind that prelinking can be easily reversed if necessary. Alternatively, you might want to weigh whether it's worth setting up prelinking in the first place.
Configuring Prelinking
If you decide to go ahead with prelinking, you'll need to download the relevant software from the Ubuntu software repositories. Open the Ubuntu Software Center and type prelink into the search box. Click Install.
Before you can run a prelinking sweep of your system, you need to enable it in one of its configuration files. To do this, type the following in a terminal window:
gksu gedit /etc/default/prelink
Change the line that reads PRELINKING=unknown to PRELINKING=yes. Then save the file and quit Gedit.
To run a prelinking scan of your system, simply issue this command:
sudo prelink -a
This will prelink practically all the binary files on your system and may take some time to complete. You may also see some error output, but you don't need to pay attention to it.
Prelinking was automatically added as a daily cron job when you installed it, so any new programs you add will be automatically prelinked.
Deactivating Prelinking
If you find that prelinking makes a particular application malfunction or simply stop working, you can try undoing prelinking. To do this, find out where the main binary for the program resides and issue the prelink command with the --undo command option. For example, to remove prelinking from the Gedit text editor program, you could type the following:
whereis gedit
This command will show that the gedit binary is found at the location /usr/bin/gedit in the file system. Next, attempt to undo prelinking on the binary:
sudo prelink --undo /usr/bin/gedit
However, this may not work, because some programs might rely on additional binaries on the system. Therefore, the solution might be to undo prelinking for the entire system, which you can do by typing the following:
sudo prelink -ua
After this, you should remove the prelink package, via the Ubuntu Software Center, to stop it from running again in the future (or manually remove its cron entry).
![]() Caution Prelinking is dangerous, as services and programs may stop working if you use it. If it works, your computer will be faster. But be prepared to do some additional manual work to undo prelinking for some of the programs on your computer.
Caution Prelinking is dangerous, as services and programs may stop working if you use it. If it works, your computer will be faster. But be prepared to do some additional manual work to undo prelinking for some of the programs on your computer.
OPTIMIZING THE KERNEL
Optimizing the Kernel
Whereas precompiling the kernel is not really the way to make your system faster, optimization of the kernel does help. In the file system of your computer, you'll find lots of files in the /proc/sys and the /sys directories. The /proc/sys directory relates to kernel settings, while the /sys directory is more to do with the devices you are using. Optimizing an Ubuntu system by tuning these files is specialist work, but let's just give you one example, which is about the scheduler.
The scheduler is the kernel component that handles I/O requests. Basically, the scheduler can do only one thing at a time: it can read data blocks, or it can write them. As an administrator, you can specify what it should do. The scheduler setting is applied to each device that is installed in your computer. For your hard disk, which in most cases uses the name /dev/sda, you can find the setting in the file /sys/block/sda/queue/scheduler. To display the current contents of this file, use the command cat /sys/block/sda/queue/scheduler:
root@texas:/sys/block/sda/queue# cat scheduler


noop anticipatory deadline [cfq]
As you can see, in the file you can use four different values:
noop: The scheduler doesn't do anything with I/O but gives it directly to the I/O controller. This is a useful setting if your computer uses a fast RAID controller.anticipatory: If the scheduler gets a request to read a block, it will read ahead the next couple of blocks. This optimizes your computer to do fast reads.deadline: The scheduler will wait as long as it can to write data to disk. By doing this, it can write the data as efficient as possible, which will make writes on your computer faster.cfq(complete fair queueing): This value does nothing to optimize I/O on the scheduler, which gives an equal share to read and write requests.
By default, the scheduler is set to cfq, which makes sense for desktop systems. If however you are reading data most of the time, your computer's performance will benefit from selecting the anticipatory setting. On the other hand, a computer that writes more than that it reads (which is typically not the case for a desktop computer) will benefit from setting the deadline option.
To change the setting from the command line you need to echo the new value into the configuration file. To do this, using root permissions, use for example echo anticipatory > /sys/block/sda/queue/scheduler. This immediately applies the new value:
root@texas:/sys/block/sda/queue# echo anticipatory > scheduler
After doing this, start some intensive read activity on your computer (like watching a movie file that is installed on your hard disk). You might see some improvement.
Freeing Up Disk Space
After using Ubuntu for some time, you might find that the disk begins to fill up. You can keep an eye on disk usage by clicking System ![]() Administration
Administration ![]() System Monitor and looking under the File Systems tab or using the following command in a terminal window:
System Monitor and looking under the File Systems tab or using the following command in a terminal window:
df -h
Either method will show the free space in terms of megabytes or gigabytes for each partition, also expressed as a percentage figure. If the disk does start to get full, you can take steps to make more space available.
![]() Note You can also find information about any connected disk by right-clicking it in Nautilus and selecting Properties.
Note You can also find information about any connected disk by right-clicking it in Nautilus and selecting Properties.
Emptying the /tmp Folder
An easy way to regain disk space is to empty the /tmp folder. Like its counterpart in the Windows operating system, this is the folder in which temporary data is stored. Some applications clean up after themselves, but others don't, leaving behind many megabytes of detritus. To check if this is the case on your computer, you can use the du -hs command from a terminal, which gives a summary of used disk space in this folder.
Because the /tmp folder is accessed practically every second the system is up and running, to empty it safely, it's necessary to switch to run level 1. This ensures that few other programs are running and avoids the risk of deleting data that is in use. Before doing this, make sure you've closed all programs that you are working in, because switching the run level will close all active programs! First, switch to the text console by pressing Ctrl+Alt+F1. Then enter these commands to switch to run level 1:
sudo killall gdm

sudo telinit 1
A recovery menu will appear. Select the Drop to Root Shell Prompt option. Then enter the following to empty the /tmp folder and reboot:
rm -rf /tmp/*

reboot
![]() Tip On a similar theme, don't forget to empty the Trash. This can hold many megabytes of old data. If you see an error message about permissions when emptying the Trash, you can do so manually from a terminal window. Simply type sudo rm -rf ~/..local/share/Trash/{files,info}/ to get the job done.
Tip On a similar theme, don't forget to empty the Trash. This can hold many megabytes of old data. If you see an error message about permissions when emptying the Trash, you can do so manually from a terminal window. Simply type sudo rm -rf ~/..local/share/Trash/{files,info}/ to get the job done.
Emptying the Cache of Package Files
You might also choose to clear out the Advanced Packaging Tool (APT) cache of old .deb package files. On a system that has been very frequently updated, this can free many megabytes (possibly gigabytes) of space.
You can empty the cache by typing the following command in a terminal window:
sudo apt-get clean
![]() Note The files concerned are held in the following directory:
Note The files concerned are held in the following directory: /var/cache/apt/archives/. Alternatively, you can use the apt-get autoclean command; this simply removes any package files that are no longer available on the main repository server (that is, those that are out-of-date) but leaves any that you might need in the future. Using this command is considered a much safer way to remove unwanted package files.
If you want to restore any packages later, simply locate them in the Synaptic Package Manager list, click the check box, and click Mark for Reinstallation. This will cause the package to be downloaded, installed, and configured.
Removing Unused Software
If you still need disk space, consider uninstalling unused programs. As you've learned, you can manage software through the Ubuntu Software Center.
To remove a package, search for it in the Installed Software section and click the Remove button. However, it's not a good idea to simply scroll down the list and remove anything that seems dispensable.
As always, removing software can create dependency problems, so you might find yourself limited in what software you can actually remove.
It's also worth periodically issuing the sudo apt-get autoremove command, which will remove any unused dependency packages on the system. Theoretically, these will always be removed provided apt-get autoremove is used when specifying packages to uninstall, but the way Ubuntu is updated might mean that a handful of unused dependencies hang around after they're no longer needed.
If you find you're adding and removing lots of software, you might find an application such as BleachBit (http://bleachbit.sourceforge.net/) quite useful. This can remove clutter that takes up space and could contain private information that would be best cleared away. You can download BleachBit through the Synaptic Package Manager, and it will appear under the Applications ![]() System Tools menu. You can run the software either as a normal user (which makes it harder to mess things up), or as root. To use it, simply scroll down the list and select the parts you'd like to remove (for instance, the cookies from Firefox), and then click the Delete button. Clicking the Preview button will give you a good idea of what is going to be removed and the amount of space it's likely to save.
System Tools menu. You can run the software either as a normal user (which makes it harder to mess things up), or as root. To use it, simply scroll down the list and select the parts you'd like to remove (for instance, the cookies from Firefox), and then click the Delete button. Clicking the Preview button will give you a good idea of what is going to be removed and the amount of space it's likely to save.
Summary
In this chapter, you looked at streamlining your installation of Ubuntu. This involves speeding up the boot procedure by running boot scripts in parallel, and decreasing the boot menu delay, along with a handful of other tricks. You also looked at optimizing your hard disk settings to allow for greater speed when loading and saving files.
Additionally, we discussed prelinking programs so that they load faster, recompiling the kernel so that it's optimized for your system, and freeing disk space by various means.
In the next chapter, you learn how to perform backups to safeguard your data.