Chapter 3
Links and Navigation
What You Will Learn in This Chapter
- How to link between pages of your site
- How to link to other sites
- How to structure the folders on your website
- How to link to specific parts of a page in your site
Wrox.com Code Downloads for this Chapter
You can find the wrox.com code downloads for this chapter at www.wrox.com/remtitle.cgi?isbn=9781118340189 on the Download Code tab. The code is in the Chapter 3 download and individually named according to the names throughout the chapter.
What distinguishes the web from other mediums is the way in which a web page can contain links (or hyperlinks) that you can click to be taken from one page to another page. The link can be a word, phrase, or image.
When you link to another page in your own website, the link is an internal link. When you link to a different site, it is an external linkand uses what’s known as an absolute URL—a URL that includes the full web address (like http://www.google.com/). In this chapter you learn how to create both types of links. You also see how you can link to a specific point within a page.
Although you can learn the basics of linking from one web page to another fairly quickly, you also must learn some other concepts, such as how to structure your site well by storing different files in separate folders or directories. When you understand directory structure, you can link between pages of your own site using shorter links called relative URLs.
Basic Links
You can specify a link using the <a> element. Anything between the opening <a> tag and the closing </a> tag becomes part of the link that users can click in a browser.
Linking to Other Web Pages
To link to another web page, the opening <a> tag must carry an attribute called href; the value of the href attribute is the name of the file you are linking to.
For example, here is the <body> of the page ch03_eg01.html. This page contains a link to a second page called index.html:
<body>
   <p>Return to the <a href="index.html">home page</a>.</p>
</body>
As long as index.html is in the same folder as ch03_eg01.html, when you click the words “home page,” the index.html page loads into the same window, replacing the current ch03_eg01.html page. As you can see from Figure 3-1, the content of the <a> element forms the link.

This is how the links for the download code for this chapter work. Remember that you can view the source of a page at any time to see what is going on in an HTML page. Why not try it on the download code now?
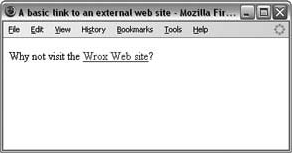
If you want to link to a different site, you can use the <a> element again, but this time you specify the full web address for the page you want to link to rather than just the filename. Here is an example of a link that takes you to an external site, in this case the Wrox website (ch03_eg02.html):
<body>
  <p>Why not visit the <a href="http://www.wrox.com/">Wrox Web site</a>?</p>
</body>
As you can see, the value of the href attribute is what you would type into a browser if you want to visit the Wrox website; the full web address is often referred to as a Uniform Resource Locator (URL). Since it includes the full web address, it’s referred to as an Absolute URL.
When creating any link, you should try to make it concise and use words that let people know what they will see if they click the link. One reason for this is that links are usually presented in a different color than the surrounding text, which makes them stick out more than the text around them. As a result, many people scan pages for links when they want to go to the next page without reading the entire page. Therefore, people are more likely to keep exploring your website if the links are easy to read and have a better explanation than just Click Here.
Many web designers also use images inside the <a> element, which is something you see in the next chapter. When you use an image, you should make sure that the image gives a clear indication of where the link takes you.
You can also use the title attribute on a link; the value of the title attribute should be a description of what the link takes you to, which displays in a tooltip when you hover over the link. This can be helpful if you do use an image for a link.
Following is a link to the Google homepage (ch03_eg03.html):
<p><a href="http://www.Google.com/" title="Search the Web with Google">Google</a>
is a very popular search engine.</p>
Figure 3-2 shows the title attribute, which gives further information about the link to the user, when the cursor is held over the link.

You should be aware that everything inside the <a> element renders as a link, including white space around the text or images. Therefore, avoid spaces directly after an opening <a> tag or before the closing </a> tag. For example, consider the following link with spaces just inside the <a> element (ch03_eg04.html):
Why not visit the<a href="http://www.wrox.com/"> Wrox Web site </a>?As you can see in Figure 3-3, these spaces in the link are underlined.

It is far better to use white space outside of these tags, like so:
Why not visit the <a href="http://www.wrox.com/">Wrox Web site</a>?Of course, you should still have spaces between words inside the <a> element; it’s just best if they are not inside the beginning or end of the link.
Linking to E-mail Addresses
You’ve probably seen a web page with an e-mail address that, when clicked, opens a new e-mail in your e-mail program, with the To field pre-populated with the e-mail address.
To create a link to an e-mail address, you need to use the following syntax with the <a> element (ch03_eg05.html):
<a href="mailto:[email protected]">[email protected]</a>Here, the value of the href attribute starts with the keyword mailto, followed by a colon, and then the e-mail address you want the mail sent to. As with any other link, the content of the <a> element is the visible part of the link shown in the browser, so this would also work:
<a href="mailto:[email protected]">E-mail us</a>.There is one drawback to putting your e-mail address on a web page: Some less scrupulous inhabitants of the web use little programs to automatically search websites for e-mail addresses. After they find e-mail addresses on websites, they start sending spam to those addresses.
Following are alternatives to creating a link to an e-mail address:
- Use an e-mail form that visitors fill out instead because automated programs cannot use contact forms to collect e-mail addresses. The drawback is that an e-mail form requires a script to run on the web server (written in a language such as ASP.NET or PHP). Chapter 6, “Forms,” provides an example of an e-mail form.
- Write your e-mail address into the page using JavaScript (covered in Chapter 11, “Working with jQuery”). The idea behind this technique is that the programs that scour the web for e-mail addresses cannot read the JavaScript version of an address.
Now that you’ve gotten a glimpse at how links are created, it’s time to put what you’ve learned into practice with a small coding exercise.
<!doctype html>
<html>
<head>
  <meta charset="utf-8">
  <title>Example Cafe - community cafe in Newquay, Cornwall, UK</title>
  </head>

<body>

  <h1>EXAMPLE CAFE</h1>
  <p>Welcome to Example Cafe. We will be developing this site throughout
     the book.</p>

  <h2>Contact</h2>
  <address>12 Sea View, Newquay, Cornwall, UK</address>

</body>
</html>
<h1>EXAMPLE CAFE</h1>
  <nav>
    <a href="">HOME</a>
    <a href="">MENU</a>
    <a href="">RECIPES</a>

</nav><h1>EXAMPLE CAFE</h1>
<nav>
<a href="">HOME</a>
<a href="">MENU</a>
<a href="">RECIPES</a>
CONTACT
</nav><h1>EXAMPLE CAFE</h1>
<div>
<a href="index.html">HOME</a>
<a href="menu.html">MENU</a>
<a href="recipes.html">RECIPES</a>
CONTACT
</div><p><a href="http://maps.google.com/maps?q=newquay">Find us on Google Maps</a></p><p><a href="mailto:[email protected]">Mail Example Cafe</a></p>
You have now seen how to create basic types of links, and you are ready to delve into the more in-depth topics. But first you need to read through a few pages that explain more about how you should organize the files in your website into folders, and also understand the anatomy of a URL (the address that identifies pages and other resources on your website).
Understanding Directories and Directory Structures
A directory is simply another name for a folder on a website; in the same way that your hard drive contains different folders, a website can be said to contain directories. Usually you find that a website contains several directories and that each directory contains different parts of a website. For example, a big site with several subsections will have a separate directory for each section of that site and also different directories for different types of files. (For example, images may live in one directory and style sheets in another.)
In the same way that you probably organize the files on your hard drive into separate folders, you must organize the files on your website into directories so that you can find what you are looking for more easily and keep control of all the files. As you can imagine, if all the files used in a website resided in the same directory, that directory would quickly get large and complicated.
Figure 3-5 shows an example directory structure for a news site with separate folders for each section. The Music section has its own folders for subsections about Features, MP3s, and Reviews. In addition, the main folder has separate folders for different types of files used in the site: images, scripts, and style sheets.

When you start to build any website, you should create a good directory structure that can withstand growth. It’s surprising how a small website can quickly grow and contain many more files than you initially imagined.
As you learn about linking, it’s helpful to learn some of the terms used in describing directory structures and the relationships between directories, so refer to Figure 3-5 to see an example directory structure:
- The root directory (or root folder) is the main directory that holds the whole of your website; in this case, it is called exampleNewsSite.com.
- A subdirectory is a directory that is within another directory. Here, Film is a subdirectory of Entertainment.
- A parent directory is one that contains another directory. Here, Entertainment is the parent directory of Arts, Film, Music, and TV.
Understanding URLs
A Uniform Resource Locator, orURL, specifies where you can find a resource on the web; you are probably most used to thinking of them as web addresses. As you move around the web, you see the URL of each web page in the address bar of your browser.
If you look at the example URL in Figure 3-6, there are three key parts to the URL: the scheme, the host address, and the filepath.

Now look at each of these in turn.
The scheme identifies the way a file transmits. Most web pages use something called the HyperText Transfer Protocol (HTTP) to pass information to you, which is why most web pages start with http://. Although you might have noticed other prefixes such as https:// when doing banking online (which is a more secure form of http) or ftp:// when downloading large files.
The host address is usually the domain name for the site, for example, wrox.com. Often you see www before the domain name; although, it is not actually part of the domain name. The host address can also be a number called an IP address.
The filepath always begins with a forward slash character and may consist of one or more directory names. (Remember, a directory is just another name for a folder on the web server.) The filepath may end with a filename at the end. Here, BeginningHTML.html is the filename:
/books/BeginningHTML.htmlThe filepath usually corresponds to the directory structure of the website, so in this case you could find the BeginningHTML.html page in a directory called books.
It is not just web pages that have their own URLs; every file on the web, including each image, has its own URL. So the filename could be an image rather than an HTML page.
If a filename is not given, the web server usually does one of three things (depending upon how it is configured):
- Looks for a default file and returns that. For websites written in HTML, the default file is usually index.html. If no filepath is specified, the server looks for a file called index.html in the root folder, or if a directory is specified, it looks for an index.html file in that directory.
- Offers a list of files in that directory.
- Shows a message saying that the page cannot be found or that you cannot browse the files in a folder.
When linking to pages on your website, you do not need to use all three parts of the URL. You can just use the filepath and filename, as you see in the next section.
Absolute and Relative URLs
An absolute URL contains everything you need to uniquely identify a particular file on the Internet. This is what you would type into the address bar of your browser to find a page. For example, to get the page about film on the fictional news site you met earlier in the chapter, you might type in the following URL. You may find it helpful to refer to Figure 3-5 to see how the filepath corresponds to the directory structure:
http://www.exampleNewsSite.com/Entertainment/Film/index.htmlAs you can see, absolute URLs can quickly get quite long, and every page of a website can contain many links. When linking to a page on your own site, however, you can use a shorthand form: relative URLs.
A relative URL indicates where the resource is in relation to the current page. The examples earlier in this chapter, which link to another page in the same directory, are relative URLs. You can also use relative URLs to specify files in different directories. For example, imagine you are looking at the homepage for the entertainment section of the following fictional news site:
http://www.exampleNewsSite.com/Entertainment/index.htmlYou want to add a link to the index pages for each of the subsections: Film, TV, Arts, and Music. Rather than including the full URL for each page, you can use a relative URL, for example:
Film/index.html
TV/index.html
Arts/index.html
Music/index.html
This is a lot quicker than having to write out the following:
http://www.exampleNewsSite.com/Entertainment/Film/index.html
http://www.exampleNewsSite.com/Entertainment/TV/index.html
http://www.exampleNewsSite.com/Entertainment/Arts/index.html
http://www.exampleNewsSite.com/Entertainment/Music/index.htmlYou might be interested to know that your web browser still requests the full URL, not the shortened relative URL, but it is the browser that is actually doing the work of turning the relative URLs into full absolute URLs.
Another benefit to using relative URLs within your site is that you can develop the site on your desktop or laptop without having bought a domain name. You can also change your domain name or copy a subsection of one site over to a new domain name without having to change all the links because each link is relative to other pages within the same site.
The subsections that follow provide a summary of the different types of relative URLs you can use.
Same Directory
When you want to link to, or include, a resource from the same directory, you can just use the name of that file. For example, to link from the homepage (index.html) to the Contact Us page (contactUs.html), you can use the following:
contactUs.htmlBecause the file lives in the same folder, you do not need to specify anything else.
Subdirectory
The Film, TV, Arts, and Music directories from Figure 3-5 were all subdirectories of the Entertainment directory. If you write a page in the Entertainment directory, you can create a link to the index page of the subdirectories like so:
Film/index.html
TV/index.html
Arts/index.html
Music/index.html
You must include the name of the subdirectory, followed by a forward slash character, and the name of the page you want to link to.
For each additional subdirectory, just add the name of the directory followed by a forward slash character. So, if you create a link from a page in the root folder of the site (such as the site’s main homepage), use a relative URL such as the following to reach the same pages:
Entertainment/Film/index.html
Entertainment/TV/index.html
Entertainment/Arts/index.html
Entertainment/Music/index.html
Parent Directory
If you want to create a link from one directory to its parent directory (the directory that it is in), use the ../ notation of two periods or dots followed by a forward slash character. For example, from a page in the Music directory to a page in the Entertainment directory, your relative URL looks like this:
../index.htmlIf you want to link from the Music directory to the root directory, you repeat the notation:
../../index.htmlEach time you repeat the ../ notation, you go up another directory.
From the Root
You can indicate a file relative to the root folder of the site. So, if you want to link to the contactUs.html page from any page within the site, use its path preceded by a forward slash. For example, if the Contact Us page is in the root folder, you just need to enter
/contactUs.htmlAlternatively, you can link to the Music section’s index page from anywhere within that site using the following:
/Entertainment/Music/index.htmlThe forward slash at the start indicates the root directory, and then the path from there is specified.
The <base> Element
As mentioned earlier, when a browser comes across a relative URL, it actually transforms the relative URL into a full absolute URL. The <base> element enables you to specify a base URL for a page that all relative URLs will be added to when the browser comes across a relative URL.
You specify the base URL as the value of the href attribute on the <base> element. For example, you might indicate a base URL forhttp://www.exampleSite2.com/ as follows:
<base href="http://www.exampleSite2.com/" />In this case, a relative URL like this one
Entertainment/Arts/index.htmlends up with the browser requesting this page:
http://www.exampleSite2.com/Entertainment/Arts/index.htmlApart from the href attribute, the only other attribute a <base> element can carry is the id attribute.
Creating In-Page Links with the <a> Element
You have already seen examples of using the <a> element to create links. The rest of the chapter looks more closely at the <a> element, and you can see how to use it to link to a specific part of a page.
As with all journeys, links have a starting point known as the source and a finishing point known as the destination. In HTML both points are called anchors. Each link that you see on a page that you can click is a source anchor, created using the <a> element. You can also use the <a> element to create markers in parts of your pages that enable you to link directly to that part of the page. These markers are called destination anchors.
Creating a Source Anchor with the href Attribute
The source anchor is what most people think of when talking about links on the web—whether the link contains text or an image. It is something you can click expecting to be taken somewhere else.
As you have already seen, any text contained between the opening <a> tag and closing </a> tag forms part of the link that a user can click. The URL the user should be taken to is specified as the value of the href attribute.
For example, when you click the words Wrox Website (which you can see are inside the <a> element), the link takes you to http://www.wrox.com/:
Why not visit the <a href="http://www.wrox.com/">Wrox Website</a> to
find out about some of our other books?
If the following link were placed on the homepage of the fictional news site you have been looking at, it would take you to the main Film page of that site:
You can see more films in the <a href="Entertainment/Film/index.html">film
section</a>.
By default, the link looks something like the one shown in Figure 3-7, underlined and in blue text.
You need to specify a destination anchor only if you want to link to a specific part of a page, as described in the next section.
Creating a Destination Anchor Using the name and id Attributes (Linking to a Specific Part of a Page)
If you have a long web page, you might want to link to a specific part of that page to save the user from having to scroll up and down the page to find the relevant part. The destination anchor enables the page author to mark specific points in a page that a source anchor can point to.
Common examples of linking to a specific part of a page that you might have seen used on web pages include:
- Back to Top links at the bottom of a long page
- A list of contents on a page that takes the user to the relevant section of that page
- Links within text to footnotes or definitions
You create a destination anchor using the <a> element again, but when it acts as a destination anchor rather than using an href attribute, you use the id attribute.
If you look at the source code of some older web pages, you may see a name attribute used as well, or even instead of the id attribute. You may remember from Chapter 1 that the name and id attributes were two of the universal attributes that most elements can carry. The id attribute is now the preferred way to create a destination anchor, but it was introduced only in version 4 of HTML, and the name attribute was used to perform the same function in previous versions.
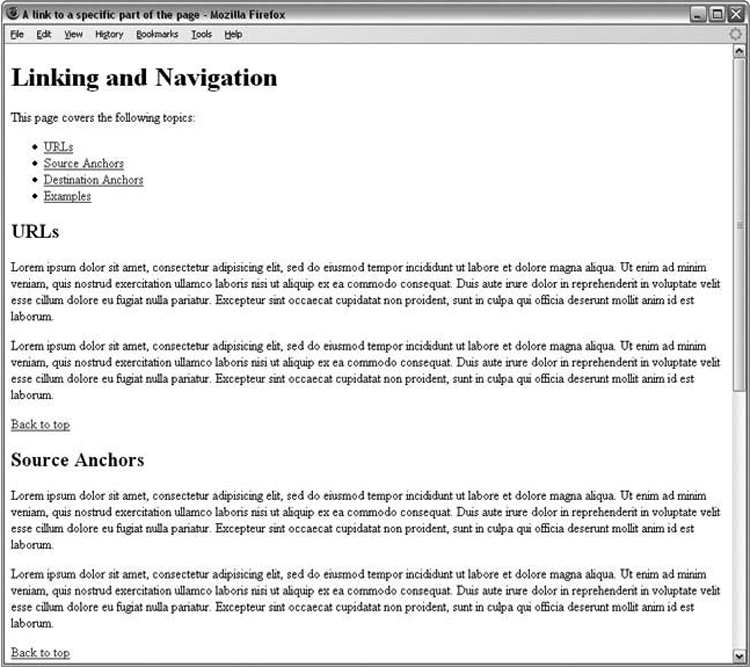
By way of example, imagine that you have a long page with a main heading and several subheadings. The whole page does not fit on the screen at once, forcing the user to scroll, so you want to add links at the top of the page that take readers directly to each of the section headings on that page.
Before you can create links to each section of the page (using the source anchors), you must add the destination anchors. Here you can see that inside the <h2> subheading elements, there is an id attribute whose value identifies each section. Remember that a page should not contain two id attributes that have the same value.
<h1>Linking and Navigation</h1>
<h2 id="URL">URLs</h2>
<h2>id="SourceAnchors">Source Anchors</h2>
<h2id="DestinationAnchors">Destination Anchors</h2>
<h2id="Examples">Examples</h2>
With destination anchors in place, you can now add source anchors to link to these sections. To link to a particular section, the value of the href attribute in the source anchor should be the same as the value of the id attribute on the corresponding destination element, preceded by a pound or hash sign (#).
<nav>
<p>This page covers the following topics:</p>
<ul>
<li><a href="#URL">URLs</a></li>
<li><a href="#SourceAnchors">Source Anchors</a></li>
<li><a href="#DestinationAnchors">Destination Anchors</a></li>
<li><a href="#Examples">Examples</a></li>
</ul>
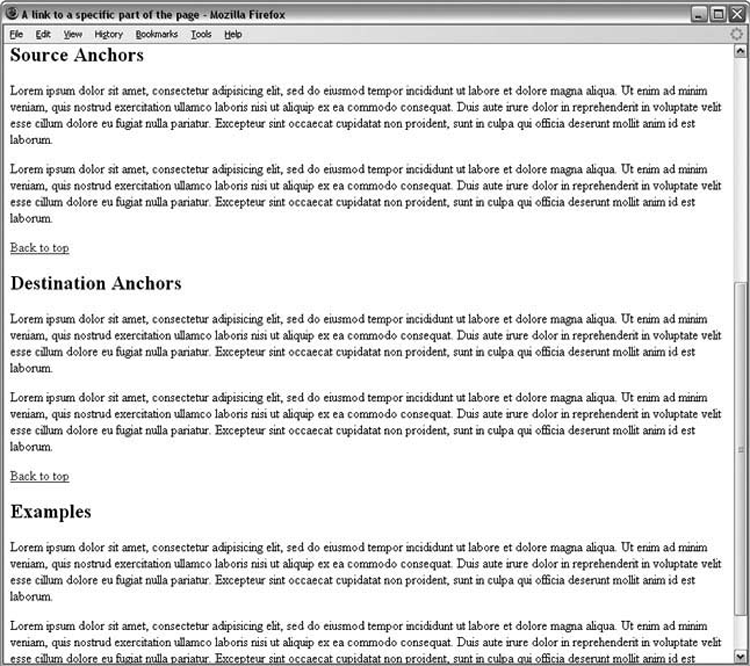
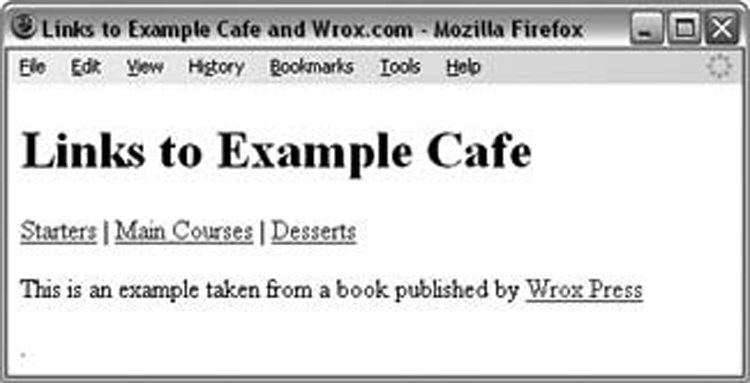
</nav>If you look at Figure 3-8, you can see how the page has several links to the sections of the page, and in Figure 3-9, you can see what happens when the user clicks the second link and is taken directly to that section of the page. You can see the full code for this example in the download code for this chapter (ch03_eg06.html).
If people want to link to a specific part of this web page from a different website (such as the section on Source Anchors), they would add the full URL for the page, followed by the pound or hash sign and then the value of the id attribute, as follows:
http://www.example.com/HTML/links.html#SourceAnchorsThe <a> Element’s Other Attributes
The <a> element can carry several attributes that you have not yet met. Although these attributes are not used as much as those covered up to this point, for completeness it is worth quickly looking at them.
The <a> element supports all the universal attributes and the following attributes:
accesskey href hreflang rel style tabindex target typeThe accesskey Attribute
The accesskey attribute creates a keyboard shortcut that you can use to activate a link. For example, if you gave the accesskey attribute a value of t, when the user presses the T key along with either the Alt key or the Ctrl key (depending on the operating system), the link activates.
In some browsers, when a link activates, the browser immediately follows the link. In some other browsers, the link is just highlighted, and the user must press the Enter (or Return) key for the link to be followed.
The accesskey attribute should be specified on the source anchor. For example, if you want to follow a link to the top of the page when the user presses the T key on his keyboard (with either Alt or Ctrl), you use the accesskey attribute like so:
<a id="bottom" accesskey="t">Back to top</a>The key is case-insensitive. You see more about the accesskey attribute (and some examples) when you look at forms in Chapter 6.
The hreflang Attribute
The hreflang attribute indicates which language the page you are linking to is written in. It’s designed to be used when linking to a page in a different language from the current document, and the value of this attribute is a two-letter language code, for example:
<a href="http://www.amazon.co.jp/" hreflang="JA">Amazon Japan</a>Appendix G, “Language Codes,” lists the language codes that are possible values for this attribute.
The rel Attribute
Use the rel attribute on the source anchor to indicate the relationship between the current document and the resource specified by the href attribute. The major browsers do not currently make any use of this attribute; although, automated applications could be written to use this information. For example, the following link uses the rel attribute to indicate that its destination is a glossary of terms used in the document:
For more information, please read the  <a href="#glossary"
rel="glossary">glossary</a>.
Table 3-1 shows possible values of the rel attribute.
Table 3-1: Possible Values of the rel Attribute
| Value | Description |
| toc (or contents) | A document that is a table of contents for the current document |
| Index | A document that is an index for the current document |
| Glossary | A document containing a glossary of terms that relate to the current document |
| Copyright | A document containing the copyright statement for the current document |
| Start | A document that is the first in a series of ordered documents, of which this is one document |
| Next | A document that is next in a series of ordered documents, of which this is one document |
| prev (or previous) | A document that is previous in a series of ordered documents, of which this is one document |
| Help | A document that helps users understand or navigate the page and/or site |
| Chapter | A document that acts as a chapter within a collection of documents |
| Section | A document that acts as a section in a collection of documents |
| Subsection | A document that acts as a subsection in a collection of documents |
| Appendix | A document that acts as an appendix in a collection of documents |
| Author | Identifies a URL that serves as the homepage of the author of an article |
| Me | Indicates the author of the current document is also the owner of the associated URL |
The tabindex Attribute
To understand the tabindex attribute, you need to know what it means for an element to gain focus. Any element that a user can interact with can gain focus. If users click the Tab key on their keyboard when a page loads, the browser moves focus between the parts of the page that users can interact with. The parts of the page that can gain focus include links and some parts of forms (such as the boxes that enable you to enter text). When a link receives focus, and the users press Enter on the keyboard, the link activates.
You can see focus working on the Google website; if you repeatedly press the Tab key, you should see focus pass between links on the page. After it has passed across each link in turn, it goes to the box where you enter search terms, across the site’s buttons, and usually ends up back where you typed in the URL. Then it cycles around the same elements again as you keep pressing Tab.
The tabindex attribute enables you to specify the order in which, when the Tab key is pressed, the links (or form controls) obtain focus. So, when the user clicks the Tab key, you may want the focus to land on the key items on the page that the user might want to interact with (skipping some of the less-used features).
The value of the tabindex attribute is a number between 0 and 32767. A link whose tabindex attribute has a value of 1 receives focus before a link with a tabindex value of 20. (And if a value of 0 is used, the links appear in the order in which they appear in the document.) Chapter 6 shows some examples of the tabindex being used with forms.
Elements without a tabindex receive focus after an element with a tabindex set in the order they appear in the document.
The target Attribute
By default, when you use the <a> element to create a link, the document you are linking to opens in the same browser window. If you want the link to open in a new browser window, you can use the target attribute with a value of _blank.
<a href="Page2.html" target="_blank">Page 2</a>The title Attribute
As mentioned at the start of the chapter, you should use a title attribute on any links that contain images. It can also help provide additional information to visitors in the form of a visual text tooltip in most browsers or an auditory clue in voice browsers for the visually impaired. Figure 3-2 near the beginning of this chapter showed you what the title attribute looks like in Firefox when a user hovers over the link.
The type Attribute
The type attribute specifies the MIME type of the link. MIME types can be compared to file extensions but are more universally accepted across different operating systems. For example, an HTML page would have the MIME type text/html, whereas a JPEG image would have the MIME type img/jpeg. (Appendix H, “MIME Media Types,” includes a list of common MIME types.)
Following is an example of the type attribute used to indicate that the document the link points to is an HTML document:
<ahref="index.html" type="text/html">Index</a>Theoretically, the browser could use the information in the type attribute to either display it differently or indicate to the user what the format of the destination is; although none use it at present.
<!doctype html>
<html>

<head>
  <title>Example Cafe - community cafe in Newquay, Cornwall, UK</title>
</head>
<body>
  <h1>EXAMPLE CAFE</h1>
  <p>Welcome to Example cafe. We will be developing this site throughout
     the book.</p>

  <h2>Menu</h2>
  <p>The menu will go here.</p>
</body>
</html> <nav>
<a href="index.html">HOME</a>
MENU
<a href="recipes.html">RECIPES</a>
<a href="opening.html">OPENING</a>
<a href="contact.html">CONTACT</a>
</nav><h1 id="top">Example Cafe Menu</h1>
<h2 id="starters">Starters</h2>
<h2 id="mains">Main Courses</h2>
<h2 id="desserts">Desserts</h2>
<p><a href="#starters">Starters</a> | <a href="#mains">Main Courses</a> | <a
href="#desserts">Desserts</a></p><p><small><a id="vegetarian">Items marked with a (v) are suitable
for vegetarians.</a></small></p><h2><a id="starters">Starters</a></h2>
<ul>
<li>Chestnut and Mushroom Goujons (<a href="#vegetarian">v</a>)</li>
<li>Goat Cheese Salad (<a href="#vegetarian">v</a>)</li>
<li>Honey Soy Chicken Kebabs</li>
<li>Seafood Salad</li>
</ul>
<p><small><a href="#top">Back to top</a></small></p>
<h2><a id="mains">Main courses</a></h2>
<ul>
<li>Spinach and Ricotta Roulade (<a href="#vegetarian">v</a>)</li>
<li>Beef Tournados with Mustard and Dill Sauce</li>
<li>Roast Chicken Salad</li>
<li>Icelandic Cod with Parsley Sauce</li>
<li>Mushroom Wellington (<a href="#vegetarian">v</a>)</li>
</ul>
<p><small><a href="#top">Back to top</a></small></p>
<h2><a id="desserts">Desserts</a></h2>
<ul>
<li>Lemon Sorbet (<a href="#vegetarian">v</a>)</li>
<li>Chocolate Mud Pie (<a href="#vegetarian">v</a>)</li>
<li>Pecan Pie (<a href="#vegetarian">v</a>)</li>
<li>Selection of Fine Cheeses from Around the World</li>
</ul>
<p><small><a href="#top">Back to top</a></small></p>
Advanced E-mail Links
As you saw at the beginning of the chapter, you can make a link open up the user’s default e-mail editor and automatically address an e-mail to you—or any other e-mail address you give. This is done like so:
<a href="mailto:[email protected]">[email protected]</a>You can also specify some other parts of the message, such as the subject, body, and e-mail addresses that should be cc’d or bcc’d on the message.
To control other properties of the e-mail, place a question mark after the e-mail address and then use name/value pairs to specify the additional properties. The name and the value are separated by an equal sign.
For example, to make the subject line of the e-mail “Inquiry,” you would add the subject property name followed by an equals sign (=), and then the term Inquiry, like so:
<a href="mailto:[email protected]?subject=Inquiry">You can specify more than one property by separating the name/value pairs with an ampersand (&). Here you can see that the subject and a CC address have been added in:
<a href="mailto:[email protected]?subject=HTML&[email protected]"></a>Table 3-2 includes a full list of properties you can add.
Table 3-2: Available E-mail Link Properties
| Property | Purpose |
| Subject | Adds a subject line to the e-mail; you can add this to encourage the user to use a subject line that makes it easier to recognize where the mail has come from. |
| Body | Adds a message into the body of the e-mail; although you should be aware that users could alter this message. |
| cc | Sends a carbon copy of the mail to the cc’d address; the value must be a valid e-mail address. If you want to provide multiple addresses, you simply repeat the property, separating it from the previous one with an ampersand. |
| bcc | Secretly sends a carbon copy of the mail to the bcc’d address without any recipient seeing any other recipients; the value must be a valid e-mail address. If you want to provide multiple addresses, simply repeat the property, separating it from the previous one with an ampersand. |
If you want to add a space between any of the words in the subject line, you should add %20 between the words instead of the space. If you want to create a line break in the body of the message, you should add %0D%0A (where 0 is a zero, not a capital O).
While an e-mail link can create an e-mail with all these properties set, it does not stop users from editing the values in their e-mail program.
It is common practice to add only the e-mail address in e-mail links. If you want to add subject lines or message bodies, you may decide to use an e-mail form instead, like the one you see in Chapter 6. (Although these do require a script on the server that can process the form and send the e-mail.)
Summary
In this chapter you learned about links. Links enable users to jump between pages and even between parts of an individual page (so that they don’t have to scroll to find the place they need).
You have seen that you can use the <a> element to create source anchors, which are what most people think of when you mention links on the web. The content of the source anchor is what users can click—and this should usually be an informative, concise description of what users see when they click the link (rather than text such as “click here”), or it can be an image (as you see in Chapter 4, “Images, Audio, and Video”).
You also learned how to link to specific parts of a page using the id attribute.
Along the way, you learned more about URLs, in particular the difference between an absolute URL, as with those that appear in the address bar of your browser, and relative URLs, which describe where a resource is in relation to the document containing it. Learning the different ways in which relative URLs can be used can also be helpful as you head to the next chapter and learn about adding images and other objects into your documents.
Exercises
The answers to all the exercises are in Appendix A, “Answers to Exercises.”
What You Learned in This Chapter
| Topic | Key Takeaway |
| Links | Links are the connective tissue of the web and are the single defining feature that originally sets the web apart from other media. |
| URLs | URLs are the addressing system of the web. In the context of building web pages there are two kinds of links: absolute URLs and relative URLs. Absolute URLs represent the complete web address. Relative URLs are pieced together using the existing site context as a starting point. |
| In-page links | Using the id attribute and the URL hash you can link to specific points on a web page. |