
5
Creating Marketing Emails
For a lot of companies, using marketing solutions and marketing emails are key features in their marketing efforts. Dynamics 365 Marketing has also put a lot of effort into marketing emails.
In this chapter, we’re going to learn how we can use different marketing emails to send to our customers. We’re going to take a look at the differences between Real-time marketing emails and Outbound marketing emails. We’re also going to look at creating email templates and how we can send our marketing emails from Dynamics 365 Marketing. Finally, we’re going to go through our analytics so that we know how we can improve the performance of our emails.
In this chapter, we’re going to go through the following:
- Creating marketing emails
- Email templates
- Sending emails
- Analytics
Creating marketing emails
According to Litmus (https://www.litmus.com/resources/email-marketing-roi/), an email drives more ROI than any other marketing channel – $36 for every dollar spent. No wonder most companies prefer to use emails in their marketing strategy. Sending emails and creating good emails are important features of any marketing automation system. Before you can start sending your emails, you will first have to create your emails. In this section, we’re going to go through everything we need to know to create high-performing emails.
Getting started with emails in Dynamics 365 Marketing
Because there are two different marketing areas, there are two different ways of creating your marketing emails:
- If you are using Real-time marketing, you will find your emails under Channels as shown in Figure 5.1:
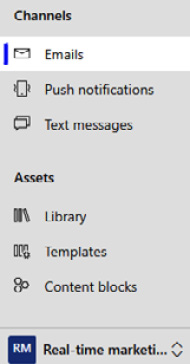
Figure 5.1 – Emails under Channels in Real-time marketing
- If you are using Outbound marketing, you will find marketing emails under Marketing execution as shown in Figure 5.2:
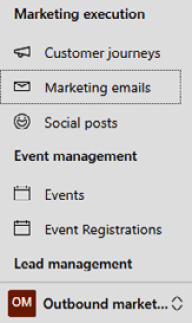
Figure 5.2 – Marketing emails under Marketing execution in Outbound marketing
Let’s look at the necessary steps for getting started with emails in the outbound area of Dynamics 365 Marketing:
- To create and start designing new emails, you have to create a new email. That’s done in the action bar, at the top. You will find + New as shown in Figure 5.3:

Figure 5.3 – The + New button in the action bar for creating a new email
- Click + New and a new popup will appear where you can select email templates as shown in Figure 5.4:

Figure 5.4 – Selecting an email template
- If you do not select any templates, you will start with a blank canvas and can start creating your own marketing emails.
- Now, you need to define the settings. You can find the settings as shown in Figure 5.5:

Figure 5.5 – Settings area of email

Figure 5.6 – Settings of the email
You can also edit the base email settings, such as the template, compliance, email content type, and language. More importantly, you can specify whether the message is a commercial or transactional email, as shown in Figure 5.7. A commercial email will need to follow the GDPR and privacy rules and can’t be sent to recipients in Europe who haven’t signed up for emails. Transactional emails can always be sent to customers. A transactional email can, for example, include customer receipts. You can also automatically generate plain text as shown in Figure 5.7 or create your own plain text:
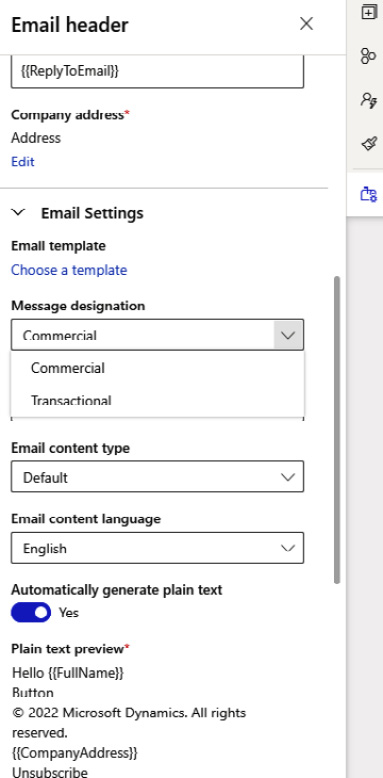
Figure 5.7 – Message designation and Automatically generate plain text
Now that we’ve gone through how you can create new emails, it’s time to start adding content. Content is added to an email by using elements. Let’s go through the different elements and how these are used.
Elements: creating content
The elements in marketing emails are almost the same as the ones we went through in the previous chapter on marketing forms. You can add four different types of elements in both marketing areas:
- Text
- Image
- Button
- Divider
In Figure 5.8, you can see how these different elements look in an email:
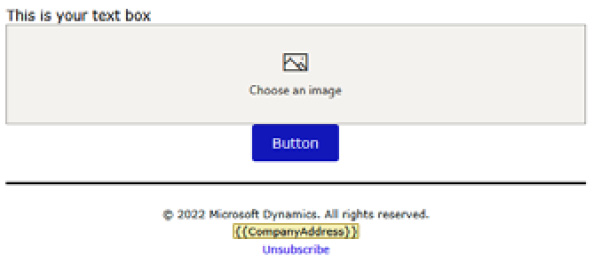
Figure 5.8 – Text, an image, a button, and a divider in a marketing email
Text
The text area is where you write the actual email. Everything you want your customers to know in the text should be in a text element. You can have several different textboxes or you can put everything in one textbox. You will most likely use text blocks in every email you send.
Images
Images can be a good way of creating beautiful emails. Most likely, you will always want to add your company’s logo to your marketing email. If own a clothing shop and you want to show your clothes, for example, the use of images will also be very important here. You need to remember that to use an image, it will have to be in the system library; you can add it in advance or you can add it when you create your email. You can also reference an item that is stored in another public system with the use of the image URL.
Buttons
A lot of companies want to add a call-to-action in their email and a common way of doing that is to use a button. You can change the color text and visual style of a button. You can also specify where the clicks should lead, as shown in Figure 5.09:
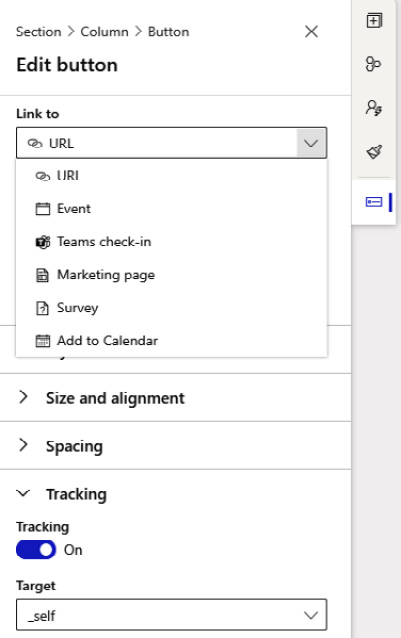
Figure 5.9 – Where the button should link to
You can add a link to the following:
- URL: The URL can be a link to any website.
- Event: The Event link connects to an event in Dynamics 365 Marketing.
- Teams check-in: If you have an online event that you are hosting in Microsoft Teams, you can use the Teams check-in option. When you select the Teams check-in option, you have to specify whether this is a check-in for the entire event or a session.
- Marketing page: Maybe you want to connect to one of the marketing pages we created in the previous chapter – this is also available as a link.
- Survey: You can link to a Dynamics 365 Customer Voice survey. We are going to go through Customer Voice in Chapter 9, Dynamics 365 Customer Voice.
- Add to Calendar: The Add to Calendar link is also connected to events. You can let your participants add the full event, the event and sessions they’ve registered for, or just the sessions they’ve registered for.
You can also set whether you want to enable tracking on the button to see whether your recipients have clicked on the button in the email.
Dividers
The divider in the email designer is a way to add more space to your email. It could be a solid line, a dotted line, or an invisible divider, just to make your email less compact and easier to consume for the reader.
QR codes
In Chapter 8, Managing Events, we’re going to go through managing events, and QR codes can be a vital part of this. When you use Dynamics 365 Marketing for events, you can embed an event QR code into your marketing email. If you want to register the people that have arrived, you do this by scanning the QR codes. The QR codes must be connected to your event and each participant will have their own unique QR code.
Additional elements in outbound emails
In addition to these, in outbound marketing emails, you can also use these three elements:
- Videos
- Code
In Figure 5.10, you can see how these different elements are used in a marketing email:

Figure 5.10 – Videos, code, and QR codes in a marketing email
Videos
The video element is only available in Outbound marketing emails. This means you can only use the outbound library and cannot store the videos in your own system. You can add a video from your outbound library or you can add it from an external URL. You can also edit the size and alignment, style, and spacing of the video. Because the videos are not stored in the email as it is sent, it will not impact the size of the email.
Code
In the code section, you can add code elements. Maybe you have two different prices for your event – one early bird and one regular price. You want to send the email once but show the correct price depending on what day it is. You can then add some code that means before one date, it shows one price, and after it, it shows another, regular price. This way, you do not have to send out two different emails but can still show the correct price to your customers.
Layout section types
In marketing emails, you have similar layout types as you do for marketing forms and pages. You have six different layouts to choose from:
- 1 column
- 1:2 column
- 2 column
- 2:1 column
- 3 column
- Custom type with up to 8 columns
To find the layouts, you need to go to Elements and then Layout section types in the email. You can see the different layouts for an email in Figure 5.11:

Figure 5.11 – The different layouts for an email
Content blocks
We talked about content blocks in the previous chapter when learning about marketing forms. Content blocks are a good way of making sure your content follows company design guidelines. You probably have a header that you always want to use in every marketing email you send out. This header can contain your logo and some information about your company with links to your website. These content blocks should always look the same and should be included in every single email you send out. Creating these as content blocks will make the work easier for your users.
General styles
In the General styles tab, you can set the maximum width layout and choose the font family, body text size, text color, and email background, as shown in Figure 5.12:

Figure 5.12 – General styles for a marketing email
It’s important to know here that you cannot add your own fonts to the general styles; you must use the HTML editor.
HTML editor
If your company has special requirements that you cannot fulfill using General styles, you can do so in the HTML editor. It is very important that you do not tamper with the HTML code if you do not know what you are doing. Tampering with the HTML code could destroy your entire email. Some marketers are used to using HTML code and will prefer this over the drag-and-drop editor. You can see the HTML editor in Figure 5.13:

Figure 5.13 – The HTML editor
If you use a custom font in your design guides, you can change it in the HTML editor. You then need to remember to make those changes in every email you send out or add them to your email templates.
Additional features in real-time emails
Real-time marketing is the future. Moving forward, Microsoft is continuing to work with real-time marketing, and all new features will only be available in real-time marketing. Because of this, there are some differences when creating your marketing emails. Let us go through the additional features you get in Real-time marketing emails.
Personalized emails
In emails that you send to your company’s customers, you might want to add the recipient’s name to the email, or maybe the name of the salesperson responsible. These fields will differ from recipient to recipient:
- To be able to do this in Dynamics 365 Marketing, you must click Personalization as shown in Figure 5.14:
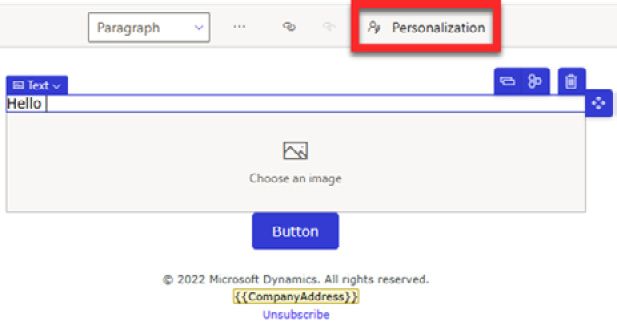
Figure 5.14 – Personalization in Real-time marketing
- After clicking on the Personalization button, I get a dropdown where I can see the dynamic text available to me, as shown in Figure 5.15, and I can add new dynamic text:
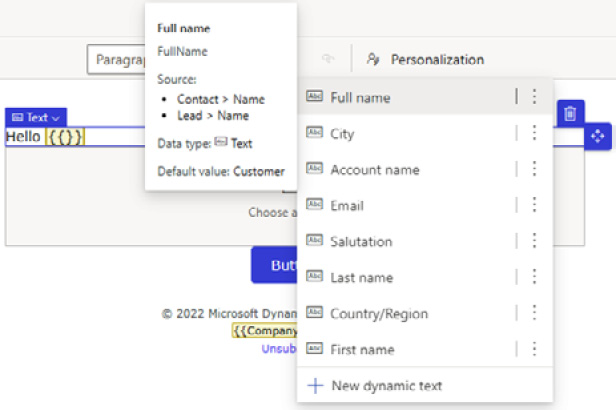
Figure 5.15 – Adding personalization
- When you click on the Full name field, you will see a new popup where you’re asked whether your audience is Contact or Lead as shown in Figure 5.16:
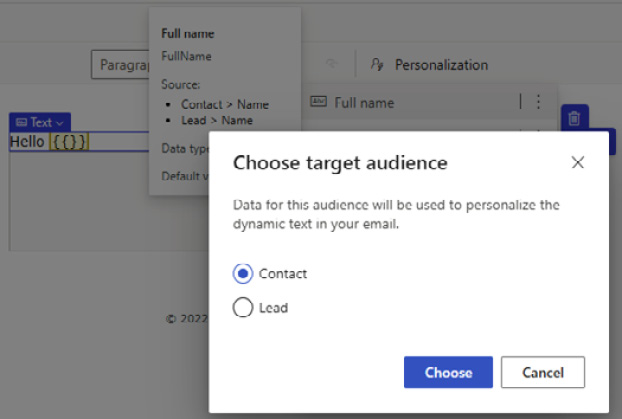
Figure 5.16 – Choosing a target audience
- When you’ve chosen Contact or Lead, the personalization for FullName is added to your text area as shown in Figure 5.17:

Figure 5.17 – FullName in Personalization
When your email is sent, each contact will see their name after Hello. If for some reason, someone doesn’t have their name registered, then they’ll get Hello Customer.
Conditional content
I often get asked by customers to show different content to different users in the same email. One customer might be interested in product A and the other in product B. I do not want to send the same content to both, but I also don’t want to create two emails. I can utilize conditional content to send customized content to both customers in one email.
When you add an element to the real-time email, you click on the Enable conditional content button as shown in Figure 5.18:

Figure 5.18 – Enabling conditional content on an image
On the right-hand side, a new pane will open where you can set your conditions. You can create a condition based on an attribute or segment membership (whether someone is or isn’t part of one) as shown in Figure 5.19:

Figure 5.19 – Adding a condition to an image
When you’ve clicked Save, your condition will have been registered as shown in Figure 5.20:
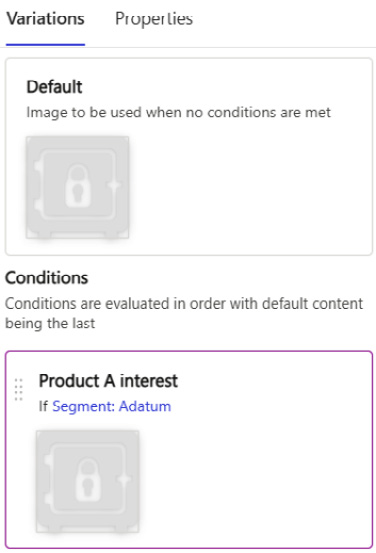
Figure 5.20 – Conditions registered
As you can see, the image is still the same. You must go to the Properties tab and replace the picture with the alternative picture you want to show the customers that matches the conditions as shown in Figure 5.21:
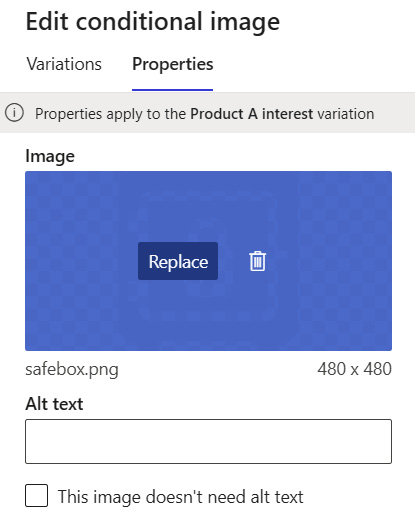
Figure 5.21 – Changing the image for customers that met the condition
Once you’ve changed the image and gone back to Variations, you can see in Figure 5.22 that your conditions image has been updated – customers that meet the criteria will see the image and the customers that don’t meet the criteria will see the default image.

Figure 5.22 – Different picture for default customers and customers that match the condition
With this condition, you don’t have to use code to show different users different content in your email. If you use advanced personalization, you must go into the HTML code to make the changes.
Brand profiles
Some customers have multiple brands they’re managing in one environment. It’s possible to define several brand profiles. In the brand profiles, you can add senders, where you define the sender and the reply email. You can add social media links to emails. You can easily change the brand profiles in the top-right corner as shown in Figure 5.23:

Figure 5.23 – Brand profile
Additional features in outbound emails
As of the wave 2 release, there is one feature that you can find in Outbound marketing emails and not in Real-time marketing emails. In Real-time marketing, you do A/B testing through the marketing journey, not the email. Let’s go through how you can do A/B testing in an Outbound marketing email.
A/B testing
On the right-hand side, you can find A/B testing as shown in Figure 5.24:

Figure 5.24 – A/B testing in an outbound email
In an A/B test, you define what you want to test:
- Header (Subject, Email from)
- Email body
- Full content
Depending on which test type you choose, you can make small changes to the email, or create two completely different emails to see which performs best.
To send the email and select the best option, you add the email to your outbound customer journey and enable A/B testing as shown in Figure 5.25:

Figure 5.25 – A/B testing from an outbound customer journey
As you can see in Figure 5.25, you can say how you want to distribute the email and what the winning metric should be – either Click-through rate or Open rate.
Now that we’ve gone through the unique features in both Outbound marketing and Real-time marketing, let’s see how we can make sure our email looks good and will be received in our customers’ inboxes.
In addition to A/B testing, you must do the personalization a bit differently in Outbound marketing. Let’s go through how this works in Outbound marketing.
Personalized emails
To make the same personalization as we went through for Real-time marketing, we have to go through some more steps in Outbound marketing.
We click on the same Personalization button in the email, but we get a different window with different options as you can see in Figure 5.26:

Figure 5.26 – Adding personalization to an outbound email
There are three steps to add the Full name details as a personalization:
- You select the table and the required Contact.
- Choose Select relationship. Here, you have to know your data to understand where you can find the different information. We want the full name from the contact table, so we select No relationship (Select a field from Contact).
- The last step is to find the column we want to add as the personalization. Here, we selected Full Name.
The Full Name column is now added as a personalization as shown in Figure 5.27:

Figure 5.27 – The personalization for Full Name – contact.fullname is added
Checking the content
Before you start looking at your email to see whether it’s acceptable to send to customers, you need to check your content. You do that by clicking on Check content in your ribbon as shown in Figure 5.28:
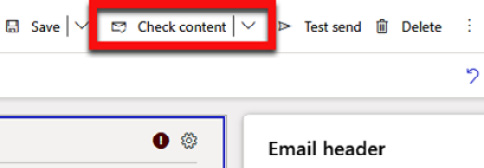
Figure 5.28 – Check content
If everything is in order, your email will pass the check. If not, you’ll get a notification saying you have this many notifications and to view the errors as shown in Figure 5.29:
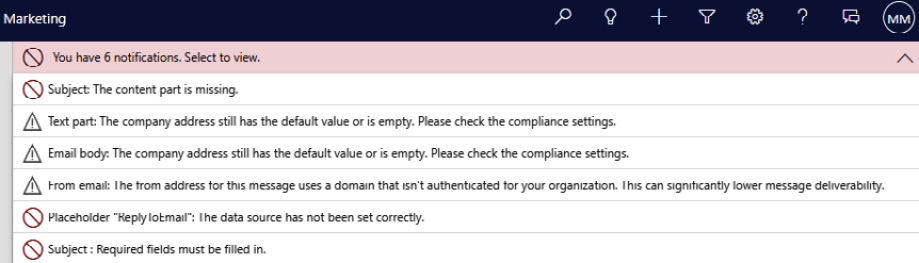
Figure 5.29 – Notifications after content is checked
When everything you have been notified about is fixed, then it’s time to check your accessibility.
Accessibility checker
Every email you send should be accessible to everyone. You never know whether the recipient has any kind of disability that makes reading your email harder for them. To check accessibility, click on the arrow next to Check content and select Accessibility checker as shown in Figure 5.30:
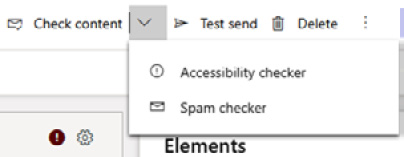
Figure 5.30 – Accessibility checker
When you’ve clicked on Accessibility checker, you will see a side panel that will show you the issues you have in your email as shown in Figure 5.31:

Figure 5.31 – Accessibility checker issues
You can fix any accessibility issues from within the checker. You click on the issue and it will tell you exactly how to fix the problem as shown in Figure 5.32:

Figure 5.32 – Fixing issues in accessibility checker
When you are done with Accessibility checker and have fixed all the issues in your email, it’s time to see what your spam score will be like.
Spam checker
We’ve all gotten them – spam emails. Make sure your recipient’s email servers don’t see you as a spammer and run Spam checker as shown in Figure 5.33:
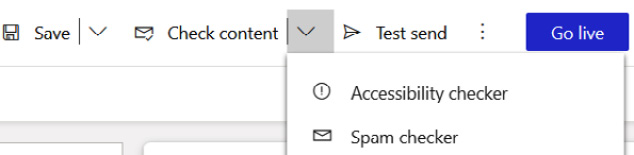
Figure 5.33 – Running Spam checker
Spam checker will now run through your email and show you how much of a risk it is that email servers will tag the email as spam as shown in Figure 5.34:

Figure 5.34 – Spam checker results
Low risk is what you want as a result. If you do get a medium or high chance of spam, you will get suggestions on how you can fix it, and you should go through the details and try to get as low a score as possible.
Now that you’ve gone through Accessibility checker and Spam checker, you know that your email is ready to be previewed and tested.
Preview and test
Before you go live with your marketing email, you need to make sure it will look good to your recipients. You must preview your email to make sure it looks good. When you click on the Preview and test tab, you’ll see a preview of your email as shown in Figure 5.35:

Figure 5.35 – The Preview and test tab for the email
In this email, we’ve used the customer’s full name as a personalization, by clicking Edit sample data, highlighted in Figure 5.36:

Figure 5.36 – Edit sample data
By doing this, a new section will open on the right-hand side, where I can edit the sample data and add the test data I want for this email, as shown in Figure 5.37:
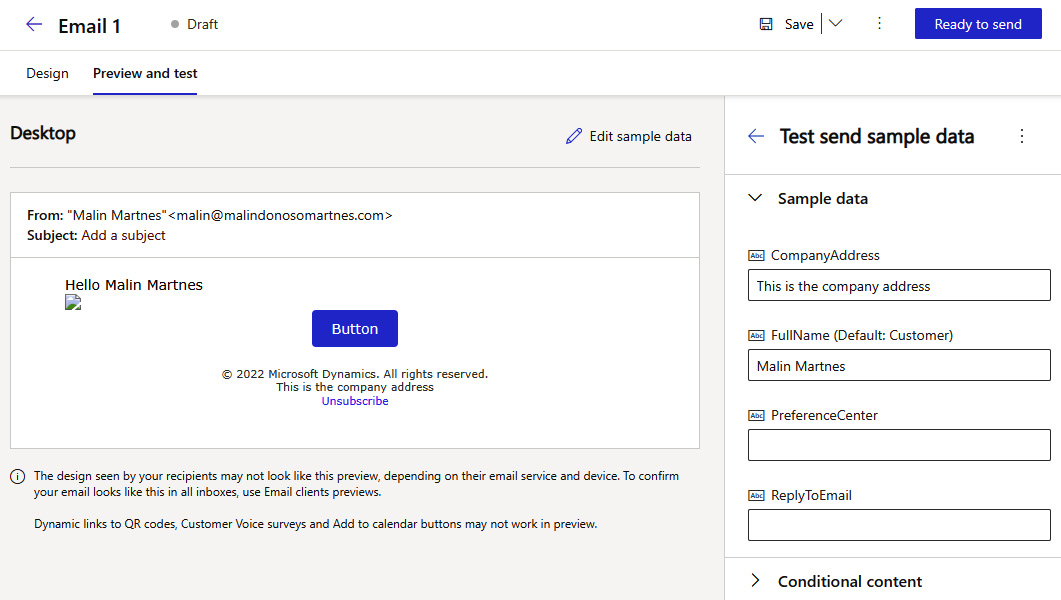
Figure 5.37 – Edited sample data
This way, I can test different types of data and make sure everything looks good when it’s sent. For example, I can test that even the longest or shortest names will not look bad in an email.
In addition to testing the sample data, you can also preview the different screen sizes as shown in Figure 5.38:
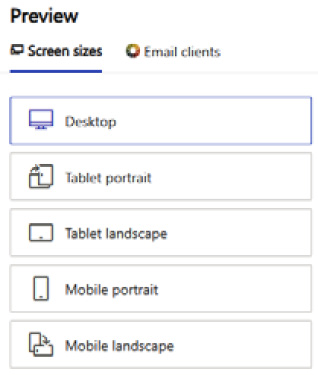
Figure 5.38 – Different screen sizes to preview
Be aware that this preview just shows you how the email will look in your system. It does not preview how it will look in the different email services and devices. For that type of preview, you use the Litmus preview.
Litmus preview
If you have worked with marketing emails previously, you know how difficult it is to find out how your email looks in your customer’s inbox. I remember creating marketing emails and wondering how they would look for each email service. We would test send the email to all our own accounts and try them out on different applications.
Even doing that, we always had some email services or devices that we could not test out our email on. If you are looking at an email in the Outlook app on your laptop, it will look different than if you look at the email on Outlook on your Android phone. If your customers are using old legacy systems or are using other email providers, you want your email to look good in every inbox.
Litmus integration will make your life much easier. You will have to enable the integration in your Default settings area, as shown in Figure 5.39, before you can use it:

Figure 5.39 – Enabling Litmus integration
Once enabled, you will have a fixed number of previews per tenant per month, defined by your license. You can always see how many you have and how many you’ve used in the Settings | Default settings | Quota limits options. If you want to add more inbox previews, you can buy these directly from the Litmus web page (find pricing information here: https://www.litmus.com/pricing/).
Now, we’ve created functional and hopefully pretty emails from blank forms. Your company probably has certain ways they want the emails to look. One of the easiest ways of doing that is by using email templates. Let’s take a look at how we can create them.
Email templates
Before a user starts creating their own emails, they should create company design guidelines as a template. You design the emails the same way as you’ve learned in this chapter, but let us see where we can create these in Real-time marketing.
Creating Real-time marketing templates
You can create your Real-time marketing templates under Assets | Templates and by clicking +New on the ribbon, as you can see in Figure 5.40:

Figure 5.40 – Creating Real-time email marketing templates
The emails will then have to be created the same way as we’ve already gone through in this chapter.
Now, let’s see where we can create an Outbound marketing email template.
Creating outbound marketing templates
You’ll find the email templates under Marketing templates in Outbound marketing, as shown in Figure 5.41:
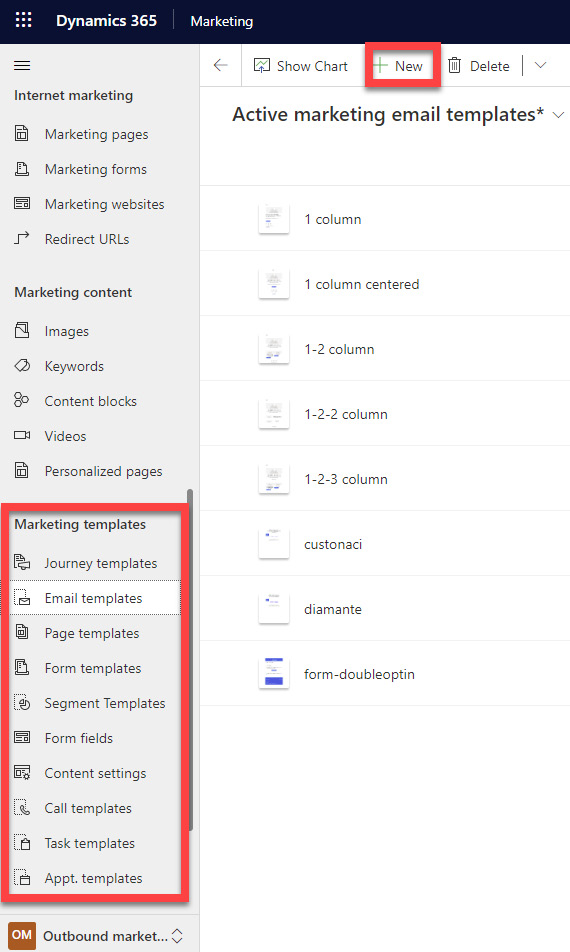
Figure 5.41 – Outbound marketing email template
In Outbound marketing as well as Real-time marketing, you can create your templates the same way you create your regular emails. Remember that the Outbound marketing and Real-time marketing areas are different, so you cannot use a template from one area in the other area. If you’re using one of the areas and want to move to the other, you must create new templates.
Now, you’ve created your template and your users are ready to start creating and sending marketing emails.
Sending emails
In order to send any emails from Dynamics 365 Marketing, you must set emails to Ready to send. When you click on Ready to send in Real-time marketing, as shown in Figure 5.42, the email is uploaded to your cloud and can be accessed by the marketing recipients:
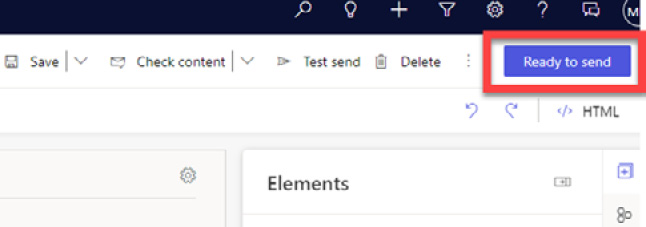
Figure 5.42 – Setting a Real-time marketing email (Ready to send)
In Outbound marketing, you click Go live as shown in Figure 5.43:

Figure 5.43 – Go live with an Outbound marketing email
Now that you’ve got your email ready and live, you can start using the email to send it to recipients.
Send now
In Outbound marketing, you have the option to send the email immediately.
Important note
Be aware that you can only send the email to 30 recipients and there is no guarantee that QR codes, Customer Voice surveys, or the Add to calendar button will work.
To use the Send now feature, click on the three dots next to Go live and then click Send now, as shown in Figure 5.44:

Figure 5.44 – Send now
When you’ve clicked that, a new popup opens, and you can select the recipients you want, as you can see in Figure 5.45:

Figure 5.45 – Selecting a maximum of 30 contacts to send the email to
When you send the email to the recipients, a customer journey will be created in the background of the system.
Customer journeys
Customer journeys are where most of your emails will be sent from. In the next two chapters, we will go through all the features of customer journeys. To send an email from a customer journey, you will first have to create the customer journey and then add the marketing email, add your recipients, and go live with the customer journey.
Double opt-in confirmation
Another way to use emails is to use them to confirm double opt-in. You can have one confirmation email for all double opt-ins or multiple emails for each of your forms using double opt-ins.
Now we’ve seen some ways of sending the emails you’ve created, let’s see what kind of analytics you can get.
Analytics
It’s always important to analyze what you do. How can you know whether you created a good email if you don’t look at the analytics? You need to see whether your recipients read the email and click on the links you send them. How many bounces you have will tell you a bit about the quality of your data. If you have a lot of bounces, your email might get flagged as spam by more email servers. If you send too many emails, your customers might not be happy with you.
There is a difference between what you’ll see in Outbound marketing and Real-time marketing when it comes to analytics. Let’s start with how this looks in the Outbound marketing area.
Outbound analytics
In the out-of-the-box dashboard, as you can see in Figure 5.46, you can see an overview of your emails. You can see statistics and analytics of the emails in your system:
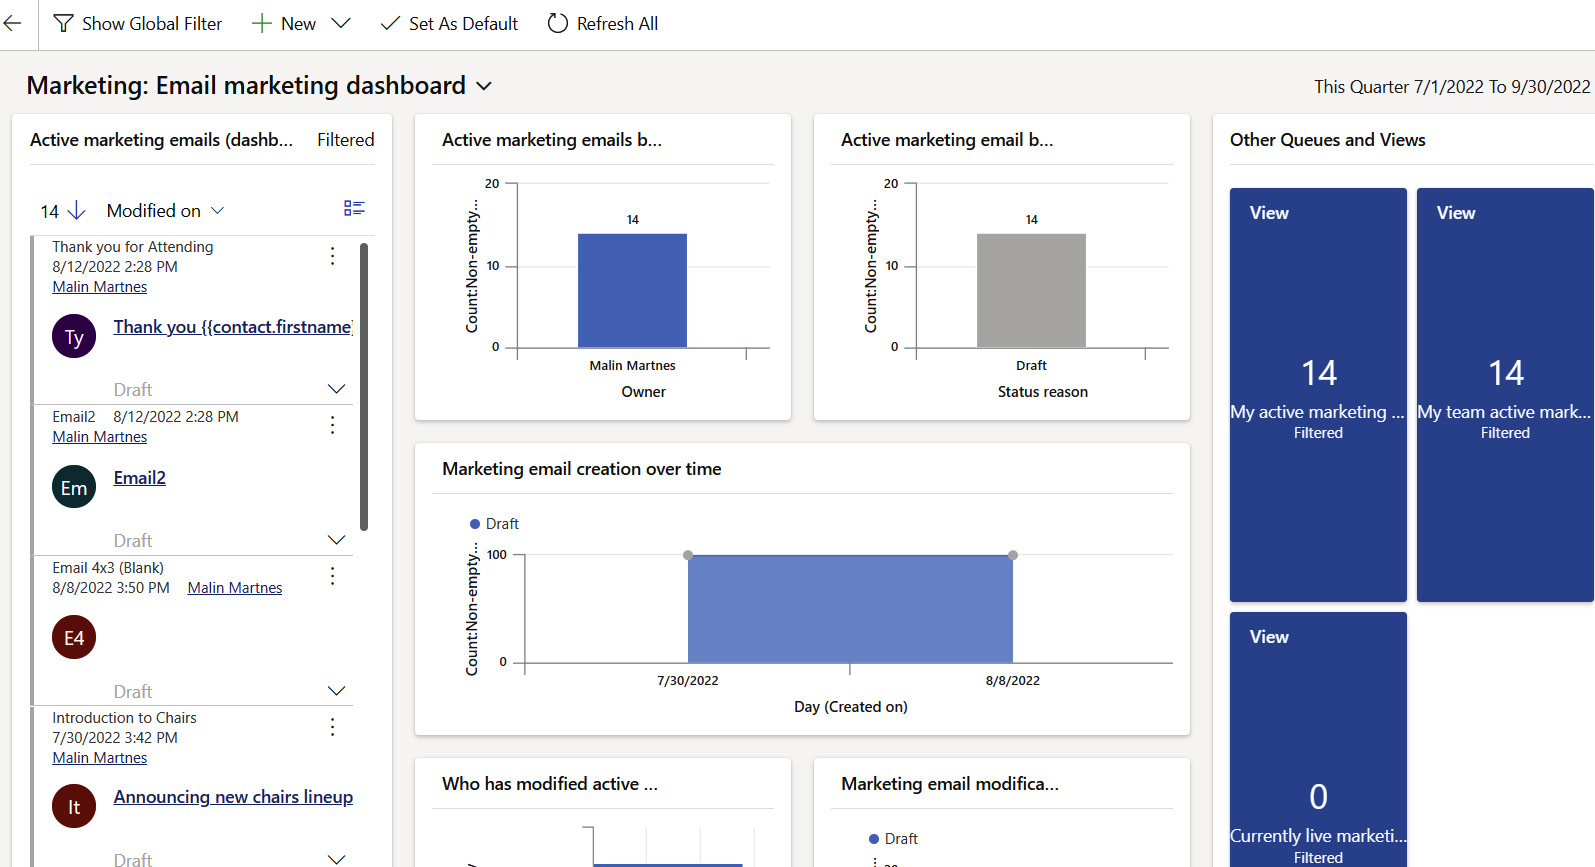
Figure 5.46 – Out-of-the-box email dashboard
For each email, you can see different statistics, as shown in Figure 5.47. You can see how many were delivered and opened and can also see other important statistics for a single email:

Figure 5.47 – Overview of one specific email
There is a lot of relevant analytics you can go through for a specific email, all emails your company has sent, or how one specific customer behaves with email interactions. Now, let’s go through how Real-time marketing uses analytics.
Real-time marketing analytics
In Real-time marketing, you can see a lot of the same information as you can in Outbound marketing.
As soon as you open an email that is live and has been sent, you will see email analytics on the right-hand side of the screen, as shown in Figure 5.48:

Figure 5.48 – Email analytics for a sent email
In the Reports section for the email, you will see a Power BI report showing the email’s delivery trends as shown in Figure 5.49:

Figure 5.49 – Power BI report for a sent email
Summary
Email is a very important feature for a lot of companies that work with marketing. We’ve gone through how you can create emails. We’ve seen different elements and how you can create pretty emails. We’ve seen the differences between Outbound marketing emails and Real-time marketing emails.
We’ve also seen the importance of previewing and testing and have seen that the Litmus preview functionality is amazing and will help your company a lot. We’ve also talked a bit about the importance of creating marketing templates.
We’ve seen how you can send your emails, which we are also going to talk about in the next chapter. We finished this chapter by talking about analytics and how important analytics are to improving your company’s email marketing.
Questions
The following are some questions that will help you gauge your understanding of the topics discussed in this chapter. The answers are available in the Assessments section at the end of the book.
- To start using Litmus integration, you first must do what?
(a) Sign in to Litmus
(b) Create a Litmus account
(c) Activate Litmus integration in the settings
(d) Activate Litmus integration in the settings and on the Litmus page
- Which two elements are only available in Outbound marketing?
(a) Text
(b) Images
(c) Personalization
(d) Videos
(e) Dividers
(f) Code
(g) QR codes
- In Send now, you can send an email to a maximum of how many people?
(a) 10
(b) 20
(c) 30
(d) 40
(e) 50
- Can a marketing form be embedded into a marketing email?
(a) Yes
(b) No