
9
Dynamics 365 Customer Voice
Everyone needs a tool for surveys. There are a lot of tools out there, but none are as tightly integrated with Dynamics 365 as Customer Voice. In this chapter, we’ll go through what Dynamics 365 Customer Voice is and how you can utilize it in your marketing efforts. For example, we can improve our events by getting information from our attendees, and we can discover what our sales process or customer service is like for customers by sending them a survey.
This chapter will go through the following:
- What is Dynamics 365 Customer Voice?
- Creating and managing surveys
- Adding questions to a survey
- Sending surveys
What is Dynamics 365 Customer Voice?
Before we start going through how to use Customer Voice, let us go through the history of the product.
Until July 01, 2020, there was a survey solution in Dynamics 365 called Voice of the Customer (VoC). In 2020, this solution was deprecated and removed from all Microsoft solutions, as it was very complex and not widely used. In July 2019, Microsoft decided to create a solution from the Microsoft 365 tool, Forms. They called it Forms Pro and worked on giving it more functionality than Forms. At Inspire in July 2020, they announced that Forms Pro was now changing – not just the name, but more functionality and where the data was stored. Dynamics 365 Customer Voice was the new name for this product. The evolution of the names and survey tools is shown in Figure 9.1:

Figure 9.1 – Surveys tools connected to Dynamics 365 applications
Dynamics 365 Customer Voice has a lot of the same features and functionalities as you will find in Microsoft Forms. In 2020, it was decided that the data from Dynamics 365 Customer Voice should be stored in Dataverse. Customer Voice spans every environment you have on your tenant. This is useful if you have multiple environments, such as development, testing, and production. The fact that it’s so tightly connected to multiple environments makes it a lot easier for customers to utilize the responses you get on your surveys. You still have Microsoft Forms connected to your Microsoft 365 subscription, but you will only find some of the more advanced functionality in Dynamics 365 Customer Voice.
Dynamics 365 Customer Voice is tightly integrated with several of the Dynamics 365 applications. Here are some ways you can use Dynamics 365 Customer Voice with other Dynamics 365 applications:
- Send a survey to a new customer asking for feedback on the sales process
- Send a survey to a customer after they have completed a customer service case
- Send a survey after your field technician has completed a work order
- Ask a new employee for feedback on the employment process
- Ask a customer how they thought your latest project went
- Evaluate the latest event
These are just some of the areas where you can utilize Dynamics 365 Customer Voice. In this chapter, we are not going to cover the functionalities of Microsoft Forms; we will just look at the capabilities you can find in Dynamics 365 Customer Voice.
For a deeper dive into Customer Voice and Forms, I highly recommend reading the book Working with Microsoft Forms and Customer Voice, available at https://www.packtpub.com/product/working-with-microsoft-forms-and-customer-voice/9781801070171.
Now that we’ve gone through a bit of the history, let us see how we can use Dynamics 365 Customer Voice to manage, create, and send our surveys.
Creating and managing surveys
In this section, we’ll go through how you can create and manage your projects and surveys in Dynamics 365 Customer Voice.
To find Dynamics 365 Customer Voice and start creating surveys, you need to go to https://customervoice.microsoft.com/ and sign in with the same credentials as you use for Dynamics 365 Marketing, as shown in Figure 9.2:

Figure 9.2 – Home page of Customer Voice
Because Dynamics 365 Customer Voice is built on a different tool than the other Dynamics 365 applications, you will not find it in the same area as your other Dynamics 365 applications.
To start creating surveys, you must first create a project. Let’s go through projects and how they are used.
Projects
A project is a way of grouping your surveys, satisfaction metrics, email templates, Power Automate flows, and reports. You cannot create a survey without a project. To create a new project, click on the + New project button that you can see on the home page, as shown in Figure 9.3:

Figure 9.3 – New project button on the home page
The next thing to do is to decide what kind of project you want to create. As you can see in Figure 9.4, there are eight different types of projects that you can create:

Figure 9.4 – The eight different projects
The different project templates contain different information and have different purposes:
- Periodic customer feedback: This template is used to get your customers’ feedback on a regular basis. You can make some changes to the survey and send it to your customers several times to see whether there are any changes in the satisfaction of your customers. It is based on the Forrester Decisions for Customer Experience best practices. In this template, you get a survey with questions, an email template, and customer sentiment and satisfaction metrics.
- Order delivery: This template is used to get feedback from your customers after an order is delivered. It contains an email template, a Power Automate flow, customer satisfaction metrics, a net promoter score, and product sentiment. The order delivery template is closely connected to Dynamics 365 Sales, and the Power Automate flow is connected to the Order table.
- Service visit: This template is tightly connected to Dynamics 365 Field Service and is used to get feedback from your customers after a scheduled visit. This contains an email template, customer satisfaction, and customer sentiment.
- Support: If you have Dynamics 365 Customer Service and want to send a survey when a case is resolved, this is the template for you. It contains an email template, customer sentiment and customer satisfaction, and a Power Automate flow.
- New Patient Survey: This template is specifically for health organizations and is used for checking in on the patient experience and monitoring their health.
- Patient Service Center: This project template is also for health organizations and asks patients about their experience with the Service Center.
- ACSI® Analytics & Benchmarks: The ACSI® is the American Customer Satisfaction Index. It tracks customer satisfaction from more than 400 of the largest corporations in the U.S. marketplace. The survey that follows this project template is used in the banking industry.
- Blank: The blank template lets you start from nothing to create your own surveys, email templates, satisfaction metrics, and Power Automate flows. In this chapter, I will use the blank project template to show what you can do when you start blank.
Once you’ve selected the template you want to create, click Next and you will be able to select the survey location, as shown in Figure 9.5:

Figure 9.5 – Survey location
If you don’t want to use any of the selected environments, you can click See all environments to get a list of all your environments, as shown in Figure 9.6:

Figure 9.6 – All environments
Why is it important to connect to the right environment? Because you want to make sure that you collect the correct data, and have the data stored and used in your marketing solution. When you select your environment, the system checks that you have access to the environment. You can then click on Select and close, and create the project.
You now have a new project with one blank survey, as shown in Figure 9.7:

Figure 9.7 – New project with one survey
Now, it’s up to you to create good surveys that your customer will want to answer so that you get the answers to the questions you’ve been wondering about.
As you can see, the project is created with the name New project. To change this (as shown in Figure 9.8), you must do the following:
- Click on All projects.
- Select your project.
- Click on the three dots.
- Click on Rename.
- Give it a new name and save it:

Figure 9.8 – Renaming a project
Renaming projects will make it easier to manage them at a later stage.
One of the benefits of creating projects and potentially having multiple surveys bundled together is that your analytics can also be bundled per project. Let’s look at the project analytics.
Analytics
On the home page, you will get some analytics from surveys where you’ve registered the satisfaction metrics, as shown in Figure 9.9:
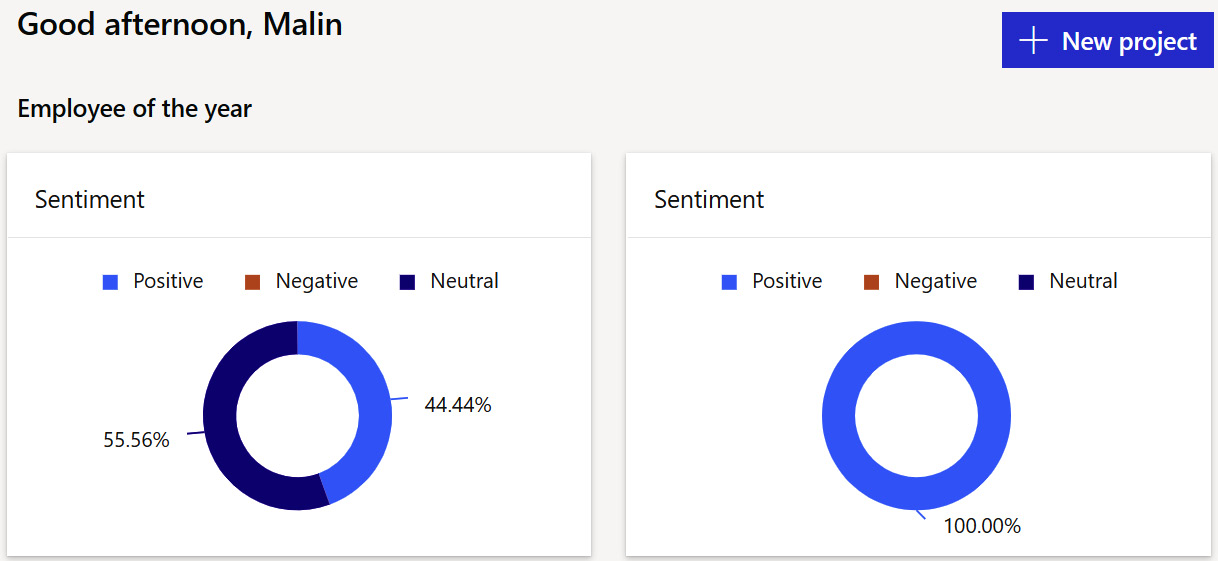
Figure 9.9 – Satisfaction metrics for a project
If you go to a project, you can see the satisfaction metrics and the reports from every survey in the project, as shown in Figure 9.10:

Figure 9.10 – Reports from a survey in a project
The kind of analytics that you get will differ based on the type of questions you ask in your surveys. Let’s go through how you create a survey.
Adding questions to a survey
The core of every project in Dynamics 365 Customer Voice is surveys. They are what you create and what you send to your customers.
For all the questions, you can say whether the question is required or optional. You can add subtitles to the questions if you want to describe the question more. You can also add logic to the questions. Let’s start by understanding the different question types in a survey.
Question types
These are the different question types in a survey, as shown in Figure 9.11:
- Choice
- Text
- Rating
- Date
- Ranking
- Likert
- File upload
- Net Promoter Score ® (NPS)
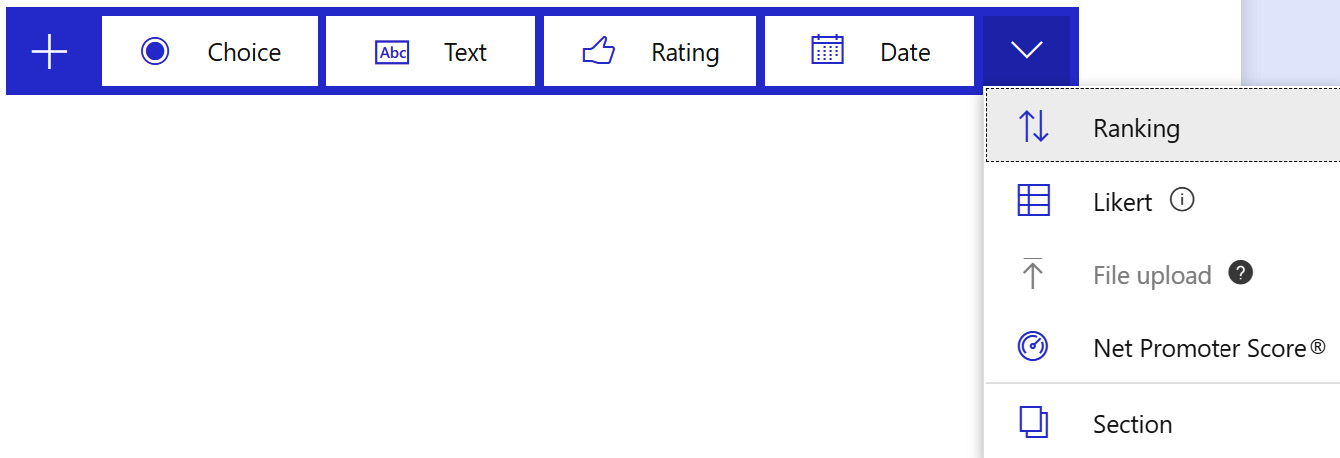
Figure 9.11 – The different question types
Some users will want to add several pages to their survey – they can have many questions – or may want to separate the type of questions into different pages. You can create different sections in the survey by clicking Section as you can see in Figure 9.11.
Let’s go through all the options and how we can use each of them in the survey.
Choice
Ask a question, and choose an answer from the predefined answers. This is a very popular question type. Let’s go through the different options you have, as shown in Figure 9.12:
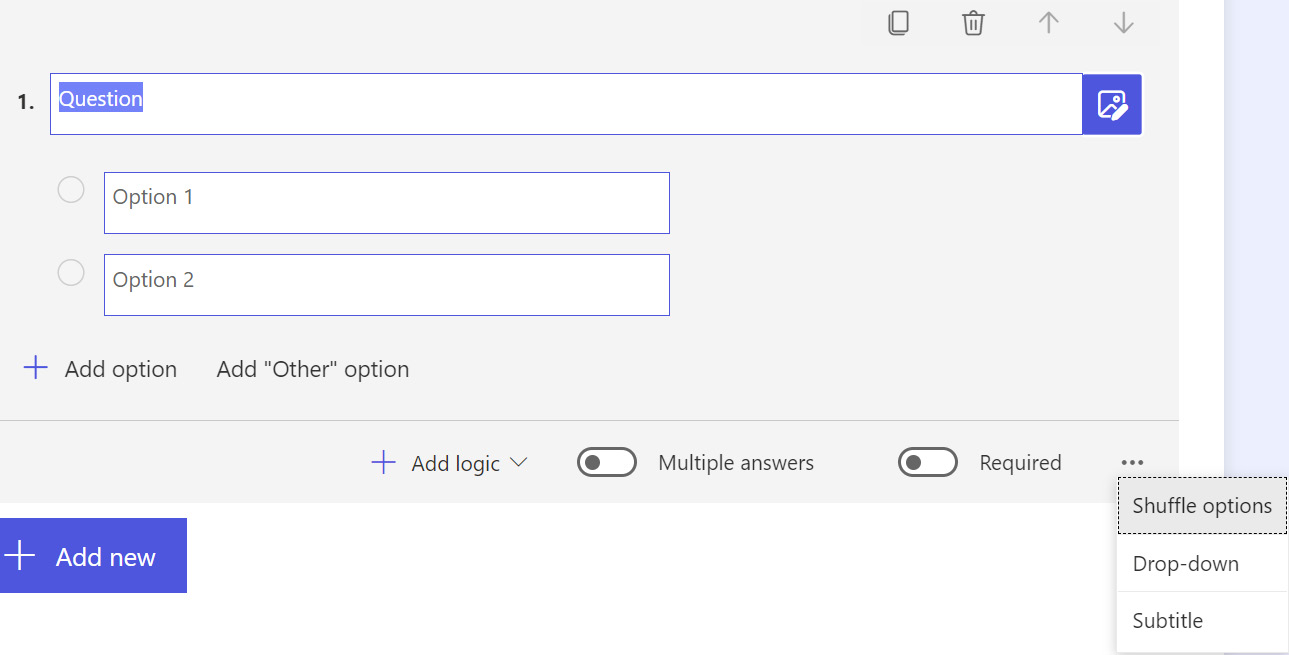
Figure 9.12 – Choice type
You can add more options or use Add “Other” option. This way, you can tailor the answers in the way most suited to your company’s needs.
With a Choice question, you can either have a single-choice answer or multiple answers. You can select whether the question is a multiple-choice question by toggling the Multiple answers toggle.
You can shuffle the options so that people don’t always select the top answer; this way, you can make sure the answer selections aren’t skewed by the order of the answers. If your question is how well you think we performed, and the answers are Bad, Neutral, and Good, then shuffling isn’t a good idea.
The Drop-down option lets you show the answers as a dropdown, and users can select their answers from the list.
Text
The next question type is the Text type, as shown in Figure 9.13:

Figure 9.13 – Text type
You can have a short, one-line textbox, or a Long answer textbox over several lines. You can also set restrictions, as shown in Figure 9.14, where you can specify whether the input should be a number, or an email, or add your own custom regular expression to specify the input:

Figure 9.14 – Setting restrictions for a Text answer
Rating
Let’s say you want to know how happy attendees are with the event you’ve just had. You want them to answer on a scale from 1 to 5 about how satisfied they are, where 1 is not satisfied and 5 is very satisfied. Rating is the question type that can help you with these types of questions. You can select whether you want to show the scale as numbers, stars, or smileys, as shown in Figure 9.15:

Figure 9.15 – Rating type – choosing the symbol
If you select Star or Number, you can choose a scale between 2 to 9; if you select Smiley, you can choose a scale between 2 to 5.
Date
When do you want the next event to be? When do you want to set up the next sales call? These are both questions for which you can use the Date question type, as shown in Figure 9.16:

Figure 9.16 – Date type
Ranking
In the Ranking question, the customer can drag and drop the different options in their preferred order, as shown in Figure 9.17:

Figure 9.17 – Ranking type
Likert
In the Likert type, you have several statements that you should select an option for, as shown in Figure 9.18:

Figure 9.18 – Likert type
Let’s say your customer has been to an event, and you want to know how each of the five sessions of the day was, but you don’t want them to answer separate questions. You can use a Likert question and have a statement for each session and set the options to Dissatisfied, Neutral, and Satisfied. The customer can then answer for every session and have the same options, without you having to create the same question five times.
File upload
The File upload type becomes available if you set the survey to only be internally available. When you set the survey as exclusively internal, only the people in your organization who can log in to your tenant will get access to the survey. All these files will be uploaded to OneDrive, and the names of the people uploading the files will be available. You can restrict how many files can be uploaded, pick a single file size limit, and determine which file types can be uploaded, as shown in Figure 9.19:

Figure 9.19 – File upload
Net Promoter Score®
Net Promoter Score® is a standardized question to measure customer experience and overall perception. It always has 0 to 10 as options, and the question should always be How likely are you to recommend us to a friend or colleague?, as shown in Figure 9.20:

Figure 9.20 – Net Promoter Score®
From the answers on the NPS, you have your detractors, passives, and promoters:
- Detractors are anyone who answered 0 to 6; they are considered unhappy customers.
- Passives are the customers scoring 7 to 8; they are happy but aren’t singing your praise.
- Promoters are the ones scoring 9 to 10; they are super happy and will talk positively about you to others and are the kind of customers we all hope to have.
Adding logic
Sometimes, you want to ask some questions to unhappy customers or show a section of questions based on what they have previously answered. You can do this by adding logic to each question. You can either add Display logic or Skip logic to every question.
Display logic
You can choose to display a question based on the response you get from another question, or a variable that you are using in the survey, as shown in Figure 9.21:

Figure 9.21 – Display logic
You want to further information about why a customer is very satisfied with the work you have done. You can display several extra questions if the customer has responded 9 to 10 (super happy) in the previous question. For any customer that does not respond with 9 to 10, these questions will not be shown.
Skip logic
With the Skip logic option, you can have the customer skip to the end of the survey, or skip several questions or several sections, as shown in Figure 9.22:

Figure 9.22 – Skip logic
Let’s say your first question is Why did you not attend this event?. If the customer answers that they were sick, there is no need to ask follow-up questions, so they should be able to skip to the end of the survey. If the customer answers that they didn’t feel like going, you can skip to a section where you have questions about what it would take for that customer to join the event.
Now that we have created our survey and added all the questions and all the logic we want to use, it is time to make the survey look and feel like it aligns with your company’s design guides.
Customization
To make the survey feel more aligned with your company, you can go into Customization on the right-hand side of the screen. You then get six options where you can customize your survey, as shown in Figure 9.23:

Figure 9.23 – Customization
Let’s go through these customizations.
Satisfaction metrics
In Satisfaction metrics, you define which questions track your customer satisfaction metrics. As you can see from Figure 9.24, you can select Net Promoter Score®, Sentiment, CSAT, and Custom score:

Figure 9.24 – Satisfaction metrics
When you have selected the satisfaction metric, give it a name and add the question that is connected to this metric, as shown in Figure 9.25:

Figure 9.25 – Marking questions as satisfaction metrics
Advanced logic
In each question, you can add simple logic. Sometimes, you have more advanced needs than these simple logics can give you; that is when you use Advanced logic, as shown in Figure 9.26:

Figure 9.26 – Use advanced logic
If you’re using some simple logic already in the questions, this will be imported into your advanced logic.
When you are using advanced logic, you can create branching rules, as shown in Figure 9.27:

Figure 9.27 – Branching rules in advanced logic
In the branching rules, you can create the condition. You then add the true path – this is what will happen if the customer matches the condition. For example, if a customer has replied negatively to all questions, then it might be a good idea to ask your customer more questions in order to understand why they are so negative.
Personalization
In Personalization, you can add variables to create a more personal feeling to the survey, as shown in Figure 9.28. You can also use variables where the data comes from Dataverse to create advanced logic.

Figure 9.28 – Personalization with variables
Languages
Some companies have customers who speak different languages and so want to create surveys in different languages. This can be done in the Languages section, as shown in Figure 9.29:

Figure 9.29 – Languages
To add other languages, you need to click on + Add language. Once that is done, you can also provide custom translations with the use of Excel. You can also choose whether your respondents can change languages. Be aware that you need to add translations if you want to use multiple languages in your surveys.
Branding
In Branding, you can add your own theme color, choose your fonts, and upload the image for your background, as shown in Figure 9.30:

Figure 9.30 – Branding
You can select the theme color by adding the HEX code. You can choose from 1 of 10 fonts, and you can upload a picture from your laptop or OneDrive to use as a background.
Formatting
In Formatting, you can choose to show or hide a progress bar if you have multiple sections, show or hide the question numbers, and shuffle questions, as shown in Figure 9.31:

Figure 9.31 – Formatting
Post-survey message
At the end of the survey, you will find the post-survey message, as shown in Figure 9.32:
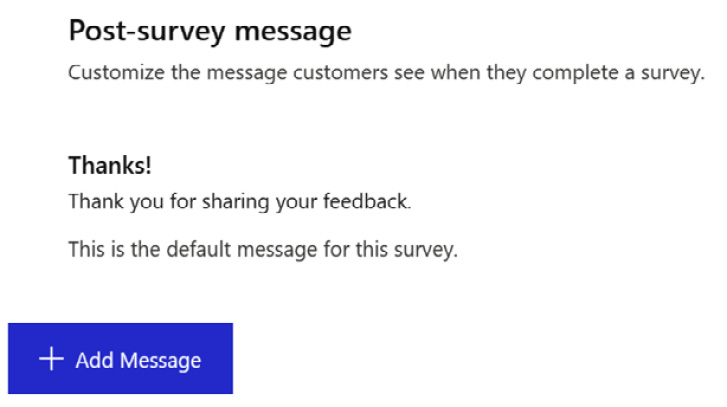
Figure 9.32 – Post-survey message
Here, you can customize the message you give to your customers after they’ve completed the survey.
Footer
At the bottom of the survey, you will find the footer. Here, you can customize the footer message for your customers, as shown in Figure 9.33:

Figure 9.33 – Footer
Now, you’ve completed the survey and you want to share the project with someone else internally to give you feedback. This is done with the Share button.
Share
You can share projects with internal users, as shown in Figure 9.34:

Figure 9.34 – Sharing a project
When you click on the Share button in the top-right corner, you can also see who has access to each project. When everything in the project is done, it’s time to send the survey.
Sending surveys
There are several different ways that you can send the survey to your customers. As you can see in Figure 9.35, you can have people answer through automation (Power Automate), email, an embedded code, a link, or a QR code:

Figure 9.35 – Sending a survey
Before we see how to send the surveys, let’s go through the distribution settings.
Distribution settings
When you click on the Send tab, other options appear on the right-hand side under Customization. Here, you can edit the Distribution settings, as shown in Figure 9.36. You can set options for Participants, Responses, Availability, Email, and Notifications:

Figure 9.36 – Distribution settings
Under Participants, you get a set of options, as shown in Figure 9.37:

Figure 9.37 – Participants options
You have options for the following:
- Whether internal or external people can respond.
- Whether responses can be anonymous.
- Whether you can have more than one response per person (this cannot be changed if you chose to allow anonymous responses, as you don’t know whether they have answered previously).
- Whether you should save invited participants as contacts (this way, they can be reused later).
- Whether to save the survey progress. This is great if you have a long survey that isn’t always completed in one go. Users can then come back up to 28 days later and complete the survey.
In Responses and Availability, you set when the survey is available for customers; if anyone tries to answer the survey outside this time, they will not get access. You can also restrict the response limit so that only a certain amount of responses can be submitted.
In Email, you can select who the sender of the surveys should be.
In Notifications, you can select whether you want to send a confirmation email to respondents and whether you want to receive an email when a survey is submitted.
Now, let’s go through all the different ways you can send a survey from Dynamics 365 Customer Voice.
Automation
When you choose to send a survey through Automation, you can either choose from one of many Power Automate templates, or you can start from blank. You can see some of the templates in Figure 9.38:
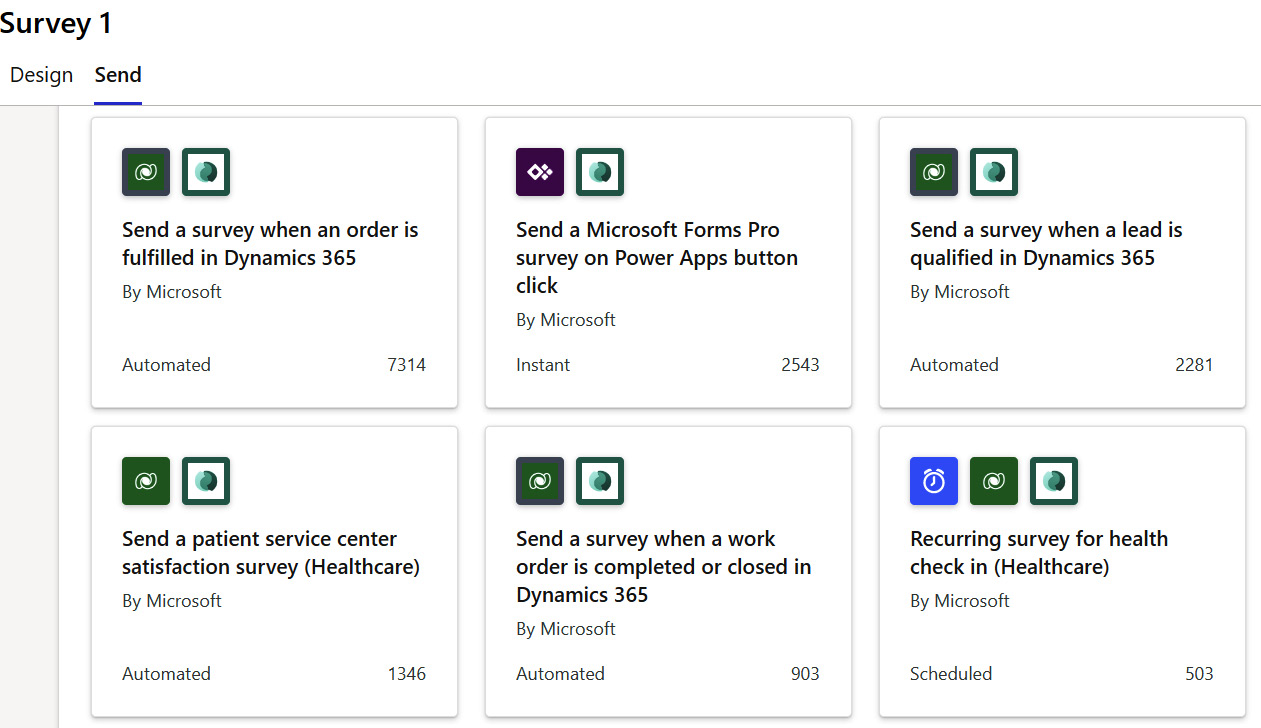
Figure 9.38 – Power Automate templates
I’ve selected Send a survey when an order is fulfilled in Dynamics 365. You can edit the Power Automate template and make it suited to your needs, as shown in Figure 9.39:

Figure 9.39 – Power Automate template
When the Power Automate flow is configured and ready, then you can go back to your survey, as shown in Figure 9.40, and see that everything is ready to start when the Power Automate flow is triggered:

Figure 9.40 – Survey is ready to send with the Power Automate flow
Now, let’s see how we can send it with an email.
When sending with Email, you should first decide which email template you should use. You can use the default template and edit it, create a new one, or import one from Surveys or My templates, as shown in Figure 9.41:

Figure 9.41 – Email templates
As you can also see from Figure 9.41, you can set the language of the email.
In addition to this, you can insert different things in the email. As you can see in Figure 9.42, you have options to add Personalized variables, First question of the survey, Survey link, and Unsubscribe link:
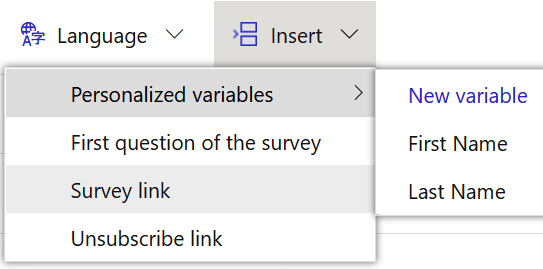
Figure 9.42 – Email insertions
Adding the first survey question is a good way of getting your customers started on the survey; research shows that if you’ve first started on a survey, it’s more likely that you’ll complete the survey.
To send the email, you must manually add each recipient or select the upload recipients. As you can see in Figure 9.43, there are some guidelines for the upload:

Figure 9.43 – Import contacts
To upload the recipients, you can upload a maximum of 10,000 recipients, and I highly recommend using the template provided; this will make it easier to make sure the data is structured the correct way and you will get all the information about the participants correct.
Let’s look at a couple of easier ways if you want to have multiple people answer but you do not have all the information about them.
Embedded code
Some companies want to embed the survey on their website. This can be done in three ways, as shown in Figure 9.44:

Figure 9.44 – Embedded survey
You can choose from Inline (where the survey is embedded into your site), Pop-up window (which creates a popup on your website), or Button (where you open a new page to answer the survey).
Another easy way is to use a link.
Link
The easiest way of getting people to answer your survey is to send them a link to the survey. This will not save any personal information but it is an easy way of sending surveys. When you click on the Link option under Send, you will get a link that you can copy. You can also create custom links if you want to keep track of where the answers are coming from. All of this is shown in Figure 9.45:

Figure 9.45 – Using a survey link
Another way of having anyone answer a survey is by using a QR code.
QR code
A QR code is something almost everyone with a smartphone can read. You scan the code with your phone’s camera and you click on the link it provides. As you can see from Figure 9.46, you can download the QR code to the survey and use it where you want:

Figure 9.46 – QR code for a survey
Now, let’s see how Dynamics 365 Marketing can send surveys.
Dynamics 365 Marketing
In Dynamics 365 Marketing, you can create an email where you link to the survey through a button, as shown in Figure 9.47:

Figure 9.47 – Linking to a Customer Voice survey in an email
This email can be used in a customer journey and sent to your customers. This works both in real-time marketing and outbound marketing.
After a survey is answered, you can use the out-of-the-box triggers for Customer Voice to trigger a new customer journey, as shown in Figure 9.48:
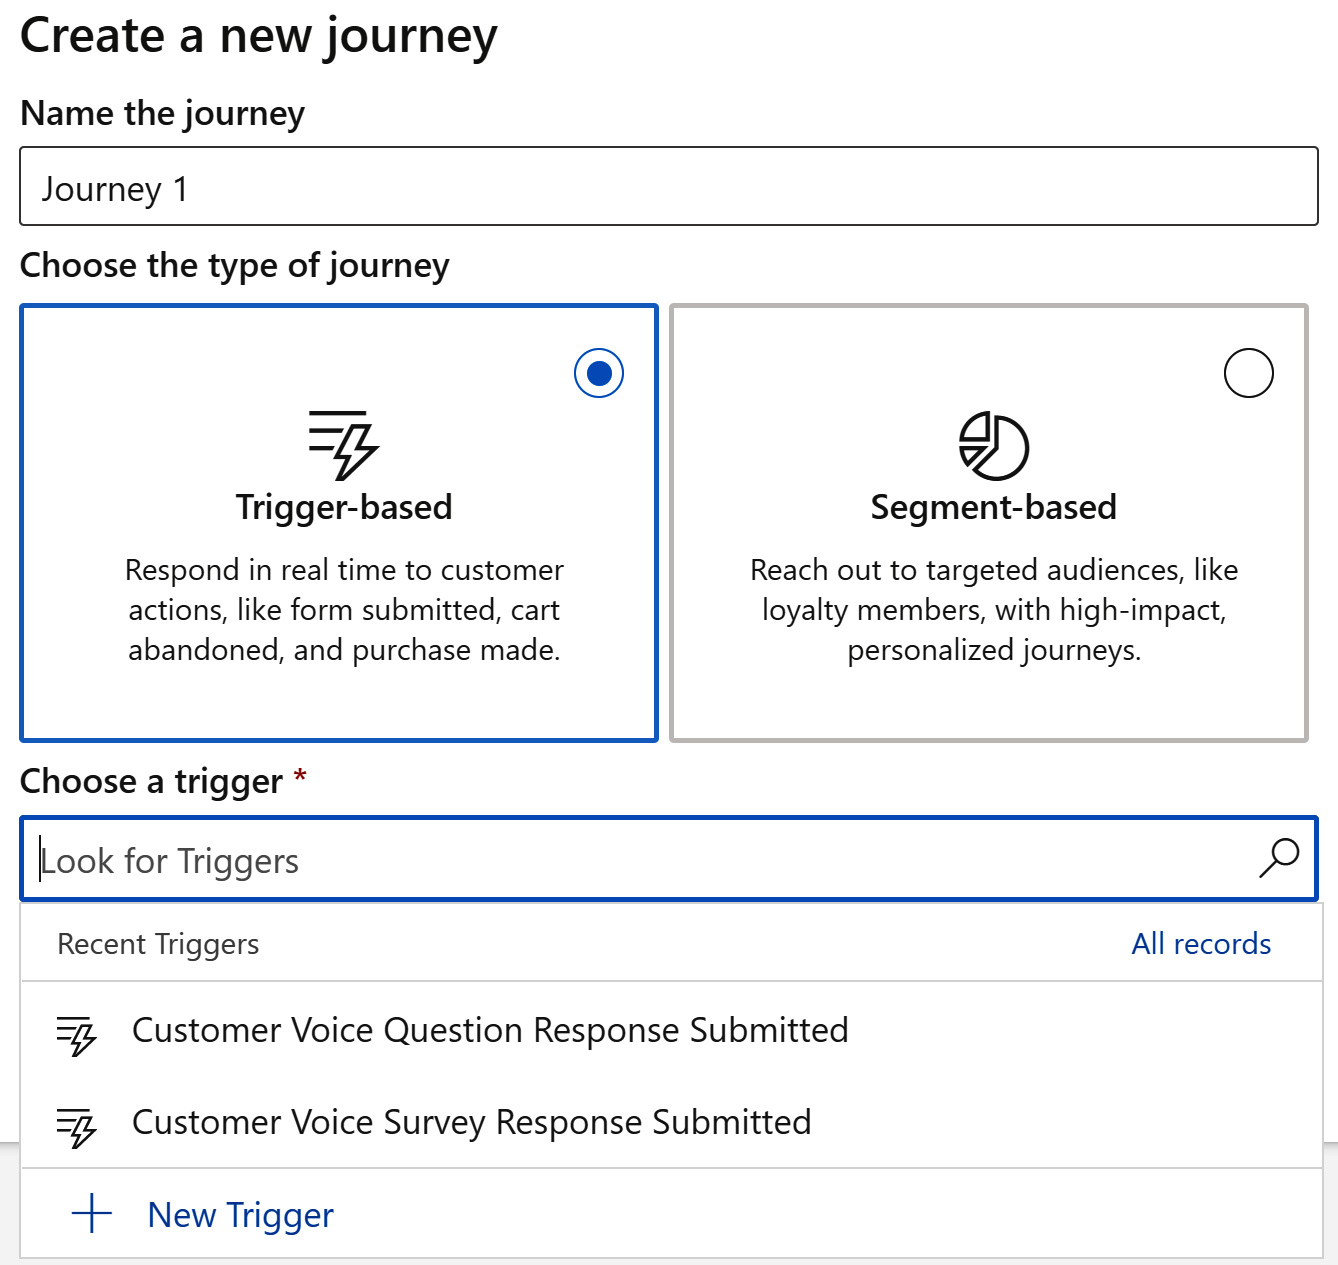
Figure 9.48 – Triggering a customer journey from Customer Voice triggers
You can also automate sending the survey with Power Automate and custom marketing triggers in real-time marketing.
Summary
As you can see from this chapter, Dynamics 365 Customer Voice is a very good survey tool, tightly integrated with Dynamics 365 Marketing.
In this chapter, we have gone through all the different types of questions you can have in a survey. We’ve gone through how you can use simple and advanced logic, and how you can make customizations to create a survey that is specific to your company’s needs and design guides.
We’ve also gone through how you can best send the surveys. We’ve seen how you can use automated solutions, such as Power Automate flows, and the use of tools in Dynamics 365 Marketing. We’ve also seen how you can use more manual methods of sending surveys: emails, links, and QR codes. Finally, we have looked at how you can integrate a survey into your website using embedded code.
Now, you can create surveys that will give you insight from your customers and employees. Gaining insight is the best way you can improve your company or your marketing efforts. Asking customers for their experience with your company is the best way to gain insight.
In the last chapter, we’re going to go through how you can use other systems, such as Dataverse, to make changes in your data model and model-driven apps to change your Marketing application.
Questions
The following are some questions that will help you gauge your understanding of the topics discussed in this chapter. The answers are available in the Assessments section at the end of the book.
- Microsoft Forms and Dynamics 365 Customer Voice are identical:
- Yes
- No
- Which of these is not a type of question you can have in a survey? (There is more than one answer)
- Rating
- Ranking
- Rhetorical
- Funnel
- CSAT
- NPS
- You can create a single survey not connected to anything in Dynamics 365 Customer Voice:
- Yes
- No
- Embedding the survey on a website can be done in which three ways?
- Inline
- Outline
- Button
- Pop-up window
- Download
- How long is the survey progress stored if the setting is turned on?
- 1 week
- 1 month
- 14 days
- 28 days
- 3 months
- 1 year
Further reading
This chapter has just scratched the surface of what is possible with Dynamics 365 Customer Voice. If you want to have a proper deep dive into the possibilities and the logic behind using surveys, then I highly recommend Welly Lee’s book, Working with Microsoft Forms and Customer Voice: Efficiently gather and manage customer feedback, insights, and experiences: https://www.packtpub.com/product/working-with-microsoft-forms-and-customer-voice/9781801070171.