
Lesson 7. Working with Particle Emitters and Replicators
Lesson Files
Motion5_Book_Files > Lessons > Lesson_07
Media
Motion5_Book_Files > Media > Rockumentary, Teaser
Time
This lesson takes approximately 60 minutes to complete.
Goals
Create and modify a particle emitter
Use an image sequence as a cell source
Browse, apply, and customize preset emitters and replicators
Create and modify a replicator
If you’ve ever wanted to add chimney smoke and falling leaves to an autumn scene, put blinking lights on a screen, or create an animated background pattern, you are going to love particle emitters and replicators.
Particle emitters shoot out a continuous stream of objects and can be used to create almost anything: natural phenomena like fog, smoke, fire, and rain; a flock of birds; pulsing light fields; or a cascade of video clips.
Replicators create a fixed pattern of objects you can animate to create an incredible variety of backgrounds, transitions, and moving elements such as video walls, splattering paint, or growing leaves.

You can use just about any object as a source for both emitters and replicators, including your own graphics, image sequences, movies, or elements from the vast Motion Library. And both emitters and replicators have unique behaviors for creating compelling animations.
Motion contains a huge number of preset emitters and replicators to get you started; you can use them as is, modify them, or make your own from scratch.
In this lesson, you’ll use a particle emitter to recreate the shower of cascading photos that starts your Rockumentary title project. Then you’ll use a replicator to animate a pattern of video clips to form an animated background for a title animation.
Using Emitters to Make Particle Systems
You create particle systems in Motion with an object called an emitter. The emitter uses a source object to create a “spray” of copies, called particles, that appear, move, and disappear. The particles can be created from just about any object in Motion: a photo or graphic, a video clip, a text layer, or a shape—it’s all fair game. In this exercise, you’ll create particles using an image sequence, which is a sequentially numbered series of still images that Motion interprets as a movie. Then, you will animate the particles to look as if they are falling back in space. Let’s start by inspecting the image sequence.
1. Open Motion5_Book_Files > Lessons > Lesson_07 > Particles Start. Save it to the Student_Saves folder, and examine the Layers list.
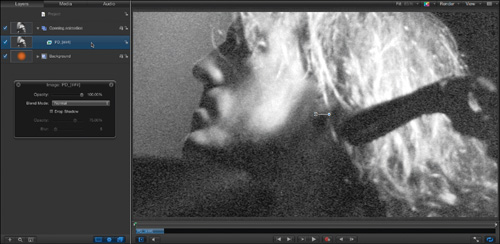
This project contains two groups: The Background group that contains the background elements you created in an earlier lesson, and the Opening animation group that contains an image sequence.
2. Select the PD_[###] layer, and Command-Spacebar-drag left in the Canvas to zoom out far enough to see the layer’s bounding box. Press Shift-V to see the full view area, and then play the beginning of the project.
If Spotlight is invoked when pressing Command-Spacebar, turn off its default keyboard shortcut in System Preferences.

The photos play for one frame each. The first time you play the project, the photos preload into RAM, so playback may be slow. After the photos have been cached, playback speed increases to real time. The large bounding box in the Canvas indicates that the photos’ dimensions are much higher than the project dimensions. While looking at the full view area, you can see that some photos are tall and some are wide—something you couldn’t determine by viewing only the bounding box, which represents the size of the largest photo in the sequence.
Although imported images are automatically scaled to fit the Canvas size, movies and image sequences are not. Before importing into Motion, it’s a good idea to scale your media to the maximum pixel dimensions necessary for your project to improve playback performance and render times. In this exercise, the image sequence has already been scaled up to fill the Canvas.
Before making a particle system from this image sequence, let’s determine how many images it contains.
3. Stop playback, and press Shift-O to move the playhead to the layer’s Out point. If necessary, click the timing display pop-up menu to switch from timecode to frames.

Because the layer ends at frame 48, and an image sequence plays one image per frame, the layer must include 48 images. This information will be useful when you work with the particle emitter. Now let’s make a particle system.
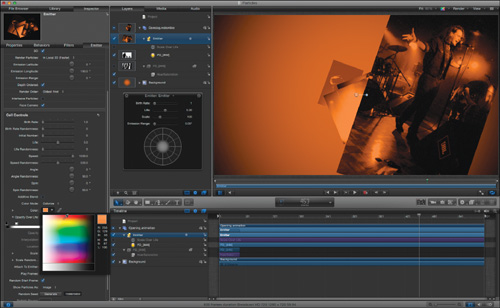
4. Resume playback, and in the toolbar, click the “Create a particle emitter” button, or press E.
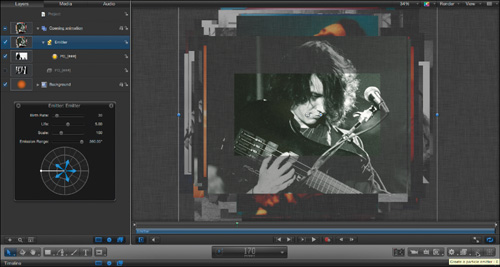
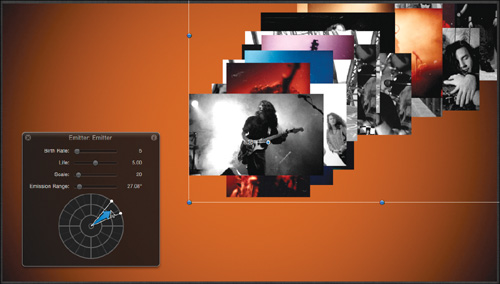
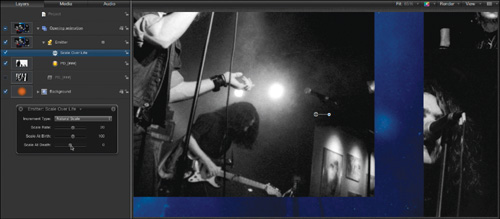
A lot happens when you click that button. In the Layers list, the PD_[###] layer is deactivated, so it no longer appears in the Canvas. Two new objects appear in the Layers list: The Emitter layer is, surprisingly enough, the emitter—the object that emits particles. Tucked underneath the emitter is the particle cell, which represents and controls the emitted particles. It assumes the name of the source for the particle system, our image sequence layer.
The Canvas fills with dozens of overlapping images with new ones constantly appearing. Also, the HUD now displays several emitter parameters.
As you can see, creating a particle system is easy, but modifying it to look the way you’d like takes a bit more effort. You can start your modifications in the HUD.
5. In the HUD, reduce Birth Rate to 5 and Scale to 20.
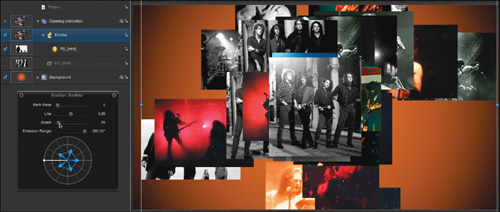
6. Press Shift-V to turn off the full view area, and press Shift-Z to fit the Canvas to the window.
With only five new particles born every second—and each particle reduced to 20 percent of its original size—it’s now easier for you to see what’s going on in the animation. However, each particle changes over time, from one photo to the next. Before you go cross-eyed, let’s change that, too.
7. Press F4 to open the fourth pane of the Inspector, which is now the Emitter pane.
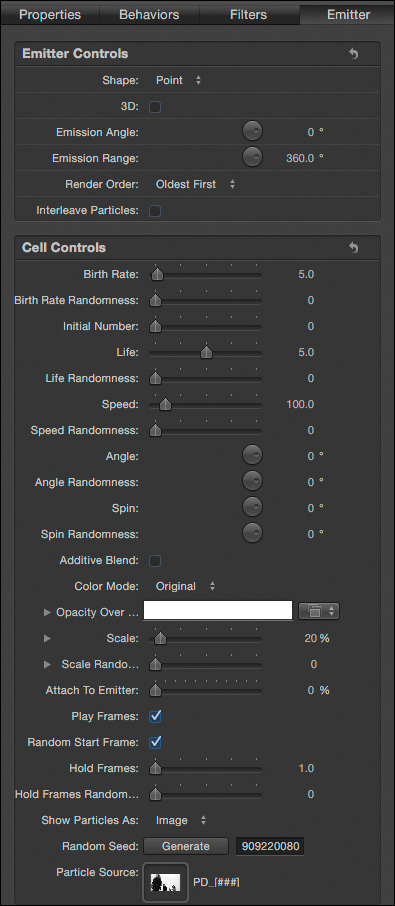
You could adjust a lot of parameters here, but don’t be overwhelmed. They are logically organized, and you can tackle them a few at a time.
8. Near the bottom of the pane, deselect the Play Frames checkbox, and leave the Random Start Frame checkbox selected.
Now each particle is born with a randomly assigned image from the image sequence, and displays only that image for its short lifespan of five seconds. Then it “dies,” never to be seen again.

The particles are born in the center of the Canvas and move out in all directions. Often, you will want to change the direction, the range, and the speed of the particles. The emission control—the visual interface at the bottom of the HUD—lets you alter all three of those parameters.
9. In the HUD, drag the dot that rests at the left edge of the circle clockwise or counterclockwise to create an emission range of less than 360 degrees. Drag inside the resulting “pie slice” to change the emission angle, and drag in and out on the arrow(s) to adjust the particle speed.
The particles now appear to spray out of the center of the Canvas and in a specific direction, as if you were holding your thumb on the end of a hose to control the width of the spray, its direction, and its speed.
The controls in the HUD let you make basic changes to the particles’ behavior, but precisely adjusting the emitter to look the way you want requires working in the Inspector. First, let’s see how the emitter and the particle cell are related to each other.
Although you have full control of the emission range and angle in the HUD, speed adjustments are limited. You can make the particles go faster by using the Inspector.
10. In the Layers list, select the PD_[###] layer that is tucked under the Emitter layer (the layer with the round orange icon), and look at the fourth pane of the Inspector.

The layer you selected is the cell of the emitter, which is why the context-sensitive Object pane is now named Particle Cell. Once again, think of the cell as representing the objects created by the emitter, and the emitter as the device that spits out those objects. Or, in terms of the hose-and-water analogy, the hose is the emitter, and the cell represents the water droplets.
11. Now in the Layers list, select the Emitter layer, and examine the Inspector.

Below the parameters that control the emitter, you will see Cell Controls, which include the same parameters as those found in the Particle Cell pane. As a convenience, Motion places the parameters for both the cell and the emitter in the Emitter pane. Therefore, you can adjust both sets of parameters when the Emitter layer is selected.
12. Save your work.
Adjusting Emitter and Cell Controls in the Inspector
Now you’ll alter the Emitter pane parameters to make the particles—the photographs—look as if they are falling back in space, and spinning as they become smaller. Right now, all the particles emanate from a single point in the center of the Canvas. It would look better if they started from different positions—even outside the visible Canvas area—and fell into view.
1. Continue to play the project.
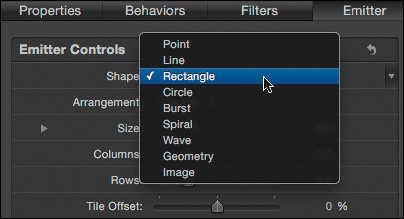
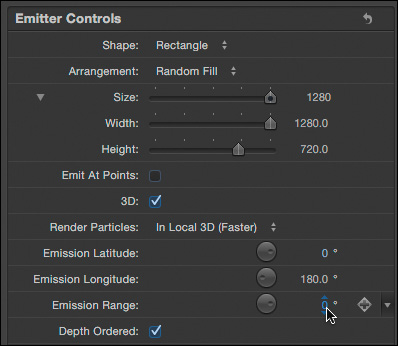
2. You have many choices for the emitter’s shape. In the Emitter pane, from the Shape pop-up menu, choose Rectangle.
When you choose a shape, parameters for that shape appear. By default, the rectangle is 300 × 300 pixels in size with five columns and rows, and all particles are born in this five-by-five grid. This pattern is easier to see if you stop the particles’ movement.
3. Locate the Speed parameter near the middle of the Emitter pane and set its value to 0.
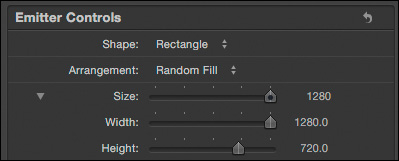
The bounding box in the Canvas is a square, and the center of each photo aligns to the five-by-five grid. However, you want a larger grid that matches the aspect ratio of the project, and has a more random layout.

4. In the Emitter pane, click the disclosure triangle to open the Size parameter. Set Width to 1280 and Height to 720, and then set Arrangement to Random Fill. Customizing a particle emitter is an iterative process, so you may later want to further adjust these settings. With the current settings, the photos are born in random positions all over the Canvas.
To make the photos look as if they are moving away, you can apply a behavior designed specifically for particles. The tricky thing to remember about this behavior is that you apply it to the cell, not the emitter.
5. Near the bottom of the Emitter pane, locate the Scale parameter and set it back to 100%. This way, the photos will start large and the behavior will make them grow smaller.
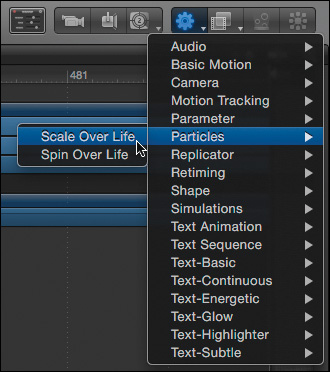
6. In the Layers list, select the PD_[###] cell below the Emitter layer. In the toolbar, click the Add Behavior button, and choose Particles > Scale Over Life.
By default, the particles now scale from 0% to 100% in size. The effect actually looks quite interesting, but it isn’t what you want here.
7. In the HUD or the Behaviors Inspector, change Scale At Birth to 100 and Scale At Death to 0.
The photos now start at full size and scale down, but the new photos cover the old ones so quickly that you never see any of them become small. A few more adjustments will take care of that.
8. In the Layers list, select the Emitter layer, and in the Inspector’s Emitter pane, change the Birth Rate to 1. You can now see the photos changing scale, which creates the illusion that they are moving back in space. Remember, Speed is still set to 0, so the movement is due only to the particles’ change in scale.
This is still not quite the effect you want because each particle scales down around its anchor point and appears to move toward the edge of the screen. If the particles were truly falling back in space, they would appear to move toward the center of the screen.
Instead of changing the Scale Over Life parameter, you can make the particles actually move along the z-axis by turning the emitter into a 3D emitter.
9. In the Layers list, deselect the Scale Over Life checkbox.
While this behavior creates interesting animation, it won’t let us achieve the look we are going for in this project.
10. In the Emitter pane’s Emitter Controls, select the 3D checkbox. New emission parameters appear below the checkbox; but because the Speed parameter is set to 0, the particles aren’t moving.
11. Set Emission Latitude to 0, Emission Longitude to 180, and Emission Range to 0. Then in the Cell Controls, set Speed to 1,000.
The photos now appear to fall quickly back in 3D space. It would be less jarring if they faded into view rather than popping onto the screen.
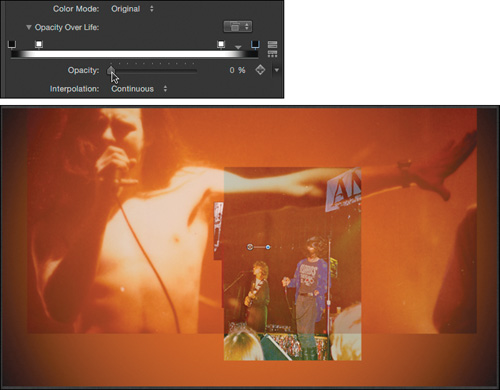
12. Near the bottom of the Emitter pane, click the Opacity Over Life disclosure triangle to reveal the gradient editor. Click the white bar to add three opacity tags near the ends of the bar, and set the Opacity value for the outer two tags to 0. The photos now fade into view when they are born and fade out when they die.
You can also Control-click (or right-click) an opacity tag and change its value by sampling from the pop-up palette.
A key aspect of particle systems is the ability to introduce variations to create a more natural, organic look. If you inspect the parameters in the Cell Controls section of the Emitter pane, you will see several randomness parameters. For example, below Birth Rate is Birth Rate Randomness, below Life is Life Randomness, and so on. Randomness parameters are the keys to more natural-looking particle systems.
13. Change Speed Randomness to 500, Angle Randomness to 90, Spin Randomness to 60, and Scale Randomness to 50. These values are added to and subtracted from each parameter to create a range of values. For example, with Speed set to 1,000 and Speed Randomness set to 500, the speed of each particle will vary between 500 and 1,500 pixels per second.
Each photo now has a different speed, angle, spin rate, and scale, which makes your composition more interesting. If you don’t like the type of randomness or you see too many repeating images, you can fine-tune the randomness by adjusting the Random Seed parameter. Because you have a total of 48 images to choose from and only about five appear onscreen at any one time, you should be able to avoid duplicates.
14. At the bottom of the Emitter pane, click the Random Seed’s Generate button repeatedly to change the particle pattern until you find one you like.
The number next to the Generate button lets you recreate the same randomness in different copies of the project. If you or someone else creates the same project with the same settings and enters the same random number, both projects will have identical particle patterns.
Some of the photos are in black and white and some are in color. You can make them all black and white using a filter, and then tint them using the emitter’s Color Mode parameter.
15. In the Layers list, select the original deactivated source layer, PD_[###]. In the toolbar, click the Add Filter button, and choose Color Correction > Hue/Saturation. In the HUD, drag the Saturation slider all the way to the left.
All the photos are now black and white. Effects applied to the source layer in the particle system are passed through to the particles—a powerful feature.
16. Reselect the Emitter layer, and in the Emitter pane from the Color Mode pop-up menu, choose Colorize to tint particles with the color specified in the Color parameter. When this setting is selected, additional Color parameters appear. Click the downward-facing arrow next to the color swatch to sample a light reddish-orange color that matches the background. The particles are shaded with the selected color.
17. Feel free to experiment further, for instance by dramatically increasing the emitter shape’s Width and Height settings and adjusting the other parameters. Then save your work.
Adding Cells
A particle emitter can have multiple cells, and each cell can be adjusted independently, allowing you to create complex particle systems. You can add a cell to this particle emitter so that it also creates particles for the years the band was together. The first step is to add the new particle source to the project.
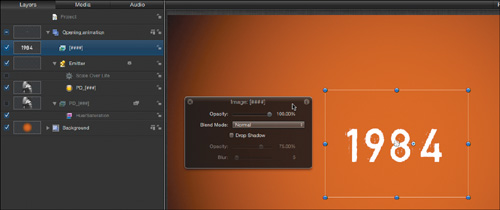
1. In the File Browser, navigate to Motion5_Book_Files > Media > Rockumentary. Click the List View button. With the project still playing, select and drag the [####].png:1984-1992 file into the Opening animation group.
Make sure the Show Image Sequences as Collapsed button at the bottom of the File Browser is selected in order to see these images as one file.
If you see only a white rectangle in the Canvas, it means that Motion is incorrectly interpreting the file’s alpha (transparency) channel. In the Project pane, select the Media list and locate and select the [####].png:1984-1992 file. In the Media Inspector, from the Alpha Type pop-up menu, choose Straight. Then reselect the Layers list.
This file is another image sequence in which the original filenames of each image are the years 1984 to 1992, so they’ve been interpreted by Motion as four-digit sequential file numbering and are therefore collapsed to #### in the image sequence filename. One way to create a new cell in the current emitter from this layer is to drag it to the emitter.
2. In the Layers list, rename the [####] layer to Years, deselect its activation checkbox, drag it to the Emitter layer, and when the + (plus sign) appears, release the mouse button.
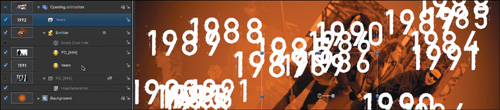
A new cell named Years appears below the emitter, and the Canvas fills with animated dates. When you add a new cell in this manner, the cell uses the default settings. Rather than customize this new cell from scratch, let’s start over by duplicating the current customized cell, and then replacing its source.
3. Press Command-Z to remove the cell you just created. Select the PD_[###] cell and press Command-D to duplicate it.
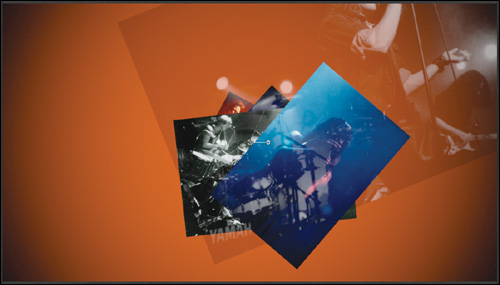
4. Drag the Years layer on top of the new PD_[###] copy cell layer. Wait for the hooked arrow before you release the mouse button. The hooked arrow indicates that you are exchanging the media. The year images now animate in exactly the same pattern as the photos, so a year image appears on top of every photo. It’s not quite what you want, but it’s close.

5. With the PD_[###] copy layer selected, at the bottom of the Particle Cell pane, click the Generate button. The year images now mix nicely with the photos. But they could use a little more tweaking.
6. In the Particle Cell pane, adjust the Cell Controls to increase the scale, modify the color, and change other particle cell settings to your liking.

If you select the Emitter pane, you will find that the Cell Controls are no longer available because you have more than one cell in the emitter. You need to select each cell individually to adjust its parameters in the Particle Cell pane.
7. Stop playback and save your work.
Using Emitters from the Library
The Motion Library includes a large, varied collection of particle emitter presets. Now that you know more about how particle emitters work, it will be easier for you to modify the presets to suit your own projects. Let’s look through the presets, apply one, and modify it.
1. Close the current project, and then choose File > New, and click the Motion Project icon. Choose the Broadcast HD 720 preset with a frame rate of 29.97 and a duration of 300 frames, or 10 seconds, and click Open. You will experiment with particle emitters in this new project.
2. Press Shift-Z to fit the Canvas to the window. Press Command-2 to open the Library, and select Particle Emitters. Switch to icon view. Motion includes over 200 particle presets organized into eight categories.

3. Select the Sparkles category. You’ll see 16 types of sparkle emitters.

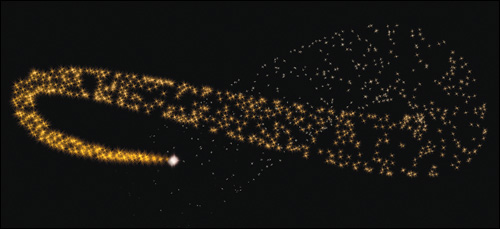
4. Select the Magic Wand preset, and drag your pointer around the preview area.

The emitter follows your pointer movements, providing a preview of how the emitter would look when animated. Let’s animate it.
5. Click Apply to bring the emitter into the Canvas, and start playback.
6. In the toolbar, click the Add Behavior button, and choose Basic Motion > Motion Path.
7. In the Canvas, a red line appears with control points at each end. Drag the control points to reposition them. Option-click the red motion path line to add more control points. Drag the points and adjust the Bezier handles to create a curving, overlapping path.

8. In the Layers list, you can see that this preset emitter contains two cells: one for the central flare and one for the stream of sparks. Because the emitter is moving so quickly, you won’t see many sparks.

9. Select the Spark06 cell layer, and press F4 to open the Particle Cell Inspector. Increase Birth Rate to around 250 to create many more particles, and then increase Life to around 5 seconds to create a longer trail.
When you combine behaviors with particles, the creative possibilities are almost infinite.
10. Select and delete the Group that contains the emitter to start over. Browse, apply, and adjust some of the other particle presets. If you make something you like, drag it to the Favorites folder in the Library to make your customized preset available for future projects.
11. In the Library, select the Content folder, and then select the Particle Images folder. This folder contains hundreds of images and movies you can use to make particles. In fact, all the Emitter presets in Motion use particle sources from the Content folder.

12. Select a particle image. Add it to your project, and make a particle system out of it by clicking the Make Particles button in the toolbar, or pressing E. Experiment with changing the parameters.
You should now understand the basics of particle systems. You can use this knowledge to modify a preset emitter to fit your project or to create your own particle emitter from scratch.
Replicating Elements
The replicator creates patterns from copies of a source object, and a replicator’s structure is very similar to that of a particle emitter. Unlike a particle emitter, however, a replicator creates a fixed number of copies in a static pattern. You can animate a replicator using keyframes, behaviors, or a dedicated behavior called the Sequence Replicator behavior.
In this exercise, you’ll start with a partially completed text animation and add a background design based on replicators.
1. Close any open projects. Open Motion5_Book_Files > Lessons > Lesson_07 > Replicators Start, and save it to the Student_Saves folder. Press Shift-Z to fit the Canvas to the window, open all the groups and layers in the Layers list, and play the project.

From the bottom of the Layers list, you can see that the project contains the following:
• A blue rectangle shape object for the background
• A video clip with three color correction filters to give it a highly stylized look
• An animated circle mask to reveal the video
• An empty Replicators group
• A text layer animated with a sequence text behavior
• Another rectangle placed on top for the vignette effect
You’ll add a replicator to create additional copies of the video.
2. Stop playback, and close all the groups. Change the timing display to Timecode, if necessary, and move the playhead to 1:00. This is the frame where the circle mask on the video stops scaling down. It’s a good place to bring on the replicated images. Instead of replicating the video clip directly, you’ll replicate the group containing the clip and all the effects.
3. Select the Video group, and at the far right of the toolbar, click the Replicate button, or press L.
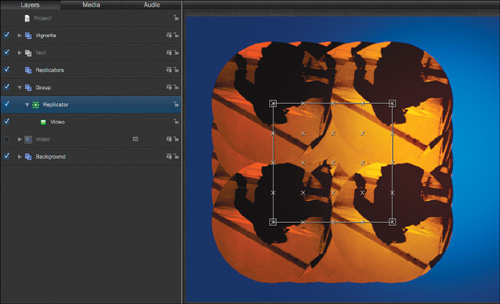
As with a particle emitter, several things happen at once when you create a replicator. In the Layers list, the Video group (the source for the replicator) is now deactivated. A new Replicator layer appears above the Video group in its own new group; and below the replicator, the replicator cell appears with the same name as the source object, Video.
In the toolbar, the Adjust Item tool is now selected, and a replicator bounding box appears in the Canvas. By default, the replicator creates 25 copies of the source object in the Canvas, in a five-by-five grid as indicated by each white X.
The Adjust Item tool changes its name depending on the type of object selected. Although the tooltip that appears when hovering over the tool in the toolbar reads Adjust Item Tool, if you Control-click in the Canvas, you’ll see in the shortcut menu that the currently selected tool is called the Replicator.
4. In the HUD, decrease Columns to 3 and Rows to 2, and drag a corner of the replicator bounding box to see how you can adjust the layout of the copies.
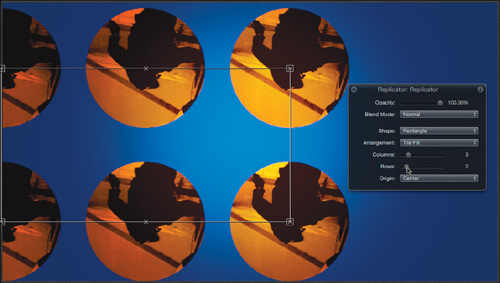
Let’s build on the circle theme of this project by changing the replicator shape.
5. In the HUD, from the Shape pop-up menu, choose Circle. From the Arrangement pop-up menu, choose Outline, and set Points to 8.
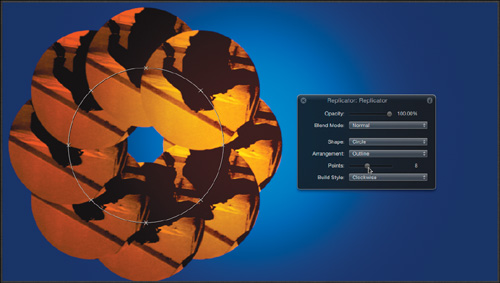
That’s about all you can adjust in the HUD, so let’s get busy in the Inspector.
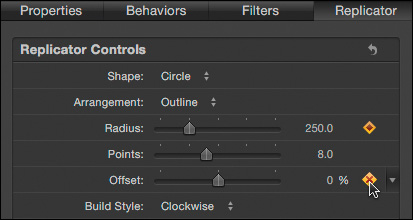
6. Press F4 to reveal the Replicator Inspector. Many of these parameters are similar to those you used with particle emitters.
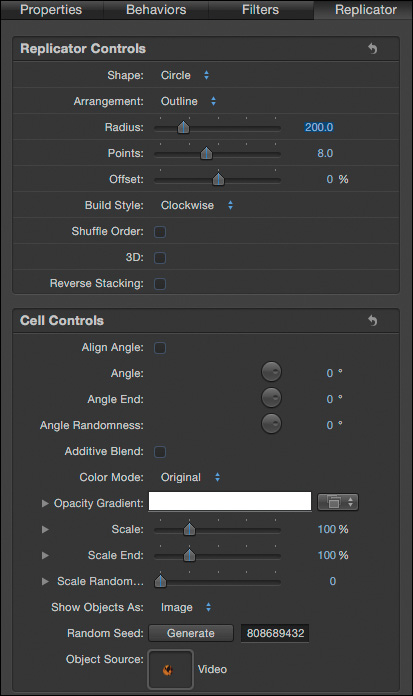
7. In the Replicator Controls, set Radius to 250. In the Cell Controls, set Scale to 52%, and then in the Layers list, select the Video group’s activation checkbox to turn the group back on.
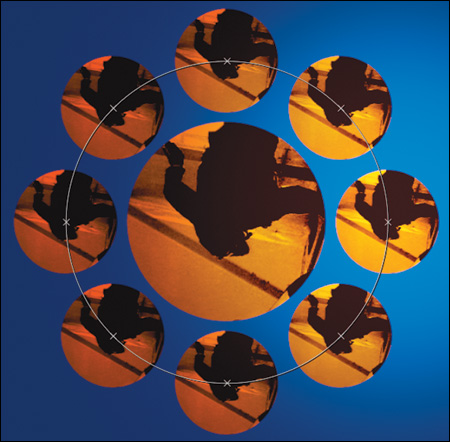
In this case, you want to see the original source object in the center of the replicated pattern. With the pattern in place, you can use a behavior designed just for replicators to animate the pattern onto the screen.
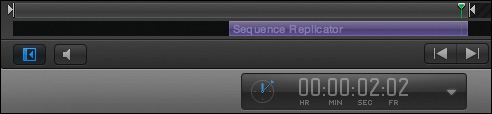
8. With the Replicator layer selected, in the toolbar, click the Add Behavior button, and choose Replicator > Sequence Replicator.
If you recall using the Sequence Text behavior in Lesson 6, you’ll find that this behavior is very similar. It creates animation that sequences through each of the copies in the pattern. By default, it is applied to the full duration of the replicator. As a result, you need to trim it so that the animation ends before the text animation begins.
9. Choose Mark > Go To > Next Marker to move the playhead to the marker at 2:02. Press O to trim the behavior’s Out point to the playhead. Press Command-Option-O to set a play range Out point at the same frame, and start playback.
The replicated pattern will animate onscreen from 1:00 to 2:02, ending at the point where the video freezes, right before the text animation starts. Just as with the Sequence Text behavior, you must choose the parameter (or parameters) you want to animate with the Sequence Replicator behavior.
10. In the Behaviors Inspector (which came forward automatically when you added the behavior), from the Parameter’s Add pop-up menu, choose Scale.
11. In the Scale parameter that appears, change the value to 0, set Sequencing to From, and increase Spread to 3.
The copies now change their scales from 0% to their set Scale value, and the animation is spread so that at any point in time three copies are animating.

12. From the Add pop-up menu, choose Rotation, and set the Rotation value to –180.
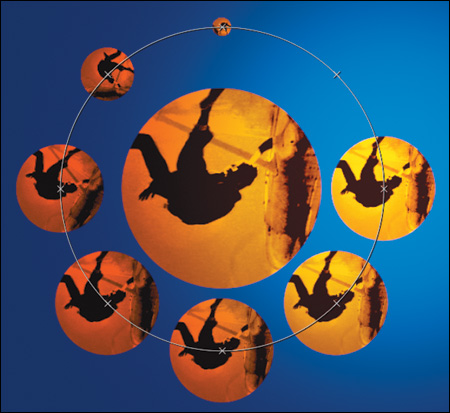
The copies now scale up and spin into place in sequence. You can take the animation a little further by keyframing a couple of the replicator’s parameters.
13. Stop playback, and press Shift-O to move the playhead to the behavior’s Out point. In the Replicator pane, click the keyframe buttons for Radius and Offset to set keyframes.
14. Press Shift-I to move the playhead to the behavior’s In point, and once again set keyframes for the Radius and Offset parameters. Then, change Radius to 0 and Offset to –30%, and resume playback.
The copies scale up from the center of the circle. It would look better if they were behind the original video.
15. In the Layers list, drag the Replicator layer into the Replicators group, and delete the empty Group group.
16. Select the Replicators group, and choose Object > Send Backward, or press Command-[ (left bracket), to move the Replicators group below the Video group. The replicated pattern now emerges from behind the original video.
17. Save your work.
Modifying Replicator Presets
In addition to its particle emitters, Motion includes a large collection of preset replicators you can use “out of the box,” or modify to your heart’s content. You will modify a preset replicator to create a background to frame the text layer in this project.
1. Stop playback. Move the playhead to the marker at 2:02, and press Command-Option-I to set a play range In point. Move the playhead to the end of the project, press Command-Option-O to set a play range Out point, and resume playback.
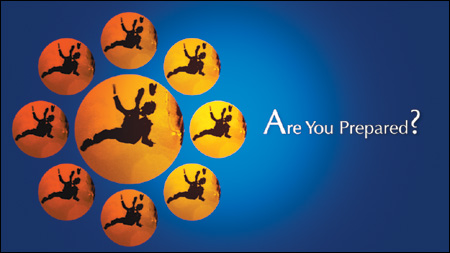
In this section of the project, a short written question animates onscreen. A subtle animated background could give the question more focus and weight.
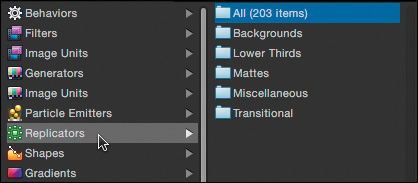
2. Press Command-2 to open the Library, and select Replicators. You will find over 200 presets organized into categories.
3. Select the Lower Thirds folder, and preview several of the presets.
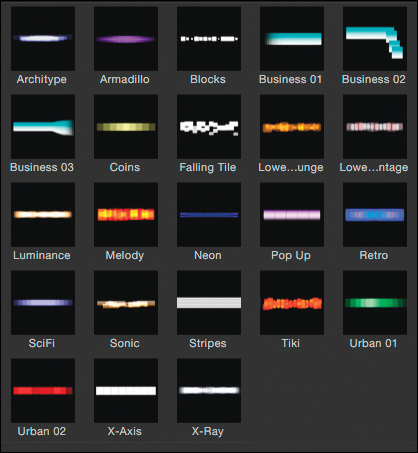
Because most of these presets were created with a Replicator and animated using the Sequence Replicator behavior, it is easy to modify them.
4. With the project still playing, locate the Lower Lounge preset and drag it into the Replicators group.
5. If necessary, select the Lower Lounge replicator layer, and in the Canvas, drag the layer to position it under the text.

The rounded squares don’t work well with the circle theme you’ve established. This replicator uses the deactivated Shape layer in the Replicators group as its source. You can change the source shape to change the cells.
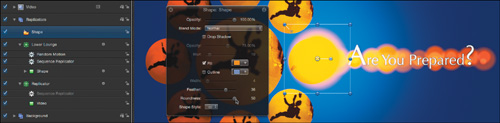
6. Activate and select the Shape layer.
7. In the HUD, drag the slider to increase the Roundness parameter as far as it will go. The shape turns into a circle, as do the cells.
The replicator exists for the full project, but it should come onscreen just before the text animates on.
8. Stop playback and deactivate the Shape layer. Choose Mark > Go To > Play Range Start, and select the Lower Lounge replicator layer. Press I to trim the layer’s In point to the playhead. Now move the playhead to a point where the text is visible.
The pattern is too wide and a little short. You can change it with the Replicator tool.
9. To choose the Replicator tool, Control-click the replicator in the Canvas, and from the shortcut menu, choose Replicator. Resize and reposition the layer to fit behind the text, and then press Shift-S to return to the Select/Transform tool.
10. In the HUD, decrease Opacity to about 60% so that it doesn’t overwhelm the text.
11. In the Layers list, select the Sequence Replicator behavior below the Lower Lounge replicator, and move the playhead to 2:16. Press O to trim the behavior to a duration of 15 frames, and resume playback.
This behavior was used to animate the opacity of the copies, but you will repurpose it to animate the scale of the pattern onto the screen.
12. In the Behaviors Inspector, in the Sequence Replicator section, change Scale to 0, Spread to 4, and Loops to 1.
That looks good. However, the color of the replicator still makes the background stand out too much.
13. Stop playback and move the playhead to the point where all the text is visible. In the Layers list, select the Shape layer (the deactivated layer, not the cell under the replicator).
14. In the Shape Inspector, change the Fill Mode to Gradient.
15. If necessary, click the disclosure triangle to reveal the gradient editor, remove the center color tag by dragging it away, and then Control-click the remaining color tags to change them to shades of blue.

Great job! You have worked with both particle emitters and replicators in this lesson, building each from scratch as well as modifying presets from the Library. You now have the know-how to leverage the incredible arsenal of presets in the Motion Library, or to build your own custom particle emitters and replicators for your next project.
Lesson Review
1. Name the two particle system components that appear in the Layers list when you make a particle emitter.
2. You created particles from a leaf graphic you found in the Library, and made those particles spin by increasing the Spin value in the Emitter pane. But you now want to spin each of them at different rates. Which Emitter pane parameter do you adjust to do this?
3. What kind of particle-specific behavior do you use to change particles’ sizes during their lifespan and what does it get applied to?
4. Your particles appear at random locations on the screen, but you want to change those random locations. Which button can you click to create a different random pattern?
5. What is a quick way to introduce variations that give your particle system a more natural, organic look?
6. What’s the primary difference between a particle emitter and a replicator?
7. How can you animate a replicator’s elements so that they fade onto the screen, one after the other?
8. You want to drag the bounding box to resize a replicator but the onscreen controls aren’t appearing. How can you display them?
9. Name three shapes that can be chosen from the Shape parameter pop-up menu for a particle emitter or a replicator.
10. Can you use a QuickTime movie as the source for a particle emitter or a replicator?
Answers
1. The emitter and the cell
2. The Spin Randomness parameter
3. Apply the Scale Over Life behavior to the particle cell.
4. The Generate button for the Random Seed parameter
5. Use the randomness parameters that appear in the Cell Controls section of the Emitter pane. For example, below Birth Rate is Birth Rate Randomness, below Life is Life Randomness, and so on.
6. A particle emitter creates a continuous stream of particles that are born, stay onscreen for some time, and then die. A replicator creates a fixed number of elements in a fixed pattern that you can animate with keyframes or behaviors.
7. Use the Sequence Replicator behavior, add the Opacity parameter, set the parameter to 0, and set Sequencing to From.
8. The replicator bounding box becomes available when you select the Adjust Item tool is in the toolbar, or Control-click the replicator in the Canvas and choose Replicator from the pop-up menu.
9. Line, Rectangle, Circle, Burst, Spiral, Wave, Geometry, and Image. Particle emitters can also have a Point shape.
10. Yes, you can use images, image sequences, movies, or many of the Motion objects (text, generators, shapes) as sources for both emitters and replicators.
Keyboard Shortcuts
