
Lesson 6. Creating Text Effects
Lesson Files
Motion5_Book_Files > Lessons > Lesson_06 > Lesson_06_Start
Media
Motion5_Book_Files > Media > Mountain Gorilla > gorilla face.ai
Time
This lesson takes approximately 60 minutes to complete.
Goals
Create, format, and style text layers
Save and apply text style presets
Format glyphs
Animate text with text behaviors
Customize the Sequence Text behavior
Save text animation favorites
Animate text on a path
Work with motion blur
Text and motion graphics were made for each other. When you integrate video, audio, motion graphics, and animated text into a presentation, you have a powerful vehicle for entertaining, educating, and persuading your audience.
The text engine in Motion is powerful and flexible. Using the text behaviors along with formatting, styling, and animation tools, you can create dynamic, engaging, and unique text treatments to complement your motion graphics.
In this lesson, you will develop an animated text for your Mountain Gorilla project.

Creating, Formatting, and Styling Text Layers
The first step is to place your text at the appropriate time using project markers, and in the appropriate space relative to the background. After entering text using the Text tool, you will adjust its format and style in the HUD and the Inspector. You’ll work with an updated Mountain Gorilla project similar to the one you finished in Lesson 5.
1. Open Lessons > Lesson_06 > Lesson_06_Start and save it to the Student_Saves folder.
2. If the playhead is not already at the start of the project, press Home (or if your keyboard lacks a Home key, press Fn-Left Arrow). Then press Command-Option-Right Arrow to move the playhead to the first marker at 00:29.

Let’s place the main text at this marker.
You can add your own marker by selecting a layer and pressing M. If no layer is selected, the marker is added to the Timeline Ruler.
3. In the Layers list, select the Sidebar group. Click the New Group (+) button to create a new group, and name it Text. The Text group is created above the Sidebar group. To create a text layer, use the Text tool.
4. Press Shift-Z to view the entire Canvas. In the toolbar, select the Text tool, or press T.
5. Click just above the gorilla’s head, and type Mountain. Press Return, and on the next line type Gorillas.
Your text font may appear differently than the font used in the following figure depending on the most recent font you used in a Motion project. The screen shot is best used to get a rough idea of the placement of the text and not its appearance.

6. Press Esc to return to the Select/Transform tool.
With the title typed, you can format the text to better fit the space provided and to match the style of your graphic.
7. Open the HUD, if necessary, and drag the Size slider to 75 points. From the Font pop-up menu, choose Trebuchet MS Bold, and under the font name, click the Center Alignment button.

If you drag through the list of fonts, the text in the Canvas will update the font in real time, so that you can see exactly how each font looks in your project.
It’s a good idea to turn on the safe zones to help place the text.
8. From the “View and Overlay” pop-up menu at the top right of the Canvas, choose Safe Zones, or press the ’ (apostrophe) key.

The outer blue rectangle represents the action-safe area, and all critical action should happen within it. The inner blue rectangle represents the title-safe area, and critical text shouldn’t extend outside it.
Although the safe zones were designed for broadcast television viewing, they ensure that you don’t crowd the edge of the frame no matter which delivery system or display device your audience is using.
9. In the Canvas, drag the text while watching the dynamic guides, and center the text over the gorilla’s head within the title-safe area.
You can continue to modify the text format and style in the HUD, but to access even more parameters, use the Inspector.
10. Close the HUD and press F4 to open the fourth pane of the Inspector, which is now the Text pane. The Text pane contains a large number of parameters in three panes: Format, Style, and Layout.
The Format pane contains many of the parameters also found in the HUD, such as the font family, typeface, size, and tracking.
11. In the Format pane, change the line spacing to –15 to bring the two text lines closer together. Then, change the tracking to roughly 25% to spread the characters farther apart. Lastly, at the bottom of the Inspector, select the All Caps checkbox to convert your text to capital letters.

12. In the Inspector, click the Style pane.
In the Style pane, you can customize four attributes of a text layer: Face, Outline, Glow, and Drop Shadow. Each attribute has a similar group of adjustable parameters. The text color is pure white by default, so it doesn’t quite match the jungle colors you’re after in this project.
13. Click the Face color eyedropper icon, and then click the yellow line coming down to the right of the text to apply that color to the text layer.

An outline could help distinguish this text from the background.
14. Select the Outline checkbox, click the arrow next to the color well, and select black. Increase the Width to 2.

That more clearly sets off the text, but a soft, subtle drop shadow would add some depth.
15. Select the Drop Shadow checkbox. Change Opacity to 80% and Blur to 2.
You can often improve the appearance and readability of text by adjusting the distance between individual characters, a technique called kerning. Some letters in Gorillas look a little too far apart relative to the others, but you can fix that.
16. Double-click the text in the Canvas to select it, and then click once between the o and r of the word Gorillas to place the insertion point.

17. Press Control-Left Arrow a few times to reduce the space between the letters.
If you are using Mac OS X Lion, be sure to disable all Mission Control keyboard shortcuts located in the Keyboard System Preferences to enable Control-Arrow shortcuts in Motion.
18. Press the Left and Right Arrow keys to move the pointer between the other characters, and adjust the kerning as you see fit. Press Esc to exit the Text tool, reposition the text layer as necessary, and save your work.
The main text for the project is now positioned and formatted so you can move on to the next text layer. Don’t worry if this text isn’t perfect. In Motion you can change the format, style, and layout of text at any stage of your project.
Saving Text Style Presets
You want to create several other text layers for this project. Rather than building each layer from scratch, you can save your modified text as a style preset, and then apply that preset to other text layers.
1. With the Mountain Gorillas text layer still selected, click the Style Preset pop-up menu that currently displays the title NORMAL.
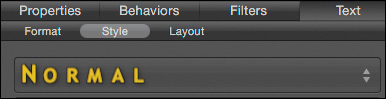
In this menu, you can select one of the preset text styles from the Motion Library or save your own style. When saving a style, you have the option to save only the Format parameters (including Font, Size, and Tracking) or only the Style parameters (including Face, Outline, Glow, and Drop Shadow); or you can save all the parameters from both the Format and Style panes.
2. Choose Save Style Attributes. The Save Preset To Library dialog appears. Type Trebuchet Yellow Outline and Shadow and click Save.
The new custom preset now appears in the Style Preset pop-up menu and in the Text Styles section of the Library. Let’s prepare for the next text layer and see how you can apply the new style.
3. In the Timeline, press Command-Option-Right Arrow to move the playhead to the second marker, at 3:59. This is the point where the red paint stroke is fully onscreen and the next line of text should appear.

4. In the Layers list, select the Background Group, and press T to choose the Text tool. Click directly over the red paint stroke, and type A Species in Danger.

Motion applies formatting identical to the most recent time you used the text tool, so the font, size, and color are the same, but the style is not. Furthermore, this text layer needs to be centered.
5. Press Esc to exit the Text tool. In the Format pane of the Inspector, click the Center Alignment button, and reposition this text layer so that it fits within the red paint stroke, centered under the gorilla.

6. Press Command-2 to open the Library. Select the Text Styles category, and locate the Trebuchet Yellow Outline and Shadow preset style you saved. The small human silhouette at the bottom right of the icon indicates that the preset was created by a user and is not part of the original Motion Library.
7. In the Layers list or the Canvas, drag the text style preset onto the text layer.
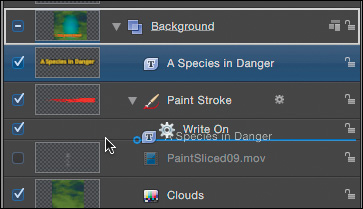
8. To make the red paint stroke reveal the text, drag the A Species in Danger text layer below the Paint Stroke layer in the Layers list.
Saving styles can help you quickly reuse great-looking text parameter combinations you may have created for previous projects. The Style settings take up very little storage space so it’s worth creating lots of them and giving them names that will make them easy to find in the future.
Modifying a Single Character
So far, you’ve formatted entire text layers, assigning the same size and color to each letter in the text. You can also make those changes to individual text characters, or glyphs, using the Transform Glyph tool.
1. In the Timeline, press Command-Option-Right Arrow to move the playhead to the third marker.
By now, you know how to type text, so we’ll save you the steps. For this exercise, the text was already created but disabled in the Sidebar group. You’ll enable the text layer and then change an individual glyph.
2. In the Layers list, open the Sidebar group and select the activation checkbox to view the text layer The Gorilla Group Fund.

You will redesign the fund’s text so that it stands out a bit more in your project. Using the Transform Glyph tool, you’ll resize a letter G so it can be used for both Gorilla and Group. Let’s start by deleting one of the current letter Gs.
3. In the Layers list, select The Gorilla Group Fund text, and then double-click the text in the Canvas to activate the Text tool.
4. Click between the letters G and O of Gorilla, and then press Delete. To push the remaining letters in the word roughly back into place, press the Spacebar and then press the Esc key.

Because you will work within a small area of the Canvas, you may want to zoom into that work area.
5. Press Command-Spacebar, and then drag the Gorilla Group text to the right to zoom into it. Next, Spacebar-drag in the Canvas to center the text you’ll work on.

If you press Command-Spacebar and the Spotlight search window opens, hold the Spacebar first then hold the Command key.
6. Control-click (or right-click) the Gorilla Group Fund text, and from the shortcut menu, choose Transform Glyph.
You can also choose the Transform Glyph tool by clicking the Select/Transform tool in the toolbar and choosing Transform Glyph from the pop-up menu.
A bounding box surrounds a glyph in the text layer, which you can use to change its scale, rotation, and position as well as its color, outline, glow, and drop shadow.
Although you can change the style parameters for an individual glyph, you cannot assign a saved style to an individual glyph.
The selected glyph has onscreen controls for position and rotation. You can drag the red, green, and blue arrows to change the position of the glyph along the x-axis (horizontally), the y-axis (vertically), or the z-axis (toward or away from the viewer), respectively. You drag the hollow white circles to rotate the glyph around each of the x, y, and z axes.
7. Select the G in Group and experiment by dragging the various controls.

8. When you finish experimenting with the various manipulation tools on the glyph, press F4 to open the Text pane in the Inspector.
Changes you make to the glyph in the Canvas are stored in the Scale, Offset, and Rotation parameters of the Advanced Formatting section in the Format pane (but not in the Scale, Position, or Rotation parameters of the Properties pane, which apply only to the text layer as a whole).
You’ll reset the Scale, Offset, and Rotation in the Advanced Formatting area to get the G back to our starting point.
9. Press Command-Z several times to return the G to its initial position.
10. Shift-drag a bounding box control handle to increase the G glyph’s size to about 200%, or until the top of the G is at the same level as the top of the other letters in Gorilla.

Scaling the G positioned it far from the remaining letters in the word Group and too close to the remaining letters of Gorilla.
11. Select the o in Gorilla, and then Shift-click the a to select all the remaining letters in the word.
12. Drag the x-axis drag handle (red arrow) to reposition the orilla away from the G.

13. Select the r in Group, and then Shift-click the p to select all the remaining letters in the word.
14. Drag the y-axis drag handle (green arrow) with the x-axis drag handle (red arrow) to reposition the roup next to the G. Adjust the word fragment so that the r in Group and the o in Gorillas are directly under each other.

15. Select the F in Fund, and then Shift-click the d. With the entire word now selected, reposition it under the word Group, and line up the F of Fund under the r of Group.
You’ll also make the word Fund slightly smaller than the Gorilla Group.
16. With the word Fund still selected, in the Inspector adjust the Scale slider in the Advanced Formatting section to 75%.
17. Do the same with the word The, bringing it in closer to the word Gorilla and positioning the T over the o. Then scale the entire word to 75% using the Scale slider in the Inspector.

When repositioning a character with the Transform Glyph tool, remember that you are changing its Offset parameter in the Format pane of the Text Inspector, not changing the Position parameter in the Properties pane.
18. Save your work, press Shift-Z to see the entire Canvas, and then press the ’ (apostrophe) key to turn off the safe zones. Finally, press Tab to choose the Select/Transform tool.
You have one more text layer to create; this time you’ll place the text along a path.
Placing Text on a Path
At times a project calls for just a bit more dynamic text placement than a straight horizontal line. Now, don’t get all crazy with this effect. Use it judiciously and it can be a wonderful thing. Do it over and over, and it becomes gratuitous. It’s a fine line, just not always horizontal.
1. In the Timeline, press Command-Option-Right Arrow to move the playhead to the fourth and final marker.
This location has another piece of text created but disabled in the Sidebar group. You’ll enable it and place it on a path around the Earth.
2. In the Layers list Sidebar group, select the activation checkbox to view the Help save the mountain gorilla text in the Canvas.

The Layout pane in the Inspector contains typical page layout settings such as margins, but it also has more sophisticated layout options such as paths that allow you to convert a text baseline into a spline curve.
3. In the Layers list, select the Help save the mountain gorilla text.
4. In the Inspector, click the Layout pane, and from the Layout Method pop-up menu, choose Path.

When you set the Layout Method to Path, Path Options is enabled further down in the Inspector interface. By default, the path is an open spline you can modify by double-clicking the text in the Canvas. For this exercise, you will place the text on a circle around the Earth.
5. From the Path Shape pop-up menu, choose Circle.

6. In the Canvas, double-click the selected text to see the path.
You can drag the handles on the circular path to reshape the circle with movement constrained to a single direction. When you drag the handles extended from the right side of the path, you access freeform reshaping. In the next step, you’ll drag the freeform handles in conjunction with the Shift key to scale the circle around the Earth.
7. Shift-drag one of the freeform handles to best fit the path around the Earth.
Take your time aligning the text. The tighter the fit, the nicer this layout will look. You may need to return to the Select/Transform tool and reposition the path to get the best fit.

8. When you complete the adjustments, save your work.

You’ve formatted and created a number of great layouts for all the text in your project. But this is a motion graphics project. It’s time to animate the text using a mix of keyframes, basic behaviors, preset text behaviors, and even a text behavior of your own creation.
Applying Text Behaviors
Now that your text is nicely formatted, styled, and positioned, it’s time to animate it on and off the screen. In addition to the keyframing methods and behaviors you already know, Motion includes a collection of text behaviors that are designed specifically to animate text.
1. In the Canvas, select The Gorilla Group Fund.
2. Press Command-2 to open the Library, and choose Behaviors > Basic Motion.
Just about any behavior in the Library can be applied to text, and some—like the Fade In/Fade Out behavior—are very useful.
3. In the Layers list, drag the Fade In/Fade Out behavior onto the Gorilla Group Fund layer, and then click Play to see the results. Stop playback when you are done.
The entire text block fades in smoothly and then fades out at the end. But instead of animating the entire text layer as a single object, you could attract more attention to the text by using a group of behaviors designed specifically to animate individual characters.
4. In the Layers list, close the Sidebar group and open the Background group. Make sure that the Select/Transform tool is still chosen.
5. Select the A Species in Danger layer. Press Shift-I to move the playhead to the layer’s In point, press Command-Option-I to set a play range In point, and finally, press the Spacebar to start playback.
6. In the Library, choose the Behaviors category. You’ll find two folders of text behaviors: Text Animation and Text Sequence.
7. Select the Text Sequence folder, and then click the disclosure triangle next to the Text-Basic folder (or, if you are in icon view, double-click the folder).
Each folder in the Text Sequence folder contains text sequence behaviors of various styles. A text sequence behavior creates animation that ripples or sequences through the characters in the layer, animating each one in the same manner but at different points in time, creating a falling domino effect.
8. Locate the Blur In behavior, and drag it to the A Species in Danger text layer in the Project pane’s Layers list or the Timeline layer list. Click Play.

The behavior appears under the layer in the Layers list and the mini-Timeline. To see the animation, you’ll need to temporarily hide the paint stroke.
9. In the Layers list, select the activation checkbox next to Paint Stroke to hide it in the Canvas.
The text in the Canvas animates onto the screen one letter at a time, with each letter starting very blurry and then coming into focus.
Notice that the behavior duration is shorter than the text layer duration. All other behaviors, filters, and masks last as long as the layer to which they are applied; but because the text behaviors are designed to animate text on and off the screen, they have a shorter default duration.
10. From the Library, drag the Blur Out behavior onto the same text layer, and in the mini-Timeline, drag the entire behavior to the right so that its Out point aligns with the end of the project. The text now animates on and off the screen.

If the text lasts too long, you can trim it and reposition the behavior.
11. Press the Spacebar to stop playback, and then position the playhead at 8:19. Drag the end of the Blur Out behavior to align it with the playhead. Then select the A Species in Danger layer, and press O to mark the current playhead position as its new Out point.
Shift-dragging layers in the Timeline snaps the layers to the playhead and/or markers and makes it easier to position tracks precisely.

12. In the transport controls, click “Play from Start” to view the play range. Now the text blurs on screen and blurs off with the correct duration.
13. In the Layers list, select the activation checkbox next to Paint Stroke to show the paint stroke.
14. Press Option-X to reset the play range to the start and end of the project, and then press the Spacebar to stop playback.
Motion includes well over 125 text behaviors. Some are designed to animate text onto the screen, some animate text off the screen, and others just ripple through text like a glint of light. When you have time to experiment, try combining various styles of text behaviors to produce very sophisticated title animations.
Animating Text Using the Sequence Text Behavior
All the behaviors in the Text Sequence folders are presets that were created using the Sequence Text behavior. When you understand how it works, you will be able customize any of the presets based on this behavior, and you will be able to create new animations from scratch.
1. In the Library, select the Text Animation folder. Tucked innocently among three other very useful behaviors is the Sequence Text behavior.
2. Drag the Sequence Text behavior to the Mountain Gorillas layer and play the project. Because the behavior has no default values it does nothing by default, and it lasts for the duration of the layer, which is much too long for this project.
3. In the mini-Timeline, drag the behavior’s Out point to the left. Using the information box as a guide, trim it to a duration of 1:00. Next, set the play range to focus just on the area you are adjusting.
4. Stop playback and set the play range by positioning the playhead at 2:59, and pressing Command-Option-O. Press the Spacebar to start playback.
You’d like the letters to fall into place randomly. So they need to rotate forward at the start. As a reminder, as when you’re using the Transform Glyph tool, you can drag the red, green, and blue arrows to change the position of the glyph along the x-axis (horizontal), the y-axis (vertical), or the z-axis (toward or away from the viewer). Drag the hollow white circles to rotate the glyph around each of those axes.
5. In the Canvas, locate the hollow white circle at the top of the letter M and drag it down until it is facing down 90 degrees.

This action sets the initial positions for all the characters. During the animation all the characters will start face down and animate back to their original positions by default.
6. Drag the y-axis drag handle (green arrow) to the right until the M starts to move offscreen.
You don’t have enough room around the Canvas to position the M and place all the letters offscreen. To make this a little easier, you can zoom out of the Canvas to provide more maneuvering space.
7. From the Zoom Level pop-up menu at the top of the Canvas, choose 25%.
8. Drag the y-axis drag handle (green arrow) and the z-axis drag handle (blue arrow) until all the letters start animating completely offscreen and fall into position. Then press Shift-Z to fill the Canvas with the project.

You can decide how many characters animate at any given time by adjusting the Spread parameter.
9. In the HUD, increase Spread to about 15. Up to 15 characters are now either finishing or starting to animate at once, which creates a smoother, overlapping animation. The total duration of the animation, however, remains unchanged.
10. In the HUD, from the Direction pop-up menu, choose Random. The letters now appear to animate into position in a random order.
While you can interactively change the starting position, rotation, and scale of a character, you can change additional parameters in the Inspector.
11. Press F2 to open the Behaviors pane of the Inspector. From the Parameter pop-up menu, choose Format.

You can animate all the parameters in this pop-up menu, which includes most of the parameters from both the Format and Style panes of the Text Inspector. You can start to see why this behavior is so powerful.
Each parameter you choose is added to the Sequence Text behavior and appears in the Behaviors pane, where you can change its starting value.
12. Choose Format > Opacity, and then drag the Opacity slider to 0.
13. From the Speed pop-up menu, choose Ease Out to enable a smoother landing at the end of the behavior.

That animation is not bad, but you can still mix it up a bit for more visual variety. Each character animates on at a different time, but the animation is exactly the same for each. Adjust the Variance parameters to vary the animation for each character.
14. In the Behaviors pane, increase the Variance value to about 10%, and then experiment with changing the other parameters. The basic animation is the same, but Variance introduces a small amount of randomness to the attributes animated in the Text Sequence behavior.

15. Stop playback, save your work, and press Option-X to reset the play range.
Creating an animation like this with keyframes would take a very long time to set up, and the results would be impossible to modify! The Variance parameter makes it easy to vary the animation by dragging a single slider.
When you create a new text behavior or modify an existing one, you can save it as a Favorite so that you can reapply it at any time to any project.
16. At the bottom of the Library categories, select the Favorites category.

17. In the Layers list, triple-click the Sequence text layer to select its name, and type Random Fly In to rename it. Then press Return.
18. Drag the newly named Random Fly In behavior from the Layers list into the Stacks area in the lower half of the Library. This custom preset is now available for use with any Motion project on this computer.

Animating Text on a Path
To complete this project, you will animate the text you placed on the path around the Earth.
1. In the Timeline, press Command-Option-Right Arrow or Command-Option-Left Arrow to go to the last marker.
This marker is placed where the text comes onscreen. You’ll choose a better rotation point for the text to appear and then use keyframes to rotate the text around the Earth.
2. Close the HUD, and in the Layers list, close the Text group.
3. Open the Sidebar group, and then select the Help save the mountain gorilla text layer.
4. In the transport controls, click the Record Keyframe button.
5. Press F4 to open the Text pane in the Inspector.
6. In the Path Options area, drag the Path Offset slider to 65.
The text now comes onscreen near the lower part of the Earth. Let’s set a keyframe at the end of the project.
7. Press End, or drag the playhead to the end of the project.
8. Drag the Path Offset slider to –40.
9. In the transport controls, click the Record Keyframe button again to disable it.
10. Press Command-Option-Left Arrow to move the playhead to the last marker, and click Play to start the animation.
You are getting there. It would look smoother if the text typed onscreen instead of popping on. To achieve this, you can combine the keyframes you just created with a behavior to type the text onscreen.
11. Press Command-2 to open the Library, and choose Behaviors >Text Sequence Behaviors > Text Basic.
12. Drag the Rotate In text behavior to the Help save the mountain gorilla layer in the Layers list.
13. Press the Spacebar to play the entire project to see all your animations, if necessary, including the new type-on effect you just applied.
14. Press Stop, and then save your work.
This same animation could have been created solely with keyframes or behaviors. The choice is yours, but in most cases using behaviors will provide more flexibility when you need to modify the animation.
Adding Motion Blur
Sometimes, an animation can be made to look more natural by adding blur based on a layer’s direction and speed. This type of blur is called motion blur. As a final step, let’s try enabling and adjusting motion blur for this project. In Motion, motion blur is a universal property that you turn on or off for the entire project.
1. Position the playhead at 0:49.
2. From the Render Options pop-up menu at the top right of the Canvas, choose Motion Blur, or press Option-M.

You can see how motion blur affects the Mountain Gorilla text and the Earth as it rotates, making it appear much more natural. Motion blur creates subframes between the current frame and adding them to the current frame with varying levels of opacity. Because each frame uses information from multiple subframes, the playback speed and render times are affected. You can adjust the number of samples and the shutter angle in the Project Properties window.
3. Choose Edit > Project Properties, or select the Project icon in the Layers list.

The Properties pane now shows the Project Properties.
In the Motion Blur section, the default number of samples is eight, and the shutter angle is 360 degrees. Samples refer to the number of subframes rendered for every 360 degrees of shutter angle. The shutter angle acts like the shutter of a film camera. Increasing the angle increases the number of frames over which the shutter is open, thereby spreading out the samples.
4. Increase Samples to 16, decrease Shutter Angle to 180 degrees, and click OK. You now have more copies of each character, and they are spaced more closely together.
As with the Render Quality setting, it’s a good idea to leave Motion Blur turned off while you are working and then turn it on before exporting, or turn it on as an Export option.
5. Press Option-M to turn off motion blur, and save your work.
Nice job. You’ve created, formatted, and styled text layers; changed the format and style of individual glyphs; saved and applied text styles; animated text layers with preset and customized behaviors; animated text on a path; and used motion blur. To expand your knowledge, feel free to dig deeper into the text animation presets and the text options available in Motion.
Lesson Review
1. Name two of the three panes in the Text pane of the Inspector.
2. How do you display the action-safe and title-safe overlays?
3. When modifying an individual character in a text layer, which tool do you use to change its scale, position, and rotation; and how do you select that tool?
4. How do you create a marker?
5. From which two locations can you apply a preset text style?
6. Which behavior was used to create all the text sequence presets in the Library?
7. Which text layer parameters can you animate directly in the Canvas using a Sequence Text behavior?
8. What parameter would you adjust to set the number of characters animating at once in a Sequence Text behavior?
9. With the Transform Glyph tool, you can change the offset, scale, and rotation of a character directly in the Canvas. Where are those parameters located in the Inspector?
10. After changing the Layout Method to Path, what must you do to see the path in the Canvas?
11. Describe one method for turning on motion blur, and identify where you can adjust its settings.
Answers
1. Format, Style, and Layout
2. From the “View and Overlay” pop-up menu at the top right of the Canvas, choose Safe Zones, or press the ’ (apostrophe) key.
3. You use the Transform Glyph tool, which you can select from the 2D Transform tools in the toolbar (the first of three View tools), or by Control-clicking a text layer in the Canvas and choosing Transform Glyph.
4. Select a layer and press M.
5. From the Style Preset pop-up menu in the Style pane of the Text Inspector, or from the Text Styles category in the Library
6. The Sequence Text behavior
7. Position, rotation, and scale
8. The Spread parameter
9. In the Format pane of the Text Inspector (as opposed to the Properties pane, which contains Position, Scale, and Rotation parameters for the entire text layer)
10. Double-click the text in the Canvas.
11. Turn on motion blur from the Render Options pop-up menu, by choosing View > Render Options > Motion Blur, or by pressing Option-M. To change its settings, open the Project Properties window by choosing Edit > Project Properties, or pressing Command-J.
Keyboard Shortcuts
