
Figure 9-1: The android-support-v13.jar file in your project listing.
Creating the Application’s Screens
The Task Reminder application needs two different screens to perform all its basic functions: create, read, update, and delete (CRUD) tasks:
![]() One view lists all current tasks in the application. This view also allows the user to delete a task by long-pressing the item.
One view lists all current tasks in the application. This view also allows the user to delete a task by long-pressing the item.
![]() A view to allow the user to view (read), add (create), or edit (update) a task.
A view to allow the user to view (read), add (create), or edit (update) a task.
Each screen eventually interacts with a database for changes to be persisted over the long-term use of the application.
Each screen consists of a single code fragment that contains most of the user interface for the screen, and that fragment is contained in an activity.
 You can reuse fragments if — or when — you build tablet support into your app. See Part IV for tablet development.
Starting the new project
To get started, open Eclipse and create a new Android project with a valid name, package, and activity. Table 9-1 shows the Eclipse settings for the Task Reminder app. (If you’re unfamiliar with how to create an Android project, see Chapter 3.)
If you download the source code from this book’s website, you can also open the Chapter 9 Android project example.
Table 9-1 New Project Settings
|
Property |
Value |
|
Project Name |
Task Reminder |
|
Build Target |
Android 4.0.3 (API Level 15) |
|
Application Name |
Task Reminder |
|
Package Name |
|
|
Create Activity |
|
|
Min SDK Version |
|
Note the Create Activity property value — ReminderListActivity. Normally, you give the first activity in an application the name of MainActivity; however, the first screen the user sees in the Task Reminder app is a list of current tasks. Therefore, this activity is an instance of a ListActivity; hence the name ReminderListActivity.
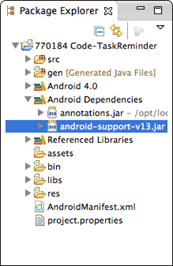
The Task Reminder app uses features from the Android Support Library to support devices running Android 2.x and earlier. Add the library to your Eclipse project by following these steps:
1. Copy the android-support-v13.jar
file to your project’s libs directory.
It’s in ANDROID_SDK/extras/android/support/v13.
If you can’t find the android-support-v13.jar file in your Android SDK directory, you may not have installed the support library yet. Open the Android SDK Manager and click Extras to install the support library from there.
2. Choose Project⇒Clean from the Eclipse menu.
Once the project finishes rebuilding, your Android Dependencies listing should look like the one shown in Figure 9-1.
Creating the ReminderListActivity
The ReminderListActivity class that Eclipse generated for you is practically empty so you’ll want to make some changes to it. Do the following:
![]() Rename the
Rename the activity_main.xml
file to reminder_list.xml
. Eclipse starts your project with the activity_main.xml file, located in the res/layout directory. To make it easy to find your layout file when you open the directory, rename it to something more informative. To rename the activity_main.xml file, right-click it and choose Refactor⇒Rename or select the file and press Shift+Alt+R.
![]() Update the Java file. After you change the filename, you need to update the name of the file in the
Update the Java file. After you change the filename, you need to update the name of the file in the setContentView() call inside the ReminderListActivity.java file. Open the file and replace R.layout.activity_main with R.layout.reminder_list.
![]() Change the inheritance. Because the
Change the inheritance. Because the ReminderListActivity contains fragments, it needs to inherit from the FragmentActivity class instead of the regular base activity. Make that change, too.
Your new ReminderListActivity class now looks like Listing 9-1.
Listing 9-1: The ReminderListActivity Class
public class ReminderListActivity extends FragmentActivity {
/** Called when the activity is first created. */
@Override
public void onCreate(Bundle savedInstanceState) {
super.onCreate(savedInstanceState);
setContentView(R.layout.reminder_list);
}
}
setContentView() uses the reminder_list layout file, but you haven’t defined that yet. Open the res/layout/reminder_list.xml file and update it to look like Listing 9-2.
Listing 9-2: The reminder_list.xml Contents
<?xml version=”1.0” encoding=”utf-8”?>
<fragment
xmlns:android=”http://schemas.android.com/apk/res/android”
android:name=”com.dummies.android.taskreminder.ReminderListFragment”
android:layout_width=”fill_parent”
android:layout_height=”fill_parent” />
The layout file for your activity has only a single element in it, the ReminderListFragment, which takes up the full height and width of the screen. The ReminderListFragment does all the hard work to display the list of tasks to the user.
Creating the ReminderListFragment
Fragments are the parts of your activities that are meant to be re-used throughout your application. Most activities have one or two fragments. The list activity needs a fragment to display the list of tasks, so create a new file named ReminderListFragment and copy the code in Listing 9-3.
Listing 9-3: The ReminderList Fragment
package com.dummies.android.taskreminder;
import android.os.Bundle;
import android.support.v4.app.ListFragment; →4
import android.view.View;
public class ReminderListFragment extends ListFragment {
@Override
public void onActivityCreated(Bundle savedInstanceState) { →10
super.onActivityCreated(savedInstanceState);
setEmptyText(getResources().getString(R.string.no_reminders)); →12
}
}

Here’s a brief explanation of the code in Listing 9-3:
→4 This line ensures that you’re using the android.support.v4.app.* imports and not their equivalents from android.app.
 Import
 android.support.v4.app.Fragment and android.support.v4.app.FragmentTransaction, and not their equivalents from android.app. Using the android.support.v4.* classes from the Android Support Library ensures that your application works on devices with Android versions going back to v4 (Android 1.6). If you don’t care about versions of Android before 3.x, feel free to skip the support library.
→10 The activity’s (not the fragment’s) onCreate() method returns and calls the onActivityCreated() callback.
If you need to do anything with your fragment’s views, onActivity Created() is a great place to do it because your fragment’s views are guaranteed to be fully constructed at that point.
→12 The ListFragment supports showing a message when the list is empty. The call uses a value of setEmptyText(), and the message uses a value of R.string.no_reminders.
Add <string name=”no_reminders”>No Reminders Yet</string> to your strings.xml file. See Chapter 6 for more information about adding strings to your strings.xml file.
Using an activity to create and edit reminders
The Task Reminder application needs an additional screen that allows the user to edit a task and its information. This new activity and fragment will allow users to create, read, and update tasks.
In Eclipse, follow these steps:
1. Create a new activity that can handle the create, read, and update roles.
Right-click the package name in the src folder and choose New⇒Class, or press Shift+Alt+N and then choose Class. Name it ReminderEditActivity.
2. In the new Java class window, set the superclass to android. support.v4.app.FragmentActivity and click Finish.
A new activity class file opens.
3. Replace the contents of the activity class file with Listing 9-4.
This code creates the activity, sets its content view, and then sets up the fragment for the activity.
Listing 9-4: ReminderEditActivity
package com.dummies.android.taskreminder;
import android.os.Bundle;
import android.support.v4.app.Fragment; →3
import android.support.v4.app.FragmentActivity;
import android.support.v4.app.FragmentTransaction;
public class ReminderEditActivity extends FragmentActivity {
@Override
public void onCreate(Bundle savedInstanceState) {
super.onCreate(savedInstanceState);
setContentView(R.layout.reminder_edit_activity); →11
Fragment fragment = getSupportFragmentManager().findFragmentByTag(
ReminderEditFragment.DEFAULT_EDIT_FRAGMENT_TAG); →15
if (fragment == null) { →17
fragment = new ReminderEditFragment();
Bundle args = new Bundle();
args.putExtra(ReminderProvider.COLUMN_ROWID, getIntent()
.getLongExtra(ReminderProvider.COLUMN_ROWID, 0L)); →21
fragment.setArguments(args); →22
FragmentTransaction transaction = getSupportFragmentManager()
.beginTransaction(); →25
transaction.add(R.id.edit_container, fragment,
ReminderEditFragment.DEFAULT_EDIT_FRAGMENT_TAG); →27
transaction.commit(); →28
}
}
}
Here’s a brief explanation of the code in Listing 9-4:
→3 This line ensures you’re using the android.support.v4.app.* imports and not their equivalents from android.app.
→11 This line sets the layout for this fragment. Listing 9-5 shows the code for the R.layout.reminder_edit_activity.
→15 Before a fragment is added for the first time, this line checks to see whether one is already there.
If an activity was re-created from another activity — say, after a screen rotation — the previous fragment would have also been re-created, and that one is used instead of creating one from scratch.
→17 If the activity couldn’t find a previous fragment, this line creates a new fragment.
→21 Intents can have extras, which allow activities to pass information from one to another. In line 21, the intent uses getLongExtra() to retrieve the long named COLUMN_ROWID if it’s there. If it’s not, the intent uses the value 0L (or 0 as a long).
→22 Fragments need arguments. Unlike with normal Java classes, you can’t pass arguments to a fragment via a constructor. Instead, line 22 uses a bundle named Fragment.setArguments().
→25 Any time you want to interact with a fragment, you must use a FragmentTransaction. This line calls FragmentActivity.getSupportFragmentManager() to get the FragmentManager, and from there calls FragmentManager.beginTransaction() to start a transaction. All fragments operate between the Fragment Transaction.beginTransaction() and Fragment Transaction.commit() calls.
→27 This line adds the fragment to the activity. It places the fragment in a FrameLayout placeholder named R.id.edit_container (which you define in Listing 9-5) and names it DEFAULT_EDIT_FRAGMENT_TAG so that the app can find it again by that name.
→28 This line finishes the transaction.
You may notice that the fragment is set up differently in this class than for the ReminderListActivity class. In ReminderListActivity, the <fragment> element is added directly to the XML because the fragment needed no parameters. The ReminderEditFragment activity needs the fragment to be manually added by using Java code to pass the reminder ID.
The reminder_edit_activity.xml layout file shown in Listing 9-5 consists of a single full-screen placeholder element called edit_container that the Java code in Listing 9-1 uses to attach the ReminderListFragment.
Listing 9-5: R.layout.reminder_edit_activity
<?xml version=”1.0” encoding=”utf-8”?>
<LinearLayout xmlns:android=”http://schemas.android.com/apk/res/android”
android:layout_width=”fill_parent”
android:layout_height=”fill_parent”>
<FrameLayout
android:id=”@+id/edit_container”
android:layout_width=”fill_parent”
android:layout_height=”fill_parent”
/>
</LinearLayout>
The ReminderEditActivity uses a constant in a class called ReminderProvider which doesn’t exist yet, so create that class now and edit it to look like the following:
package com.dummies.android.taskreminder;
public class ReminderProvider {
public static final String COLUMN_ROWID = “_id”;
}
You also need to inform the Android platform about the existence of the ReminderEditActivity by adding it to the Android Manifest. You can do so by adding it to the Application element of the AndroidManifest.xml file, as shown here in bold:
<application android:icon=”@drawable/ic_launcher” android:label=”@string/app_name”>
<activity android:name=”.ReminderListActivity”
android:label=”@string/app_name”>
<intent-filter>
<action android:name=”android.intent.action.MAIN” />
<category android:name=”android.intent.category.LAUNCHER” />
</intent-filter>
</activity>
<activity android:name=”.ReminderEditActivity”
android:label=”@string/app_name” />
</application>
 If you don’t add the activity to the
 AndroidManifest.xml file, you receive a runtime exception informing you that Android cannot find the class (the activity).
Adding a fragment to the activity
After you’ve created an activity to hold the ReminderEditFragment, it’s time to create the fragment. Create a new Java class, name it ReminderEditFragment, and copy the following code into the file:
package com.dummies.android.taskreminder;
import android.os.Bundle;
import android.support.v4.app.Fragment; →4
import android.view.LayoutInflater;
import android.view.View;
import android.view.ViewGroup;
import android.widget.Button;
import android.widget.EditText;
public class ReminderEditFragment extends Fragment {
public static final String DEFAULT_EDIT_FRAGMENT_TAG = “editFragmentTag”; →12
private EditText mTitleText;
private EditText mBodyText;
private Button mDateButton;
private Button mTimeButton;
private Button mConfirmButton;
private long mRowId; →19
@Override
public void onCreate(Bundle savedInstanceState) { →22
super.onCreate(savedInstanceState);
Bundle arguments = getArguments(); →25
if (arguments != null) {
mRowId = arguments.getLong(ReminderProvider.COLUMN_ROWID);
}
}
@Override
public View onCreateView(LayoutInflater inflater, ViewGroup container,
Bundle savedInstanceState) { →33
View v = inflater.inflate(R.layout.reminder_edit, container, false); →35
mTitleText = (EditText) v.findViewById(R.id.title);
mBodyText = (EditText) v.findViewById(R.id.body);
mDateButton = (Button) v.findViewById(R.id.reminder_date);
mTimeButton = (Button) v.findViewById(R.id.reminder_time);
mConfirmButton = (Button) v.findViewById(R.id.confirm);
return v;
}
}
Here’s how the code works:
→4 Make sure you’re using the android.support.v4.app.* imports and not their equivalents from android.app.
→12 Activities need a tag or an ID to refer to when they work with fragments. This line gives the ReminderEditFragment a tag so it can be found again later using the same tag.
→19 Every instance of ReminderEditFragment has an ID for the reminder. The Row ID corresponds to a row in the database. When editing existing reminders, mRowId is the ID of the row in the database for that reminder. New reminders get a mRowId of 0.
→22 Fragments have onCreate() methods, just as activities do. onCreate() is called when the fragment is created, and you generally do most of the fragment initialization in onCreate.
Unlike with activities, though, you don’t do initialization related to views in onCreate. Those have to wait until onCreateView() on line 33.
→25 The fragment finds out which reminder the user is editing or creating by calling getArguments().
Arguments come from the bundle that’s returned by get Arguments(), not from the bundle that’s passed into on Create() (an easy mistake to make).
→33 Unlike with activities, you inflate your XML layouts in Fragment.onCreateView() instead of using Activity.setContent View(). This line inflates R.layout.reminder_edit layout, and then calls findViewById() to set up the View objects, much like you would do when initializing an activity.
You could set up the View objects in onActivityCreated(), but it’s convenient to do so in onCreateView() in this case because you’re not manipulating views. See the sidebar “The fragment lifecycle” for more information about onActivity Created() versus onCreateView().
→35 This line calls inflate() with attachToRoot set to false, because the fragment attaches the view.
The fragment lifecycle
Just like activities (see Chapter 5), fragments have their own lifecycle.
Like an activity, a fragment can exist in three states:
![]() Resumed: The fragment is visible in the running activity.
Resumed: The fragment is visible in the running activity.
![]() Paused: Another activity is in the foreground and has focus, but the activity in which this fragment lives is still visible (the foreground activity is partially transparent or doesn’t cover the entire screen).
Paused: Another activity is in the foreground and has focus, but the activity in which this fragment lives is still visible (the foreground activity is partially transparent or doesn’t cover the entire screen).
![]() Stopped: The fragment is not visible. Either the host activity has been stopped or the fragment has been removed from the activity but added to the back stack. A stopped fragment is still alive (all state and member information is retained by the system). However, it is no longer visible to the user and will be killed if the activity is killed.
Stopped: The fragment is not visible. Either the host activity has been stopped or the fragment has been removed from the activity but added to the back stack. A stopped fragment is still alive (all state and member information is retained by the system). However, it is no longer visible to the user and will be killed if the activity is killed.
Most of the fragment callbacks are very similar to the activity callbacks. However, there are some important differences. The three most common fragment callbacks are
![]()
onCreate: Unlike an activity, fragments don’t have a setContentView() method. Unlike activities, views are not created at all in a fragment’s onCreate() method, so there is no way to manipulate views in onCreate().
![]()
onCreateView: To create a view in a fragment, override the onCreateView() method and inflate the view yourself, and then return it at the end of the function. See Listing 9-1 for an example. One important thing to note: Even though the views are created, they aren’t fully constructed yet. If any saved state needs to be restored to the view (for example, if the activity was destroyed and re-created because of a screen rotation), that state isn’t available until the next step.
![]()
onActivityCreated: onActivityCreated() is the final step called before your fragment is fully created. At this point, your fragment is fully set up. Because of this, it’s usually best to put most of the code involving views or saved state in onActivityCreated().
Creating the adding/editing fragment layout
The layout for adding and editing is fairly simple because the form contains only a few fields:
![]() Title: The title of the task as it will show in list view
Title: The title of the task as it will show in list view
![]() Body: The body of the task, where the user would type details
Body: The body of the task, where the user would type details
![]() Reminder Date: The date on which the user should be reminded of the task
Reminder Date: The date on which the user should be reminded of the task
![]() Reminder Time: The time at which the user should be reminded on the reminder date
Reminder Time: The time at which the user should be reminded on the reminder date
When the app is complete and running on a device or an emulator, the screen looks like Figure 9-2.
Figure 9-2: The Add/Edit Task Reminder screen.

To create this layout, create a layout file in the res/layout directory with an appropriate name; for example, reminder_edit.xml. To create this file, follow these steps:
1. Right-click the res/layout
directory and choose New⇒Android XML File.
2. Provide the name in the File field.
3. Leave the default type of resource selected — Layout.
4. Leave the folder set to res/layout
.
5. Set the root element to ScrollView
.
6. Click the Finish button.
You now need to provide all view definitions to build the screen. (Refer to Figure 9-2.) To do this, type the code shown in Listing 9-6.
Listing 9-6: The reminder_edit.xml File
<?xml version=”1.0” encoding=”utf-8”?>
<ScrollView
xmlns:android=”http://schemas.android.com/apk/res/android”
android:layout_width=”fill_parent”
android:layout_height=”fill_parent”> →5
<LinearLayout →6
android:orientation=”vertical” →7
android:layout_width=”fill_parent”
android:layout_height=”fill_parent”>
<TextView android:layout_width=”wrap_content”
android:layout_height=”wrap_content”
android:text=”@string/title” /> →12
<EditText android:id=”@+id/title”
android:layout_width=”fill_parent”
android:layout_height=”wrap_content” /> →15
<TextView android:layout_width=”wrap_content”
android:layout_height=”wrap_content”
android:text=”@string/body” /> →18
<EditText android:id=”@+id/body”
android:layout_width=”fill_parent”
android:layout_height=”wrap_content”
android:minLines=”5”
android:scrollbars=”vertical”
android:gravity=”top” /> →24
<TextView android:layout_width=”wrap_content”
android:layout_height=”wrap_content”
android:text=”@string/date” /> →27
<Button
android:id=”@+id/reminder_date”
android:layout_height=”wrap_content”
android:layout_width=”wrap_content”/> →31
<TextView android:layout_width=”wrap_content”
android:layout_height=”wrap_content”
android:text=”@string/time” /> →34
<Button
android:id=”@+id/reminder_time”
android:layout_height=”wrap_content”
android:layout_width=”wrap_content” /> →38
<Button android:id=”@+id/confirm”
android:text=”@string/confirm”
android:layout_width=”wrap_content”
android:layout_height=”wrap_content” /> →42
</LinearLayout>
</ScrollView>
Here’s brief explanation of the code in Listing 9-6:
→5 The parent view is ScrollView, which creates a scroll bar and allows the view to be scrolled when the contents of the view are too large to fit onscreen. The screen shown in Figure 9-2 is shown in Portrait mode. However, if the device is rotated 90 degrees, the view flips and more than half is cut off. The parent ScrollView allows the remaining contents of the screen to be scrollable. Therefore, the user can flick a finger upward on the screen to scroll the contents and see the remainder of the view.
→6 A ScrollView can have only one child — in this case, the main LinearLayout that houses the rest of the layout.
→7 The orientation of the linear layout is set to vertical to signify that the views inside this layout should be stacked on top of one another.
→12 This is the label for the Title field.
→15 The EditText that allows the user to provide a title for the task. You add <string name=”title”>Title</string> to strings.xml.
→18 The label for the Body field and add the <string name=”body”>Body</string> to the strings.xml.
→24 The EditText that defines the Body field. The EditText view has set the minLines property to 5 and the gravity property to top to inform the Android platform that the EditText is at least five lines tall and that when the user starts typing, the text should be bound to the top of the view (the gravity).
→27 The reminder date label also uses a string resource. You need to add a string resource with the name of “date” and a value of “Reminder Date”.
→31 When this reminder date button is tapped, a DatePickerDialog is launched. The user can choose a date with a built-in Android date picker. When the date is set via the DatePicker, the value of the date is set as the button text.
→34 This reminder time label uses a string resource. You need to add a string resource with the name of “time” and a value of “Time”.
→38 When this time reminder button is clicked, a TimePicker is launched. The user can choose a time with a built-in Android time picker. When the time is set via the TimePickerDialog, the value of the time is set as the button text.
→42 This confirmation button saves the values of the form when clicked. Add <string name=”confirm”>Save</string> to the strings.xml.
..................Content has been hidden....................
You can't read the all page of ebook, please click here login for view all page.