Once you have satisfactorily tested your application with the simulator and/or the device, you need to prepare it for distribution. The first stop to do so is by clicking on the application name in the project list that brings up the screen, displaying details about the application. Let's create a single view application called Chapter 7. We will use this template application (it does nothing for now) and prepare it for distribution. We will customize the different aspects that one might need at the end of their application.

The fist tab you can see is the General tab. Under this tab, you will find major options listed in the following subsections. In the most basic scenarios, all one needs is present in this tab—for example, would the device support the various orientations; should the status bar (displaying the time and battery level) be visible?
This helps to set up attributes such as Bundle Identifier, Version, Build, and Team. Once you have your Apple Developer account set up, Team will show your team name (generally your developer apple ID). If you have a new installation without any account, the Add an account option helps you to set up your account for use. You can also view your account details at any time via Preferences (CMD + ,).
The Deployment Info section is useful to set the various aspects such as the orientation and the devices on which the application should run. The first option is Deployment Target. This is the setting that specifies the minimum iOS version. The next option is Devices that specifies the devices on which the application can run. This can be iPhone, iPad or Universal (both). The Device Orientation option specifies the orientations that the device would adapt to/support. The Status Bar Style option specifies the type of status bar, light, or default and the status bar can also be hidden.
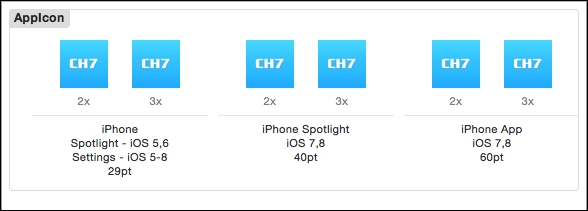
This is where you can specify the icons that will show up on the main screen from where the application is launched. The little arrow next to the AppIcon option takes you to images.xcassets that allows us to specify all the icons required as per the various resolutions and sizes:
Note
If you have worked with or read about Xcode, you might have read about the filename, filename@2x. This was introduced allowing developers to add retina capable assets to their projects. With the minimum entry barrier raising to an iPhone 4S, the devices are all retina enabled and hence you do not create the 1x assets any more.
The launch image is the image that displays when the applications starts, also called the splash screen. Apple's suggestion for Splash Screens was to make it like the empty UI of your application. So, as far as the user was concerned, the application started instantly from the time they saw the splash screen. However, many developers would want to utilize this to display their logos, their publishers' logos, and so on. These were static images called Default.png; you could, like icons, have multiple splash screens for each device type and orientation. So you could have two Splash screens for the iPad, one in portrait and another in landscape. Then, you could have another two for Retina iPad and so on.
With Xcode 6, Apple has allowed the use of a XIB or storyboard file as a launch image. This is a single view like our application that is displayed as the Splash Screen. This could be used to display an animated Splash Screen, which is a custom loading screen. The following is the image of LaunchScreen.xib that is used as the launch image for the sample application. Note that this was automatically created by XCode 6.

The advantage of using a launch screen is that this is code driven and can include dynamism as compared to a static image.

Under the Capabilities section, you can visually specify the options supported by your application. The way to set or unset any option is via a checkbox that specifies ON or OFF. The good part of this section is that it takes away the arduous task of linking frameworks and setting a key in the info.plist file. When you unset, it also removes those settings. If you have ever used any of these features in earlier versions of Xcode, you will know how painful and ugly this process could become. With Xcode 6, it automatically generates the required entitlements and provisioning certificates.
This is the section that displays the info.plist file that is used by the application to determine its capabilities and settings. Apart from the custom plist settings, it also allows you to set up the document types and custom UTI and URLs that the application will support. This is useful to allow your application to be able to handle a particular file type or handle a URL. Even with a simple application, you might have to visit this tab to add a key or tweak a setting. The most common scenario would be to specify the setting for location access authorization.
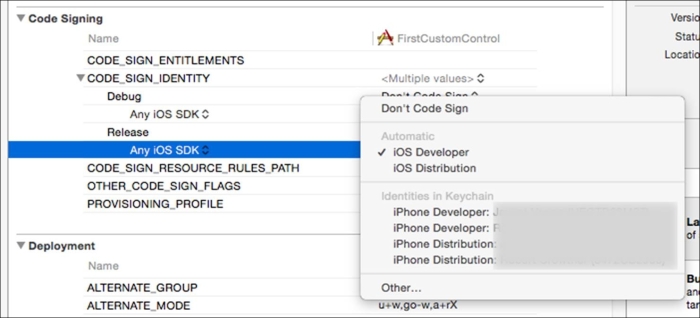
There are three additional sections, Build Settings, Build Phases, and Build Rules. We will not go into detail about these. It could be very rare for you to get to these sections. However, you could use this to fine-tune the compilation and linking flags. Earlier, you could specify the certificates and so on to use for signing the application. Now, in Xcode 6.1, Apple makes it easy for you and automatically sets the appropriate certificates and so on. As a beginner, you could get away without ever having to peek under the bonnet and tweak any settings in these tabs. Going through these settings in detail is a bit out of scope of this book. However, note that you can, if you want to, change a specific provisioning profile under the Code Signing section. In a real-life scenario, you might be developing with your own certificates but, when you want to deploy the application, you might want to use a client certificate. You can change from the automatic value set by Xcode here.
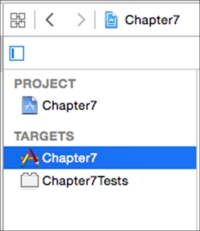
Not all projects are applications; you might want to create a framework, a test, a library, or any other type. You could do this because you might not want to distribute the source code to anyone and instead offer them a binary that they could use in their application (via the embedded binary option).
Each target has its own set of options associated with it; when you click on the different ones, you get different options. There are two sections namely: Project and Targets. Under Targets, by default, Xcode adds two options; one is the application and the other is the set of tests for that application.