
9 Backgrounds
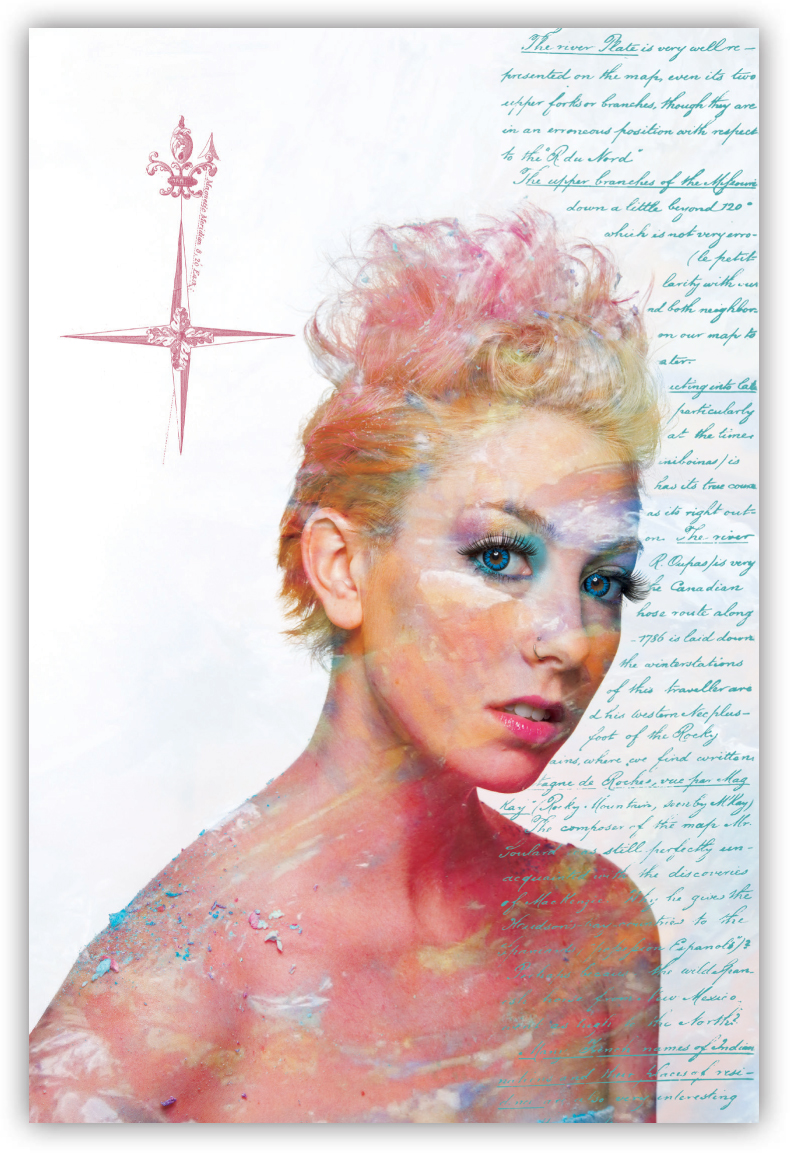
In this image, Judy Host used several layers, blending options, and masking to craft this portrait © Judy Host (Courtesy of the artist)
Like the music track in a movie, the background of a portrait seldom makes the art. The background can help or hurt, but it is not what people are interested in seeing. Regardless of the lack of attention paid to the background, it is an important part of the portrait. In the traditional portrait, it eliminates clutter that can become disruptive to the image. In informal and environmental portraits, it can assist in communicating the mood or other desired information.
When discussing backgrounds, we need to consider established and found backgrounds. Established backgrounds include those that the portraitist arranges, erects, or constructs. These range in complexity from seamless paper and cloth to elaborate painted backdrops or sets. The major advantage of an established background is its convenience for lighting and control of other aspects of the photographic process.
Found backgrounds can be anything that will support the portrait’s needs. In selecting a background, attention must be paid to whatever portion of it will show in the portrait and how it will relate to the subject. In many found situations, ambient light may become the key light or create the need to conform the key light to the available light. Also, some environments have logistical problems that require specialized equipment or compromises in photographic processes to utilize the background.
Seamless Backgrounds
A seamless background is just what it sounds like: a background that shows no changes in form, connection, or patterning. The major advantage of a seamless background is its ability to isolate the subject in the frame. Because the background is a consistent tone without distractions, it has the potential of “nothing”, i.e., it can take on a pattern or intensity of light or become a colored field to contrast against the subject.
A seamless background can be made of many materials. Most common are seamless papers, fabric, and constructed walls. For a full-length portrait, the seamless background needs to extend below the subject so that no seams or corners will be visible. To avoid unwanted seams, corners, or visible changes in the background, a sweep or constructed cove can be used.
Beyond the uncluttered effect of a seamless background, it provides opportunities for tonal and color changes based on how it is lit. With overall lighting, it is just as defined, a flat, tonal field that isolates the contours of the subject. However, pooling light on the background creates opportunities to accentuate some portions of the subject while diminishing others. For example, lightening the background on the shadow side of the face will define that portion of the portrait. At the same time, the light can be controlled to have darkness behind an area that is either lighter or that has been accented with other lighting. In addition to the use of tonal differences on the seamless background, colored gels can further enhance contrast or complement the subject.
A variation on the seamless background is draping material that may or may not have dimension or tonal variation. When dimension is desired, the fabric is arranged to form a series of folds or other discontinuities that create shadows or tonal variations behind the portrait.
While any kind of material can be used as an established backdrop, fabric backgrounds usually employ heavier cloth. Muslin is the most common material used. Heavier materials are easier to control in the way they hang. The common use of fabric is to drape it to produce a series of ripples or folds in an abstract pattern. Another alternative is to have the material crumpled or otherwise texturized; the resulting permanent pattern can be used as either a seamless or folded drape.
Painted Backgrounds
The idea of painting a background for a portrait goes back to the very beginnings of commercial photography. In early portrait photography, a background would be painted to provide a pleasant setting for the portrait. Today, the same idea persists. In some cases traditional landscapes are used, but many other visions can support a portrait as well. The scenes in painted backgrounds are often stylized to present the viewer with the reality of the subject in front of a less-than-real setting. In illustrative-type portraits, there is a great variety of painted or photographically produced backgrounds.
Another type of painted background is the abstract or impressionistic background, which provides a mix of colors and tones that do not interfere with the subject. These are often darker tones of various colors applied in overlapping streaks, daubs, or blobs. The idea is to avoid definable patterns. With impressionistic backgrounds, the idea is to give a hint of a background scene without distracting attention from the subject.
The modern method of using an image or abstract background began with projection systems that placed the subject in a setting. These were initially rear projection systems and later front projection systems. In both of these systems, a slide was projected so that an image appears to be behind the subject. These systems have been replaced by the use of “green screen” and “chroma key” systems.
The green or blue screen derives its name from the color of the screen behind the subject. Sometimes this color is referred to as electric green or blue because of its vibrancy. Because the color does not occur naturally, it can be used as a dropout color in a computer. When the green is dropped out of a digital image, it can be replaced by any image file as a background—whether a scanned slide from the subject’s summer trip, a graphic element or logo, or a purchased digital backdrop. Once the portrait and the digital background are combined, the final portrait can be completed.
There are two concerns that affect the correct use of the green screen process. First, the screen must be evenly lit behind the subject as seen through the camera. Shadows on the green screen can cause problems with the computer dropout. The second issue is that the lighting should mimic the light in the replacement background. If the scene to be placed behind the subject has light coming from the right, then that direction must be duplicated during the shot.
Post-Production Backgrounds
Projecting a background or using methods to create a background in a darkroom has been common in portraiture since the early days of photography. With the advent of Photoshop and other electronic imaging technologies, the ability to utilize a background not present in the studio has become a common reality. This has opened up a great number of potentials for using backgrounds that have never been considered before. Whether these are real or imagined locations, or digitally constructed materials, the opportunity to insert new and varied backgrounds into the repertoire of the portrait photographer has expanded.
Borrowing from the nomenclature of video, many photographers are using a “green screen” approach to making portraits. The concept of a green screen is to utilize a color not found in the photographs and to electronically replace that tone with the desired background. In videography this is known as chroma key. The color most commonly used is a vivid green that is seldom seen in the props or people who will be superimposed over the background. After the photo is taken, the green color is replaced with a digital file that will make up the background. Therefore, only the background will be dropped out and replaced unless the chroma key color is present in the foreground. Remember that if there are any discrepancies between the portrait and the background, these will likely be seen as rough edges or as remnants of the background color along the edges of the foreground portrait subject.
While chroma key equipment can be used in portrait photography, creating background for the portrait can also be accomplished with the use of imaging software such as Photoshop. If the subject is photographed on a well-lit background of uniform color, then a simple selection and deletion of the background can be done to create a layer in the software with no background information. When the background layer is added below the subject in the software’s layer stacking order, the subject will appear in front of whatever background was selected.
Even without a specific background color or tone, the subject can be isolated by either using the selection or masking tools common in imaging software. However, these techniques require the photographer/artist to use hand-manipulated techniques with the computer to create the proper selections or masks. Just as with the chroma key method, once the background is selected, it can be deleted from the image. Because of this, it is not necessary to make extensive lighting or background preparation for a background that will be eventually eliminated and replaced.
With the relative ease of selecting and layering a portrait over a background, several considerations need to be taken into account to ensure successful merging of the foreground portrait and the digital file being used as the background. The first consideration is the angle of light. The light angle in the portrait and the light angle in the image file that becomes the background need to be consistent—particularly when the background scene is to appear as a real scene. This is especially the case if the portrait is to be presented in a recognizable location or where visual cues referring to the accuracy of the background exist, such as signs that can be read, etc. In these cases, the lighting for the portrait must take the same general angle as the lighting used as the background. When the light angles on the subject and the background are not consistent, the portrait appears fake.

This image uses both a physical background and an electronic background to create its unique look. The image is of a little girl looking out the window of a front door—the window and the door are the background. Two layers were then added to create the illusion of a vintage look. The first layer is the script that was carefully edited using a layer mask. It was important to have the text continue between the little girl and the door to give the appearance of the written page behind the girl. A second layer was used to create what the artist calls grunge. This layer was handled with both selective masking and blending options to accomplish its desired appearance. In this construction, the background is both behind and in front of the subject. © Judy Host
(Courtesy of the artist)
The next concern for utilizing electronically introduced backgrounds is noting when a shadow from the portrait subject will be seen. In cases where the photographs of the portrait must include the shadow, the layering requires that blending options and levels of opacity, particularly where the shadow exists, are used to create a seamless transition from the subject to the background. In some cases this may require another layer created from only the shadow to be introduced between the foreground and the background to create the proper look for the portrait.
It is also important to realize that there must be a pixel density relationship between the portrait and the electronically generated background. If the electronically generated background is chosen from a file with significantly less pixel density (pixels per inch), the background will show pixilation and aliasing while the portrait will not. Depending on the way the background layer is married to the portrait, this might also degrade the pixel structure of the foreground portrait. It is highly recommended the background used be equal to or greater in pixel density than the portrait that will be placed in front of it.
Lastly, when selecting, masking, or layering a digital portrait over a digital background, there is a strong possibility that aliasing, the jagged structure of the pixels, will be seen at the boundary of the portrait. This is particularly the case when the portrait has been selected without feathering the edge. This is common when the selection or mask is not feathered or when there is an uneven tone in the background and the selection picks up extraneous pixels from the originally photographed background. This will require digital retouching of the final image to smooth the boundary area of the portrait with the background or to erase the erroneous pixels from the portrait’s layers.
Constructed Indoor and Outdoor Settings
A set is commonly used in many portraiture applications. Sets are designed to allow effective lighting and are used as photographic backgrounds. Often they replicate common settings such an office with bookcases or a hearth with Christmas decorations. The idea of these settings is that they can be controlled in their focus and lighting. Even if they consist of a single wall or a wall with a single corner, various camera angles are built into the design to allow posing the subject with a supporting background. Most often there is no ceiling so that lighting can be controlled at high angles if desired. Sets as painted backgrounds are usually designed for multiple portraits, though specific sets may be appropriate for certain individual portraits. Also, many companies manufacture sets for portraiture, ranging from Tuscan ruins to high-tech settings with painted or photographic backgrounds.

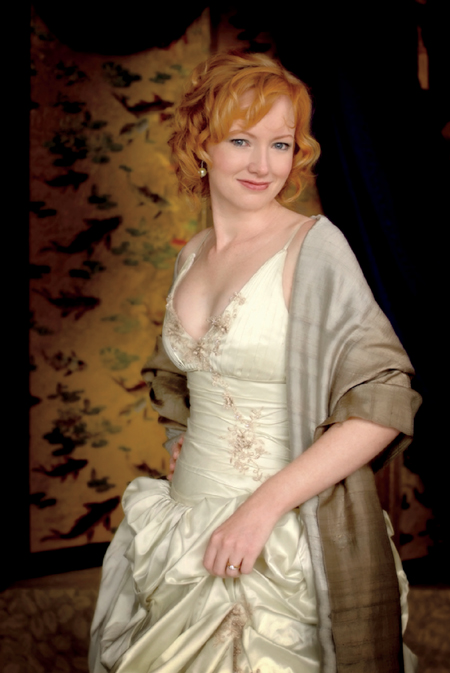
In this portrait, Paul Tumason used a painting technique to make the background function the same as an abstract painted background
© Paul Tumason (Courtesy of the artist)
A very common created background is an outdoor set. Unlike the studio-based set, the outdoor set relies on ambient lighting, which adds a further level of complexity to the exposure. When choosing an outdoor location, thought must be given to the sun’s angle and to eliminating direct sunlight on the set.
While light angles for the portrait are always an issue, so is the background upon which the portrait will be photographed. In the studio, light can be left off the background if its tone is too bright, but on the outdoor set, the background is lit by ambient light and beyond direct control. For this reason, the camera angle as well as the basic tone of the areas behind the subject need to be considered.
Another issue that must be addressed is the need to keep distracting materials from intruding into the portrait. For example, it would not be desirable to have a brightly lit leaf right behind the subject’s nose in a profile shot or sticking up from the head like a feather in a war bonnet. It is far better to have a background of dark foliage where the predominant light does not reach it at an angle that can easily reflect toward the camera.
© David Williams (Courtesy of the artist)

© Art P. Suwansang (Courtesy of the artist)

© Lisa Evans (Courtesy of the artist)
Found Backgrounds
Any surface, landscape, or cityscape can serve as a found background. Found backgrounds present tremendous opportunities and produce further demands on the requirements for the portrait. The issues in using found backgrounds are primarily access, lighting, and exposure. They basically fall into two types: environmental portrait settings and interesting though nonspecific backgrounds.
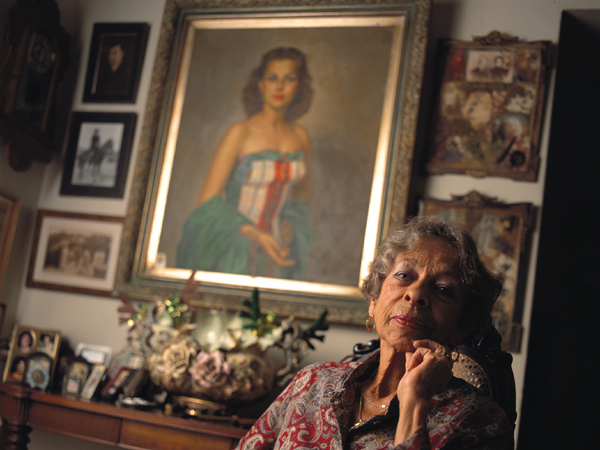
An environmental portrait setting is one that gives clues as to what we learn about an individual. This might be their work or living space or important symbols that identify or enlighten us about the subject. Unlike many portraits, in environmental portraiture the background is very important to the content of the image. The way the background is lit becomes important for symbolism, image information, and definition of the subject. This might involve highlighting or clearly representing portions of the surrounding elements, including the background. While ambient light can be the light source, lighting equipment may be required to ensure that important information in the background is conveyed in relationship to the subject. The use of additional light can effectively create a new light ratio in the portrait between the subject and the background.
The other type of found background is the nonspecific background. This is a setting that might be interesting to use as a backdrop but is not related in any way to the portrait. Nonspecific backgrounds are used to add interest and compositional strength to the portrait.
In most found background situations, the major concern is lighting. Often because of the location of a found background, power for lighting and/or space become concerns. These situations tend to use ambient light as fill, or else all the lighting is ambient. As a result, there is a need to find ways to create the light ratios needed for the portrait. Some found backgrounds do not provide the access needed to achieve the proper camera distance or angle. In either situation, with lighting or space issues, it is important to put the success of the portrait ahead of the look of the background.
Found backgrounds often offer attractive colors. Particularly with saturated colors in intense light, such as direct sunlight, the color of the background can reflect onto the subject and thus change the color in ambient fill.

© Elinor Carucci (Courtesy of the artist)
© Tim Mantoani (Courtesy of the artist)
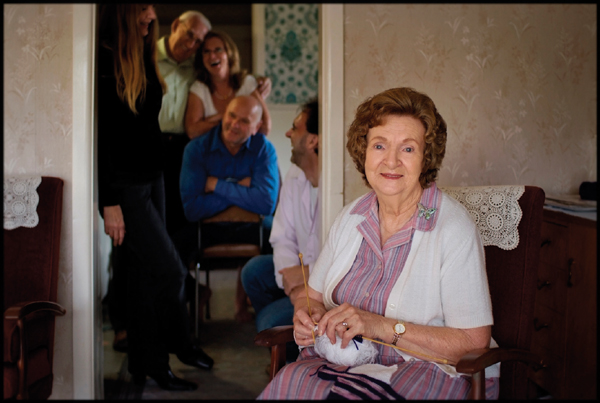
David Williams used a found environmental background, including the important people in the subject’s life, to create this portrait
© David Williams (Courtesy of the artist)