
8 Lighting Setups

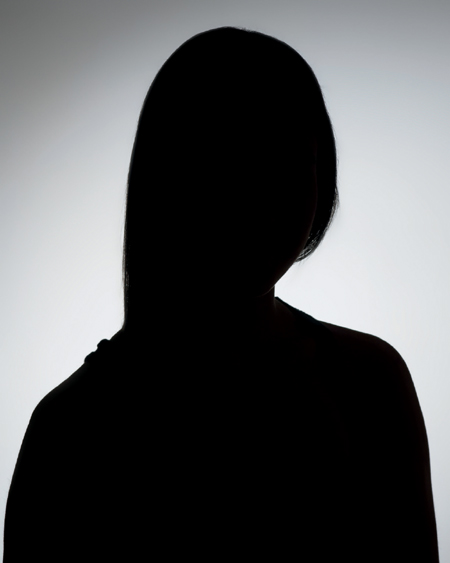
Being ready is important when approaching portraiture in a candid manner. In this image Art Suwansang was aware of the energy as opposed to the lighting setup. Since this was photographed on infrared film, his understanding of what would be presented to the camera and how this would be translated into a finished image was crucial.
© Art P. Suwansang (Courtesy of the artist)
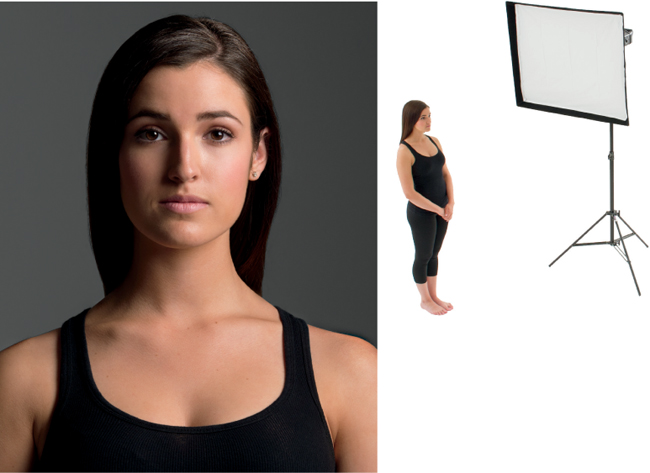
Our approach to lighting utilizes a building-block concept. This means that we start with the simplest setup and add lights to control various areas within the portrait. Our idea is to present a progression of lighting design that provides predictable results. With these setups as a starting point, you will be able to use the information from other portions of this book to make additional lighting choices.
In chapter 2, we discussed the direction of the key light and how its angle from the face axis determines the look of the shadows on the subject. The examples where the light is positioned at the front and side of the face axis illustrate shadows produced on the face. The examples where the light is positioned behind the face axis, away from the camera, are used as accents of various types.
While we show the basic setup with diffused sources for the key light, the specularity of the key light determines the “hardness” of the portrait. In most portraiture there is a desire to soften the LD Edge, smooth the skin, and avoid accenting the angularity of the face, but there are situations where high contrast and harsh lighting are useful. In these situations, the key light’s size, various light modifiers, and the light’s distance from the subject can be manipulated to change the specularity of the portrait.

Key light

Fill light
One Light
When only one artificial light is used, the light ratio is obviously affected by the ambient light that creates the fill. In this case, the light ratio depends on the intensity of the key light. We can use lighting equipment with variable power or move the light to control the ratio as well as the volume aspects of shadow formation. For metering in this situation, we will need to use the additive method to determine or set the lighting ratio.
The major caveat for the use of one light with ambient light as the fill is color bias. If ambient light is the fill, any color bias it has will be visible in the shadow areas of the portrait. For example, when normal fluorescent lighting becomes the fill, there will likely be a greenish color bias in the shadows. Similarly, an outdoor portrait in a grassy area may also create green-biased shadows.
When a single light is used within a natural light environment, the key light should take on the angular dynamic of the sunlight if the portrait is to look natural. In other words, if the sunlight is approximately at a 60° angle from the south, then the key light should be approximately at the same angle. The issue of matching the angular dynamic of the ambient light will be addressed in other setups.
In the studio, single light images have a different look than most other portraits. Primarily, these portraits tend to look more dramatic because of the higher apparent lighting ratio and the dark, hard-edged shadows created by the specular light. The placement of the shadows and highlights on the face are critical. Hollywood glamour images of the 1930s are great examples of this technique. Softer light sources can produce a lower apparent ratio while still achieving a dramatic look.
Two Lights
Here we discuss a two-light setup as the use of a key light with a fill light. This is the most common way a second light is used in portraiture. Though it may not seem accurate, the use of a reflector as a fill light qualifies as a two-light setup because a reflector acts like a light source in most respects and therefore can be controlled.
As with any light source, the distance of the fill reflector from the subject affects the intensity of light. The closer the reflector is to the subject, the more intense the fill. The more reflective the material, the higher the intensity of the light coming from the reflector, thus the stronger the fill. Finally, the larger the fill reflector, the more diffused the light will be.
A crucial point with fill reflectors is whether they are in the pattern of light illuminated by the key or ambient light. Regardless of the material used in making the reflector, it will be more effective when it is lit. Even if only ambient light is available, the more light falling on the reflector, the more intense the fill.
The reflector’s angle also has an effect on the fill light. Just like a mirror, any reflector can be aimed. If the light illuminating the reflector has directionality, then the law of reflection (which states that the angle of incidence equals the angle of reflection) determines the direction of the light. Thus, reflectors can direct their light to specific areas on the subject. There will be different reflection patterns depending on the surface shape of the reflector.
Reflectors can also be used to add color. Gold or warm tone reflectors are common, but any color reflector can be used. It should be noted that the reflecting color may mute other colors. Also, green reflecting onto Caucasian skin may gray the skin tone in the fill, whereas pink may heighten the skin tone. A reflecting fill may also be used to eliminate color by reflecting white light from the key light to counter ambient colors reflecting onto the subject.
Background light
Hair light
The most common lighting setup is to have the key light to the camera side and above the subject, such as a 45-45. The fill reflector is positioned to bring as much light onto the subject as possible. The fill reflector may be angled slightly toward the subject from near the camera to maximize the intensity of the fill. The closer the reflector is to the camera axis, the less likely the fill will create unwanted crossing shadows. Moving the reflector to oppose the key light increases the potential for crossing shadows.
On the vertical axis, reflectors come from two basic directions: either below the subject from the camera axis or from the side opposite the key angle, normally at the same height as the face.
When a fill light is used, two major issues arise. First is determining the lighting ratio as discussed in chapter 6. Once the ratio is established, the second issue is the positioning of the fill light. With a low light ratio such as a 1:2, the fill light may create unwanted shadows on the key lit portion of the subject. To avoid the possibility of crossing shadows in the basic setup, the fill light is positioned close to the camera axis. The more specular the fill light, the more likely any shadowing caused by the fill will be visible.
In the basic studio setup, the fill light is behind and slightly above the camera (the 0-70 position). Regardless of the quality of the key light, this setup traditionally uses a diffuse source, such as an umbrella or a softbox. It is possible to use either a ring light or a giant reflector directly behind the camera as the fill, which will produce more intense frontal highlights as well as more fill in the shadows.
In this setup, the role of the key light is to define the shadow and volume of the face, while the fill light determines the intensity of the shadows. When the fill light is behind the camera, its intensity needs to be equal to or less than the key light. When the fill equals the intensity of the key light, the ratio becomes 2:1. If the intensity of the fill is greater than the key light, the ratio approaches 1:1. The key light still defines shadowing on the subject, but the ratio is reversed. If the setup has the fill behind the camera, 1:1 will never be reached.
Three Lights
In the next step of basic lighting, the third light is added as a background light. It controls the intensity of the background to add image depth, define the contour of the subject, and control shadows created by the key light.
The background light is important for creating depth in the image rather than depth in the subject. The key and fill lights create the light/shadow dynamics that affect the front surfaces of the subject. Our ability to define the background establishes the depth of the entire image. If there is flat light in the background (truly black or fully white), the depth of the image is confined to the subject.
The second issue, contour management, is a tool that comes from the Renaissance painters. Many think it means the pool of light behind the subject, but it is more than that. In order to accentuate the contour, Rembrandt and other artists used background light to contrast with the subject. Varying the tone of the background so that the background goes dark when the subject is light in tone and vice versa created good separation and defined the contour of the subject. In the same way, photographic portraits use the background light to keep the subject from becoming absorbed in the “nonimage” areas.
Finally, the background light can control any shadow that may be created by the key light. Depending on the individual needs of the portrait, the control of the darkness of any cast shadow can be accomplished by the background light.
The position of a background light within the basic setup depends on what shape the light will be. The pattern can be as small as a streak or totally illumine the background; however, the most commonly used background light is a shaped light located below and behind the subject.
As a general guide, use an incident meter to determine the exposure of your background light. If you set the light intensity to match your exposure aperture, the background will record as it appears to the human eye. A white background will appear white, and darker backgrounds will appear dark. If you want your backgrounds lighter, increase the amount of light beyond the exposure aperture; to darken your backgrounds, give them less intensity than the exposure aperture.
Combination of the four lights
Four Lights
Any additional lights beyond the three already discussed will be accent lights. The most common accent light is a hair light, which creates a noticeable separation from the background as well as giving texture and form to the back of the head. To do this, a smaller light pattern is directed at the back and top of the head. The idea of the hair light is to reflect light from the hair toward the camera. Sometimes a snoot controls the size of the light pattern, although most modern studios use strip lights in the 180-70 position. This works well for both group and individual portraits.
The other frequently used accent lights are edge accents, which can be used on any critical contour. They bring light from behind the subject to strike the critical edge without casting light on other portions of the portrait.
A special setup based on the concept of edge lighting is the “rim light.” Rim lighting is created by backlighting the subject so that the light itself is totally blocked by the subject’s body or head. The rim light can also be above and behind the subject, pointing down and toward the camera but not shining into the camera. This will produce an edge lighting effect around the subject, which sometimes appears as a fine line or “halo” around the portrait.
Normal exposures for hair and rim lights vary depending upon the subject matter. When the light falls on fabric and hair, it normally has an intensity about ½ to 1 full stop less than the exposure aperture (when the incident meter dome is pointed toward the light source). When the light falls on the skin or other specular surfaces, its intensity should be around 1½ to 2 stops less than the exposing aperture.

The common four-light setup uses: a key light with a specularity chosen by the photographer to establish the form and intensity for the image; a fill light to open up the shadows on the face; a background light to add the appropriate level of illumination for the background; and a hair light to accent the top of the head. While the key light may have any level of specularity, the fill light is normally diffuse to avoid creating crossing shadows. The hair light can have any level of specularity, but a larger diffuse source tends to make posing easier for both the subject and the photographer. The background light is to provide illumination to the background and only becomes an issue if the background has detail shadowing or content that is contrary to the subject.
Clamshells
While the four-light setup is the most common and gives us the most information about general portrait lighting, there are other types of lighting that depend on the position of the fill or fills. One variation of the two-light setup is the clamshell, which gets its name from the way the key and fill lights oppose each other. The plane of the lights forms a V shape with the camera at the point of the V. The key light can have any level of specularity, but the fill needs to be very diffuse to minimize crossing shadows.
In basic lighting setups, we can consider two clamshell arrangements. There are many side-to-side clamshells with the key and fill lights on opposite sides of the subject, but the more interesting arrangement is top-to-bottom. A top-to-bottom clamshell is most common for butterfly lighting with the key light in the 0-80 position and the fill light pointing up from in front and below the subject. In this arrangement, the specularity of the key light establishes the look of the shadow and the ratio determines the darkness of the shadows. The top-to-bottom clamshell is common for “glamour” lighting.

In this vertical clamshell, the light above creates a near paramount lighting pattern. The lower fill is of sufficient power to nearly fill in all the shadows, so the specular highlights on the forehead, nose, and cheeks become more prominent. There is a one-stop difference between the intensity of the two lights, with the lower light being the dimmer of the two.


Form Fill
A form fill is primarily used to reinforce the key light. If the fill light does not come from the same axis as the camera in a form fill situation, there are areas of the image that will not receive direct illumination from the fill light. In this case, it is not a true fill light by the strict definition. This is, however, a technique that was used extensively in the past and is enjoying a revival of sorts in modern portraiture.
You can also rotate the fill light to the same side as the key light and position it between the key light and the camera. The fill provides less intensity than the key light. If the key light is more specular than the form fill, the fill does not reduce the shadowing effects of the key light; it softens the LD Edge, opens the shadow detail slightly, and shortens the shadow length. On its own, the fill would create similar lighting patterns as the key, only softer and less pronounced. Adding a form fill to the key light’s effects produces more pronounced shadowing than other lighting types with similar ratios. In a form fill situation, the key light is often used in a selective fashion with the fill light as a more general lighting tool. The result is that the key light primarily illuminates one portion of the portrait, e.g., an important facial structure or detail, while the fill illuminates the entire image. This can be achieved because the key light and fill light come from the same direction.
The form fill reinforces the directional characteristic, the shadowing effects, and highlight effects of the key light. The subject’s face gains depth with slightly more openness in the shadows. This provides more tonal variation on the face with a lower light ratio. Because the near alignment of the key and fill lights, there will be added complexity to the highlights. The lower the light ratio, the less obvious the highlight complexity.
At the extremes of form fill is the “light-within-a-light.” This method of aligning the fill on near axis with the key light is often called “double key.” In this situation, a specular light is positioned within the bounds of a diffuse modifier. When the more specular light produces greater intensity, the specular source is the key, and the broader diffuse source is the form fill. If the specular light is of lesser output than the diffused source, then the specular light acts as an accent light. In both cases, complex highlights are created. The key light defines the LD Edges and shadow characteristics.


The previous page shows form fill, which uses two different light sources positioned near to each other. This page shows a specular and diffuse lighting source on the same side of the subject. Both specular and diffuse light sources are aligned or in close proximity, they produce a complex highlight. This can be seen with a specular highlight embedded in the diffuse highlight. The selective nature of a smaller light source, a gridded spot, only illuminates the upper shoulders and face while the large softbox produces a diffuse directional light that illuminates the entire subject. This produces the desired ratio between the two lights and demonstrates the possibility of using a selective light within a broader light.
Start with the subject’s position aligned with the end of the softbox farthest from the camera. Because the diffusing surface extends in front of the subject, the light wraps around the face, creating a softer LD Edge with a strong directional feel.
Walking the Light
It is important to realize that the positioning relationship between the light and the subject can change the effect of the portrait. “Walking the light” means not relying on a predetermined position for the light or the subject. If you are using a large softbox, e.g., 3 x 4 feet or larger, the subject/softbox relationship will determine the affects of the light. Either the subject or softbox can be moved to achieve the desired light. When the softbox is positioned horizontally on the key light side of the subject, the light coming from the softbox can range from large and diffuse light to specular.

As the subject moves to the middle of the softbox, the light creates a split pattern on the face. Because less of the diffusing surface extends in front of the subject, less of the light wraps around the face, creating a harder LD Edge.
If the subject is aligned with the farthest point of the softbox from the camera, the light will be diffused with falloff toward the back. As the subject moves closer to the center, the softbox will wrap the light around the subject, providing diffuse lighting on the subject from the back of the softbox on areas away from the camera. Finally, when the subject is positioned on the camera side of the softbox, the light on the portrait takes the form of a strip light. The back of the softbox acts as a rim or accent light on the far edges and generates complex or fat light. Because of the strip light effect, this lighting setup works best if the subject’s head is turned toward the light, presenting a profile or near profile to the camera.

When the subject moves to the front of the softbox, the effective surface of light becomes very narrow. Because there is a narrow form to the light, it creates broad highlights on the facial surfaces parallel to the softbox’s front panel. If the subject turns their head toward the softbox, the light opens up the face producing a beautiful profile light. Also, in this lighting position, the light from the softbox behind the subject will accent the surfaces of the face toward the back, serving as an additional variation of an edge light on the highlighted side of the face.
Accents
While it is most common to use broad, diffuse light sources as fills, there are times when it is appropriate to use specular lights as accents rather than filling in the shadows created by the key light. Hatchet lighting is one example of this type of setup. With hatchet lighting, two accents are used on both sides of the face to highlight the edges of the face. This lighting style creates a flatter portrait because the large, specular patterns on the sides of the face perceptually move those highlighted areas forward.
While hatchet lighting tends to flatten an image, using accent lighting instead of fill does not always do so. Particularly when the lighting approach is short, an accent used instead of a fill will bring the otherwise darkened surface forward and give the image exaggerated depth. This is a very dramatic way of lighting a portrait.

This accent lighting pattern is known as “hatchet lighting.” Two strip softboxes are positioned behind the model on either side. The power of the accent lights is equal to or less than that of the key light. Since the accent lights are behind the subject, their effect is seen only on the edges of the subject and does not affect the lighting pattern chosen for the front of the portrait.
Glamour Lighting
Glamour photography is normally associated with images for the cosmetic industry. Because the goal of these images is to show “perfect” skin, the lighting is very flat. This style of lighting is also useful in portraiture. Two basic setups produce this type of lighting. The easiest and most in vogue is the use of giant reflectors, i.e., eight-foot or larger umbrellas placed directly behind and slightly above the camera. The other is a high, closed clamshell with the goal of achieving a 1:1 light ratio.
A glamour lighting setup is especially useful for bridal and high-key portraits. In both of these cases, the flat, evenly lit subject gains softness with few dark shadows. Also, the frontal, even light minimizes skin texture and lessens blemishes.
A hybrid clamshell can be used to create the appearance of a 1:1 ratio. This can be accomplished by starting with highly diffused butterfly lighting with a large softbox and two equally strong soft fills from below. The fills form their own clamshell so that the combined power of the fills matches the key light. This lighting has very weak shadows and no apparent LD Edge.
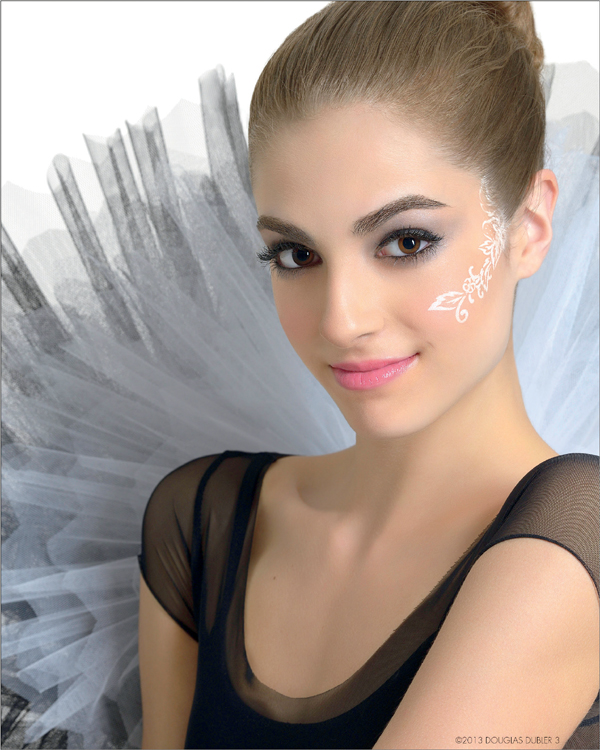
Douglas Dubler is well known as a beauty/glamour photographer
© Douglas Dubler (Courtesy of the artist)