STEP-BY-STEP PROJECT
DIRTY POUR
This project is all about experimenting! The more you experiment with colors, the more fearless you and your kids will become when it comes to creating fluid art.
It is important to remember not to mix too many dark colors into your pour or the design may turn out dark or muddy. When pouring paint, keep in mind that paint will dry darker. Try using white in your color palette the first couple of times you do a dirty pour to ensure that your design stays light and vibrant.
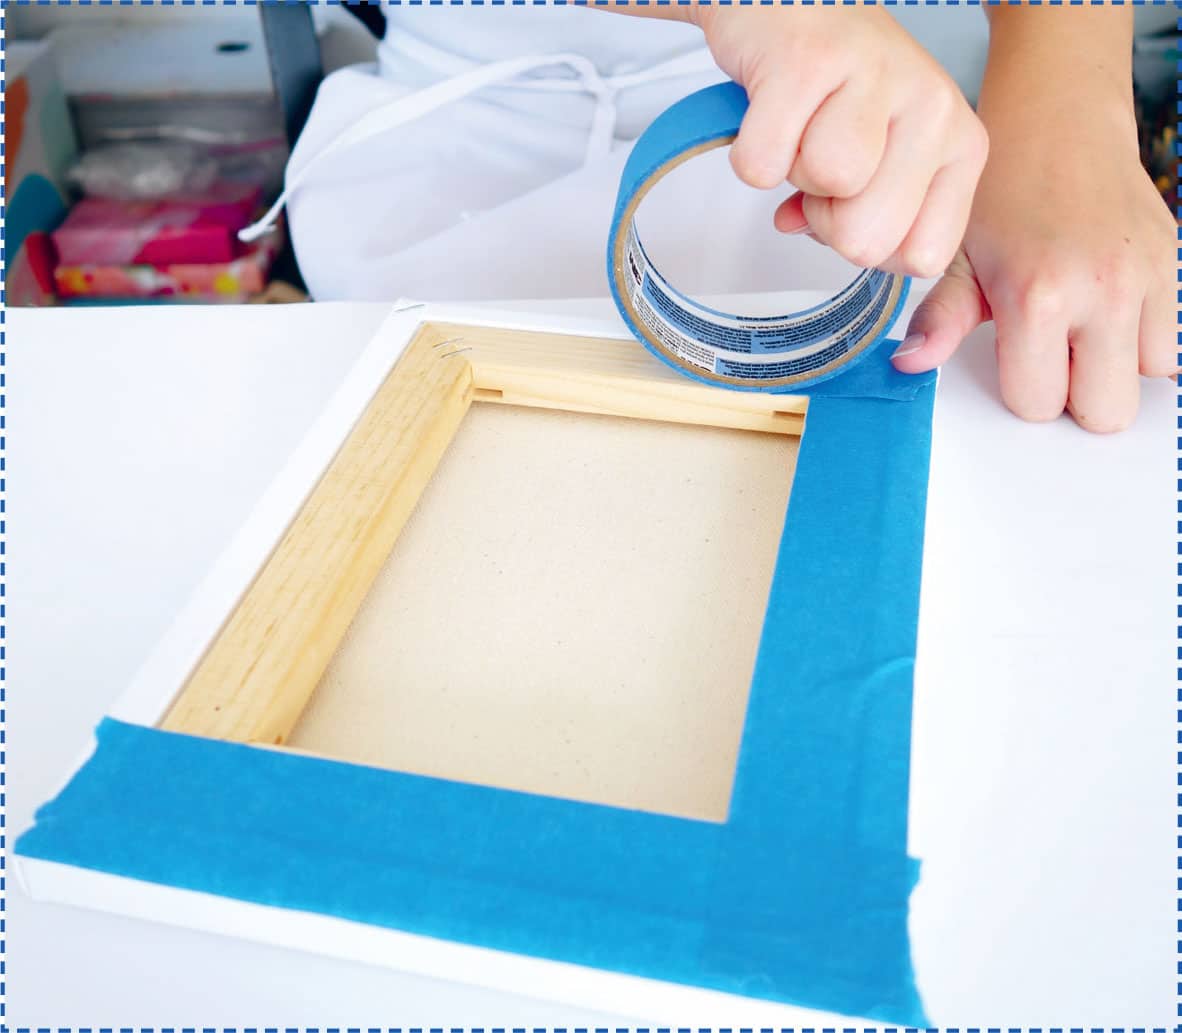
STEP 1
Have your child prep the back of a canvas with masking tape. Next, set up your creative space by placing a sheet of wax paper on a foil tray and laying your canvas on top of four cups.

STEP 2
Add paint to separate cups.

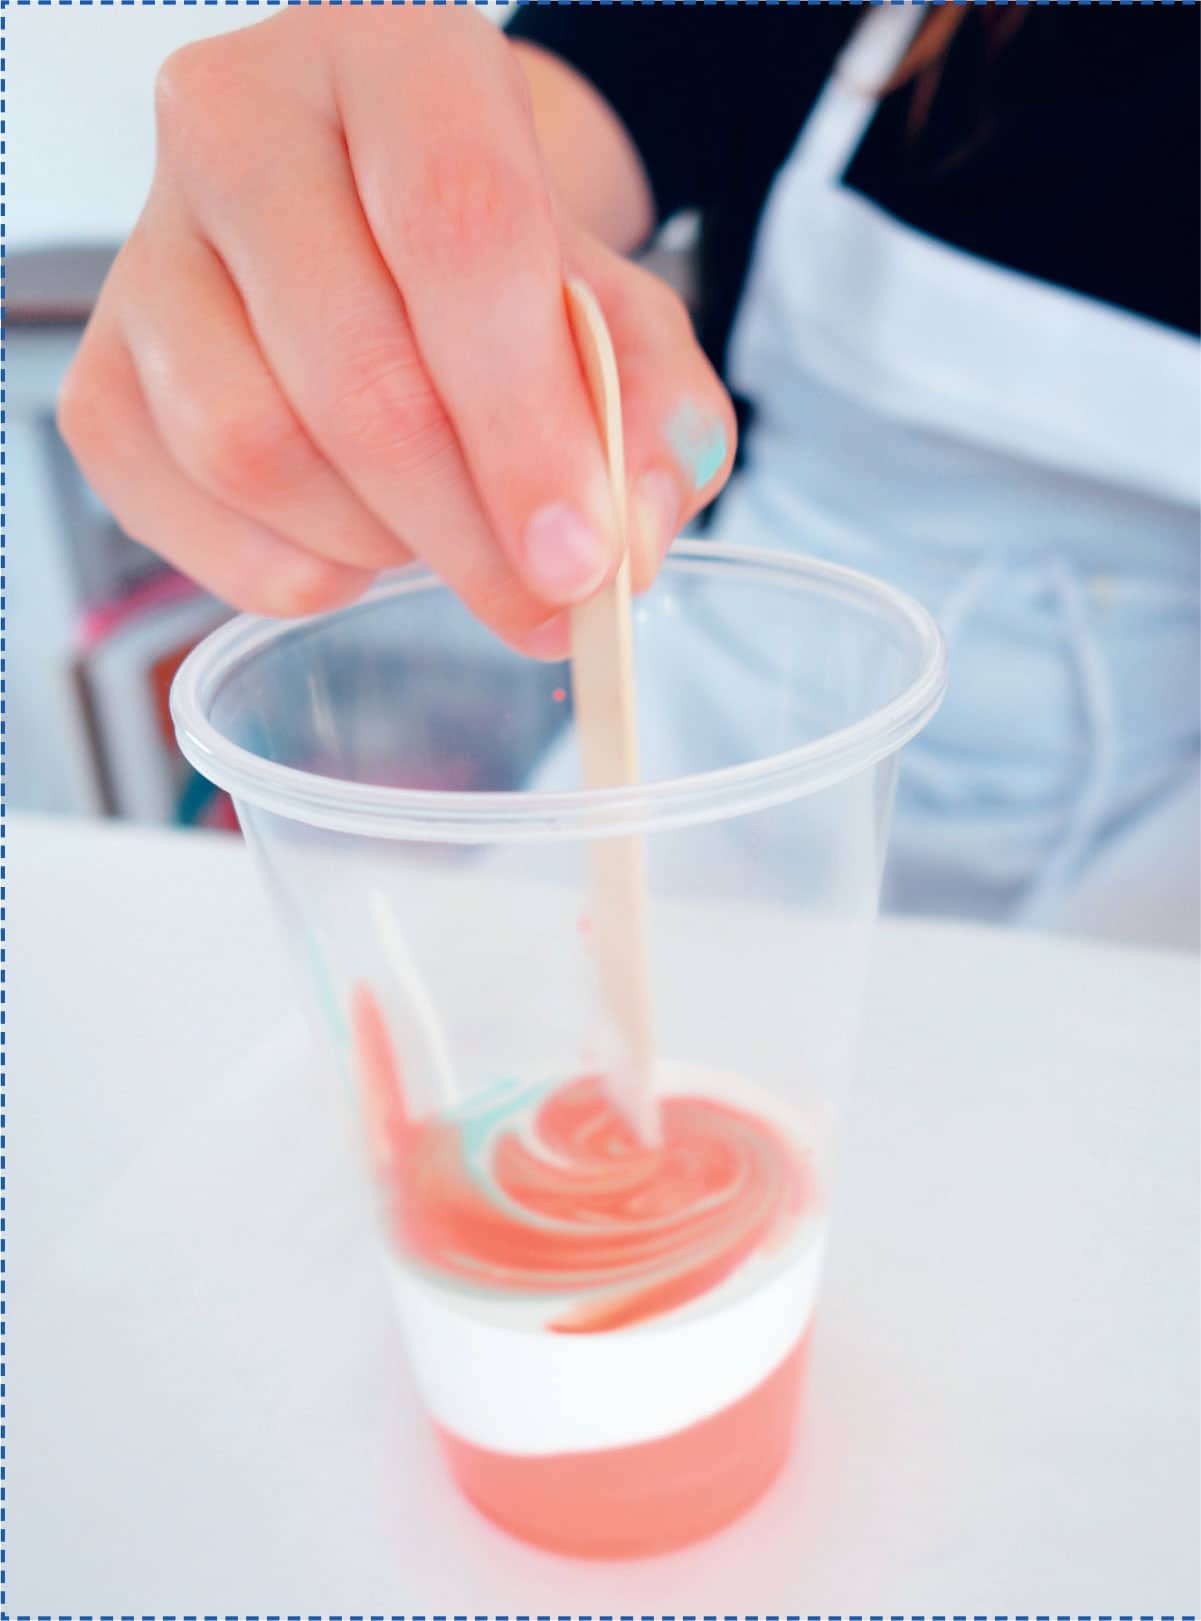
STEP 3
Have your child add pouring medium to each cup of paint. We used 21/2 parts pouring medium to 1 part paint. Add a small splash of water and mix thoroughly, ensuring that there are no clumps in the paint.
If your child would like to create additional cells in the design, add a small amount of rubbing alcohol or 1 to 2 pumps of dimethicone to each color, instead of the water. Mix thoroughly until there are no clumps.

STEP 4
Pour the individually mixed paints into a single cup. You can pour each color, one right after the other, or you can slowly layer the colors.
Your child can gently stir the colors once they’re in the cup, or pour the paint as-is. The choice is theirs! If your child chooses to stir the paint, one gentle swoop with a wooden stir stick is enough to avoid overmixing the colors.

STEP 5
It’s time to pour the paint onto the canvas! There is no right or wrong way to pour. You can start in the middle or on one side only, or pour in a circle or diagonally. Your child will enjoy the freedom to explore and be creative while pouring!

STEP 6
Have your child pick up the canvas and slowly start tilting and flowing the paint around until all of the canvas is covered, including the sides. If necessary, use your fingers to gently rub poured paint along the sides of the canvas to cover them. Keep the areas of the design you like, and tilt to change what you don’t like. You can mix more paint if necessary.

STEP 7
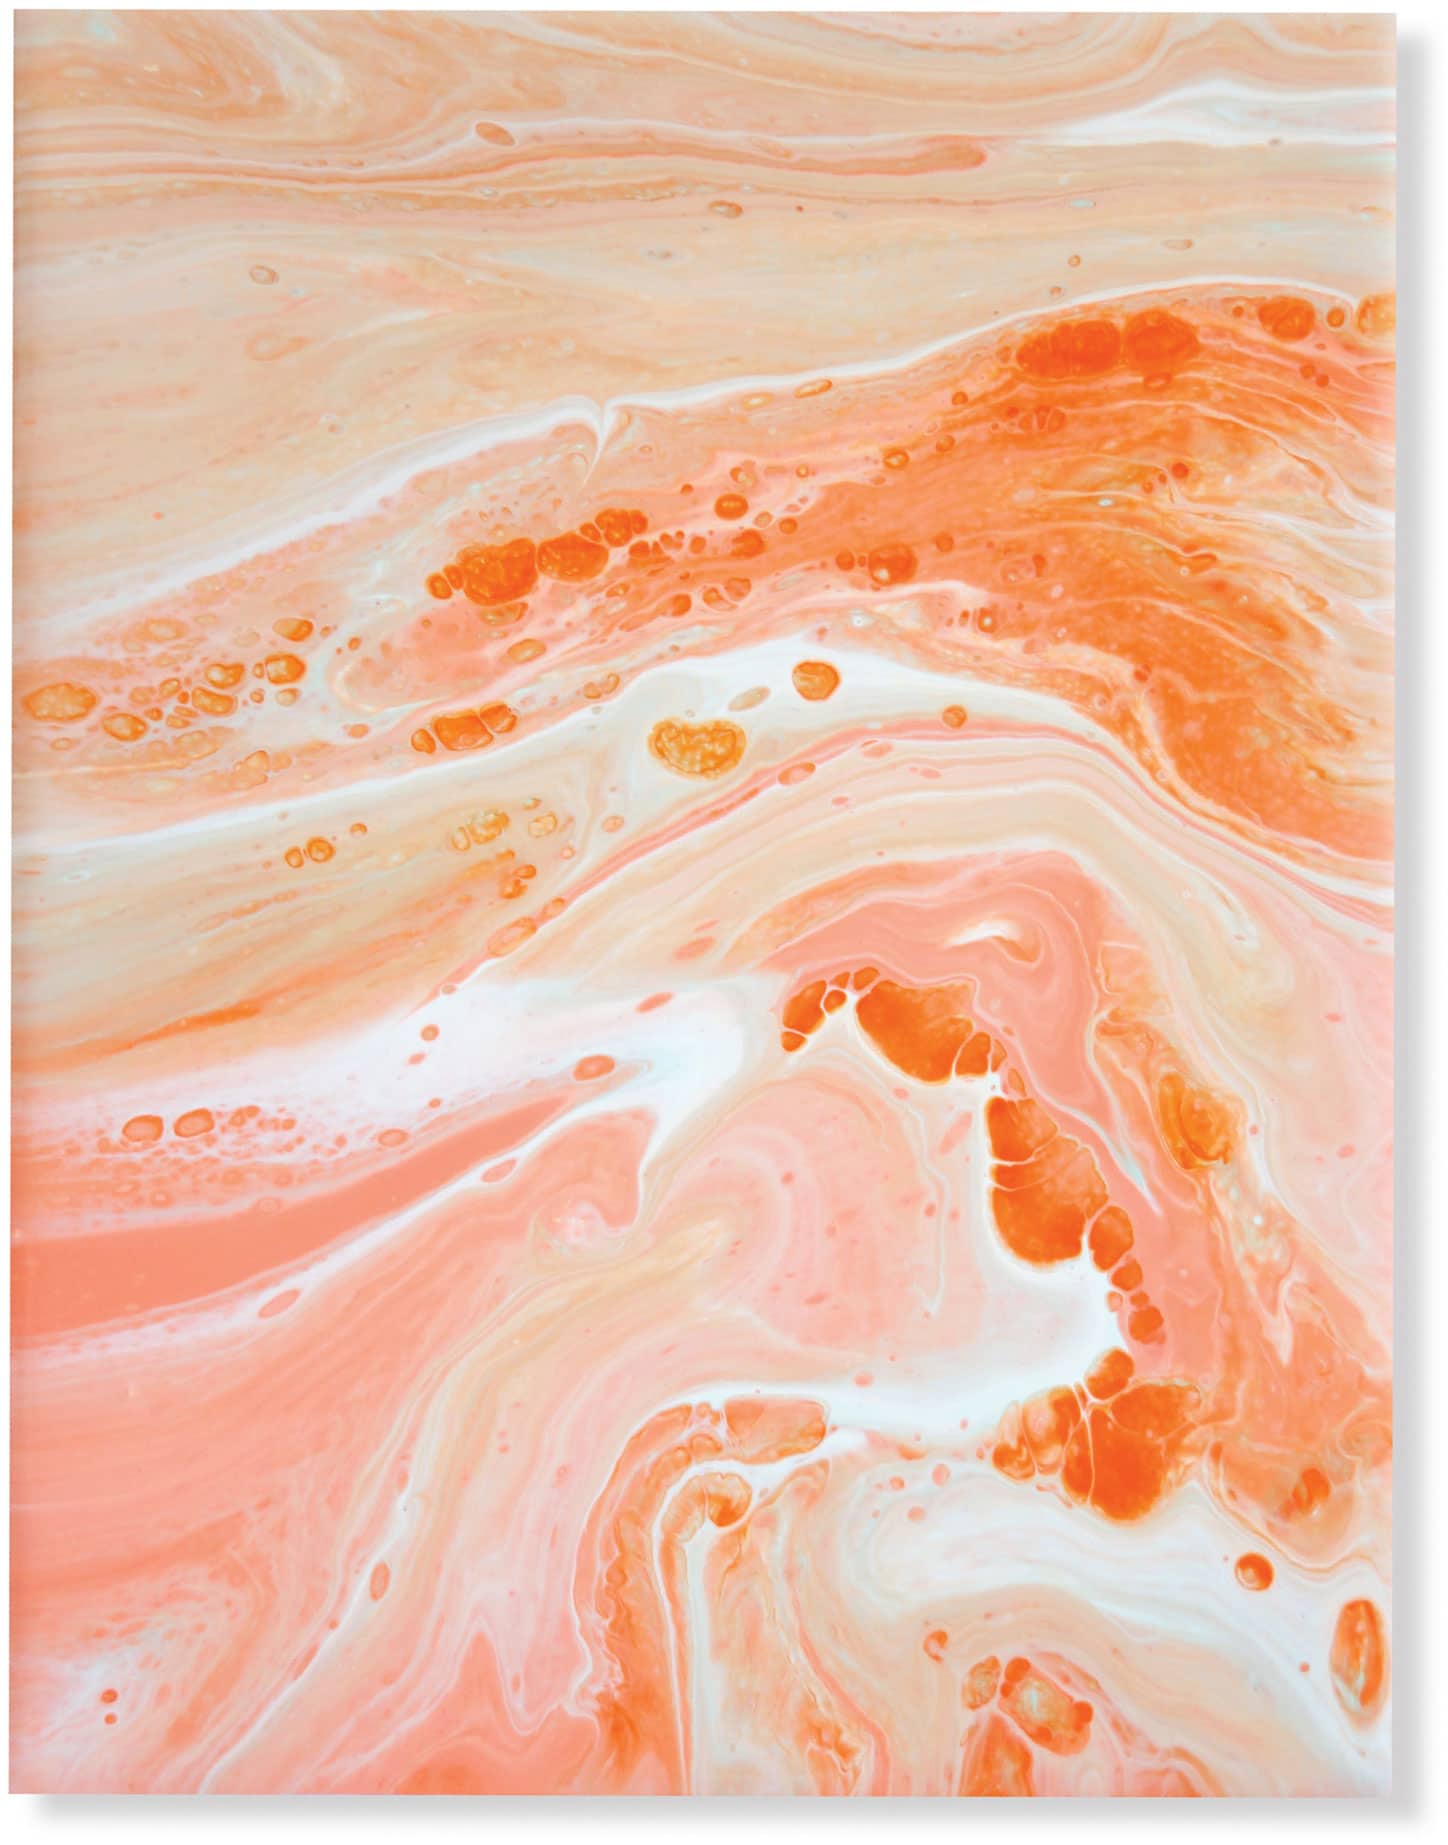
Remember: Fluid art truly is all about experimenting. You will know that your design is complete when you see it! And when you do, place the canvas back on the cups to dry completely. If you used a wood surface, lay it flat on a sheet of wax paper to avoid warping while drying.