It is common knowledge that photography (literally ‘light- writing’) depends for its existence on light. Yet, how many of us really understand the way light behaves, how it can be controlled, and the impact it has on our images?
When I came into social photography from the once ‘glamorous’ world of television, I was surprised to find that in the United Kingdom at least there was no obvious established training route for core camera and lighting skills designed specifically for wedding photographers. The extensive knowledge I had gained from my formal training seemed to have no equal in the ‘still’ photography world. I’m talking about 6 weeks’ full-time studying lighting and a further 6 months on attachment as a lighting director in the studios of London. I can see now that this was worth more, far more than I gave credit for at the time. I believethere is no substitute for a thorough understanding of light and its application when creating images, whether still or moving. In this chapter, I want to touch on some of the most common lighting decisions Julie and I take when shooting weddings. It’s also worth noting that the majority of techniques we use on the wedding day are equally applicable to portraiture.
Whatever the situation, the first step is to assess the light around you. When we enter a room or anywhere that we are going to be taking photographs, we immediately consider the direction and quantity of light. We then look at the suitability of the background. For example, when Julie photographs the bride getting ready, it’s quite normal for her to rearrange the position of the people and some furniture in the room so that the bride is well lit against an uncluttered background.

Fig. 2 ISO 800 f/4 at 1/2000th
Dramatic backlight from the sun attracted me to these glasses. The background is a hedge out of focus and in shadow.
Both the uncluttered and well-lit factors are trademarks of our style. We take a proactive approach to getting this type of image. We certainly like to set up and simplify the environment we shoot in. We also set up all of our still life images: this is how we get our ‘look.’ Having established the ‘ideal’ environment for our shots, Julie and I can let the action take place without intervention, knowing all the pictures will be clean.
During hectic wedding preparations, it sometimes happens that the only available clutter-free background in a bedroom is the window. That’s fine – shooting into a window has many benefits. Windows provide strong graphic background shapes of bright, high-key tone. They can also add depth and sometimes emphasize the illusion of three dimensions in the resulting prints. Window-backed images can be made with a simple exposure increase or are remarkably easy to light with through the lens (TTL) handheld flash. Even if it’s gloomy or raining outside the pictures, we shoot into windows to give a bright vibrant look to the wedding album.
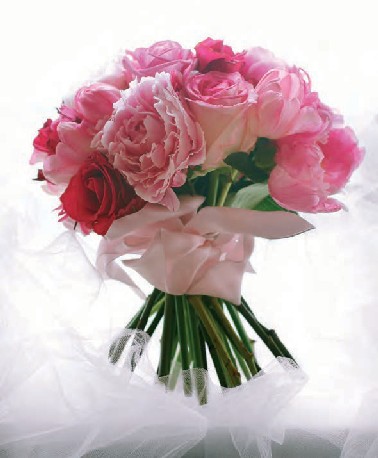
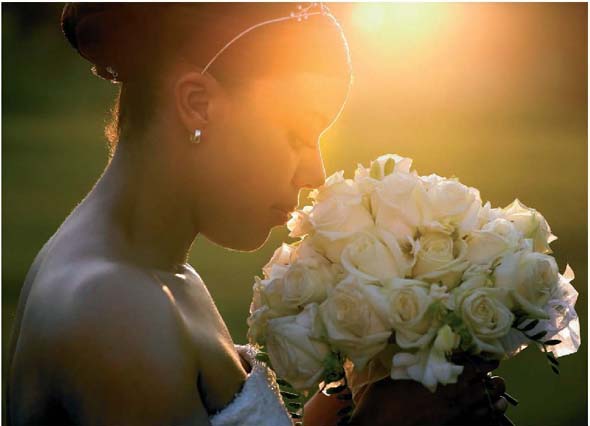
These backlit flowers needed plus two stops of exposure compensation to get the look that Julie was after. The flowers were placed on a spare piece of veil Julie keeps in her camera bag.

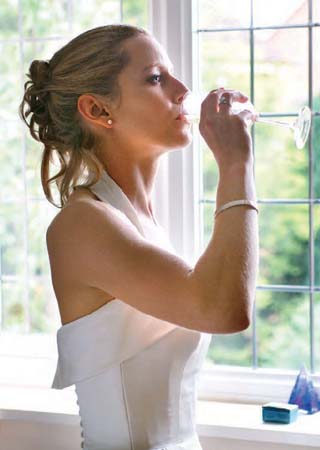
For this wonderful shot of the girls getting ready Julie deliberately shot into the sunlit window. An exposure increase of plus three stops was dialed in to avoid the obvious silhouette that the camera’s meter alone would have delivered. For this kind of shot to work top lenses are needed, as flare can soon become a problem when using extreme exposure increases.
For this shot into the window Julie again used exposure compensation. A setting of plus two stops was necessary on this occasion. This technique works well even if it is raining outside. It produces brightly lit pictures that look ‘sunny.’
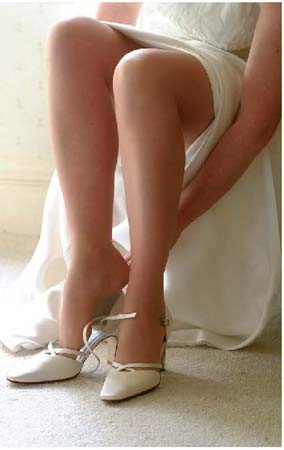
Shooting toward the window without using flash gave these legs a lovely rim light.

Occasionally, changeable weather produces natural light patterns that can be used to great effect. Here, Julie posed the bride and shot into the light. The sky was of a dark enough tone to make an interesting backdrop.
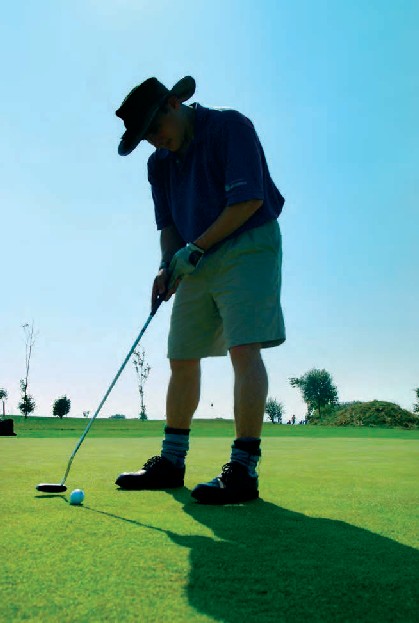
Fig. 8 ISO 320 f/5.6 at 1/2000th
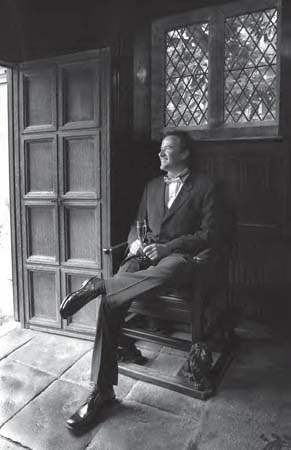
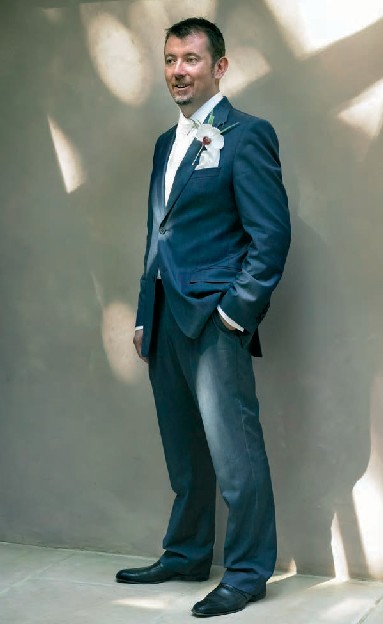
No exposure compensation was needed here to create this dramatic shot of the groom in early morning sunlight.
After assessing a lighting situation, we may decide not to use artificial light, but to go with the existing available light. In that case, several factors that affect the image quality need consideration: these include ISO, aperture, shutter speed, color, tone, and subject. Making ‘natural light’ pictures can be rewarding when everything comes together well. f/4 shooters like Julie and I use just enough depth of field to render our subject in sharp focus while maintaining beautiful out of focus backgrounds to support the final composition. The great reportage photographers have learned to read natural light well and produce some of their most dramatic images in what might seem like ‘impossible’ lighting conditions. Having a ‘fast’ 50-mm f/1.4 lens opens up a world of opportunity often overlooked by other photographers.
In the fashion, commercial, and illustrative photographic world a picture need not flatter the subject as long as it conveys the right message. But for wedding photographers flattery is everything. Making a bride look great by lighting her from the ‘right’ side or angle is vital. A simple question I ask myself when I compose each image is ‘Does the person I’m photographing look great in this picture?’ If not ‘why not?’ Often the answer is simple. If a groom has a bent nose for instance, lighting his face from the same direction as the bend in his nose will cast a small insignificant nose shadow reducing the effect of the bend. Light him from the other side and wallop! his nose shadow scoots across his face and accentuates the bent nose.
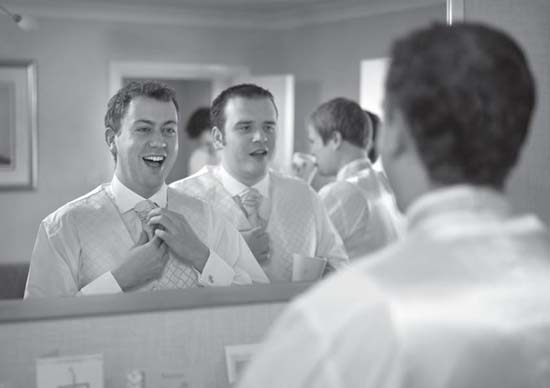
Fig. 9 ISO 400 f/2.8 at 1/60th
I placed my flashgun behind my back for this shot. It illuminated the room via the sidewall behind me. The resulting picture has a great light balance that has kept the back of the groom on the right at a sensible level.
The wedding make-up artist works hard to accentuate cheekbones and the jaw line; it’s then up to us to take the process to the next stage. It’s not difficult to take beautifully lit pictures, you just need to know what you are trying to achieve and how to do it. For example, you need to remember that attaching the flash to a camera removes the whole creative process of lighting. What this achieves is simply to illuminate the scene. On the other hand, using the flashgun off-camera while maintaining TTL functionality gives modeling to a face and is a technique Julie and I use extensively. But don’t take our word for it. Experiment and find out what works best for you.
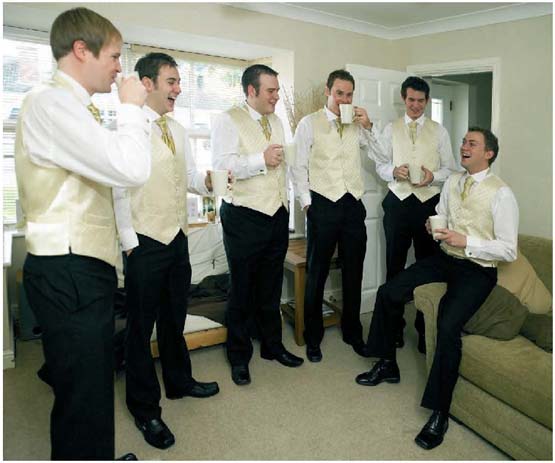
For this picture of the same guys I used off-camera flash held above and to the right of me. I always point the flash upward and use a Sto-Fen diffusing dome. You can just make out the shadow of the ceiling lights. On another note, I asked the guys to remove their jackets as I thought their waistcoats would match the colors in the room.
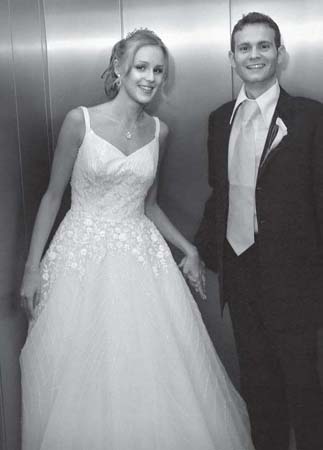
I used my flash off-camera in this stainless steel lift to capture this spur-of-the-moment shot. I like the kick back of light the background created.
Try using your flashgun off-camera using either an infra red trigger or a coiled lead that supports T TL. Add a Sto-Fen diffuser or the one that came with your Speedlite. Have the flashgun in your left hand and your camera in your right hand. If the camera is too heavy for you to use in this way try using a monopod.

I had to hold my camera very steady on a monopod to capture this picture using the ambient light in the lift. I had a three-floor journey to get everyone in the right positions and to hide my reflection.
We certainly needed to change our working method several times before we hit upon a balance between aesthetic and technical quality. But whatever we do, the core principles of lighting still remain in our shots.
In classical portraiture, the key or principal light is usually a hard light source. The shape and size of the subject’s nose and the depth of the eye sockets govern their position. There’s nothing new about this. In fact, the artist Rembrandt is considered by many to be the founder of the principles for portrait lighting. He made a few mistakes by modern convention but went on to develop a formula that worked, and made it his own. The important point to note here is the key light angle and position are always determined by the position of the face of the sitter, and not the position of the camera (or the painter for that matter!).
TIP When you are posing your subjects in ambient light, position their face toward the window, door, or light source. Aim to ‘key’ down the nose. If you are using off-camera flash aim this so that the flashgun is directly in line with their nose too. Where possible shoot into the unlit side of the face as it will be the shadow area of the face that will reveal its shape and make the picture interesting.
THE COLOR OF LIGHT
The various natural colors of light create opportunities to be exploited at weddings. In the days of film, I often had to filter light to get the correct ‘look’ that meant ‘warming up’ overcast light and ‘bluing’ tungsten-lit shots. Knowing and understanding color temperature was a must. Now, using digital capture, the white balance adjustments available in a camera or software can take care of that. In fact, I usually like to include as many light sources as I can in my pictures. UK winter weddings are hard work because of the sheer lack of light, but they offer wonderful opportunities for capturing a great variety of colored light in your pictures.
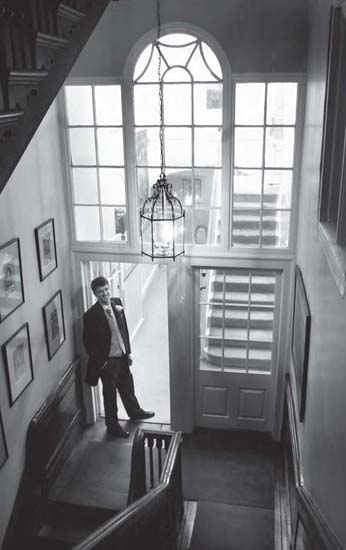
I used a monopod to steady my camera for this shot of the groom. Having the brightest part of this image the furthest away gave the picture depth.
SHADOWS
Shadows reveal shape, light, and texture. What’s more they’re always available, easy to create, and very useful for adding graphical elements and interesting shapes to our wedding pictures. Try not to confuse the hardness of a shadow with its contrast or depth. Hard shadows have crisp edges while soft shadows have diffused edges. When lighting faces or objects, it is worth noting that both hard and soft shadows reveal shape. In dark skin, it is the highlights and not the shadows that reveal shape. The contrast or depth of a shadow that is created is dependent upon the ratio of direct and indirect light.
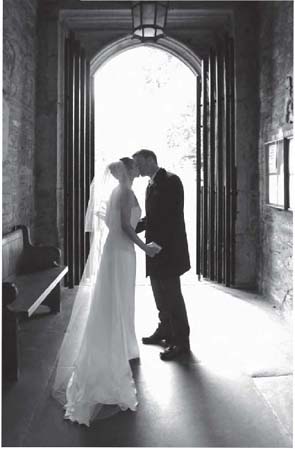
Minus two stops of compensation was needed here to keep the exposure under control in this low-key picture. I directed the groom to look at the best man I had positioned outside the door. This made the key light from the doorway work directly in line with the groom’s nose. Shooting into the unlit side of his face revealed shape and form.
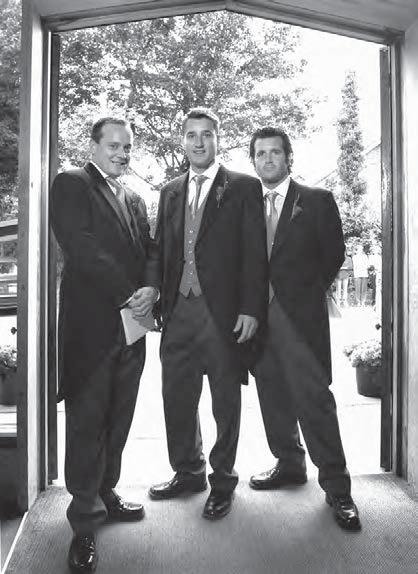
Fig. 15 ISO 400 f/4 at 1/125th
This church doorway provided a perfect frame for this picture of the ushers. A splash of flash held above and to the left of the camera provided the key light. I shot from below the guy’s eye line to add drama to the picture.
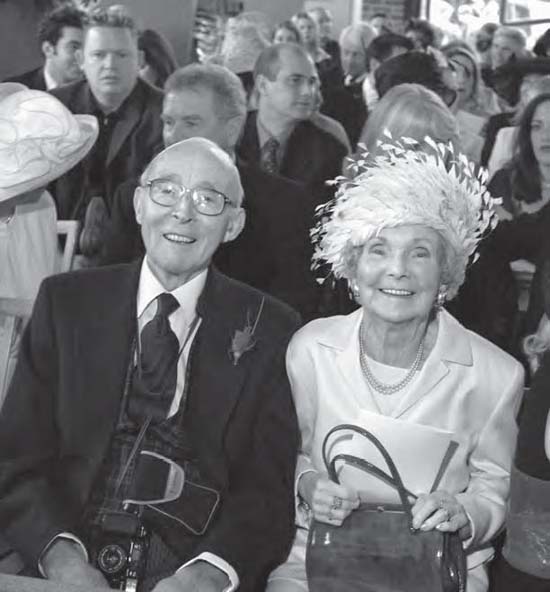
My off-camera flash technique was again used to capture this study of grandparents. I generated a rapport, created the moment, and captured it. Pictures like these are valuable to the whole family.

Fig. 17 ISO 400 f/6.8 at 1/60th
I used a splash of TTL flash above and to the left of my camera to record this moment of the bride arriving on a rainy day. I exposed for the background and uncharacteristically added a bit more depth of field.
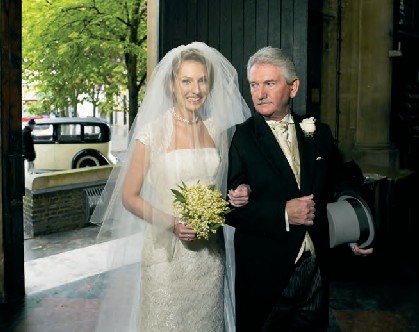
A moment later, still with the flash attached, I opened the aperture to f/4 and caught this moment of the bride with her father. Having the bright horizon in this picture creates the depth that would be lost if the church door had been shut.
It is important to realize that it is impossible to ‘light out’ a shadow. You can ‘fill’ a shadow to reduce its contrast until it becomes much less significant, but it will still be there. Press photographers use flash mounted directly on camera extensively but sparingly in daylight to ‘fill’ the shadows created by the sun and thus reduce contrast. On-camera flash used subtly in this way is a great hard-fill light source. But when flash is used as the key or principal light then always use it off-camera.
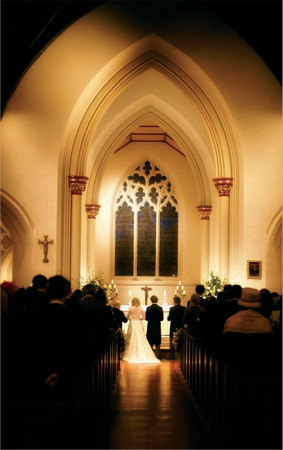
Fig. 19 ISO 400 f/2.8 at 1/15th
At night ceremonies or in the dark of winter I resort to long exposures with fast lenses to capture the atmosphere. I used a monopod leant against the font at the back of the church to keep the camera still.
Fig. 20 ISO 200 f/4.8 at 1/1000th
A high vantage point together with the contra jour lighting made this picture work well. I held the interest at the top right of the frame and excluded the sky to strengthen the composition.
BRIGHT HORIZONS
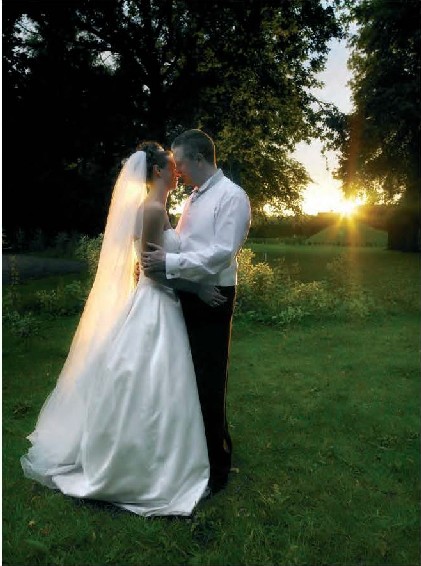
Throughout the natural world the norm is for the brightest part of a scene to be the most distant. Take this, a most obvious scenario: you are standing on a cliff looking out to sea, the sun is shining, the sky and sea are blue. The brightest part of the scene (sun excepted) is the horizon. Throughout the world of fine art, from the old masters to the present works, this ‘rule’ of the distant being the brightest is used time and time again. This tonal variation linked to distance from camera creates depth in the image. Julie and I try and apply the same techniques on the wedding day itself where situations allow.
Fig. 21 ISO 400 f/2.8 at 1/20th
This spot at Babington House in Wiltshire is a favorite of mine because with plus two stops exposure compensation pictures really begin to sing. The rim light creates the separation between the bride and the hedge behind.
FLASH AND AMBIENCE
In a naturally lit world we expect to see room interiors darker at the top and lighter at the bottom. This is because light enters a window in a downward direction predominantly from the sky above. It is this simple truth that makes bounced flash pictures look so unnatural. A characteristic of bounced flash is for the floor to be the darkest part of the image and the ceiling to be the brightest – quite the opposite of the normal situation.
At a wedding, you need to achieve a balance when lighting interiors. Do you light the room and let the action happen or do you light the people in the room and accept the ambience for the room? We do both, we expose the image so that the room’s natural lighting prevails and then add flash or a tungsten spot to light the subject. Lighting the subject beautifully nearly always requires the light source to be away from the camera. Flash has the advantage of freezing the subject in the often lengthy exposures but is harder to control. Once a system that works has been adopted and learned, applying it is easy.
Fig. 22 ISO 400 f/4 at 1/500th
The shadows here form repeating patterns and lead-in lines. I chose an offset composition to favor the sunlit trees on the left.
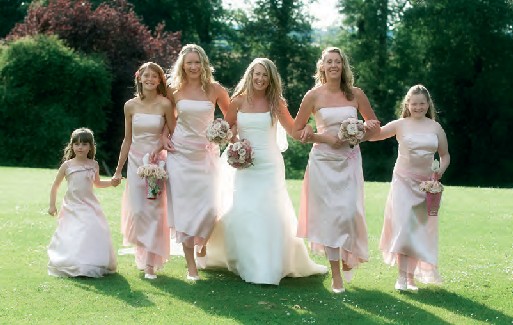
Fig. 23 ISO 400 f/4 at 1/1500th
I shoot group shots into the sun on long lenses whenever possible. The trick here is to avoid the sky in the composition and to use a hand to shield the lens from flare.
LOW KEY
Julie and I always try to avoid ‘black holes’ in our wedding pictures. One exception to this rule is when we want to shoot low key. Oak-paneled rooms and wet winter weddings pose their own problems but they also create opportunities to change the shooting style. One of the biggest problems we encounter is cutting flash output to avoid overexposure. Getting a bit of specula reflection of the flash in the background reveals texture and brings the picture to life. If our pictures combine the ambience of the wedding venue and show detail and beauty of the clients then we have succeeded. Once you’ve decided on the lighting, then all that’s left is to make the picture‘happen.’ We nearly always create or stimulate the energy and fun in our pictures after the shooting techniques have beenestablished.
Fig. 24 ISO 320 f/4 at 1/1000th
Here is another group picture I took on a long lens into the sun. Simple line up groups like this work well if you create a moment and strike up a rapport with the guests. It’s the expressions on the faces that determine if a picture is boring or not.
Fig. 25 ISO 800 f/4 at 1/350th
Reflected sunlight off a building behind me lit this bride beautifully. A subtle ‘glow’ was added in post-production to all the pictures from this wedding.

Fig. 26 ISO 400 f/4 at 1/1000th
Shot into the light on a long lens makes this a trademark Lovegrove picture. A hint of out of focus foliage in the foreground was unavoidable. Too much out of focus foreground would have made the picture voyeuristic.
Figs 27 and 28 ISO 800 f/5.7 at 1/1500th and ISO 200 f/8 at 1/250th
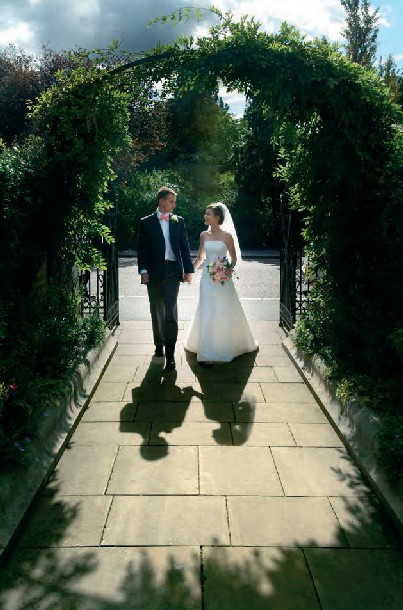
A leading shadow and the two arches make a strong graphic composition, while the groom’s casual stance makes the picture saleable. I was waiting for the bride and groom to appear around the corner when a guest came up the path toward me. I saw the shadows and immediately switched to a wide lens to capture this image. My only direction to the couple was for them to look at each other at the right moment.
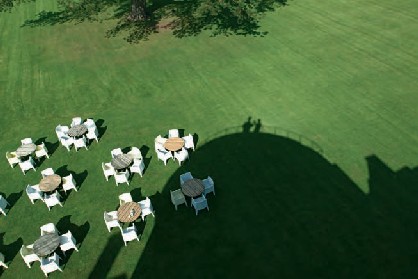
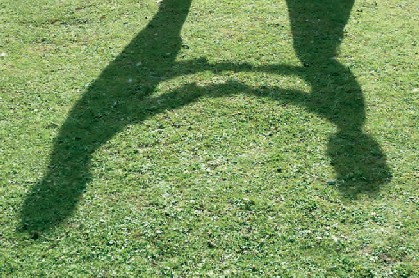
Have fun with shadows. These three pictures all made the wedding albums. It pays to have your eyes open to opportunity. In the first picture, I had to remove my shadow in Photoshop to leave just the groom and his best man.
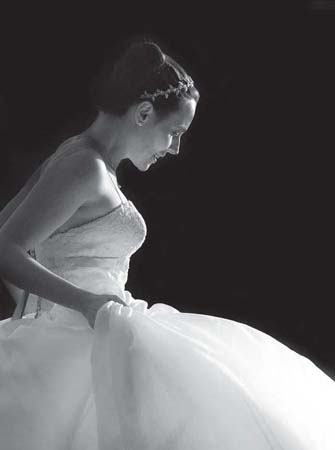
Fig. 32 ISO 320 f6.7 @ 1/850th
The direction and angle of light was perfect for this candid shot of the bride. The dark hedge beyond was printed down to black in Photoshop.
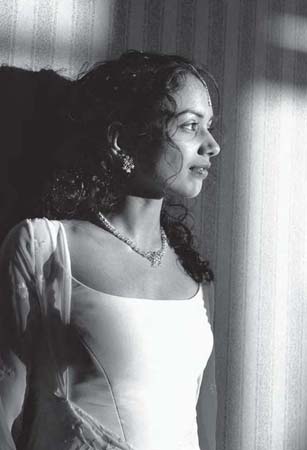
Fig. 33 ISO 800 f/5.7 at 1/90th
The pattern of the window shadow created by the setting sun on a hotel bedroom wall made this picture worth taking. I placed the bride so that her lit face was against the dark background. She is ‘keyed down the nose’ and I am shooting into the unlit side of her face. Notice how her wonderful cheekbones and jaw line have been accentuated by the lighting direction. Even the stripy wallpaper works in this shot.
Dappled sunlight on this wall made a picture out of nothing. I nearly didn’t get the shot because I forgot to put my lens back to f/4 after the previous picture. This error forced a long exposure but I used a monopod and I got away with it.

Fig. 35 ISO 400 f/4 at 1/750th
This bride is lit by a pool of light from a window 30 feet away at Wedderburn Castle in Scotland.

Winter wedding interiors in old houses with dark paneling are a speciality of ours. Here, I used a monopod to steady the camera, added a splash of off-camera flash, and exposed for the light from a table lamp. The flash reflected back off the shiny wood and the lamp reflected in the top of the piano avoiding the black-hole syndrome.

Fig. 37 ISO 400 f/3.2 at 1/90th
Julie and I used a Bescor battery video light from B & H in New York for this shot. Julie lit the bride ‘down the nose’ and I took the picture shooting into the unlit side of the face. I always make a habit of switching on the table lamps in hotel bedrooms because they give depth to a picture like this.
As the day becomes night there are a variety of picture opportunities that include the setting sun in the composition.Here are three that Julie and I have recently shot.

This fun light fitting made a picture. Props like this should not go unnoticed. I used a monopod to keep the camera still during exposure.
A near silhouette like this can be very effective. Leave the flash switched off and increase the exposure by a stop as a starting point.
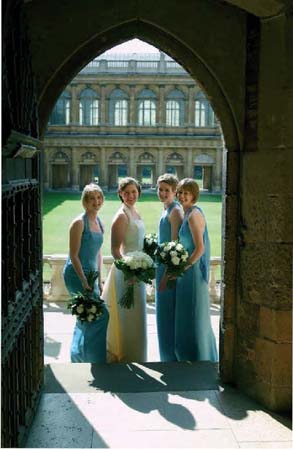
Fig 43. ISO 320 f/4 at 1/850th
Asking the girls to step down a step allowed them to get some light from the walls either side of the archway. A risky shot but I got away with it. Trinity College, Cambridge.
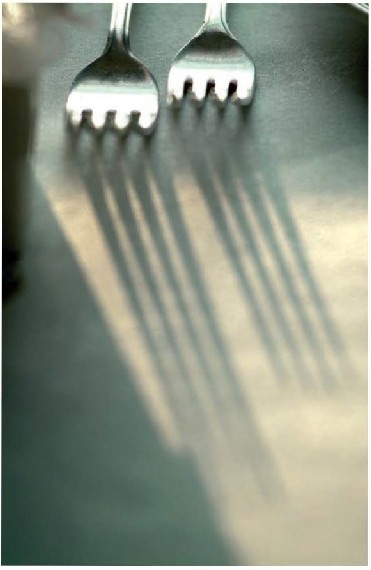
Fig 44. ISO 400 f/4 at 1/SOOth
Very simple shots like this created by sunlight on the dining table have a charm of their own. Beware, you tidy them up a bit and the magic is often lost.
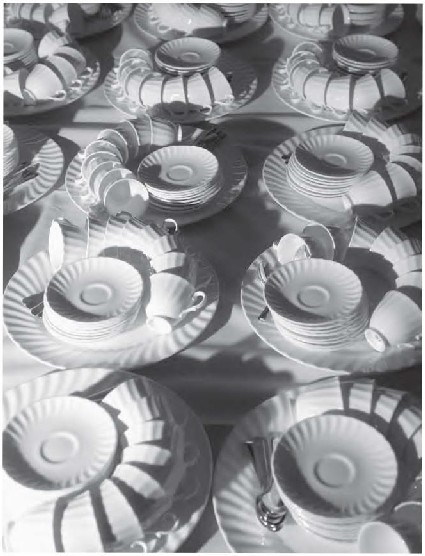
1 saw these coffee cups and I couldn't resist a picture. I used a flash off-camera to create the dramatic shadows and emphasize the patterns. They look a bit like fossils now.
Fig 46. ISO 400 f6.7 at1/125th
Taken moments before the heavens opened and torrential rain came upon us. I used a small handheld flashgun on full power zoomed in to cover an 80-mm lens. Julie held this beside me as I shot on a wide lens.
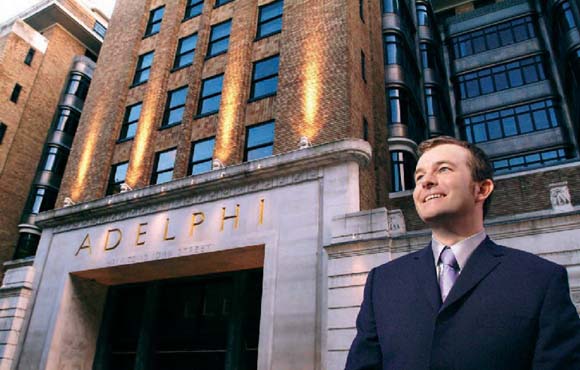
Fig. 47 ISO 800 f/6.7 at 1/60th
Julie held my flashgun so that this groom was lit straight down the nose and I balanced the exposure for the Adelphi building in the background. The color contrast with the yellow and blue further enhances this shot as does the low angle viewpoint.
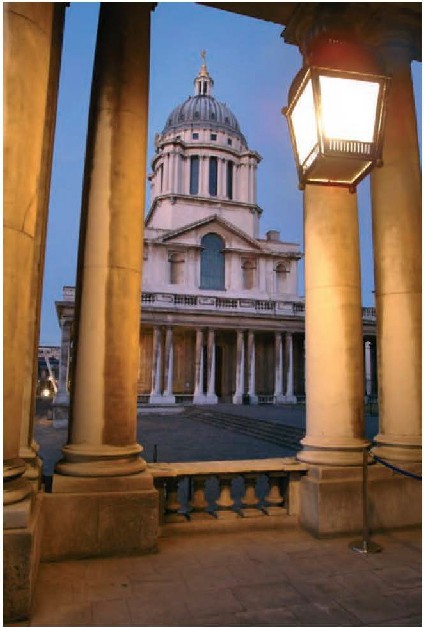
FIGS 48 & 49 ISO 800 f/4 at 1/8th and ISO 800 f/4 at 1/3rd
Mixing tungsten light and daylight at dusk is a firm favorite of mine. It doesn't matter what the weather is doing, great shots are nearly always possible. Shutter speeds get slow so be prepared to use a tripod.

Low pressure sodium light emits just one predominant wavelength and is therefore imposable to color balance correctly. I was about 10 minutes too late for this shot as I’d have preferred more light in the sky. The reflection is courtesy of a BMW 3 series sunroof!