why should you need a distinct and coherent style? Because your work and the way it is presented needs to be recognizable – it needs to stand out from the work of other photographers. That’s the key to generating continuing demand for your work.
Magnum photographer Martin Parr once told me ‘an album of pictures should be a complete body of work that is eloquent and self-supporting.’ He’s right of course, and the best work will also stand the test of time. In fact, this longevity is vital to wedding photography. So my advice is to avoid gimmicks like spot color, pictures taken on angles, extreme color, cross- processing, or excessive diffusion. In a few years’ time these will look very dated and will ruin what might have been a great album.
Let me give you an actual example. Back in the 1970s, it became fashionable to heavily vignette prints and even superimpose the bride and groom in a wineglass. Those collections of prints have low value and integrity today. Compare them with good photo journalistic photography of the 1970s and you will see that work that is less gimmicky has vastly increased in value. A bride and groom invest in wedding photography not just for the present but also to share with their children and grandchildren for many years to come. So stick to good photographic principles, present your pictures well, and your work will be worth investing in.
Deliberate panning of the camera while using a slow shutter speed can make a great shot from humble beginnings.
I was told some years ago that the best photographers steal ideas and adapt them while the worst photographers simply copy the work of others. By all means be inspired by the work of other photographers but the sooner you develop your own‘look’ the sooner you will command high enough fees to make a decent living. I regularly study photographs and paintings to find out how they work – what makes an image great. I have learnt to read a picture and to break it down into its core elements. This deconstruction helps me to develop my craft skills and helps me to see potentially great images unfolding in front of me. I get my inspiration from the main fashion-based women’s magazines, the editorial photography in the weekend color supplements, good fashion catalogues, old books on photography from the1930s to the 1970s, and the great master painters.
When Julie and I started photographing weddings we used shooting techniques that I had been taught in my previous career at the BBC. When shooting our first 200 or so weddings we left our cameras set at f/4 and shot continuously at that aperture. This was how I shot dramas for television. Over a period of 10 days or so (the time it takes to shoot a 50-minute episode), we would shoot every frame at the same aperture. This gave the finished edited show a continuity of look. It also helped to isolate the principal points of interest in each shot using differential focus. Treating our weddings the same way allows our wedding albums to show a consistent approach and style throughout. In other words, the pictures taken at the beginning of the day are in harmony with those taken at the end of the day and so on.
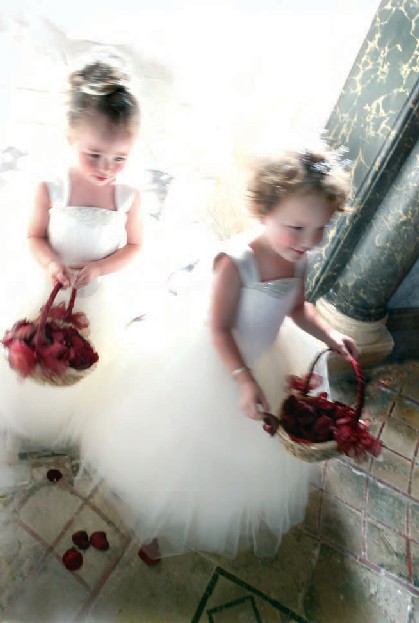
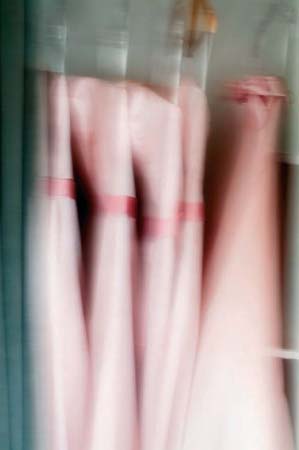
Fig. 3 ISO 200 f/5.6 at 1/10th
I used a slow shutter speed to get some movement into this picture of bridesmaids entering a church.
Shooting every frame at f/4 was just the start. We also endeavored never to include the sky unless it was dramatic; this also gave our albums a different look. To further restrict and focus our style, I decided to have just two lenses in my kit, a 17 to 35 and an 80 to 200 mm f/2.8. As I used no lenses between 35 and 80 mm, I was forced to shoot either tight or wide. These top-shelf professional lenses designed for use at wide open apertures produce phenomenal sharpness at just one stop down at f/4. Amateur series lenses that start at f/4 or f/5.6 don’t reach their optimum performance until f/8 or so and by then focus subject distinction is lost.

Fig. 4 ISO 400 f/2.8 at 1/100th
By 2001, fashion photographers and some editorial photographers had begun tilting shots to add an extra dynamic quality. This style soon became overused and we had dropped all tilted shots by 2002. This picture combines a shallow depth of field with a tilt.

Backlit flowers became a look we championed from the early days of digital imaging. Using the camera screen as an exposure guide Julie was able to accurately judge the amount of exposure increase that was necessary to record the white lilies, white feathers, and the Venetian blind in this picture.
Here’s another storytelling trick I learned at the BBC. Establish the location in a wide shot, then go in tight for the closeups and details. Shoot each scene in wide and tight shots from forward and reverse angles. Scene setting and storytelling were always shot with the wide lens whereas beauty and emotion were shot in closeup on the tight lens. This made putting albums together a delight, just like editing a movie.
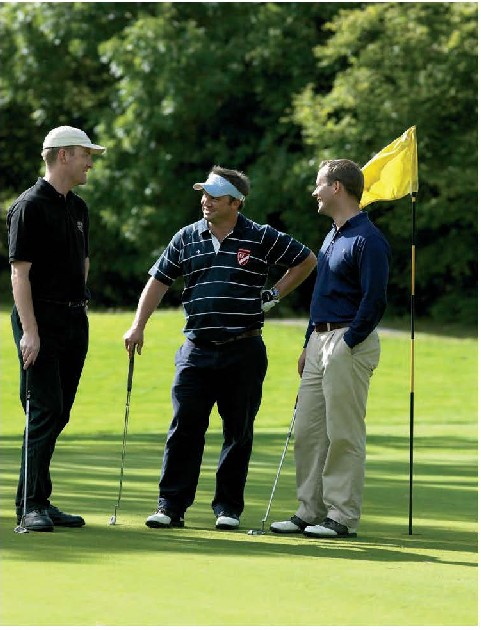
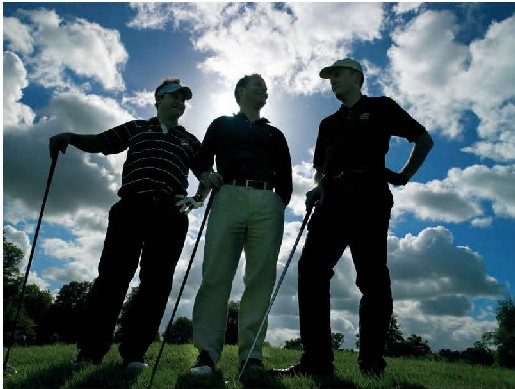
FIGS 6 & 7 ISO 200 f/5.6 at 1/400th and ISO 200 f/14 at 1/640th
These two pictures of the same golfers taken just a few minutes apart on a wedding morning show how much latitude there is to develop a style.
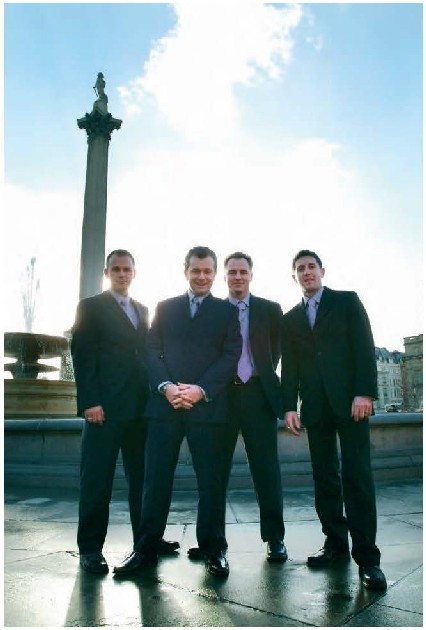
FIGS 8 & 9 ISO 400 f/8 at 1/250th and ISO 200 f/5.6 at 1/SOOth
These two pictures include massive monuments in the background and were shot into the sun. By 2001. we had started to exclude the sky from our pictures unless there was a good reason to include it.
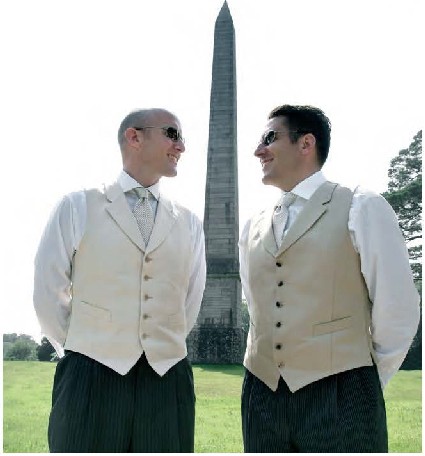
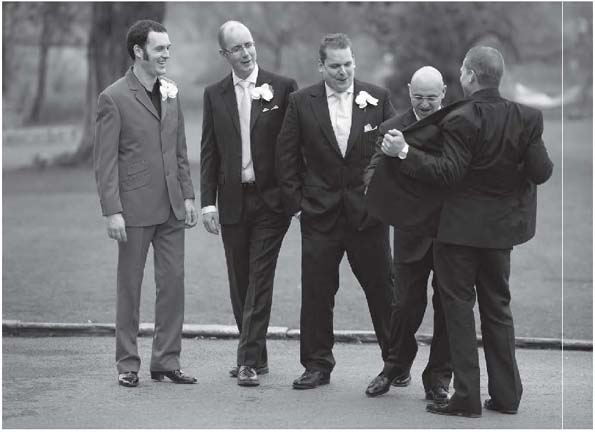
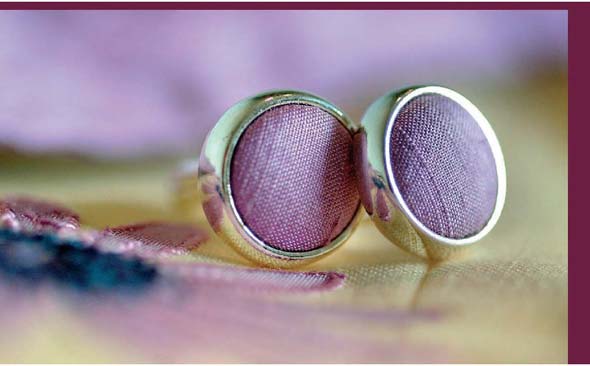
Fig. 10 ISO 400 f/4 at 1/250th
I asked the usher on the right to go up to join the other guys and give them a flash of his purple suit lining. I was ready to capture the reaction with my 210-mm lens. Distant shots like this on a long lens create a very different look to the more obvious wide angle coverage from close in.
TIP: BE ADVENTUROUS – Allow your picture shooting style to evolve continually and keep looking for new ways to develop it. Occasionally you will find that the emergence of a new technology enables you to create a new look that you can call your own – for a while.
Digital shooting with instant feedback enabled Julie and I to shoot using extremes of exposure compensation up to - or + five stops. We started to shoot in risky light without fear. On film it might be considered foolhardy to attempt such dramatic looks on a client’s wedding day without the time for a Polaroid test.
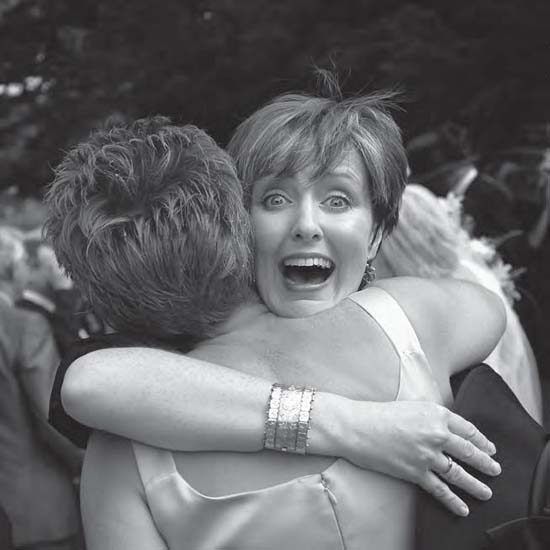
Fig. 11 ISO 200 f/4 at 1/750th
Moments like this happen all the time at weddings. The trick to capturing these situations is to be in the right place at the right time with the right lens and the right exposure set on your camera. Photojournalists stay prepared and watch situations like this develop. I had made my presence known here already and the reaction on the girl’s face was aimed at the camera.

Figs 12 & 13 ISO 400 f/4 at 1/300th and ISO 400 f/4 at 1/800th
Think in sequences and bring elements of humor into your work. Storytelling becomes more fun when you can think on your feet and put together frames like these.
BASIC EQUIPMENT
When choosing (and using) your equipment, keep in mind three things:
The style of the images you want to create will determine the equipment you need to do the job properly. Don’t let the kit you already own dictate your style. In most places, you can rent the camera bodies or lenses you need for a particular job. This is especially useful if you are starting out.
Always remember that the greatest differentiation between a good photographer and a poor one is not his or her equipment,it’s the ability to see a picture. No amount of equipment will make this process easier, though in my case, I have learnt to cheat a bit. My constant use of prime lenses (wide or tight) has trained me to ‘see’ a scene in a more specific way. I don’t mean when I’m looking through the camera, I mean when looking directly at the scene. It’s like having horse blinkers on (though I’m also aware of peripheral vision). Film directors use their hands at arm’s length to ‘frame’ the scene they have in front of them. As a photographer I can ‘see’ the world through my Hasselblad 35 mm lens or my210 mm quite clearly without having the camera to hand. My digital medium format kit also gives me thinking time between frames. I use this to fine-tune my composition.
The lens that produces the image is the one bit of kit that can separate the professional photographer from the amateur. Amateurs will never justify the vastly increased price of faster lenses. I think ‘f’ numbers are one mystery in photography that will inadvertently help to keep the Pro–Am divide. ‘Why pay more money for less f’ I hear the amateurs cry.

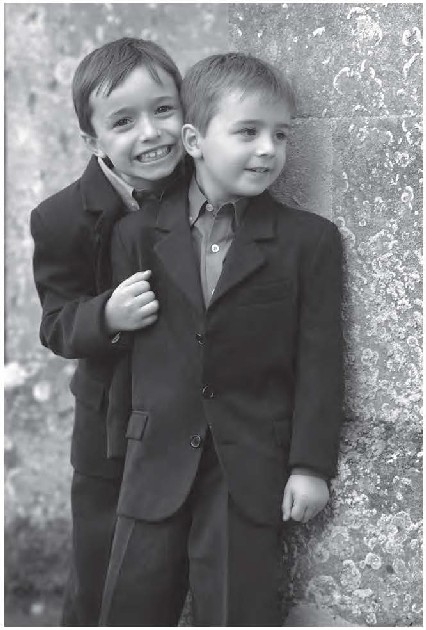
Figs 14 & 1 5 ISO 320 f/4 at 1/200th and ISO 320 f/4 at 1/70th
Watch the guests at a wedding and look for echoes in behavior. I could have improved this pairing by using a longer lens and being further away when I took the picture of the man. I had plenty of time to retake the shot, as he doesn’t look as though he was going anywhere. The composition of the picture of the girl is far stronger.
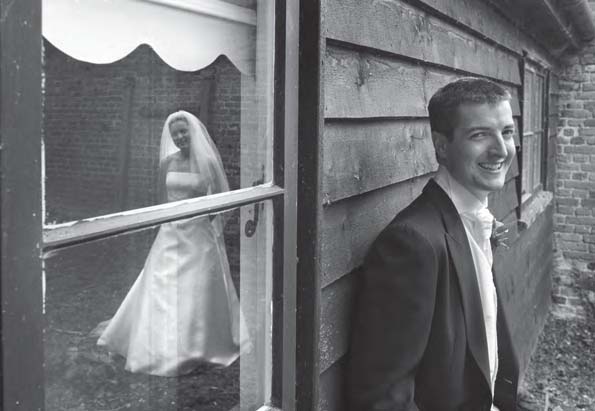
Fig. 16 ISO 200 f/5.6 at 1/125th
I like to be a bit clever with my work at times. Creating reflection shots like this is a fun part of the photo shoot. In this instance, I am the focus of attention and I asked the bride to look at my reflection in the window. Pictures like these rarely get set up and taken by guests on the wedding day.
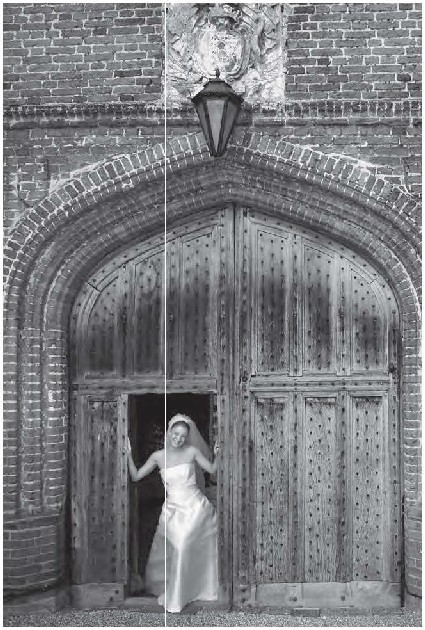
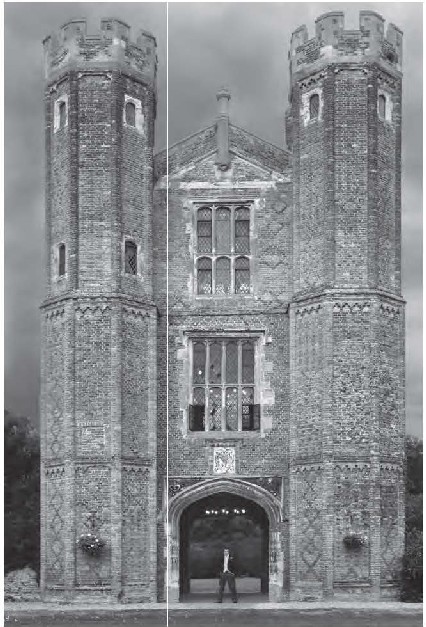
Figs 17 & 1 8 ISO 200 f/5.6 at 1/125th and ISO 800 f/6.7 at 1/180th
Figures in landscape pictures work well if you get the framing right. Both these pictures were shot square on to the buildings and have symmetry in the architecture.
So here’s my advice: always buy the best glass there is. Great lenses stay great lenses for a very long time; so don’t think twice about buying the best. Price and build quality are good indicators of performance.
What about camera bodies? There is now far less to choose between ‘amateur’ and ‘professional’ single-lens reflex (SLR) cameras. In fact, the digital revolution has brought a multitude of decent SLRs to amateurs and professionals alike. It seems that all the current crop of digital SLRs have excellent handling and sensors. In fact, if you believe the equipment reviews, it is now seemingly impossible to buy a bad digital SLR from the main manufacturers! You can choose from across the range of cameras and as long as you have a good eye for a shot, good shooting technique, and of course, fine lenses, almost any camera will do. That’s not to say that all cameras are equal, but Julie chose her last camera from the amateur range because it’s nearly half the weight of the top spec body. It has the same sensor, the same screen, great metering, and accepts the same lenses. So, why do most professionals pay the extra for ‘pro’ camera bodies? Mostly because of build quality: pro cameras are made with more robust materials and therefore last longer and can take the rough and tumble of professional life.
TIP: HOW LOW CAN YOU GO? If you want to be able to shoot in low light without having to illuminate the scene, then two key factors come into play: the maximum aperture of your lens and the slowest shutter speed that will allow you to produce acceptably sharp images. Vibration reduction (sometimes called ‘image stabilization’) systems in modern lenses allow the use of slower shutter speeds (up to three stops of advantage). But don’t be fooled into thinking you can now shoot a ceremony in a church at 1/15th and get great images. Vibration reduction does not stop subject movement. In this instance, fast lenses rule. Many a top wedding photographer uses a 50 mm f/1.4 or even f/1. 2 prime lens in a dark church.

Fig. 19 ISO 200 f/6.7 at 1/180th
Shooting through a window tells more about the venue than just photographing the scene from the window. I carefully placed the distant building in the top of the window opening.
Developing a style is the best way to concentrate your mind on the wedding day shoot. Reportage photographers have to learn how to react to what’s going on and predict what will happen next. Non-reportage photographers have to make the best use of light and people. Wedding photography has many current shooting styles and products that sell well. Almost anything goes as long as it’s good. The shooting style that Julie and I have developed is a combination of reactive and proactive shooting. But I strongly urge you to resist labeling yourself. If you call yourself a pure photojournalist and this style of work ceases to become fashionable or command high prices it may be difficult to reinvent yourself. Keep an open mind about style and accept evolution to some extent.
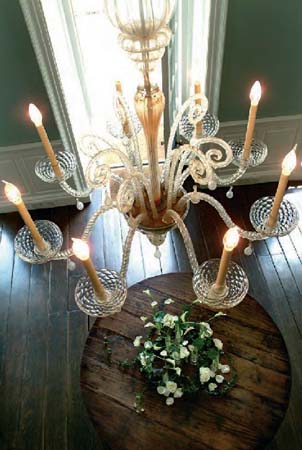
Fig. 20 ISO 800 f/4 at 1/180th
This is another high viewpoint picture. I took this picture with the camera on the ceiling held in place using my monopod. The camera was triggered using the self- timer set at 10 seconds.
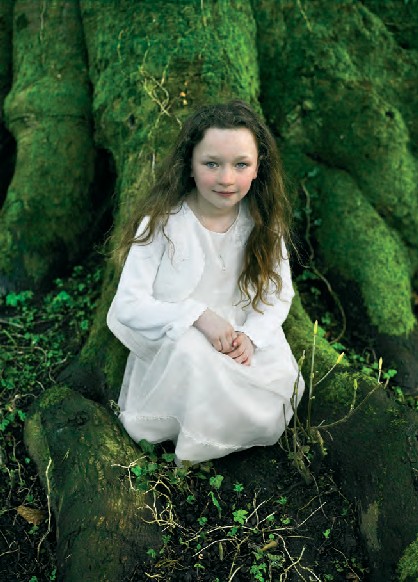
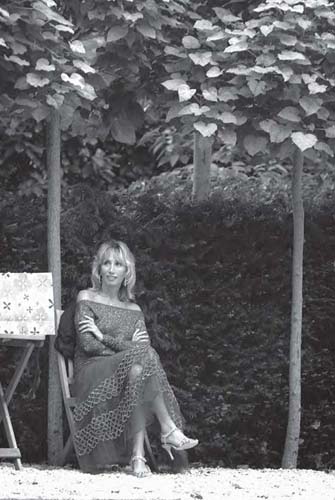
Fig. 21 ISO 400 f/4 at 1/180th
The big old tree provided the perfect setting for this bridesmaid picture. A high viewpoint makes the girl seem vulnerable and the image might have been better if I had knelt down. Explore your viewpoint and its effect on the resulting images at the taking stage. Then question your shooting decisions when you review your images after the wedding.
Let’s take my own career path as an example. I’ve been many a ‘specialist’ in my lifetime and I’ll probably morph into a few more careers as time goes by. Back in 1984, I started as a TV cameraman; then came spells as a lighting cameraman, a lighting director, a news cameraman, and all this time I was shooting stills for a stock library in my time off. I then spent some time as a commercial photographer before deciding that people are more fun to shoot than products. I became a portrait photographer and eventually a full-time wedding photographer back in 2000. The thing is, my image-making style has evolved along with my job title. Maintaining openness to external influence and inspiration from other photographers has given me a special outlook on the image-making process.
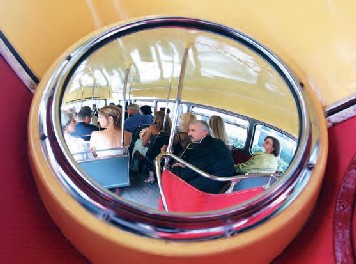
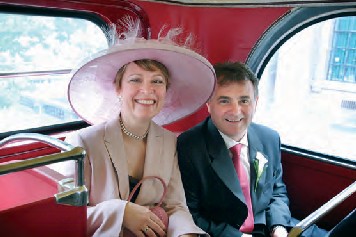

Figs 22–24 ISO 400 f/4 at 1/860th and ISO 400 f/4 at 1/45th and ISO 800 f/4 at 1/45th
It’s too obvious at times to shoot a big wide shot of a bus like this. That is just what the amateur photographers at the wedding were doing. I set my work apart and took a more creative approach by shooting a close sequence of details.
My personal style tips:
- 1. Shoot emotion Create a relaxed ambience and use it to make pictures. Make opportunities for fun, whoop it up a bit, and shoot. Feel and be involved, not just an observer. Have fun with the wedding guests and bridal party then capture it in camera. Forget jokes and one-liners. Take FUN PICTURES!
- 2. Think first then shoot This is the way Julie and I work. Occasionally, having a ‘shoot first’ approach to capture the reality of the situation can be an advantage. But this only works well if you are prepared. So when you walk into a room, automatically set your camera to a suitable exposure so that you can react instantly and effectively.
- 3. Move don’t zoom Create pictures in three dimensions. Using the zoom to compose images is like cropping a two-dimensional image. Try to create depth. Moving helps align the foregro und, midground, and background elements of an image. If you feel lazy and want a bit of work to do, use prime lenses. Your composition will get worse before it gets better, but it will eventually be worth the effort.
- 4. Tell the story To achieve this, use a ‘less is more’ technique. Single out key elements. This style works well if you keep the edges of the frame clear distracting detail.
- 5. Shoot sequences This makes it easier to create dynamic layouts. Why take one shot where three or four will do the job better?
- 6. What’s hot and what’s not? Out goes spot color and pictures on angles. In comes an increase of saturation and pictures that seem to glow. Look to advertising to see what’s current. Don’t go crazy, just a hint of a look is fine. Remember that advertisers usually have only one image to get the effect or look-over to the buying public. You have hundreds right throughout the album, so go easy on it. Don’t mix and match. Make your black and whites and your color style consistent.
- 7. Take control Controlling your surroundings, your subjects, and the light is the first and most obvious way to develop a style. Beyond the physical control is the emotional control. This is where a photographer creates a moment of fun or reflection and captures it. This ability to create and capture emotions leads to fantastic wedding photography. Like film making, telling a story with pictures often relies on a good director.
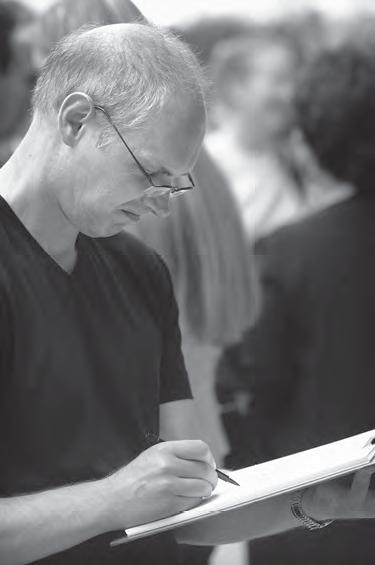

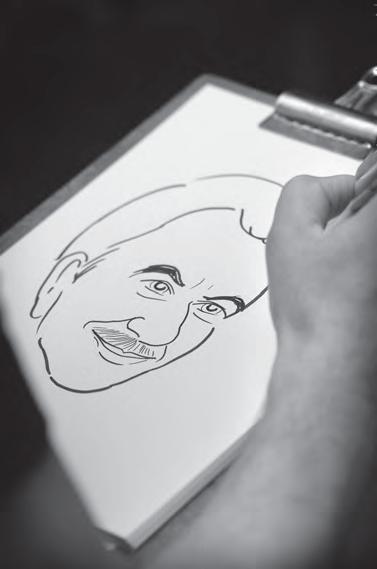
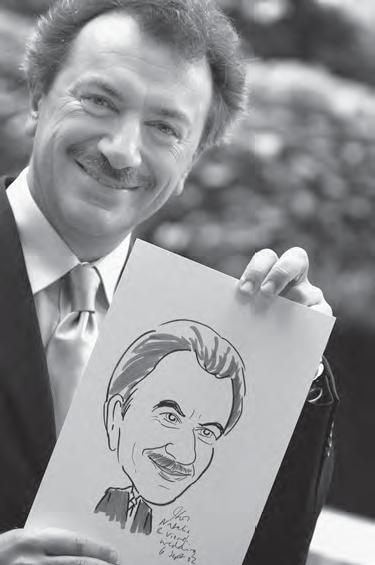
Figs 25–28 ISO 320 f/4 at 1/125th
I chose to shoot this sequence of an artist at work using a 80 to 200 mm lens. The long lens together with the tight crops ensures a continuity of style for all the pictures. From a business point of view it makes obvious sense to shoot and sell four images rather than a single wide shot that tells the whole story by itself.

Fig. 29 ISO 320 f/4 at 1/60th In 2001,