
In addition to the controls that affect formatting and presentation, InCopy has an arsenal of tools related to structuring the content of a story with Extensible Markup Language.
This chapter is all about working with the XML structure of your InCopy stories. It’s worth looking into how InCopy and, in turn, InDesign use this powerful technology to give your stories a logical structure and make it easier to repurpose your content in other formats and publishing mediums. There are many excellent books out there about using XML, so we’re going to keep this chapter fairly elementary, limiting it to a discussion of XML in InCopy. If your publication has technical experts who are implementing XML in your InCopy/InDesign workflow, by all means read this chapter and then share it with your technical team. You’ll have a better grasp of what they do, and they’ll have a better understanding of how InCopy can use XML. You won’t be an XML expert at the end of this chapter, but you’ll be able to contribute to a publishing workflow that relies on XML.
With all the structure-related tools available to you in InCopy, particularly the Structure pane and the Tags palette, you might think that InCopy would be an ideal tool for writing raw XML files. That’s not really a viable approach.
InCopy is ideal as a receptacle for XML files, and as such, the InCopy tools are designed for fixing, tweaking, or massaging incoming XML. Writing XML is best done in a true XML editor like Oxygen, XMLSpy, or BBEdit and is best left to those who are familiar with writing XML. InCopy users need only be XML-savvy enough to import, apply, and fix XML as needed in the InCopy document. In most workflows, InCopy users will probably get their XML either from an external XML file or in the process of checking out an InCopy story or assignment. Some InCopy users will be called upon to import an existing set of tags and apply them to an InCopy document.
XML stands for eXtensible Markup Language.
Like many technologies Adobe supports in its software, XML is an industry standard. The implementation of open standards in Adobe software means that Adobe’s tools are designed to work in the context of larger workflows, rather than limit users to a proprietary, Adobe-only world.
But what do XML and open standards have to do with print workflows or InCopy? We are all familiar with formatting a document for visual presentation in a magazine, newspaper, or Web site. Defining the logical structure of a story with XML is a profoundly different approach to a document. XML is a powerful way to mark up the information in your InCopy file to describe its contents, as opposed to its design. InCopy and InDesign use the word tag to describe the process of marking up a document, so we use that word in this chapter. (Tag and other terms are explained in the next section.) When you assign paragraph styles, character styles, or color swatches to text in your document, you’re formatting the document for visual presentation. Using XML enables you to divorce form from content, which is very useful for repurposing content. For instance, the same story you write for the front page of the newspaper might also be used on the paper’s Web site. It will look very different in each place, but the content is still the same. The structure of your document might by broken down into a headline, byline, body, and caption. It is only in terms of the form of your story that it likely looks very different in print and on the Web. That’s what we mean when we say XML describes the contents of a document (headline, sub-head, byline, and body) but not the form (font, size, alignment, and color).
None of the following terms is unique to InCopy’s use of XML, but you’ll need to be familiar with them in order to use InCopy’s XML features.
Tag (noun) is XML markup describing an element’s content. In InCopy, each tag has a unique name and identifying color. Some common tags used in a publishing workflow include headline, byline, body, and caption. XML must be well-formed, meaning that an opening tag, such as <headline> must have a matching closing tag </headline>. The content in between the two tags is referred to as tagged content.
Tag (verb) is to assign an XML element to the content, in other words, to “mark up.”
Element is any item defined by opening and closing tags in an XML file. InCopy automatically creates well-formed XML, so when you tag content, all necessary opening and closing tags are written for you.
Attribute is a single property of an element. In XML an attribute is required to have a value. For example, to state the location of a particular author, one might use an element called <author> with an attribute of “location” set to a value of “New York”: <author location=“New York”> </author>.
Structure is the way the elements fit together in a logical outline of the content.
DTD [Document Type Definition] is the set of rules for the structure of a particular file: what elements and attributes are permitted in a file and the order in which they must appear and/or are assigned. A similar method of setting up rules that govern the structure of a document is to use a set of XML-based statements called a schema, but at this time InCopy supports DTDs only.
Validate is to confirm that the XML in your document conforms to the DTD you’ve associated with it.
Tags are the glue connecting an element in the structure with its page object. Without tags, you cannot have XML. Although you can change the name of a tag after its creation, it is helpful to decide in advance on the tags you will need to use for your document. If the parts of the structure of your file boil down to headline, byline, body, and caption, those would be great tags to create. Often, text styles in your InCopy story provide the basis for deciding on a set of tag names. In some cases, InCopy users will create tags from scratch; in others, InCopy users will load tags from other sources into their current InCopy stories. Either way, you manage tags in the Tags palette.
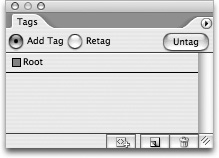
Creating new tags in InCopy is done through the Tags palette (Figure 7.1), which is accessed from the Window menu or by pressing Command-Option-F5/Control-Alt-F5. The Tags palette will already be populated with the Root element, which is the top-level element in your XML structure. Think of the Root as the container for the rest of your document that can’t be removed or deleted.
From the Tags palette, there are two ways to create a new tag. One is to click on the New tag button at the bottom of the Tags palette (Figure 7.2). A new tag with a preassigned color appears in the Tags palette ready for you to type in a tag name of your choice. After you’ve typed in a name, press the Enter/Return key, and the tag is added to the tags list in the palette in alphabetical order.

Tip
When creating a new tag, bear in mind that XML tag names must be unique and also cannot contain punctuation or spaces, so sub-head or sub_head is fine, but sub head or head, sub is not. Tag names can only begin with a letter, an underscore, or a colon, which can be followed by letters, numbers, underscores, hyphens, periods, and colons. Tag colors need not be unique, but we find it helpful to assign a unique color to each XML tag.
You can also use the Tags palette menu to create a new tag. Choose New Tag from the palette menu and in the New Tag dialog (Figure 7.3) type in a name for the new tag and choose a color from the pull-down menu. If you prefer to control which color is assigned to which tag, this is the best way to assert immediate control over tag color.

To change either a tag’s name or its color, double-click on its name in the Tags palette or select the tag in the Tags palette and choose Tag Options from the palette menu. Both of these options are available in the Tag Options dialog.
In the long run, automating the tagging process is going to save time and money, but understanding the basics of applying tags to text in InCopy is a good place to start.
Applying a tag to text is simply a process of highlighting a piece of text and clicking on a tag in the Tags palette. The text is now assigned that XML tag. For instance, create tags named headline, byline, and body, then select your headline text and click on the headline tag. Select the byline text and click on the byline tag, and then select the body copy and click on the body tag. You can methodically go through an entire InCopy document and tag pieces of text appropriately. Notice that as you insert your cursor into a piece of tagged text, the name of the applied tag is highlighted in the Tags palette. You can also tag content by dragging a tag onto a frame in Layout view. Dragging a tag onto a frame applies the tag to the entire frame, as well as to any other frames that are part of the same text thread.
If you have enabled Show Tag Markers (View > Show Tag Markers), note that there will also be tag markers visible around the text you tagged. In Galley or Story view, the tag markers are small graphics. In Layout view, they look more like brackets (Figure 7.4). When you apply the tag or drag a tag onto a frame, InCopy also generates a new element in the XML structure of your document, which can be seen in the Structure pane (see the “Viewing Structure” section later in this chapter). Enabling Show Tagged Frames (View > Show Tag Markers) displays tagged frames with the tag’s assigned color in Layout view.

The Tags palette offers two radio buttons at the top of the palette, Add Tag and Retag, which control InCopy’s behavior when you’re applying tags to text. Much of what the buttons do is context sensitive, but feel free to modify the settings when you need to. If the Add Tag button is selected when you click on a tag, it assigns the selected tag to the selected text. If the Retag button is active, InCopy removes the existing tag and assigns the new tag you’re clicking on. To remove a tag from an item entirely, simply highlight that item in the document and click the Untag button in the Tags palette.
Tip
InCopy’s default keyboard shortcut set does not include any keyboard shortcuts for using XML other than opening the Structure pane. If you’ll be working with XML regularly in InCopy, you might create your own custom keyboard shortcuts for that purpose. For more on customizing keyboard shortcuts in InCopy, see Chapter 1.
The process of creating tags and then going through an entire InCopy document and manually applying tags to each part of the content could take as long as a TV awards show. Doesn’t this seem a bit tedious? Fortunately, there are ways to streamline and automate the process.
If you regularly create the same types of documents, it’s quite possible that you will be using the same tags in those documents. In the same way that your publication might regularly use the same swatches or the same styles, you might have a standard set of XML tags, which is easily saved as an XML file. If you manually created a set of tags in the Tags palette, as we described earlier, choose Save Tags from the Tags palette menu. In the Save Tags as XML dialog (Figure 7.5), navigate to where you’d like to save them and give your file a name. We find it’s particularly helpful to name your set of tags in a way that makes it clear that this is the source file for tags, because there’s nothing unique about the file format of a set of saved tags. It’s an XML file much like any other, so an appropriate name, such as StandardXMLTags.xml, can be quite helpful.

As we mentioned earlier, someone may have previously saved an XML tag file from InCopy for you to load into your current InCopy document. From the Tags palette menu, choose Load Tags (Figure 7.6), navigate to the .xml file, click open, and your Tags palette is populated with the tags from the XML file you’ve loaded.

In addition to loading a set of tags saved as an XML tags file from InCopy, you can also load a set of tags saved from the Tags palette in InDesign (saving tags from InDesign works the same as in InCopy, from InDesign’s own Tags palette). Any set of tags saved from InCopy’s (or InDesign’s) Tags palette is an XML file that can be loaded into the Tags palette for a new file. What’s more, after choosing Load Tags from InCopy’s Tags palette menu, you can select a wide variety of possible sources for tags, including an XML file, InCopy files (.incx), InCopy templates (.inct), InDesign files (.indd), and InDesign templates (.indt). You can load tags from several different source files into the same InCopy document. After you’ve loaded the first set of tags from your first source, just repeat the steps until you have all the tags from all the respective sources.
InCopy does not allow you to import XML files into an existing InCopy document. On the other hand, you can open an XML file in InCopy the same way you would open any other file, by clicking File > Open. Your XML file will open in InCopy with all its tags intact and the structure available in your Structure pane, ready for you to go to work.
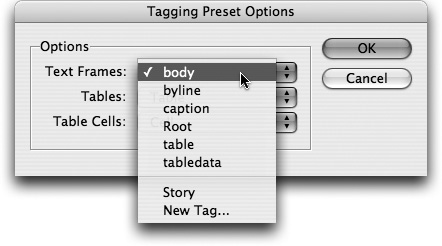
Autotag is a feature new to InCopy CS2 that automatically attaches default tags to newly created content in InCopy. Configure Autotag from the Tags palette menu by selecting Tagging Preset Options, which opens the Tagging Preset Options dialog where you specify the default tags. Using the three pull-downs in the Tagging Preset Options dialog, you can set InCopy to pre-assign an XML tag to each newly created text frame, table, or table cell in InCopy. Click the pull-down menu for Text Frames and you’ll see a list of tags currently available in your Tags palette (Figure 7.7). Choose the tag you want to associate with text frames by default. If you choose the body tag, anytime you invoke the Autotag feature, a new text frame will automatically be tagged body. You should also choose a preset tag for tables and table cells.
Tip
If, in the process of setting up your tag presets, you decide that you need a new tag, you can create one directly from the Tagging Preset Options dialog. Just choose New Tag from the bottom of any of the pull-down menus. You’ll see the New Tag dialog and can create the new tag just the same as if you had invoked New Tag from the Tags palette menu, as described earlier.
To invoke the Autotag feature, put your curser into an untagged text frame, table, or table cell and choose Autotag from the Tags palette menu (Command-Option-Shift-F7/Control-Alt-Shift-F7) or click the Autotag button ![]() in the Tags palette. InCopy identifies the type of object and assigns the appropriate tag. If you place your cursor into a series of linked text boxes in Layout view and choose Autotag from the Tags palette menu, InCopy tags all of the linked text frames. If you use Autotag in a table cell, InCopy tags the text frame with the default tag, the table with its default tag, and the cell with its respective default tag.
in the Tags palette. InCopy identifies the type of object and assigns the appropriate tag. If you place your cursor into a series of linked text boxes in Layout view and choose Autotag from the Tags palette menu, InCopy tags all of the linked text frames. If you use Autotag in a table cell, InCopy tags the text frame with the default tag, the table with its default tag, and the cell with its respective default tag.
Odds are you’ve already used paragraph styles and character styles throughout the story. You can take advantage of those styles by mapping your text styles to your XML tags. Mapping styles to tags is very similar to mapping Word styles to InCopy styles (see Chapter 4).
When you map styles to tags, you’re telling InCopy that a given style (or even several styles) in InCopy always corresponds to a given tag. For instance, you might have a style called headline that corresponds to a tag called headline. From InCopy’s Tags palette menu, choose Map Styles to Tags. In the Map Styles to Tags dialog, the left column lists styles available in your InCopy document (even ones that are not in use), and the right column lists available tags. The initial view of this dialog lists everything as Not Mapped. Just click on any of the Not Mapped tags (Figure 7.8) and use the pull-down menu to choose a tag to associate with the paragraph style or character style to its left. Run through your entire list of styles and map them each to a tag. It’s fast and far less work than reading through an entire InCopy document and manually tagging each piece of text.

If that wasn’t easy enough, the Map By Name button at the bottom of the Map Styles to Tags dialog can make the tagging process even easier (Figure 7.9). Map by Name will, as you might expect, map a style with a given name to a tag with the identical name: the headline style would map to the headline tag, and so forth.

On the other hand, maybe you have XML in your InCopy document, either because you’ve opened it directly or because it came from an InDesign document that was already tagged. Instead of manually applying all the corresponding paragraph and character styles, you can save lots of time by automatically formatting the story based on the XML structure in the file. In this case, it’s nearly the same as mapping styles to tags, but what you’ll do is map tags to styles.
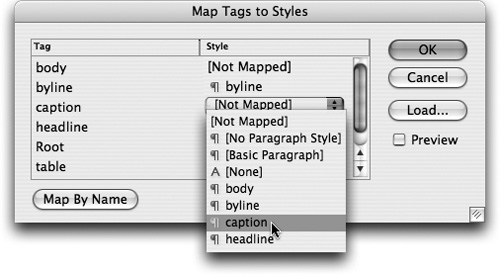
Mapping tags to styles tells InCopy to apply a particular style to an existing tag. From InCopy’s Tags palette menu, choose Map Tags to Styles. In the Map Tags to Styles dialog, the left column lists available tags in alphabetical order, and the right column lists character and paragraph styles. The initial view of this dialog lists everything as Not Mapped. Just click on any of the Not Mapped styles (Figure 7.10) and use the pull-down menu to choose a paragraph style or character style to associate with the tag to its left. Run through your entire list of tags and map them each to a style. It’s fast and far less work than reading through an entire InCopy document and manually styling each piece of text.
If that seems easy, at the bottom of the Map Tags to Styles dialog, the Map By Name button can make this even easier, just as it does when mapping styles to tags, and it works by the same rules.
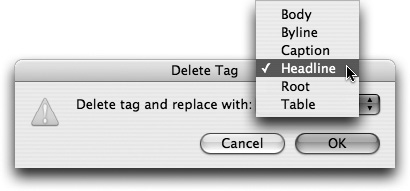
Want to remove a tag from a document that’s in use? Maybe you’ve decided it’s too similar to another tag in your document; for instance, you have used both head and headline tags in your document. Select the tag you want to remove in the Tags palette and either click on the Delete Tag button ![]() at the bottom of the Tags palette or select Delete Tag from the Tags palette menu. The Delete Tag dialog (Figure 7.11) then gives you the ability to select a replacement tag from the pull-down. In our example, we’d replace head with headline.
at the bottom of the Tags palette or select Delete Tag from the Tags palette menu. The Delete Tag dialog (Figure 7.11) then gives you the ability to select a replacement tag from the pull-down. In our example, we’d replace head with headline.
Mom taught you to clean up after yourself, right? It’s a good idea to remove any unused tags from your InCopy document. In true Adobe style, the process is nearly identical to that of removing unused swatches or styles. From the Tags palette menu, choose Select All Unused Tags (Figure 7.12). InCopy searches your document, identifies any unused tags, and highlights them in your Tags palette. Either click on the Delete Tag button at the bottom of the Tags palette or select Delete Tag from the Tags palette menu. You’ll be faced with a Warning dialog, just to make certain you’re doing this intentionally. Click OK, and those unused tags will be removed.

InCopy and InDesign both make use of an expandable/collapsible pane that displays the structure of your document.
Sure, most of us look at the printed page and see form. It jumps out at us: the huge type for the headline, the smaller type for the body text, the pictures. How could we miss it? And for designers, the people who lay out these pages, in many ways, it’s how they view the world: form. But don’t miss the structure. It might be subtle in the printed page, but it’s there. To view and manipulate the XML structure in your InCopy documents, you utilize InCopy’s Structure pane. From the Structure pane you can create or delete elements, rearrange them, or associate them with items on the page. To open the Structure pane of your InCopy document choose View > Structure (Command-Option-1/Control-Alt-1).
When working with XML, it is very helpful to see at a glance which frames are associated with XML elements. Before even looking at the Structure pane, enable View > Structure > Show Tagged Frames. Now any frame that’s tagged will appear in Layout view in the same background color as its tag. You can also tell InCopy to show tag markers (View > Structure > Show Tag Markers) to see which text is associated with a particular XML element.
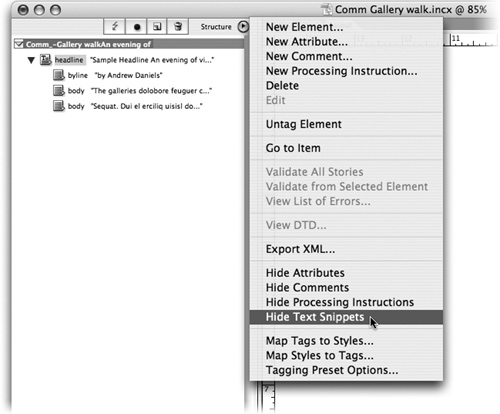
In the Structure pane you’ll see the XML elements associated with your InCopy file and be able to organize and rearrange them. Ultimately, the Structure pane is the best way both to understand how an InCopy document is structured and to maintain control over that structure. Want to know which piece of text is associated with which XML element in your Structure pane? From the Structure pane flyout menu, choose Show Text Snippets; now the first few words of any text associated with an element in your structure will appear to its right in the Structure pane (Figure 7.13). To turn off the snippets, choose Hide Text Snippets from the Structure pane flyout menu.
The Structure pane is one-stop-shopping for organizing the structure of your InCopy document. What follows is a brief list of tools available from the Structure pane:
Adding XML elements: By definition, an XML structure starts with a Root element, and any additional elements become a part of an existing element. To add an XML element to your structure, select an existing element, from the Structure pane flyout menu choose New Element, and select an appropriate tag from the pull-down menu.
Duplicating XML elements: Need that XML element repeated several times in your structure? Select it in the Structure pane, copy it (Edit > Copy), select the element you want to contain your duplicate, and paste (Edit > Paste).
Moving XML elements: Drag an element up or down in the Structure pane or into another element in the Structure pane to move it.
Deleting XML elements: To delete an XML element, select the element and either press the Delete key or choose Delete from the Structure pane flyout menu.
Controlling attributes: Assign an attribute to an element by selecting the element and choosing Assign Attribute from the Structure pane flyout menu (Figure 7.14). The newly assigned attribute appears as a bulleted item below the associated element. To delete an attribute select it in the structure and from the flyout menu choose Delete.
Inserting comments: Comments are a great way of making notes to yourself or to others who will go back through the XML later. Although comments don’t affect the XML, they allow the person reading it to understand why the XML was structured in a particular manner. Put comments anywhere into an InCopy structure by selecting a particular element and choosing New Comment from the Structure pane flyout menu.
Including Processing Instructions: A Processing Instruction will launch a particular action when the XML file is opened in an application that understands it. Choose New Processing Instruction from the Structure pane flyout menu, fill in the Target field with a name that identifies the Instruction to the application reading the XML file, and fill in the Data field with the actual Instruction.

As we mentioned, a DTD, or Document Type Definition, is the file that defines the rules for a particular XML file. Just as we have certain agreed-upon rules for interacting with one another in society (don’t lie, don’t kill, don’t spy on people, don’t chew with your mouth open), you probably have agreed-upon rules for organizing your InCopy file and the rest of your publishing workflow. You already know some of the rules for the structure of your document; the DTD simply puts this in writing. For instance, you know that a headline is followed by the sub-head, which is followed, in turn, by the body. Conversely, you’d never start with the body, followed by the sub-head, followed by the headline. And, much the same as in society, if you’re working by yourself, you can follow your own rules, but if you’re publishing with others, a DTD requires that everyone follow the same set of consistent rules for organizing your documents. DTDs can be referenced from outside your XML file (external) or can be inside your XML file (internal). If you will be applying the same structure to multiple XML files, an external DTD makes more sense because changing the one external file updates all the XML files referencing it. To learn more about DTDs check out Real World XML by Steve Holzner, published by Peachpit Press.
Where do DTDs come from? Although you can’t import a DTD directly into InCopy, you can do so in InDesign. If you then edit a story from InDesign in InCopy, the DTD from InDesign is made available to you in InCopy. To view the DTD, choose View DTD from the Structure pane flyout menu. If you know how to read a DTD, this can be a useful lesson in your document’s XML rules.
The primary point of using a DTD is to make certain that your document is following its rules. The way to do this in InCopy is to validate the XML in your document against the DTD provided by InDesign when the story was exported. From the Structure pane in InCopy, click the Validate button ![]() . InCopy reviews the XML in your InCopy document and makes sure it conforms to the associated DTD.
. InCopy reviews the XML in your InCopy document and makes sure it conforms to the associated DTD.
After going through the validation process, a small pane called the Suggestions pane opens in the lower portion of the Structure pane, revealing the results of the validation (Figure 7.15). If your XML follows the rules of the DTD, validation will give you a clean bill of health and read “No known errors.”
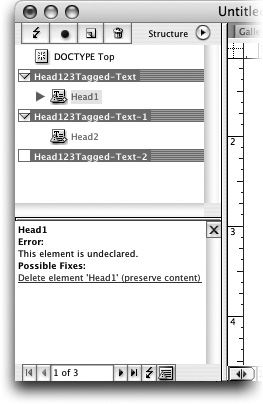
If there are errors, InCopy lists them (up to 250 of them) and describes, as best it can, what each error is while offering a suggestion for how to fix it. Using the suggestions provided, either click on the suggested fix (our personal favorite solution) or head to the Structure pane and edit the structure and tags directly. Once you believe you’ve fixed everything, it’s a good idea to validate your XML again.
If the point of using XML in InCopy is repurposing a file’s content, then the goal is to get the finished XML out of your InCopy document. The process of getting XML out of your InCopy document is called exporting. The exported XML is available to other users or applications downstream in your workflow, without formatting. That’s why we’ve gone through this XML workflow.
Tip
In a typical workflow, XML originating in InCopy lands in an InDesign document and is, in turn, exported out of the InDesign document. Frequently, the entire page of, say, a newspaper will be repurposed as a whole, rather than just as an individual InCopy document. In that case, odds are you’ll not need to export XML from InCopy at all. It’ll be handled by the person responsible for the InDesign file.
Before you actually export XML, make certain that all the page items have been appropriately tagged. In the most extreme case, if nothing in your InCopy document is tagged, InCopy will not even give you the option of exporting XML.
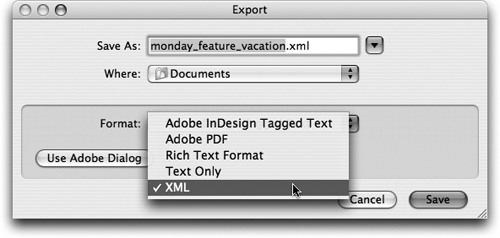
To export XML from InCopy, choose File > Export. In the Export dialog (Figure 7.16), navigate to the location where you want to save the exported XML, choose XML from the Format pull-down menu, and give your XML file a name.
Next you’ll see the Export XML dialog (Figure 7.17). Choose an Encoding type from the pull-down (you may need to talk to the person responsible for your XML workflow downstream about which one to choose). If your InCopy document makes use of a DTD, you can opt to include the DTD Declaration in the exported XML, particularly if the downstream use of XML needs to conform to the same DTD.
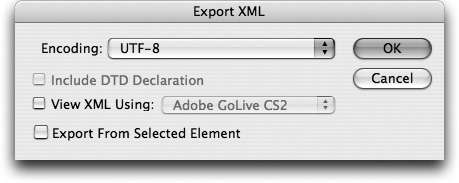
In the Export XML dialog, you can also opt to export only a part of the XML associated with your document. If your document is a series of repeating names and addresses, all you may want to repurpose is the structure of a sample entry, rather than the entire file. In that case, click on the element you want to export in the Structure pane and go through the same export XML steps described in the previous section. In the Export XML dialog, check the Export From Selected Element, and InCopy will limit the exported XML to only the selected element. Finally, if you need to see your exported XML, check the View XML Using box and from the pull-down, choose where you want to view it and click OK.
Tip
You can also right-click (Control-click on Mac) on an element in the Structure pane and choose Export XML.
Although InCopy will be only one piece of your organization’s XML workflow, there are some solid tools built into it for moving the XML from InCopy through InDesign and on to other applications in your workflow.
In the next section we explore the big picture of using InCopy in concert with InDesign.