Prevent Apple ID Problems
It’s likely you acquired this book to solve problems, but I want to start off by telling you how to prevent common ones. These issues mostly affect account access when you lose a device, forget or lose a password, experience a hacking attempt that leads Apple to lock your account, or otherwise need to regain access.
Make Sure You Can Self-Recover
Apple offers a fairly large number of methods that let you regain access to your account without having to convince someone at Apple that you’re the legitimate owner of your Apple ID account. You can ease self-recovery by ensuring your account has extra recovery information in it before something goes wrong, like you losing a device, losing access to a phone number, or having to reset a password.
Here are several simple actions you can take:
Add rescue email addresses (password): These addresses provide an alternative if you can’t receive email at your main Apple ID address. Add addresses to your password-only account on the Apple ID site (Figure 12); see this Apple support page for more details. (The site shown in the figure has been updated since the screen capture below, but I have no active password-only Apple ID accounts to grab a new one!)
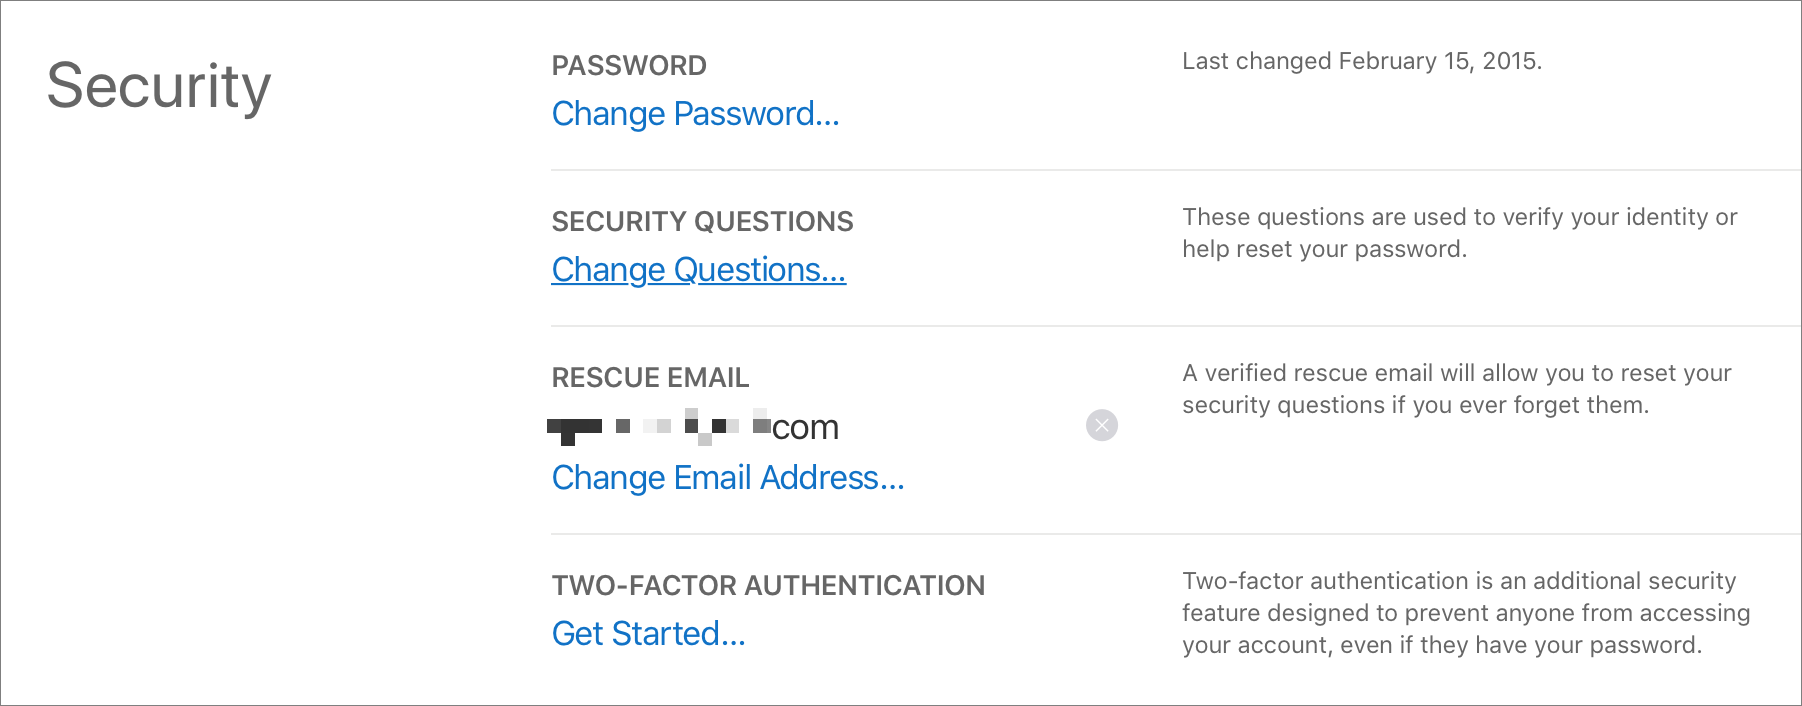
Figure 12: Use the Apple ID site to manage rescue addresses for accounts protected only by your password. Include “reachable at” addresses (code, keys): Apple lets you list other addresses that you’re “reachable at,” but these are only used by Apple in assisted account recovery, not in normal efforts to regain access. (Add these addresses via the Apple ID website under Personal Information, or in Apple ID settings in iOS, iPadOS, or macOS.)
Add trusted phone numbers (code): With code-based two-factor authentication accounts, you can receive a verification token on an iOS, iPadOS, or macOS device associated with the same Apple ID, or via a phone number as a text message or automated voice message. It may be difficult to add trusted devices, because they can only be associated with a single account. Trusted phone numbers, however, can be reused across Apple ID accounts. You could employ a VoIP number, like Google Voice, or that of your partner, spouse, sibling, or other trusted person as a backup. (Add numbers using the Apple ID site under Sign-In and Security, or in iCloud settings in iOS, iPadOS, or macOS. See Work with Code-Based 2FA.)
Make sure you have your Recovery Key (code, keys): If you enabled the Apple ID Recovery Key feature, you received a long alphanumeric code when you opted in. They key is used to restore access to your Apple ID in certain limited but critical circumstances. If you can’t immediately find your key, you can regenerate it. Do that now via instructions at Pick a Recovery Pathway for 2FA and Keys.
Store your security keys safely (keys): Apple requires that you enroll with at least two different security keys if you opt for that method of Apple ID authentication. Store your keys safely, including one in a place that’s safe from fire, flood, and other damage that you can get to in case you need to access your account and have also lost access to all your trusted devices. See much more in Deploy a Security Key with Apple ID.
Avoid Losing Access
If you need to get help from Apple to recover access, having taken these precautions can dramatically improve the odds that the company’s customer service representatives will restore your account:
Only use email addresses you control: I routinely hear from people who registered an Apple ID to an address at what is now a former workplace or a former mail host. Don’t get stuck in a situation like that. Change to an email you control on the Apple ID site.
Ensure personal information is up to date: Use the Apple ID site to update your information, including your name, address, billing information, phone number, and more. Your name should match what appears on official identification, such as a driver’s license, national ID, or passport, if you want the chance that Apple could recover your account later. It will require those documents to match your account name.
Update or find security questions (password): You’re likely to hit a roadblock when you need help from Apple if you’ve forgotten what answers you gave to the three security questions they ask you for a password-only account (Figure 13). If you can’t remember yours, visit the Apple ID site, or use iCloud settings in iOS, iPadOS, or MacOS, to update your questions and answers. (The site now appears differently, but the questions are the same.)
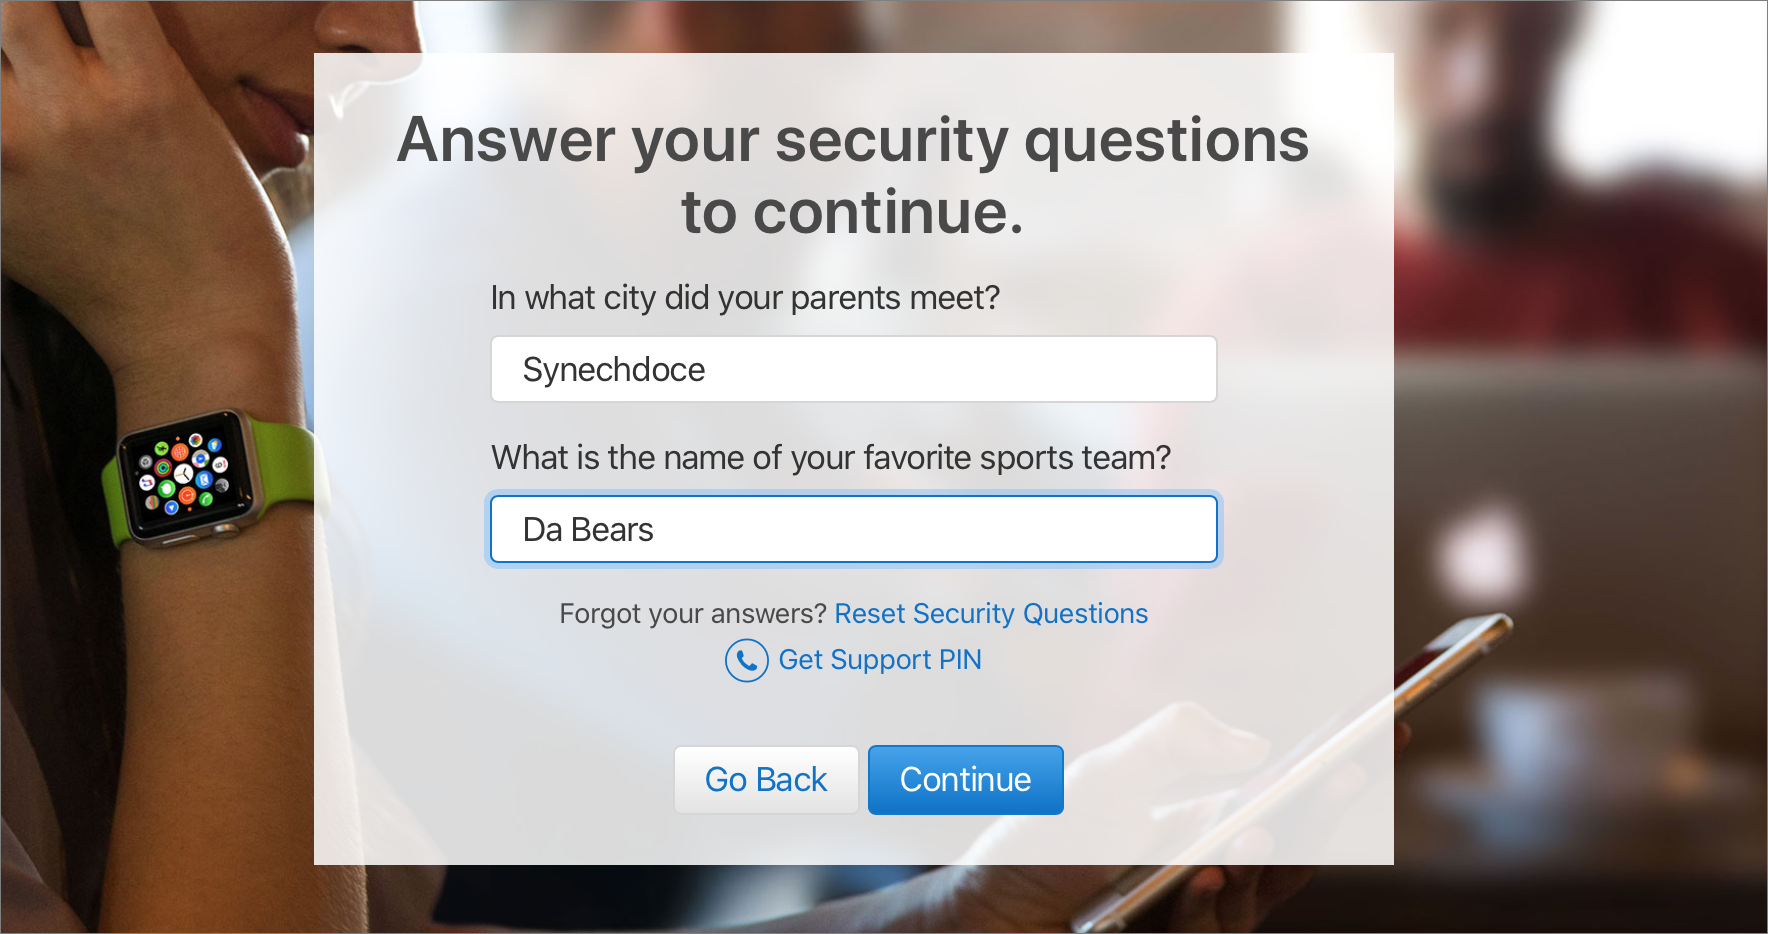
Figure 13: I swear these are my legitimate answers. Enable Recovery Assistance: Apple lets you set up what’s now Recovery Assistance with up to five Recovery Contacts, people who can help you restore access to data synchronized through and stored at iCloud. I explain how to use this service in Recover Your Account.