12
Exporting, Editing, and Sharing Your Character Animator Sequence
With a complete sequence animated in Character Animator, we can take it to the next step. You can choose to export the sequence as is to share it with friends or on social media, or you can take it over to After Effects or Premiere to add effects or make edits to help with the flow. We can use Character Animator for many projects, so we will try to cover as much ground as logically possible.
In this chapter, we will cover the following:
- Export options in Character Animator
- Editing in After Effects with Dynamic Link
- Editing in Premiere
Technical requirements
In addition to Character Animator, we will be using After Effects, Premiere, and Media Encoder for this chapter. There are a few files we will be referencing (you can download them from the Chapter 12 folder):
- Chat_with_Chaz.chproj (Character Animator project file)
- Chat with Chaz.prproj (Premiere project file)
- Chat_with_Chaz_AE_File.aep (After Effects project file)
- Chat with Chaz Title.png
- Scene 01 – Chaz with Alien Guest.mp4
- Scene 01 – Chaz with Alien Guest-AE-RENDER.mp4
- Scene 01 – Chaz with Alien Guest-PR-RENDER.mp4
- The AudienceAnimation PNG sequence (from Chapter 11’s files)
- BG.png (from Chapter 10’s files)
- CAMERA.png (from Chapter 10’s files)
- STUDIO LIGHT.png (from Chapter 10’s files)
So, with that said, let’s look at what we can do to bring our animation into other applications.
Export options in Character Animator
While Character Animator is a fully featured animation suite, there are some tasks best left to other applications – tasks such as integrating visual effects, and filters, cutting out unneeded frames, and editing sequences together. Before we get too ahead of ourselves, let’s look at our options for exporting and sharing media with other Adobe apps.
Setting export duration
Before we export our file, let’s make sure we have the timeline set up to render only what we need. There’s no need, for example, to render several seconds of the scene after the keyframes we animated. This is easy to correct:
- Make sure you’re on the Record tab with access to the timeline.
- At the top of the timeline, above and to the right of the text frames, is a dark gray or, if selected, a light gray bar.

Figure 12.1: The light gray bar at the top of the timeline shows us what will be exported

Figure 12.2: Trimming the duration eliminates dead space we don’t need
With that, we should now be ready to export our files.
How to export files
There are a few options to create media files for your sequences in Character Animator. You can find these options when going to File > Export.

Figure 12.3: The list of export options available in Character Animator
Here is what each of these options does:
- Video via Adobe Media Encoder...: This allows us to bring the sequence into Media Encoder and use its tools and presets to render the video as we choose. We will learn more about Media Encoder throughout this chapter.
- Video with Alpha via Adobe Media Encoder...: If you have alpha effects, you can choose this option to include this effect when you bring the sequence to Media Encoder to export.
- PNG Sequence and WAV...: Export the sequence as a series of images with the audio sequences compressed into a .wav file. This is like the audience image sequence we imported in the previous chapter.
- Adobe Dynamic Link...: Dynamic Link refers to the Adobe suite’s ability to import project files from one app to another without having to render media first. This actually doesn’t require us to export anything from Character Animator. Instead, this option under Export launches the Adobe website, giving you more information on exporting with Character Animator.
- Frame...: Exports the current frame on the timeline as an image. This is nice if you want to export an image quickly to share with friends or perhaps use it for promotional purposes.
- Puppet...: This allows you to select a puppet on the timeline and export it to be used in other Character Animator projects.
- Live Options...: This launches the Adobe website, giving you more information on streaming with Character Animator. We will go over streaming in the next chapter.
With an idea of our export options, let’s start by exporting the current scene as a video.
Exporting Character Animator scenes as videos
Exporting a video of your scene serves multiple purposes, such as creating a file that can be shared with friends, edited in another app, or uploaded online. Here is how we can do that:
- First, let’s rename our scene to something more specific. Locate Scene - BG in the Project panel.
- Right-click and rename Scene - BG Scene 01 – Chaz with Alien Guest.

Figure 12.4: It’s best to rename files to keep things as organized as possible
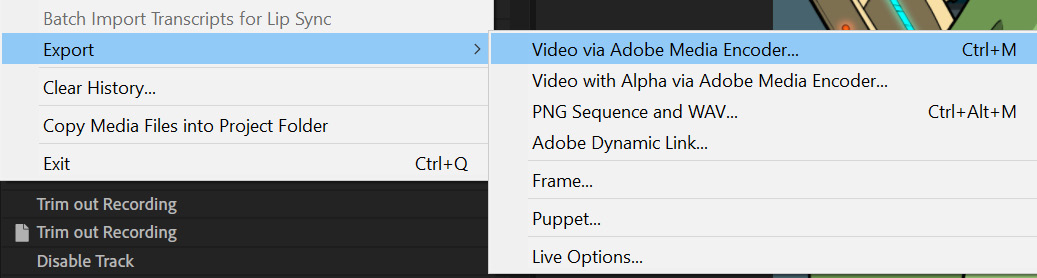
Figure 12.5: Exporting with Media Encoder is the first option on the Export list
- This will launch an Export Scene window. Choose where you want to save your video using the file browser.
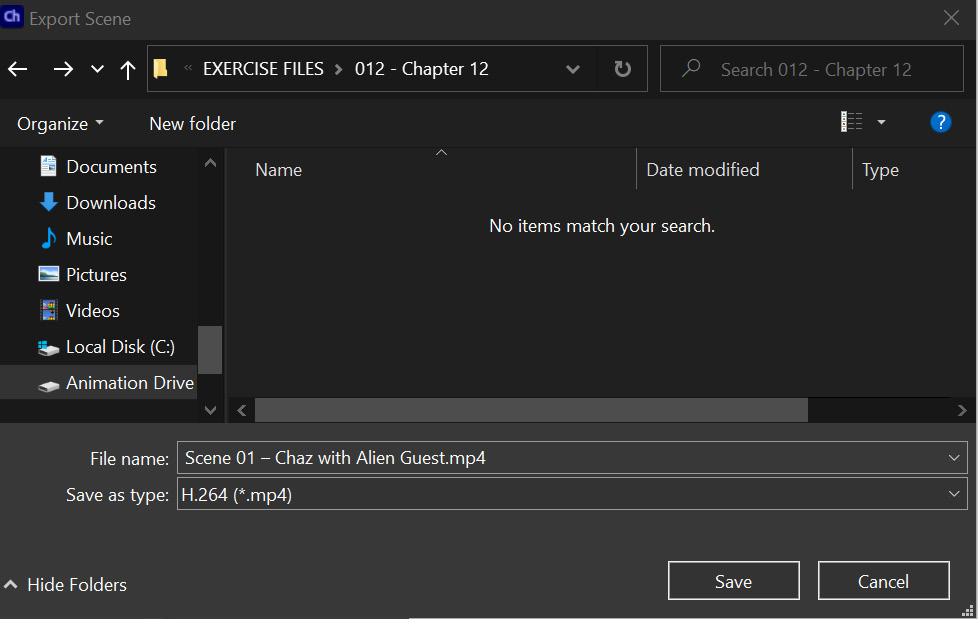
Figure 12.6: Exporting with Media Encoder is the first option on the Export list
- Pressing Save on the bottom right will prepare the scene to be sent to Adobe Media Encoder. Be patient during this time, as it may take some time for the file to be ready to render.
- Once Adobe Media Encoder launches, you will see Scene 01 – Chaz with Alien Guest appear in the Queue tab.
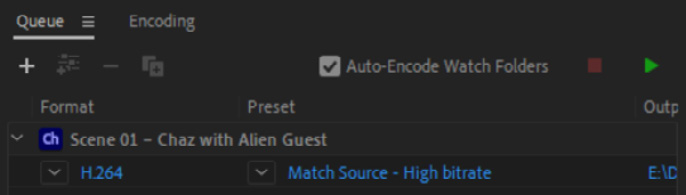
Figure 12.7: Your project listed in Adobe Media Encoder
The preset defaults to H.264 with a Match Source - High bitrate preset. This is a good option if you want to export a video that keeps as much quality as possible while making the file size manageable. So, we will go with that. Here are some other popular formats for your reference:
- Animated GIF: Creates a sharable .gif image that shows the animated frames from the export
- JPEG, BMP, PNG, and TIFF: Allows you to export every frame as an image, using your desired format, to be re-compiled into an animated sequence elsewhere
- ACC AUDIO, AIFF, MP3, and Waveform Audio: Exports an audio file using your desired format
You will find the Preset list changes depending on what format you have selected. You can explore that on your own. For now, let’s move on to exporting our video.
Make sure Format is set to H.264 and Preset to Match Source - High bitrate:
- Click the Output File link.

Figure 12.8: Clicking the file link allows you to choose where to save your files
- Choose where you want to save the video using the file browser.
- Hit Save.
- Finally, click the green Start Queue button to render the video.

Figure 12.9: The green Start Queue button will start the exporting process
You will see the Status bar appear. As the animation renders, this bar will show its progress.

Figure 12.10: Exporting can take some time; it will depend on the animation duration and detail
From here, sit back and relax. Once the file has finished rendering, go to your computer’s file browser and preview the video using your media player of choice.
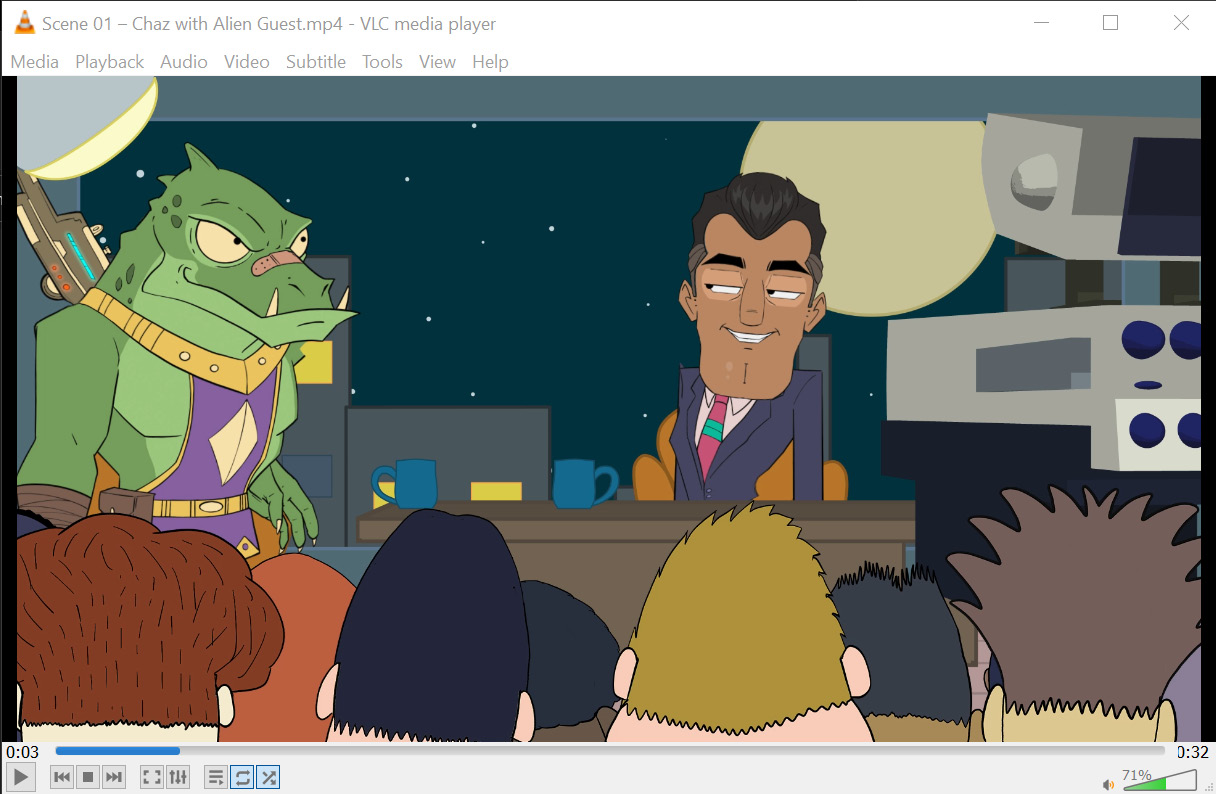
Figure 12.11: Watching renders is a good way to spot errors or areas that need more work
While we could use this file to edit our scene in Premiere or After Effects, we will be using Dynamic Link to show another way of working with these files.
Editing in After Effects with Dynamic Link
The good thing about working with the Adobe Dynamic Link option is that it’s all automated for us. We really don’t have to do anything beyond importing the Character Animator project file into After Effects and getting to work.
Why use After Effects?
Let’s briefly discuss After Effects before we dive into editing with Dynamic Link. After Effects is an incredibly deep program with limitless uses. And one thing it’s good at is allowing us to apply visual effects quickly and easily, something that would be more difficult to pull off in Character Animator alone.
Do we need these visual effects? Not necessarily. As stated before, you could use what we exported in the preceding section as your completed piece of art. However, since we have access to After Effects, why not see what it can do to enhance the scene?
Importing and understanding Dynamic Link
Here is what we need to do to get going:
- Launch After Effects. You will find it included in the Adobe Creative Cloud app you used to install Character Animator.
- On the welcome screen, press New project on the upper left.

Figure 12.12: Click New project to begin your After Effects work
- Once launched, make sure you’re using the Default workspace. This is on the upper right of the app window.
Figure 12.13: The Default workspace is a good starting point when using After Effects
- On the left side is our Project panel, similar to Character Animator. Double-click inside the Project panel to prompt an import.
- Locate Chat_With_Chaz.chproj, the Character Animator project file, and choose Import.

Figure 12.14: The Character Animator file should appear in the import list
- Once you do this, the app will ask which scene you’d like to import into After Effects. Select Scene 01 – Chaz with Alien Guest and choose OK.

Figure 12.15: Choose the animation scene we worked on in Character Animator
- This may take a few moments. Once it finishes importing, the file will appear in the Project panel.

Figure 12.16: Dynamic Link saves time by cutting out the exporting process
- To easily bring this animation into a composition, click and drag Scene 01 – Chaz with Alien Guest down to the New Composition button, which looks like a frame with three shapes in it near the bottom of the app.

Figure 12.17: Drag the file right on top of the New Composition button
Once you release the mouse button, the footage should create a new composition that matches the duration and frame rate of the Character Animator file.
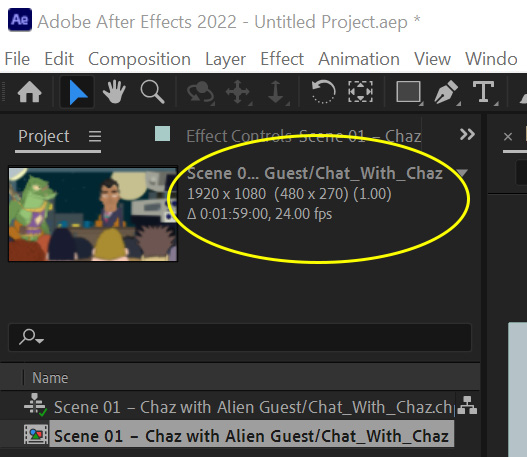
Figure 12.18: The good thing about Dynamic Link is it saves the resolution and frame rate
With that now set up, we can move over and focus on properly layering the assets and preparing to add effects.
Layering
In order to add effects, we first need to establish proper layer ordering. As of right now, with this imported scene, it’s all on one layer. But with a combination of Dynamic Link and rebuilding some of the scene, we will get the most use out of this technique.
The most important part of the Character Animator file is Chaz and the Alien. Everything else we can add back in through After Effects. So, how do we isolate the characters? Here is one quick way to accomplish this:
- Launch Character Animator and load the Chatting_With_Chaz project file.
- Make sure you have Scene 01 – Chaz with Alien Guest open, as well.
- Hide every layer in the Character Animator scene except for Chaz, the Alien, the two chairs, and the table.
- Go back to After Effects. You should now see the two characters interacting on a black background.
This is the power of Adobe Dynamic Link. Any changes made in Character Animator will update in After Effects.
Note
For more granular control, you can also import each Character Animator layer as its own composition into After Effects and work back and forth that way. Play around with different workflows to see what works for you!

Figure 12.19: Making changes to any part of Dynamic Link will update instantly
Now, let’s rebuild the set so that we can add our special effects. To start this process, we will need to import our assets:
- In After Effects, double-click the Project panel to prompt an import.

Figure 12.20: The background assets from Chapter 10
- Locate the background assets we used to build the set in Character Animator in Chapter 10 and import them.

Figure 12.21: Drag STUDIO LIGHT.png, CAMERA.png, and BG.png to the timeline
- With those assets selected, drag them over to the Composition panel. This will add them to the timeline.
Finally, rearrange the layers on the timeline so that the order is the same as how we arranged it in Character Animator:
- CAMERA.png
- STUDIO LIGHT.png
- Scene 01 – Chaz with Alien Guest/Chat With Chaz.chproj
- BG.png
The following image also shows this order.

Figure 12.22: Properly reordering the layers is key to building effects properly
We also need to add the audience back in. This will require a different way of importing the files compared to the background assets:
- Double-click the Project panel to import the files.
- Locate the AudienceAnimation folder from Chapter 8, which contains the AudienceAnimation.png files we used in Character Animator in the previous chapter.
- Select the first image, AudienceAnimation_00001.png, from the list of images.
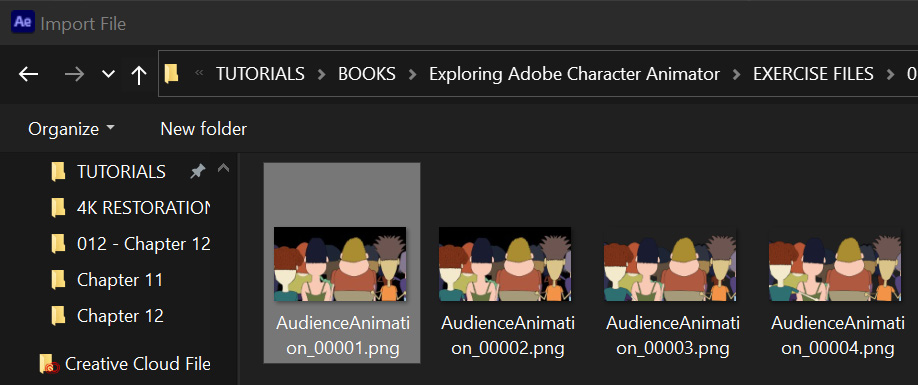
Figure 12.23: Like Character Animator, After Effects can build animated sequences from a series of images

Figure 12.24: Selecting PNG Sequence is important when you don’t want just still images to be imported
- Click Import.
- Once in the Project panel, drag AudienceAnimation_p[00001-00060].png into the scene.
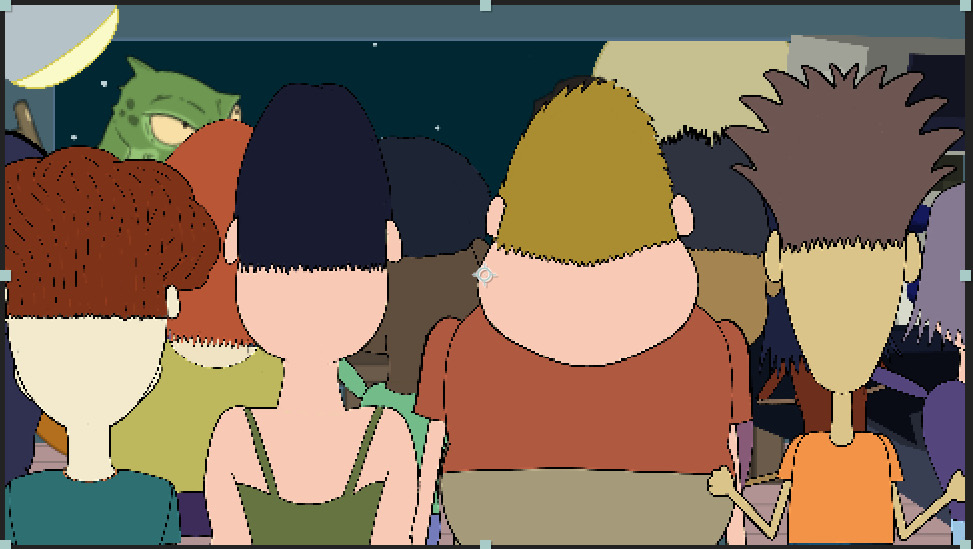
Figure 12.25: The audience will appear too high up in the shot initially
- With the audience still selected, use your down arrow key on the keyboard to move the audience down, as we did in Character Animator in the previous chapter.

Figure 12.26: The audience should be low enough so that we can see Chaz and the Alien
- Finally, right-click on the AudienceAnimation_p[00001-00060].png layer and go to Time > Freeze on Last Frame. This will ensure that the audience stops moving and stays in the frame once the animation ends.

Figure 12.27: Freeze On Last Frame will prevent the audience from disappearing after they stop cheering
Adding special effects
With all the assets now in place, we can add our special effects! Let’s start with something simple: adding a blur effect to the audience. This will help to focus on Chaz and the Alien. To do this, follow these steps:
- Locate the Effects & Presets tab on the right side of the screen.
- At the top of the Effects & Presets panel is a search bar.
- Search for blur.
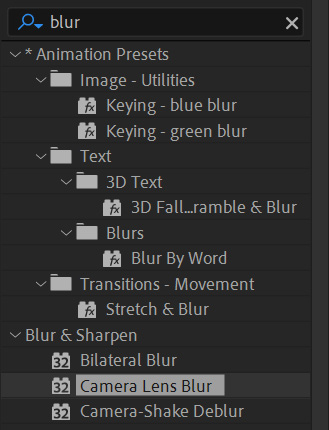
Figure 12.28: The search bar can help with finding specific effects
- Select Camera Lens Blur from the list on the panel; click and drag it over to the AudienceAnimation_p[00001-00060].png layer on the timeline.
- With the effect in place, the Effect Controls panel will open on the left.
- The first option on the panel, Blur Radius, by default, is set to 5. Adjust it to 15.

Figure 12.29: Effect Controls allows you to adjust any effect on the selected layer
The result on the Composition panel should be evident, with the audience appearing a bit out of focus.

Figure 12.30: Creating the illusion of depth of field can be a nice way to separate elements in the scene
We have a bit more to do. Let’s focus on the background next.
- Grab the Camera Lens Blur effect from the Effects & Presets panel and place it on the BG layer on the timeline.
- Set Blur Radius to 7, giving the background a softer appearance.

Figure 12.31: It may be hard to tell in this image but the background is slightly out of focus
- Now, let’s search for another effect on the Effect & Presets panel. This time, we will search for Brightness. The only effect that should appear is Brightness & Contrast.

Figure 12.32: The search function comes in handy; use it when you can
- Drag the effect over to the AudienceAnimation_p[00001-00060].png layer.
- Under the Effect Controls panel on the left, you should see Brightness & Contrast listed under Camera Lens Blur.
- Under Brightness & Contrast, change Brightness to –106 and Contrast to 56.

Figure 12.33: Like any parameter, you can drag the number with your mouse or enter it manually with your keyboard
- Now, go back to the Effects & Presets panel, grab Brightness & Contrast, and drag it over BG.
- Change the effect values for Brightness to –66 and Contrast to 49.
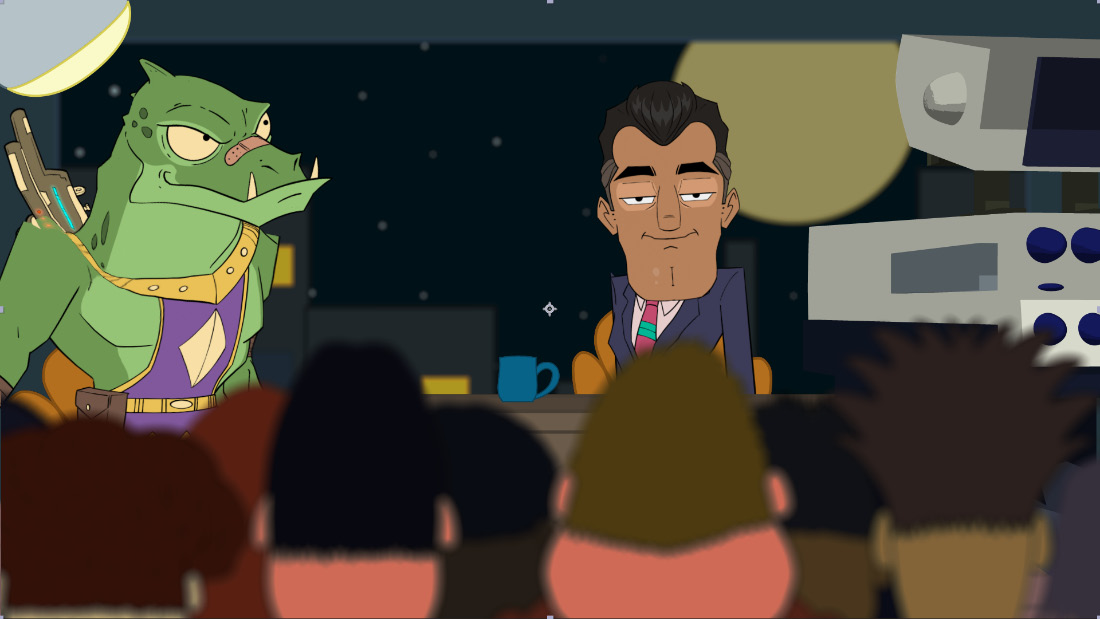
Figure 12.34: A lot of these style choices can be altered to your liking; play around if you wish!
Now, let’s add a light effect to add a bit more visual appeal to the set. To do this, we will create an adjustment layer to add a lens flare effect. Usually, we would advise you to create your own lens flare, as it’s always best to build your own assets when possible. However, since this book isn’t going to extensively cover After Effects, we will use a built-in effect. First, let’s add that adjustment layer:
- Click once on the Timeline panel.
- Go up to Layer > New > Adjustment Layer or press Ctrl or ⌘ + Alt + Y.
- Drag the new layer below STUDIO LIGHT.png onto the timeline.
- With the new layer still selected, press Enter on the keyboard to rename the new layer from Adjustment Layer to Flare.

Figure 12.35: Renaming and keeping layers organized helps with any task
- Now, under the Effects & Presets panel, search for Lens Flare.
- Drag the Lens Flare effect over to the Flare adjustment layer.
- With the Flare layer still selected, make the following adjustments under Effect Controls:
- Flare Center: 137.0, 122.0
- Flare Brightness: 93%
- Lens Type: 105mm Prime
- Blend with Original: 19%
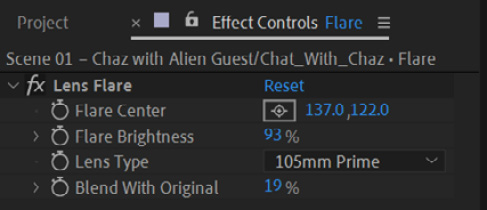
Figure 12.36: Feel free to change the Lens Flare parameters if something else appeals to you
As you adjust these Len Flare parameters, you will see the visuals update in the Composition panel.

Figure 12.37: The lens flare adds a bit more punch to the scene
Now, let’s add a little motion blur to the moving assets. This, like any effect, comes down to choice. You may not like how the motion blur looks, and that’s perfectly fine. However, if you wish to add it, follow these steps:
- Search for Pixel Motion Blur under Effects & Presets.
- Drag Pixel Motion Blur over to Scene 01 – Chaz with Alien Guest and [AudienceAnimation]_[00001 – 00060].png].
- If you lose your Brightness effect for the audience, click on the layer, and under Effects & Presets, make sure Pixel Motion Blur is the first effect on the list. Drag it up if it’s not.

Figure 12.38: The order of your effects will change how the layer looks
Test the effect by playing the sequence. You should see a motion blur take place during the animation.

Figure 12.39: Motion blur can be as subtle or extreme as you like
Pixel Motion Blur, like any effect, can be adjusted. However, we will just use the default settings for this book.
Adding camera features
So, what about camera pans, cuts, and zooms? We can do that in After Effects as well. What’s important here is we create a logical pace, such as the camera pointing and zooming in on where an important event is happening in the scene.
There is a caveat to this. If you use the camera to zoom past the original resolution of the Character Animator scene, your assets will appear blurry or pixelated. This is a good reason to create assets bigger than the scene you plan to render.
As an example, we are working with a composition that contains our assets that is set to 1920 x 1080 px. We designed the scene in Character Animator to be this resolution as well. So, zooming in past that resolution will degrade the quality, but we can work around this by shrinking the scene down.
This means we will take our 1080p scene and turn it into a 720p resolution sequence. If you want a higher resolution with camera zooms, then it’s best to plan around this. If you want to export your scene at 4K, then designing the assets and scene to be around 8K is recommended.
We have been using a smaller resolution to keep the book’s file sizes manageable. So, here’s how we can set up our composition for a 720p scene:
- Click the Project tab on the top left so you can see your imported assets:
- Click and drag the Scene 01 – Chaz with Alien Guest/Chat composition with Chaz.chproj from the Project panel down to the New Composition button. Remember, this looks like a frame with three shapes in the middle. Ctrl or ⌘ + Shift + C also creates a new composition for any selected asset(s).
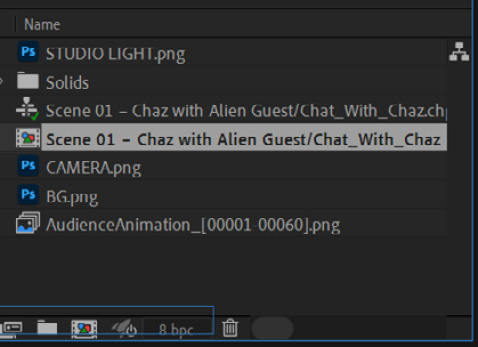
Figure 12.40: Dragging a composition on top of the New Composition button will create a new composition within a composition
What this will do is create a new composition, placing your old composition as the only layer on the timeline.
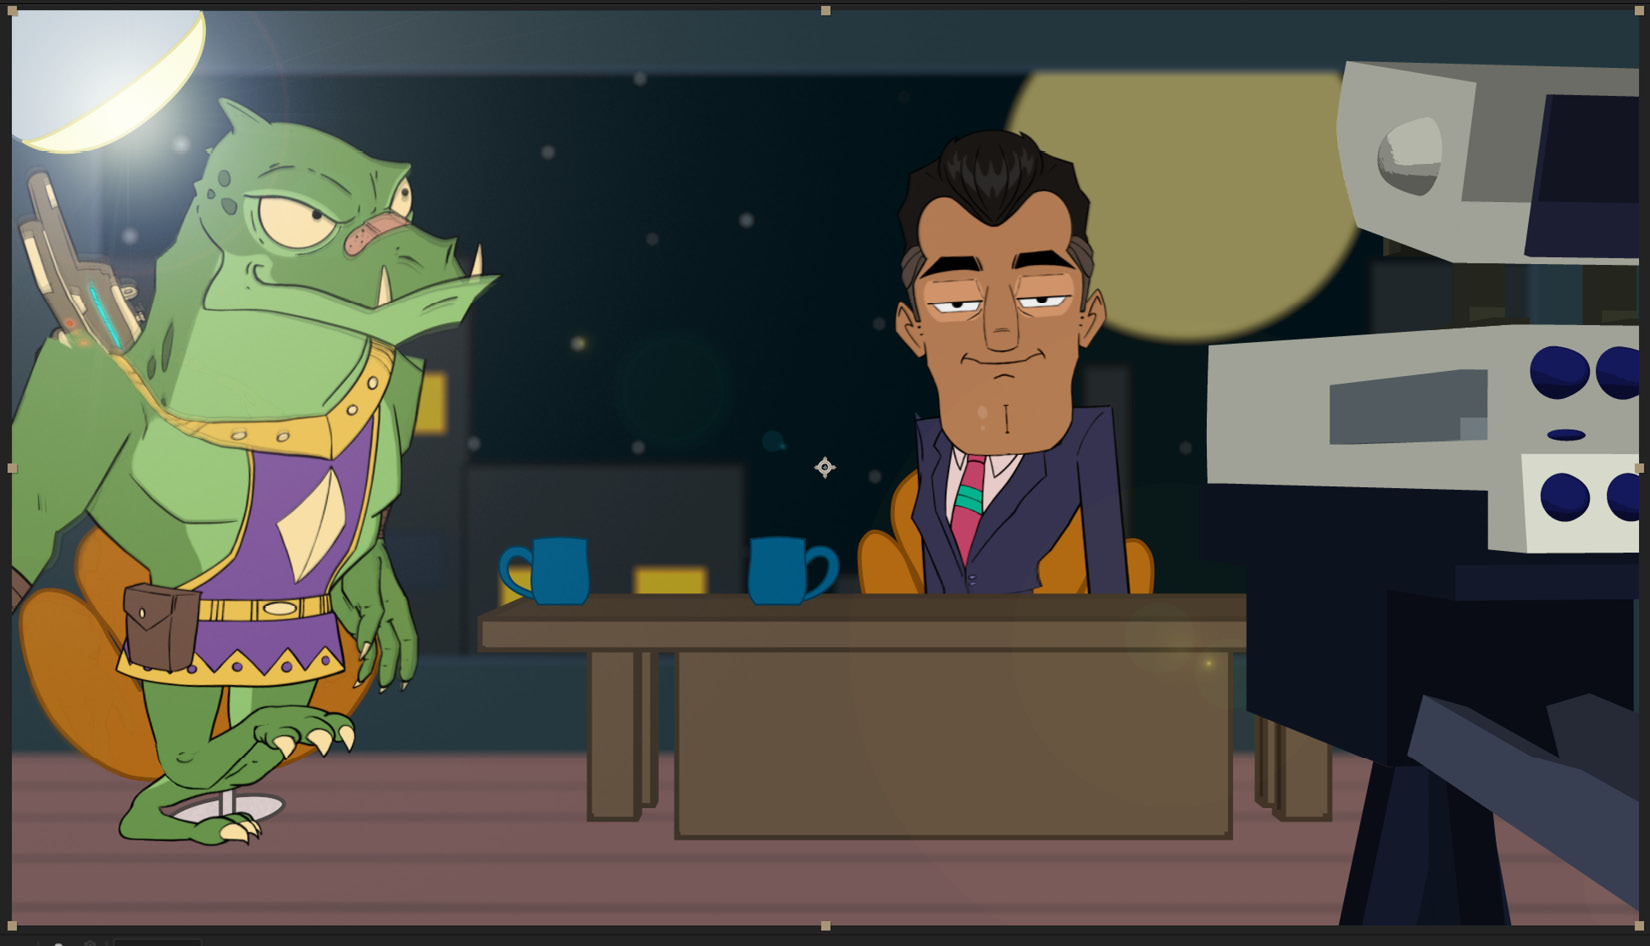
Figure 12.41: Having a composition within a composition allows us to move the entire scene without worrying about the individual set layers
In order to use the Camera tool, we need to ensure our layers are 3D. Since we created a new composition to do this, we only have one layer to worry about.
- To do this, click the 3D cube icon next to the layer on the timeline.

Figure 12.42: Clicking the 3D cube makes a layer interact in 3D space
- Next, to add the camera, go up to Layer > New > Camera.
- A new window will allow you to adjust Camera Settings. Just press OK.

Figure 12.43: You can adjust many things with the camera layers
- A layer called Camera 1 will now be added to the timeline. Click the down arrow next to the layer to expand its options.
- Then, click Camera Options to see what options we have.

Figure 12.44: You can access many different camera parameters when working in 3D space
- How does all this help with the size degradation issue? To see how, we need to go to Composition Settings using Ctrl or ⌘ + K.
- Change Width to 1280 px and Height to 720 px.
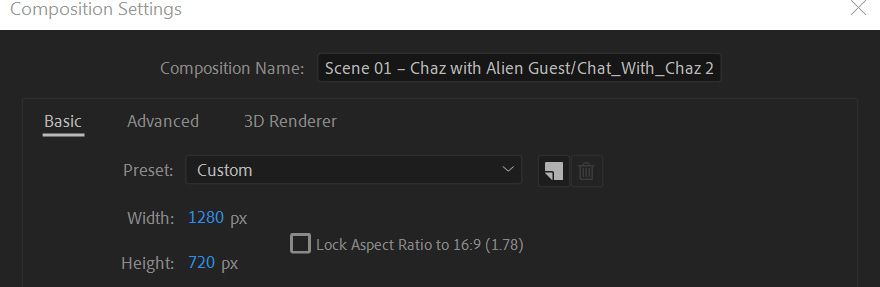
Figure 12.45: You can change the size of a composition at any time
Your sequence will now appear cut off, but we can animate the camera to fix this:
- Go to 0:00:00:00 on the timeline.
- Under Camera Options for Zoom, click the clock icon to the left of it to create a keyframe. This will allow us to create animation, similar to how we created frames in Character Animator for our characters.
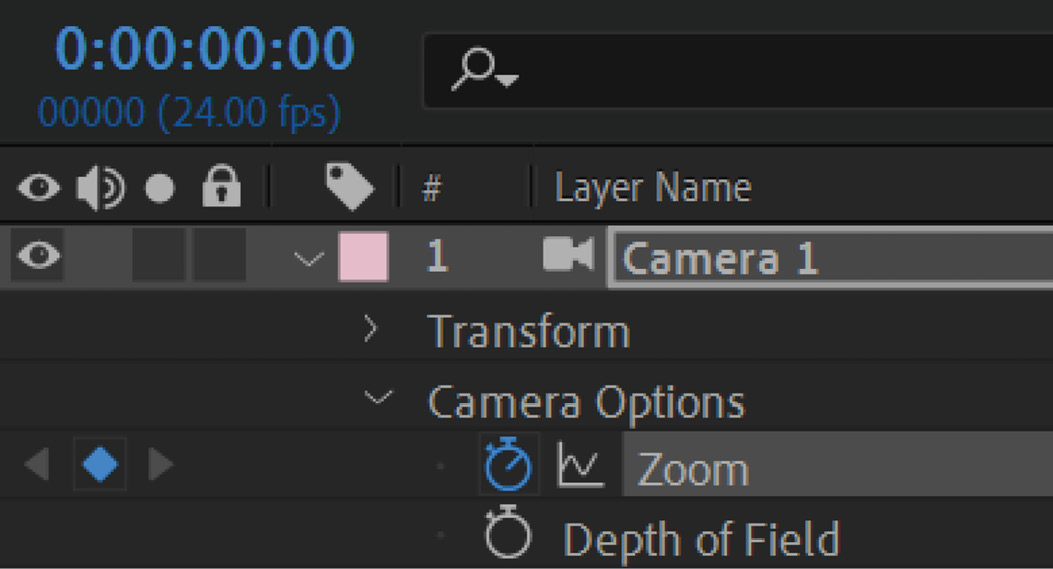
Figure 12.46: The clock to the left of any effect allows you to turn on the animation
- For Zoom, set the value to 4660.4 pixels. This will shrink the scene back so that everything is in view.
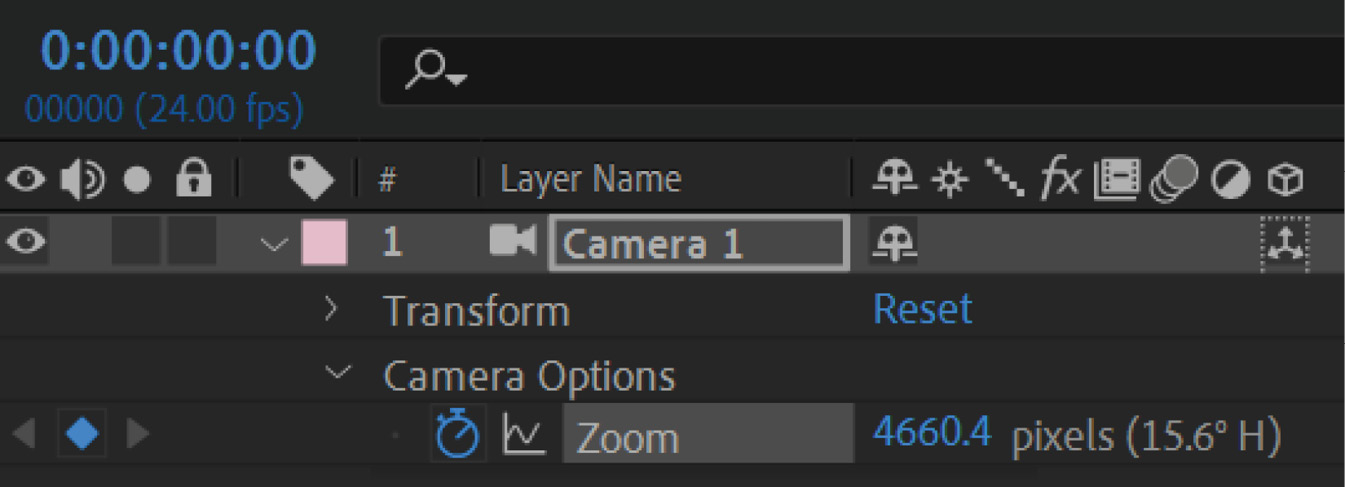
Figure 12.47: When you adjust a parameter with the stopwatch turned on, keyframes will automatically be created
- Expand Transform under Camera 1.
- Keyframe Point of Interest by clicking the clock to the left of it.

Figure 12.48: Point of Interest allows us to pan the camera around the set
- Now, advance to 0:00:11:21 on the timeline.
- Change the Zoom value to 6615.4.
- Change Point of Interest to 898.0, 318.0, 0.0. This will frame the camera to focus on Chaz. However, if we scroll back to frame 1, we also now have an animated zoom effect.

Figure 12.49: Animating your camera can really add life to an otherwise static scene
- Now, go to 0:00:17:00.
- Click the add keyframe button for Zoom. This looks like a diamond to the left of the setting. This will lock down our zoom animation at this spot.

Figure 12.50: The diamond shape on the left, when blue, indicates a keyframe
Figure 12.51: Laying down one keyframe after another allows us to create a quick cut with no zoom
- Go to 0:00:25:00.
- Click the add keyframe button for both Point of Interest and Zoom.
- Advance forward one frame to 0:00:25:01.
- Set the camera keys back to how they were on frame 1. To easily do this, you can drag a lasso around the two keyframes on frame 1, copy with Ctrl or ⌘ + C, and then go to 0:00:25:01 and paste with Ctrl or ⌘ + V.
- Once you have finished, save the file with Ctrl or ⌘ + S.
When you play the animation now, we should see the camera zoom in on Chaz, pan over to the Alien, and then cut back out. Adding a little camera movement to any animation can breathe additional life into the scene. It’s an excellent technique to keep in mind.
You can also reference the complete video in your book files by accessing Scene 01 – Chaz with Alien Guest-AE-RENDER.mp4.
As you can see, it’s pretty simple to add a wide range of effects using After Effects. There are so many things we can do to enhance this further. But the purpose here is to give a crash course on the benefits After Effects brings to any Character Animator project. Add more effects and continue to explore the app. Once you are ready, we can move over and work on our animation in Premiere.
Editing in Premiere
While After Effects is best used to create special effects, or even build animations, Premiere is best for piecing footage together, adding transitions, basic titles, audio, color grading, and much more. In this book, we will focus on a few basics and export the video.
To get started, be sure to have Premiere ready:
- Once on the Welcome screen, click New Project.
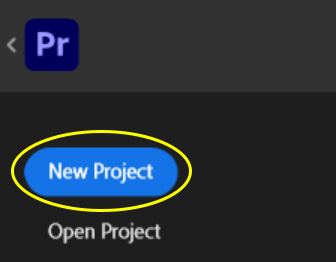
Figure 12.52: The New Project button is in the same spot in Premiere as it is in After Effects
- At the top, name the project Chat_With_Chaz and choose a location on your computer for the Premiere files.

Figure 12.53: You need to create a project before any work can be done
- On the bottom right, click Create.
- On the top-left Project panel, double-click to import the Chat_With_Chaz_AE_File file.
- It will then ask you which composition to import. Choose the second scene, Scene 01 – Chaz with Alien Guest/Chat_with_Chaz 2.
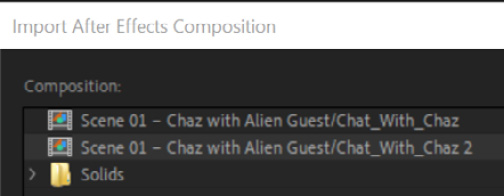
Figure 12.54: Select the second item on the list to import
- Once the composition is imported into the Project panel, grab the file and drag it to the bottom blank timeline. This will create a Premiere sequence for us that matches the After Effects composition settings.

Figure 12.55: Luckily, the Timeline and Project panels appear in the same spot between all three apps; this makes learning how to use the interface less problematic
This also means Dynamic Link is working between the three apps. If you were to go back to Character Animator and make changes, they would also reflect in Premiere through the After Effects sequence. This also applies to hiding layers. Hopefully, such a workflow is showing its benefits.
Going back to the task at hand, let’s start by trimming the sequence. As it stands now, it has a lot of extra space we don’t need:
- Place the timeline playhead at 0:00:32:15.
- Place the cursor at the right end of the clip.
- Drag it back to the 0:00:32:15 mark. This will trim the sequence and remove the dead space we left in After Effects.

Figure 12.56: You could trim the sequence in After Effects or Character Animator as well
- Let’s bring an image in to add to the sequence. Double-click your Project panel and import Chat_with_Chaz_Title.png.
- Go back to the timeline, and click and drag the scene clip so that it starts at 0:00:03:00.
- Drag Chat_with_Chaz_Title.png from the Project panel and place it above the scene layer.

Figure 12.57: Adding images or other media through Premiere is an easy task
- Now, trim the new layer so that it ends at 0:00:03:00, when the scene begins.
- Then, drag the title layer down to the scene channel, as shown here.

Figure 12.58: The two clips will now play back to back
- Right-click the title image on the timeline and choose Scale to Frame Size to shrink the image into view.
Now, when you play the content, we will see the title, followed by the animated scene. This is a simple example of how you can build more complex sequences. While we are using an image for this example, you can also import and add videos, audio files, PNG sequences, and more.
Speaking of audio files, adding music and sounds, such as the audience cheering, can really help breathe more life into the sequence. It’s advised you seek these audio files on your own as we can’t include other artists’ works in the book files because of various copyright issues.
However, there are plenty of free and paid options out there. Just be sure to pay attention to the copyright parameters before adding any outside media to your production, as some artists and services have specific rules for using their work.
Before we wrap up, let’s look at one more feature that Premiere offers.
Color grading and filters
Color grading and filters allow you to change the overall look of footage to help various visuals pop or even create a mood for the scene. While After Effects can grade your footage, Premiere has a feature set that can be quickly and easily applied to perform this task. Let’s create an adjustment layer. This acts as the After Effects variant, allowing us to add effects to the sequence easily:
- At the bottom of the timeline is the New Item icon. Click it and choose Adjustment Layer... from the list.
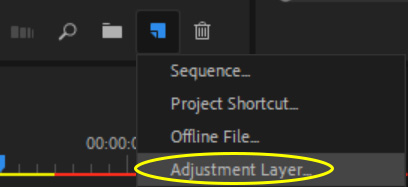
Figure 12.59: There are many items you can create in Premiere
- A new window will pop up confirming the adjustment layer. The default options should be fine, so just click OK to continue.
- The adjustment layer will now appear in our Project panel. Click and drag it to the V2 channel, the one above our sequence, on the timeline.
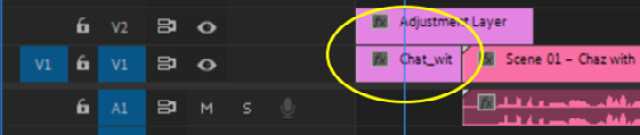
Figure 12.60: You can layer items on top of one another for more complex workflows
- Place your cursor on the right end of the adjustment layer and drag it to the right until you match the duration of the animated sequence.

Figure 12.61: Adjustment layers are great for adding effects in any Adobe app
- Switch the workspace to Color by going to Window > Workspaces > Color.

Figure 12.62: You can switch workspaces to fit the task at hand anytime
- At the top right should be a panel labeled Lumetri Color. Select it to open the panel.
- Here, you will see a wealth of options. You can adjust the colors in a wide range of ways, choose a Creative template, add a vignette, and so much more. Experiment with all the options to see whether you can find a look you like for the scene.
- Use the following screenshots to reference the settings we will use for the book files. To start, under Basic Correction, adjust Temperature to –49.5 and Tint to 4.3.

Figure 12.63: You can make footage look warmer or cooler by dragging the Temperature dial

Figure 12.64: You have many options for creative looks in Premiere
- The last option on the panel, Vignette, adds a shadow effect around the frame. Change this to –3.0 for Amount.

Figure 12.65: You can make the vignette light or dark, as well as many other options
The final result creates a cooler-looking image that adds a bit more contrast to the original look.

Figure 12.66: What the scene looks like before the color effects
The result gives the scene a more blue or cool look.
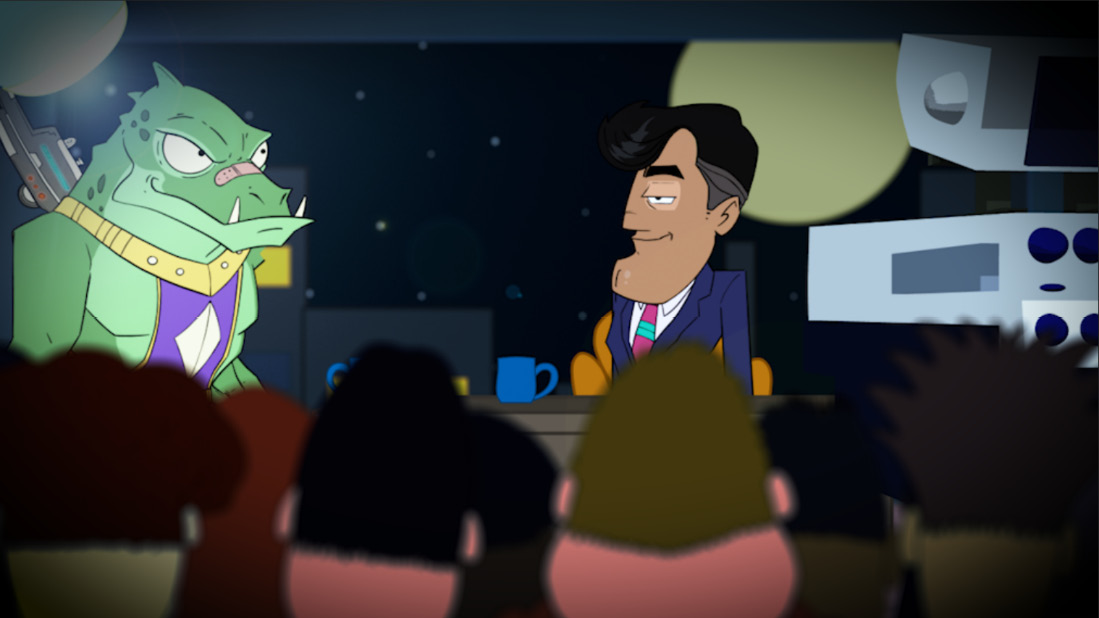
Figure 12.67: What the scene looks like with the color effects applied
Once you are satisfied with your production, you can export the sequence through Adobe Media Encoder, just like we did at the beginning of the chapter. To do this, simply have the sequence you wish to export open in Premiere and then go to File > Export > Media or Ctrl or ⌘ + M.
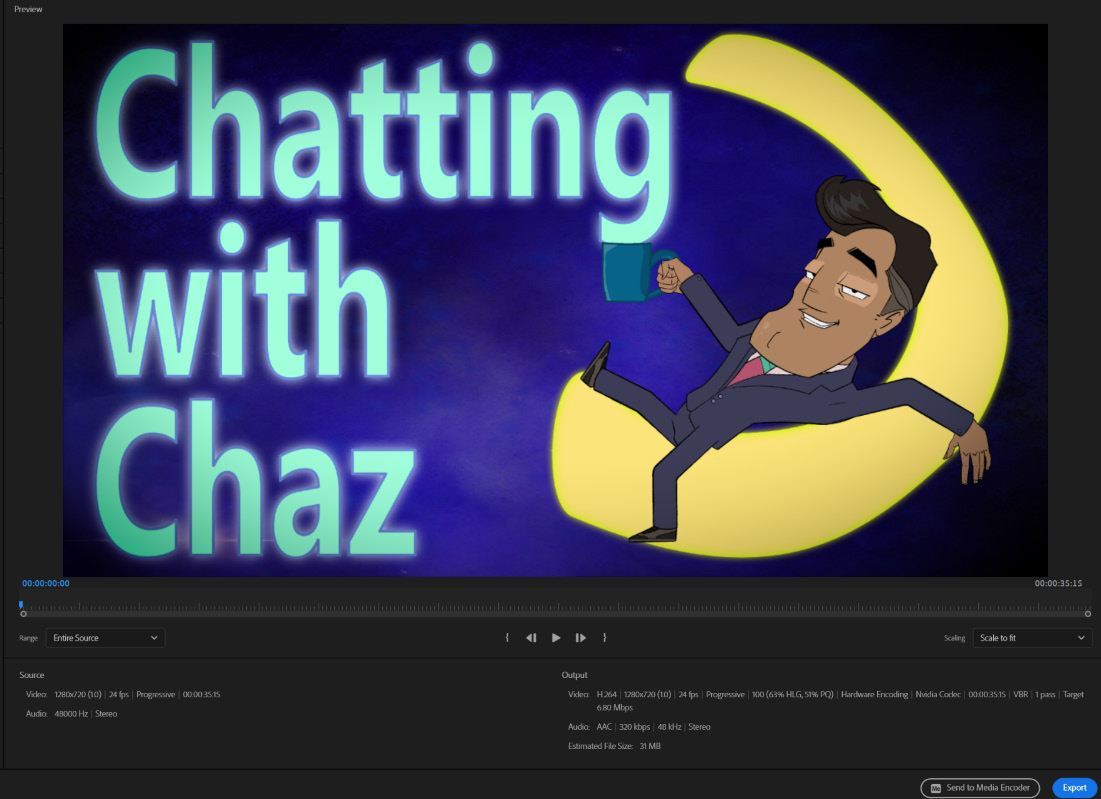
Figure 12.68: You can export with many options, just like Adobe Media Encoder
Here, you can export directly from Premiere or choose Send to Media Encoder. Sending to Media Encoder will open up the app and allow you to queue up and adjust settings for clips you wish to export, just like we did before.
If you want to just export this clip, using the export feature in Premiere should work just fine as it contains the same features as Media Encoder, minus the ability to queue multiple files for export.
For this book, we will use the default setting, H.264 with Match Source - Adaptive High Bitrate

Figure 12.69: The default preset and format settings should be suitable
Once you are satisfied with the file settings, you can press Export on the bottom right.

Figure 12.70: You can export or add the sequence to Media Encoder
You can also reference the complete video in your book files by accessing Scene 01 – Chaz with Alien Guest-PR-RENDER.mp4.
Premiere offers a lot of features, and what we have done here doesn’t even scratch the surface. Hopefully, trimming clips, piecing footage together, color grading, and exporting your sequence gave a good crash course on how the app works.
Summary
There is understandably a lot to take in with this chapter. The thing to keep in mind is there is no right or wrong process. If you feel the animation you created in Character Animator is sufficient, you don’t need to take the process any further. Using After Effects for simple or complex effects is a great option. If you need to piece clips together, add audio or other media, or even do some quick color grading, Premiere is the best pick. Having access to Adobe Creative Cloud has many benefits, including being able to dynamically link to all these files as you work. Finally, Adobe Media Encoder allows us to export in a variety of formats, as well as queue up multiple clips at once.
Next, we are going to go over some additional features that didn’t fit into our original workflow. This includes Puppet Maker, body turns, streaming, and much more!