
9
Working with Preset Actions
While you can make all of your character animations from scratch, preset actions are included to help you get your character moving. Walk cycles, running animations, and more can easily be added with a click of a button. Furthermore, you can refine these actions to make them more customized to the character in the scene.
In addition, we can add more than one action at a time to create a more complicated or dynamic animated sequence. Once we have looked at this, we will polish up the rig and correct any final errors that may pop up.
More specifically, we will cover the following topics:
- Creating a walk cycle
- Modifying a walk cycle
- Mixing actions on the timeline
With that said, it’s time to open up Character Animator and get going!
Technical requirements
Make sure that you have Character Animator open with Version 6 loaded under the Chat_With_Chaz project file. We will be working with the CHAZ WALK rig for this chapter.
Creating a walk cycle
Walk cycles are a big part of the animation process. If you can learn the fundamentals of this animation, then anything else you choose to animate will come more naturally.
However, Character Animator is unique compared to other animation software. While it is possible to move limbs, create keyframes, and time everything appropriately to animate a walk, it proves to be a bit more difficult.
Fortunately, Character Animator has a built-in walk cycle animation that can be applied and tweaked for any rig that’s been appropriately tagged and set up. And that’s what we will learn here.
For this example, we will use a modified version of the original Chaz rig. The only difference is that this rig has not been set up for head turns.
To start adding a walk cycle, follow these steps:
- Make sure you’re on the Rig tab.
- If the body or head is hidden, reveal the layers so that the whole character is visible:
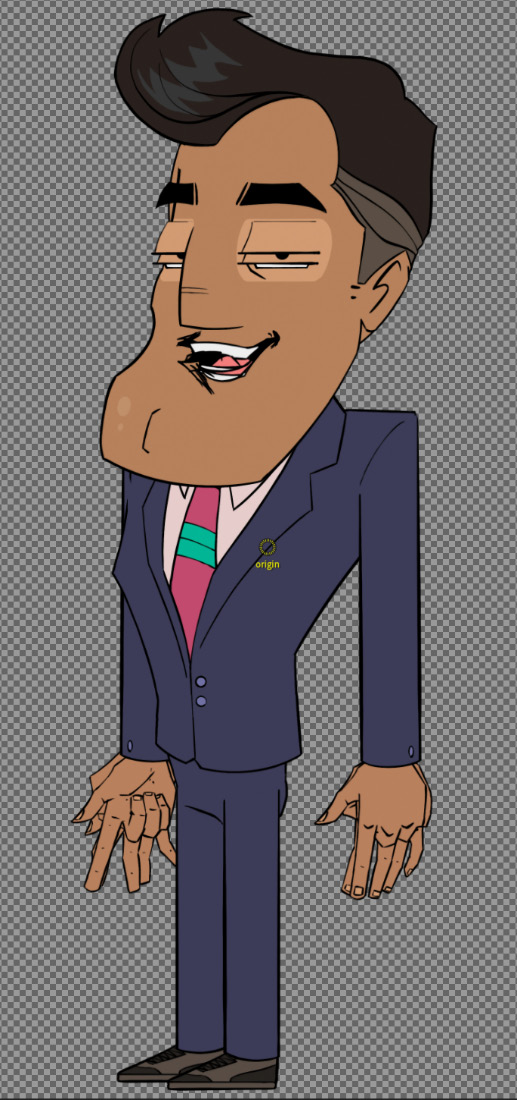
Figure 9.1: Making the rig fully visible will help with the animation process
- To make viewing the layers easier, expand the HEAD and BODY groups while keeping the subgroup or layers compressed:
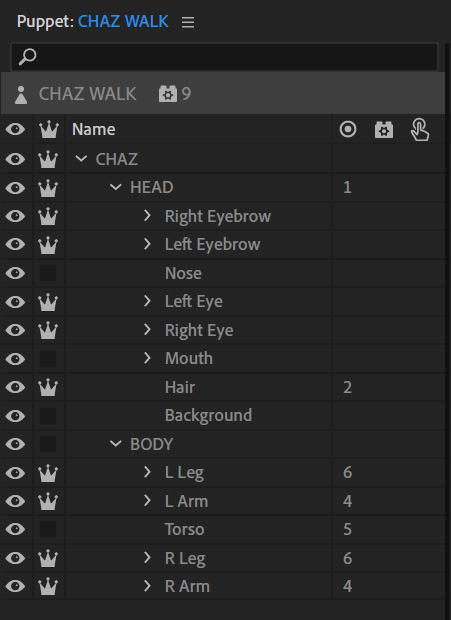
Figure 9.2: The layers are close to the rig we worked with before. Now, we only have one HEAD phase
- Next to CHAZ WALK is the Behavior icon. Remember, this is where our universal behaviors for the puppet are. Click the + button next to this and choose Walk from this list:

Figure 9.3: Choosing to add Walk to the CHAZ WALK puppet
The new Walk behavior will appear on the bottom right Behaviors panel. Here, we have several options to choose from. For now, we will leave the adjustments alone and direct our attention to the bottom, where the Handles section lies:

Figure 9.4: For the best results, ensure the Walk animation is detecting all the handles listed here
This is the most important part of setting up the walk cycle. For the best results, you will want to ensure each tag listed is accounted for, represented by a 1 to the right of the listing. While we have done some work with tagging, let’s provide a quick overview of the tags on the rig:
- The Torso layer should include these tags:
- Right Hip
- Left Hip
- Right Shoulder
- Left Shoulder
- Waist
- Neck (can also lay on the Head group, depending on the design):

Figure 9.5: Be sure these are added to the torso or body graphic layer, not the Body group
- For the legs, you will want to tag the following:
- For Right Leg:
- Right Knee
- Right Ankle
- Right Toe
- Right Heel
- For Left Leg:
- Left Knee
- Left Ankle
- Left Toe
- Left Heel:
- For Right Leg:
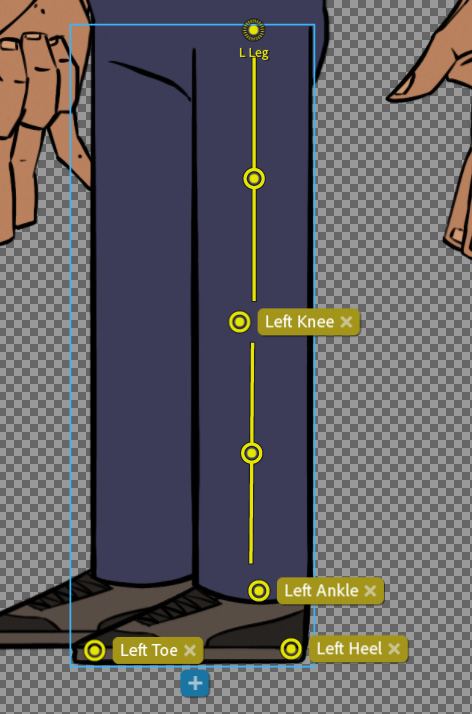
Figure 9.6: Each leg should be tagged with its appropriate direction
- For the hands, you will want to tag the following:
- For Right Arm:
- Right Elbow
- Right Wrist
- For Left Arm:
- Left Elbow
- Left Wrist:
- For Right Arm:
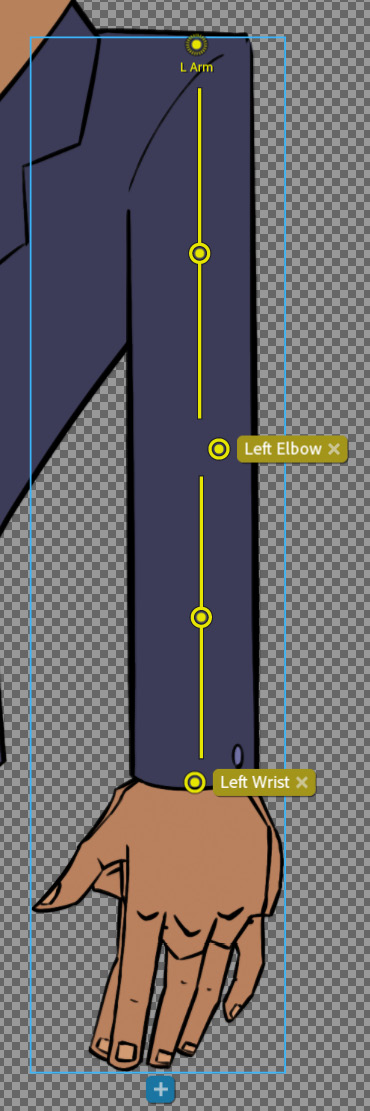
Figure 9.7: Like the legs, ensure the arm groups have their elbows and wrists tagged
Finally, HEAD is set to Independent, along with the hair, pupils, blinks, and eyebrows:

Figure 9.8: To ensure you can control the eyes and eyebrows, keep their layers independent
To test the animation, go to the Record tab. You should see Chaz walking in place:
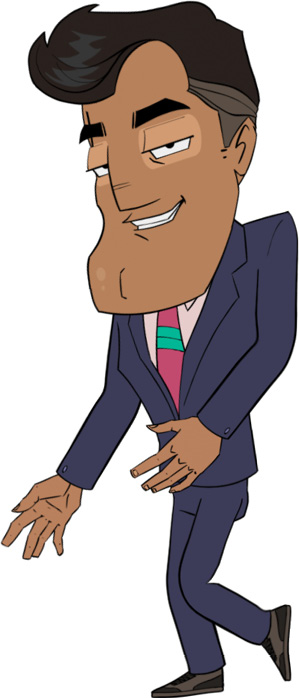
Figure 9.9: Chaz’s default walk
If you have any issues, such as the body or head morphing, or perhaps another visual anomaly is prevalent, go back to Rig and ensure everything has been tagged appropriately, along with your limbs and head being set to Independent.
With the walk now animating, we can adjust how the walk functions. Let’s take a look at that now.
Modifying a walk cycle
Once you tag the character appropriately for a walk, the hard part is over. Now, it’s time to personalize the animation. Luckily, you have several options to accomplish this.
Let’s click on the Record tab and start adjusting the parameters. Here are a few of the main ones:
- Mode: This allows you to adjust how the rig walks. You can loop the animation, control it with the arrow keys, or use a position-based parameter to move the rig. This provides several ways to record the animation. Try switching the modes and trying it for yourself:
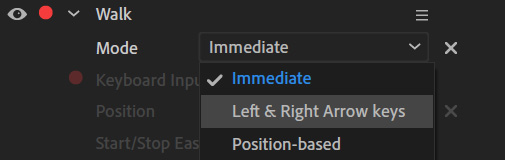
Figure 9.10: You can control the walk with three different functions
- Style: This allows you to change how the animation looks. Walking, running, strutting, and slumping are just some of the presets you can implement, providing a base for you to customize and personalize:
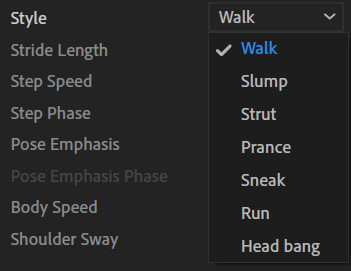
Figure 9.11: Each style can be adjusted for maximum customization
- Style: Below the Style drop-down are options that allow you to hone and adjust how you want the animation to look. If you want the character to take shorter strides, adjust how the arms move, or modify hip movement, you can do so here:
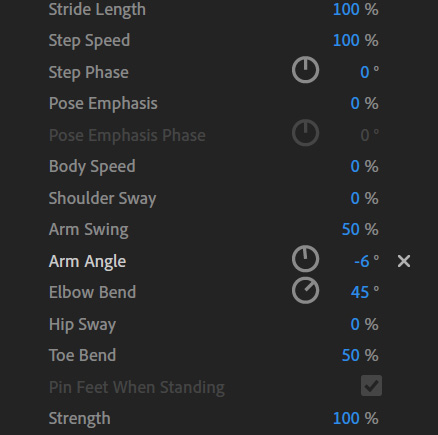
Figure 9.12: There are many parameters you can adjust to customize to your liking
Now that we know how to easily add preset animations to our characters, let’s jump over to the Record tab and create a simple sequence so that we can get a better handle on the timeline and how keyframes work.
Mixing actions on the timeline
So, we have our walk animation set up the way we want. But how do we record it on the timeline? Can we mix other actions while doing this? Well, let’s take a look at trying to record some basic animation. To do this, follow these steps:
- Make sure you’re on the Record tab.
- For the Walk behavior, switch the Mode option to Left & Right Arrow Keys:

Figure 9.13: We will use the arrow keys for this test
- Press the Record button above the timeline.
- Once the countdown completes, the timeline will scroll and anything you do will record. In this case, move the character with the left and right arrow keys.
- After about 10 seconds, press the Stop button.
- You should now see, below the puppet, your recorded frames for the walking animation:
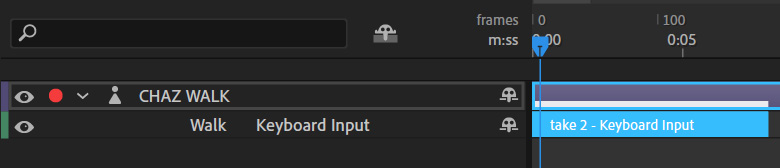
Figure 9.14: The keyframe input is shown on the timeline
So, what happens if we want to, in the middle of the animation, raise Chaz’s left arm? We can do that. Here are the steps:
- Go back to Rig.
- On the L Arm group, click the Left Wrist tag and choose Draggable on the right.
- Go back to Record.
- Play the animation.
- Halfway through the walk cycle, grab the left arm and drag it up.
- Once the walk animation has finished, press Stop. New keyframes should form above the Keyboard Input area:

Figure 9.15: You can stack and mix actions to create detailed animations
Play the animation back – you should see the walk cycle, along with the new arm animation, coupled together as the play head moves along. Using this method allows us to layer animations on top of each other. Not only that, but they can modify each other, creating more complex sequences.
In the next chapter, when we start to work on our animated scene, we will be layering multiple keyframed actions. The flexibility of this system will allow us to create detailed animations with multiple puppets and props.
Summary
When it comes to creating walk cycles, Character Animator makes the process simple, so long as you have your rig properly tagged. If your rig appears to not function correctly during the cycle, be sure to double-check check all the tags have been accounted for. It’s also important to keep the limbs independent from the body. Finally, remember that once you have set up the cycle, you can customize it in several ways to fit the personality of the character. Mixing animations with preset cycles is also easy to do and edit once in the Record phase. You will find that working with these cycles can save you a lot of time!
In the next chapter, we will start the process of animating our sequence by using Chaz, another puppet, props, and a set or scene for our characters to interact in.