
When you work with video in Photoshop, it isn't to create an extensive video project; that's what Premiere is for. Photoshop enables you to bring in pieces of video that need the special Photoshop touch and clean them up a bit. You also can create fantastic composites with video files that you may not be able to accomplish in fine Photoshop style anywhere else. The Animation (Timeline) panel gives you just enough capability to make working with video files an efficient and relatively uncomplicated process.
The first step in being able to edit your video files in Photoshop is to understand the video workspace. The Animation (Timeline) panel is practically an application all by itself, giving you the ability to add, edit, and move video clips not only as layers but through time. You can add other layers as well: image files, text, and 3D objects. In this chapter, I show you how you can open, add, and maneuver these files within a video timeline so you are prepared to correct lighting and color and create artistic effects with video files and image files.
To work with video successfully, you need to know the basics of video file formats, why they are different, and how they work. Some file formats are higher quality and, consequently, larger than those of lower quality. You also must understand aspect ratios. Photoshop has more possibilities for changing the aspect ratio than you might think. Using the right aspect ratio and understanding the settings are important to creating successful video files within Photoshop.
Note
Review the basics of video file formats in Chapter 3.
An aspect ratio is the relative width to height of a video or an image. The frame aspect ratio indicates the ratio of the video or image frame. You are probably familiar with the 4:3 and 16:9 aspect ratios that are industry-standard television sizes. The next step in getting to know all about pixels is understanding the pixel aspect ratio.
Individual pixels also have aspect ratios. Depending on the video standard, pixels have either a square aspect ratio or a rectangular aspect ratio. A computer monitor, for instance, is usually set up for square pixels. For example, a 4:3 monitor typically has a setting of 640 pixels wide and 480 pixels tall, which results in square pixels.
Televisions do not have square pixels. Their pixels match the aspect ratio of standard video, which is rectangular. That means that when you play a movie on your computer that is a standard video format, the video is distorted unless the pixel aspect ratio is taken into account and adjusted.
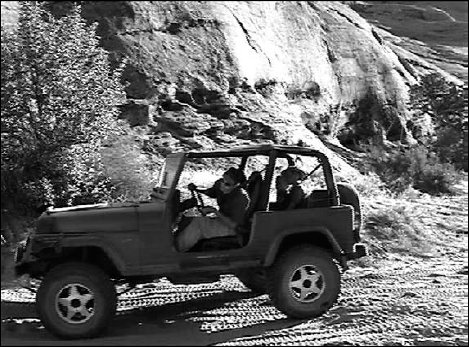
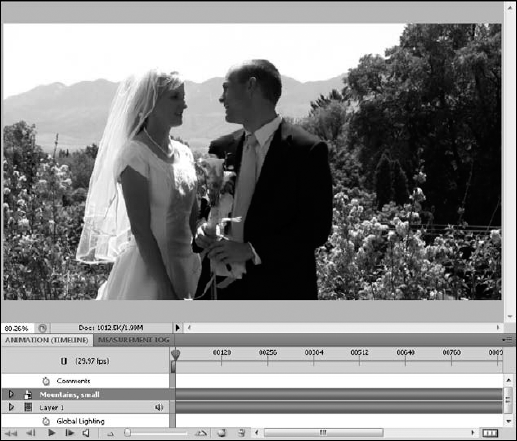
When you import a video file into Photoshop, it automatically performs a pixel aspect ratio correction on the document, so it appears just as it would on a television screen. This reduces the preview quality of the document, but it is only for preview purposes and doesn't change the document materially in any way, as shown in Figure 25.1.
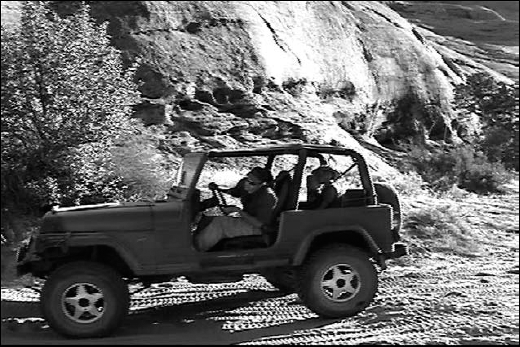
You can turn off Pixel Aspect Ratio Correction and preview the video with all the pixels intact. The image looks distorted, but it actually contains the correct number of pixels. Simply choose View
Note
You can view both pixel settings at once by choosing Window
You are probably familiar with common video aspect ratios such as 4:3 and 16:9. You are probably less familiar with pixel aspect ratios, which is what Photoshop uses. Here's a list of Photoshop's preset aspect ratios to help you translate pixel aspect ratios into more familiar terms. The number listed in parenthesis is the relative height of the pixel to a width of 1. For example, D1/DV NTSC (0.9) has a pixel aspect of 1 wide and .9 high, making it slightly wider than it is high.
Square: As discussed, most computer monitors have square pixels. Some video made for a 4:3 screen ratio is also captured at 640×480, making the pixels square.
D1/DV NTSC (0.91): This is a standard capture ratio for pixels, probably the most common, with a pixel ratio of 720×480. Standard 4:3 televisions and video cameras both probably have this setting, although widescreen is becoming more popular. Figure 25.3 shows an example of this aspect ratio.
D1/DV PAL (1.09): The PAL pixel ratios create a pixel that is taller rather than wide. This is the standard pixel aspect ratio used for 4:3 screens. PAL is the video format used in most countries outside North America.
D1/DV NTSC Widescreen (1.21): This is the common pixel aspect ratio for NTSC 16:9 screen. Most video cameras also shoot in this aspect ratio.
HDV 1080/DVCPRO HD 720 (1.33): This is the standard pixel aspect ratio for big-screen movies and is becoming more popular with higher quality video cameras. The frame size is 1440×1080 pixels for the highest quality setting. The screen size used for this pixel aspect ratio is 16:9.
D1/DV PAL Widescreen (1.46): This is the common pixel aspect ratio for PAL 16:9 screen.
Anamorphic 2:1 (2): This pixel ratio—obviously, quite a bit more rectangular than the others—should be used only if your footage was shot with an anamorphic lens. An anamorphic lens creates wide pixels that condense to be shown at 4:3 or 16:9 aspect ratios.
DVCPRO HD 1080 (1.5): This pixel ratio is used in a video ratio of 16:9. It has a high-quality pixel level with a 1280×1080 frame size. Figure 25.4 shows an example of this aspect ratio.

You can create a custom pixel aspect ratio by choosing View
The pixel aspect ratio is important to know a bit about, but if you are wondering whether you've gotten in over your head, don't worry too much. When you open a video file, the pixel aspect ratio is automatically set to the aspect ratio at which the video footage was shot. As long as you are editing just one aspect ratio, you should be okay. When it comes to adding an image to your video footage, however, you may want to correct its aspect ratio to match that of the video.
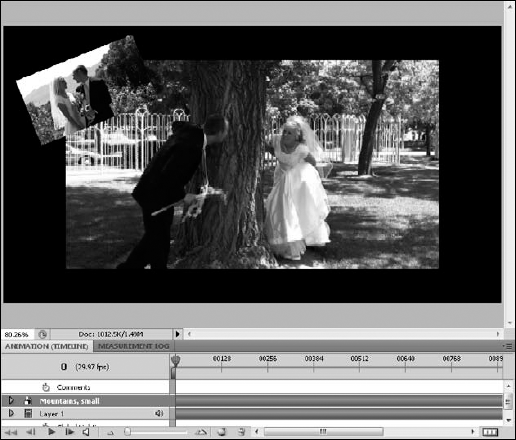
You can add as many images to a video file as you want. The video file can even be set to the correct aspect ratio. When you place images that don't fit the aspect ratio, any portion of the image that doesn't fill the frame of the video is transparent, as indicated in Figure 25.6.

Figure 25.5. It looks cool now, but it plays back normally on a 4:3 television, just like it would play back stretched on a 16:9 display.
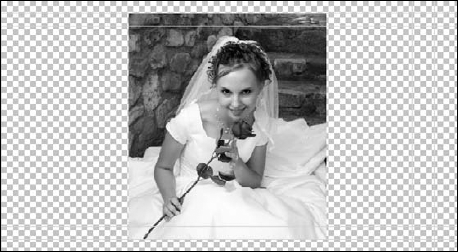
Figure 25.6. A tall image set in a 4:3 aspect ratio shows transparency in the areas that the image doesn't cover.
You can solve this problem in one of two ways: You can create a background for all the images that are placed in the video, or you can create a background for each image. Either way, you need to create an image document that is the right pixel aspect ratio.
You can create a document in Photoshop with the correct pixel aspect ratio for your video file by following these steps:
Choose File

From the Preset drop-down menu, choose Film & Video.
This creates several presets for your document and gives you several more menu options, as shown in Figure 25.7.
Choose the size of your video footage from the appropriate drop-down menu.
From the Pixel Aspect Ratio drop-down menu, choose the pixel aspect ratio you want for your footage.
Click OK.
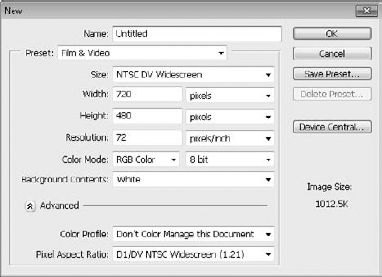
The default settings created by the Film & Video preset are standard for most video files. If you want to create an HD video, you can change the number of pixels and the resolution to a higher quality, of course. You also can change the color settings and background contents, among other things. The important thing is to create a document that's the same size and pixel resolution as the video you are trying to create.
After you click OK to create the new document, you are reminded that Adobe has just turned on the Pixel Aspect Ratio Correction for this document because it presumably will be part of a rendered video file eventually.
The document created by the Film & Video presets looks different than the usual Photoshop document. Notice in Figure 25.8 that guidelines are added to the blank canvas. These guides don't print or show up on your video; they indicate the safe zones in the video file. As long as your action is contained within the outside bounding box and your text is contained within the inside bounding box, you won't lose any of the important pieces of your video to a television that cuts out the edges of the video and enlarges the center.

Note
If you are creating a video for the Web, you probably chose the square pixel settings, which means the Pixel Aspect Ratio Correction doesn't have to be turned on. You can disregard the guides as well, because computer monitors play the entire video without cropping the edges.
You can now place an image in this document or create a neutral background that can be placed in the video file as a separate layer behind any photos that are placed in the video file.
The Video filters are accessed in the filter menu and are specifically for video files. Video filters can be used on video or image files that will be placed into video files. These filters work to reduce the noise of a video file.
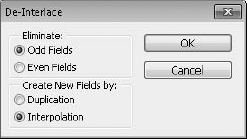
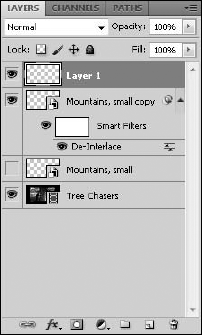
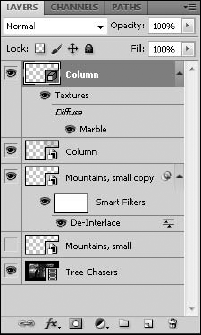
Interlaced video is created by generating every other line of video in one pass and then filling in the missing lines in the second pass. De-interlacing can clear the look of moving video by removing either the odd or even lines and filling those lines in by either duplicating or interpolating the existing lines. The difference can be dramatic, especially on a computer monitor that has a high enough quality output to catch the variable scans. Figure 25.9 shows the same frame before and after de-interlacing.
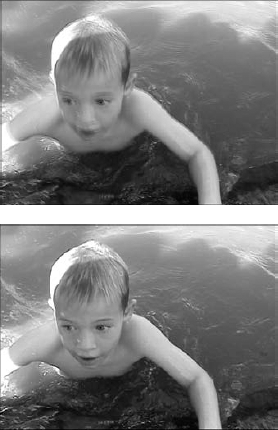
Figure 25.9. The first image is fuzzy; you can see the image echo. The second image has been de-interlaced and is much clearer.
Choose Filter
When you apply the NTSC Colors filter to an image or video file, you are restricting the colors used in that file to the colors used in television production. This keeps your video cleaner by preventing over-saturation and bleeding of colors. Change the colors to NTSC colors by choosing Filter
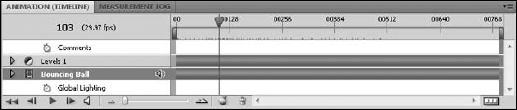
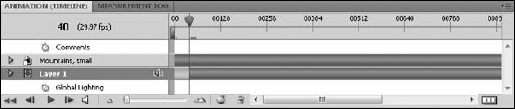
The Animation (Timeline) panel consists of a timeline for creating animations or editing video through time. It has features such as a current time indicator that allows you to move through time in your file and lists the layers that are placed in your file. You can access layer properties that allow you to animate any layer in your file in different ways, depending on the layer type selected.
The Animation (Timeline) panel has so many features that I break them into three categories for you: time adjustment, work area, and icons.
The Animation (Timeline) panel includes many time indicators and time features, as shown in Figure 25.11. Here's what these features do and how to use them:

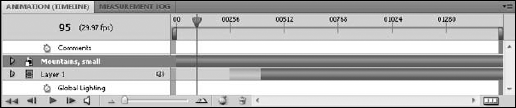
Current time: The current Time is a numerical representation of where the current time indicator is placed on the time ruler. Notice that the current time indicated in Figure 25.11 matches exactly with the position of the current time indicator.
Current frame rate: This number is an indicator of how many frames are in every second of an animation or video. The default setting, which is the NTSC standard rate shown in Figure 25.11, is 29.97 frames per second.
Time ruler: The time ruler indicates the time relative to the video layers.
Current time indicator: The current time indicator is a slider that allows you to preview your animation or select a particular time or frame in your animation by dragging it back and forth across the video layers.
Playback controls: The playback controls allow you to rewind, play, pause, and fast-forward your animation or video as well as move the current time indicator to the beginning of the animation.
Tip
You can press the spacebar to play and pause your animation.
Zoom slider: The zoom slider is a handy feature that allows you to expand or reduce the time ruler. Zooming in increases the length of each second in the Timeline. If you zoom all the way up, each frame takes up the same amount of room as each second did at the lowest setting.
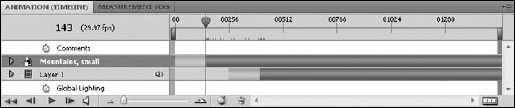
Current frame: The current frame can be viewed in lieu of the current time if you choose Panel Options from the Panel menu and select Frame Number. You can see in Figure 25.12 how the look of the Timeline panel has changed.
Frame ruler: When the Animation (Timeline) panel is set to the frame number display, the time ruler becomes a frame ruler, indicating the number of frames relative to the video layers, as opposed to the number of seconds.
The work area of the Animation (Timeline) panel includes the following features that can be seen in Figure 25.13.

Comments track: The comments track provides a space to enter comments in any area of the timeline.
Global Lighting track: The Global Lighting track allows you to animate Global Lighting throughout all layers at the same time.
Time-Vary Stopwatch: The Time-Vary Stopwatch can be turned on in any layer property that can be animated. It allows keyframe indicators to be placed inside the property layer.
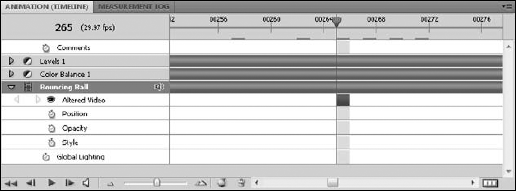
Video layers: These represent the layers in your video file. They correspond exactly to the layers in the Layers panel. Notice in Figure 25.13 that the top layer is actually an Adjustment layer.
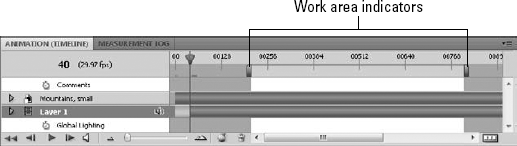
Work area indicators: By dragging these indicators to different spots in your timeline, you can reduce your work area to the immediate area you are working on. When you start a playback, it is restricted to this area. You also can render and export just the segment of your video or animation contained inside the work area indicators. This tool is more useful as your file becomes longer in duration.
Cached frames indicator: The cached frames indicator shows the frames that have been cached in the computer's memory and can be easily previewed. When the line is solid, all the frames in that area have been cached. If the line looks jagged, only a few frames have been cached in that area. If the line is nonexistent, none of the frames have been cached yet. As you play back video, you'll notice that a limited number of frames can be cached. As a consequence, past frames are discarded as new frames become cached.
Layer duration bar: This bar indicates the duration of the layer inside the timeline. When the bar is light green, the layer is not viewable. Drag either end of the bar to lengthen or shorten it. You can edit the layer position and length in the Timeline in several ways that are covered when I discuss the Animation (Timeline) panel menu.
The icons around the Animation (Timeline) panel make certain actions quick to perform. Some perform their function with a quick click, and others require more input. The icons are labeled in Figure 25.14.
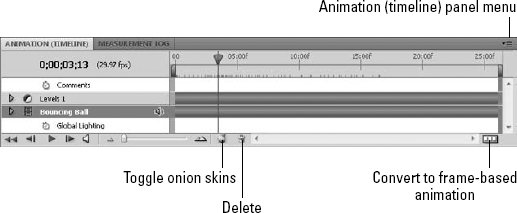
Toggle onion skins: This icon allows you to quickly enable or disable your view of onion skins in the frame being previewed.
Delete Keyframes: You don't need an explanation here. Click this icon whenever you have a keyframe highlighted that you want to discard.
Convert to Frame Animation: Clicking this icon changes the Timeline panel to the Frame Animation panel. Your file also is converted to a frame-based animation. This option is viable only if you are working on an animation rather than a video file, because video files do not play in the Animation (Frames) panel.
Animation panel menu: Clicking this icon brings up the Animation panel flyout menu. This is a pretty hefty menu, so I give it its own section.
The Animation (Timeline) panel menu has many features, as shown in Figure 25.15. Some of them are pretty intuitive, and some are covered in much greater depth in this and following chapters. I give you a quick rundown of the list so you'll have a comprehensive at-a-glance resource. Where any of these options are covered in more depth in a different chapter, you find a cross-reference to that chapter after each definition.
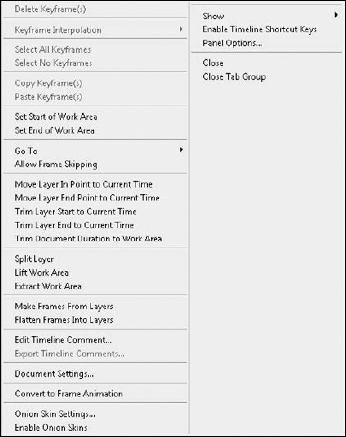
Delete, Copy, and Paste Keyframe(s): Use these options to Delete, Copy, or Paste a keyframe. Duplicating a keyframe duplicates the frame, the keyframe indicator, and if you've selected more than one keyframe, all the interpolation in between. You may want to note that you can't use the hotkeys for these functions (Ctrl/

Keyframe Interpolation: This option allows you to set the type of interpolation you want between keyframes. Your choices are Interpolation, which generates tweening between keyframes, and Hold, which holds the keyframe settings until the next keyframe. See Chapter 27.
Select All and Select No Keyframes: This selects or deselects all the keyframes in the targeted layer.
Set Start or End of Work Area: Click these options to move the start or end of your work area to the position of the current time indicator, as shown in Figure 25.16.
Go to: This option allows you to move your current time indicator to any of the following places: a specified time, the next frame, the previous frame, the first frame, the last frame, the beginning of the work area, or the end of the work area.
Allow Frame Skipping: Check this option to skip frames as you preview an animation or video. This allows Photoshop to play the preview in real time, although the quality is not as good as the rendered version.
Move Layer In Point to Current Time: This option repositions the selected layer's start point to the position of the current time indicator.
Move Layer End Point to Current Time: This option repositions the selected layer's end point to the position of the current time indicator.
Trim Layer Start to Current Time: This option splits the selected layer at the position of the current time indicator and discards the first portion of the layer.
Trim Layer End to Current Time: This option splits the selected layer at the position of the current time indicator and discards the last portion of the layer, as shown in Figure 25.17.
Trim Document Duration to Work Area: This deletes any video layers or portions of layers that fall outside the work area.
Split Layer: This splits the layer into two at the site of the current time Indicator. After a layer has been split, you can edit each portion individually.
Lift Work Area: If you lift the work area, all the layers in the work area are deleted, but a space the size of the work area is left in the timeline.
Extract Work Area: Extracting the work area deleted all the layers contained in the work area, closing the gap in the timeline left by the deletion.
Make Frames From Layers: This option allows you to take an image with several layers and create an individual frame from each layer. See Chapter 29 for more information.
Flatten Frames Into Layers: This creates a layer for every frame in your video or animation. See Chapter 29.
Edit Timeline Comment: This allows you to create or edit a timeline comment in the Comments track.
Export Timeline Comment: This allows you to export your timeline comments into a separate text file.
Document Settings: The Document settings in the timeline include the duration of the animation and the frame rate.
Convert to Frame Animation: Rather than clicking the Frame icon in the panel, you can go the long way and choose this option from the panel menu.
Onion Skin Settings: Clicking this menu item brings up the Onion Skin Options dialog box, where you can set several options, including what frames become onion skins and their opacity. See Chapter 29.
Enable Onion Skins: When this option is checked, you can use the Onion Skin icon at the bottom of the timeline panel to toggle the view of the onion skins on and off. See Chapter 29.
Show: From this option, you can choose whether to show all layers or your favorite layers. You also can set up or edit your favorite layers.
Enable Timeline Shortcut Keys: This makes shortcut keys available to use for the Animation (Timeline) panel.
Panel Options: This option allows you to change the thumbnail size of the layers. You also can change the ruler on the timeline from Timecode to Frame number.
You should be especially aware of one other menu while working in the Animation (Timeline) panel. This menu can be found by choosing Layer
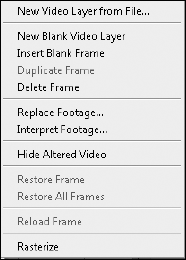
New Video Layer From File: Like the Place command, this option allows you to import a separate file as a layer in your existing file.
New Blank Video Layer: A new blank video layer is handy for making changes to existing video, and it's imperative if you are animating an image or rasterized layer that doesn't already contain a video layer. Besides the regular layer properties, a video layer contains an Altered Video layer that allows you to make changes frame by frame. The new video layer is completely transparent until you add changes to it, as shown in Figure 25.19.
Insert Blank Frame: This creates a blank frame on the Altered Video layer at the position of the current time indicator.
Duplicate Frame: This duplicates the current frame on the Altered Video layer and places it directly after the selected frame.
Delete Frame: This deletes the current frame on the Altered Video layer.
Replace Footage: Use this option if the file containing the original footage has moved locations and Photoshop can't locate it. Click Replace Footage, and browse to the new location to correct the link between the original file and the Photoshop document you've created with it.
Interpret Footage: If you have video layers that contain an alpha channel, this option allows you to determine how the alpha channel is interpreted. You also can change other options such as whether the video is interlaced. This is one other place where you can modify the frame rate as well.
Hide Altered Video: You could just click the eye on the video layer you want to hide, but if you really like to take the scenic route, the Hide Altered Video layer option accomplishes the same thing.
Restore Frame and Restore All Frames: By selecting one of these options, you can discard the edits you've made to any or all frames. All edits to video in Photoshop are non-destructive, meaning that they do not affect the original file.
Reload Frame: If the original footage of a video file you are using has been changed, Photoshop eventually reflects those changes. You can use this option to reload the footage for the current frame you are working on, or you can simply use the playback controls to play the footage, allowing Photoshop to reload the original file.
Rasterize: A video layer is dynamic and can be modified frame by frame. When it is rasterized, it becomes a flat image, containing only the data in the frame that was selected when it was rasterized. That data plays continuously through the duration of the original video layer.
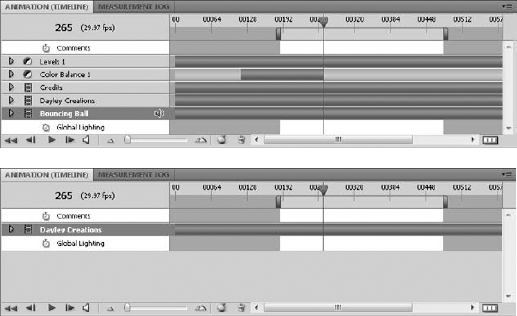
As your project grows, the Animation (Timeline) panel becomes unwieldy as more layers are added. You can hide layers that you are not working on to keep your work area neater and easier to work in. Do this by setting your layer favorites. You can set your layer favorites at any time during your project; in fact, you'll probably want to change your favorite layers often.
You can set up layer favorites in the following manner:
Highlight the layers to be placed among your favorites.
You can select multiple layers by holding down the Ctrl/
Click the Animation (Timeline) panel menu icon to open the flyout menu.
Choose Show
The unselected layers no longer show inside the Timeline. These layers are still viewable in the Layers panel, and they are still visible in the animation, as shown in Figure 25.20.
You can change your layer favorites by choosing Show
Getting started with video editing in Photoshop is as easy as opening a video file. After you have one video file, you can place more video files in the same document to create a composite.
Opening a video file in Photoshop isn't any harder than opening any other kind of file. But you need to import the smallest possible file for editing. Photoshop is not meant to create and manage extensive video projects. A large video file has the capability of creating a very unwieldy work area at the best and bringing your work in Photoshop to a grinding halt at the worst.
You shouldn't be discouraged from bringing in as much video as needs to be edited, but don't bring in any more than is necessary. You can trim larger video files down to an editable size in the video-editing program of your choice by creating a work area or trimming around the area you want to edit and rendering just that portion to a separate video file that you can then import into Photoshop. Taking the time to trim a video file down to a manageable size saves you lots of time and frustration later.
To open a video file in Photoshop, choose File
Note
To play video in Photoshop, you must have QuickTime 7 installed on your computer. You can get a free QuickTime download from www.apple.com/quicktime.
Tip
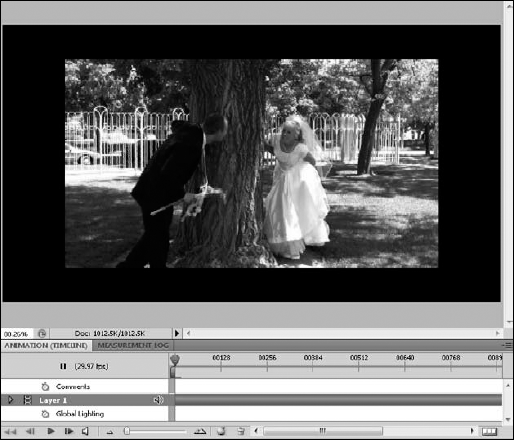
For your own sanity, rename your layers as soon as you import them. As you can see in Figure 25.1, the layer associated with the opened video file is named Layer 1. If you've never bothered about your layers in the past, keeping track of them through their icons or knowing which ones they were just because you had only two or three, change your ways now before it's too late. Give each layer a descriptive and unique name.
You can add video files to an open video document in several ways. You can drag a video layer from another file into the window of the file it's being placed in, or you can choose Layer
Sometimes, you may want to add a new video file differently than just inserting it over the last one. You may want to change the size of it, for example, to create a picture-in-picture effect. In this case, you want to place the new video file. Choose File
Of course, you can create the same effect after the fact by selecting the video layer and choosing Edit
Note
Whether you use the Place function or the Free Transform function, a transformed video layer becomes a Smart Object.
An image sequence is a series of image files that are saved in sequence for an animation or video. Usually, they are exported out of a video project. A video file is very intense to render, especially if it contains several layers, high-resolution images, or 3D objects. If you render a video project as an image sequence rather than a video, the rendered—and saved—images are preserved, even if your computer crashes, allowing you to start the rendering process where you left off. Photoshop allows you to import these rendered images together as one animation file.
You can do this in two ways. The first imports the image sequence as a single layer, creating one video layer from the individual image files, just as if it had been a single video file. The second way imports the Image Sequence into a stack, giving each frame its own individual layer without any extra steps. I show you how to import using both methods.
Note
Before you import an Image Sequence, make sure it has been saved correctly. An image sequence should be a series of images saved with sequential filenames and placed in a folder that doesn't contain any other files.
Opening an image sequence as one video layer is the fastest, and in most cases probably the preferred, method of importing an image sequence.
You can open an image sequence as just one video layer by following these steps:
Choose File
Browse to the folder containing the image sequence, and select the first file in the sequence.
In the Open dialog box, click the box next to Image Sequence, as shown in Figure 25.24.
Click Open.
You are prompted to enter a frame rate for your image sequence.
If this is an exported video, select the original frame rate. If this is a series of still shots, select the frame rate that will work best and click OK.

You now have a simple file that looks just like you opened a video file, as indicated in Figure 25.25. This file was generated fairly quickly and is very easy to work with.

If you need your image sequence to be placed in separate layers, you can use a method that creates the layers as the images are imported and opened. With this method, there is no waiting time to cache the frames after the file is created.
You can create an individual layer for every image in an image sequence by following these steps:
Choose File
This opens the Load Layers dialog box.
Choose Folder from the Use drop-down menu.
Browse to the folder containing the image sequence you want to open, as shown in Figure 25.26.
Click OK.
Click the Animation (Timeline) panel menu icon, and choose Document Settings.
Now that the images have been loaded into separate layers in a new document, the document settings need to be changed from the default setting.
Set the duration and frame rate to match the number of frames in your image and how long you want each to last. Click OK.
Click the Animation (Timeline) panel menu icon, and choose Make Frames from Layers.
This creates one frame for each layer at the frame rate specified in the document settings.

Warning
As you make frames from layers, make sure your current time indicator is placed at the beginning of your timeline. The first frame is placed at the location of the current time indicator.
Now your animation contains a separate layer for every single image in your image sequence. This is handy if your image sequence is short, containing only a few images, but it isn't so great if you have several images. In Figure 25.27, you can see a view of my Animation panel after importing a 5-second sequence. Of course, my frame rate is set to 30, so the file contains 125 images. That's 125 layers in the timeline, 125 layers in the Layers panel . . . well, you get the idea.

As you add new video layers to a project, you may find that you need to trim them. Trimming a video layer consists of cutting the unwanted ends off the layer, leaving the rest of the video intact. You can trim a layer in several ways—by manually dragging the layer duration bar or by using the Animation (Timeline) menu options.
The easiest and most rudimentary way to trim a layer is to drag the ends of the layer to the point where you want the video to start or end. First, you need to place the current time indicator in the place where you want to begin or end the clip. You probably can get to that spot just by your initial preview of your video clip. Then simply grab the end of the layer duration bar by clicking and holding it as you drag it to the current time indicator. This isn't a precise method, but it works well for a preliminary trim. Figure 25.28 shows my attempt at lining up the layer duration bar and the current time indicator.

When you drag the beginning of the layer to trim it, the layer doesn't reposition itself at the beginning of the document automatically. If you want your layer to start at the beginning of the document, you can do one of two things: drag and drop the already trimmed layer to reposition it or simply drag the untrimmed layer forward, moving it out of the beginning of the document. Place the current time indicator at the beginning of the document so you can preview the video as you are shoving it out of the document.
If you want to trim your video more precisely, move the current time indicator to the proper area and select Trim Layer Start/End to Current Time. This trims the layer to the current time. Again, this leaves the beginning of your layer at the current time indicator rather than at the beginning of your document, as shown in Figure 25.29. This might be exactly what you wanted it to do, but if you want the layer to start at the beginning of the document, you have one other choice.
To change the document duration to the trimmed areas of your video, you can set the work area to surround the video you want keep and choose Trim Document Duration to Current Work Area from the Animation panel menu, as shown in Figure 25.30. This quickly and concisely crops your video down to the size of your set work area. If you have only one video layer in your document, this is probably your best option for trimming your video file. Figure 25.31 shows my trimmed video.
Warning
If you have more than one layer in your Animation (Timeline) panel, be aware that trimming the document duration to the work area trims all your layers down to the work area. To prevent inadvertently trimming a layer too short, be sure that all the video you want in your final product is contained inside the work area.
When you start trimming, splitting, and moving layers in the timeline, the look of the layers changes to help you visualize the edits you are making. This can be confusing until you get the hang of what all the different colors represent. In Figure 25.32, you can see that the layer duration bar looks different, depending on whether content is available and if that content is visible.

Figure 25.31. Choose Trim Document Duration to Current Work Area from the Animation panel menu, and the work area becomes your entire document.
When you place a video file in the timeline, the entire file is always available to you no matter how many times you trim or split it. Trimming a file changes the visibility of that file, but just like a hidden layer, the visibility can always be restored. You can do this by simply dragging the ends of the dark green areas of the layer duration bar into the light green areas to restore visibility. You also can place the current time indicator anywhere in the light green area and choose Trim Layer Start/End to Current Time, which moves the dark green area back to the current time indicator. Of course, you are working blind if you use this method, because the light green area isn't visible.
If your layer duration bar is light gray, this indicates that the area has no content at all. As you add more files to your video project, you'll see this more often as some of your files have a longer duration than others.
Moving video layers is a fairly straightforward process. You'll probably find yourself dragging layers around fairly frequently without even thinking about it as you work on your video project. You can move layers around in more than one way, so I briefly cover each one so you are aware of them.
Changing the layer hierarchy in a video project is done exactly the same as any other project. As you work in the timeline, don't forget that the Layers panel is very much a part of your work area as well. You can select, delete, and move layers in the Layers panel. To move a layer up or down in the hierarchy, click it inside the Layers panel and drag it into position.
To change the relative position of a video in your timeline, you can simply click and drag its layer duration bar back and forth inside the timeline. Photoshop doesn't have a distinguishing icon for this action, but if your layer is visible, you can preview the movement in the document window. It looks like changing the position of the current time indicator manually, but of course the layer is moving rather than the indicator. As mentioned earlier, you can drag a layer right past the beginning or end of the document, effectively trimming the ends of the layer. This content is always available even then, because you can always drag it back into the document.
The most precise way to move a layer is to use the panel menu to change the layer in or layer end point to the position of the current time indicator. Simply move the current time indicator to the position where you want the layer to begin or end, and select Move Layer In (End) Point to Current Time from the panel menu. This slides the indicated end of the layer to the current time indicator. If the layer has been previously trimmed, the Layer In/End point is defined as the visible end of the layer. Figure 25.33 indicates this type of layer movement.
To split a video layer, move the current time indicator to the location where you want the video split and choose Split Layers from the Animation panel menu. When a video layer is split, it is divided into two different layers, with the beginning of the split video segment on one layer and the end on another, as shown in Figure 25.34. If you watch a video right after you have split it, you won't see any difference in the video playback.
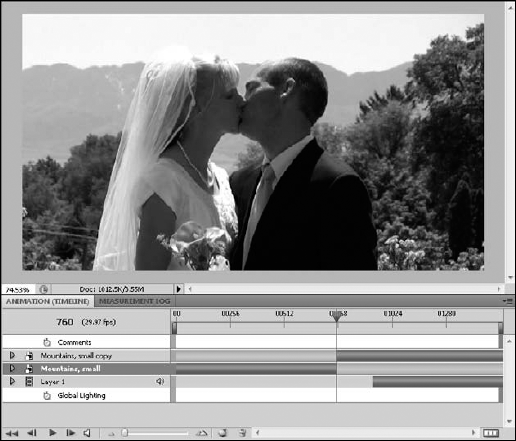
You can see from looking at the layer duration bars that the full content of the video file is on both layers. This means that you can drag either layer to duplicate the content of the other. In fact, this is a viable reason to split the layer in the first place. By dragging out the end of one of these layers and repositioning it, you can create a stutter effect in the video. That's great for kissing shots.
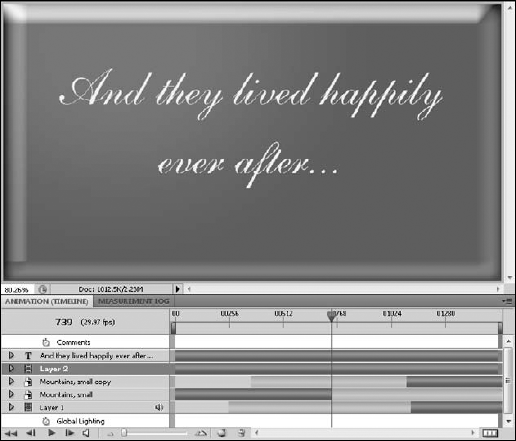
Another reason to split video layers is to insert something between the two clips—another video, a still shot, or a title. Figure 25.35 shows a title placed after the first segment of the split video.
As you saw in Figure 25.31, stacking up split layers with other layers placed in there can make the Animation panel look very busy. When you look at the Layers panel, you only have to understand how the layer hierarchy works to know which layers are visible. When you look at the Animation panel, you need to understand the hierarchy and the layer duration bar.
In Figure 25.36, the layers are clearly marked so you can see which layers are visible and when. Follow the layer hierarchy down to the first visible layer. That layer is visible until another layer, higher up in the hierarchy, takes its place. After the top layer ends, the bottom layer in the hierarchy is the only one visible, so it is played until it is superseded by the second layer, higher up in the hierarchy. The concept is simple, but as you add more layers, it can look very intimidating. Even if you understand exactly how it works, it takes practice and experience to understand what's happening with the layers at a glance.

You can clip your video and remove unwanted sections in just one step by lifting or extracting them. You can lift or extract any portion of a video layer: beginning, middle, or end. Lifting a video creates a gap in the area that the video once occupied, and extracting the video takes the video out and closes the gap, so the video layer plays continuously.
Lifting a section of a video layer takes the work area out of the video, leaving a gap in the video the size of the video that has been removed.
To lift a section of your video, set the work area around the section that you want to lift. Choose Lift Work Area from the Animation (Timeline) panel menu. The video layer is turned into two video layers, and a gap is created inside the work area. You can see in Figure 25.37 that the work area is empty. Now I can place another file to fill the gap.
Extracting a section of video is a little different. Rather than deleting the video and leaving a gap, extracting it deletes the video and closes the gap. This is the easiest way to simply delete unwanted video from the middle of your video file.
You can extract a section of a video layer by setting the work area around the section you want to delete. Choose Extract Work Area from the Animation panel menu. The video layer is turned into two video layers, and the second portion of the video is moved into the work area to close the gap created by the extraction. Figure 25.38 shows that the extracted video has been replaced by the remaining video. This allows uninterrupted playback of your video file without having to fill the gap created by lifting a video file.
Performing a slip edit is simply a matter of dragging video footage through a trim, gap, or extraction in that video footage. For example, I have created a gap in my footage by lifting the work area. Now I want to add another video file to fill the gap. I add the file and trim the ends to fill the gap perfectly, as shown in Figure 25.39.
After I trimmed the new video clip, I realized that I wanted a slightly different section of video. Without the capability of a slip edit, changing this clip would be a multistep process: I would have to drag the ends of my video to the portion of the clip I wanted and then drag that section back into place to fill the gap. A slip edit can do all this in just one easy step.
Figure 25.38. Extracting the work area deletes the video layer inside the work area and closes the gap.
To perform a slip edit, simply grab the light green area at either side of the video clip and push it into the visible content. The content stays in the same place, but the video contained inside the content changes. It's lots of fun to watch and difficult to show you with the still images in a book, but you can see in Figure 25.40 that the content has changed in relation to the current time indicator.
When you are trying to slip edit, be sure you click the light green area to drag your video content. If you click the dark green area, you drag the active video segment through the timeline rather than moving the video content through the active segment, as indicated in Figure 25.41.

Adding still images or other elements, such as text layers or a 3D model, is very similar to adding video files. These kinds of files look different from a video file in the timeline as well as the Layers panel, however, so I show you some of the things that distinguish these files.
You can add still image layers to your video project in several ways. When I say still image, I'm lumping together all the different kinds of images that can be manipulated in Photoshop—photos, paint, vector images, and text. So it makes sense that you can add them in so many ways, from creating a new layer to placing a separate file.

Figure 25.40. Use the light green area in the layer duration bar to push the content through the active video segment.
If you are building an image rather than importing it, you want to create a new layer for the image, especially if your other layers consist of video files. To add a blank layer, simply click the New Layer icon at the bottom of the Layers panel. You also can choose Layer
Adding a text layer is as simple as choosing the Text tool from the Toolbox, clicking your document, and typing text. A separate text layer is automatically created, which allows you to move and edit the text separately from the rest of the file.
Figure 25.41. Clicking the dark green, or active, segment of the layer moves the segment through the timeline.
Creating a title for a video project is the perfect example of optimizing the Photoshop tools to create the best results for your video project. You can create a title for a video file in Photoshop, or you can create a title separately to import into a video project being created in a different application. Either way, the tools in Photoshop make it easy to create a custom, classy title.
If you have a photo or an image that is a separate file, you need to add it to your video file for it to be part of your project. This is easily done by choosing File
You also can drag a new file in by clicking the layer containing the still image and dragging it into the window of your video file. You also can copy and paste all or part of an image file.
Placing or dragging an image into your video file creates a new layer in your video containing the new image file. If you copy and paste an image, be sure to create a blank layer to paste it into. However you bring an image in, make sure the layer is labeled well and placed in the hierarchy where it needs to be.
Note
When you add blank layers, text, images, or 3D objects to your video, they are placed so the layers are active throughout the duration of the video. If you are creating a title or placing a short image clip, you want it to be shorter. This gives you the perfect opportunity to practice your newfound video editing skills.
You can add or place a 3D model in the same way you add a still image: Simply choose File
You also can choose 3D
If you drag a 3D object from its own file or create a new layer from a 3D file, the 3D object is brought in as a 3D layer. You can transform the 3D object directly from the file it has been placed in.
When you use the Place command to place a 3D object in any other type of file, the 3D object becomes a Smart Object. You can still edit it and transform it, but you have to open the originating file to do so. This creates an extra few steps in the editing process.
A 3D object is distinguished in the Layers panel by the 3D icon in the corner of the layer thumbnail. A Smart Object has a different icon, as you can see in Figure 25.43.
This chapter covered the basics of working with video in Photoshop. The Animation (Timeline) panel has several features and menus, and you should now be familiar with what they are and how they work. You should also know how to do these things in Photoshop:
Open and place video files
Trim video footage
Move video layers
Split video clips
Lift and extract unwanted video clips
Slip edit video footage
Add images and 3D files to a video project