Chapter 1
Welcome to Microsoft Office 2013
IN THIS CHAPTER
Reviewing the core Microsoft Office business applications
Looking at additional Office applications
Getting a first look at new features in Office 2013
Starting and closing an application
Finding a file
Browsing and finding Help
Microsoft Office 2013 provides a comprehensive toolkit for tackling day-to-day productivity and communication tasks for business or personal purposes. This chapter introduces the individual Office applications and teaches you skills for getting started using them.
Learning about Office Applications
Microsoft Office 2013 offers a robust set of applications, each tailor-made to provide the best tools for a particular job. For example, if you’re creating a letter, you may need to work with commands for formatting text. If you need to total sales figures, you’ll need an automated way to sum the numbers.
Office provides applications that enable you to handle each of those aforementioned scenarios and more. Read on to learn which Office applications to use for creating text-based documents, manipulating numbers, presenting your ideas, or even communicating with others.
Microsoft offers several different versions of the Microsoft Office 2013 software suite, including the Home & Student, Home & Business, and Professional retail versions. In addition, some plans for the Office 365 subscription service will include licensed copies of the different versions of the Office software, including a Professional Plus version, with the version varying depending on the subscription. Each version includes a different combination of the individual Office programs. Only Word 2013, Excel 2013, and PowerPoint 2013 are included in all versions. Therefore, depending on the Office version you’ve purchased, you may not have all of the applications described in this chapter and further throughout the book. Office 2013 also comes in both 32-bit and 64-bit releases. If you have a 64-bit computer system and are running a 64-bit operating system, you could choose a 64-bit Office release for enhanced functionality.
Microsoft also offers free Office web apps: web-browser-based versions of Word, Excel, PowerPoint, and OneNote, helping eliminate the need for the software to be installed locally on your computer, subsequently enabling online file sharing and collaboration. (Some of the Office 365 subscriptions also enable you to offer other Office web apps.) Using Office web apps enables you to store your files in an online location, in the “cloud,” in a SkyDrive account; if you have Office installed on your computer, you also can download from a web app to the local app. Access to Office web apps is included free with your Microsoft account, with a limited amount of storage available for free. This book focuses on the locally installed desktop versions of the Office applications, but you can explore Office web apps and online storage options if you require remote capabilities of either specific office applications or your data.
Finally, Office 2013 will include a version optimized for Windows RT — the version of Windows 8 optimized for tablet and other portable devices.
Word
Word processing — typing, editing, formatting letters, reports, fax cover sheets, and so on — is perhaps the most common activity performed on a computer. Whether you need to create a memo at the office or a letter at home, using a word processing program can save you time and help you achieve polished results.
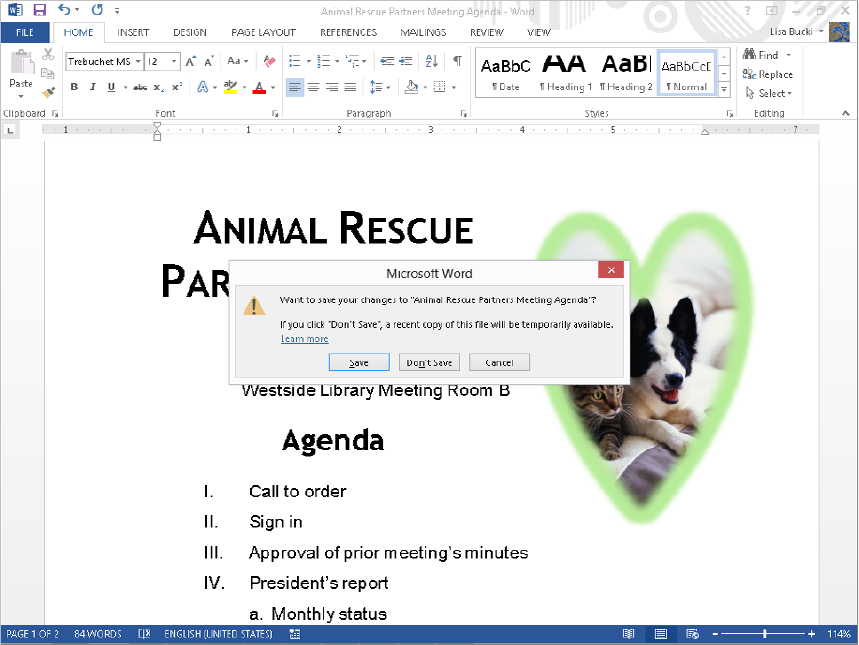
Microsoft Word has long been the leading word processing program. As one of the core applications in the Office suite, Word provides a host of document-creation tools that have been refined to be easy to use, yet have comprehensive feature sets should you wish to extend your document beyond the basics. Using Word to apply a minor bit of text formatting and a graphic can make even a simple document, such as the meeting agenda shown in Figure 1.1, have more impact and appeal than just plain text alone.
FIGURE 1.1 Microsoft Word 2013 enables you to create appealing documents.

Word enables you to do more than just make your documents look great. Its features can help you enhance your document text more easily and furthermore create sophisticated elements such as footnotes, endnotes, and more. You’ll learn about these powerful Word features, among others, later in this book:
- Templates: A template is a starter document that supplies the document design, text formatting, and, often, placeholder text or suggested text. Add your own text and your document is finished!
- Styles: If you like a particular combination of formatting settings that you’ve applied to text, you can save the combination as a style that you can easily apply to other text.
- Tables: Add a table to organize text in a grid of rows and columns to which you can then apply terrific formatting. In Word 2013, you can add a title and a summary to a table to better describe its contents.
- Graphics: You can add all types of pictures to your documents and even create diagrams like the one in Figure 1.2 using the SmartArt feature. Some SmartArt layouts even enable you to insert pictures as shown in Figure 1.2.
FIGURE 1.2 SmartArt diagrams illustrate information in a document.
- Mail Merge: Create your own, customized “form letter” wherein each copy is automatically customized for a particular recipient (or list entry). Word’s Merge feature even enables you to create matching envelopes and labels.
- Document Security and Review: Word enables you to protect a document against unwanted changes, as well as to track changes made by other users. Using these features, you can control the document content through a collaboration process.
Excel
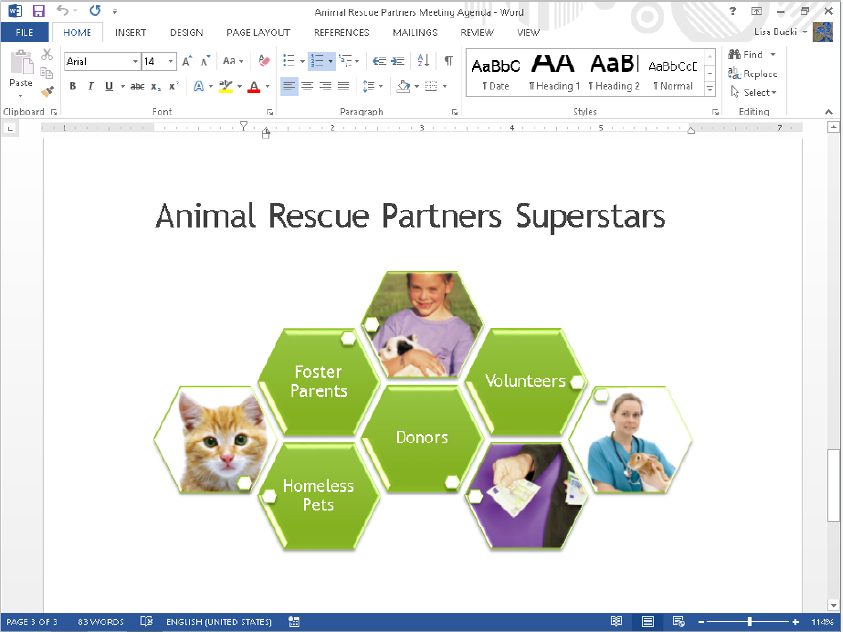
Spreadsheet programs — which provide formulas and functions that make it easy to calculate numerical data — made a critical technology leap in business computing. Business people no longer need to rely on adding machines, scientific calculators, or accountants to perform detailed sales or financial calculations. Even a beginning salesperson could insert numbers into a spreadsheet, type a few formulas, and have the data automatically calculated. Even better, spreadsheet programs give you the ability to represent data graphically, which communicates the impact of the data more effectively. Microsoft Excel 2013, shown in Figure 1.3, performs the spreadsheet duties in the Microsoft Office suite.
FIGURE 1.3 Use the Microsoft Excel 2013 program to organize and calculate numerical data.
Excel 2013 enables you to build a calculation by creating a formula that specifies the values to calculate and which mathematical operators to use to perform the calculation. Excel also offers functions — predesigned formulas that perform more complex calculations, such as calculating accrued interest. Excel not only provides tools to assist you in building and error-checking spreadsheet formulas, but it also gives you many easy choices for formatting the data to make it more readable and professional. You’ll learn these Excel essentials later in the book, as well as more about these key Excel features:
- Worksheets: Within each file, you can divide and organize a large volume of data across multiple worksheets or pages of information in the file.
- Ranges: You can assign a name to a contiguous area on a worksheet so that you can later select that area by name, or use the name in a formula to save time.
- Number and Date Value Formatting: You can apply a number format that defines how Excel should display a cell’s contents, indicating details such as how many decimal points should appear and whether a percentage or dollar sign should be included. You can also apply a date format to determine how the date appears.
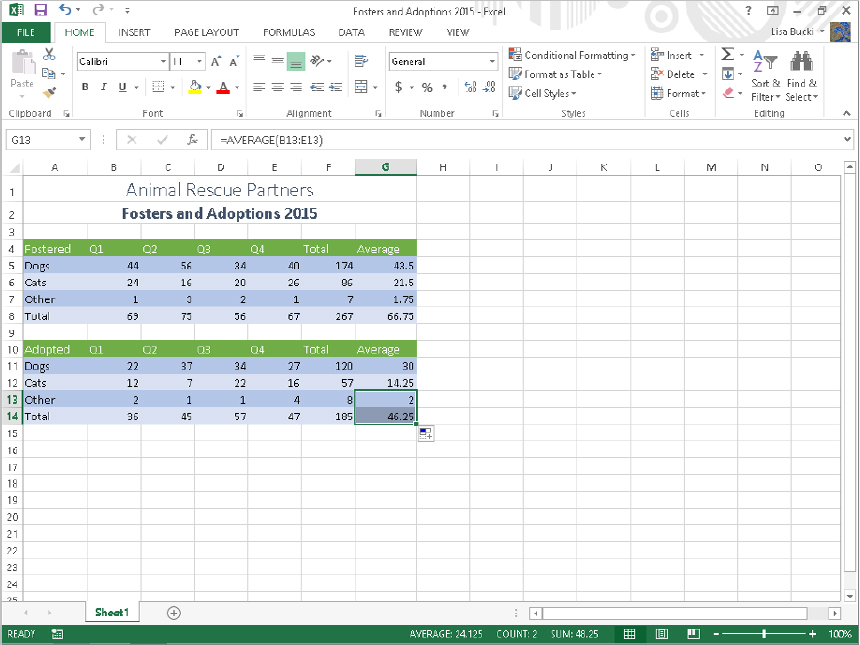
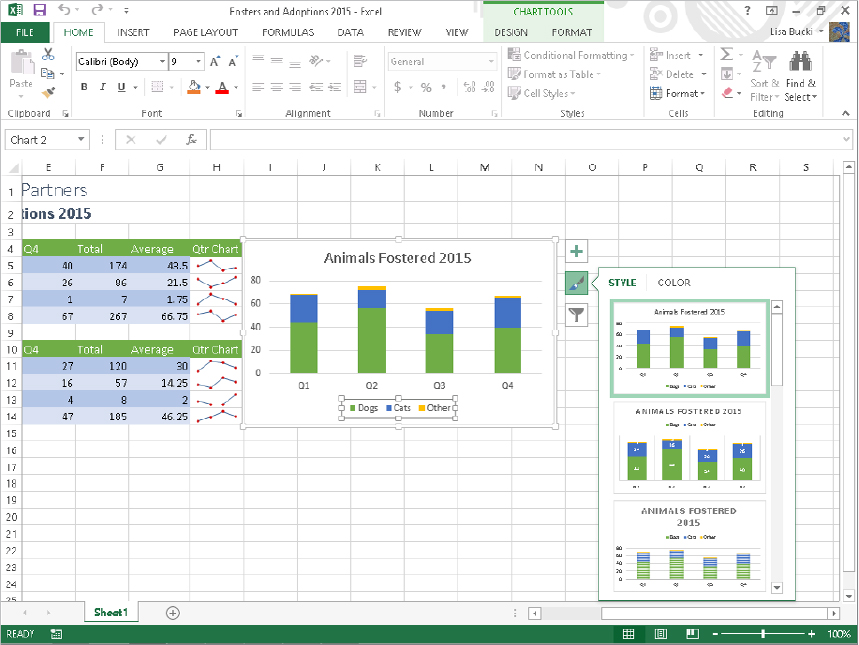
- Charts: Translate your data into a meaningful image by creating a chart in Excel (as shown in Figure 1.4). Excel offers dozens of chart types, layouts, and formats to help you present your results in the clearest way.
FIGURE 1.4 Excel’s data visualization features, such as sparklines and charting, help you make data more compelling and easier to evaluate.
- Specialized Data Formatting: Sometimes it’s more expedient to use cell formatting to help data have more visual impact rather than creating a separate chart. Excel offers conditional formatting, a tool that enables it to apply specialized formatting for selected cells based on the results of the formulas in those cells or the contents of the cells. For example, if you have a spreadsheet calculating grade averages, you can set up the cells to be formatted in one color for a passing average and another for a failing average. The conditional formats include data bars, color scales, icon scales, and more. Excel 2013 offers a sparklines feature that enables you to create a small chart within a cell. Refer to Figure 1.4 to see examples under Qtr Chart.
PowerPoint
To achieve positive outcomes in situations such as persuading customers to buy; convincing your company’s leadership to invest in developing a new product you’ve conceived; training members of your team to follow a new operating procedure; or making sure that a group of volunteers understands program requirements — you must deliver your message in a clear, concise, convincing, and often visual way. A presentation graphics program helps you inform your audience in situations like those just described, and more.
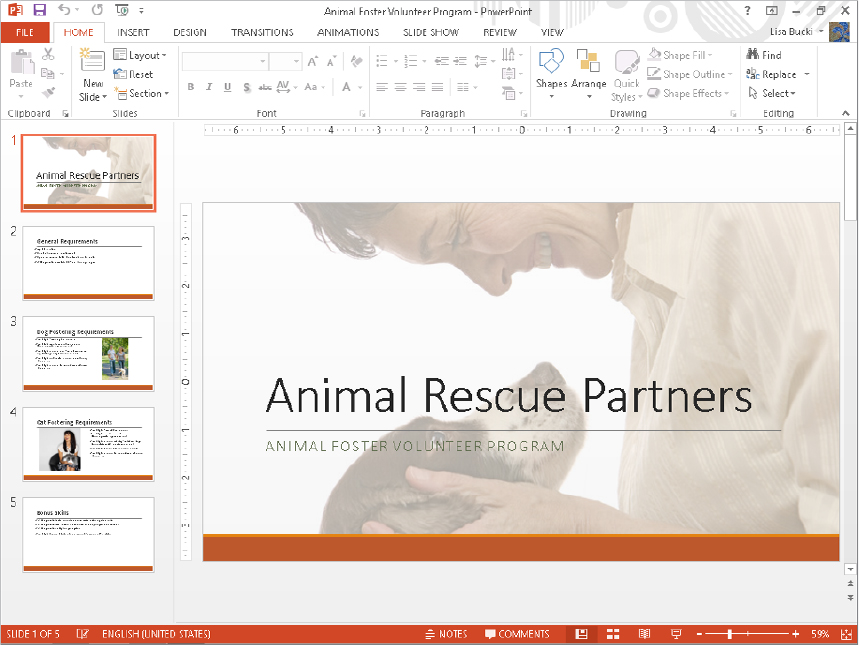
The Microsoft PowerPoint 2013 presentation graphics program (see Figure 1.5) enables you to communicate information and ideas via an on-screen slide show or by printing the pages as handouts. Each slide should present a key topic that you want to convey, along with a few supporting points or a graphical reinforcement, such as a chart or picture. In this way, PowerPoint helps you to divide information into chunks that audience members can more easily absorb.
FIGURE 1.5 Use PowerPoint to present your message in informative slides.
Later in the book, you will learn how to create the basic presentation structure and add information as well as use the following PowerPoint features to help reinforce your message:
- Layouts, Themes, and Masters: These PowerPoint features control the content that appears on a slide and how the content is arranged, as well as the appearance of all of the slides. You can quickly redesign a single slide or the entire presentation.
- Tables and Charts: Similar to Word and Excel, PowerPoint enables you to arrange information in an attractively formatted grid of rows and columns. PowerPoint works with Excel to deliver charted data, so the Excel charting skills you build make developing charts in PowerPoint even easier.
- Animations and Transitions: You can set up the text and other items on slides to make a special entrance, such as appearing to fly onto the screen, when you play them in a slide show. In addition to applying animations on objects, you can apply a transition that animates how the overall slide appears and disappears from the screen, such as dissolving or wiping in and away.
- Live Presentations: PowerPoint offers several different ways in which you can customize and control how the presentation looks when played as an on-screen slide show. In this book, you will learn tricks such as hiding slides or jumping between slides on-screen.
Outlook
As technology improves, businesses naturally begin to move at a faster and faster pace. The days of face-to-face conversations for each meeting are a thing of the past, and everyone faces the challenge of tracking more and more virtual meetings, contacts, and to-dos. The Microsoft Outlook 2013 program in the Microsoft Office suite can handle your e-mail messages (Figure 1.6), appointment scheduling, contact information, and your to-do list, as well as other various communication tasks. This program helps you stay in the loop, keeps you organized, and also keeps you up-to-date with all the action in your work life, including connecting you with social and business networks via the People app in Windows 8.
FIGURE 1.6 Send and receive e-mail messages in Microsoft Outlook.

In addition to learning Outlook e-mail, scheduling, contact management, and to-do list basics later in the book, you will learn which Outlook settings and tools help prevent messages with viruses from infecting your computer. Also, you’ll learn how Outlook can automatically manage annoying yet pervasive junk mail messages.
Taking Advantage of Other Office Applications
You may be a user whose needs extend beyond letter writing and number crunching. If you routinely take on special tasks such as creating printed publications or tracking extensive customer data, you may find yourself working with some of the other applications that are part of certain editions of Microsoft Office 2013. This section gives you a snapshot of those other applications; later chapters of the book revisit these topics.
Publisher
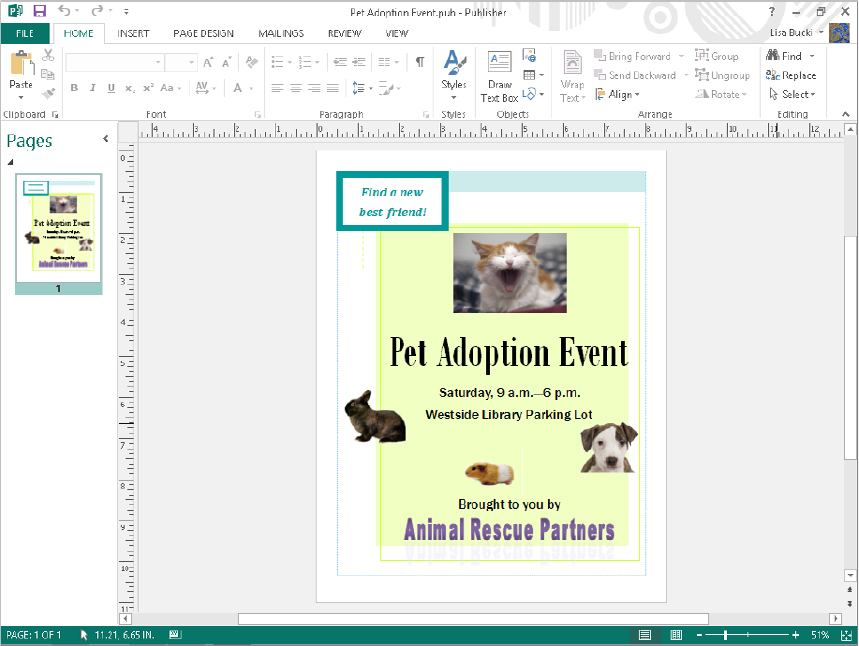
Microsoft Publisher 2013 enables you to create publications, which have a greater emphasis on design than a word processing program typically offers. To help the creative process, Publisher includes attractive publication designs and templates with placeholders for text and images, as well as other features, including decorative rules and backgrounds already in place, as shown in Figure 1.7.
FIGURE 1.7 Microsoft Publisher provides placeholders and design elements so that you can create eye-catching publications with minimal design effort.
A later chapter shows you how to handle Publisher’s basics of choosing a publication design and then adding the text and graphics. You’ll also learn how to add effects such as drop caps and design gallery objects, and even how to prepare a publication for professional printing.
Access
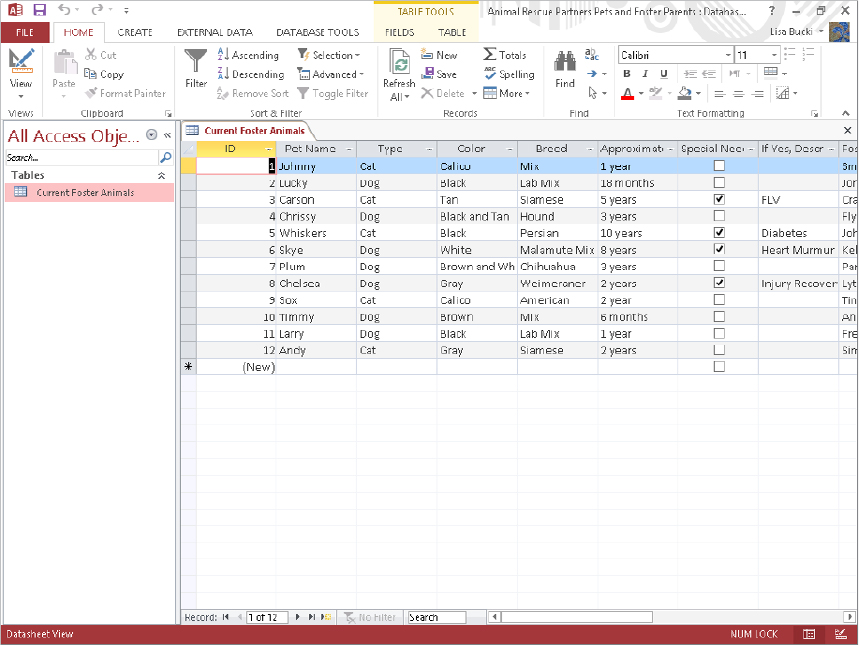
The Microsoft Access 2013 database program can certainly do heavy lifting when it comes to managing detailed mountains of data such as customer detail, stock inventory, and order lists that may have hundreds or thousands of entries. The file that holds such lists is called a database. Each Access database file actually can hold multiple lists of data, each usually stored in a separate table, such as the Current Foster Animals table shown in Figure 1.8.
FIGURE 1.8 A Microsoft Access database organizes lists of information in tables.
Access enables you to enter and view data using various forms. You also can set up queries to retrieve data that matches certain criteria out of your database tables. These queries can be used to generate reports that consolidate and analyze your data. Later chapters introduce you to these Access skills.
OneNote
It’s a risky proposition to track your professional or educational life via notes scribbled on various scraps of paper or notebook pages. As the notes pile up, it becomes harder and harder to find relevant information, making it look as though you can’t keep up. If you lose a scrap of paper containing a critical piece of information, you can put a project in jeopardy.
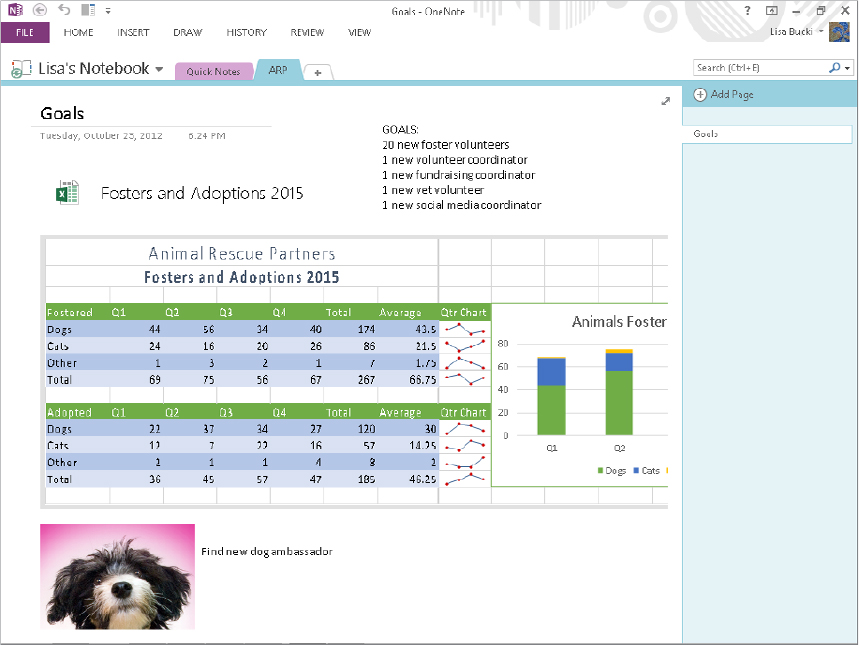
Microsoft OneNote 2013 as seen in Figure 1.9, serves as a type of electronic scrapbook for notes, reference materials, and files related to a particular activity or project. This way, when you need to find all the relevant material related to a specific topic or a particular project, you can flip right to the applicable notebook tab. You learn to get yourself together with OneNote in a later chapter.
FIGURE 1.9 Organize notes, files, pictures, and other material in a OneNote notebook.
Previewing New Features
If you’ve worked with previous versions of the Office applications, then the previous figures showing the applications covered in this book just gave you a clue to one overall change for Office. The tabs and other screen elements now sport a streamlined, 2-D appearance. This makes it easier to identify the tools you want to use and to focus on the content you’re creating. Some new features appear in nearly all of the applications, and from there, each application sports its own unique improvements. You’ll learn about key new features throughout the book.
A number of the applications feature a new Start screen that appears by default when you start the program. From this screen, you can select a theme or template, search for templates, or open one of your recently used files. This helps you get on task in the application more quickly.
Many of the improvements across applications streamline your ability to work with the look of a document or work with graphics. For example, both Word and PowerPoint now have a Design tab offering updated choices, such as Style Sets in Word and theme variants in PowerPoint. Microsoft freshened up the themes and specific formatting styles found on Design contextual tabs. You can use live layout and alignment guides to help align graphics and other objects in Word and PowerPoint. A number of the applications enable you to search for and insert online pictures, including ones from an extensive royalty-free clipart collection on Office.com, or even audio and video from online sources. And when you select many different types of objects, one or more buttons appear on the right; click that type of button to open a flyout with contextual formatting and other choices such as toggling settings for a selected item on and off. Figure 1.10 shows an example of this new style of pane, in this case for applying a new style or color to a selected chart in Excel. (You might see this new style of pane referred to as a Format Object task pane.)
FIGURE 1.10 New “flyouts” offer contextual formatting choices or toggles.
Office 2013 introduces new views in some applications, such as the new Read Mode in Word. This mode hides the Ribbon and other screen tools, so that you can see more of the document in the current view and flip through pages in a natural way. In Word’s Read Mode and PowerPoint’s Slide Show view, you can now zoom in on objects or parts of the slide. Both PowerPoint and Word now include a Resume Reading feature; when you reopen a document, you can go to the last slide or page you were working on by clicking the pop-up that appears.
The Office applications now help you work smoothly in the cloud. You can save directly to your online SkyDrive folder, or when you have SkyDrive for Windows also installed, you can save to a local SkyDrive folder that automatically syncs with your SkyDrive storage online in the cloud. This means you can sync files between devices. In addition, because you now sign into the Office applications with a user account, Office also can sync your settings across devices. Plus, you can install Apps for Office to add cloud-based capabilities and services within some Office applications, such as adding dictionaries to provide definitions in Word.
Beyond those positive new additions to Office 2013, you’ll find new features such as these spread among the applications:
- Word: PDF editing with the PDF Reflow feature enabling you to open PDF files directly in Word and enhanced comments with Simple Markup view
- Excel: Recommended Chart suggestions for charting, Quick Analysis suggestions for analyzing and presenting selected data, Flash Fill, new functions, ability to embed data in an online web page, and enhanced data labels and other tools for charts
- PowerPoint: Improved Presenter view, enhanced ways to share a presentation online, Merge Shapes tool, and enhanced comments
- Outlook: Integration with the Windows 8 People app, Weather Bar on the calendar
- OneNote: Enhanced cloud integration and syncing between devices and accounts
Starting an Application
When you launch any of the Office applications, that program and its respective tool set will be loaded into your computer’s RAM (working memory) so that you can begin working. Office 2013 only runs on the Windows 7 and Windows 8 operation systems. (It also runs on Windows Server 2008 R2 and Windows Server 2012, but this book limits coverage to using Office on the end user versions of Windows.) This book assumes that you’re using Windows 8 in its default configuration. If you’re using Windows 7, some actions won’t apply, and the text will point them out along the way. Because of the significant changes made to the user interface in Windows 8, the start-up method you’ll use will vary heavily depending on your operating system.
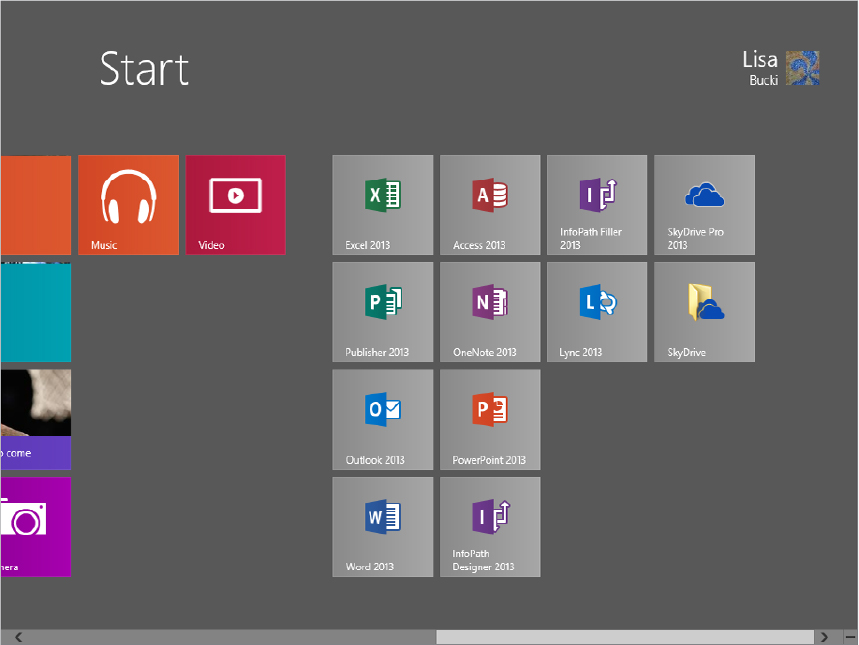
When you install Office 2013 in Windows 8, a tile for each Office program automatically appears on the Windows 8 Start screen, the screen that appears after you start your computer and sign in to your user account. The Start screen is the central location for accessing programs like Word and Windows 8 apps, and the fastest way to return to the Start screen at any time is to press the Windows logo key on the keyboard. You also can point to the lower-left corner of the Windows desktop — which retains much the same appearance in Windows 8 that it had in Windows 7 — until a Start tile appears, and then click it. Here’s how to start an Office 2013 program from the Windows 8 Start screen:
FIGURE 1.11 Tiles for the Office 2013 programs appear on the Start screen.
In Windows 8, you can sign on using two account types: a local account or a cloud-connected Microsoft account. (Microsoft accounts can be set up to work with your Outlook.com, Windows Live, G-mail account, or other e-mail account.) If you want to take full advantage of an Office application’s online, social, and collaboration features, sign on to Windows with a Microsoft account. Then, the first time you start an Office application, it will use your Microsoft account as your Word account, and you should enter that account’s information if prompted to activate the program. As described later in Chapter 39, “Collaborating in the Cloud with SkyDrive,” you also can sign in to your Office applications with your Office 365 sign-in information to access Office 365 features.
In Windows 7, you find and start the Office programs in the Start menu:
Closing an Application
When you finish your work in an application, shutting the application down removes it from system memory, freeing that memory for other uses. Closing the application also provides the benefit of closing any possibly sensitive open files to prevent unwanted viewing by others.
Some Office programs enable you to have multiple files open at any given time. You have to shut down all of the files to shut down the program itself. You can use one of three methods to shut down any files and the program:
- Press the Alt and F4 keys simultaneously (Alt+F4). Repeat for each open file in the application.
- Click the File tab in the upper-left corner of the program window; then click Close. Repeat for each open file in the application.
- Click the X in the upper-right corner, which denotes that you’d like to close the program. Repeat for each open file in the program.
If you see a message box similar to the one in Figure 1.12, it means that you haven’t saved all your changes to the file. Click Yes to save your changes.
FIGURE 1.12 A prompt appears to remind you to save file changes.
Finding Files
Searching through folders on a computer’s hard drive to try to find the file you want to work with sure can waste valuable time you often don’t have.
You can work in the Open dialog box for any Office program to search for a file. Use these steps when you’re already working in the application used to create the file:
FIGURE 1.13 You can search for a file in the Open dialog box for any Office application.

Getting Help
Program features sometimes can seem a little obscure, and because the interface has been heavily redesigned in the Microsoft Office 2013 applications, you may get stuck from time to time when you’re trying out a feature that you don’t use every day. If you don’t have this book handy, it’s time to turn to another resource — the Help system for the application that you’re using.
Browsing Help Contents
Regardless of whether you have an Internet connection, you can explore and browse the basic Help that is installed with each of the Office applications. With an Internet connection, you can also search Office.com, a repository containing further topics as well as more up-to-date information. To open the application’s Help window, click the round question mark button above your user name in the upper-right corner of the application window or press F1.
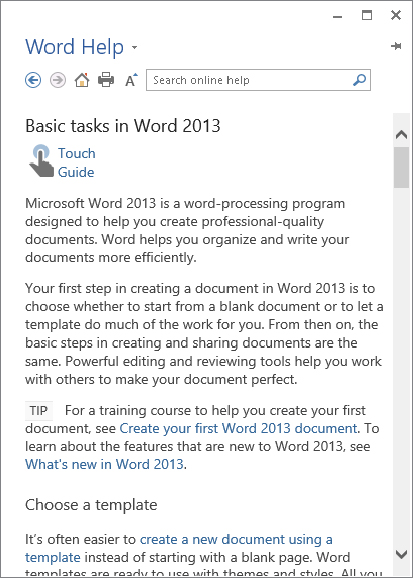
The Help window for the program appears and lists popular searches and a few general help categories under Getting started. (Clicking the More button to the right of this title launches your system’s web browser and displays an online support location you can search.) Click on a category such as Learn Word basics to view the Help information (see Figure 1.14). To move around to additional topics, click additional links. When you see the topic you need, you can click the Print button to print it.
FIGURE 1.14 Browse by clicking on categories, subcategories, and topics.
When you finish working in the Help window, click the window’s Close button to finish.
Searching Office.com
You can search for help about a particular topic or question using the Search online help text box near the top of the Help window. If your system is connected to the Internet, simply type the topic to search for into the text box and press Enter.
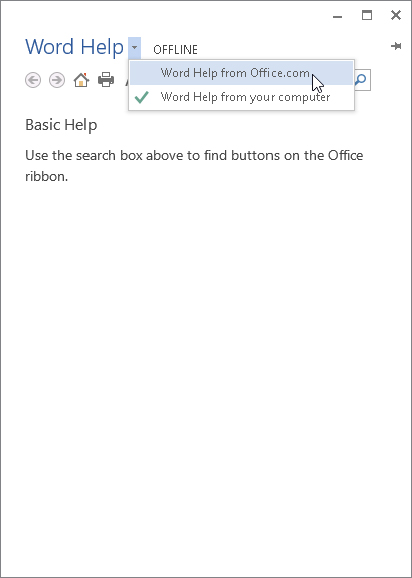
However, if you see OFFLINE displayed near the Help window title, you might need to double-check your connection to ensure you can search online Help. To go back online and search help:
FIGURE 1.15 You can request that Office go back online for Help.
Summary
This chapter introduced the programs that are part of the Microsoft Office 2013 system that will be covered in this book. You learned about core features in the Word (word processing), Excel (spreadsheet), PowerPoint (presentation graphics), and Outlook (e-mail scheduling and collaboration) programs. You also learned that you can perform more specialized business functions with Publisher (publication design), Access (database), and OneNote (information management). The chapter also previewed key new features throughout Office and within specific applications. In addition, you should now know how to:
- Start an Office application from Windows 7 or Windows 8.
- Close an Office application.
- Find a file from the Open dialog box.
- Use Help to find answers about applications.