Appendix A
Customizing Office
IN THIS APPENDIX
Finding program options
Using common options
Exploring top options from Word, Excel, PowerPoint, Access, and Outlook
Customizing the Ribbon and Quick Access Toolbar
Nearly every program has options that you can choose to customize the program to meet your working preferences. Each of the Office applications has numerous settings that you can tweak to adapt the program to your needs.
Finding Program Options
You can adjust Office program settings such as how often the program saves AutoRecover information, where to save files by default, how certain elements look onscreen, and on and on. Each of the Office programs offers dozens of settings for changing program appearance and behavior.
Opening the Options Dialog Box
Each Office application gathers its settings in an Options dialog box. The method for opening the Options dialog box is now the same across the Office applications:
FIGURE A.1 Click Options near the bottom-left corner in Backstage view to choose options.

Navigating in the Dialog Box
The left side of the Options dialog box lists the categories of available settings. Figure A.2 shows the Word Options dialog box. To display the options in another category, click the category in the list at the left. For example, clicking Save, as shown in Figure A.2, will display Word’s saving options.
FIGURE A.2 The left side of the Options dialog box lists categories of options.
Using Common Options
All the Office applications have some options in common. For example, each of the programs enables you to control how ScreenTips appear and what color scheme to use. The common options are found in the General category in the Options dialog box for each program. Here’s a review of these common options:
- Show Mini Toolbar on selection: This check box controls whether the Mini Toolbar appears when you select text (with the exception of Access).
- Enable Live Preview: When this option is selected, pointing to a style, font, or other formatting choice in a gallery displays a preview of that formatting on the selected object.
- Office Background: Select a tattoo or pattern to appear at the top of the Office window, behind the title and Ribbon tabs. Choosing No Background results in a white background.
- Office Theme: Select the White, Light Gray, or Dark Gray color scheme from this drop-down list.
- ScreenTip style: Select a setting from this list to change the display style of ScreenTips or to turn them off altogether.
- User name and Initials: Enter information in these text boxes to personalize an application and enable it to identify you as the author of your files. (There is no Initials choice in Excel.)
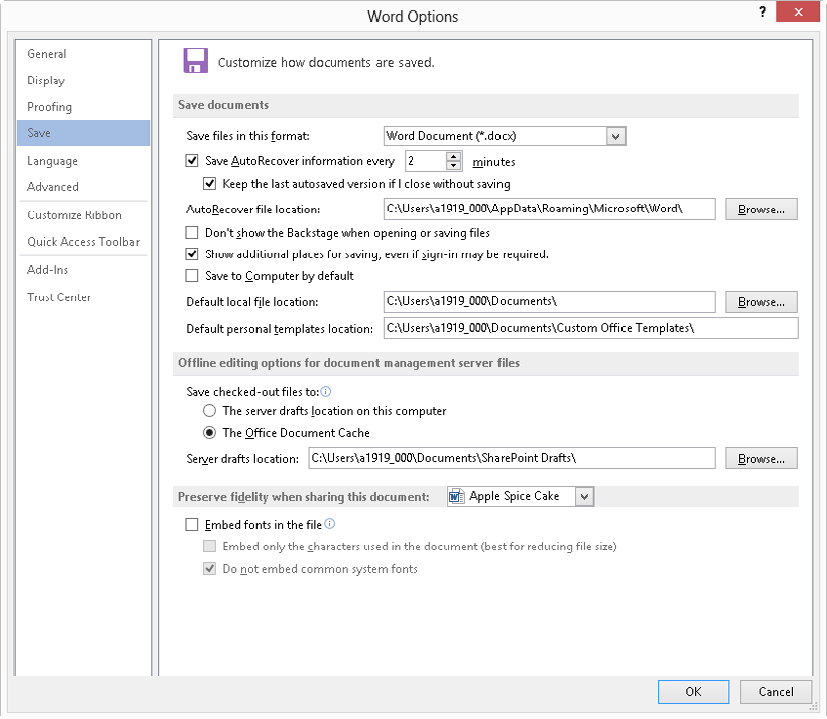
Each of the applications offers options for setting up default saving settings. In Word, Excel, PowerPoint, and Publisher, you click the Save tab at the left side of the Options dialog box to find the saving choices; in Access, the options appear in the General category. Saving options include:
- Save files in this format: Choose the default file format to apply to newly saved files from this drop-down list. (This is called Default File Format in Access and is not an option in Publisher.)
- Save AutoRecover information every x minutes: Change this value to specify how often AutoRecover should save file recovery information. (This is not available in Access.)
- AutoRecover file location: Specify the folder in which AutoRecover should store file recovering information. (This is not available in Publisher or Access.)
- Default local file location: Specifies the folder that is selected by default when you display the Save As or Open dialog boxes. This is sometimes referred to as your default folder or working folder. (This is called Default Database Folder in Access and is not found in Publisher.)
Note that the Save category for each application has additional choices that are specific to that application.
Some of the applications also include a Language category, where you can choose the default language used for display, editing, and help.
Top Word Options
Word’s other options include settings that affect a document’s appearance onscreen and when printed, how the proofing tools work, and how certain editing features behave. Here’s a review of some of the most important features, identified by Options dialog box tab (category):
- Display: Clicking this tab displays the settings shown in Figure A.3. The settings in the Always show these formatting marks on the screen section turn on marks that typically don’t print, such as Tab character marks. If you need to check the formatting in your document, selecting the Show all formatting marks option to check its check box will display those marks so that you can eliminate such errors as double spaces. The settings in the Printing options section are also helpful. For example, if you are printing a document with a color printer, you may want to check the Print background colors and images choice to make sure that those decorative items print.
FIGURE A.3 Word’s Display options.

- Proofing: The settings in this category of the Word Options dialog box let you set up how the AutoCorrect, Spelling Check, and Grammar Check features work. Clicking the Auto-Correct Options button here opens a dialog box in which you can change AutoCorrect and AutoFormat settings. The choices under When correcting spelling in Microsoft Office programs enable you to turn certain corrections on and off; for example, clearing the Ignore words in UPPERCASE check box tells the Spelling Check feature to include words in all uppercase as possible misspellings. Under When correcting spelling and grammar in Word, the Check spelling as you type and Mark grammar errors as you type options control whether you see the wavy underlines under words that may be misspelled and grammar that may be incorrect.
- Advanced: Among the plethora of options here, you’re likely to use those in the Editing Options; Cut, Copy, and Paste; and Print categories most often. The choices under Editing options enable you to turn editing features on and off. For example, if you don’t like the drag-and-drop feature, you can clear the Allow text to be dragged and dropped check box. Under Cut, Copy, and Paste, many of the choices enable you to control whether pasted text keeps its formatting by default. You also can check or clear the Show Paste Options Buttons check box to turn that feature on or off. The Print category offers settings for controlling a printout, such as Use draft quality and Print pages in reverse order.
Top Excel Options
Not surprisingly, many of Excel’s options have to do with calculations, but there are also other options for proofing and editing. These are other Excel options you may need to know, by category:
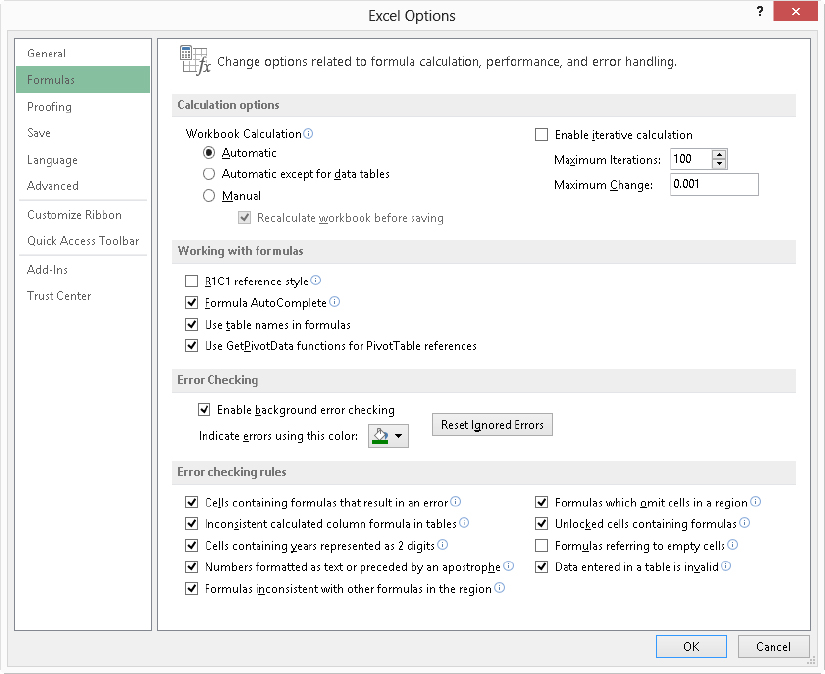
- Formulas: The section names in this category (see Figure A.4) do a good job of identifying the purpose of the options in this category. If you have a large worksheet that recalculates slowly, you can click the Manual option button under Workbook Calculation in the Calculation options section and then press F9 to recalculate the sheet manually when needed. Under Working with formulas, you can turn Formula AutoComplete on and off. The Error Checking and Error checking rules sections offer numerous settings for turning formula error checking on and off as well as identifying which errors Excel should flag.
FIGURE A.4 Excel Formula options.
- Proofing: The choices that appear in this category are a subset of those that appear in Word. You can control AutoCorrect Options and use the settings under When correcting spelling in Microsoft Office programs choices to fine-tune spell checking.
- Advanced: This category also includes Editing options for Excel, but they are different from those for Word. For example, with After pressing Enter, move selection selected, you can use the Direction drop-down list to specify which direction the cell selector will move. You can check the Enable automatic percent entry check box so that values you type with a percentage sign will be recognized as percentages, and you can also click Enable AutoComplete for cell values. The two sections of Display options settings are also important to many users. For example, you can clear the Show row and column headers check box if you want to hide the row numbers and column letters in a finished workbook. You can select Show page breaks if it’s important for you to see page breaks onscreen, and you can control the appearance of gridlines using the Show gridlines and Gridline color options.
Top PowerPoint Options
PowerPoint offers additional options in the Proofing and Advanced categories. It includes many of the same Proofing options as in Word, such as the ability to ignore certain corrections and turn automatic spell checking on and off. Its Advanced category (Figure A.5) starts off with editing and pasting options. The most important settings appear in the Slide Show category, where you can choose Show menu on right mouse click, Show popup toolbar, Prompt to keep ink annotations when exiting, and End with black slide.
FIGURE A.5 PowerPoint Advanced options

Top Access Options
Access’s Options dialog box offers options to help you work more effectively with your databases, in these categories:
- Current Database: This tab (Figure A.6) offers settings for customizing the current database file, including entering an Application Title and selecting an Application Icon. You can choose a Display Form, set up Navigation options, and choose Ribbon and Toolbar Options for the finished database, among other choices.
FIGURE A.6 Access Current Database options

- Datasheet: This category offers formatting settings for any datasheet in Access. You can change settings for Gridlines and cell effects, and change the Default font settings.
- Object Designers: This tab offers choices for controlling appearance and behavior when you’re using Table Design and Query Design views, as well as the design views for Forms/Reports. For example, you can choose a Default field type and Default text field size for the Table Design view, or choose whether to Show table names in Query Design view. This tab also has settings for controlling Error Checking.
- Proofing: As in the other applications, the settings here adjust AutoCorrect and Spelling Check.
- Client Settings: This tab offers various settings for editing in tables, such as whether pressing an arrow key moves to the next field or to the next character. You can specify margins for printing or turn on such features as Open last used database when Access starts under Advanced.
Top Outlook Options
When you select File ⇒ Options in Outlook, Outlook’s Options dialog box appears. It offers a General category with most of the same settings found in Word and other applications, as well as these key categories:
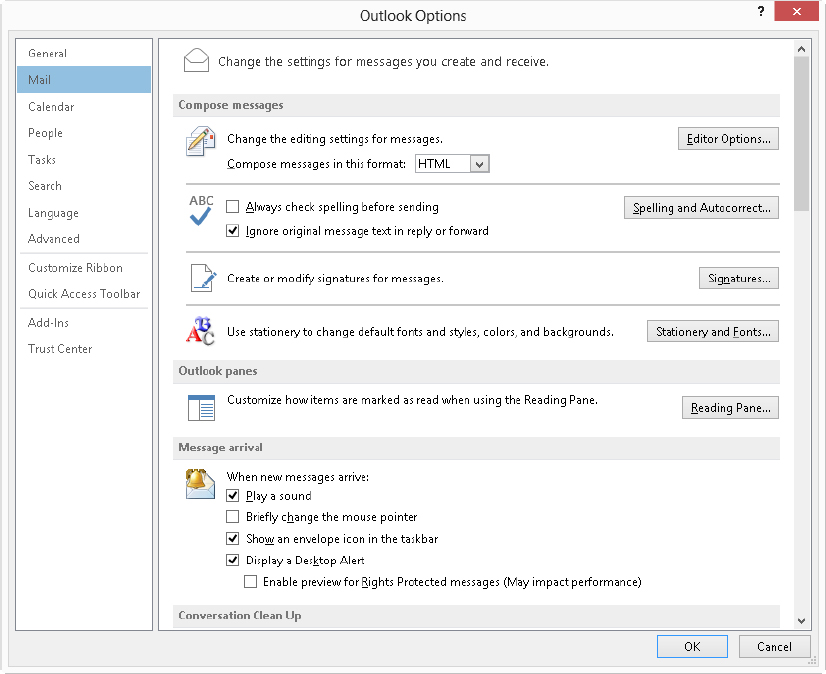
- Mail: This tab, shown in Figure A.7, enables you adjust a wide variety of mail settings, including turning on automatic spell checking with Always check spelling before sending. You can set up Signatures or choose Stationery and Fonts, control the Conversations feature’s behavior, change desktop alert settings, and a lot more. Scroll down to see the wide variety of settings this category includes.
FIGURE A.7 Outlook Options dialog box offers settings for all its major tools.
- Calendar: Choose a variety of Calendar defaults, such as the Start time and End time for work hours, adding holidays to the calendar, a Default calendar color, and more.
- People: Use this category to adjust Contacts settings such as Default “Full Name” order, Default “File As” order, and whether to Check for duplicates when saving new contacts.
- Tasks: Set up Tasks features such as Overdue task color and Completed task color here.
- Search: Use these categories to optimize search functionality.
- Advanced: This category enables you to customize the panes in Outlook. You can choose start and exit settings, AutoArchive settings, send and receive settings, and much more.
Customizing the Quick Access Toolbar
Even though certain commands you may have relied on in older menu-based versions of Office do not appear on the Ribbon in the current version of the applications, some of those commands remain available as buttons that you can add to the Quick Access Toolbar (QAT) above the File tab. You can find and add those “missing” buttons and others to the QAT using the Options dialog box, as follows:
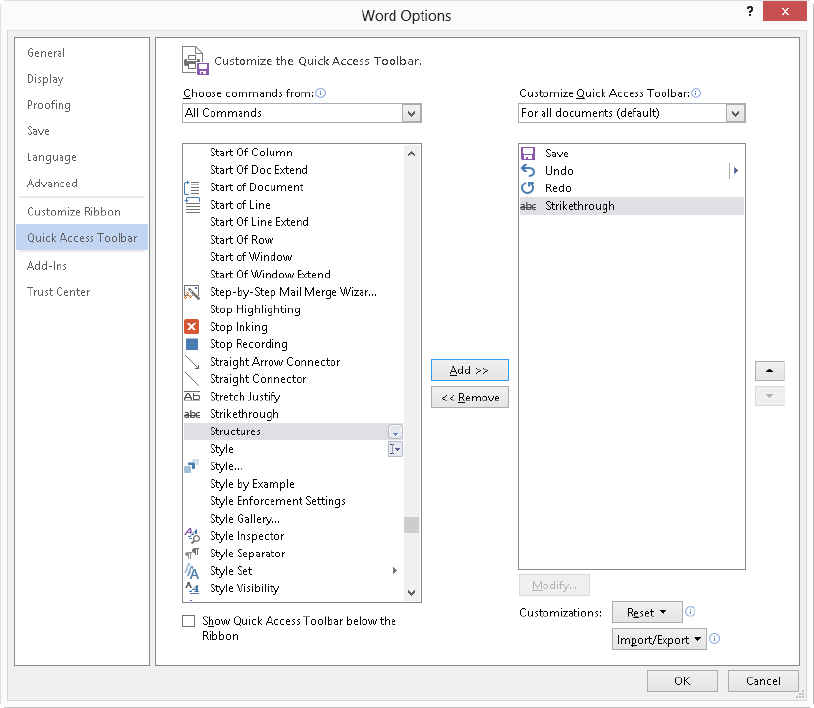
FIGURE A.8 Use the Quick Access Toolbar category of the Options dialog box to add QAT buttons.
Customizing the Ribbon
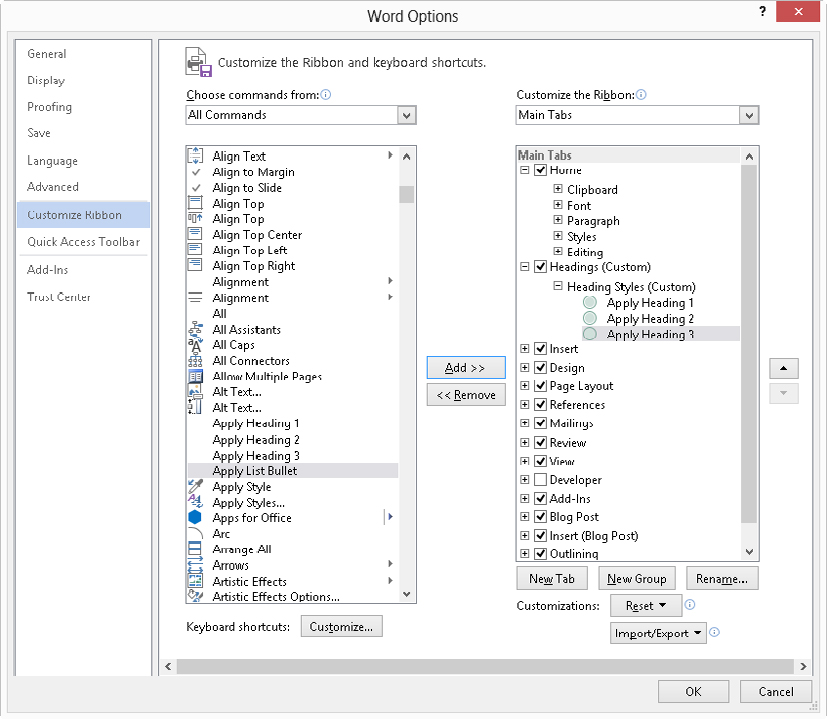
Office 2013 now includes the ability to customize the Ribbon, a feature that will be welcomed by anyone who prefers to have frequently used commands all in one location. While you cannot add commands to any of the default Ribbon tabs, you can create a custom tab and fill it with the commands you need. Use the Options dialog box to customize the Ribbon, as follows:
FIGURE A.9 Create a custom Ribbon tab.