Chapter 39
Collaborating in the Cloud with SkyDrive
IN THIS CHAPTER
Learning the difference between SkyDrive and SkyDrive Pro
Saving to your SkyDrive and sharing files
Working with SkyDrive Pro
Using SkyDrive Pro with Office 365
Office 2013 includes features that integrate it into the cloud more than ever before, and this chapter serves as your roadmap for navigating them. The Microsoft account that you use to sign into Windows 8 and to Office applications includes free SkyDrive storage. You store files in your SkyDrive and share them from there directly, using the Save or Save As command on the File tab. If needed, you also can install client software to integrate SkyDrive with your Windows desktop file storage. Most versions of Office 2013 also include the SkyDrive Pro application. SkyDrive Pro works with a separate cloud-based service called Office 365 as well as SharePoint. It enables you to sync files from your online library to a local folder, as you’ll learn near the conclusion of the chapter.
Understanding SkyDrive Pro and SkyDrive for Windows
SkyDrive is cloud-based service that offers you online storage and an online workspace. You automatically receive a SkyDrive account when you create a Microsoft account to sign into Windows 8 or Office 2013. Your free SkyDrive account includes 7 GB of free online storage space, accessed through your Microsoft account sign-in information. You can upgrade your SkyDrive account for a fee to include even more storage. But once your account is established you can share files and folders and use SkyDrive as your personal gateway for sharing files and folders.
Most versions of Office 2013 include an application called SkyDrive Pro. SkyDrive Pro does not work with the SkyDrive account associated with your Microsoft account, but instead works with your library on your organization’s Office 365 site (as well as SharePoint and SharePoint online sites, but this book focuses on Office 365). Office 365 is a more team-oriented type of cloud-based sharing and requires a subscription. This is discussed further in the “Accessing Your SkyDrive Pro Library on Office 365” section later in this chapter.
You need to understand that SkyDrive syncing and SkyDrive Pro syncing are two distinct things. SkyDrive syncing uses the SkyDrive for Windows application. It sets up a copy of the cloud-based SkyDrive folders associated with your Microsoft account on your computer’s hard disk, and keeps files synced between those local folders and your online SkyDrive. SkyDrive Pro syncing, in contrast, uses the SkyDrive Pro 2013 application included with some versions of Office, and syncs the online library associated with your Office 365 account with a location you specify on your computer’s hard disk. You’ll learn about each type of syncing later in the chapter.
Saving to the Cloud with SkyDrive
You can save to your SkyDrive storage directly from most Office 2013 applications. (Access and Outlook 2013 do not let you save to your SkyDrive, and OneNote 2013 notebooks sync to your SkyDrive using a different process as is covered in Chapter 38.) As long as you are signed into Office using the Microsoft account that has the same sign-in settings as the SkyDrive account that you want to use (some users have multiple accounts that include SkyDrive) you want to save to, the process should work seamlessly. If you have separate SkyDrive accounts for personal and work purposes, or if you are using a system where a colleague or family member is signed in, you could inadvertently upload sensitive files to the wrong account. In such instances you’ll need to be a little more careful about saving your files.
The rest of this section covers the two SkyDrive operations you can perform within applicable Office applications: saving to your SkyDrive, and saving and sharing a file.
Saving
Saving to your SkyDrive is as easy as saving to your system’s hard disk. SkyDrive has three top-level folders by default: Documents, Pictures, and Public. By default, the Documents and Pictures folders are not shared, but the Public folder is. So it’s a good policy to save any file that you want to share with other users to the Public folder. Once you get comfortable working with your SkyDrive online, you’ll learn how to create other folders and share them. Follow these steps to save a file to your SkyDrive:
FIGURE 39.1 Choose your SkyDrive after clicking Save As.
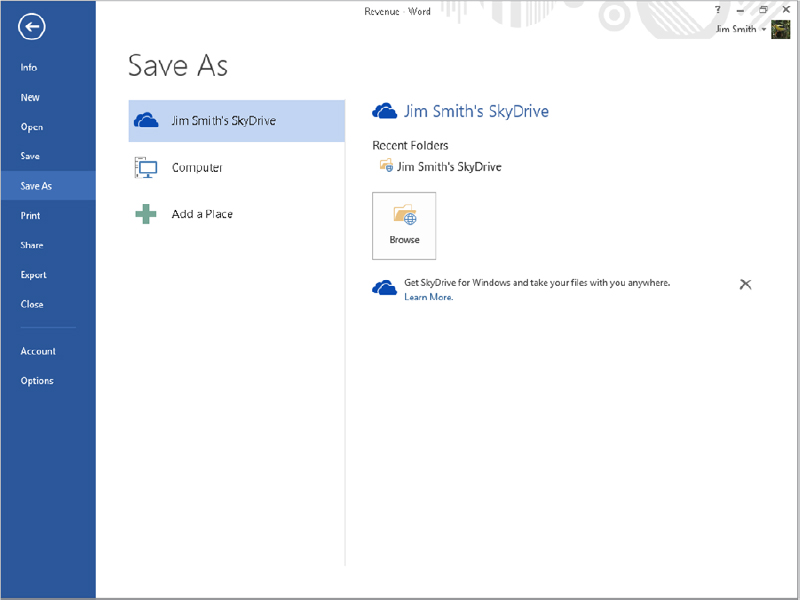
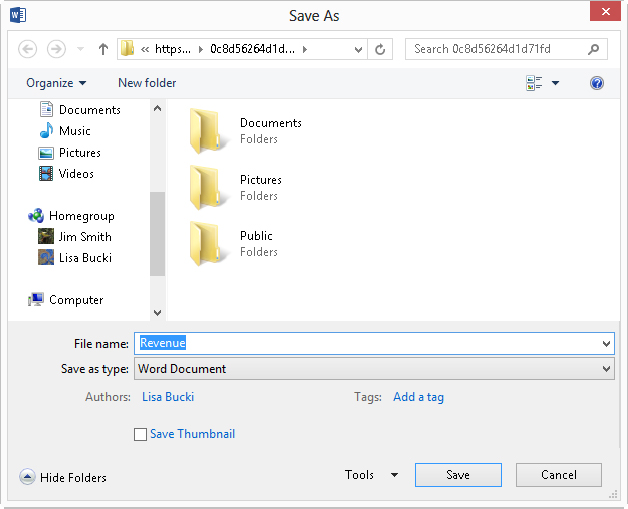
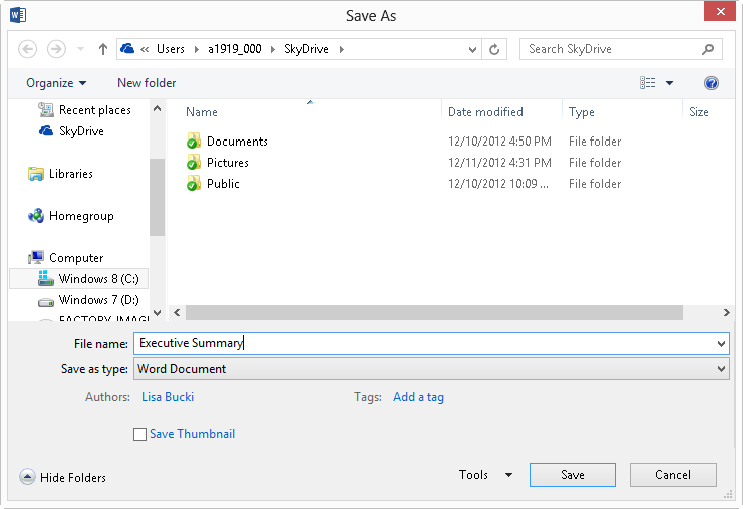
FIGURE 39.2 Specify a save location as you would for any file, and then click Save.
Saving and sharing
When you share a file stored on your SkyDrive with other users, the process sends an email message with a link they can follow to see and download the file from your SkyDrive via a web browser. The process works differently depending on whether you’ve saved the file to your SkyDrive during the current work session in the Office application you’re using.
If you’ve just saved the file to your SkyDrive using the preceding steps, follow these steps to share:
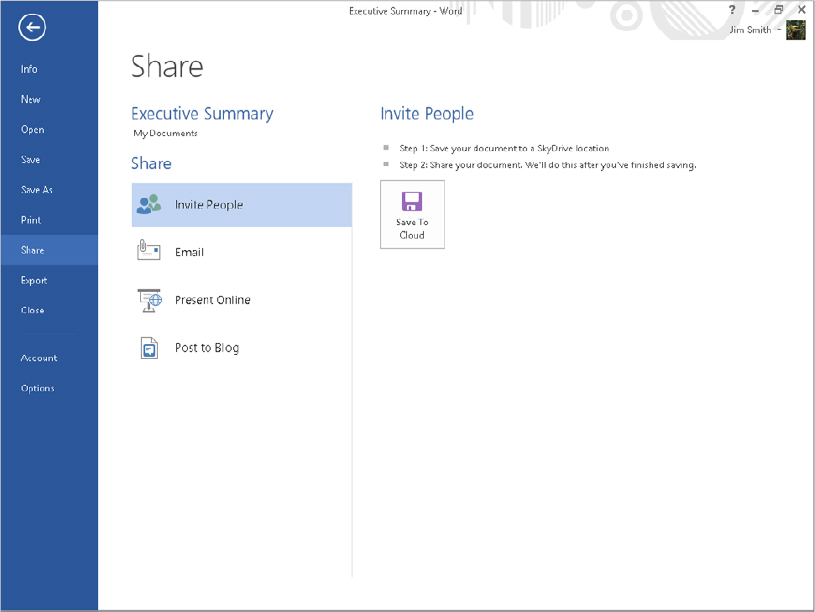
FIGURE 39.3 Sharing a file via SkyDrive

If you haven’t just saved a file to your SkyDrive and choose File ⇒ Share ⇒ Invite People, you’ll see the Save To Cloud button shown in Figure 39.4. Click it, and then follow the prompts that appear (which resemble the previously described processes to save and then share the file).
FIGURE 39.4 If you try to share a file before saving to your SkyDrive, the Save To Cloud button appears.
SkyDrive for Windows Application versus SkyDrive in Office
Using SkyDrive as described in the previous section has a limitation. The files you upload to SkyDrive exist independently of the copies on your hard disk. For example, if you or another user with whom you’ve shared a Word file (with Can edit enabled) makes changes to a file via Word Web App on your online SkyDrive, you may need to sync the files manually. As shown in Figure 39.5, the Save button on the QAT changes to include a refresh indicator. (If you want to be able to compare the changes that were made online to the local copy of the file, make a copy of the local file and rename the copy. Then, when you refresh the shared file with the changes from the SkyDrive version, you can use the Compare Documents feature to compare the two files. See the section called “Comparing Documents” in Chapter 11.)
FIGURE 39.5 Save a shared document from the QAT to update it with all user changes.

Microsoft has created another way to take your SkyDrive file syncing to a more secure and flexible level: the SkyDrive for Windows client application. And even limiting it to SkyDrive “for Windows” is not strictly accurate. You also can download a SkyDrive app for computers running the Mac OS X Lion operating system and mobile SkyDrive apps for Windows Phone, iOS, and Android. The various client apps will keep your files synced between your SkyDrive and any computer or mobile phone device where the app is installed. This means you have access to the latest version of your files from any device at any time.
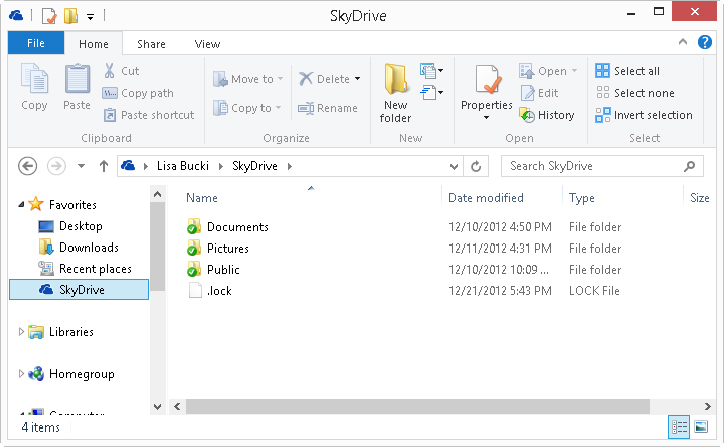
Some versions of Windows 8 are now shipping with SkyDrive for Windows already installed. If you are running Office 2013 on Windows 7 or for some reason don’t have it in Windows 8, you can install it. You can verify whether you have SkyDrive for Windows by opening a folder window from the desktop. As shown in Figure 39.6, expand the Favorites in the Navigation pane at the left and see if SkyDrive is listed. If it is, the SkyDrive client is installed and you can see the local copies of your SkyDrive folders and files.
FIGURE 39.6 When SkyDrive for Windows is installed, it appears under Favorites in File Explorer (Windows 8) or Windows Explorer (Windows 7).
To download the SkyDrive desktop client (or to learn about and find the versions for the other platforms noted here), go to http://windows.microsoft.com/en-US/skydrive/download and click the Download button. You can then double-click the downloaded file to install it. The rest of this section assumes you have the client installed and are read to work with it.
Saving and viewing your files
Even with the SkyDrive client installed, the process for saving an Office file to your SkyDrive is the same as described earlier. The only difference is that when you click Browse, the Save As dialog box displays your local SkyDrive folders (see Figure 39.7), versus the virtual location shown earlier (see Figure 39.2). When you save to one of the online SkyDrive folders, the Office application again contacts the SkyDrive server and saves the file there, but it also saves a copy to the corresponding local SkyDrive subfolder.
FIGURE 39.7 Your local SkyDrive client folders are part of your user personal folders.
To view the files in a local SkyDrive folder, click SkyDrive under Favorites, and then double-click folders as needed to navigate to the desired location in the window. The files appear as in any folder window. Once you’ve navigated to a file, you can share it via the local SkyDrive folder. To share, right-click the file, point to SkyDrive, and click Share, as shown in Figure 39.8. After you do so, your SkyDrive opens in your web browser. Even though your SkyDrive and the file will appear, click Sign in to continue the sharing process. At that point, the screen shown in Figure 39.9 appears, so you can address and send an e-mail message sharing the file. Enter the desired recipient e-mail addresses and a message and click Share.
FIGURE 39.8 You also can share a file from your local SkyDrive client folder.

FIGURE 39.9 Finishing the share online on your SkyDrive

Syncing your files
You also can copy files and paste them into the local SkyDrive client folders via Windows by copying and pasting. The local SkyDrive folders should automatically sync with the SkyDrive folders in a matter of minutes. In Figure 39.10, the bottom file, Long Report, was copied within Windows. As shown by the check mark on its file icon, it has been automatically synced to the online SkyDrive. Assuming you are logged into Windows with the Microsoft account that corresponds to your SkyDrive, the syncing should occur automatically.
FIGURE 39.10 The Long Report file was copied to the local SkyDrive subfolder in Windows; the check on the file icon shows that it has synced automatically with the online SkyDrive.

Viewing and working with SkyDrive files online
SkyDrive initially offered convenience because you could access your files via any web browser and Internet connection. That holds true—the integration with the Office 2013 applications just adds another level of convenience. You can access your SkyDrive folders via the web at any time.
There is one detail to be aware of at this point. Microsoft is in the process of rebranding a number of its online services. Previously its hotmail.com domain provided e-mail and file support. Then Microsoft moved on to the Windows Live branding, so you could sign on for services at home.live.com, and it added skydrive.live.com from there. The new branding is Outlook.com. Right now, there is legacy support for all of these. So if you go to hotmail.com, home.live.com, skydrive.live.com, or outlook.com and sign in, you should be taken to the main e-mail screen for Outlook.com.
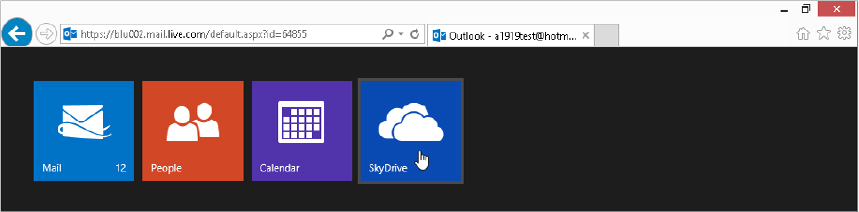
After you sign in to your account, whatever its branding, click the down arrow icon to the right of Outlook at the upper right to display the choices shown in Figure 39.11 (the down arrow itself is not visible at this point), and then click SkyDrive. The Files section at the center displays the folders in your SkyDrive. Double-click the tile for a folder to display its files.
FIGURE 39.11 At the main Outlook.com screen, click the arrow beside Outlook, and then click SkyDrive.
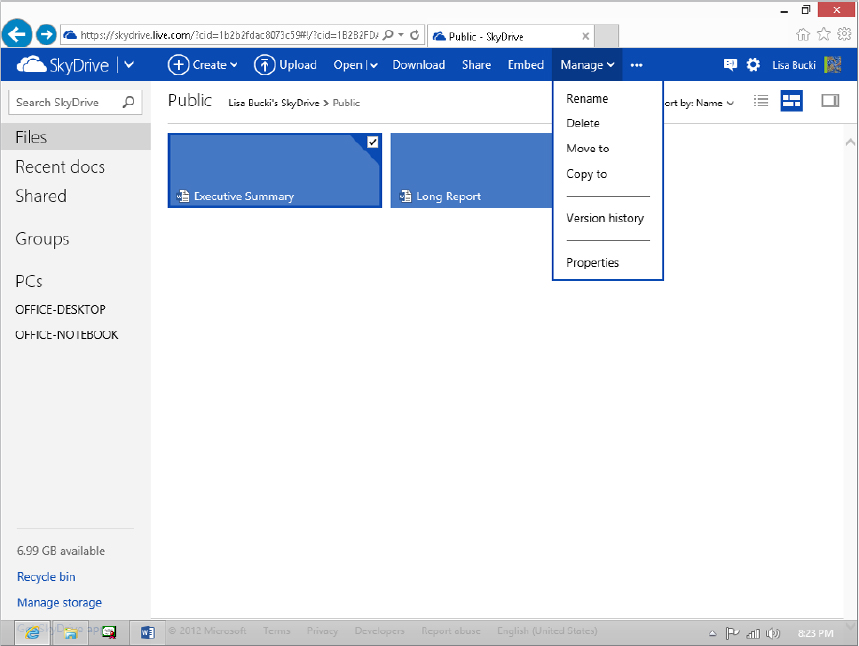
To work with a particular file, move the mouse pointer over its tile until you see a check box in the upper-right corner, and then click to check it. Commands for working with the file appear above the file tiles, as shown in Figure 39.12. For example, you could click Download to download the checked file, or click the Manage down arrow (also shown in Figure 39.12) to see additional choices for working with the selected file. Follow the prompts that appear to perform the desired action on the file.
FIGURE 39.12 Managing a file in your SkyDrive
Touching up a document in the Web App
Your SkyDrive account also includes access to the Office Web Apps. These cloud-based versions of the Word, Excel, PowerPoint, and OneNote Office applications aren’t fully featured, but they do allow you or your collaborators to make some of the most important types of edits—changes to the text—online without even needing to have Office installed. Here’s how:
FIGURE 39.13 Choose to edit a document stored in your SkyDrive using a Web App.
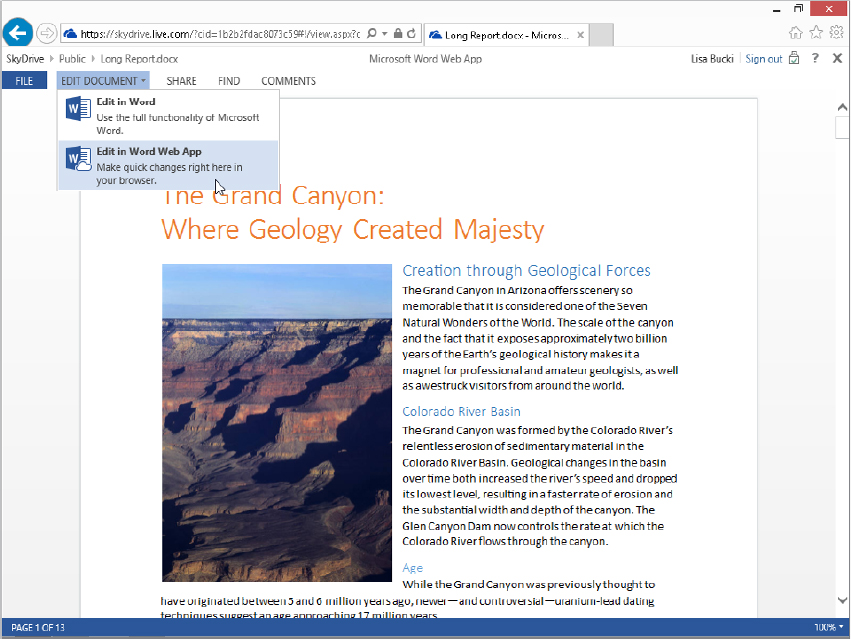
FIGURE 39.14 The Web App Ribbon choices are a subset of the choices found in the full-blown version of the Office application.

Accessing Your SkyDrive Pro Library on Office 365
Office 365 is a completely separate animal from SkyDrive. Office 365 is a licensed service that provides a platform for team members in an organization to access e-mail, share files, and more. The Office 365 file sharing capability is based on the SharePoint platform, an enterprise collaboration platform.
Office 2013 can interface directly with an Office 365 SharePoint-based team storage site, assuming the user is signed in to Office using the same sign-in information as for his or her Office 365 account. In addition, most Office versions include a SkyDrive Pro client by default. This client is specifically created to sync files between a file library on Office 365 and a local folder on your computer.
This final section of the chapter gives you an introduction to SkyDrive Pro and how it works with your Office 365 sign-in. To have an Office 365 sign-in, the administrator of an Office 365 account must add you as a user and provide your account sign-in information. If your Office 365 administrator has not added a private domain for the Office 365 setup, the sign-in e-mail addressed to you might be a variation of the onmicrosoft.com domain, as in mycompany.onmicrosoft.com.
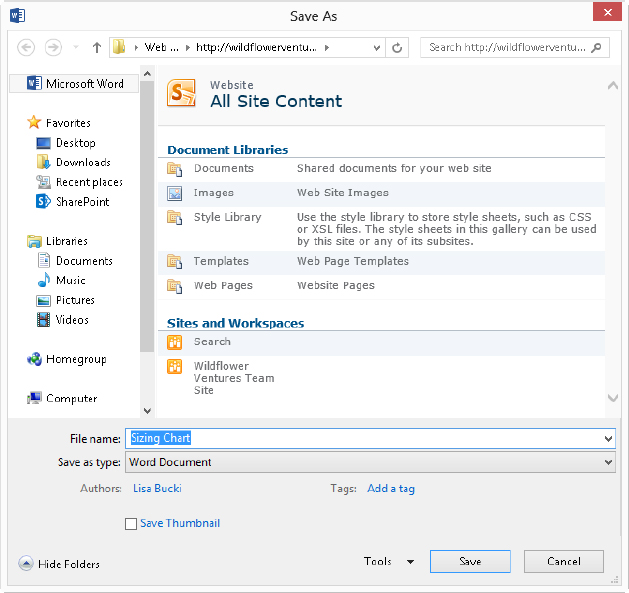
Saving
Saving a file to your Office 365 account so that you can sync it via SkyDrive Pro in the future works much like saving to your SkyDrive:
FIGURE 39.15 Saving to an Office 365 location

FIGURE 39.16 Save locations on an Office 365 team site
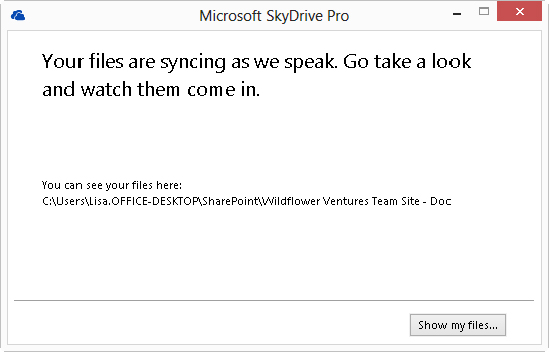
Changing the sync folder, syncing files, and viewing local files
As you and other users view and edit your files via Office 365, you can use SkyDrive Pro 2013 to sync the files to a local folder and view the files. You can even change the local folder that you want to sync to. Here’s the overview of how to accomplish all of that:
FIGURE 39.17 Use SkyDrive Pro to sync with Office 365 cloud storage.
Summary
In this chapter you’ve seen how Office integrates with cloud storage via SkyDrive and Office 365. You’ve learned that SkyDrive offers 7 GB of free online storage, when you sign in with your Microsoft account information, and that Office 365 is a separate team-based environment for sharing information in the cloud. You should now be able to do the following:
- Save a document to your SkyDrive from Office applications that allow you to do so (Word, Excel, PowerPoint, and Publisher).
- Use an Office application to share a document from your SkyDrive.
- Use the SkyDrive for Windows client to manage and sync files between your system and the cloud from your desktop.
- Understand the difference between Office 365 and SkyDrive.
- Use SkyDrive Pro to sync files from your Office 365 library to a local folder.