Chapter 38
Keeping Information at Hand with OneNote
IN THIS CHAPTER
Introducing OneNote
Learning how OneNote is organized
Adding notebooks, sections, and pages
Creating notes
Inserting Outlook tasks
Inserting pictures, files, or screen clips
Writing notes rather than typing
Saving and browsing your notebook
Working with notes in the cloud
One of the challenges in managing any project is how to bring together all the information so that it’s at your fingertips. This typically includes making notes, tracking tasks, creating data files, looking at Web information, and handling other activities in different programs. Storing all the files or having many open program windows onscreen has never been a satisfactory way to manage your project’s information. Microsoft OneNote 2013 provides that elusive solution, enabling you to bring together notes and other types of information in an accessible way. If you’re ready to see how you can be better organized and more effective at anything you do, read this chapter and learn how to use OneNote.
Who Needs OneNote and Why
OneNote is designed to function as a digital three-ring binder. With a three-ring binder, you can add and rearrange pages, write on pages, paste clipped articles on a page, or even punch holes in a magazine or report page to add it to the binder. You also can add plastic sleeves that expand the notebook’s versatility, enabling you to include non-paper materials in the notebook.
OneNote brings the same type of versatility to tracking all sorts of digital information in a centralized location. You can add a variety of information to a OneNote notebook — notes, Outlook tasks, pictures, files, screen clips, audio or video recordings, details about a meeting, information copied from a web page, and much more. But, the best part is that you can see and use all the information at the same time — you don’t have to open multiple files and arrange multiple windows.
These capabilities make OneNote a perfect tool for managing information related to specific projects or clients, research or study subjects, or topical areas of interest. Although OneNote’s versatility can make it useful to anyone, users in the following types of situations will find OneNote an especially valuable tool:
- If you attend many meetings that generate ideas and action items, OneNote can be perfect for tracking these. Because OneNote enables you to organize information quickly and flexibly, you can easily add the notes and tasks you need. You also can jump right to the information you need as a meeting discussion changes.
- If you often handle research projects in which you bring together information from a variety of sources, OneNote provides a great central storage location for statistics, citations, and useful documents.
- If you like to brainstorm or capture ideas about a topic over time, OneNote helps you keep the information together so that the big picture comes together. You can even capture your ideas as an audio recording so that you’re not slowed down by your typing skills.
- If you’re a student and need to keep together notes and information for each class, OneNote enables you to collect all the notes and schedule information that you need to stay prepared.
- If you need to use your notes on multiple computers or share them with other users, OneNote enables you to place a notebook on a shared network location or even a USB thumb drive. In this way, OneNote gives you the opportunity to take your work with you or keep others involved.
Touring OneNote
OneNote divides information into notebooks, sections, and pages. You can start OneNote by clicking its tile on the Windows 8 Start screen or by using the Windows 7 Start menu (Start ⇒ All Programs ⇒ Microsoft Office ⇒ OneNote 2013). If you don’t see OneNote on the Windows 8 Start screen, you can use the Search charm to find the program’s startup tile and then click it. When you store a notebook on your computer’s hard disk, each notebook is set up as a separate subfolder within the My DocumentsOneNote Notebooks folder within your Windows 7 or 8 user folder. The notebooks folder appears as the OneNote Notebooks folder within the Documents library.
Each section you add to a notebook appears as a file within the folder for the specific notebook, and that file stores the information for the pages in the section.
In the OneNote window, this arrangement translates to a Click to view other notebooks button at upper left, which shows the current notebook name; click it and then click on a listed notebook to change to that notebook and display its sections, as seen in Figure 38.1. Tabs for the sections within the selected notebook appear above the page area. Clicking a section tab selects that section, displaying page tabs for the pages in the section at the right. Click on a page tab to display the contents of that page. OneNote also includes a Ribbon with tabs and choices, just as in the other Office applications.
FIGURE 38.1 Clicking selects a notebook, section, or page.

As Figure 38.1 also shows, by default, the first time you launch OneNote, the new notebook that you create includes a section named Quick Notes with descriptive instructions to help you get started. Scroll down the OneNote: one place for all of your notes page to read the useful information it offers. As shown in Figure 38.1, the first instruction on the page even prompts you to practice by writing or typing your name. The page also includes a variety of links to brief videos to help you learn more about using OneNote.
OneNote also now incorporates the Ribbon. The Ribbon is collapsed by default, as shown in Figure 38.1. To display it, double-click any Ribbon tab. Double-click a tab to re-collapse the Ribbon. The rest of the figures in this chapter will display the Ribbon uncollapsed so that you can see its tools and choices.
If you want to close any open notebook, click the Click to view other notebooks button, right-click the notebook name, and then click Close This Notebook. To close the current notebook, just click its name at upper left and click Close This Notebook. You can reopen a notebook at any time by choosing File ⇒ Open, selecting a location from the Open from other locations list, clicking Browse, and navigating to and selecting the notebook folder in the Open Notebook dialog box, and then clicking Open.
Creating a Notebook
You can create a notebook for any project, client, subject, research topic, or purpose that you want. Because each notebook represents a folder, you can create as many notebooks as your system has storage to handle. Follow these steps to create a new notebook in OneNote:
FIGURE 38.2 The Backstage view prompts you to name the new notebook.

The new notebook will have a single section called New Section 1 that contains a single blank page called Untitled Page.
Creating a Section
Each new section in a notebook works much like a tabbed divider added into a three-ring binder. The section sets off the pages within and provides a label for them. If you create a notebook for client information, for example, you might create a new section for each client. If you create a notebook for school studies, you might create a section for each class during the current semester.
To add a new section to a notebook:
FIGURE 38.3 Type a name to replace the placeholder in the new section’s tab.
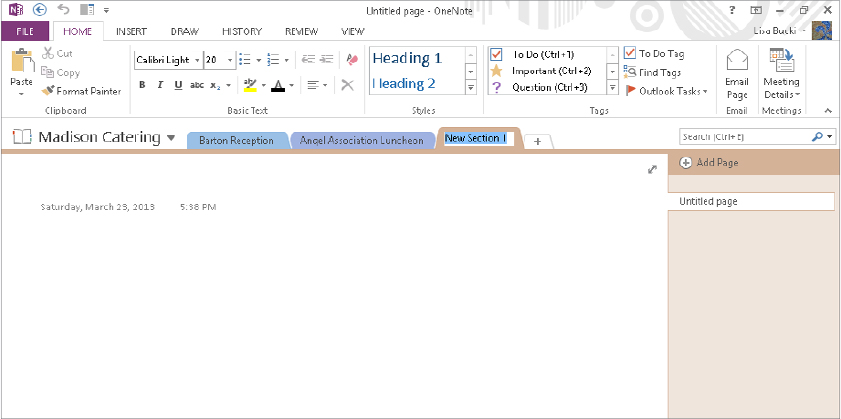
Creating a Page
Each new section you create includes, by default, a new, blank page called Untitled page. You can add pages as needed to further organize the information in a notebook. For example, within a section for a client, you could have a page for each project you’re handling for that client. Within a section for a class, you could have a page for each assignment, report, or exam. Because you can switch between pages simply by clicking a page tab, dividing your notes into more pages actually saves time because you can jump to the information you need by clicking a tab rather than having to scroll around in a lengthy document.
Use these steps to add a page:
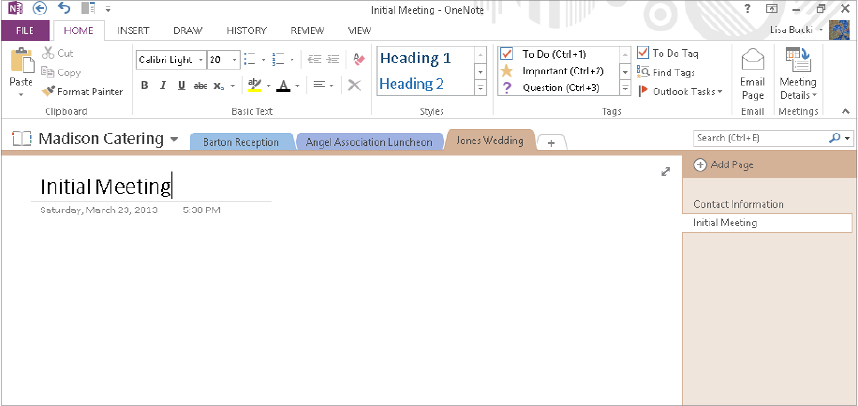
FIGURE 38.4 The page name appears on the Page tab and as a page title.
You also can use a template to create a page. There are dozens of templates for special purposes from taking lecture notes to keeping meeting notes, to creating a planner, to simply applying a nice design to a page. Choose Insert ⇒ Pages ⇒ Page Templates ⇒ Page Templates. A Templates task pane appears. Click on the triangle beside any category to select it, and then click on a template. OneNote instantly inserts a page using that template design. You also can click Templates on Office.com in the page to search for a template online. Click the pane’s Close (X) button to close it when you’ve finished.
Inserting Notes
Each new page you add to a notebook section is ready to go as a blank slate for your notes, doodles, tasks, and more. Adding notes to a notebook may be the feature you use the most. This section explains how OneNote trumps sticky notes in helping you capture key thoughts.
Plain notes
You can add a note anywhere on a page in OneNote. You’re not bound by the tradition of starting at the top and working down to the bottom. Just click anywhere on the page, type the note text (see Figure 38.5), and click outside the note when you’ve finished. You can press Enter as needed within a note, and pressing Tab after you enter at least one character of text creates table cells within the note. You also can click back on the note to place the insertion point within it to make changes to the note at any time.
FIGURE 38.5 Click and type a note anywhere on a page.
Tagged notes
Tagging a note assigns a category and icon to the note, such as the To Do tag, Important tag, Question tag, Phone number tag, or Idea tag. The tag icon appears beside the note so that you can determine what kind of information a note contains just by scanning the page. You also can view tagged notes by group, as described later in this chapter.
First click in the note to tag. On the Home tab of the Ribbon, click the More button for the Tag This Note gallery in the Tags group, and then click the tag to apply from the drop-down list. You can assign a tag when you create a note or at any later time. To assign the tag when you create the note, click in the page to position the insertion point where you want the note to appear, click the More button in the Tags group, and then click the desired tag type in the menu. A note container with the tag icon appears. Type your note text, and then click outside the boundaries to finish.
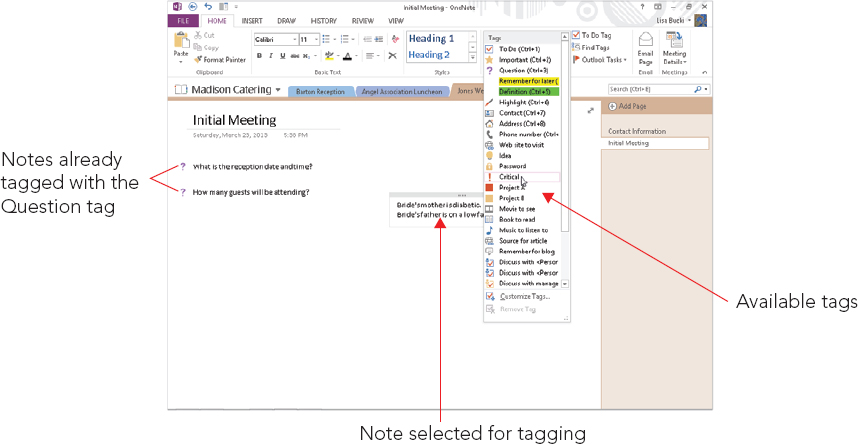
To assign a tag to an existing note, click the note to display its note container. Then click More on the Tag This Note gallery in the Tags group of the Home tab, and click the tag type in the drop-down list shown in Figure 38.6. (The Remove Tag command at the bottom removes a previously applied tag.) Then click outside the note.
FIGURE 38.6 Tagging a note identifies the type of information the note contains.
Extra writing space
Even though you certainly can make room for more information by creating a new page in a section, you also have the option of extending the space available in a page so that it can accommodate more notes or larger items. To add more writing space, click the Insert tab of the Ribbon, and click the Insert Space button in the Insert group. Drag down the page until the down-arrow pointer changes from a single arrow to a layered arrow. Then click on the page. OneNote adds more space on the page. If you scroll back up without adding anything to the new space, the extra space disappears.
Formatting information
If you refer to Figure 38.6, you can see that the Home tab of the Ribbon includes a Basic Text group with a variety of formatting settings. These settings work just as they do in Word. You can drag over text within a note container and then apply formatting to only the selected text via the Mini Toolbar that pops up or the Home tab. Or, you can click the note container title bar to select all of the note text, and then apply the desired formatting.
One other formatting change you can make is to change the section tab color. Right-click on the tab, point to the Section Color choice, and click on the desired color.
Inserting an Outlook Task
Talk about keeping you on track! Any Outlook task you add on a OneNote page automatically appears in your To-Do list in Outlook. If you, like many people, have ever failed to follow through on an action item because you didn’t copy it from your meeting notes to your calendar, this feature alone will make you more productive. The Outlook tools do not appear on the Home tab of the Ribbon until you configure a profile in Outlook.
To add an Outlook Task into the notebook:
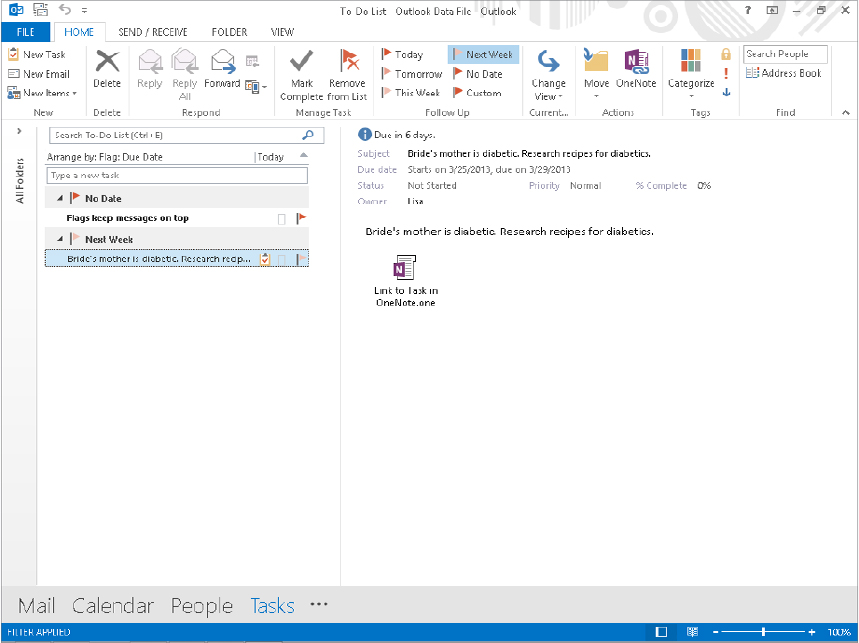
As shown in Figure 38.7, when you select the task in your Outlook To-Do list, Outlook identifies it as a task linked to OneNote. The two applications synchronize the task information. Marking the task as complete in Outlook, for example, identifies it as complete in OneNote, dimming the task flag for that note.
FIGURE 38.7 The selected task was created in OneNote and remains synchronized to the notebook.
Inserting a Picture or File
If the contents you want to capture already exist in a file outside OneNote, you can insert the information. Inserting information works much the same as opening a file: You give a command, navigate to the folder holding the file to insert, and select and insert the file.
When you insert a picture, the image appears on the OneNote page, where you can move or resize it as desired. You might insert a picture that shows a look or idea that you’re after, or that you want to use to illustrate some other document at a later time. (You can copy-and-paste the picture from OneNote.)
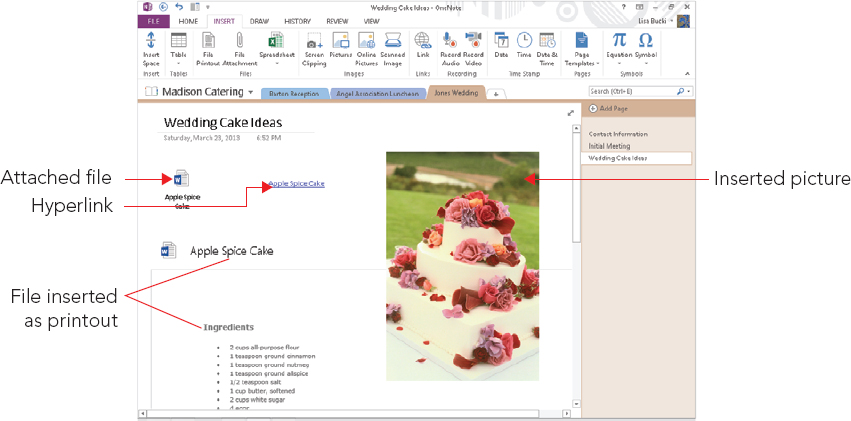
There are two different ways in which you can insert a file. A regular insert operation displays a hyperlinked icon for the file on the page. Double-clicking the icon opens the file in its home application. Or, to display the file’s contents on the OneNote page, insert the file as a printout. In that case, a special OneNote print driver outputs a version of the file’s contents that displays on the page along with an icon for the file and a hyperlink to the original document.
To insert a picture, file, or printout, use these steps:
- Pictures in the Images group: Opens the Insert Picture dialog box so that you can select the picture to insert.
- Online Pictures in the Images group. Opens the Insert Pictures window, so you can use Office.com Clip Art or Bing Image Search to find an image, or insert a picture file from your SkyDrive.
- Attach File in the Files group: Opens the Choose a File or Set of Files to Insert dialog box so that you can select one or more files to insert.
- File Printout in the Files group: Opens the Choose Document to Insert dialog box so that you can choose the file to “print” and display.
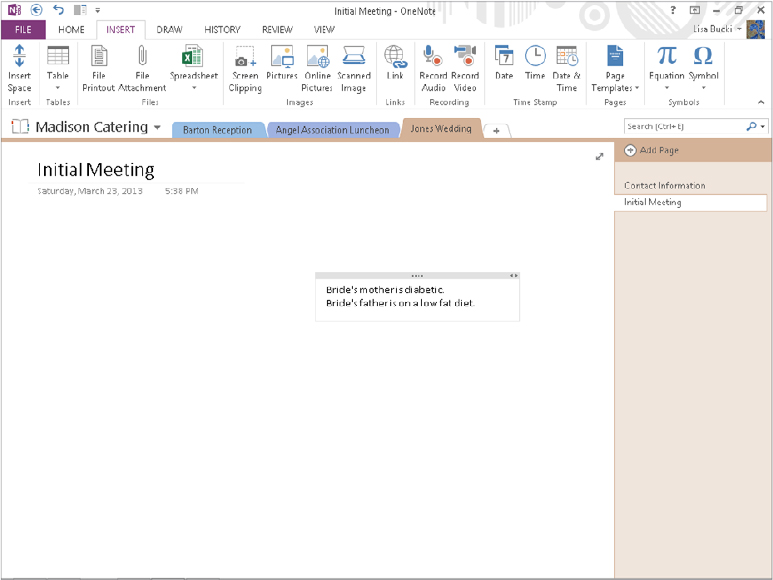
FIGURE 38.8 This page holds an icon for an inserted file, an inserted picture, and a “printout” of a file.
Inserting a Screen Clipping
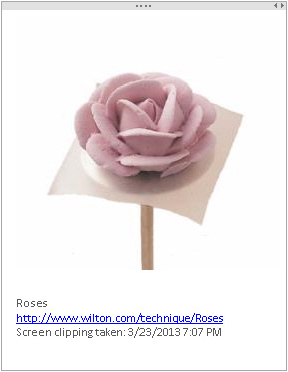
Adding a screen clipping to OneNote literally enables you to take a picture of something on your computer screen and place it on a OneNote page. You might use this feature to capture information that appears onscreen during a Webcast or shared online work session. Or you can capture information from a web page, such as grabbing the headline and lead photo from a news site so that you remember where you saw the information. When you take a screen clipping from a web page, OneNote also inserts a hyperlink to the web page.
Here’s how to create a screen clip in OneNote:
FIGURE 38.9 The screen clip appears as a new note.
Writing on a Page
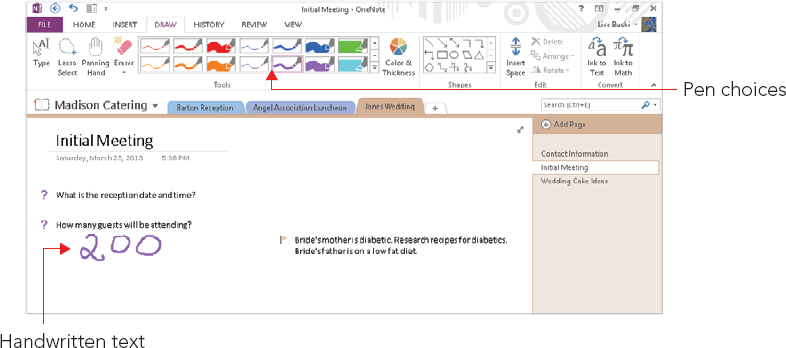
If you have a Tablet PC or a pen input device attached to your computer, you can choose a pen and then use the stylus to create a handwritten note, also called ink, like this:
FIGURE 38.10 Create handwritten notes on a Tablet PC or pen input device.
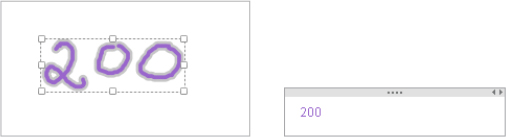
If you want to convert the handwritten note to text, move the mouse over the note so that the note container appears. Click (or tap) the top edge of the note container to select all the note contents. Then choose Draw ⇒ Convert ⇒ Ink to Text. Figure 38.11 shows a selected note container with some handwriting and the same note with the ink converted to text. Converting the note to text in this way makes it easier to edit later, if needed.
FIGURE 38.11 You can select a handwritten note and convert it to text.
Using Linked Note Taking
OneNote 2010 enables you to dock it to the side of the desktop so that you can work with other applications but still have access to OneNote. This makes it easier to take notes from other documents and the Internet. To dock or undock One Note, click the Dock to Desktop button on OneNote’s Quick Access Toolbar (QAT). To redisplay the toolbar while OneNote is docked, click the bar with three dots along the top of the OneNote pane. You can then click Dock to Desktop again to undock OneNote.
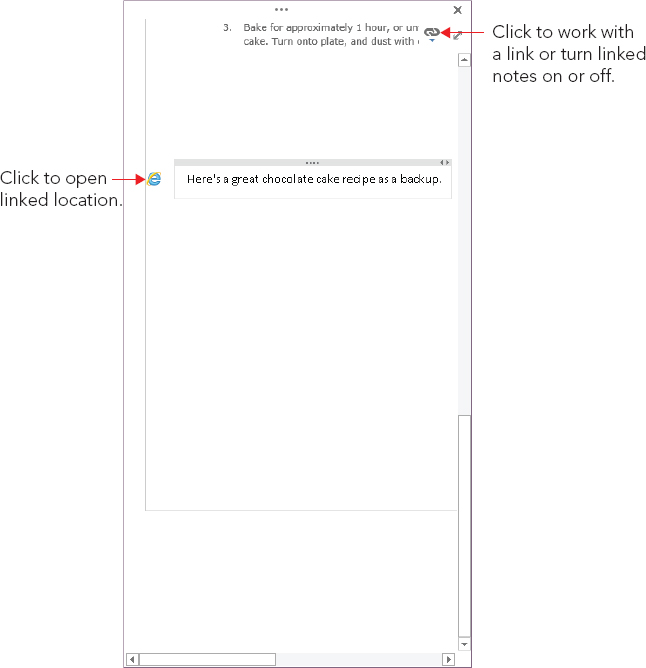
When you dock OneNote, by default it enters a new mode called Linked Note Taking. When you add a note on any page while viewing a particular web page or location in a document such as a particular slide in a PowerPoint presentation, OneNote automatically creates a hyperlink back to the content you were viewing. As shown in Figure 38.12, an icon for the hyperlink appears beside the note container. Moving the mouse pointer over it displays information about the source, and clicking it redisplays the linked location.
FIGURE 38.12 Working with hyperlinked notes
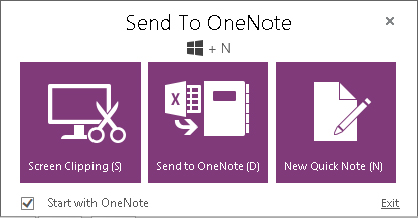
Using Send To OneNote
Another way to insert content into OneNote is to use the Send To OneNote feature, which has been enhanced in OneNote 2013. This feature starts automatically when you start OneNote and appears as a button on the taskbar. If it doesn’t appear there, you can click View ⇒ Window ⇒ Send to OneNote Tool to display it. The tool works somewhat differently depending on what you’re grabbing, so here are the overview steps:
FIGURE 38.13 Using Send To OneNote
Organizing, Finding, and Sharing
Just as you can rearrange, change, and view pages in a three-ring binder, your OneNote notes remain flexible so that you can update, change, rearrange, and use them exactly as you need to. You can search for notes or even publish them for use by others. This section in the chapter explains how you can get the most out of all the content that you pile in to your OneNote notebooks.
Reorganizing
You can tackle any of a number of tasks to reorganize and rearrange information on a page, between sections, and between notebooks. These are the most common actions you will use to keep your notebook information up-to-date:
- Rename a Section: Right-click on the section tab, click Rename, type the new name, and press Enter.
- Rename a Page: Click in the title box at the top of the page and make the desired changes. The new name appears in the page tab, as well.
- Move a Note on a Page: Click the note, move the mouse pointer over the bar at the top of the note container until the four-headed arrow appears, and then drag. To move an icon, drag it. To move a picture or inserted file printout, place the mouse pointer over the picture or printout and click the select button that appears; then, drag the picture.
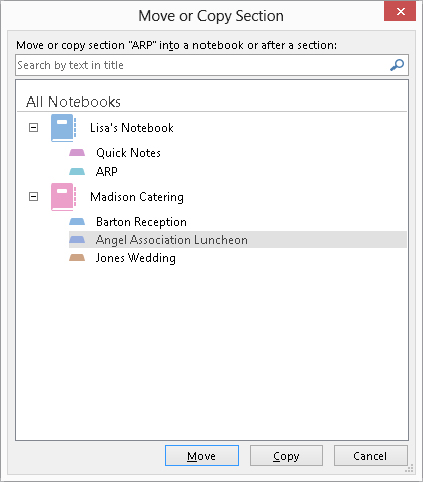
- Move a section to another notebook: Right-click on the section tab and click Move or Copy. In the Move or Copy Section dialog box that appears (Figure 38.14), click on the notebook into which you want to move the section, and then click the Move button.
FIGURE 38.14 You can move a section into another notebook.
- Move a section within the notebook. Drag the section tab left or right until the black triangle appears in the desired destination, and then release the mouse button.
- Move or copy a page to another section: Right-click on the page tab, and then click Move or Copy. Select the desired section in the Move or Copy Pages dialog box that appears (it resembles the Move or Copy Section dialog box in Figure 38.14), click the section into which you want to move or copy the page, and then click the Move or Copy button.
- Move a page within its own section: Drag the page tab until the black triangle appears at the desired destination location, and then release the mouse button.
- Delete a note or other item from the page: Move the mouse pointer over the item or note container, and then click the select button that appears. Press Delete.
- Delete a page or section: Right-click on the page or section tab, and then click Delete.
Viewing tagged notes
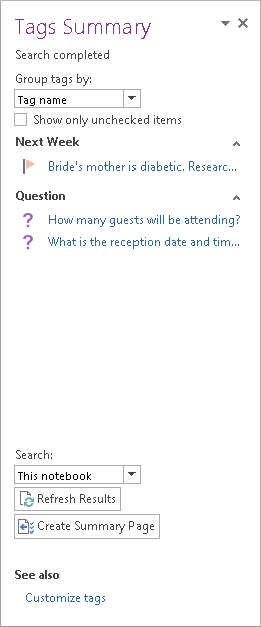
Taking the time to tag notes pays off when you need to view key note information later. OneNote can display a Tags Summary pane (Figure 38.15), which displays the tagged notes from all your open notebooks. To open the Tags Summary pane, click Find Tags in the Tags group of the Home tab. To change how the pane lists the notes, open the Group tags by drop-down list at the top of the task pane, and then click the desired grouping: Tag Name, Section, Title, Date, or Note Text. You can even add a new page listing the tagged notes to the current notebook by clicking the Create Summary Page button at the bottom of the pane. Click the pane’s Close (X) button when you finish viewing the tagged notes.
FIGURE 38.15 Viewing tagged notes can help you find key information stored in your notebooks.
Searching notes
When you want to find a particular note, type a search word or phrase into the Search text box above the page tabs, and then press Enter. The Search feature highlights every item on the page that holds matching text. The search results also highlight the tab for every page that holds the matching text; click page tabs or the arrows in the Search textbox area to view additional matches. To close the search, click the X button at the right end of the Search text box to clear the search.
Saving note information for others
You can use the Export command to convert the current page, section, or notebook to another file format to share the information with others who need the information but don’t necessarily need to have access to your OneNote notebook. You can select one of several formats: Single File Web Page (viewable with a Web browser), OneNote 2010-2013 Section or OneNote 2007 Section, Word Document (for Word 2013, 2010 and 2007 users), Word 97-2003 Document (for users of an older Word version), as well as the PDF and XPS formats.
Use this process to save information from the notebook in another file format:
FIGURE 38.16 Saving notebook content in another format enables other users to view your notes.

Working with Notes in the Cloud
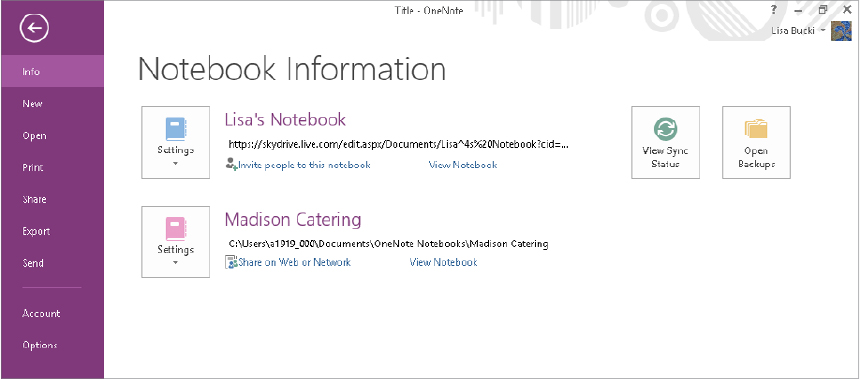
If you saved a notebook to your SkyDrive as noted earlier in the chapter, you can choose File ⇒ Info to see commands for working with it, as shown in Figure 38.17. You can click Invite people to this notebook, enter the e-mail addresses of people you want to share with, add message text, and then click Share to share the notebook. If you click the Settings button beside the online notebook, you can click the Sync choice in the menu that appears to sync local changes and changes by sharers to the online copies.
FIGURE 38.17 You can sync, invite, and view an online notebook on the Info Page.
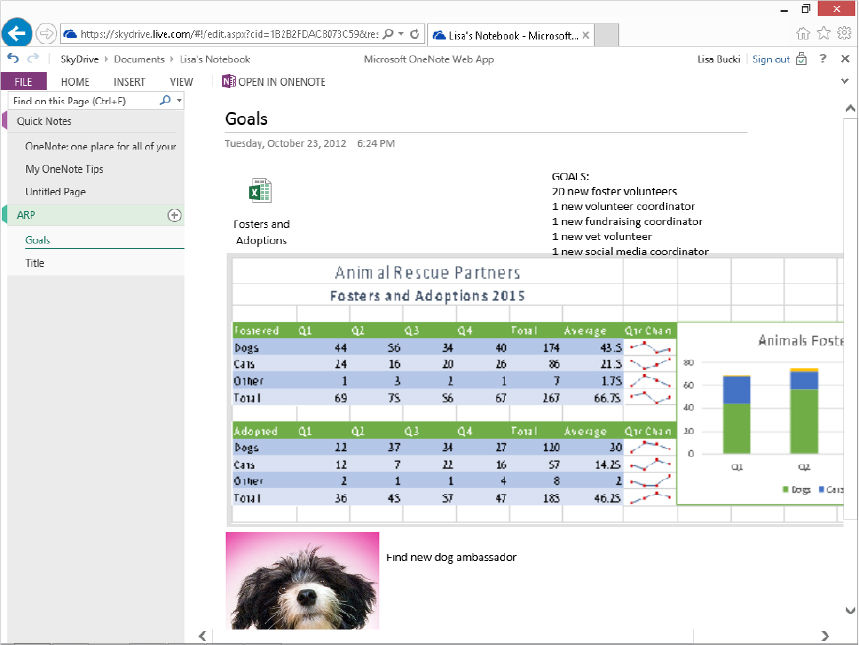
To view the notebook online, go to skydrive.live.com, sign in to your SkyDrive account, click the tile for the folder holding the notebook (usually Documents by default), and then click the tile for the notebook. The notebook opens in the OneNote Web App, as shown in the example in Figure 38.18. It offers a more limited number of tools than the full version of OneNote, but does enable you to keep up with your notes when you’re away from your main working location.
FIGURE 38.18 Viewing and working with a notebook on SkyDrive
Summary
You’re now well on your way to getting your life organized with Microsoft OneNote. This chapter explained the benefits of using OneNote and how OneNote organizes information. You should now be comfortable with:
- Creating a notebook, sections, and pages to arrange information in the way that suits your needs.
- Adding notes and tasks on a page, as well as how to insert a file, picture, or screen clipping and how to write on a page.
- Creating linked notes when OneNote is docked.
- Reorganizing and updating content.
- Saving information for others.
- Working with your notes in the cloud.