2. Navigating Your Xbox One’s Dashboard and Settings
In this chapter, you learn how to navigate your Xbox One console and become familiar with its Dashboard and settings.
→ Navigating the Dashboard with Your Controller
→ Understanding the Dashboard Content
→ Understanding Kinect Controls
→ Breaking Down the Settings Screen
→ Changing the Console Settings
→ Managing Other People and Guest Settings
To fully enjoy your Xbox One’s rich gaming and multimedia capabilities, you need to become familiar with its Dashboard and settings and learn how to navigate your console. Xbox One enables you to control the system, its Dashboard, and the devices to which it’s connected by using the controller, motion, or voice controls through Kinect, or a combination of these.
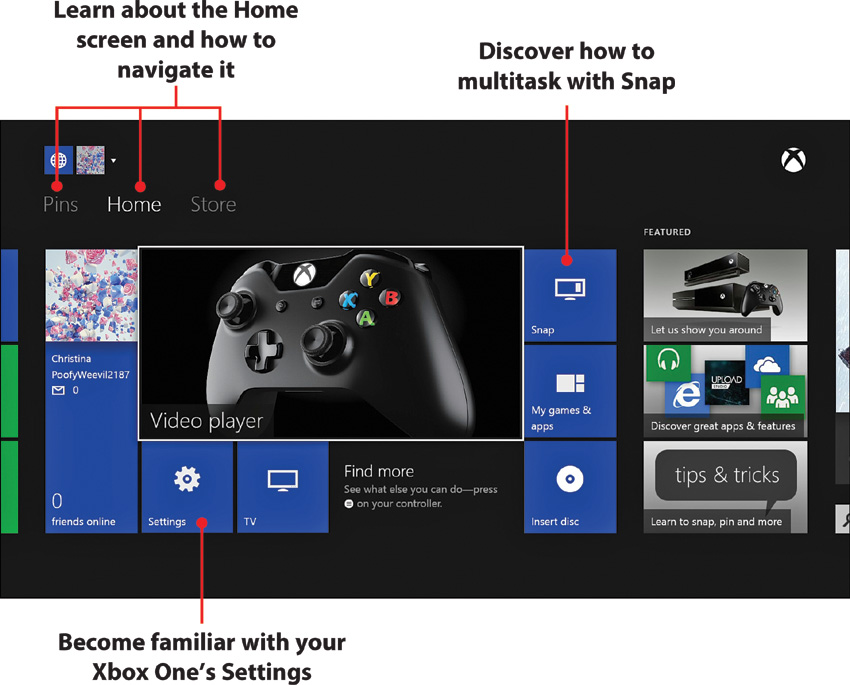
In this chapter, you become familiar with the Xbox One Dashboard and learn how to navigate it in all the aforementioned ways. You also learn how to adjust your console’s settings to suit your needs, pin and unpin apps, navigate the Store, and discover how to multitask using Snap.
Navigating the Dashboard with Your Controller
It’s best to get a lay of the rich Xbox One landscape using a reliable navigation vehicle, and the controller is by far the easiest way to get around. Unlike Kinect’s voice and motion controls, which are discussed later in this chapter, it’s never fussy and is, in fact, quite intuitive.
If you need a refresher on the components of your Xbox One controller before proceeding to the general navigation rules, see the Prologue, “Getting to Know the Xbox One.” Otherwise, this is how you’ll navigate the Xbox One Dashboard using your controller:
• Moving left, right, up, and down—Use the left stick or the D-pad. To more quickly move left and right (but not up and down), you can also use the left bumper and right bumper, respectively.
• Selecting items—Press the A button when the item is highlighted (outlined in white).
• Going back or exiting an app or screen—Press the B button.
• Going back to the default Home screen—Press the Xbox button.
• Opening app-related menus—Press the Menu button.

Understanding the Dashboard Content
The Xbox One Dashboard consists of three distinct areas that contain a variety of tiles that divide content, settings, and functions into specific categories, similar to the user experience provided by Windows 8 and vaguely reminiscent of the Xbox 360 interface. These areas include Home, Pins, and Store, with the latter two being an extension of the Home screen. There is also a Quick Info area that appears at the very top of each of the Home screens. In this area, you’ll encounter several thumbnail-sized tiles, including a Notification and Gamertag tile.
All features of your Xbox One Dashboard are available when you’re logged in to Xbox Live. If you don’t have an Xbox Live account, fewer options are accessible. For more on Xbox Live, turn to Chapter 3, “Examining Xbox Live.”
Reviewing the Home Screen
The Home screen is the default view. Although you can’t customize this screen manually, as you can with many Windows applications, it becomes tailored based on how you use your Xbox One.
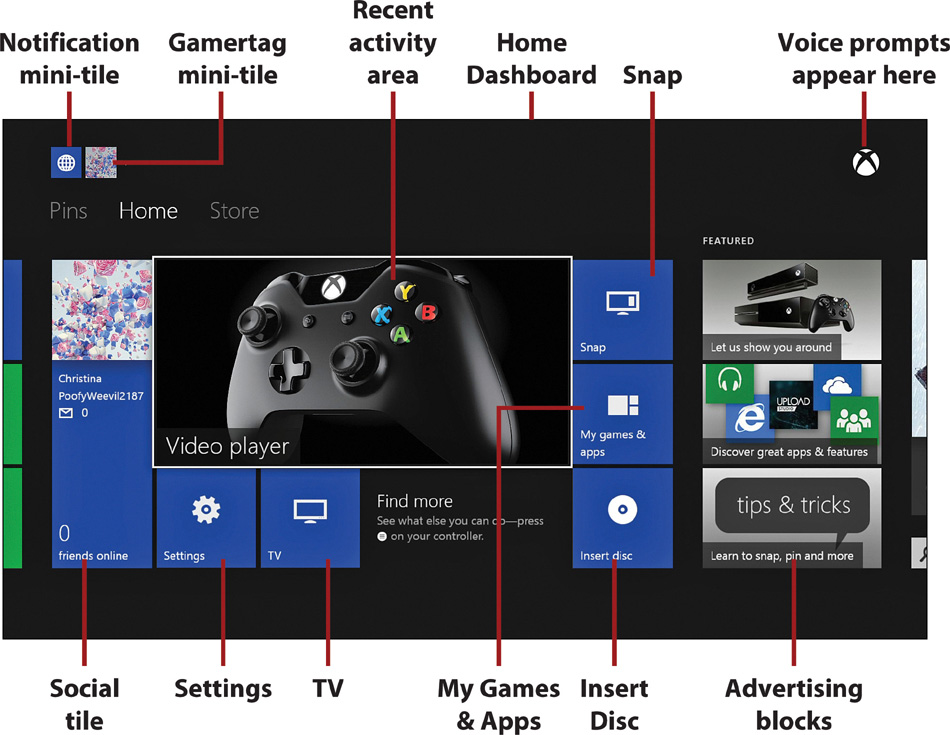
These are the items you’ll encounter on your virgin Dashboard:
• Notification mini-tile—Part of the Quick Info area, this option enables you to access any notifications, including for Skype, messaging, and parties, among others. You have the opportunity to tailor the notifications you receive here by selecting the Preferences option from the Settings menu, which is discussed in greater detail in the “Changing the Console Settings” section later in this chapter.
• Gamertag mini-tile—Another option in the Quick Info area, this item shows you which player is signed in to the console. In addition, by selecting this tile, you can sign in other people to your console.
• Social tile—This tile provides at-a-glance information related to you, whether you have any messages, and how many of your friends are online. Upon selecting this tile, you can access your profile, friends, followers, and messages. You can also add people and find additional connections. Turn to Chapter 4, “Personalizing Your Xbox One Experience,” for information on how to adjust your profile and customize your Xbox One experience.
• Recent activity area—This is the largest block and appears front and center. What is shown in this area changes based on your most recent activity, enabling you to get back into that activity quickly, if desired.
• Settings—Selecting this option is your portal into your Xbox One settings, which dictate your user experience. You’ll find options that are specific to your personal Xbox account, those that address your general console settings, and those that enable you to manage settings for other individuals who use your console. You’ll learn more details about the settings in the “Breaking Down the Settings Screen” section later in this chapter.
Accessing Settings via Your Controller
You can access the settings any time with your controller. Just go to the Home screen and press the Menu button on your controller.
• TV—This option enables you to set up your TV to work in collaboration with your console, letting you control your TV through your console, change channels using only your voice, and watch TV while gaming. Once this is set up, you’ll be able to use it to access your TV. For details on how to set up your TV, turn to “Setting Up a Cable or Satellite Connection” in Chapter 1, “Setting Up Your Xbox One.”
• Snap—This application enables you to multitask by letting you run two applications simultaneously. While you’re engaged in your primary activity, you can dock another app on the right side of the screen. For more on Snap, turn to the “Multitasking with Snap” section later in this chapter.
• My Games & Apps—This option is your portal to all of your gaming-related activities, providing access to your avatar, friends, messages, and settings. You can also access Internet Explorer, the Xbox One Store, among other options.
• Insert Disc—This indicates what disc is in your Xbox One console at any given time. When no disc is inserted, it just says Insert Disc.
• Featured blocks—These are advertising blocks that change based on what Microsoft wants to showcase. They are in no way obtrusive or irritating...except that yes, yes they really are.
Examining Pins
To the far left of the main Home screen is the Pins area. You can manually customize this area by pinning your favorite games, apps, or web pages, enabling you to quickly locate the media that you use and interact with most frequently. Think of the pins you set as bookmarks.
Even before you manually pin any content to this section, it contains the following items, which you can unpin (remove) at any time:
• OneDrive—Enables you to store your photo and video files in the cloud so that you can view them from your TV. In addition, you can use it to play slideshows and view photos and videos that others share with you. For more on OneDrive, turn to Chapter 9, “Managing Files with OneDrive.”
• Skype—Enables you to enjoy free and unlimited voice and HD video calls with anyone else on Skype. For more on Skype, turn to “Keeping in Touch via Skype” in Chapter 6, “Making the Social Connection.”
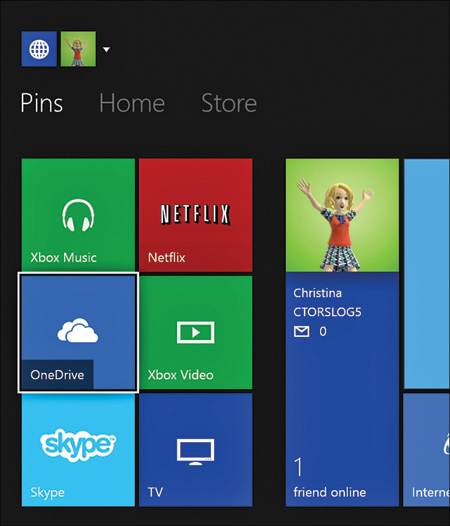
• TV—Provides the same portal as initially appears on the main Home screen. For more on getting your TV to work in unity with your Xbox One, turn to “Setting Up a Cable or Satellite Connection” in Chapter 1.
• Xbox Music—Enables you to listen to live streaming music on your Xbox One. However, this streaming music service is an application you must pay for to maximize the use of this service. For more on Xbox Music, turn to Chapter 8, “Tuning In to Music.”
• Xbox Video—Enables you to rent and buy movies and watch TV shows. You can also use it to stream your personal videos to Xbox One from compatible Windows tablets and computers. To learn more about this app, see “Enjoying TV Shows, Music Videos, and Movies with Xbox Video” in Chapter 7.
Pinning content to the Home screen enables you to easily access your favorite stuff, much like bookmarks help you find pages in a book. You can pin anything from favorite apps and games to web pages, and they’ll then appear under the Pins section of the Home screen.
Pin and Unpin Content
Follow these steps to pin/unpin content using your controller, which is by far the easiest way to accomplish these tasks:
1. Go to the Home screen. If you’re in an application, you can easily get to the Home screen by pressing the Xbox button on your controller.

2. Move to an area of the screen where you can access the game, music, video, or app you want to pin so that it becomes highlighted (outlined in white) on the Xbox One Dashboard. Press the A button to select it.

3. Scroll to the specific item that you want to pin so that it is highlighted, and press the Menu button.
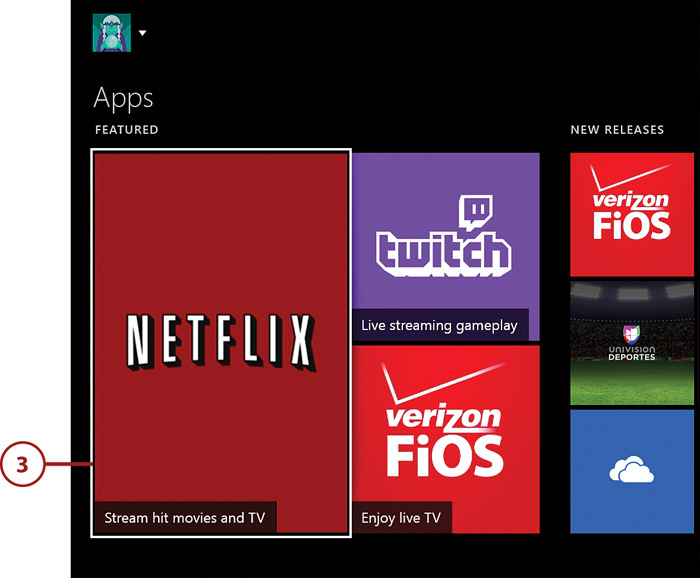
4. From the menu that appears, select the Pin to Home option. Your item is now pinned.

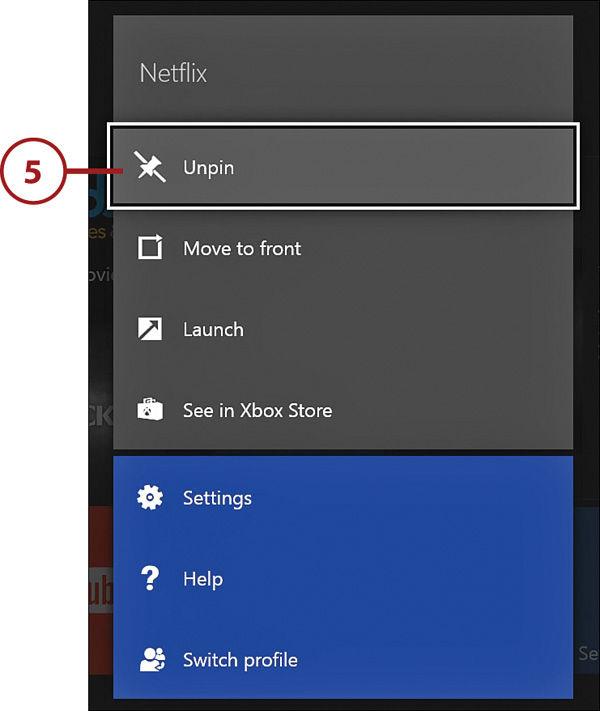
5. To unpin an item, highlight it in the Pins area of your Dashboard, select the Menu button once again, and this time select the Unpin option. Your item is now unpinned from the Home screen.
Checking Out the Store
To the far right of the main Home screen is the Store. Here, you can peruse and purchase a variety of content from the Xbox One Store, which features Games, Movies & TV, Music, and Apps departments. Occasionally, heavily discounted or even free items are made available for download, so it’s worth checking out the Store from time to time.
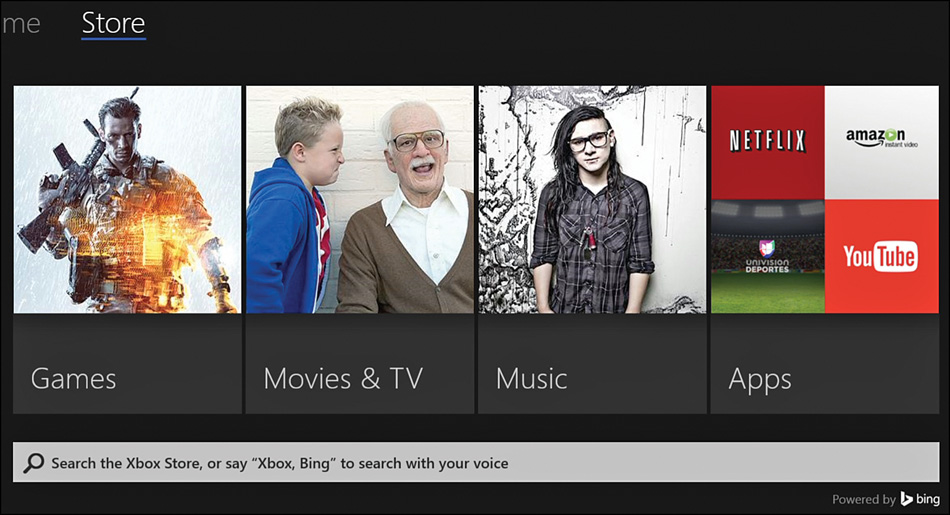
Here’s what each department has in store (pun intended) for you:
• Games—You can find games through a variety of means. You can peruse games that are being highlighted, which are broken down into various Popular Games categories, including Featured, New Releases, Top Games Right Now, Recommended for You, New Game Demos, Top Selling, and Top Rated. You can also search for games by selecting the Search Games tile and redeem game-related goods using a code by selecting the Use a Code tile. For more on gaming on your console and games to consider, turn to Chapter 5, “Getting Your Game On.”
• Movies & TV—From this option, you can browse and access movies and TV shows, which are organized into a variety of categories, including Featured Movies, Featured TV Shows, New Movies, New TV Shows, Top Rented Movies, Movies Recommended for You, TV Shows Recommended for You, Top Selling TV Shows, Top Rated Movies, and Top Rated TV Shows. You can also search for video-related content by selecting the Search Videos tile, as well as access the Xbox Video app. For more on viewing videos and video content on your console, turn to Chapter 7.
• Music—The Music section has only a Featured category. You can also search for music by selecting the Search Music tile and access the Xbox Music app. For more on enjoying music on your Xbox One, turn to Chapter 8.
• Apps—In this department, the available apps are categorized into Featured, Popular Apps, and New Releases. You can find apps by selecting the Search Apps tile and use a code to redeem an app by selecting the Use a Code tile. Turn to “Using Apps to Watch Video” in Chapter 7 for some video-related apps that are worth checking out.
Understanding Kinect Controls
After setting up the Kinect sensor as described in “Power on for the First Time” in Chapter 1, you can use your Kinect to navigate your Xbox One. You can do this using motion gestures or your voice. Although both of these options work quite well, particularly when you understand how to use them, they don’t always work as flawlessly as using your controller. Of course, as the system matures and updates refine and add to existing features, the sensitivity of both motion and voice controls is likely to improve considerably.
The following section shows you how to use motions and voice to control your Xbox. When outlining how to perform tasks throughout the remainder of this book, the text mainly focuses on using the controller because there is far less room for user error or technical issues arising, and you don’t want to read a 700-page manual, do you? Still, you can apply the information you learn here to other tasks.
As you interact with your Xbox One, practice both motion and voice controls. Doing so will help you become one with your system—after all, you’ll become a living controller. And the voice controls do, in fact, make some tasks much simpler than reaching for a controller. In addition, having these extra navigation/control options at your disposal can make it easier for you to accomplish tasks.
Navigating the Dashboard via Motion Controls
You can use six specific motions to control your Xbox One console. These are for returning Home, making a selection, scrolling through a screen, opening the system menu, opening onscreen notifications, and zooming in and out. Although many of these tasks use fairly intuitive motions, you must remember the sequences to perform them properly and execute the desired task. Therefore, take some time to practice them, particularly if you want to employ this mode of navigation on a regular basis.
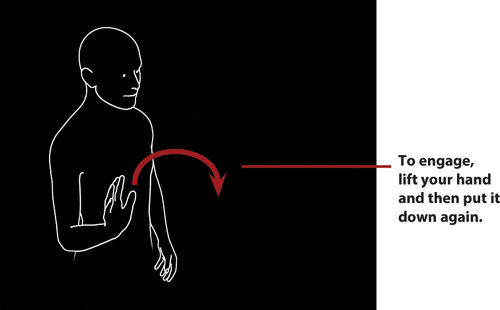
Before you can initiate any of these motion controls, you must engage your Kinect by lifting your hand up and then putting it down again.
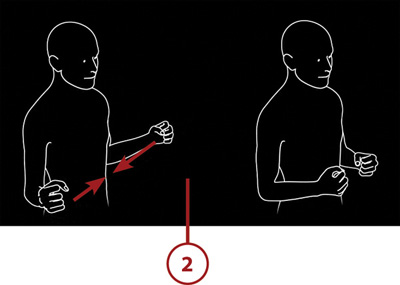
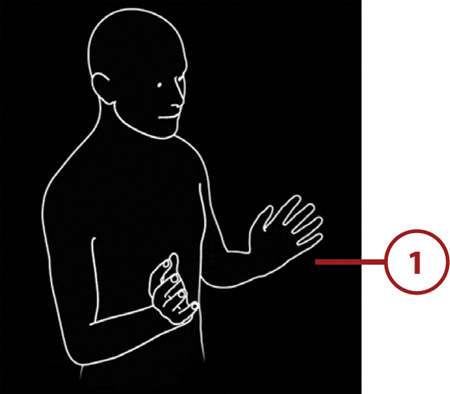
1. Hold out both of your hands toward the edge of the screen, making sure your hands are open and your palms are facing inward.
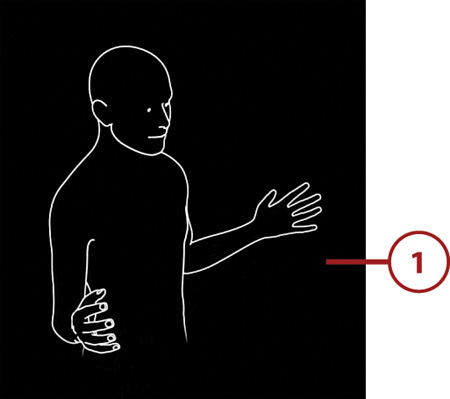
2. As you close your hands, move them toward each other in front of your chest. You’re now at the Home screen.
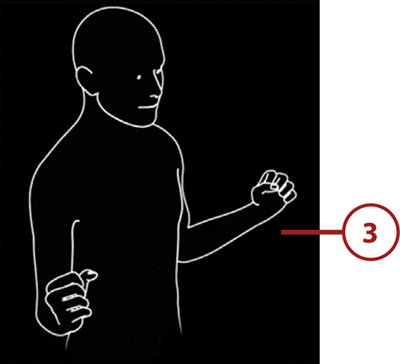
Select Items
To select items, follow these steps:
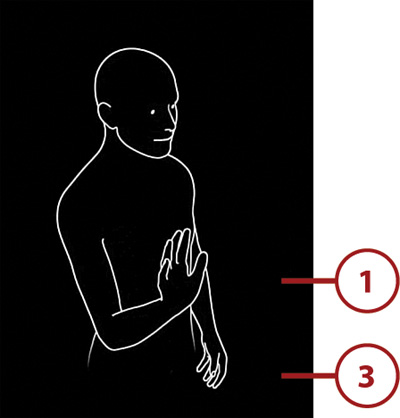
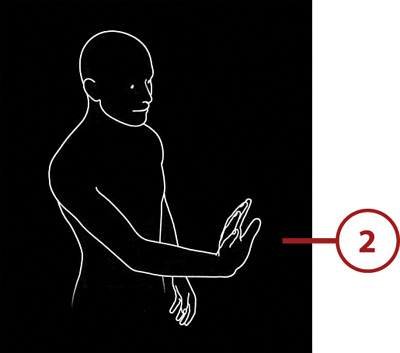
1. Raise one of your hands so that an open palm faces the sensor.
2. Move your hand so that it rests over the tile/item you want, and push your hand forward.
3. Now pull your hand back toward your body to make the selection.
1. Raise one of your hands so that an open palm faces the sensor.

2. When the hand icon appears, close your hand anywhere over the area you want to scroll.
3. Move your hand left or right to pull the screen in the desired direction. You can also move your hand up or down to go in these directions if an app you’re in supports vertical scrolling.
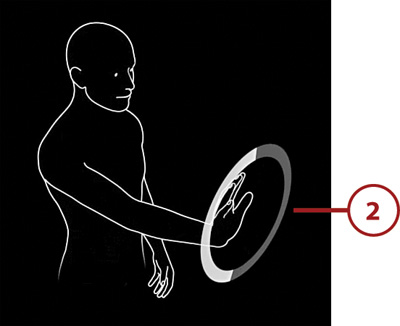
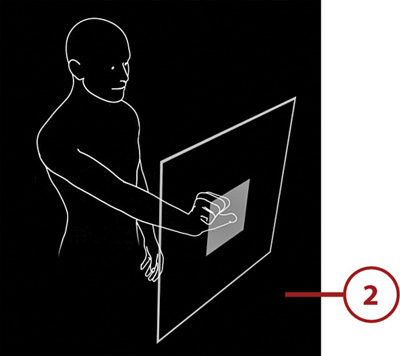
Open App-Specific System Menus
In addition to being able to open full apps, you can open app-specific system menus. To do so, follow these steps:
1. Raise one of your hands so that an open palm faces the sensor.

2. Push your arm forward toward the Kinect and hold it steady until a circle timer appears. When the ring comes full circle, a system menu appears from which you can select the item you want.
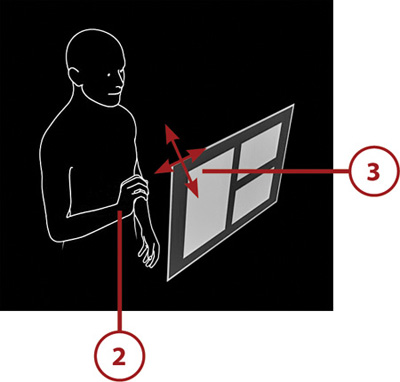
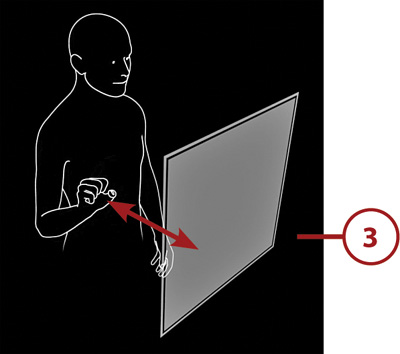
Open Onscreen Notifications
When you see you have an onscreen notification, you can open it as follows:
1. Hold both hands in front of you and move them together in front of your chest.
2. Grip with both hands.

3. Pull apart, moving both hands out horizontally.
1. Raise one of your hands so that an open palm faces the sensor.

2. When the hand icon appears onscreen, close your hand over the area you want to zoom into or out of.
3. Pull your hand toward you to zoom in. To zoom out again, push your hand away from your body and toward the screen.
Navigating the Dashboard via Voice Controls
Although Kinect generally does a good job of picking up voice commands, it might not always work flawlessly. Kinect seems to have some difficulty deciphering certain voices and accents, so there might be times when you need to repeat commands. Similarly, it’s very good at executing some commands (“Xbox, pause”), whereas it really struggles with others, like when you tell it to tune to a specific TV station. Again, as the system evolves, this is likely to become much less of a problem.
Nevertheless, you can take several actions to improve the odds of Kinect understanding your voice commands:
• Minimizing background noise—Try to minimize as much background noise as possible. If you’re blasting music or someone is running the vacuum, for example, your Kinect might not be able to hear your voice among the auditory clutter.
• Ensuring Kinect is properly located and calibrated—Make sure your Kinect sensor is positioned so that it can hear and recognize your voice commands. (See “Making a Home for Your Xbox One” in Chapter 1.) In addition, your Kinect must be calibrated for it to function properly. For more on this, see the “Kinect” section later in this chapter.
• Speaking normally but clearly—When making voice commands, use your normal speaking voice and speech pattern, but be sure to speak clearly. You don’t want to slur your words or yell at Kinect, which can make it difficult for the sensor to decipher your prompts. But if you tend to speak more quietly or have a softer voice, you might need to project your voice a bit. And one last comment, if your house is bilingual or you have a guest over who speaks a different language, Kinect might not understand your voice commands if multiple languages are being spoken, especially if an individual in focus is speaking a different language than you are.
• Pausing before saying each command—Most Xbox voice commands start with the word “Xbox.” Make sure you pause a second after saying “Xbox” and before you proceed with the voice shortcut that follows, such as “go Home.” If you say the command too quickly, your Kinect sensor might not recognize that you’re directing commands at it. However, when you become familiar with using voice commands and know the voice shortcuts, you can reduce this extended pause time.
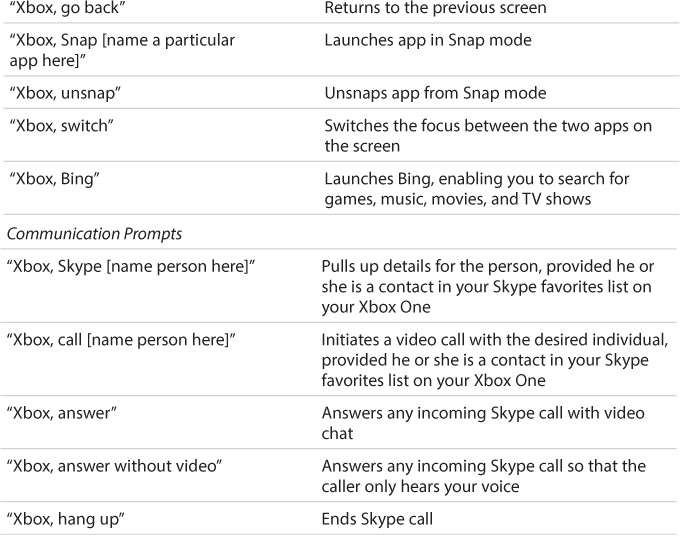
Table 2.1 outlines the voice shortcuts you can use. Don’t worry about memorizing them. You can always say “Xbox, select” to see the commands available to you. Also, whenever any text appears in green, it can be spoken as a command.
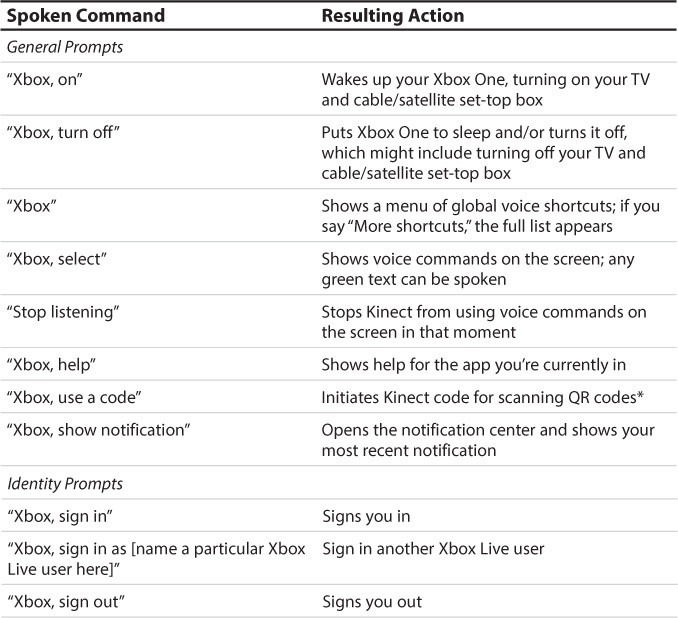
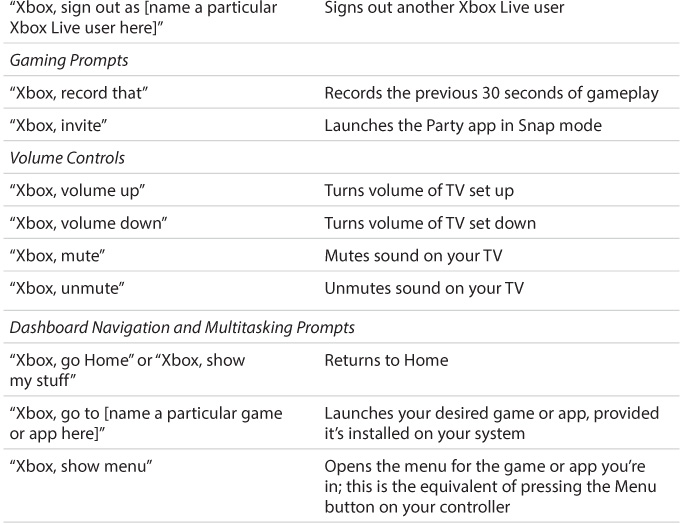

*QR codes are a type of square bar code that is optically readable, including by your Kinect sensor. They are intended to make your Xbox One entertainment experience more pleasurable. For example, if you have an Xbox Store gift card, you can hold the QR code up to Kinect and redeem it instantly, saving you time from entering long codes into your system.
Table 2.1 Kinect Voice Shortcuts for Controlling Your Xbox One Console
Breaking Down the Settings Screen
When you select the Settings tile from the Home screen, a variety of options become available to you. To the far left, you’ll find access to a variety of options that are specific to your personal Xbox account. The middle section includes tiles for all of your console’s settings, which are discussed in greater detail in the “Changing the Console Settings” section later in this chapter. To the far right, you can add, remove, and tweak settings of family members and others using your Xbox One console. You also can access a Guest Settings tile, which enables you to create a guest key. These options are outlined in greater detail later in this chapter.
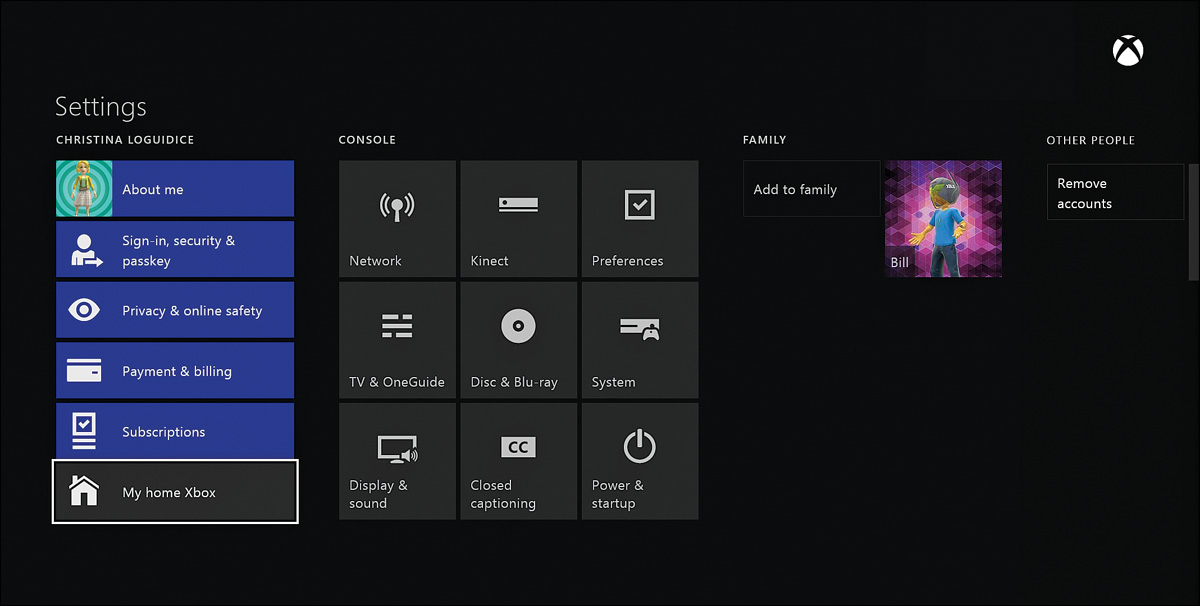
What follows is a brief description of the Settings options on the far left, many of which are outlined in other chapters or later in this chapter:
• About Me—Here, you can adjust the information tied to your profile, including your gamerpic, gamertag, avatar, and privacy settings. For more on what you can do here, turn to Chapter 4.
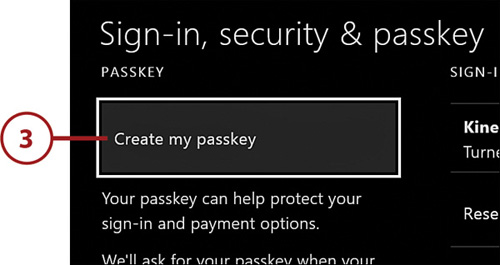
• Sign-in, Security & Passkey—Here, you can create a passkey, which is a protective six-digit code; tweak your Kinect and console sign-in settings; and access a variety of legal documents. See “Set Up a Passkey” later in this section.
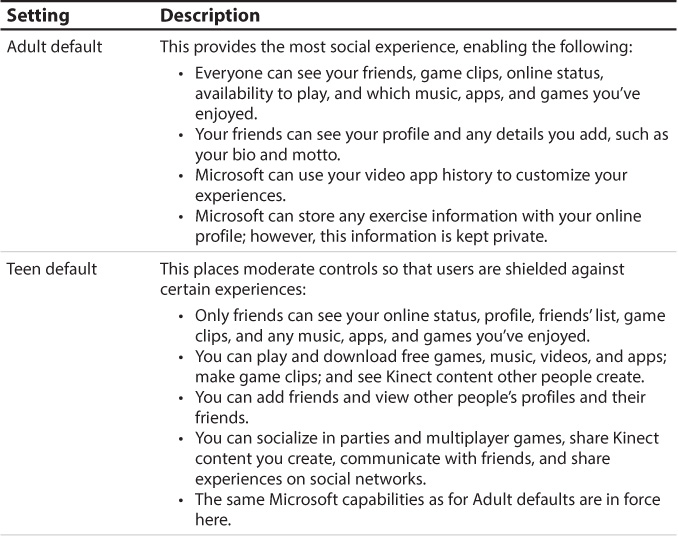
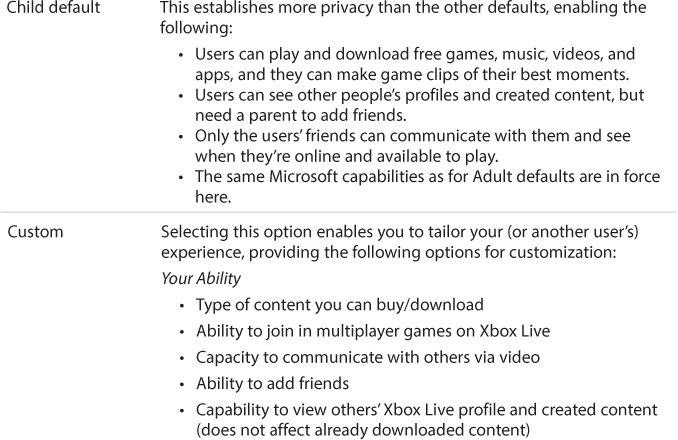
• Privacy & Online Safety—This area enables you to set a variety of privacy defaults, selecting from child, teen, and adult defaults, or creating your own custom defaults (see Table 2.2 for what these mean, so you can decide accordingly). You also can adjust your content restrictions, such as whether you want any explicit text blocked, and select your contact preferences, including whether you’d like to receive offers from Xbox and companies providing Xbox-compatible products.

• Payment & Billing—Here, you can add credit card and billing information to your account.
• Subscriptions—This is where you manage your Xbox Live Gold membership, Xbox Music Pass account, and other paid subscriptions. Turn to Chapter 3 for more on Xbox Live and to Chapter 8 for details about Xbox Music and the Music Pass.
• My Home Xbox—From this area, people can play games downloaded to your console without having to sign in as you. It extends Xbox Live Gold membership to your entire household.
Xbox One enables you to tie a six-digit passkey to your profile. This passkey serves several key functions. It prevents children from signing in as their parents and overriding parental controls, yet enables parents to grant content exceptions. It also protects against unauthorized charges, as you can require a passkey to complete transactions on Xbox Live.
When you set a passkey, it roams with you, meaning it follows you to any Xbox One console you use. So if you sign in to your friend’s Xbox One console, as long as you sign out when you leave, you can feel secure knowing your account is safely saved to your friend’s Xbox One console and ready for you the next time you go over to play.
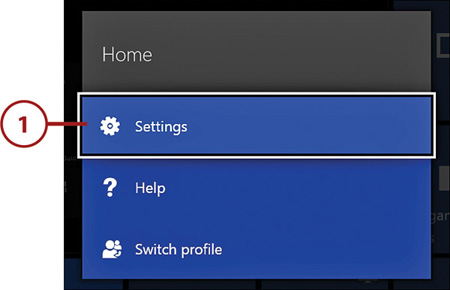
1. Go to the Home screen (make sure Home is highlighted/underlined on the Dashboard), press the Menu button on the controller, and select Settings.
2. Select Sign-in, Security & Passkey.

3. Select Create My Passkey.
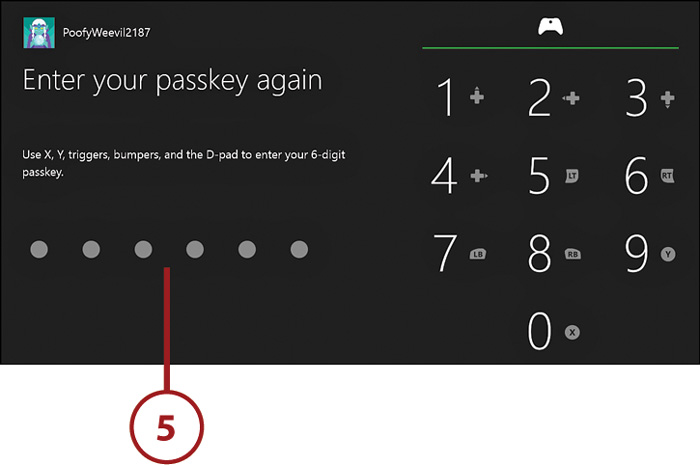
4. Enter your six-digit passkey.

5. Confirm your passkey.
6. Decide whether sign-in and purchases will require your passkey. When you are finished, press the B button to go back to Settings or the Xbox button to go to the Home screen.

Changing the Console Settings
Your Xbox One enables you to adjust a variety of console settings to suit your needs and preferences, and you don’t need to be signed in to your account to do so. You just need to go to the Settings option on the Home screen. Alternatively, you can press the Menu button on your controller and select Settings.
Once in Settings, you can adjust the following console settings:
• Network—This is where you tweak your console’s capability to connect to Xbox Live, play multiplayer games, and troubleshoot general network performance issues.
• Kinect—Go here to turn your Kinect on and off, and to troubleshoot any issues you encounter with your sensor, such as it not recognizing or hearing you.
• Preferences—This area enables you to change behaviors on your Xbox One, including notifications, system and app behaviors, and SmartGlass Connections. For more on SmartGlass, turn to Chapter 11, “Looking Through the SmartGlass.”
• TV & OneGuide—From here, you can troubleshoot TV- and OneGuide-related issues, such as incorrect or missing channel lineups. You also can choose to show only HD or SD channels, or both.
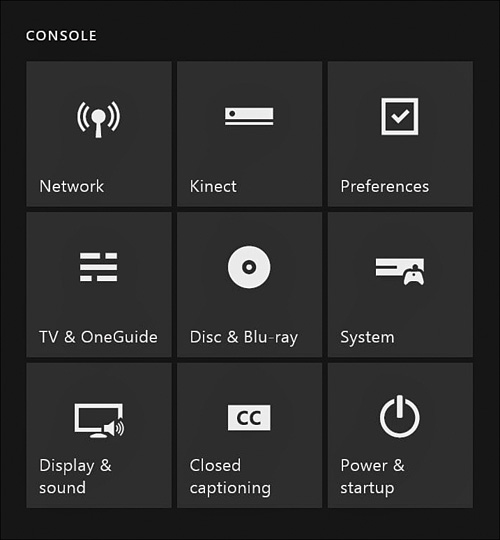
• Disc & Blu-ray—This area enables you to adjust disc playback behaviors, including audio, frame rates, and preferred language.
• System—Go here to control some of your console’s core behaviors, including its name, location/time zone, and system time. You can also restore factory defaults here.
• Display & Sound—This is where you adjust your console’s display and sound settings by selecting your TV’s resolution/connection, color depth, and color space.
• Closed Captioning—Go here to turn closed captioning on or off and customize the way captions appear.
• Power & Startup—This area enables you to customize the power settings on your Xbox One console, such as by setting it to shut down automatically or having it turn on with a voice command.
Network
When you select Network, you access the Network Settings screen, which is divided into three columns. The left column provides options for setting up a new connection or modifying the existing connection for your home networking devices. The middle column is purely informational, displaying the current status of your network connection (if any connection issues are detected, they’ll be outlined here) and the Network Address Translation (NAT) type. Finally, the right column offers options for testing your network connection and troubleshooting network performance issues.

Here’s what you need to know about the Network Settings in the left column:
• Set Up Wireless Network—Select this option if your Xbox One isn’t currently connected to the Internet or if you want to change wireless access points, such as if you’ve taken your Xbox One to a friend’s house.

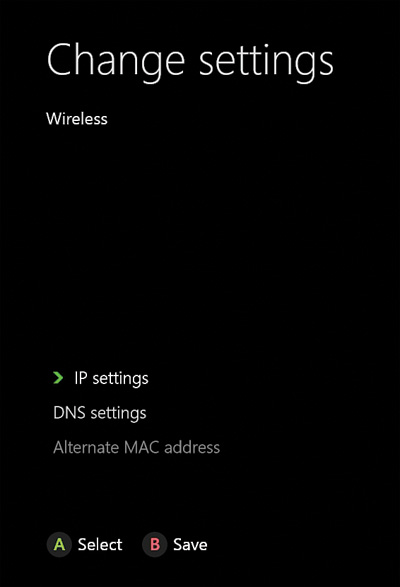
• Advanced Settings—Unless you’re an advanced user, you can largely ignore this area, which is generally reserved for technical users or support. This is where you can access your Internet Protocol (IP) and Domain Name System (DNS) settings and set up MAC spoofing (changing the Media Access Control [MAC] address of the network interface on your networked device).
• Disconnect Wireless—You need to concern yourself with this option only if you’re going to be an offline gamer. If so, you still need to connect to Xbox Live on occasion to download the latest system updates. When such updates are completed, you must select the Disconnect Wireless option to get your console offline again. If you were using a wired network connection, you’d only have to disconnect the local area network (LAN) cable from the back of your console to go offline again.
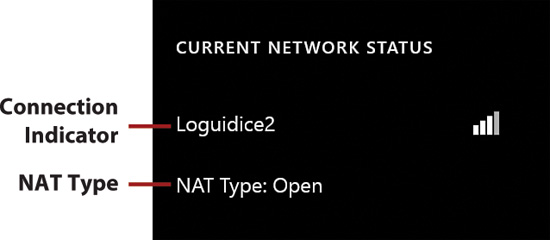
Here’s what you need to know about the Current Network Status information in the middle column:
• Connection indicator—This indicator tells you whether you’re connected and which network you’re connected to. If you have a wireless connection, you’ll see the signal strength indicator, which can contain one to four bars. One bar indicates a poor signal and four bars indicate an excellent signal.
• NAT Type—NAT stands for Network Address Translation and it gives you one IP address for internal traffic and another for external traffic, thereby serving as a type of firewall. Don’t fret if this means nothing to you. Here’s what you need to know: Your NAT type can be Open, Moderate, or Strict. The NAT type determines with whom you can play multiplayer games online and whether you can host matches. An Open NAT type enables you to play and host multiplayer games with people who have any NAT type on their network. A Moderate NAT type enables you to play multiplayer games with people who have an Open or Moderate NAT type, but you’re unlikely to be chosen as the host of a match. A Strict NAT type enables you to play multiplayer games only with people who have an Open NAT type, and you can’t be chosen to host any matches.
Here’s what you need to know about the Troubleshooting options in the right column:
• Test Network Connection—Select this option if you can’t connect to Xbox Live. It tests your network connection and whether you can connect to the Internet. If a problem is identified, you’ll see a summary of where your connection failed and receive troubleshooting steps to help correct the problem. If your connection is good, your console verifies that as well.
• Test Multiplayer Connection—Select this option if you experience lag, random disconnects, or other game-related network issues. It tests for anything that could affect your experience while multiplayer gaming on Xbox Live, such as IP address issues and download and upload lags. Your console also verifies whether all is well.
• Detailed Network Statistics—This test is intended for networking experts who don’t need the troubleshooting guide to correct network performance issues. Selecting this option runs a short test that provides detailed network statistics in a format that’s easy to read for those well versed in networking language.
Kinect
When you select Kinect from the Settings screen, you access the Kinect screen, from which you can manage your Kinect. The options are divided into three columns as follows:
• Kinect—On the far left, you see whether Kinect is turned on, whether the Kinect microphone is enabled for chat, and what sensor version you have. You also have the option to turn the hand cursor off while watching videos.
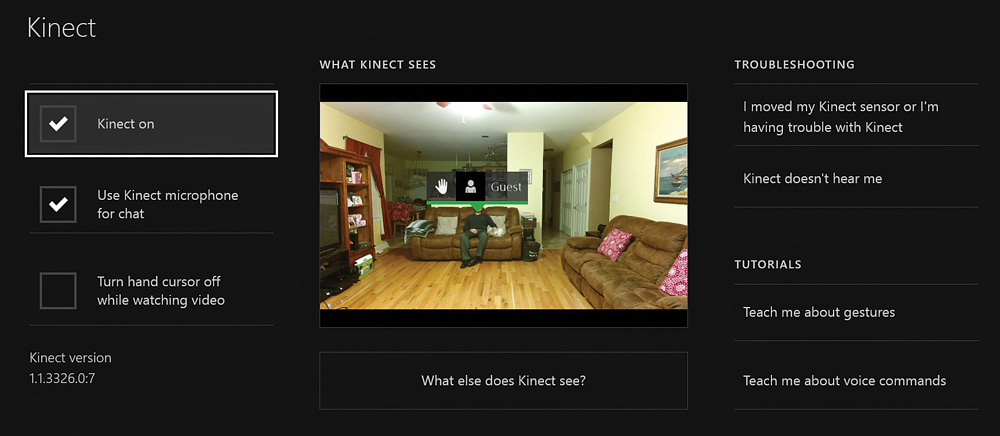
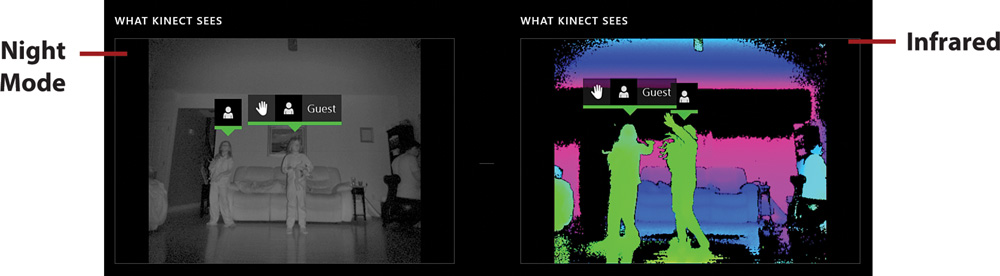
• What Kinect Sees—In the middle column is a small window showing you exactly what your Kinect sees, including the environment it’s capturing and the people in it. If it recognizes any individuals in its field of view, their names and gamerpics appear above them. There is also a What Else Does Kinect See? option. If you select this option, you can see Kinect’s field of view in Night mode and infrared. Pressing the A button while this is selected is all that’s needed to move through these modes.
• Troubleshooting/Tutorials—On the right, you see the Troubleshooting area, which provides troubleshooting for both sensor placement/visual field issues and sound detection issues. When you select the I Moved My Kinect Sensor or I’m Having Trouble with Kinect option, you’re guided through a series of straightforward calibration tests/options, such as moving your sensor to align a dot with an onscreen series of dots. There is also a handy Tutorials section, from which you can learn all about controlling your Kinect with gestures and voice commands.
Preferences
When you select Preferences from the Settings screen, you access options to tweak your Notifications, System & App preferences, and SmartGlass Connections. If an option is checked off in the Notifications and System & App areas, it means the stated feature is enabled. Under SmartGlass Connections, the option you select appears with a solid circle next to it. For more on Smart-Glass, turn to Chapter 11.

Notifications
To the far left are the Notifications options, including for Skype, messages, party invites, and others. You can individually decide which notifications you’d like to receive. When a particular notification is enabled, you’ll receive a pop-up whenever such a notification comes through.
When notifications arrive, you can view them by pressing and holding the Xbox button on your controller for a few seconds. Just don’t hold it for 5 seconds or longer, as you’ll turn off your console and controller. Any notifications you receive remain in the notification center for 1 week, or until you’ve received more than 50. You can access the notification center by saying “Xbox, show notifications,” or by going to the Home screen and choosing the Notification mini-tile.
Keep in mind that some notifications are time-sensitive, such as if you’re receiving a party invite. Any commands in these notifications work only if an action is still available, like your friends are still in the party you were invited to. Even if a notification is no longer valid, it won’t automatically delete and there is no way to manually delete it.
System & App and SmartGlass Connections
In the middle of the screen is the System & App option and on the right is the SmartGlass Connections option. From these areas, you can change the following preferences:
• Allow Play To Streaming—Place a check mark next to this if you want to play video and music on your Xbox One from the Windows 8 and 8.1 Share charm or other Play To compatible devices. Share charm and Play To are applications that make it easy to stream music, video, and photos from your computer to other PCs, TVs, stereos, or devices on your home network.
• Allow Broadcasts and Game DVR Uploads—Enable this option if you’d like to use Upload Studio or other broadcast apps, such as Twitch, to capture and share your gameplay footage.
• Preferred Video Provider—This feature has not yet been enabled, but in the future you’ll be able to pick your preferred video provider here. As of press time, the only option you can select is None.
• SmartGlass Connections—SmartGlass enables your Xbox One to interact with your mobile phone, tablet, and other compatible devices, turning these into a second screen to enhance your entertainment experience. You must select what level of SmartGlass capability you’d like enabled.
TV & OneGuide
This is where you go to make changes after you have your TV and OneGuide set up. The initial setup process is outlined in Chapter 1. What follows are the settings you can tweak here:
• OneGuide—Select this option to change the programming that shows up in the OneGuide. If you select TV Lineup, you can select your TV provider by entering your ZIP code. If you select Clear OneGuide, you can refresh your OneGuide with the latest Xbox Live information. If you select Clear History, you can clear your personalized viewing history. The final option in this section enables you to choose to show only HD or SD channels, or both.
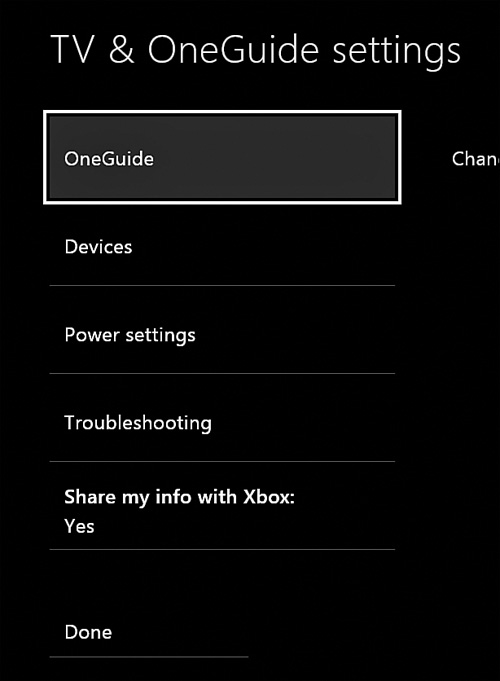
• Devices—Choose this option if you need to set up cable/satellite box, TV, and audio receiver control, or if you’d like to see which devices you currently have connected. You also have the option of removing a cable/satellite box, TV, or audio receiver.
• Power Settings—This option enables you to select which devices to turn on and off when you say “Xbox, on” and “Xbox, turn off.” You can select from the following options: “Xbox, On” Turns On My Devices, “Xbox, Turn Off” Turns Off My Audio Receiver, “Xbox, Turn Off” Turns Off My Cable or Satellite Box, and “Xbox, Turn Off” Turns Off My TV. Keep in mind that these devices are turned on and off by these prompts along with your Xbox One console.
• Troubleshooting—Select this option to set up your TV picture; reset your settings, which clears all TV settings and requires you to set up your TV again when it restarts; or change advanced settings, such as the IR delay (the speed at which commands are sent to your cable/satellite box), remote codes that control the devices hooked up to your console, and audio details.
• Share My Info with Xbox—You can decide whether to track the TV shows you watch to improve your TV experience.
• Done—Select this option to go back to the main Settings screen.
Disc & Blu-ray
When you select Disc & Blu-ray from the Settings screen, you can set your Xbox One console behavior for disc playback. You’ll find three basic types of settings under this option: Disc, Blu-ray, and Preferred Language. These enable the following:
• Disc—Here, you’ll find two options: Play Disc Automatically and Resume Playback. Check the Play Disc Automatically option if you’d like your discs to begin playing automatically when you insert them. Check the Resume Playback option if you’d like the player to bookmark the point at which you stopped watching your discs so that they resume at the same point when you watch them again.
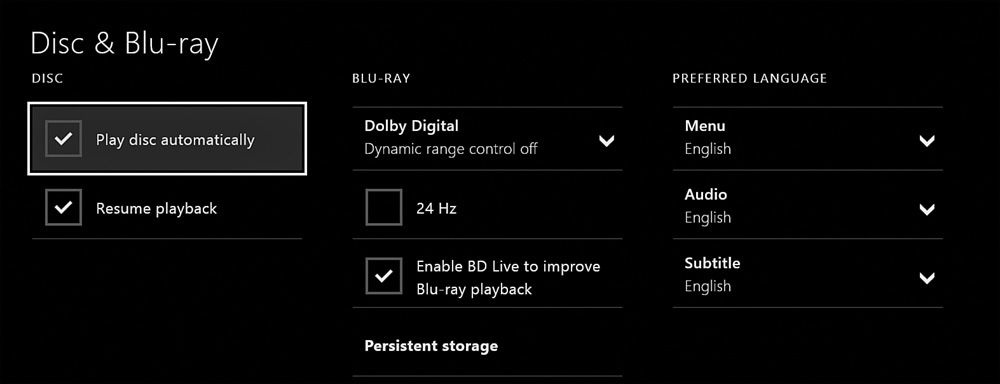
• Blu-Ray—There are several advanced settings you can tweak for the Blu-ray player app, which is a separate download (refer to “Playing DVDs and Blu-rays” in Chapter 7). First, there is a Dolby Digital option, which enables you to adjust your system’s dynamic range control (this modifies the audio to keep a consistent volume even through the loudest action scenes so that you don’t constantly need to turn your volume up and down). If you select Dolby Digital, there are three options: Dynamic Range Control Off, which means this feature is turned off and the intensity of the sound will vary (select this option if you’re fine with loudness—this is considered the optimal setting); Dynamic Range Control On, which turns this sound filtering on to keep dialogue and action scenes at a consistent sound level (select this if you don’t want to disturb others); and Dynamic Range Control Auto, which lets your system decide based on the material whether this feature should be on or off.
Second, you’ll see 24Hz. This is the natural frame rate for movie viewing. If you primarily watch Blu-ray content, you might want to enable it.
Third, you’ll see Enable BD Live to Improve Blu-ray Playback. This setting enables access to additional features and content through the BD-Live service. So when you insert a Blu-ray disc, you can connect to the Internet to access this additional media.
Finally, you’ll see Persistent Storage. Select this if you want to clear Blu-ray data that has been cached to the console. Sometimes this needs to be cleared so that you can access related content from other discs, but your Xbox One should inform you when you’ve reached the maximum amount of content that can be held in persistent storage.
• Preferred Language—Here, you can select your preferred language for movie menus (Menu), the audio track of your movie (Audio), and subtitles (Subtitle). Keep in mind that these language settings are defaults and might not be supported by all movies.
System
The system settings enable you to learn about and control some of your console’s core behaviors.
The options on the far left include
• Name—Select this option to name your Xbox One so that you can identify your console when there are multiple Xbox One consoles in the vicinity. After you change the name, you’ll have to restart your Xbox.
• Console Info—Choosing this option pulls up a screen that shows you the information you need to use when registering and troubleshooting your console. It provides your serial number, console ID, OS version, and Xbox Live device ID.
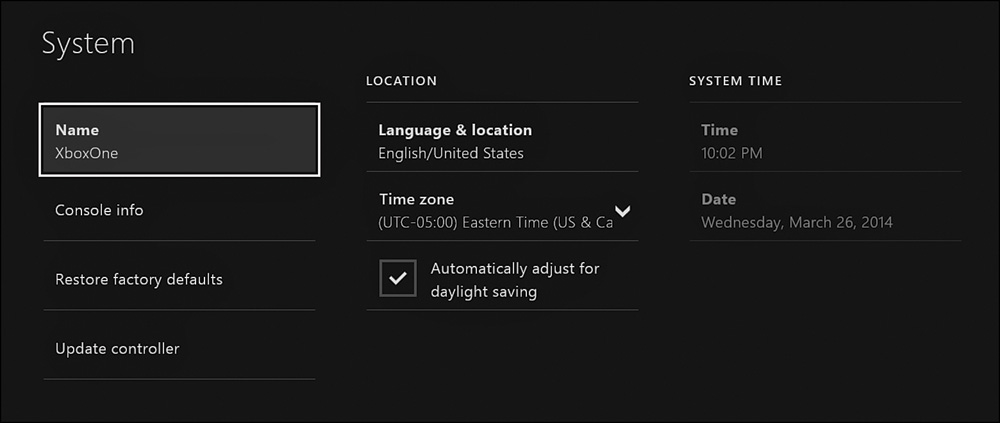
• Restore Factory Defaults—This option removes everything from your console so that it goes back to the system it was when you first took it out of the box. Because all accounts, apps, games, saved games (that haven’t been synced to the cloud), and settings are erased, this is an option you should only use if absolutely necessary. It is not considered a troubleshooting option.
• Update Controller—Here, you can update your Xbox One controller with the latest software to support the use of the Xbox One Stereo Headset Adapter. This adapter connects chat or stereo headsets to your controller, such as the Xbox One Stereo Headset, third-party gaming headsets, or legacy headsets. The adapter is included with the Xbox One Stereo Headset and can also be purchased separately.
The middle section includes
• Location—Here, you can change the language display information of your console, such as if you move to a different time zone or region. The Language & Location option controls your console’s display language and region, including for content at the Xbox Store. The Time Zone option lets you select the time zone you’re in, and the Automatically Adjust for Daylight Saving option enables your console clock to change automatically with daylight saving time.
On the far right, you’ll find
• System Time—These settings are inaccessible while you’re connected to Xbox Live. During those times, your console uses “net time,” which is automatically pulled from online time servers. You can change these time settings when you’re not connected to Xbox Live.
Display & Sound
Your Xbox One console supports a variety of display settings, which you can adjust to best suit your TV, if needed. Because the resolution settings are selected automatically when you hook up your console, you shouldn’t have to adjust these settings. Nevertheless, it’s good to have an understanding of them, and they are as follows:
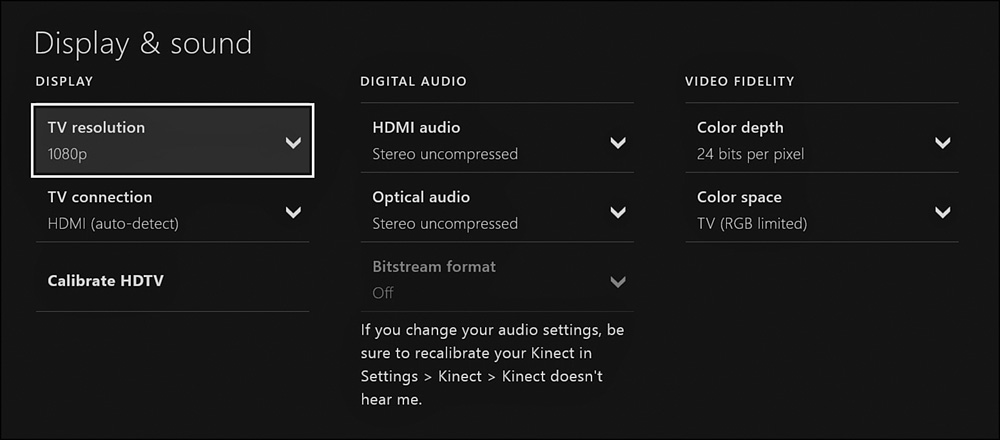
The Display options include
• TV Resolution—Your Xbox One console supports the following resolutions: 720p and 1080p. These are standard for high-definition TVs.
• TV Connection—There are three settings for handling the detection of available resolutions: HDMI (Auto-detect), which is the recommend setting because it enables your console to select the TV resolution based on information provided by your TV; DVI, which should be selected only if you’re using an HDMI-to-DVI converter (keep in mind that this will disable HDMI audio, so you won’t have audio unless you’re using Optical Audio); and HDMI, which you can select if you know there’s a resolution that’s supported by both your console and TV but that resolution is not listed.
• Calibrate HDTV—Select this option if you want to calibrate your TV to get the best visual experience for games, movies, and TV.
The Digital Audio options include
• HDMI Audio—Depending on what your TV or sound system supports, select from Stereo Uncompressed, 5.1 Uncompressed, 7.1 Uncompressed, or Bitstream Out. Refer to your TV or sound system’s manual to determine what’s supported. You also have the option of turning off HDMI audio. You would select this option if you’re using optical audio to meet your audio needs.
• Optical Audio—If you have an optical audio cable going from the display or sound system to the S/PDIF port on your console, select either Stereo Uncompressed or Bitstream Out, respectively, depending on what’s supported. Refer to your TV or sound system’s manual if you’re unsure. If nothing is plugged into your S/PDIF port, select Off to disable the port.
• Bitstream Format—This enables you to choose between DTS Digital Surround or Dolby Digital provided either HDMI Audio and/or Optical Audio are set to Bitstream Out.
The Video Fidelity options include
• Color Depth—Color depth, also known as bit depth, refers to the number of bits used to indicate the color of a single pixel in an image. As the number of bits increases, the number of possible colors also increases, improving picture quality. True Color displays use 24 bits of color data to represent the three RGB colors. If you know that your TV supports Deep Color, you can also choose 30 bits per pixel or 36 bits per pixel, depending on what is supported.
• Color Space—Microsoft highly recommends that you leave the color space setting set to TV (RGB Limited). RGB Limited is the broadcast standard for video content and is intended for use with TVs. On the other hand, if you’re using a PC monitor, you can select PC (RGB Full) to optimize your display’s black levels.
Closed Captioning
This area enables you to turn closed captioning on and off. If you turn it on, you can select between the default style and a custom style. There are many options for customization of captions, from selecting the type, color, and size of the captions to the background and window color.
Power & Startup
Selecting Power & Startup from the Settings menu enables you to configure your console’s startup and power options, such as whether it shuts down automatically and turns on via a voice command.
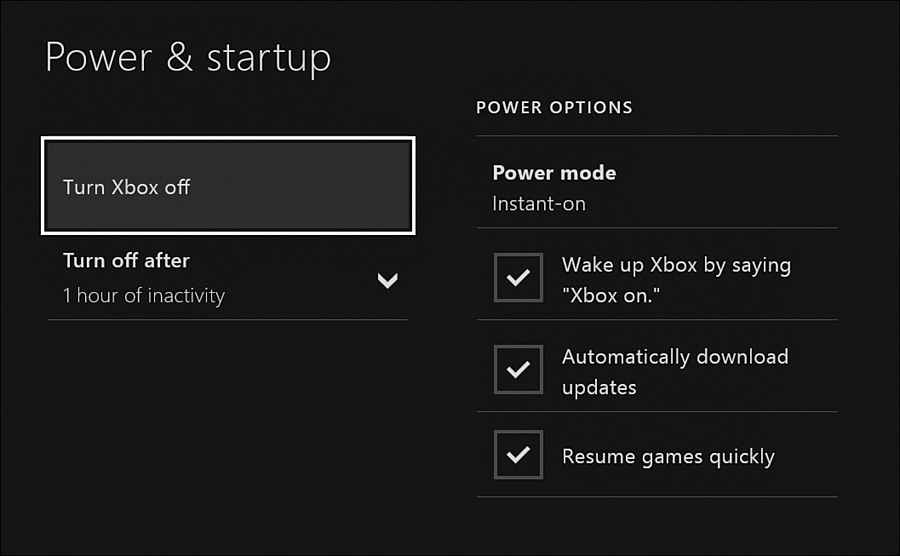
The options on the left include
• Turn Xbox Off—Select this option if you want to turn off your console. It just provides another way to accomplish this task.
• Turn Off After—This option enables you to select whether you want your console to turn off automatically after a set amount of inactivity. You can select from Turn Off After 1 Hour of Inactivity, Turn Off After 6 Hours of Inactivity, and Don’t Turn Off Automatically.
The options on the right include
• Power Mode—You can use this to select whether you want Instant-On mode or Energy-Saving mode. Instant-On is recommended. If you select Energy-Saving mode, you won’t be able to use your voice to turn on the console and your console won’t automatically download updates. In addition, this mode slows the startup time and prevents you from turning on your TV and cable/satellite box with the console. When Instant-On is selected, you can still opt out of certain features, such as the ability to wake up Xbox by saying “Xbox, on” and to automatically download updates. Simply uncheck these items.
There is also a Resume Games Quickly option. If you select it, you can resume games from the exact point you left off, even if you turn your Xbox One off and on again; however, you must sign back in to your account before you launch the game. If you don’t, your console will restart the game.
Adjusting Family Settings
Under the Settings menu, there is a Family option to the right of the Console setting options. By creating a family on Xbox One, you can manage privacy and online safety settings for children. Any adult in the family can add new members to the family, and there are different rights given to adults and to children with regard to managing the family.
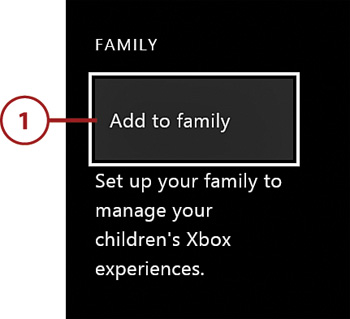
Add Family
To add a family member, sign in to your Xbox Live account and then follow these steps:
1. Go to the Settings on your console, scroll right to the Family section, and select Add to Family.
2. Select Add New.

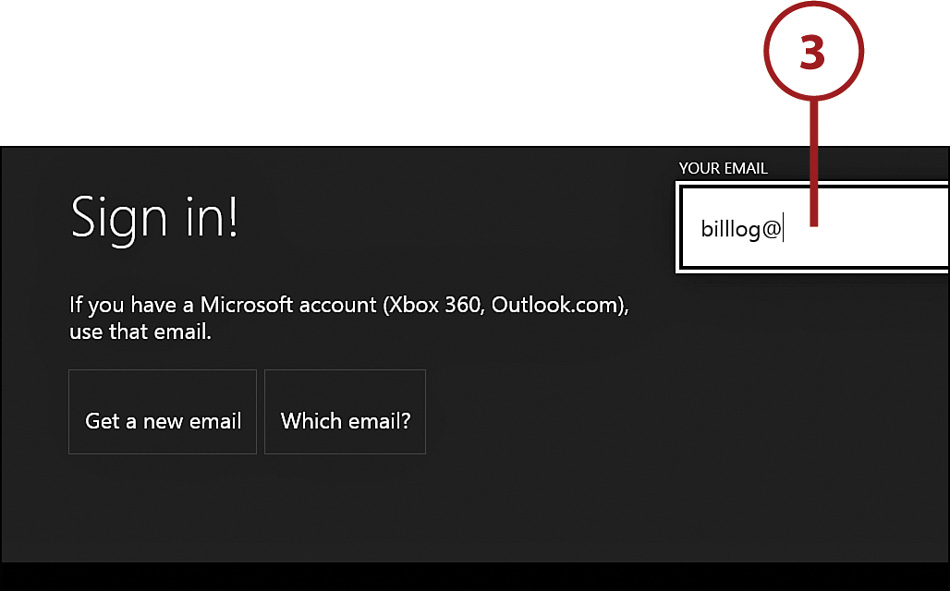
3. Have that person sign in to his or her Microsoft account (or choose to Get a New Email) using the onscreen keyboard and select Enter.
4. Have the person enter his or her password and select Enter.

5. Select Next on the privacy message that appears.

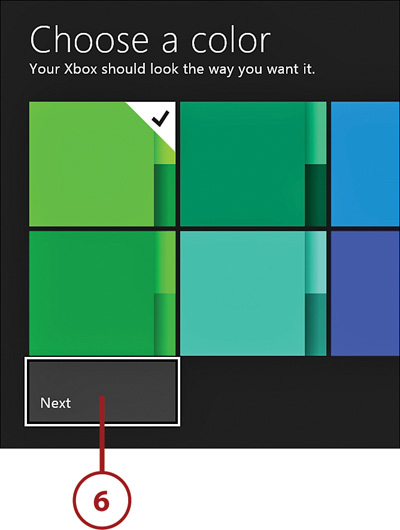
6. Have the person choose a color for his or her Dashboard tiles and select Next.
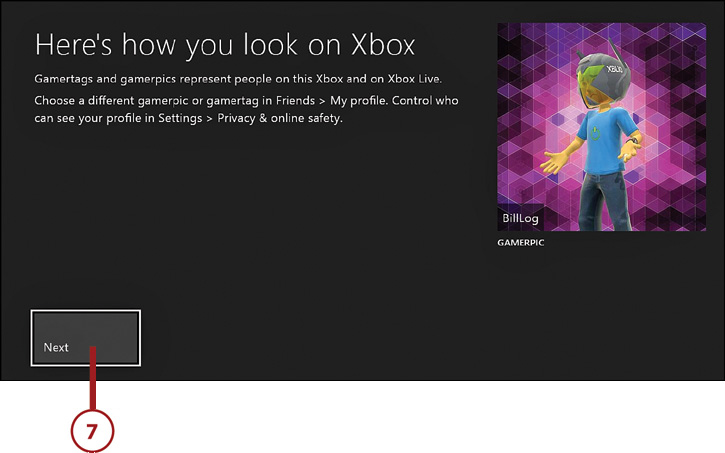
7. Confirm the person’s look and select Next. There’s really nothing you can do here other than accept what you see.
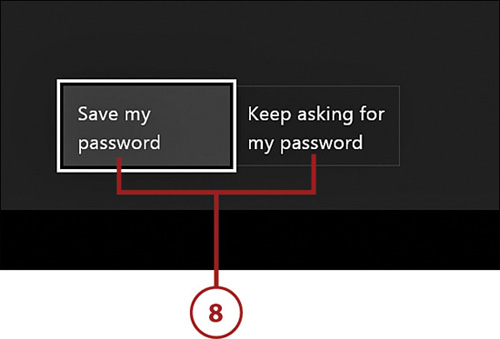
8. Decide whether you want to save the password or have the console keep asking for your password before you can log on.
9. Decide whether you want Kinect to sign you in. If you do, proceed to step 10. Otherwise, proceed to step 11.

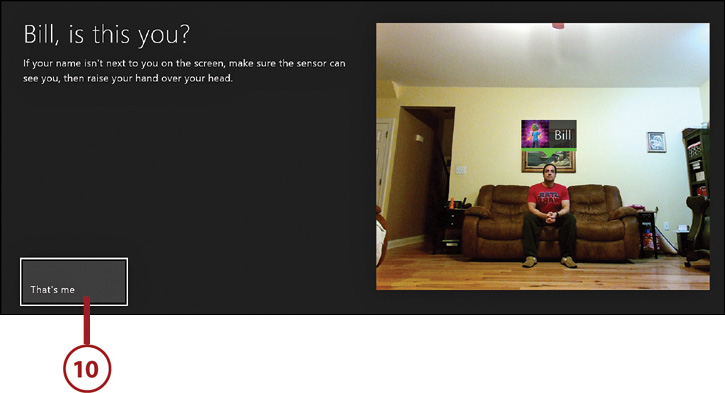
10. Have the person get in front of Kinect so that it can recognize him or her. After it does, select That’s Me. (If it doesn’t put the name over the person’s head on its own, have the person raise his or her hand straight up in the air.)
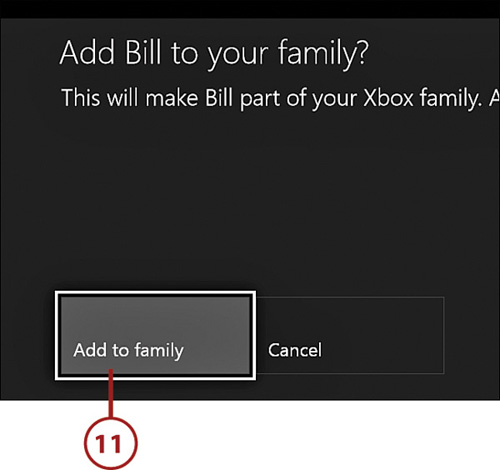
11. Select Add to Family.
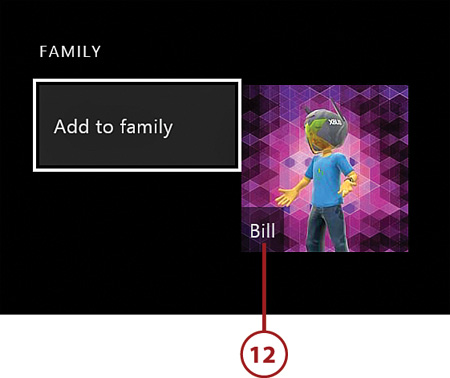
12. The person now appears in your family on the Settings screen.
When Adding Children
If the person you’re adding is a child, and you haven’t already associated his or her account with yours, you’ll need to provide parental consent to complete this process.
Remove Family
To remove a family member, follow these steps:
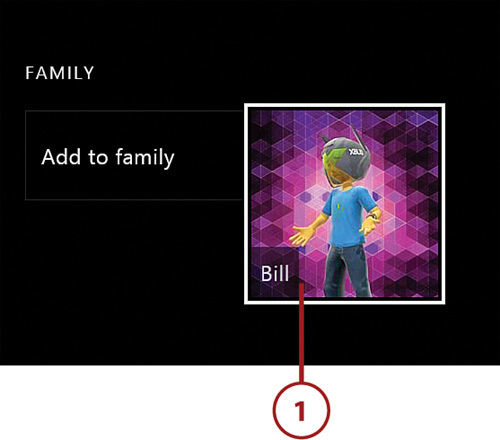
1. Go to Settings, scroll to Family, and select the family member you want to remove.
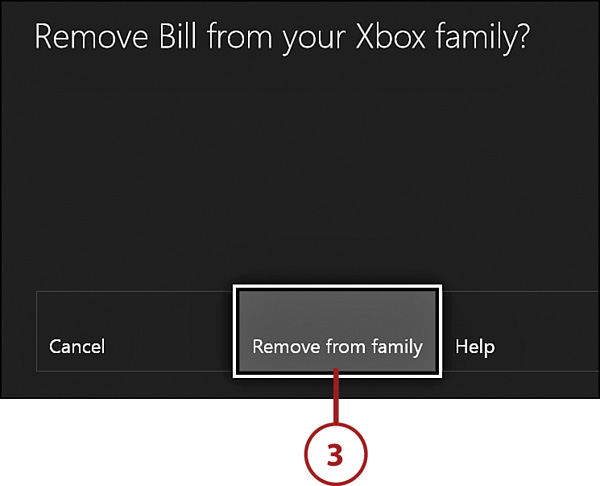
2. Select Remove from Family.

3. Confirm Remove from Family. The person’s profile no longer appears under your family.
Managing Other People and Guest Settings
Under the Settings screen, you can also manage other people by removing accounts and adjusting guest settings.
Remove Accounts
To remove accounts, follow these steps:
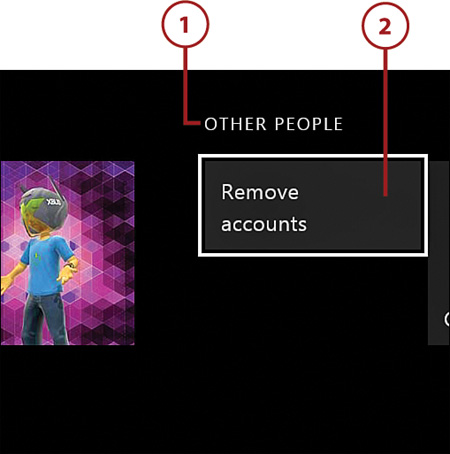
1. Go to the Home screen, press the Menu button on your controller, select Settings, and scroll right to Other People.
2. Select Remove Accounts.
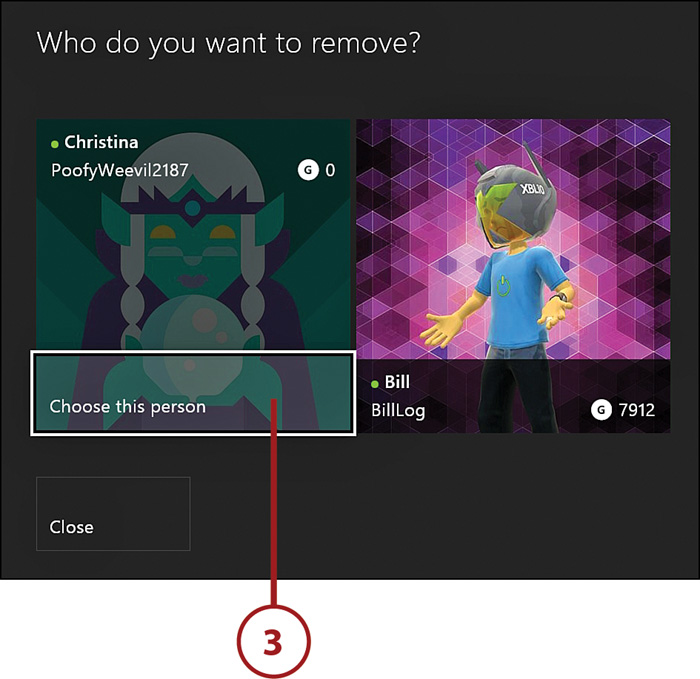
3. Scroll to the person you want to remove and select Choose This Person.
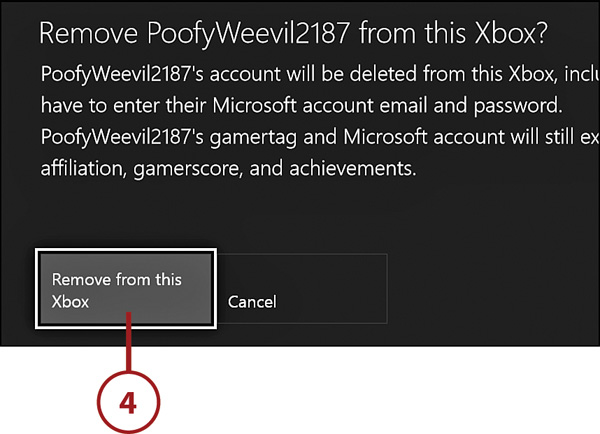
4. Select Remove from This Xbox. The person is now removed.
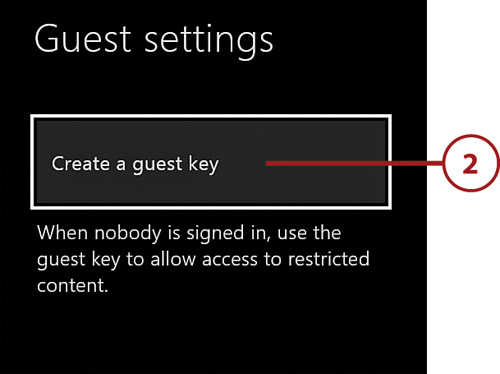
Adjust Guest Settings
When guests without Xbox Live accounts want to play games or watch movies on your Xbox One, you can sign them in with a guest account and they can use your console without you being present or signed in. To facilitate this, create a guest key, which enables the guest to override any content limitations that you set as the default experience on your Xbox One.
To set a guest key, sign in to your profile and then follow these steps:
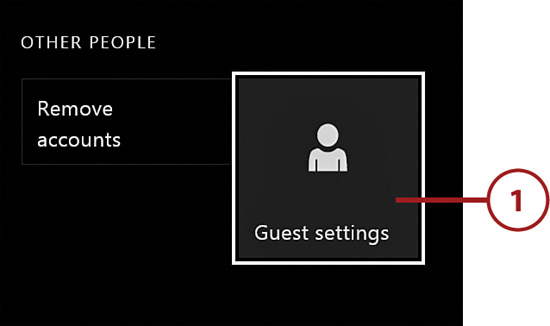
1. Press the Menu button on your controller, select Settings, and then scroll to the far right to Guest Settings.
2. Select Create a Guest Key.
Guest Keys Versus Passkeys
Setting a guest key doesn’t grant access to accounts for which you’ve already set a personal passkey. To optimize security, Microsoft recommends that you use a different six-digit combination for the guest key.
3. Set your six-digit guest key using the buttons on your console as illustrated onscreen.

4. Enter the guest key again to confirm it.

5. At the Guest Settings screen, decide what kind of access to content your guests should have and whether people can download and make new accounts. Then press the B button to get back to the Settings menu or the Xbox button to go to the Home screen.

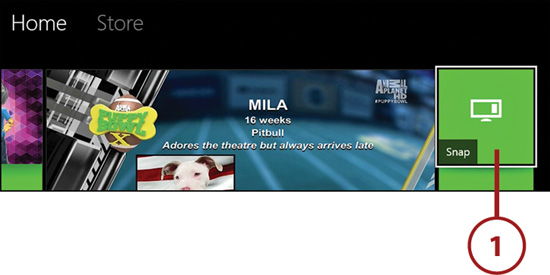
Multitasking with Snap
Snap is an Xbox One feature that enables you to multitask by letting you anchor, or snap, the apps most important to you to the right side of the screen while you’re engaged in another activity. For example, say you’re in the mood to play a football game but also want to keep tabs on the live game going on. No problem! With Snap, you can continue playing your game and have live TV snapped and streaming on the right side of your screen. If suddenly that live game gets super exciting, you can switch over to that snapped app and view it in Full-Screen mode. Pretty cool!
And just as there are multiple ways to skin a cat (though we’re not sure why anyone would want to do that), there are multiple ways for you to snap/unsnap apps and switch which app you’re focusing on. Just remember that although games can have a snapped app, games themselves can’t be snapped. Also, it’s one size fits all, as there’s no way to resize either the main window or the snapped app.
1. Go to the Home screen and select the Snap tile.
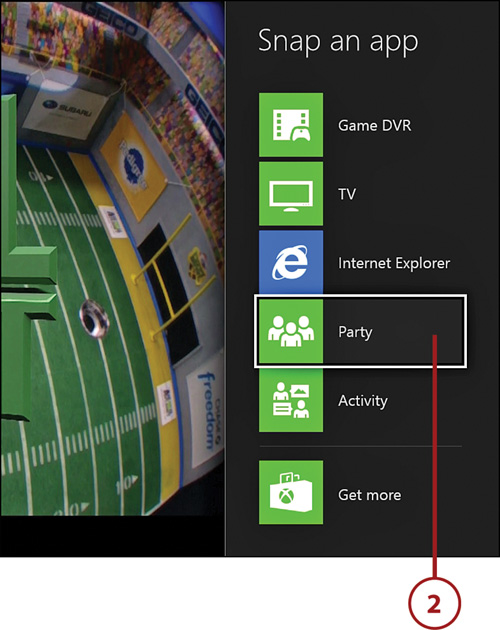
2. You now see a list of apps you can snap. Select the app you want. That’s it. To unsnap, proceed to step 3.
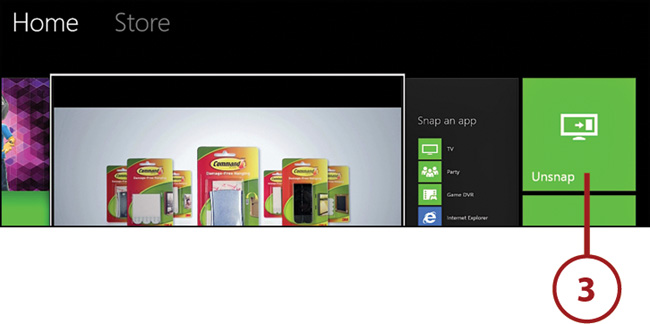
3. Go back to the Home screen and select the Snap tile again; it’ll say Unsnap.
Switch Over to Your Snapped App
The easiest ways to switch focus of which app you’re in is to either double-tap the Xbox button on your controller or to say “Xbox, switch.” Now the previously snapped app is the larger app in the center of your screen, with the other app appearing off to the right side.
An alternative way to toggle between your primary and snapped apps using your controller is to press the Xbox button to go Home, move to the app you want to focus on, and press the A button.
View a Snapped App in Full Screen
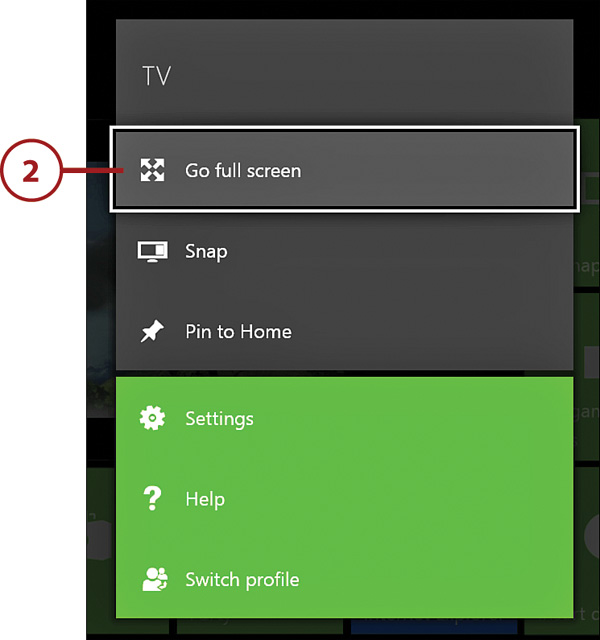
Your Xbox One remembers the most recent size of any app you’ve used. So if you want to view an app that you’ve snapped, it will appear in those snapped dimensions. To have that app fill your entire screen, follow these steps on your controller:
1. From the Home screen, go to the app that you want to view in full screen.

2. Press the Menu button on your controller and select Go Full Screen.