
Chapter 24
Enhancing Linux Security with SELinux
Security Enhanced Linux (SELinux) was developed by the National Security Agency (NSA) along with other security research organizations, such as Secure Computing Corporation (SCC). SELinux was released to the open source community in 2000 and became popular when Red Hat began implementing SELinux as a default package. Now, SElinux is used by many organizations and is widely available.
Understanding SELinux Benefits
SELinux is a security enhancement module deployed on top of Linux. It provides additional security measures and is included by default in RHEL and Fedora.
SELinux provides improved security on the Linux system via Role Based Access Controls (RBAC) on subjects and objects (aka processes and resources). "Traditional” Linux security uses Discretionary Access Controls (DAC).
SELinux is not a replacement for DAC. Instead, it is an additional security layer.
- DAC rules are still used when using SELinux.
- DAC rules are checked first and, if access is allowed, then SELinux policies are checked.
- If DAC rules deny access, SELinux policies are not reviewed.
If a user tries to execute a file that he does not have execute access to (rw-), the “traditional” Linux DAC controls will deny access. Thus, the SELinux policies will not even be checked.
Even though “traditional” Linux security controls still work, there are several benefits to using SELinux. A few of SELinux's benefits include:
- Implements the RBAC access control model—This is considered the strongest access control model.
- Uses least privilege access for subjects (for example, users and processes)—The term least privilege means that every subject is given a limited set of privileges that are only enough to allow the subject to be functional in its tasks. With least privilege implemented, a user or process is limited on the accidental (or on-purpose) damage to objects they can cause.
- Allows process sandboxing—The term process sandboxing means that each process runs in its own area (sandbox). It cannot access other processes or their files unless special permissions are granted. These areas where processes run are called “domains.”
- Allows a test of its functionality before implementation—SELinux has a Permissive mode, which allows you to see the effect of enforcing SELinux on your system.
Another way to look at SELinux benefits is to examine what can happen if SELinux is not running on your Linux system. For example, your web server daemon (httpd) is listening on a port for something to happen. A simple request from a web browser comes in to view a home page. Going through its normal routine, the httpd daemon hears the request and only “traditional” Linux security is applied. Being unconstrained by SELinux, httpd is able to:
- Access any file or directory, based on read/write/execute permissions for the associated owner and group.
- Perform potentially insecure activities, such as allow a file upload or change system limits.
- Listen on any port it likes for incoming requests.
On a system constrained by SELinux, the httpd daemon is much more tightly controlled. Using the preceding example, httpd can only listen on the port SELinux allows it to listen on. In essence, SELinux severely limits malicious code and activity on your Linux system.
Understanding How SELinux Works
SELinux could be compared to a guard at a door: In this comparison, the subject (the user) wants to access the object (the file) inside the room. To gain access to this object:
- If the access rules allow this particular ID badge inside the door, the subject may enter the room to access the object.
- If the access rules do not allow this particular ID badge access to the object, then the guard refuses entry.
SELinux provides a combination of Role Based Access Control (RBAC) and either Type Enforcement (TE) or Multi-Level Security (MLS). In Role Based Access Control (see Chapter 22), access to an object is based on a subject's assigned role in the organization. Therefore, it is not based on the subject's username or process ID. Each role is granted access rights.
Understanding Type Enforcement
Type Enforcement (TE) is necessary to implement the RBAC model. Type Enforcement secures a system through:
- Labeling objects as certain security types
- Assigning subjects to particular domains and roles
- Providing rules allowing certain domains and roles to access certain object types
The example that follows uses the ls -l command to show the DAC controls on the file my_stuff. The file has owner and group listed as well as its assignments for read, write, and execute. If you need a review of file permissions, see Chapter 4, “Moving around the File System.”
$ ls -l my_stuff
-rw-rw-r--. 1 johndoe johndoe 0 Feb 12 06:57 my_stuff
The example that follows includes ls -Z and the same file, my_stuff, but instead of just the DAC controls, the -Z option displays the SELinux security RBAC controls, too.
$ ls -Z my_stuff
-rw-rw-r--. johndoe johndoe
unconfined_u:object_r:user_home_t:s0 my_stuff
The ls -Z example displays four more items than the ls -l command:
- A user (unconfined_u)
- A role (object_r)
- A type (user_home_t)
- A level (s0)
These four RBAC items (user, role, type, and level) are used in the SELinux access control to determine appropriate access levels. Together, the items are called the SELinux security context. A security context (ID badge) is sometimes called a “security label.”
These security context assignments are given to subjects (processes and users). Each security context has a specific name. The name given depends upon what object or subject it has been assigned: Files have a file context, users have a user context, and processes have a process context, also called a “domain.”
The rules allowing access are called “allow rules” or “policy rules.” A policy rule is the process SELinux follows to grant or deny access to a particular system security type. Returning to the comparison of SELinx with the guard, SELinux serves as the guard who must see the subject's security context (ID badge) and review the policy rules (access rules manual) before allowing or denying access to an object. Thus, Type Enforcement ensures that only certain “types” of subjects can access certain “types” of objects.
Understanding Multi-Level Security
With SELinux, you can choose Multi-Level Security, which uses Type Enforcement along with the additional feature of security clearances. It also offers Multi-Category Security, which gives classification levels to objects.
Multi-Level Security enforces the Bell-LaPadula Mandatory Access security model. The Bell-LaPadula model was developed by the U.S. government to impose information confidentiality. Enforcing this model is accomplished by granting object access based on the role's security clearance and the object's classification level. Security clearance is an attribute granted to roles allowing access to classified objects. Classification level is an attribute granted to an object, providing protection from subjects who have a security clearance attribute that is too low. You most likely have heard the classification level “Top Secret.” The fictional book and movie character James Bond had a top-secret security clearance, which granted him access to top-secret classified information. This is a classic use of the Bell-LaPadula model.
The combination of RBAC along with either Type Enforcement (TE) or Multi-Level Security (MLS) enables SELinux to provide such a strong security enhancement. SELinux also offers different Operational Modes for its use.
Implementing SELinux security models
The Role Based Access Control model, Type Enforcement, Multi-Level Security, and Bell-LaPadula models are all interesting topics. SELinux implements these models through a combination of four primary SELinux pieces:
- Operational Modes
- Security contexts
- Policy types
- Policy rule packages
Although we've touched on some of these design elements, the following will give you an in-depth understanding of them. This understanding is needed before you begin configuring SELinux on your system.
Understanding SELinux Operational Modes
SELinux comes with three Operational Modes: Disabled, Permissive, and Enforcing. Each one of these modes offers different benefits for Linux system security.
Using the Disabled mode
In the Disabled mode, SELinux is turned off. The default method of access control, Discretionary Access Control (DAC), is used instead. This mode is useful for circumstances in which enhanced security is not required.
Using the Permissive mode
In Permissive mode, SELinux is turned on, but the security policy rules are not enforced. When a security policy rule should deny admission, access is still allowed. However, a message is sent to a log file denoting that access should have been denied.
SELinux Permissive mode is used for the following:
- Auditing the current SELinux policy rules
- Testing new applications to see what effect SELinux policy rules will have on them
- Testing new SELinux policy rules to see what effect the new rules will have on current services and applications
- Troubleshooting why a particular service or application is no longer working properly under SELinux
Using the Enforcing mode
The name pretty much says it all. In Enforcing mode, SELinux is turned on and all the security policy rules are enforced.
Understanding SELinux security contexts
As mentioned earlier, an SELinux security context is the method used to classify objects (such as files) and subjects (such as users and programs). The defined security context allows SELinux to enforce policy rules for subjects accessing objects. A security context consists of four attributes: user, role, type, and level.
- user—The user attribute is a mapping of a Linux username to an SELinux name. This is not the same as a user's login name, and is referred to specifically as the SELinux user. The SELinux username ends with a u, making it easier to identify in the output.
- role—A designated role in the company is mapped to an SELinux role name. The role attribute is then assigned to various subjects and objects. Each role is granted access to other subjects and objects based on the role's security clearance and the object's classification level. More specifically, for SELinux, users are assigned a role and roles are authorized for particular types or domains. Using roles can force accounts, such as root, into a less privileged position. The SELinux role name has an “r” at the end.
- type—This attribute defines a domain type for processes, a user type for users, and a file type for files. This attribute is also called “security type.” Assigning a type is a method of grouping items based on their similarity from a security viewpoint. Policy rules allow certain domains and roles to access certain object types. This is a key element in Type Enforcement. For example, every process runs in a domain. This assigned domain type directly determines each process's access to the various file types as well as access to other processes' domain types. Most policy rules are concerned with what security types have access to what other security types. The SELinux type name ends with a t.
- level—The level is an attribute of Multi-Level Security (MLS) and enforces the Bell-LaPadula model. It is optional in TE, but required if you are using MLS.
- sensitivity
- Represents the security or sensitivity level of an object, such as confidential or top secret.
- Is hierarchical with s0 (unclassified) typically being the lowest.
- Is listed as a pair of sensitivity levels (lowlevel-highlevel) if the levels differ.
- Is listed as a single sensitivity level (s0) if there are no low and high levels. Yet in some cases, even if there are no low and high levels, the range is still shown (s0-s0).
- category
- Represents the category of an object, such as No Clearance, Top Clearance, and so on.
- Traditionally, the values are between c0 and c255.
- Is listed as a pair of category levels (lowlevel:highlevel) if the levels differ.
- Is listed as a single category level (level) if there are no low and high levels.
Users have security contexts
To see your SELinux user context, enter the id command at the shell prompt. The following is an example of the security context for user johndoe:
$ id
uid=1000(johndoe) gid=1000(johndoe) groups=1000(johndoe)
 context=unconfined_u:unconfined_r:unconfined_t:s0-s0:c0.c1023
The user's security context list shows the following:
- user—The Linux user, johndoe, is mapped to the SELinux unconfined_u user.
- role—The SELinux user, unconfined_u, is mapped to the role of the unconfined_r.
- type—The user has been given the type of unconfined_t.
- level—
- sensitivity—The user has only one sensitivity level and it is the lowest level of s0.
- categories—The user has access to c0.c1023, which is all categories (c0 through to c1023).
Files have security contexts
A file also has a security context. To see an individual file's context, use the -Z option on the ls command. The following is a security context for the file my_stuff:
$ ls -Z my_stuff
-rw-rw-r--. johndoe johndoe
 unconfined_u:object_r:user_home_t:s0 my_stuff
The file context list shows the following:
- user—The file is mapped to the SELinux unconfined_u user.
- role—The file is mapped to the role of object_r.
- type—The file is considered to be part of the user_home_t domain.
- level—
- sensitivity—The user has only one sensitivity level and it is the lowest level of s0.
- categories—MCS is not set for this file.
Processes have security contexts
A process's security context has the same four attributes as a user and a file's context. To see process information on a Linux system, you typically use a variant of the ps command. In the following code, the ps -el command was used.
# ps -el | grep bash
0 S  1000  1589  1583  0  80   0 -  1653 n_tty_ pts/0    00:00:00 bash
0 S  1000  5289  1583  0  80   0 -  1653 wait   pts/1    00:00:00 bash
4 S     0  5350  5342  0  80   0 -  1684 wait   pts/1    00:00:00 bash
To see a process's security context, you need to use the -Z option on the ps command. In the example that follows, the ps -eZ command was used and then piped into grep to search for only processes running the bash shell.
# ps -eZ | grep bash
unconfined_u:unconfined_r:unconfined_t:s0-s0:c0.c1023 1589 pts/0 00:00:00 bash
unconfined_u:unconfined_r:unconfined_t:s0-s0:c0.c1023 5289 pts/1 00:00:00 bash
unconfined_u:unconfined_r:unconfined_t:s0-s0:c0.c1023 5350 pts/1 00:00:00 bash
The process context list shows the following:
- user—Process is mapped to the SELinux unconfined_u user.
- role—Process is running as the unconfined_r role.
- type—Process is running in the unconfined_t domain.
- level—
- sensitivity—Process has only level s0.
- categories—Process has access to c0.c1023, which is all categories (c0 through to c1023).
These security contexts can all be changed to meet your organization's particular security needs. However, before you learn how to change the settings of these security contexts, you need to understand another piece of the SELinux puzzle, SELinux Policy types.
Understanding SELinux Policy types
The Policy type chosen directly determines what sets of policy rules are used to dictate what an object can access. The Policy type also determines what specific security context attributes are needed. This is where you start to see the fine level of access control that can be implemented via SELinux.
SELinux has different policies you can choose between:
- Targeted
- MLS
- Minimum
Each policy implements different access control to match your organization's needs. It is critical to understand these Policy types in order to select the correct one for your particular security requirements.
Targeted policy
The Targeted policy's primary purpose is to restrict “targeted” daemons. However, it can also restrict other processes and users. Targeted daemons are sandboxed. A sandbox is an environment where programs can run, but their access to other objects is tightly controlled. A process running in such an environment is said to be “sandboxed.” Thus, a targeted daemon is restricted so that no malicious attacks launched through them can affect other services or the Linux system as a whole.
All subjects and objects not targeted are run in the unconfined_t domain. The unconfined_t domain has no SELinux policy restrictions and thus only uses the “traditional” Linux security.
SELinux comes with the Targeted policy set as the default. Thus, by default, SELinux targets only a few daemons.
MLS (Multi-Level Security) policy
The MLS policy's primary purpose is to enforce the Bell-LaPadula model. It grants access to other subjects and objects based upon a role's security clearance and the object's classification level.
In the MLS policy, a security context's MLS attribute is critical. Otherwise, the policy rules will not know how to enforce access restrictions.
Minimum policy
This policy is just as it sounds, minimal. It was originally created for low-memory machines or devices such as smart phones.
The Minimum policy is essentially the same as the Targeted policy, but only the base policy rule package is used. This “bare bones” policy can be used to test out the effects of SELinux on a single designated daemon. For low-memory devices, the Minimum policy allows SELinux to run without consuming a great deal of resources.
Understanding SELinux Policy rule packages
Policy rules, also called allow rules, are the rules used by SELinux to determine if a subject has access to an object. Policy rules are installed with SELinux and are grouped into packages, also called modules. Each particular policy package file ends with a *.pp.
The /etc/selinux/policy_type/modules/active/modules directory contains a number of policy package (*.pp) files. The example that follows shows the policy rule packages for a Linux system with the Targeted policy implemented:
# ls /etc/selinux/targeted/modules/active/modules/*.pp
/etc/selinux/targeted/modules/active/modules/abrt.pp
/etc/selinux/targeted/modules/active/modules/accountsd.pp
/etc/selinux/targeted/modules/active/modules/acct.pp
/etc/selinux/targeted/modules/active/modules/ada.pp
/etc/selinux/targeted/modules/active/modules/afs.pp
...
/etc/selinux/targeted/modules/active/modules/xserver.pp
/etc/selinux/targeted/modules/active/modules/zabbix.pp
/etc/selinux/targeted/modules/active/modules/zarafa.pp
/etc/selinux/targeted/modules/active/modules/zebra.pp
/etc/selinux/targeted/modules/active/modules/zosremote.pp
On your Linux system, there is user documentation on these various policy modules, in the form of HTML files. To view this documentation on Fedora or RHEL, open your system's browser and type in the following URL: file:///usr/share/doc/selinux-policy-selinuxversion#/html/index.html. Figure 24.1 shows the policy module documentation index. For Ubuntu, the URL is file:///usr/share/doc/selinux-policy-doc/html/index.html. If you do not have the policy documentation on your system, you can install it on a Fedora or RHEL system, by typing yum install selinux-policy-doc at the command line. On Ubuntu, type sudo apt-get install selinux-policy-doc at the command line.
Figure 24.1 SELinux policy module documentation.
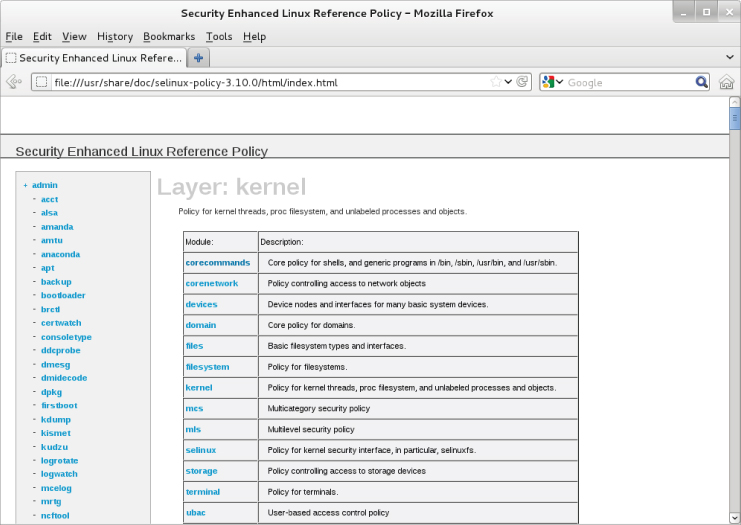
You can review this policy documentation to see how policy rules are created and packaged.
The policy rule packages, along with the SELinux operation mode, Policy type, and various security contexts, work together to secure your Linux system via SELinux. The following section will cover how to begin configuring SELinux to meet your particular organization's security needs.
Configuring SELinux
SELinux comes preconfigured. You can use the SELinux features without any configuration work. However, rarely will the preconfigured settings meet all your Linux system's security needs.
SELinux configurations can only be set and modified by the root user. Configuration and policy files are located in the /etc/selinux directory. The primary configuration file is the /etc/selinux/config file and it appears as follows:
# cat /etc/selinux/config
# This file controls the state of SELinux on the system.
# SELINUX= can take one of these three values:
#      enforcing - SELinux security policy is enforced.
#      permissive - SELinux prints warnings instead of enforcing.
#      disabled - SELinux is fully disabled.
SELINUX=enforcing
# SELINUXTYPE= type of policy in use. Possible values are:
#      targeted - Only targeted network daemons are protected.
#      strict - Full SELinux protection.
SELINUXTYPE=targeted
This main SELinux configuration file allows you set the Operational Mode and the Policy type.
Setting the SELinux Operational Mode
To see SELinux's current Operational Mode on your system, use the getenforce command. To see both the current Operational Mode and the mode set in the configuration file, use the sestatus command. Both commands are shown in the code that follows:
# getenforce
Enforcing
#
# sestatus
SELinux status:                 enabled
SELinuxfs mount:                /sys/fs/selinux
Current mode:                   enforcing
Mode from config file:          enforcing
Policy version:                 26
Policy from config file:        targeted
To change the Operational Mode setting, you can use the setenforce newsetting, where newsetting is either:
- enforcing or 1
- permissive or 0
Notice that you cannot use the setenforce command to change SELinux to disabled mode.
The example that follows shows the SELinux mode being changed to permissive mode via the setenforce command. The sestatus command shows the current Operational Mode and the mode in the configuration file, which has not been modified. When the system is rebooted, it determines the SELinux Operational Mode from the configuration file. Thus, the permissive mode set in the example that follows is temporary because the enforcing mode will be set via the configuration file when the system is rebooted.
# setenforce 0
#
# getenforce
Permissive
#
# sestatus
SELinux status:                 enabled
SELinuxfs mount:                /sys/fs/selinux
Current mode:                   permissive
Mode from config file:          enforcing
...
To disable SELinux, you must edit the SELinux configuration file. To keep any current Operational Mode settings from changing, you also must edit the configuration file. The preferred method of changing the SELinux Operational Mode is to modify the configuration file and then reboot the system.
When switching from disabled to either enforcing or permissive mode, SELinux will automatically relabel the filesystem after a reboot. This means SELinux will check and change the security contexts of any files with incorrect security contexts (for example, mislabeled files) that can cause problems in the new Operational Mode. Also, any files not labeled are labeled with contexts. This relabeling process can take a long time because each file's context is checked. The following is the message you will receive when a system is going through a relabeling process after a reboot:
*** Warning -- SELinux targeted policy relabel is required.
*** Relabeling could take a very long time, depending on file
*** system size and speed of hard drives.
To modify the Operational Mode in the /etc/selinux/config file, change the line SELINUX= to one of the following:
- disabled
- enforcing
- permissive
The SELinux configuration file example that follows shows that the mode has been set to permissive. Now, when a system reboot occurs, the mode will be changed.
# cat /etc/selinux/config
# This file controls the state of SELinux on the system.
# SELINUX= can take one of these three values:
#      enforcing - SELinux security policy is enforced.
#      permissive - SELinux prints warnings instead of enforcing.
#      disabled - SELinux is fully disabled.
SELINUX=permissive
...
The primary SELinux configuration file does not only contain the Operational Mode setting. It also specifies the Policy type, which will be enforced.
Setting the SELinux Policy type
The Policy type you choose will determine whether SELinux enforces TE, MLS, or a base package. This type setting directly determines the sets of policy rules used to dictate what an object can access.
By default, the Policy type is set to targeted. To change the default Policy type, edit the /etc/selinux/config file. Change the line SELINUXTYPE= to one of the following:
- targeted
- mls
- minimum
If you set the SELinux type to mls or minimum, you need to make sure you have their policy package installed first. Check by typing the following command: yum list selinux-policy-mls or yum list selinux-policy-minimum.
The example of the SELinux configuration file that follows shows that the type has been set to mls. Now, when a system reboot occurs, the Policy type will be changed.
# cat /etc/selinux/config
# This file controls the state of SELinux on the system.
...
# SELINUXTYPE= type of policy in use. Possible values are:
#      targeted - Only targeted network daemons are protected.
#      strict - Full SELinux protection.
SELINUXTYPE=mls
Managing SELinux security contexts
SELinux security contexts allow SELinux to enforce policy rules for subjects accessing objects. Your Linux system comes with security contexts already assigned.
To view current SELinux file and process security contexts, use the secon command. Table 24.1 lists options available on the secon command.
Table 24.1 secon Command Options
| Option | Description |
| -u | Use this option to show the user of the security context. |
| -r | Use this option to show the role of the security context. |
| -t | Use this option to show the type of the security context. |
| -s | Use this option to show sensitivity level of the security context. |
| -c | Use this option to show the clearance level of the security context. |
| -m | Use this option to show the sensitivity and clearance level of the security context as an MLS range. |
If you use the secon command with no designation, it will show you the current process's security context. To see another process's security context, use the -p option. The example that follows shows you how to use secon to view the current and the init process's security context.
# secon -urt
user: unconfined_u
role: unconfined_r
type: unconfined_t
#
# secon -urt -p 1
user: system_u
role: system_r
type: init_t
To view a file's security context, you use the -f option, as shown here:
# secon -urt -f /etc/passwd
user: system_u
role: object_r
type: etc_t
A user's security context is not viewed using the secon command. To see a user's security context, the id command must be used. To see a user's security context besides your own, the command syntax is id -Z username.
Managing the user security context
Remember that every system user login ID is mapped to a particular SELinux user ID. To see a mapping list on your system, enter the semanage login -l command. The semanage command and its output are shown in the code that follows. If a user login ID is not listed, then it uses the “default” login mapping, which is the Login Name of _default_. Notice that the associated MLS/MCS settings for each SELinux user are shown as well.
# semanage login -l
Login Name           SELinux User         MLS/MCS Range
__default__          unconfined_u         s0-s0:c0.c1023
root                 unconfined_u         s0-s0:c0.c1023
system_u             system_u             s0-s0:c0.c1023
To see a current display of the SELinux users and their associated roles, use the command semanage user -l. The partial display that follows shows roles mapped to SELinux usernames:
# semanage user -l
             Labeling MLS/      MLS/
SELinux User Prefix   MCS Level MCS Range       SELinux Roles
git_shell_u  user     s0        s0              git_shell_r
guest_u      user     s0        s0              guest_r
...
user_u       user     s0        s0              user_r
xguest_u     user     s0        s0              xguest_r
If you need to add a new SELinux username, the semanage utility is used again. This time, the command is semanage user -a selinux_username. To map a login ID to the newly added SELinux username, the command is semanage login -a -s selinux_username loginID. The semanage utility is a powerful tool in managing your SELinux configuration. For more information on the semanage utility, see the man pages.
Managing the file security context
Labeling files is critical to maintaining proper access control to each file's data. SELinux does set file security labels upon installation and upon system reboot when the SELinux Operation Mode is switched from disabled. To see a file's current label (aka security context), use the ls -Z command, as shown here:
# ls -Z /etc/passwd
-rw-r--r--. root root
 system_u:object_r:etc_t:s0       /etc/passwd
There are several commands you can use to manage file security context labels, as shown in Table 24.2.
Table 24.2 File Security Context Label Management Commands
| Utility | Description |
| chcat | Used to change a file's security context label's category. |
| chcon | Used to change a file's security context label. |
| fixfiles | Calls the restorecon/setfiles utility. |
| restorecon | Does the exact same thing as setfiles utility, but has a different interface than setfiles. |
| setfiles | Used for verifying and/or correcting security context labels. It can be run for file label verification and/or relabeling files when adding a new policy module to the system. Does exactly the same thing as the restorecon utility, but has a different interface than restorecon. |
The chcat and chcon commands, shown in Table 24.2, allow you to change a file's security context. In the example below, the chcon command is used to change the SELinux user associated with file.txt from undefined_u to system_u.
# ls -Z file.txt
-rw-rw-r--. johndoe johndoe
 unconfined_u:object_r:user_home_t:s0 file.txt
#
# chcon -u system_u file.txt
#
# ls -Z file.txt
-rw-rw-r--. johndoe johndoe
 system_u:object_r:user_home_t:s0 file.txt
Notice in Table 24.2 that fixfiles, restorecon, and setfiles are essentially the same utility. However, restorecon is the popular choice to use when fixing files' labels. The command restorecon -R filename will change a file back to its default security context.
Managing the process security context
The definition of a process is a running program. When you run programs or start services on a Linux system, each one is given a process ID (see Chapter 6). On a system with SELinux, a process is also given a security context.
How a process gets its security context depends upon which process started it. Remember that init is the “mother” of all processes (see Chapter 15). Thus, many daemons and processes are started by init. The processes init starts are given new security contexts. For instance, when the apache daemon is started by init, it is assigned the type (aka domain) httpd_t. The context assigned is handled by the SELinux policy written specifically for that daemon. If no policy exists for a process, then it is assigned a default type, unconfined_t.
For a program or application run by a user (parent process), the new process (child process) inherits the user's security context. Of course, this occurs only if the user is allowed to run the program. A process can also run a program. The child process in this case also inherits its parent process's security context. Thus, the child process runs in the same domain.
So, a process's security context is set before the program is run and depends upon who started it. There are a couple of commands you can use to change the security contexts under which a program is run:
- runcon—Run the program using options to determine the user, role, and type (aka domain).
- sandbox—Run the program within a tightly controlled domain (aka sandbox).
You can cause several problems by using runcon, so use it with caution. However, sandbox offers a great deal of protection. It allows flexibility in testing out new programs on your Linux system.
Managing SELinux policy rule packages
Policy rules are the rules used by SELinux to determine whether a subject has access to an object. They are grouped into packages, also called modules, and are installed with SELinux. An easy way to view the modules on your system is to use the semodule -l command. It will list all the policy modules along with their current version number. An example of the semodule -l command is show here:
# semodule -l
abrt          1.2.0
accountsd     1.0.0
acct          1.5.0
...
xserver       3.5.6
zabbix        1.3.1
zarafa        1.0.0
zebra         1.12.0
zosremote     1.1.0
Several tools will help you to manage and even create your own policy modules. Table 24.3 shows the various Policy rule package tools available on a Fedora system.
Table 24.3 SELinux Policy Package Tools
| Policy Tool | Description |
| audit2allow | Generates policy allow/dontaudit rules from logs of denied operations |
| audit2why | Generates a description of why the access was denied from logs of denied operations |
| checkmodule | Compiles policy modules |
| checkpolicy | Compiles SELinux policies |
| load_policy | Loads new policies into the kernel |
| semodule | Manages policy modules |
| semodule_deps | Lists dependencies between policy packages |
| semodule_expand | Expands a policy module package |
| semodule_link | Links policy module packages together |
| semodule_package | Creates a policy module package |
The following is an example policy typically used as a framework to create local policy rules. The example policy is rather long, so only a portion of it is shown.
# cat /usr/share/selinux/devel/example.te
policy_module(myapp,1.0.0)
########################################
#
# Declarations
#
type myapp_t;
type myapp_exec_t;
domain_type(myapp_t)
domain_entry_file(myapp_t, myapp_exec_t)
type myapp_log_t;
logging_log_file(myapp_log_t)
type myapp_tmp_t;
files_tmp_file(myapp_tmp_t)
...
allow myapp_t myapp_tmp_t:file manage_file_perms;
files_tmp_filetrans(myapp_t,myapp_tmp_t,file)
#
You can see from the preceding example code that there is a special syntax used in policy code. To create and modify policy rules, you will need to learn this policy rule language syntax; learn how to use the SELinux policy compilers; learn how to link policy rule files together to form modules, and probably need to take a couple of day-long classes. You may be tempted to give up on SELinux at this point. However, it is much easier to use Booleans to modify policies.
Managing SELinux via Booleans
SELinux policy rule writing and module creation is a rather complicated and time-consuming activity. Creating incorrect policy rules could potentially compromise your Linux system's security. Thankfully, SELinux provides Booleans.
A Boolean is a toggle switch that toggles a setting on or off. A Boolean switch allows you to change parts of SELinux policy rules, without any knowledge of policy writing. These policy changes can be done without a system reboot, too!
To see a list of all the current Booleans used in SELinux, use the getsebool -a command. The following is an example of the SELinux policy rules with Booleans on a Fedora Linux system:
# getsebool -a
abrt_anon_write --> off
abrt_handle_event --> off
allow_console_login --> off
...
xserver_object_manager --> off
zabbix_can_network --> off
To see a specific policy that can be modified by a Boolean, the getsebool command is used again. This time, the policy name is passed to it, as shown in the following example:
# getsebool httpd_can_connect_ftp
httpd_can_connect_ftp --> off
To toggle a policy, you can use either the setsebool command or the togglebool command. Both of these commands change the policy rule temporarily. When the system is rebooted, the Boolean will return to its original setting. If you need this setting to be permanent, you can use only the setsebool with the -P option.
The togglebool command just toggles the current Boolean setting of the policy you specify between on and off. For instance, if you issued the command togglebool httpd_can_connect_ftp, you would change the policy setting status from its previous setting of “off” to “on.”
The setsebool command has six settings: three for turning a policy on (on, 1, or true), and three for turning a policy off (off, 0, or false).
For an example using setsebool, remember from Chapter 22 that it is not good security to allow users to execute programs from their /home directory. Typically, programs executed by users in this location are malware. To prevent this from happening, the allow_user_exec_content policy rule needs to be turned off. The example that follows shows the setsebool command being used to do just that. Notice that the -P option is used to make this setting permanent.
# setsebool -P allow_user_exec_content off
The getsebool command will verify that the Boolean setting has been correctly made:
# getsebool allow_user_exec_content
allow_user_exec_content --> off
Booleans make modifying current SELinux policy rules much easier. Overall, the SELinux command line configuration utilities, such as getsebool, are easy to use. However, if you want a GUI configuration tool, SELinux has one. It is installed via the command yum install policycoreutils-gui. On Ubuntu, use the command sudo apt-get install policycoreutils. To use this configuration tool, simply type in the command system-config-selinux and a GUI interface appears.
Monitoring and Troubleshooting SELinux
SELinux is another tool for monitoring your system. It logs all access denials, which can help you determine if an attack is being attempted. These same SELinux log files are also useful in troubleshooting SELinux problems.
Understanding SELinux logging
SELinux uses a cache called the Access Vector Cache (AVC) when reviewing policy rules for particular security contexts. When access is denied, called an AVC denial, a denial message is put into a log file.
These logged denial messages can help you diagnose and address routine SELinux policy violations. Where these denial messages are logged depends upon the status of the auditd and rsyslogd daemons:
- If the auditd daemon is running, the denial messages are logged to /var/log/audit/audit.log.
- If auditd is not running, but the rsyslogd daemon is running, the denial messages are logged to /var/log/messages.
Reviewing SELinux messages in the audit log
If you have the auditd daemon running, you can quickly see if any AVC denials have been logged by using the aureport command. The example that follows shows the use of aureport and grep to search for AVC denials. At least one denial has been logged to /var/log/audit/audit.log:
# aureport | grep AVC
Number of AVC's: 1
Once you discover that an AVC denial has been logged in audit.log, you can use ausearch to review the denial message(s). The example that follows shows the ausearch command being used to review the logged AVC denial message.
# ausearch -m avc
----
time->Sat Feb 25 09:18:07 2015
type=SYSCALL msg=audit(1330179487.213:250):
 arch=40000003 syscall=226 success=no exit=-22
 a0=8c1d8d8 a1=4c6db1cb a2=8c1ec90 a3=1f items=0
 ppid=2582 pid=3053 auid=1000 uid=0 gid=0 euid=0
 suid=0 fsuid=0 egid=0 sgid=0 fsgid=0 tty=pts0
 ses=2 comm=”chcon” exe=”/usr/bin/chcon”
 subj=unconfined_u:unconfined_r:unconfined_t:s0-s0:c0.c1023
 key=(null)
type=AVC msg=audit(1330179487.213:250): avc:  denied
{ mac_admin } for  pid=3053 comm=”chcon” capability=33
scontext=unconfined_u:unconfined_r:unconfined_t:s0-s0:c0.c1023
tcontext=unconfined_u:unconfined_r:unconfined_t:s0-s0:c0.c1023
 tclass=capability2
The display will provide information on who was attempting access, along with their security context when attempting it. Key words to look for in an AVC denial message are:
- type=AVC
- avc: denied
- pid=
- exe=
- subj=
This can give you enough data to either begin fixing a problem or track down malicious activity.
Reviewing SELinux messages in the messages log
If you have the rsyslogd running, you can find AVC denials messages by searching through the /var/log/messages file using grep. The example that follows shows the search for SELinux denial messages.
# grep "SELinux is preventing" /var/log/messages
Feb 25 09:18:08 localhost setroubleshoot: SELinux is preventing
 /usr/bin/chcon from mac_admin access on the None . For complete
 SELinux messages.
 run sealert -l b1386ca2-6e83-4c29-b0db-a5470fa34f75
From the example, you can see that a Linux user attempted to run the chcon command. Also, notice that the AVC denial message tells you that you can run the sealert command to get more information. The message includes this information because, on this particular Linux system, the setroubleshootd daemon is running.
The sealert utility allows you to get more information on a particular AVC denial message. The information format sealert provides will help you diagnose your problems. The example that follows shows the information sealert provides concerning the AVC denial, which was shown in the previous example. Notice the command used is exactly the same command suggested from the preceding message log file. The long number used in the sealert command is the AVC denial message's ID number.
# sealert -l  b1386ca2-6e83-4c29-b0db-a5470fa34f75
SELinux is preventing /usr/bin/chcon from mac_admin access on the None .
*****  Plugin catchall (100. confidence) suggests  ******************
If you believe that chcon should be allowed mac_admin access
 on the  <Unknown> by default.
Then you should report this as a bug.
You can generate a local policy module to allow this access.
Do
allow this access for now by executing:
# grep chcon /var/log/audit/audit.log | audit2allow -M mypol
# semodule -i mypol.pp
Additional Information:
Source Context          unconfined_u:unconfined_r:unconfined_t:s0-s0:c0.c1
                        023
Target Context          unconfined_u:unconfined_r:unconfined_t:s0-s0:c0.c1
                        023
Target Objects          [ None ]
Source                  chcon
Source Path             /usr/bin/chcon
Port                    <Unknown>
Host                    localhost.localdomain
Source RPM Packages     coreutils-8.12-6.fc16.i686
Target RPM Packages
Policy RPM              selinux-policy-3.10.0-75.fc16.noarch
Selinux Enabled         True
Policy Type             targeted
Enforcing Mode          Enforcing
Host Name               localhost.localdomain
Platform                Linux localhost.localdomain 3.2.7-1.fc16.i686 #1
                        SMP Tue Feb 21 01:38:57 UTC 2012 i686 i686
Alert Count             1
First Seen              Sat 25 Feb 2015 09:18:07 AM EST
Last Seen               Sat 25 Feb 2015 09:18:07 AM EST
Local ID                b1386ca2-6e83-4c29-b0db-a5470fa34f75
Raw Audit Messages
type=AVC msg=audit(1330179487.213:250): avc:  denied
...
You can see that there is a great deal of helpful information in the sealert output. If you have SELinux enforced on your system, it would be wise to have the setroubleshootd daemon running as well.
Troubleshooting SELinux logging
Obviously, the log files are extremely important for diagnosing and addressing SELinux policy violations. The log files are your first step in troubleshooting SELinux. Thus, it is important to make sure your Linux system is logging messages in the first place.
A quick way to determine if the logging is taking place is to check if the proper daemons are running: auditd, rsyslogd, and/or setroubleshootd. Use an appropriate command, such as systemctl status auditd.service. Of course, the command you use depends on your Linux distribution and its version. See Chapter 15 for more details. If the daemon is not running, start it so that logging may begin to occur.
Now you can force a “fake” AVC denial by issuing a command you know will generate a denial, such as chcon -u fake_u filename from a non-administrator account. Issuing a chcon command from a non-administrator user account should generate your desired test message. Now review the appropriate log file(s) to see if an AVC denial message was generated.
Troubleshooting common SELinux problems
When you begin working with SELinux, it is easy to overlook the obvious. Whenever access is denied, you should first check the “traditional” Linux DAC permissions. For example, use the ls -l command and double-check that a file's owner, group, and read, write, and execute assignments are correct.
With SELinux, several regular items can cause problems:
- Using a non-standard directory for a service
- Using a non-standard port for a service
- Moving files that result in losing their security context labels
- Having Booleans set incorrectly
Each one of these problems can be solved fairly quickly.
Using a non-standard directory for a service
For various reasons, you may decide to store a service's files in a non-standard directory. When you do this, SELinux needs to know that this non-standard behavior has occurred. Otherwise, it will deny access to legitimate service access requests.
For example, you decided to keep your HTML files in a different location from the standard /var/www/html. You put the files in /srv/www/html. You must let SELinux know you want the http service to be able to access the files within /srv/www/html. The commands to accomplish this are semanage and restorecon. In the following, the commands are used to add the proper security context type on the /srv/www/html directory and all it contains:
# semanage fcontext -a -t httpd_sys_content_t "/srv/www/html(/.*)?"
To actually set the new security context type to the files within the directory, you will need to use the restorecon -R command. This is accomplished in the following:
# restorecon -R -v /srv/www/html
Now the httpd daemon has permission to access your HTML files in their non-standard directory location.
Using a non-standard port for a service
Similar to the problem just described, you may decide to have a service listening on a non-standard port. When you make this port change, the service often fails to start.
For example, you decide for security purposes to move sshd from port 22 to a non-standard port, 47347. SELinux does not know about this port and the service will fail to start. To fix this problem, you must first find the security context type for sshd. This is accomplished using the code that follows by issuing the semanage port -l command and piping the results into grep to search for ssh.
# semanage port -l | grep ssh
ssh_port_t                tcp             22
In the preceding example, you can see that the context type needed is ssh_port_t. Now, using the semanage command again, you add that type to port 47347, as shown here:
# semanage port -a -t ssh_port_t -p tcp 47347
At this point, you should be able to start up the sshd on the non-standard port 47347.
Moving files and losing security context labels
You used the cp command to move some files temporarily to a new directory. Then you used the mv command to put them back. Now, the files have the security context of the temporary directory instead of their original security context, and your system is getting AVC denial messages.
This is an easy fix, thanks to the restorecon -R command. Simply type in restorecon -R original_directory and the files will have their original security context restored.
Booleans set incorrectly
Another common problem is simply setting a Boolean incorrectly. This can give you several AVC denials.
For example, if your system's scripts are no longer able to connect out to the network and you are getting AVC denials in your logs, you need to check the httpd Booleans. Use the getsebool -a command and pipe it into grep to search for any Booleans that affect httpd. The example here shows these commands being used:
# getsebool -a | grep http
...
httpd_can_network_connect --> off
...
The getsebool command shows the Boolean httpd_can_network_connect is set to off. To change this Boolean, use the following command: setsebool -P httpd_can_network_connect on. Notice the -P option was used to make the setting permanent. Now, your scripts should be able to connect out to the network.
As you encounter various problems with SELinux, your troubleshooting skills will improve. Meanwhile, here is another excellent resource to help you with troubleshooting, http://docs.redhat.com. The Red Hat document “Red Hat Enterprise Linux” has an entire chapter (Chapter 8) dedicated to troubleshooting SELinux.
Putting It All Together
Obviously, SELinux is a rather complicated and rich tool. You now have a good, solid foundation on the SELinux basics. Here are some recommendations as you get started implementing SELinux on your system.
- Start with the Security Process Lifecycle Planning phase (see Chapter 22).
- This is not a security tool that you can use without planning. You need to determine organizational roles and who will be in those roles and assign clearance levels; determine an individual object's classification level; and so on.
- Use an Access Control Matrix (see Chapter 22).
- An Access Control Matrix will help you implement the determined roles, clearance levels, and types; assign the various SELinux security contexts; and modify access rules.
- Start with the permissive operational mode.
- Run your current system for a significant amount of time in Permissive mode. Review the logs and see what problems may occur with the default SELinux settings. Once the problems are worked out, turn on enforcing mode.
- Change one thing at a time.
- Overall, implement SELinux configuration changes one at a time, in a test environment or using Permissive mode. See what kind of effect each configuration change has before moving on to the next one.
Obtaining More Information on SELinux
There are several additional sources of information to help you with SELinux on your Linux system:
- Your system's man pages—Issue the command man -k selinux to find all the various man pages you can review for the SELinux utilities currently installed on your system.
- Your system's SELinux policy module documentation—To view this documentation, open your system's browser and type in the following URL: http:///usr/share/docs/selinux-policy-selinuxversion#/index.html.
- The Red Hat Enterprise Linux manuals—Located at http://docs.redhat.com, this site contains an entire manual on SELinux.
- The Fedora Project SELinux Guide—Located at http://docs.fedoraproject.org, this site has a Security-Enhanced Linux Guide. However, the guide is not updated for every Fedora version, so you may need to look in older versions to find it. Also, the SELinux Guide is not located within the Security manual, but the Security manual is a good manual to review as well.
- SELinux on Ubuntu—Because there are subtle differences between SELinux on RHEL/Fedora and Ubuntu, the site https://wiki.ubuntu.com/SELinux provides you with the additional help you need.
- SELinux Project Wiki—This is the official SELinux project page. There are several resources at this site, which is located at http://selinuxproject.org.
- SELinux News—Just as it sounds, there is current news on SELinux at http://selinuxnews.org.
Summary
Securing your Linux server is critical and SELinux can help. SELinux provides a security enhancement to Linux, and is installed by default on many Linux distributions. In this chapter, you learned the benefits of SELinux; how it works; how to set it up; how to fix various problems with SELinux; and how to get more information about this important security enhancement.
SELinux provides the ability to implement the enhanced access controls models—MAC and RBAC—in addition to the default Linux DAC. It provides enhanced security by using important security features, such as least privileged access and process sandboxing. These features alone make SELinux a clear winner in security enhancement.
SELinux at first glance appears rather complicated. However, once broken down in to its various components, Operational Modes, Security contexts, Policy types, and policy packages, you can see how the various pieces work together. Each component has an important role for enforcing and testing the chosen security requirements for your organization.
You learned the various steps to configure SELinux. Even though SELinux comes preconfigured, you may need to make some modifications to meet your organization's security needs. Each component has its own configuration steps and settings to choose. Though policy rule creation was not covered, you did learn how to modify the supplied policies via Booleans.
SELinux provides another tool for monitoring your Linux system's security. Because SELinux logs all access denials, it can help you determine if an attack has been or is being attempted. Even the best made plans can go badly. Therefore, in this chapter, you learned how to fix common SELinux configuration problems.
Because learning how to configure, use, and maintain SELinux can be overwhelming, it helps to know where you can get additional information on SELinux. This chapter, along with the included additional helpful sources, should get you started on configuring and practically using Security Enhanced Linux to enhance your Linux system's security.
In the next chapter, you'll learn how to protect your Linux system on a network. You'll learn about controlling access, managing firewalls, and securing remote access.
Exercises
Use these exercises to test your knowledge of using SELinux. These tasks assume you are running a Fedora or Red Hat Enterprise Linux system (although some tasks will work on other Linux systems as well). If you are stuck, solutions to the tasks are shown in Appendix B (although in Linux, there are often multiple ways to complete a task).