
Chapter 3
Handling Events
In This Chapter
![]() Understanding important event concepts
Understanding important event concepts
![]() Working with event-handling classes and interfaces
Working with event-handling classes and interfaces
![]() Extending the EventHandler interface
Extending the EventHandler interface
![]() Using inner and anonymous classes for event handling
Using inner and anonymous classes for event handling
![]() Using Lambda expressions for event handling
Using Lambda expressions for event handling
In Chapter 2, I discuss two programs that display simple scenes that include a button and that respond when the user clicks the button. These programs respond to the event triggered when the user clicks the button by providing an event handler that’s executed when the event occurs.
In this chapter, you read more details about how event handling works in JavaFX. I discuss how events are generated and how they’re dispatched by JavaFX so that your programs can respond to them. You discover the many varieties of events that can be processed by a JavaFX program. And you figure out several programming techniques for handling JavaFX events.
Finally, in this chapter you’re introduced to the idea of property bindings, which let you write code that responds to changes in the value of certain types of class fields, dubbed property fields. In JavaFX, property bindings are sometimes used in situations that would’ve called for an event handler in Swing.
 Although event handling is used mostly to respond to button clicks, it can also be used to respond to other types of user interactions. You can use event handling, for example, to write code that’s executed when the user makes a selection from a combo box, moves the mouse over a label, or presses a key on the keyboard. The event-handling techniques in this chapter work for those events as well.
Examining Events
An event is an object that’s generated when the user does something noteworthy with one of your user-interface components. Then this event object is passed to a special method you create, called an event handler. The event handler can examine the event object, determine exactly what type of event occurred, and respond accordingly. If the user clicks a button, the event handler might write any data entered by the user via text fields to a file. If the user passes the mouse cursor over a label, the event handler might change the text displayed by the label. And if the user selects an item from a combo box, the event handler might use the value that was selected to look up information in a database. The possibilities are endless!
An event is represented by an instance of the class javafx.event.Event or one of its many subclasses. Table 3-1 lists the most commonly used event classes.
Table 3-1 Commonly Used Event Classes
|
Event Class |
Package |
Description |
|
ActionEvent |
javafx.event |
Created when the user performs an action with a button or other component. Usually this means that the user clicked the button, but the user can also invoke a button action by tabbing to the button and pressing the Enter key. This is the most commonly used event class, as it represents the most common types of user-interface events. |
|
InputEvent |
javafx.scene.input |
Created when an event that results from user input, such as a mouse or key click, occurs. |
|
KeyEvent |
javafx.scene.input |
Created when the user presses a key on the keyboard. This event can be used to watch for specific keystrokes entered by the user. (KeyEvent is a subclass of InputEvent.) |
|
MouseEvent |
javafx.scene.input |
Created when the user does something interesting with the mouse, such as clicking one of the buttons, dragging the mouse, or simply moving the mouse cursor over another object. (MouseEvent is a subclass of InputEvent.) |
|
TouchEvent |
javafx.scene.input |
Created when a user initiates a touch event on a device that allows touch input. |
|
WindowEvent |
javafx.stage |
Created when the status of the window (stage) changes. |
Here are four important terms you need to know:
- Event: An object that’s created when the user does something noteworthy with a component, such as clicking it.
- Event source: The object on which the event initially occurred.
- Event target: The node that the event is directed at.
This is usually the button or other control that the user clicked or otherwise manipulated. (In most cases, the event source and the event target are the same.)
- Event handler: The object that listens for events and handles them when they occur.
The event-listener object must implement the EventHandler interface, which defines a single method named handle (see Table 3-2). The EventHandler interface is defined in the package javafx.event.
Table 3-2 The EventHandler Interface
|
Method |
Description |
|
void handle<T event> |
Called when an event occurs |
Handling Events
Now that you know the basic classes and interfaces that are used for event handling, you’re ready to figure out how to wire them to create a program that responds to events.
In this section, I discuss how to implement the event handler by coding the program’s Application so that in addition to extending the Application class, it also implements the EventHandler interface. In subsequent sections of this chapter, I discuss alternative techniques to implement event handlers that are more concise and, in many cases, easier to work with.
Note that the programs that were shown in Chapters 1 and 2 use the concise Lambda expressions technique, and most of the programs featured throughout the rest of this book also use Lambda expressions. But it’s important that you know the other techniques so that you have a complete understanding of how event handling actually works.
Here are three steps you must take to handle a JavaFX event:
- Create an event source.
An event source is simply a control, such as a button, that can generate events. Usually, you declare the variable that refers to the event source as a private class field, outside the start method or any other class methods:
private Button btn;
Then, in the start method, you can create the button like this:
btn = new Button();
btn.setText("Click me please!"); - Create an event handler.
To create an event handler, you must create an object that implements the EventHandler interface and provides an implementation of the handle method.
Here are four ways to create an event handler:
- Add implements EventHandler to the program’s Application class and provide an implementation of the handle method.
You figure out how to use this technique in the section “Implementing the EventHandler Interface.”
- Create an inner class that implements EventHandler within the Application class.
You figure out how to use this technique in the section “Handling Events with Inner Classes.”
- Create an anonymous class that implements EventHandler.
I show you how to use this technique in the section “Handling Events with Anonymous Inner Classes.”
- Use a Lambda expression to implement the handle method.
You read about how to use this technique in the section “Using Lambda Expressions to Handle Events.”
- Add implements EventHandler to the program’s Application class and provide an implementation of the handle method.
- Register the event handler with the event source.
The final step is to register the event handler with the event source so that the handle method is called whenever the event occurs.
Every component that serves as an event source provides a method that lets you register event handlers to listen for the event. For example, a Button control provides a setOnAction method that lets you register an event handler for the action event. In the setOnAction method, you specify the event handler object as a parameter. The exact way you do that depends on which of the various techniques you used to create the event handler.
Implementing the EventHandler Interface
To see how all these elements work together in a complete program, Figure 3-1 shows the output from a simple program called AddSubtract1. This program displays a label and two buttons, one titled Add and the other titled Subtract. The label initially displays the number 0. Each time the user clicks the Add button, the value displayed by the label is increased by one; each time the user clicks the Subtract button, the value is decreased by one.
Listing 3-1 shows the complete code for this program.
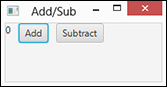
Figure 3-1: The AddSubtract1 program.
Listing 3-1: The AddSubtract1 Program
import javafx.application.*;
import javafx.stage.*;
import javafx.scene.*;
import javafx.scene.layout.*;
import javafx.scene.control.*;
import javafx.event.*; →6
public class AddSubtract extends Application
implements EventHandler <ActionEvent> →9
{
public static void main(String[] args) →11
{
launch(args);
}
Button btnAdd; →16
Button btnSubtract;
Label lbl;
int iCounter = 0; →19
@Override public void start(Stage primaryStage) →21
{
// Create the Add button
btnAdd = new Button(); →24
btnAdd.setText("Add");
btnAdd.setOnAction(this); →26
// Create the Subtract button
btnSubtract = new Button(); →29
btnSubtract.setText("Subtract");
btnSubtract.setOnAction(this);
// Create the Label →33
lbl = new Label();
lbl.setText(Integer.toString(iCounter));
// Add the buttons and label to an HBox pane
HBox pane = new HBox(10); →38
pane.getChildren().addAll(lbl, btnAdd, btnSubtract); →39
// Add the layout pane to a scene
Scene scene = new Scene(pane, 200, 75); →42
// Add the scene to the stage, set the title
// and show the stage
primaryStage.setScene(scene); →46
primaryStage.setTitle("Add/Sub");
primaryStage.show();
}
@Override public void handle(ActionEvent e) →51
{
if (e.getSource()==btnAdd) →53
{
iCounter++;
}
else
{
if (e.getSource()==btnSubtract) →59
{
iCounter--;
}
}
lbl.setText(Integer.toString(iCounter)); →64
}
}
The following paragraphs point out some key lines of the program:
→ 6: The program must import the javafx.event package, which defines the ActionEvent class and the EventHandler interfaces.
→ 9: As in any JavaFX program, the AddSubtract1 class extends the Application class. However, the AddSubtract1 class also implements the EventHandler interface so that it can define a handle method that will handle ActionEvent events that are generated by the buttons.
The EventHandler interface is a generic interface, which means that you must specify the specific event type that the interface will implement. In this case, the class will handle ActionEvent events.
→ 11: The main method is required as usual. This method simply calls the launch method to create an instance of the AddSubtract class, which in turn calls the start method.
→ 16: Two buttons (btnAdd and btnSubtract) and a label (lbl) are defined as class fields so that they can be accessed throughout the class.
→ 19: The iCounter variable keeps track of the value displayed by the label. The value will be incremented when the user clicks the btnAdd button and decremented when the user clicks the btnSubtract button.
→ 21: The start method is called when the application is started.
→ 24: This line and the next line create the Add button and set its text to display the word Add.
→ 26: This line sets the current object as the event handler for the btnAdd button. The this keyword is used here because the AddSubtract class implements the EventHandler. In effect, the AddSubtract class itself handles any events that are created by its own controls.
→ 29: These lines create the Subtract button, set its text to the word Subtract, and set the current object (this) as the event handler for the button.
→ 33: These two lines create the label and set its initial text value to a string equivalent of the iCounter variable.
→ 38: For this program, a border pane is not the appropriate type of layout pane. Instead, for this program, use a new type of layout pane called an HBox. An HBox pane arranges any controls you add to it in a horizontal row. The parameter 10 indicates that the controls should be separated from one another by a space ten pixels wide.
→ 39: This line adds the label and the two buttons to the horizontal box. The code required to do this is admittedly a bit convoluted. First, you must call the getChildren method to get a list of all the child nodes that are in the HBox. Then, you call the addAll method to add one or more controls. In this case, three controls are added: the label (lbl), the Add button (btnAdd), and the Subtract button (btnSubtract).
→ 42: This line creates a new scene, using the HBox pane as its root node.
→ 46: This line sets the scene created in line 42 as the primary scene for the stage, sets the stage title, and then shows the stage.
→ 51: The handle method must be coded because the AddSubtract class implements the EventHandler interface. This method is called by either of the button objects whenever the user clicks one of the buttons. The ActionEvent parameter is the event generated by the button click and passed to the handle method.
→ 53: The getSource method of the ActionEvent parameter is called to determine the event source. If the event source is btnAdd, the iCounter variable is incremented.
→ 59: If, on the other hand, the event source is btnSubtract, the iCounter variable is decremented.
→ 64: The label’s text value is set to the string equivalent of the iCounter variable.
Handling Events with Inner Classes
An inner class is a class that’s nested within another class. Inner classes are commonly used for event handlers. That way, the class that defines the application doesn’t also have to implement the event handler. Instead, it includes an inner class that handles the events.
Listing 3-2 shows the AddSubtract2 program, which uses an inner class to handle the action event for the buttons.
Listing 3-2: The AddSubtract2 Program with an Inner Class
import javafx.application.*;
import javafx.stage.*;
import javafx.scene.*;
import javafx.scene.layout.*;
import javafx.scene.control.*;
import javafx.event.*;
public class AddSubtract2 extends Application →8
{
public static void main(String[] args)
{
launch(args);
}
Button btnAdd;
Button btnSubtract;
Label lbl;
int iCounter = 0;
@Override public void start(Stage primaryStage)
{
// Create a ClickHandler instance
ClickHandler ch = new ClickHandler(); →23
// Create the Add button
btnAdd = new Button();
btnAdd.setText("Add");
btnAdd.setOnAction(ch); →28
// Create the Subtract button
btnSubtract = new Button();
btnSubtract.setText("Subtract");
btnSubtract.setOnAction(ch); →33
// Create the Label
lbl = new Label();
lbl.setText(Integer.toString(iCounter));
// Add the buttons and label to an HBox pane
HBox pane = new HBox(10);
pane.getChildren().addAll(lbl, btnAdd, btnSubtract);
// Add the layout pane to a scene
Scene scene = new Scene(pane, 200, 75);
// Add the scene to the stage, set the title
// and show the stage
primaryStage.setScene(scene);
primaryStage.setTitle("Add/Sub");
primaryStage.show();
}
private class ClickHandler →53
implements EventHandler <ActionEvent>
{
@Override public void handle(ActionEvent e) →56
{
if (e.getSource()==btnAdd)
{
iCounter++;
}
else
{
if (e.getSource()==btnSubtract)
{
iCounter--;
}
}
lbl.setText(Integer.toString(iCounter));
}
}
}
This program works essentially the same way as the program shown in Listing 3-1, so I don’t review every detail. Instead, I just highlight the differences:
→ 8: The AddSubtract2 class still extends Application but doesn’t implement EventHandler.
→ 23: This statement creates an instance of the ClickHandler class (the inner class) and assigns it to the variable ch.
→ 28: This statement sets ch as the action listener for the Add button.
→ 33: This statement sets ch as the action listener for the Subtract button.
→ 53: The ClickHandler class is declared as an inner class by placing its declaration completely within the AddSubtract2 class. The ClickHandler class implements the EventHandler interface so that it can handle events.
→ 56: The handle method here is identical to the handle method in the AddSubtract1 program (see Listing 3-1) but resides in the inner ClickHandler class instead of in the outer class.
Handling Events with Anonymous Inner Classes
An anonymous inner class, usually just called an anonymous class, is a class that’s defined on the spot, right at the point where you need it. Because you code the body of the class right where you need it, you don’t have to give it a name; that’s why it’s called an anonymous class.
Anonymous classes are often used for event handlers to avoid the need to create a separate class that explicitly implements the EventHandler interface.
One advantage of using anonymous classes for event handlers is that you can easily create a separate event handler for each control that generates events. Then, in the handle method for those event handlers, you can dispense with the if statements that check the event source.
Consider the event handler for the AddSubtract2 program shown earlier in Listing 3-2: It must check the event source to determine whether to increment or decrement the iCounter variable. By using anonymous classes, you can create separate event handlers for the Add and Subtract buttons. The event handler for the Add button increments iCounter, and the event handler for the Subtract button decrements it. Neither event handler needs to check the event source because the event handler’s handle method will be called only when an event is raised on the button with which the handler is associated.
Listing 3-3 shows the AddSubtract3 program, which uses anonymous inner classes in this way.
Listing 3-3: The AddSubtract3 Program with Anonymous Inner Classes
import javafx.application.*;
import javafx.stage.*;
import javafx.scene.*;
import javafx.scene.layout.*;
import javafx.scene.control.*;
import javafx.event.*;
public class AddSubtract3 extends Application
{
public static void main(String[] args)
{
launch(args);
}
Button btnAdd;
Button btnSubtract;
Label lbl;
int iCounter = 0;
@Override public void start(Stage primaryStage)
{
// Create the Add button
btnAdd = new Button();
btnAdd.setText("Add");
btnAdd.setOnAction(
new EventHandler<ActionEvent>() →26
{
public void handle(ActionEvent e) →28
{
iCounter++; →30
lbl.setText(Integer.toString(iCounter));
}
} );
// Create the Subtract button
btnSubtract = new Button();
btnSubtract.setText("Subtract");
btnSubtract.setOnAction(
new EventHandler<ActionEvent>() →39
{
public void handle(ActionEvent e) →41
{
iCounter--;
lbl.setText(Integer.toString(iCounter));
}
} );
// Create the Label
lbl = new Label();
lbl.setText(Integer.toString(iCounter));
// Add the buttons and label to an HBox pane
HBox pane = new HBox(10);
pane.getChildren().addAll(lbl, btnAdd, btnSubtract);
// Add the layout pane to a scene
Scene scene = new Scene(pane, 200, 75);
// Add the scene to the stage, set the title
// and show the stage
primaryStage.setScene(scene);
primaryStage.setTitle("Add/Sub");
primaryStage.show();
}
}
The following paragraphs highlight the key points of how this program uses anonymous inner classes to handle the button events:
→ 26: This line calls the setOnAction method of the Add button and creates an anonymous instance of the EventHandler class, specifying ActionEvent as the type.
→ 28: The handle method must be defined within the body of the anonymous class.
→ 30: Because this handle method will be called only when the Add button is clicked (not when the Subtract button is clicked), it does not need to determine the event source. Instead, the method simply increments the counter variable and sets the label text to display the new value of the counter.
→ 39: This line calls the setOnAction method of the Subtract button and creates another anonymous instance of the EventHandler class.
→ 41: This time, the handle method decrements the counter variable and updates the label text to display the new counter value.
Using Lambda Expressions to Handle Events
Java 8 introduces a new feature that in some ways is similar to anonymous classes, but with more concise syntax. More specifically, a Lambda expression lets you create an anonymous class that implements a specific type of interface — a functional interface — which has one and only one abstract method.
The EventHandler interface used to handle JavaFX events meets that definition: It has just one abstract method, handle. Thus, EventHandler is a functional interface and can be used with Lambda expressions.
A Lambda expression is a concise way to create an anonymous class that implements a functional interface. Instead of providing a formal method declaration that includes the return type, method name, parameter types, and method body, you simply define the parameter types and the method body. The Java compiler infers the rest based on the context in which you use the Lambda expression.
The parameter types are separated from the method body by a new operator — the arrow operator — which consists of a hyphen followed by a greater-than symbol. Here’s an example of a Lambda expression that implements the EventHandler interface:
e ->
{
iCounter++;
lbl.setText(Integer.toString(iCounter);
}
In this case the Lambda expression implements a functional interface whose single method accepts a single parameter, identified as e. When the method is called, the iCounter variable is incremented and the label text is updated to display the new counter value.
Here’s how you’d register this Lambda expression as the event handler for a button:
btnAdd.setOnAction( e ->
{
iCounter++;
lbl.setText(Integer.toString(iCounter));
} );
One of the interesting things about Lambda expressions is that you don’t need to know the name of the method being called. This is possible because a functional interface used with a Lambda expression can have only one abstract method. In the case of the EventHandler interface, the method is named handle.
You also do not need to know the name of the interface being implemented. This is possible because the interface is determined by the context. The setOnAction method takes a single parameter of type EventHandler. Thus, when you use a Lambda expression in a call to setOnAction, the Java compiler can deduce that the Lambda expression will implement the EventHandler interface. And because the only abstract method of EventHandler is the handle method, the compiler can deduce that the method body you supply is an implementation of the handle method.
In a way, Lambda expressions take the concept of anonymous classes two steps further. When you use an anonymous class to set an event handler, you must know and specify the name of the class (EventHandler) and the name of the method to be called (handle), so the only sense in which the class is anonymous is that you don’t need to provide a name for a variable that will reference the class. But when you use a Lambda expression, you don’t have to know or specify the name of the class, the method, or a variable used to reference it. All you have to do, essentially, is provide the body of the handle method.
Listing 3-4 shows the AddSubtract4 program, which uses Lambda expressions to handle the button clicks.
Listing 3-4: The AddSubtract4 Program with Lambda Expressions
import javafx.application.*;
import javafx.stage.*;
import javafx.scene.*;
import javafx.scene.layout.*;
import javafx.scene.control.*;
import javafx.event.*;
public class AddSubtract4 extends Application
{
public static void main(String[] args)
{
launch(args);
}
Button btnAdd;
Button btnSubtract;
Label lbl;
int iCounter = 0;
@Override public void start(Stage primaryStage)
{
// Create the Add button
btnAdd = new Button();
btnAdd.setText("Add");
btnAdd.setOnAction( e -> →25
{
iCounter++;
lbl.setText(Integer.toString(iCounter));
} );
// Create the Subtract button
btnSubtract = new Button();
btnSubtract.setText("Subtract");
btnSubtract.setOnAction( e -> →34
{
iCounter--;
lbl.setText(Integer.toString(iCounter));
} );
// Create the Label
lbl = new Label();
lbl.setText(Integer.toString(iCounter));
// Add the buttons and label to an HBox pane
HBox pane = new HBox(10);
pane.getChildren().addAll(lbl, btnAdd, btnSubtract);
// Add the layout pane to a scene
Scene scene = new Scene(pane, 200, 75);
// Add the scene to the stage, set the title
// and show the stage
primaryStage.setScene(scene);
primaryStage.setTitle("Add/Sub");
primaryStage.show();
}
}
This program works essentially the same way as the program shown in Listing 3-3, so I just point out the features directly related to the use of the Lambda expression:
→ 25: This statement uses a Lambda expression to add an event handler to the Add button. The method body of this Lambda expression increments the counter variable and then sets the label text to reflect the updated value.
→ 34: This statement uses a similar Lambda expression to create the event handler for the Subtract button. The only difference between this Lambda expression and the one for the Add button is that here the counter variable is decremented instead of incremented.
Note that in this example, the Lambda expressions for the two event handlers are simple because very little processing needs to be done when either of the buttons in this program are clicked. What would the program look like, however, if the processing required for one or more of the button clicks required hundreds of lines of Java code to implement? The Lambda expression would become unwieldy. For this reason, I often prefer to isolate the actual processing to be done by an event handler in a separate method. Then, the Lambda expression itself includes just one line of code that simply calls the method.
Listing 3-5 shows another variation of the AddSubtract5 program implemented using that technique. Note that the technique used in Listing 3-5 is the technique that most of the remaining programs in this book use.
Listing 3-5: The AddSubtract5 Program with Lambda Expressions
import javafx.application.*;
import javafx.stage.*;
import javafx.scene.*;
import javafx.scene.layout.*;
import javafx.scene.control.*;
import javafx.event.*;
public class AddSubtract5 extends Application
{
public static void main(String[] args)
{
launch(args);
}
Button btnAdd;
Button btnSubtract;
Label lbl;
int iCounter = 0;
@Override public void start(Stage primaryStage)
{
// Create the Add button
btnAdd = new Button();
btnAdd.setText("Add");
btnAdd.setOnAction( e -> btnAdd_Click() ); →25
// Create the Subtract button
btnSubtract = new Button();
btnSubtract.setText("Subtract");
btnSubtract.setOnAction( e -> btnSubtract_Click() ); →30
// Create the Label
lbl = new Label();
lbl.setText(Integer.toString(iCounter));
// Add the buttons and label to an HBox pane
HBox pane = new HBox(10);
pane.getChildren().addAll(lbl, btnAdd, btnSubtract);
// Add the layout pane to a scene
Scene scene = new Scene(pane, 200, 75);
// Add the scene to the stage, set the title
// and show the stage
primaryStage.setScene(scene);
primaryStage.setTitle("Add/Sub");
primaryStage.show();
}
private void btnAdd_Click() →50
{
iCounter++;
lbl.setText(Integer.toString(iCounter));
}
private void btnSubtract_Click() →56
{
iCounter--;
lbl.setText(Integer.toString(iCounter));
}
}
The following paragraphs highlight the important points of this version of the program:
→ 25: The setOnAction method for the Add button uses a Lambda expression to specify that the method named btnAdd_Click should be called when the user clicks the button.
→ 30: The setOnAction method for the Subtract button uses a Lambda expression to specify that the method named btnSubtract_Click should be called when the user clicks the button.
→ 50: The btnAdd_Click method increments the counter and updates the label’s text to reflect the updated counter value.
→ 56: Likewise, the btnSubtract_Click method decrements the counter and updates the label’s text accordingly.