Gallery
3ds Max Gallery
On the following pages, you will find a combination of images from the book and images created by a few artists fairly new to 3ds Max, most of whom are students at The Art Institute of California–Los Angeles, where one of the authors teaches. We hope these images will inspire your own creativity as you become more familiar with 3D in general and 3ds Max specifically. On the Internet, you can find a wealth of information about schools and programs such as The Art Institute of California–Los Angeles, where you can continue your education in CG work.
Some of these artists have been using 3ds Max for only a short period of time, and already they’ve been able to use the tools and techniques they’ve learned to channel their artistic eye and creativity into some beautiful and interesting imagery.

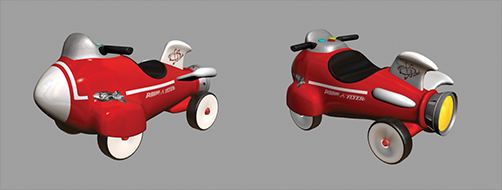
ABOVE: The toy rocket that we modeled in Chapter 5, “Modeling in 3ds Max: Part II,” is textured in Chapter 7, “Materials and Mapping.” Use this photo to study how the surface of the rocket reflects its environment and how its coloring reacts to light, especially as you light and render the rocket in Chapter 10, “3ds Max Lighting,” and Chapter 11, “3ds Max Rendering.” BELOW: By the end of Chapter 7, your rocket will look like this color image. By applying materials, you set a look for the model that is further refined in the lighting and rendering stages of production.


ABOVE: As you finish with the rocket example in Chapter 11, your rocket will take on a whole new life. Lighting touches and reflections of the rocket’s environment will bring your model to life. BELOW: The chess set, used throughout Chapters 10 and 11 to illustrate lighting and rendering topics, is rendered in color for your reference.


ABOVE: A color version of Figure 7-170 to help you visualize the UV seams needed for the exercise in Chapter 7. BELOW: A color version of Figure 7-171 from Chapter 7. Use this to help you lay out the UVs for the soldier.


ABOVE: A color version of Figure 7-178 from Chapter 7 shows in better detail the layout for UVs for the soldier model. These UVs are laid out in such a way as to fit the painting for the soldier’s uniform. BELOW: This color version of Figure 7-182 shows the color texture map for the soldier from Chapter 7’s exercise. Notice how the color map lines up with elements laid out in the UVs.


ABOVE: A normal map is used to add extra detail to a low polygon model. Although normal maps are not covered in this book, this map was put on the soldier to increase its detail level when rendering in Chapter 11. The colors of the map direct pixel values in the final detail to add high polygon mesh detail into a low polygon mesh version of that model. This greatly reduces the polygon count without losing much overall detail. BELOW: The soldier from Chapter 7 is compared here as a color version of Figure 7-188 to compare using a bump map to the same render without the bump.


ABOVE: The final textures for the soldier completed in Chapter 7. This is a higher quality print of Figure 7-190. BELOW: These purple spheres were rendered in mental ray with Final Gather and are shown here for comparison. They are color versions of Figures 11.90 (middle) and 11.91 (bottom). Notice there is more bounced light and purple color spill on the floor in the bottom image.
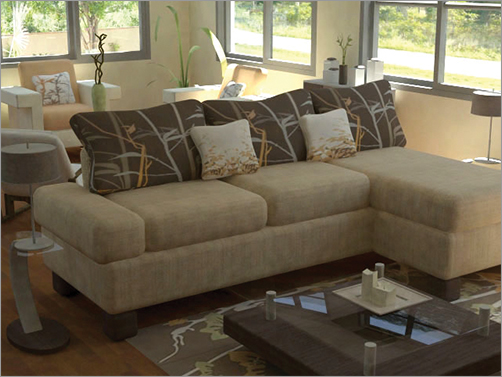

ABOVE: Darlene Gauci created this living room scene for her modeling class as an interior design student at The Art Institute of California—Los Angeles. Photometric lighting and mental ray give this image a natural and realistic appearance. BELOW: Another angle of Darlene Gauci’s living room shows the striking light coming through the window.


ABOVE: Federico Esparza’s fantasy rifle model is inspired by popular game designs and was created for his Principles of Modeling class. BELOW: Federico’s tank is featured in Chapter 11’s HDRI lighting tutorial. Inspired by a tank game asset used in THQ’s popular game Warhammer 40,000: Dawn of War, Federico’s model was created for one of his modeling classes at The Art Institute.


ABOVE: Anthony Gonzales created this Ford Mustang for his Principles of Modeling class at The Art Institute. BELOW: This vintage Nash car was modeled as coauthor Randi learned various modeling tools way back in the olden days. Randi dusted off this model recently and rendered it with Final Gather as a sample for her students to design and model their own cars in her class.
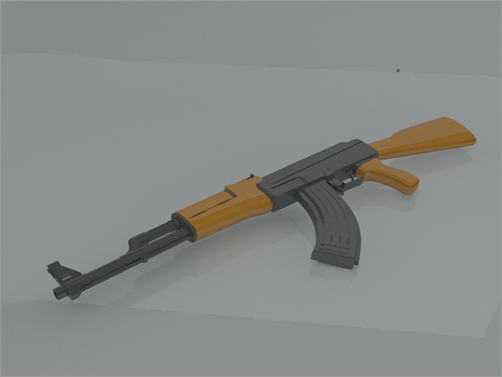

ABOVE: David Pounce created this AK-47 assault rifle model as an asset model, a model used as a prop or set piece in a game, as part of a modeling exercise. BELOW: The tank and soldier from Figure 11-133 in Chapter 11 are shown here rendered with an HDRI image.

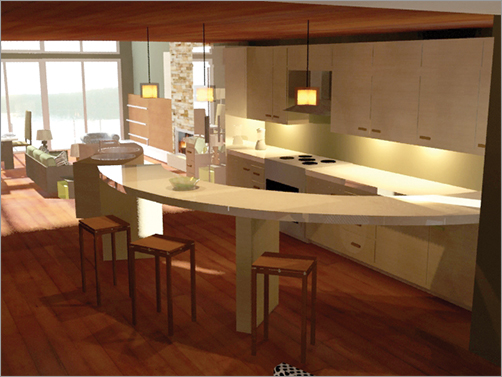
ABOVE: Who wouldn’t want to nap in a bedroom like the one modeled, textured, and lighted by Ghazaleh Pourkazemi for his Camera and Lighting Techniques class as an interior design student at The Art Institute? The lighting lends an interesting mood to the warmth of the bedroom. BELOW: Ghazaleh Pourkazemi created this morning view of a kitchen, flooding the open space with light to show off the large, well-designed space. Textures help sell the look of his interior design.
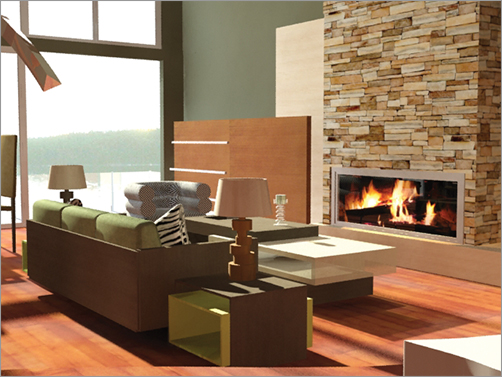

ABOVE: Ghazaleh Pourkazemi’s living room uses clever texture mapping of photos for the fireplace and the outside view through the picture windows of this lake house. BELOW: The Daylight System in mental ray adds a very nice early morning look to the Red Rocket from Chapter 11. This is a color version of Figure 11-122 from the chapter.
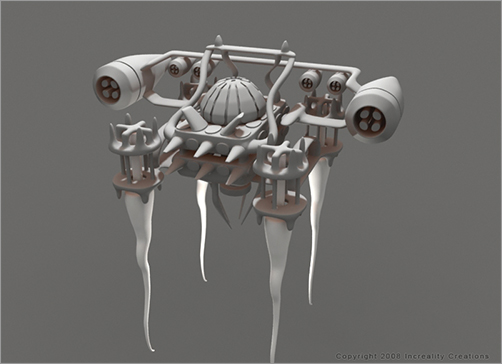

ABOVE: Jesse Doyle, a student of USC Cinema-Television School’s Division of Animation and Digital Art created this model as he taught himself 3ds Max before entering school. The organic forms in this “Alien Mech” vehicle model have an interesting and appealing look. BELOW: A wireframe view of Jesse Doyle’s model gives you an idea of how detailed the mesh needed to be to conform to this design. The vehicle is meant to hover, as witnessed by the slipstreams emanating from the downward thrusters. These images were both rendered with the popular and powerful third-party VRay renderer from Chaos Group.


ABOVE: Jesse Doyle created these images of Sony’s PSP to further his education in 3ds Max. His goal was to create a fairly accurate representation of the Sony PSP with a single polygonal object using polygonal modeling. Texturing was all done using 3ds Max materials and Adobe Photoshop/Illustrator. BELOW: Desiree Herr, a student of interior design at The Art Institute of California—Los Angeles, created this urban loft condo and filled it with golden afternoon light using mental ray rendering.


ABOVE: Desiree Herr shows a spartan corner of her urban loft, contrasting some warm light coming through the front door glass, all using Final Gather in mental ray. BELOW: Desiree Herr relies on Final Gather light bounce to fill the space in her loft condo design. She created a soft and warm light filling the space using photometric lights in the scene.