
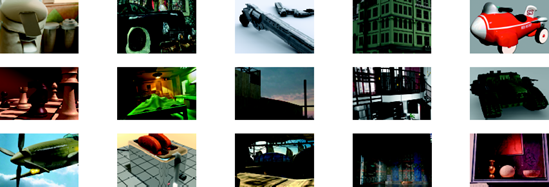
On the following pages, you will find a combination of images from the book as well as images created by a few artists fairly new to 3ds Max, all of whom are students at The Art Institute of California-Los Angeles, where one of the authors teaches. We hope these images will inspire your own creativity as you become more familiar with 3D in general and 3ds Max specifically. On the Internet, you can find a wealth of information about schools and programs such as The Art Institute of California-Los Angeles, where you can continue your education in CG work.
Some of these artists have been using 3ds Max for only a short period of time, and already they've been able to use the tools and techniques they've learned, to channel their artistic eye and creativity into some beautiful and interesting imagery.
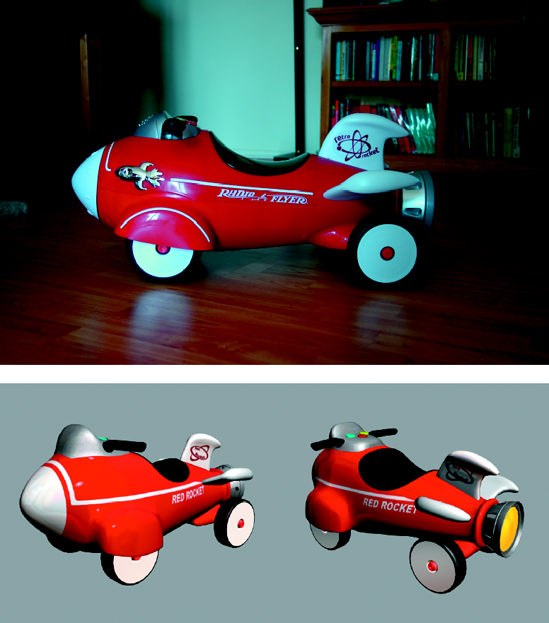
ABOVE: The toy rocket that we modeled in Chapter 5, "Modeling in 3ds Max: Part II," is textured in Chapter 7, "Materials and Mapping." Use this photo to study how the surface of the rocket reflects its environment and how its coloring reacts to light, especially as you light and render the rocket in Chapter 10, "3ds Max Lighting," and Chapter 11, "3ds Max Rendering."
BELOW: By the end of Chapter 7, "Materials and Mapping," your rocket will look like this color image. By applying materials, you set a look for the model that is further refined in the lighting and rendering stages of production.
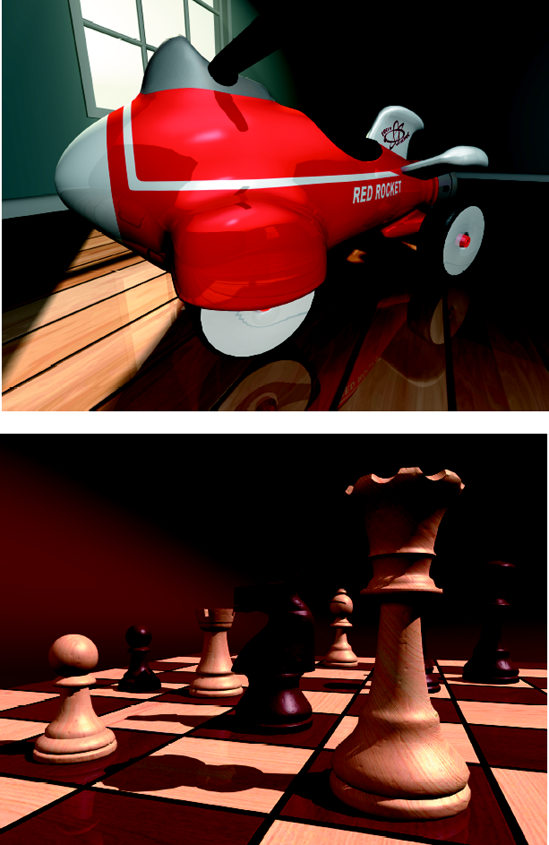
ABOVE: As you finish with the rocket example in Chapter 11, your rocket will take on a whole new life. Reflections of its environment and lighting touches will bring your model to life.
BELOW: The chess set, frequently used throughout Chapters 10 and 11 to illustrate lighting and rendering topics, is rendered in color for your reference.
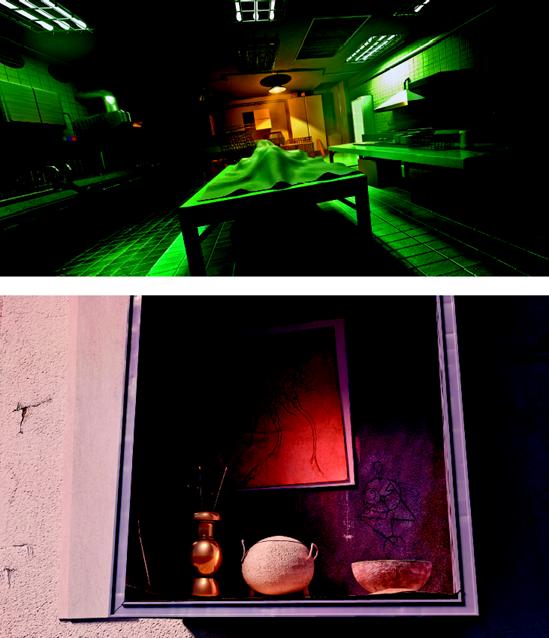
ABOVE: Shane Sternstein created this moody and ominous kitchen for a lighting and texturing course. His use of volume lighting and moody shadows reinforces the suggestion that the "Dark Kitchen" is actually a morgue.
BELOW: Shane Sternstein created this still life image using mental ray with meticulous textures and obsessive attention to lighting. What sells this image most is Sternstein's attention to detail; notice the cracks in the wall, the distressed materials of the cabinet, and the subtle nature of the incense smoke.

ABOVE: For this piece, Ronald N. Howard used mental ray along with daylight lighting in order to get the proper "morning" lighting. He also used mental ray Sky within the Daylight system to color the scene because most of the textures in it were gray. The textures themselves were created in Photoshop, referencing some examples provided by his teachers in his game-creation courses.
BELOW: Ronald N. Howard created this library for his Materials and Lighting course. The scene uses a base Daylight lighting system in mental ray with some Omni lights added to make more of the scene visible. The textures were painted in Photoshop, based on photographs of rocks and marble, and were used for the color as well as bump maps.

ABOVE: The Game Wizards Production Team at the Art Institute of California-Los Angeles created the game "Mythos" as an exercise in game production as they would encounter it in the professional world. 3ds Max was used to create this game efficiently using low-polygoncount models and resourceful texture maps. In this image, you can see how detail is created in the textures. This circumvents the need to create unnecessary models that would bog the game down during play.
BELOW: In another scene from the "Mythos" game, a small fleet of low-poly-count ships approaches the beach. Like many professional game designs, this render relies heavily on textures to convey atmosphere and detail.
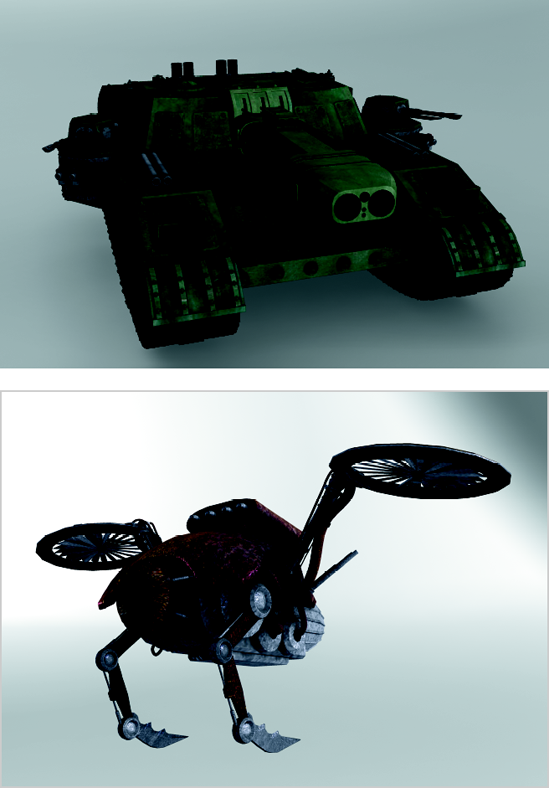
ABOVE: When he modeled this Stormblade vehicle, Colin Mills was inspired by vehicles from the game Warhammer 40,000. The model uses polygons and was rendered using mental ray. Colin made sure to create maps for his render for diffuse, specular level, specular color, bump, and ambient occlusion.
BELOW: Colin Mills designed this peculiar robot character for a modeling class. He added several maps to the robot's materials to make sure there was enough detail when he rendered through mental ray.

ABOVE: This corridor was created by Andrew Prince using polygon modeling and texture maps created in Photoshop. His floor and stone wall maps are quite successful; you don't see tiling or seams easily, which is always a plus when you are texturing a model.
BELOW: Andrew Prince created this simple pistol model and used Planar mapping for its materials. He rendered the gun through mental ray using indirect lighting for a soft, lighted feel.
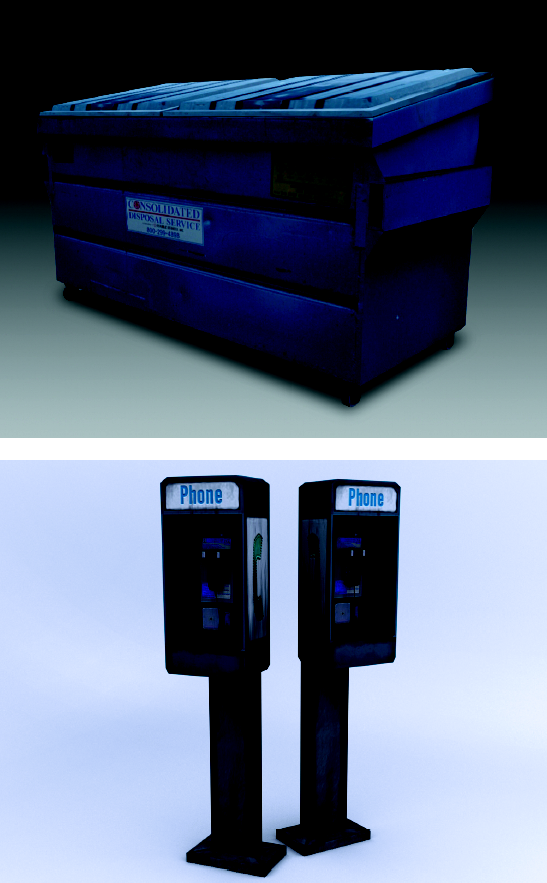
ABOVE: Nelson Mendez created this dumpster model out of a surprisingly low 526 polygons for a game art class. The detail lies within the textures Nelson used. Textures are an important tool for game development.
BELOW: The payphone was created for Torrence T. Trotter's Game Modeling and Animation class as an example of an asset model, a model used as an prop or set piece (for example) in a game. The model consists of only 178 polygons. Two texture pages were used on this model: a diffuse map and a bump map to give it detail.
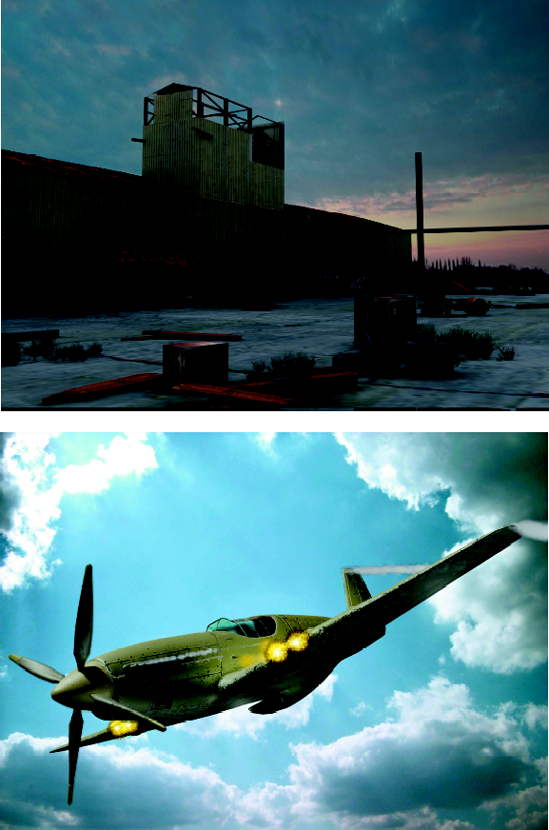
ABOVE: Ruben Morales created this exterior scene and rendered it to a background photograph of a setting sun. To keep the polygon count low, the warehouse relies on mapping for its details. It was created for a game-modeling class.
BELOW: Using different architectural- and design-type materials in 3ds Max, Sean Dunny created the plane and rendered it with mental ray. He used particle effects to simulate the muzzle flashes on the guns and the vapor trails left behind by the plane, as well as the smoke from the exhaust vents. The plane was lit using the Daylight system, with mental ray Sun and an IES sky (a type of light system found in 3ds Max and used in conjunction with the Daylight system used in Radiosity renders).
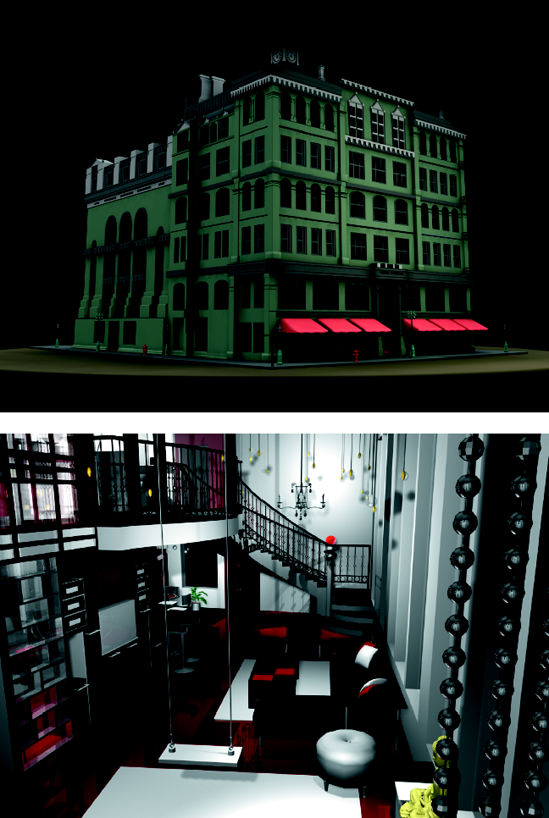
ABOVE: Charles Ptacek created this model of Central Music Hall in Chicago for a Hard Surface and Organic Modeling class. It is created with polygons and some basic NURBS converted back to polygons. The scene is lit with a Standard Sky Light.
BELOW: Danika VanAlstyne is a student in the Interior Design Department. This department's curriculum is geared to further the students' skill sets and work with AutoCAD projects. This scene is a loft space with a meditation corner. Its muted reds and blacks are a soothing environment for its dweller.

ABOVE: By referencing a few fishing boats and crabbing boats, Brian F. Lee was able to get a pretty good idea of the "Foggy Ship" he wanted to build. After building the model, he used a series of textures, lights, and a foggy environmental effect to really bring the scene to life. The textures came from pictures of rotted wood and rusty metal that Brian took at the marina and edited in Photoshop. Brian painted in some extra details and made them ready to tile. The volume lights, combined with the fog, give a very natural look, and the Omni lights from within the hull of the ship and on the dock give a more mechanical appearance.
BELOW: Joshua Palacios used just 4,463 polygons to create this model. He made the beams, bottles, rope, rails, and spray cans with extruded splines; used some bevels to put dents and holes in the floor; and used regular planes (with alpha channel maps) for the chains, walls, and ceiling. Joshua then painted some paint splatters near the cans and tried to make the graffiti look as real as possible by placing it where graffiti artists would paint. For the lighting, Joshua used four omni lights on the lower floor to give it some light inside. Then he used a Target spotlight from above to give the room an exterior light effect, rendered with a touch of fog.
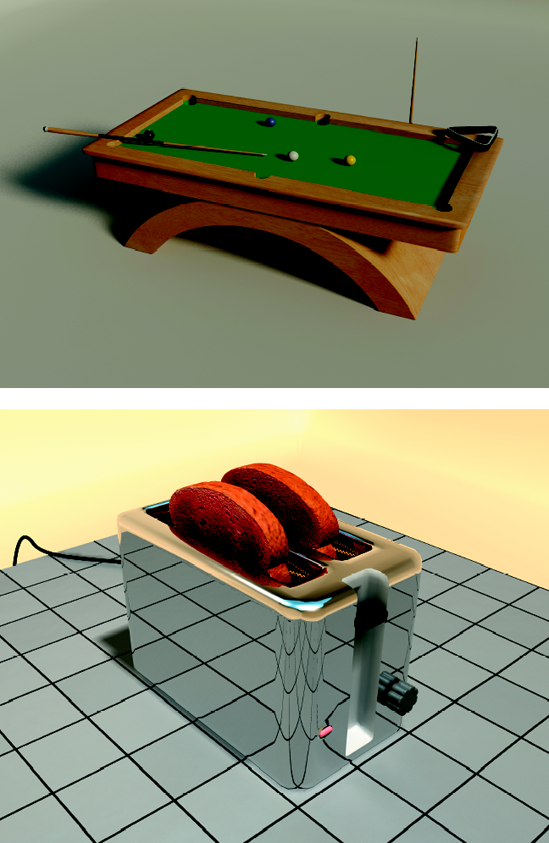
ABOVE: Jua Harmon created this image for his portfolio. The model is accented by simple materials rendered with soft shadows in mental ray.
BELOW: Jua Harmon's toaster was rendered with raytraced reflections to give the chrome a more believable look. The textures on the face of the toast are quite nice.

ABOVE: Joshua Palacios was given a polygon count limit of 500 to create a game asset for his game-modeling class. He used 473 for his design, again relying on textures to give the most detail bang for the buck. Joshua started out using splines to get the figure of the gun, and then he extruded them to convert the model to an editable poly, where he was able to clean up the edges of the object. He next broke out the different parts of the pistol and shaped them up as low poly as possible. He lit and rendered the image using the Skylight in 3ds Max.
BELOW: Chun Jay Hwang's "Sword of Omens" is a homage to the Thundercats cartoon that one of this book's authors grew up on. The low-poly model was created for a game-texturing class and was created to be used as a game asset prop. The render lays out the sword in a nice manner, showing you just one way you can present your models for review.

ABOVE: The school's Game Wizards Production Team worked on the game "Detox" in a production course to teach the students the ins and outs of a typical professional game production. This crane model was created by Ruben Morales and is rendered with a typical gray material using soft shadows from Final Gather's renderer. The crane has a few nice details in the hydraulic hoses and cables running along its "fingers" that give the model believability. Imagine how the fingers will animate when the crane moves!
BELOW: In another semester, the Game Wizards Production Team created the "Thunder Flash" game. Here you can see a dilapidated car in front of a majestic church façade. Because the production team was tasked with creating assets for a game, they had to rely on well-painted texture maps. The rust on the front of the car and the dirt and grime on the chassis give the car a very interesting look and beg further study.

ABOVE: Ronald N. Howard's 5,500 poly-count model was created for his game modeling and texturing courses. The throne room itself is just a box with some pillars in it and some really cool axes on the wall. He relied heavily on the textures and lighting to make the image pop. For the lighting, Ronald used the Daylight system from mental ray but also added some volume lights shining through the window to give that faint dust effect you see. He also added three Omni lights near the top of the room to brighten things up a little. On the floor, nice mapping work brings out the specular of the glossy tiles.
BELOW: Shane Sternstein created this kitchen counter for his 3ds Max class. The use of raytraced reflections goes a long way to make this image believable. His use of soft lighting and indirect lighting through mental ray's Final Gather gives the room a warm morning glow.