
06
Dialogue
Summary: Timed and triggered dialogue for advice, handling dialouge interuptions, using conditions and contexts for dialogue choices
Project: DemoCh06Castle01 Level: Castle01
Introduction
Trying to avoid clumsy game dialogue is particularly difficult, as there is often a huge burden put on dialogue as the sole driver of the game’s narrative. Perhaps not yet as developed in terms of visual storytelling as film, where a couple of shots may convey several key story elements, games often rely upon dialogue to not only move the narrative forward but also to provide a great deal of instructional information to the player. Games also tend to operate within very well established genres (action, space opera, Tolkienesque fantasy, etc.) where it is hard to avoid cliché. Even if you are an experienced writer, this is challenging!
Dialogue typically falls into one of the following categories:
Informational
This dialogue provides the player with information they need to play the game. This might be instructions on how to use a piece of equipment or designating a rendezvous point. The key point with this dialogue is that needs to be clear and heard. It is clear and articulate and in complete sentences—very different from natural dialogue. This dialogue might be panned to the center speaker and typically also ducks other sounds so it is certain to be heard. The ideal aim is for the informational category to be subsumed into character so that any instructions necessary emerge naturally out of the character’s speech. Failure to do this often results in the kind of clunky repetitive dialogue we want to avoid (see Chapter 08 for how to route dialogue to the center speaker).
Character
This dialogue conveys the thoughts and emotions of the speaker. It is more naturalistic than the informational style, as its emphasis is on conveying the emotions of the words. This is more likely to be spatialized in the game world, but may still also be bled into the center speaker for clarity (see Chapter 08).
Ambient/Incidental/Chatter/Grunts
This dialogue helps to set the scene for the location or situation you are in. Although crucial for establishing the ambience, the information conveyed by the words is not necessarily vitally important. This would be spatialized to originate from the characters in the game.
Preparation
Before importing your dialogue, it is important to consider the following:
- Editing— Make sure the dialogue starts at the start of the file and trim off any silence at the end.
- High-pass Filter— The mic will often pick up some low-end elements like feet or mic stand movement, so get rid of these by applying a high-pass filter.
- Clicks and Pops— Although you are obviously already using a pop shield, some of these can occasionally slip through—time to edit!
- Breaths— these can be important for some kinds of dialogue delivery but distracting in others. Try using expander functions to duck down audio below a given threshold.
- De-essing— sibilant elements can sometimes be unnaturally emphasized through the recording process, so try a de-essing plugin effect.
- Levels— Dialogue can have a huge variation in dynamic range, from a whisper to a shout. It can be particularly difficult to maintain even levels if you are recording your dialogue in different sessions, possibly in different studios. Using consistent equipment and maintaining the same physical setup can help with this, but short of sifting through thousands of lines and adjusting by hand, you could try an automated batch process that looks at average values.
- Organization— There can be many thousands of lines of dialogue in a typical game. You are going to need a good naming convention and some spreadsheet chops to keep track of everything.
Randomization
Summary: Types of random
We’ve discussed earlier in the book how repetition can destroy immersion in games. This is a particularly acute problem for dialogue. Since you were a baby, the human voice has been the most important sound in the world to you, and our hearing is most acute for the range within which human speech falls. It is the thing you pay most attention to, and you have spent your life understanding the subtle nuances in frequency, volume, and timbre that can change a compliment into a sarcastic snipe. Even if a character says the same line, in the same way (i.e., playing back the same wave) several hours apart from the first time the character said it, chances are that we will notice this, and it will momentarily destroy our immersion in the game world.
The nature of games is that we are often in similar situations again and again and are consequently receiving similar dialogue (e.g., “Enemy spotted!”, “I’ve been hit!”). This indicates that, for the most heavily used dialogue for each character, we need to record lots of different versions of the same line.
- Project: DemoCh06Castle01
- Level: Castle01
You can skip between the three locations in this level by pressing 1, 2, or 3. The player character needs to be close to objects in order to interact with them.
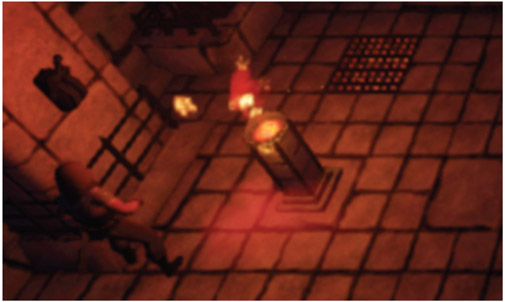
After choosing your character you will find yourself in a castle chamber in area *Chamber 01* (Bookmark 1), the back half of which is shrouded in darkness.

Clicking to move into the darkened back half of the chamber will result in comments such as: “I can’t walk on over there without a light, else I’m sure to fall to my death!”, “I’d better not”, “I’d be mad to try that without a light”, “What am I thinking, I need more light”, “I must be an idiot, I need more light to cross”, “What an imbecile, I can’t cross that without more light”, “I must be madder than a bag of spanners—I need more light to cross over there.”
If you have a situation where you can anticipate that the player will be performing, or trying to perform, the same action numerous times, then this is an obvious candidate for a large number of variations on the same sentiment within a randomized Sound Cue (See {E22_01_No_Light} referenced from the “Chamber 01”/“Lights not on Warming” section of the Level Blueprint.)

Better than Random? Randomize without Replacement
The problem with a purely random system is that you may, by random chance, get the same dialogue line repeated twice in succession, something that will definitely sound unnatural to the player. The randomize without replacement option provided in the -Random- node of the Sound Cue is a particularly useful one. This will keep track of which sounds have been played and randomly choose between only the sounds that have not been played recently. This is useful not only for avoiding the distraction of the same sound being played twice in succession, but also in spacing out the repetition of sounds.
For example:
- The Sound Cue is triggered and sound 3 (out of a possible 0, 1, 2, and 3) is chosen and plays.
- The Sound Cue is triggered again, but this time the -Random- node will only choose from sounds 0, 1, and 2. Sound 1 is chosen and plays.
- The Sound Cue is triggered again. This time the -Random- node will only choose from sounds 0 and 2. Sound 2 is chosen and plays.
- The Sound Cue is triggered again, and sound 0 is chosen to play. The -Random- node then resets itself so that all sounds are once again available.
This system is sometimes referred to as random cycle down in other engines to describe the random choice cycling down each time through the samples left available.
Dialogue for Advice
Summary: Timed dialogue, triggered dialogue
Timed Help Advice
As well as giving direct feedback on a player’s actions, dialogue can often be used to offer advice or hints should a player become stuck. In *Chamber 01* (Bookmark 1) the player needs to interact with the handle on the wall before they can light the way to the back half of the chamber. As what is required is not necessarily that obvious, we’ve set up a hint system. (See the “Hint Timer” section of the Level Blueprint.)
On entry to the room, a <Delay> is started. This checks whether the room has actually been completed or the task (switching on the lights) completed using <Branch> nodes (which we’ll be looking at shortly). If neither of them has, it plays the clue dialogue, “Hmm, I wonder what that lever over there is for?” (and some variations thereof).

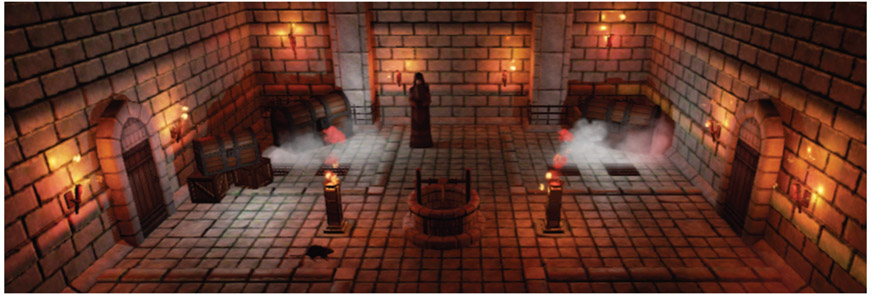
There is a similar hint system in *Chamber Two* that gives some slightly more enigmatic clues suggesting that the player should investigate the well at the center of the room (“Well, well, well,” “Oh, well,” etc.) Given the specific environment and approach of your game, you’ll need to consider carefully the frequency of such hints so that they don’t become irritating.
Triggered Advice
Another typical use for dialogue is to set up simple triggers on the entry to an area to give the player instructions or clues when they enter. Once the player lights the torches at the back of *Chamber 01*, there’s a [Box Trigger] as they pass through the gate to warn them that they “need to be careful about the broken tiles.”

It’s often more immersive if these only play once using the <DoOnce> node.

Exercise 06_01: Dialogue Advice
Return to the *City Streets* area of the exercise map. We know that the player needs to collect some items in the area in order to bribe their way into the *Inner Sanctum*, but the player does not. Help the player by adding some dialogue to the characters in this area so that they can offer some advice (the enemy bot systems set up here for the music systems in Chapter 05 may prove a little irritating while you’re working on dialogue, so you can disable them by pressing K when the game starts).
- Find Character 01 in the *City Streets* area of the map (use
 World Outliner to search).
 - This character needs to advise the player. Something along the lines of “You won’t get into the inner sanctum through force. The guards are bananas about food though; you could bribe your way in.” Record a few variations of this line including more highly amusing puns on the other items—apples and dates.
- Add these to a randomized Sound Cue {Character_01_Dialogue}.
- Set up a system for Character 01 so that the player needs to press the use key to interact (a [Trigger] in the level opening a <Gate> on proximity to the character that lets the E key event through to the <Play Sound Attached>). Attach the <Play Sound Attached> to the character by selecting the character in the level then creating a <Get Root Component> in the [Level Blueprint] (it will automatically create a reference to the character) then link this to the Attach to Component input.
- Find Character 02 near to the guards at the inner sanctum gate. Set up a timed reminder for this character such as “Those guys are always hungry,” “They’ll do anything for a bit of grub,” etc. Create a [Trigger] on entry to the *City Streets* area to start a <Delay> (after passing through a <DoOnce> to stop retriggers) leading to a <Play Sound Attached>. Loop the output of the <Play Sound Attached> back into the <Delay>.
- Attach the <Play Sound Attached> to the character. With the character selected in the Viewport, right-click to <Get Root Component> and connect this to the <Play Sound Attached> Attach to Component input.
- Remember to set the attenuation for this character’s speech in the -Output- node of the Sound Cue so that you don’t hear it everywhere.
- You could randomize the <Delay> time by dragging out from its Duration input to create a <Random Float in Range> node.
Dialogue Interrupts
Summary: How to handle interrupted dialogue with overlaps, fade outs, blocking until finished, global ducking
One of the things that will stand out for you once you start listening closely to game dialogue is how we haven’t really solved the problem of interruptions yet. There’s something about simply stopping or fading out a line that just doesn’t sound like how we respond to interruptions in the real world.
Bad/Better/Better-er
Bad
In *Chamber 01* (Bookmark 1) you can click on various items to get some more, not very useful, information about them, like “It’s a wooden crate,” “It’s a metal grate on the floor,” and “It’s a burning torch.”

If you click rapidly on these, you’ll hear that they repeat the new line while the old one is still playing. This obviously sounds very silly since people are not typically polyphonic (i.e., we can only say one thing at a time!)

Better
When clicking in the darkened back half of the chamber, you’ll hear that these dialogue lines do not play over each other, since we’ve now set the already playing line to be faded out should a new line be called. Although it is still not that satisfactory, you might choose to do this when it’s important that the new dialogue line is heard.

Better-er
In *Chamber 02* (Bookmark 2) you can see a different approach where you can simply block any interruptions, not allowing the new file to be played if there is one ongoing. Click on either door to get a “door locked” message. If you click again while the line is still playing, you will not get the new line.

Presuming the player does not already have the key (<Branch> is False), the dialogue line “It’s locked!” is played and the <Gate> node is closed, blocking any further input to the <Play Sound Attached>. The <Gate> will not open to allow another line of dialogue through until we receive the <Custom Event> LockedDoor1_Finished, telling us that the currently playing line is finished and opening the <Gate>.
It’s always important to not only acknowledge a player’s actions, but to also point out if a command is not possible right now. In this case we’ve used a <MultiGate>. This node increments the output each time it receives an input. So when the player first clicks on the door, it plays the dialogue, but if it’s clicked again it will play a negative input sound. When the dialogue has finished, the <MultiGate> is reset, allowing for the next dialogue line if clicked on again. (See the “Chamber 02”/“Door01” section of the Level Blueprint.)
Exercise 06_02: Don’t Interrupt!
The Character 03 in the *City Streets* section of the map offers some advice as to where to find the dates. Set up a system so the player cannot interrupt them while they are talking.
<Assign on Audio Finished>
- Find Character 03 in the *City Streets* and set up a use system like you just did for Character 01 (see Appendix A: Core Concepts/Events and Triggers/Trigger “Use”).
- Create some dialogue such as “You want a date? Try the back alley over there behind me,” “I haven’t had a date in ages, but I think the delivery boy might have dropped some in the alley behind me,” etc.
- Attach the <Play Sound Attached> to the in-game character as you did in Exercise 06_01.
- Put a <Gate> between the use system and the <Play Sound Attached>.
- Create an <Assign OnAudio Finished> node by dragging out from the Return Value of the <Play Sound Attached> and searching for “Finish”. Use the output of the <Bind Event to OnAudioFinished> to close the <Gate> then the output of the <OnAudioFinished> to reopen it. This means that the player won’t be able to retrigger the dialogue while the previous line is still playing. (Don’t forget the exercise screenshots from the website for more help)
- See if you can extend this system to use the negative click response discussed above.
Global Interrupt
It is hard to keep track of every possible piece of dialogue that might be playing if you need to stop them for some global event such as a player death, so instead of a complicated tracking system, we’ve used a {SoundMix} that ducks all dialogue if the player falls to their death through a cracked floor tile in *Chamber 01*.
All dialogue in the level is assigned to the {RPG_Dialogue} Sound Class, so when we instigate (or push) a Sound Mix ({DuckforScream}) this is set to duck this Sound Class.

The Sound Mix is set to last for 4 seconds (long enough for the game to reset) and so will automatically switch off(or pop) when complete. (See the “Collapsing Floor” section of the Level Blueprint.)

If you have several of these sorts of global dialogue events that need to mute any other dialogue that may be playing, you could assign them to a Sound Class that automatically calls a specific mix when they are played. This is called a passive Sound Mix. This, together with general mixing approaches, is dealt with in Chapter 08.
Stacked/Queued Dialogue
There may be instances where you want to hold a new dialogue line until the current line or event is finished and then play it, rather than simply discarding it, because it may be important. We’ll look at this in Chapter 11.
Conditions and Dialogue Choices
Summary: Books, integers and arrays for tracking variables and selecting dialogue choices
Players can feel a much greater involvement in the game when the dialogue comments on their past actions since it creates the impression of a real and intelligent world. Equally there are fewer more effective ways to break a player’s immersion in a game than simply getting the dialogue wrong—for example your comrades muttering “It’s quiet” in the middle of a pitched battle.
Dialogue is often an indicator for a change in AI state, and you are reliant to a great extent on the effectiveness of these AI systems to ensure that your dialogue is appropriate to the current situation; however, it’s also important for you to understand how to deal with tracking game conditions so that you can improve the use of your dialogue.
Simple Conditions and Dialogue Choices

Clicking once on the rat in *Chamber 01* results in the insightful observation “It’s a rat.” Click again, and you kill the rat—“I’ve killed a rat, I feel powerful.” If you click on the rat again after this, you will observe that “It’s a dead rat.”
The rat’s condition (alive or dead) is held in a Boolean variable, sometimes called a Bool. As we have previously discussed, a Boolean is a type of variable that is either True (alive) or False (dead), and this determines which line of dialogue is played. Storing conditions using Booleans allows you to start to more intelligently choose which lines of dialogue to play. In this case we use a <Branch> node to test the condition of the Rat_01_State variable. If True then “It’s a rat,” if False then “It’s a dead rat.” (See the “Chamber 01”/“Rat01” section of the Level Blueprint.)

You can see that the use of Boolean variables to track conditions in the game is widespread. Another example is used to see whether the player has completed the first task (using the lever to switch the lights on). If the lights are on, then the player can move to the back of the chamber, if not, then the hint about turning the lights on is given.

Exercise 06_03: Conditional Dialogue
We want Character 04 to show a little situational awareness in that they can see whether you have collected the apples or not.
- Set up a use interaction system for Character 04.
- Record some dialogue like “I know they like apples for sure” (and variations of), and “I see you already have some apples, try searching for something else.”
- Add these to two separate Sound Cues {No_Apples} and {Got_Apples}.
- Send your use system through a <Branch Node>. This is going to check whether the player has already collected the apples.
- Create a Boolean variable in the My Blueprint panel (+ in the Variables section) and name it Apples_Condition in its Details panel. Compile the Blueprint and then set the Apples_ Condition Boolean to a default value of False in the Details panel.
- In the “City Streets” area of the [Level Blueprint], there is an event called Collected Apples. Use the event here to <Set> your Apples_Condition Boolean to True (drag and drop the variable into the Event Graph to create a <Set>).
- Connect your Apples_Condition variable to the <Branch> node and send the True output to play the {Got_Apples} Sound Cue, and the False to the {No_Apples} Sound Cue.
Counts to Dialogue Choices
In some cases we might want to respond to a numerical value, such as how many times something has happened or how many objects a player has picked up. In *Chamber 02* (Bookmark 2) there is a character who has strong feelings about animal welfare. If you leave the rats in Chamber 01 and 02 unharmed, then he is pleased, however kill one rat (“Ratkiller!”) or both (“Rat Genocide!”), and he’s less impressed.

Each time a rat is killed, the integer variable Rats_Killed is added to and then when you come to interact with the character, this variable is used to decide on the selection of a <Switch on Int> node that will choose a corresponding dialogue line. (See the “Rat Friend” section of the Level Blueprint.)

This use of a <Switch> index makes the process transparent, but you could equally use a variable that directly affects a -Switch- inside a Sound Cue. We avoided these earlier when looking at music since if the cue is playing any change in the switch parameter will make the new sound automatically start playing, something we didn’t want in the music system. However since our dialogue is not continuous like music but more of a one-shot event, these can now be utilized. See the exercise below.
Exercise 06_04: Tracking Numbers
There are two guards by the gates to the *Inner Sanctum*. The guard on the left will respond to how many items you have collected.
- Find Character 05.
- Record some dialogue such as “Only one piece of food! That’s not enough for a growing lad like me,” “Two pieces of food? Well I guess we could share, but Godfrey is not going to be happy about it,” and “Ah three pieces of food, that’s more like it. Go and talk to Godfrey.”
- Set up your three Sound Cues as {Character_05_One}, {Character_05_Two}, and {Character_05_Three}, create a use system for Character 05, and connect it to the input of a <Switch on Int> node.
- We have already set up the Food_Num variable in the Pickups section, so just <Get> this and connect it to the Selection input of your <Switch On Int>.
- Connect three <Play Sound Attached> nodes to the three outputs of the <Switch On Int> in order (0, 1, and 2) and assign your three cues. Since the index of the <Switch on Int> is controlled by the variable Food_Num, the system will play different cues depending on the number of items the player has picked up.
Tracking Multiple Actions or Inventory for Dialogue Choice
Once you start dealing with more than a few game conditions or variables, it starts to become harder to organize and remember what is what. For the player’s inventory, we’ve stored the multiple conditions in a single place—an array. We could of course do this with a series of separate Boolean variables, but an array keeps things neater, and we can interrogate the content of the array to inform the decision of which sound is played.

In the *Forest* area of the level (Bookmark 3), the player can interact with a tradesman (on the left). This character will respond in a variety of ways depending on what items you took from the chests in *Chamber 02*.
No Items
“I see you have achieved nothing in your quest thus far, how disappointing.”
“You have nothing of interest to me.”
Chalice Only
“Ah, a diamond encrusted chalice, how pretty.”
“Lovely chalice.”
“I’m sure that chalice will look charming on your mantelpiece, should you ever get home.”
Vial Only
“Ah I see you have limitless patience, just wait a moment while I finish this book.”
“I’ll be with you in a jiffy.”
“Just a minute and I’ll be with you.”
“Yes, any minute and I’ll tell you what you need to know.”
“Just bear with me a minute.”
Vial and Chalice
“Hmm, I see you have everything. Remember (son/lass), nobody likes a smartass.” (See the Character, Contexts, and Dialogue Choices section below for more on this gender switch.)
A Boolean array variable called Inventory stores each item’s condition. Index 0 stores the chalice condition, and index 1 the vial. We don’t need an index for the scroll wheel mouse since we don’t allow the player to pick that up. As each item is picked up, an <Insert> node is applied to the array to put the condition True into the appropriate index. (See the “Forest”/“NPC Tradesman Inventory” section of the Level Blueprint.”)


When the player comes to interact with the trader, we <Get> the contents of these indexes and use a bit of logic to determine which line to play. UE4 has a number of logic gates available to help us with these sorts of comparisons. Their exact operation can be found in the tooltip text when floating the mouse over the nodes.
- Has the player picked up just one item (<XOR> will only answer True if inputs are different)?
- It they have just one item, is it the chalice?
- If yes—play chalice line
- If no—play vial line
- Do they have both items or no items (i.e., the <XOR> was False)?
- If the <AND> is True they have both—play both line
- If the <AND> is False they have none—play none line

Exercise 06_05: Arrays for Tracking Dialogue Conditions
Godfrey the guard is very particular about his menu. Only if you collect all the correct items will he let you through the gate into the *Inner Sanctum*.
{Array}
- We have set up the system to add items to an array as the player collects them. An array is a container for a number of variables (see Appendix A: Core Concepts/Variables, Parameters, Numbers, and Arrays).
- This is stored in the array variable City_Inventory. Whether the player has the items or not is stored as Boolean variables: in index 0—apples, index 1—bananas, and index 2—dates.
- Record the following lines (or brilliant equivalents) and set them up in separate <Play Sound Attached> nodes.
- “Apples and dates? That’s greats—but you ain’t coming in!”
- “Apples and bananas? I’ll feed them to my llamas. Not enough to fill me!”
- “Bananas and Dates? This combo I hates! I need some apples too for the right mix.”
- “Well, well! That’s a good feast that will fill this beast. I guess you could just slip in while I’m not looking.”
- <Get> this Boolean array by dragging and dropping it into the Event Graph.
- Create three <Get> objects to get the contents of each index of the array.
- Set up and attach the logic system illustrated below. This tests each of the conditions and gives you a True output to connect to the appropriate dialogue line.

- Connect a trigger use system around Godfrey (Character 06) and use it to trigger the top <Branch> node.
- Link the output of the <Play Sound> you have created for when the player successfully bribes Godfrey and link it to the “Inner Sanctum Door Open” section of the Blueprint.
- You could also set up additional <Branch> nodes for separate responses if the player only has one of the items.
- Instead of having separate <Play Sound Attached> nodes, you could set this all up in a single Sound Cue that has a -Switch- node and is controlled through attaching a <Set Int>. The value of your int could be set to corresponding switch values by the True outputs. Try this.
Conditions to Sound Cue Branching Choices
You’ll note that for each of the conditions, apart from vial only, the lines can be said in any order. For the vial we want the first line to acknowledge that the player has the vial, and then subsequent lines to be randomly picked from a selection. In order to do this, we set an additional Boolean variable that tracks whether this line has been played. The Vial_Played variable is used to set a -Branch- node within the Sound Cue itself via the <Set Bool Parameter> node. This works under the same principles as the conditions to dialogue choices above, only this time we are setting a -Branch- within the Sound Cue instead of using a <Branch> to choose between two Sound Cues. All of the above systems could be done like this. We kept them as separate <Play Sound Attached> nodes just to make it clearer as to what was going on.

Branching Dialogue
Summary: Branching dialogue systems
From the exercise above, you might perhaps begin to see how you might apply these ideas of conditions and branches to form a branching dialogue system. A branching dialogue system is where you might be able to have a continued conversation with an NPC, with the character responding differently depending on your choice of line during each interaction. Branching dialogue is typically deeply integrated with the game’s database and character systems in order to keep track of the multiple conditions that might arise.

One of the essential tools for a branching dialogue system (and indeed any dialogue) is the spreadsheet, where you can easily track the route that the interactions might take.

You import spreadsheets to Unreal to form data tables from which you query the contents of the rows and columns in order to populate variables for your system. Double-click on the data table {Dialogue_Branching_05} to see the data table that results from importing the spreadsheet above.

In the *Forest* area, the character on the right is an old crone—who has something you want! Play the game to see if you can persuade her to hand it over.

When the player first interacts with the crone, we play a short movement animation and then get the contents of the data table, first looking at the row defined by the variable Crone Dialogue Line. The default value of this variable is 10001, so we get the values stored in the row whose name column matches.

The <Break DialogueTableRow> separates out all the column data on that row so we can access the different variables. Not shown above is the internal name column. This defines the name of the row that allows the <Get Data Table Row> node to find the row to extract data from.
- Wav: This is the name of the Sound Wave to be played.
- Text: This is the abbreviated text used to populate the HUD buttons.
- UI_Index: These point to the rows that contain the text for each HUD button.
- Next_Line: This defines the next line for the NPC, depending on which line (HUD button) the player chooses.
The Wav column contains the name for the dialogue Sound Wave, and this is passed to the <Play Sound Attached> to play the crone’s first dialogue line. The UI_Index columns define the row values where the possible player responses are stored. We look at these rows and get the string (text) to populate the HUD. At the same time we store the Next Line value from the row. If the Next Line column contains the string “END”, then this means that this particular branch has come to an end, so we <Branch> off (True) to play an ending animation. (See the “Forest”/“Old Crone Branching” section of the Level Blueprint.)

When the player clicks on the HUD, it gets and plays the wave file from the appropriate row and sends the next line value to set the next line for the crone. Then the system goes around again. This is a fairly simple branching dialogue system but should be pretty extendable to your needs once you get your head around it.
Note that in order for the data table to correctly populate, the Sound Waves must be loaded into memory or it won’t find the references to them. In the *Forest* area, you’ll see an ambient sound [AllDialogueSounds-ForLoading]. This references a Sound Cue that contains all of our dialogue Sound Waves. Although it’s set not to Auto Activate, and so never actually plays them, this serves the function of ensuring that the data table can correctly find the references.
Exercise 06_06: Branching Dialogue
In this exercise you will experiment with swapping in your own branching dialogue for Character 07 in the *City Streets* area of the exercise map.
{Data Table}
- Locate Character 07 in the *City Streets* area of the exercise map and interact to follow the placeholder branching dialogue system.
- Now try replacing this with your own branching dialogue system.
- Find the Character_07_Branching.csv file in the exercises folder.
- Edit this with Excel (or other spreadsheet software) following the system outlined above.
- You’ll need to import your dialogue lines to the Content Browser and then right-click/Copy Reference to get the full path to these files to enter into the Wav column (also be sure to add “” around the whole path name).
- Add all your dialogue files to a Sound Cue and place this in the level using an [Ambient Sound] Actor. Set this not to Auto-Activate in its Details panel.
- Right-click on the {Character_07_Branching} data table and select Reimport. This will replace our placeholder data table with your new one.
- If you import your own CSV file, then make sure you use the same headings and the import options in the figure below for the system to work correctly (our template is available on the website).

Characters, Contexts, and Dialogue Choices
As you can already imagine, handling a large amount of dialogue for lots of conditions and characters can quickly become a huge challenge. The Unreal Engine’s built-in dialogue tools can help us address some aspects. The {Dialogue Voice} asset allows us to set up characteristics for each of our characters in the game:
Neuter, masculine, feminine, or mixed
Singular or plural
Then we can use the {Dialogue Wave} assets to set up contexts that determine which wave file is played depending on the characteristics of the two characters that are interacting. At the start of the game, the player is asked to choose their player character and is given the choices of:
Female group
Male group
Male
Female
(Note that we don’t actually create the groups of characters in the Demo level—it’s just for illustration!)
This defines the {Dialogue Voice} to use for the opening announcement. See the “Opening VO Dialogue” section of the Level Blueprint. (In the demo level the character choice does not actually alter the dialogue for gender but you could set up conditional bools within Sound Cues as discussed above.)

So if the speaker (defined by its {Dialogue Voice} as being neuter/singular) is speaking to male/singular, it will use the line {E_22_InaWorld_Prince}, and if female/singular, the line {E_22_InaWorld_ Princess} will be chosen.

“In a world gone to hell, a lone iron born warrior prince must forge his destiny.”
“In a world gone to hell, a lone iron born warrior princess must forge her destiny.”
“In a world gone to hell, a ragtag band of iron born warrior princes must forge their destiny.”
“In a world gone to hell a ragtag band of iron born warrior princesses must forge their destiny.”
In this instance the speaker remains the same, but you could also vary the speaker (e.g., Guard_01 or Guard_02) so that the same line actually plays back different versions depending on who is speaking.
We’ve set up a variable for each player character type in the [Level Blueprint] (Player_F_S, Player_M_S, etc.) These have been created as array variables since this is required by the <Make Dialogue Context> node. As each menu choice is made, the character type is combined with the speaker in the <Make Dialogue Context> node, which is then referenced by the <Play Dialogue Attached>.

The variable Opening_Voice_Over_Context is also referred to by our inventory dialogue system to choose either the line “Remember son, nobody likes a smartass” or “Remember lass, nobody likes a smartass.”


Although this may seem quite convoluted to set up, once you have grasped the concepts it provides a system with great potential to make your dialogue more context and character aware.
Exercise 06_07: Dialogue Contexts
When the player enters the “Inner Sanctum” area, the cry goes up “She’s here!” or “He’s here!” or “They’re here!” (note that it might not be quite the welcome you’re expecting!) The choice of phrase will depend upon the character type you choose using keyboard commands (F for female solo, M for male solo, or G for group).
{Dialogue Voice}, {Dialogue Wave}, <Make Dialogue Context>
- On the steps up to the *Inner Sanctum* a triggered menu offers the player the choice to define their character type. Use this to define the choice of phrase that the crowd uses on entry to the Inner sanctum.
- Create the following {Dialogue Voice} assets in the Content Browser.
- {Guard}: gender—masculine, plurality—singular
- {Female} character: gender—feminine, plurality—singular
- {Male} character: gender—masculine, plurality—singular
- {Group} of characters: gender—mixed, plurality—plural
- Create a {Dialogue Wave} asset in the Content Browser. Double-click to open its Generic Asset Editor. Add Dialogue Contexts (the button at the top) to create:
- Use the arrow on the left to expand each dialogue context and add your Sound Waves to the appropriate context:
- Speaker: guard, Directed at: female—“She’s here!”
- Speaker: guard, Directed at: male—“He’s here!”
- Speaker: guard, Directed at: group—“They’re here!”
- Create 4 Dialogue Voice variables in the My Blueprint panel of the [Level Blueprint] (+).
- Female
- Male
- Group
- Player_Type
- Add the relevant dialogue voice assets to the appropriate variables as defaults.
- Go to the “Inner Sanctum Dialogue” section of the [Level Blueprint] and assign your {Dialogue Wave} to the <Play Dialogue Attached> node.
- <Get> your Player variable and assign it to the Target of the <Make Dialogue Context> node. Also assign the {Guard} variable as the speaker. (This will create a <Make Array> node in between)
- Drag and drop your Player_Type variable into the event graph to create the <Set> nodes. Leading from the <Switch On Name> node attach these <Set> nodes and assign the appropriate Dialogue Voice variable. Attach the output exec of each of these to the existing <Set> node for the character choice.
- Don’t forget that there are screenshots of all the completed exercise systems on the website to download if you get stuck!
Localization or Localisation?
Once you have got your script with all 30,000 lines worked out, it might dawn on you that most of the world does not actually speak English. The nine foreign language versions need their dialogue localized (if you’re lucky it will just be French, Italian, German, and Spanish). Localization can be a huge job requiring very specific skills, which is why many outsourcing companies have sprung up to provide this service. These recording, editing, and organizational skills generally fall outside of the implementation remit of this book; however, the following are principles with which you should become familiar.
For the in-game cutscenes or FMVs (full motion videos), the foreign language dialogue will need to sync to the existing English language animations. It would cost too much to re-animate to match the timing of the new language. Many foreign language voice actors are very experienced in dubbing for films and so are expert at matching the rhythm and flow of the visuals to the new lines, but as you will appreciate, particularly with close ups on the face, this is difficult. You can use the English recordings as a template for time reference so that the local actors can attempt to approximate the same timing. Given that some languages will require considerably more words or syllables to communicate the same sentence, this is never going to be ideal, particularly if your English performance is fast (meaning that your German version will be supersonic!) The new language files also need to match the exact length of the existing English language assets so that the overall file size does not differ.
The good news is that you may not need to replace the non-word-based vocals such as screams and expressions of pain, although we believe in some regions “Aiieee!” is more popular than “Arrgghhh!”
Localization is a specialist area that we do not have space to really go into here, but if nothing else it serves again to highlight the meticulous approach to organization and management required by dialogue in games.
Conclusion
It is often useful to be able to generate dialogue lines for prototyping the system before you go to record. An ideal way to do this would be to use a speech synthesizer to read through your spreadsheet and automatically churn out the lines, correctly named of course, as waves. We have built such a system for you! Download it from the website.
For further reading please see the up-to-date list of books and links on the book website.
Recap:
After working through this chapter you should now be able to:
- Use timed and triggered dialogue for advice;
- Handle dialogue interrupt by fading, blocking, or ducking;
- Use conditions, counts, and arrays for dialogue choices;
- Use dialogue contexts to play different lines depending on the speaker/listener.