Chapter 5: Share It With the World: Working With LottieFiles
Here we are, ready to export our awesome first Lottie animation as a .json file to then add it to our app or website using React Native. Our app is minutes away from looking stunning and making a quality change. Follow me!
In this chapter, we are going to learn how to export our Lottie animation using both Bodymovin and LottieFiles plugins for Adobe After Effects (AE). We will guide you through creating a LottieFiles platform account so that we can preview our animations and hand them off to developers. We will also have a look at the LottieFiles mobile app for iOS so that we can effortlessly test our animations directly on mobile. We will also teach you how to create simple animations without even using AE and, finally, we will have some fun by converting animations into stickers for Telegram.
In this chapter, we are going to cover the following topics:
- Exporting our animations from AE to .json files
- Creating an account in LottieFiles
- Exploring the LottieFiles dashboard
- Importance of testing in desktop and mobile Lottie platforms
- Creating and editing Lottie animations without using AE
- Converting Scalable Vector Graphics (SVG) files to animated Lottie files
- Converting Lottie files to GIFs
- Creating Telegram stickers and sticker sets
Technical requirements
For this chapter, we are going to need some specific plugins that will help us export our animation as a .json file and preview them on both desktop and mobile devices. The tools that we require are as follows:
- Adobe AE
- Bodymovin for AE plugin
- LottieFiles for AE plugin
- LottieFiles for mobile
- Chrome, Safari, or a browser of your choice
Exporting our animation for handoff
To export our animation from AE to a .json file, we can use Bodymovin and LottieFiles plugins for AE. But, do we have to learn both? You are free to use any of them; they are available to download, are free to use, and are fully maintained and supported.
Downloading and Installing the Plugins
For downloading and a how-to installation guide, you can jump ahead to Chapter 6, Don't Stop! Exploring Plugins and Resources That Will Keep You Going, where we will guide you through the process.
So, just choose the one you feel more comfortable with or the one that best matches your workflow. Maybe working with Bodymovin is all you need, however, LottieFiles will give you additional testing and preview tools.
For me, I'm really used to working with Bodymovin, especially because, as you know by now, this was the first plugin ever to exist that would convert your animation into a .json file; it is simple and does the job. But, times change and new tools with new features appear.
There is a big team of professionals working behind the scenes of LottieFiles. I must say, these days, the LottieFiles plugin matches my workflow better. It allows me to easily preview my animations on both desktop and mobile devices and share them with stakeholders in the blink of an eye.
That said, I suggest you go through both plugins and then decide which one suits you best. Let's start by exploring Bodymovin.
Exporting our animation using Bodymovin
As we've seen in earlier chapters, Bodymovin was the first plugin ever released for AE that would allow us to export our animation as a .json file, and it works perfectly well. It is simple and gives some interesting exporting options, which we will see in a minute.
But, before we start, we are assuming you have already installed Bodymovin for AE, otherwise, you can jump ahead to Chapter 6, Don't Stop! Exploring Plugins and Resources That Will Keep You Going, and follow the steps to install it.
Right, let's say we've got everything ready to go (Adobe AE and the Bodymovin plugin installed), so let's open the Bodymovin plugin in AE:
- Open Adobe After Effects.
- Open our check_icon.ae project.
- Go to the top navigation menu and click on Window | Extensions | Bodymovin:

Figure 5.1 – Opening the Bodymovin panel in AE
Let's check the Bodymovin panel.
First, the panel opens up in the Render view. This is the view we are going to be focusing on as the other options are not relevant for us at this point. As we can see in Figure 5.2, the two compositions contained in our project are listed here as check_icon and Sparks:

Figure 5.2 – Bodymovin composition view
We can export any of the compositions listed in the panel, but we want to export the whole animation. So, which of the compositions listed in the panel should we export? That's right, the main composition that contains the whole animation, which is the check_icon composition.
For each composition, there are a few settings we could adjust before exporting. That comes in handy in cases where we are using images, expressions, and live text, but as you know, I strongly recommend keeping our animations as simple as possible. If you want to get further information on that, you can check our discussion of supported Lottie features in Chapter 6, Don't Stop! Exploring Plugins and Resources That Will Keep You Going.
Now, let's export our animation:
- Click on the little circle to the left of the check_icon composition, below the Selected column.
- Click on the three green dots icon to the right to save your .json file and choose your folder destination. Notice the .json file is named as data.json by default, but you can give it any name you want. I'm going to call mine check_icon.json:
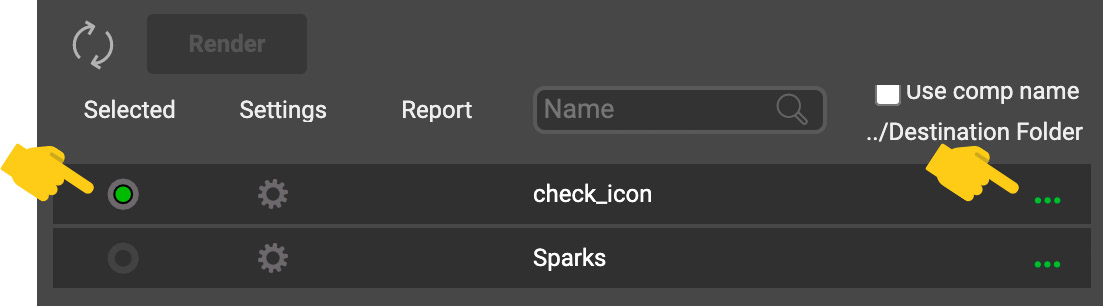
Figure 5.3 – check_icon selected
- You can now see the Render button is highlighted and the destination folder is visible next to the check_icon name. Let's click the Render button:

Figure 5.4 – Render button highlighted
- Click the Done button:

Figure 5.5 – Render successfully done
Great! Our animation is exported as a .json file and is ready for preview. But, before we do that, we are going to show you how to do the same using the LottieFiles plugin.
Exporting our animation using LottieFiles
People in the LottieFiles community have been very busy these last years and have come up with a new plugin for AE called LottieFiles.
The LottieFiles plugin is based on the actual Bodymovin open source but has some extra features that Bodymovin doesn't. That's why we are going to see how to export your animation using LottieFiles as well.
So, we are assuming you've got everything ready to go, otherwise, move ahead to the Installing LottieFiles plugin section in Chapter 6, Don't Stop! Exploring Plugins and Resources That Will Keep You Going, where we will show you the details on how to download and install the LottieFiles plugin.
Whenever you are ready, let's open the LottieFiles plugin in AE:
- Open Adobe After Effects, in case you haven't done it yet.
- Open our check_icon.ae project.
- Go to the top navigation menu and click on Window | Extensions | LottieFiles:
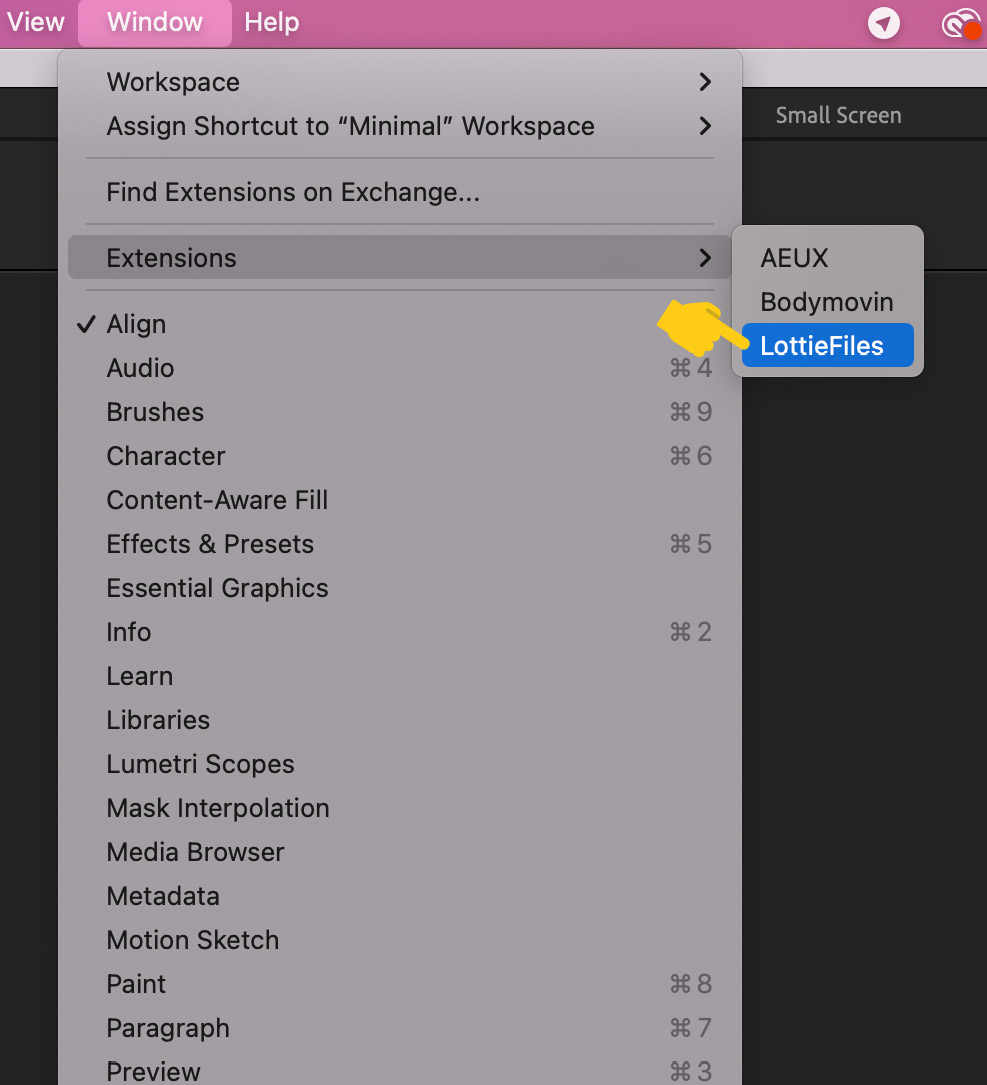
Figure 5.6 – Opening the LottieFiles panel in AE
Keep in Mind
To be able to access the LottieFiles plugin panel, you will need to create a LottieFiles platform account. We are covering that in the following section, so if you want to create your account now, just jump to the next section and then come back again. We will wait for you here.
Great! So, now that everything is sorted, let's check the LottieFiles plugin for AE panel.
At first sight, the LottieFiles panel is quite similar to Bodymovin. Both open up on the composition panel. We can also see a list of our compositions, the Settings tool icon next to each composition, and the Exporting arrow icon to export our animation, as shown in Figure 5.7 for reference:

Figure 5.7 – LottieFiles panel composition view
Next to the Composition panel, we find some other icons such as an eye and a compass:
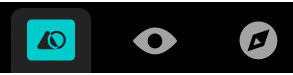
Figure 5.8 – LottieFiles panel top-bar icons
The eye represents the Preview panel. In this panel, we can find every previously rendered animation we've done so far, as shown in the following figure:

Figure 5.9 – LottieFiles panel Previews view
By selecting any of the shown animations, we will see its details such as the file size, frame rate, dimensions, and time of export. We can also change the background color to see how it looks in different scenarios or export it directly to our LottieFiles mobile app. We can save the file or share it with the community by clicking on the little world icon:
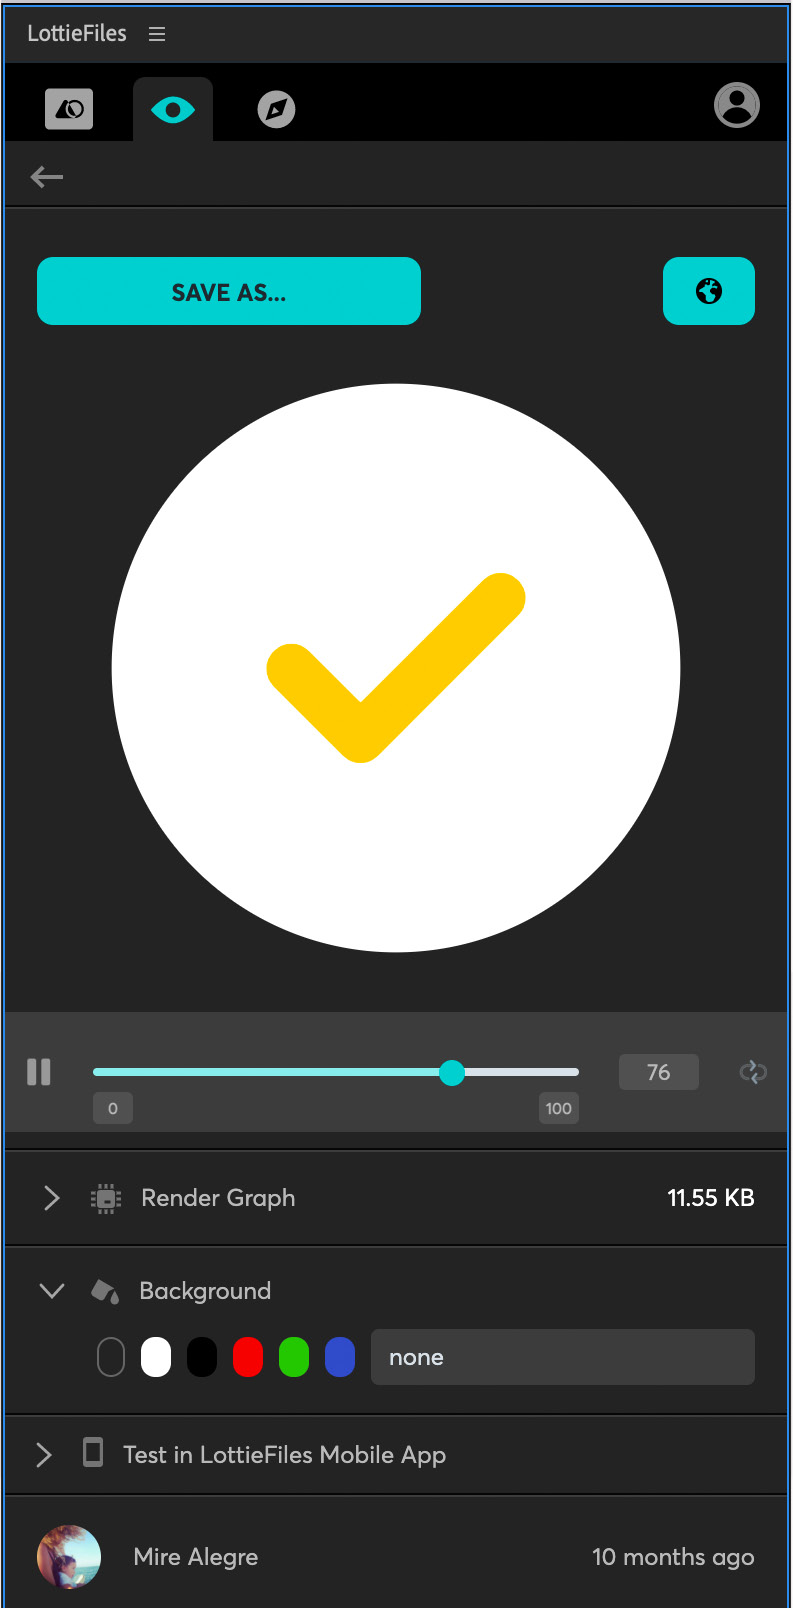
Figure 5.10 – LottieFiles panel preview details
The compass stands for the Search panel. In this panel, we can look into the LottieFiles library for free animations to use or get inspired. This becomes very handy when we don't need a totally personalized animation. Imagine we need a loading bar; we can search for one, load it into AE, and change whatever we need to, such as the color, the time, and so on.
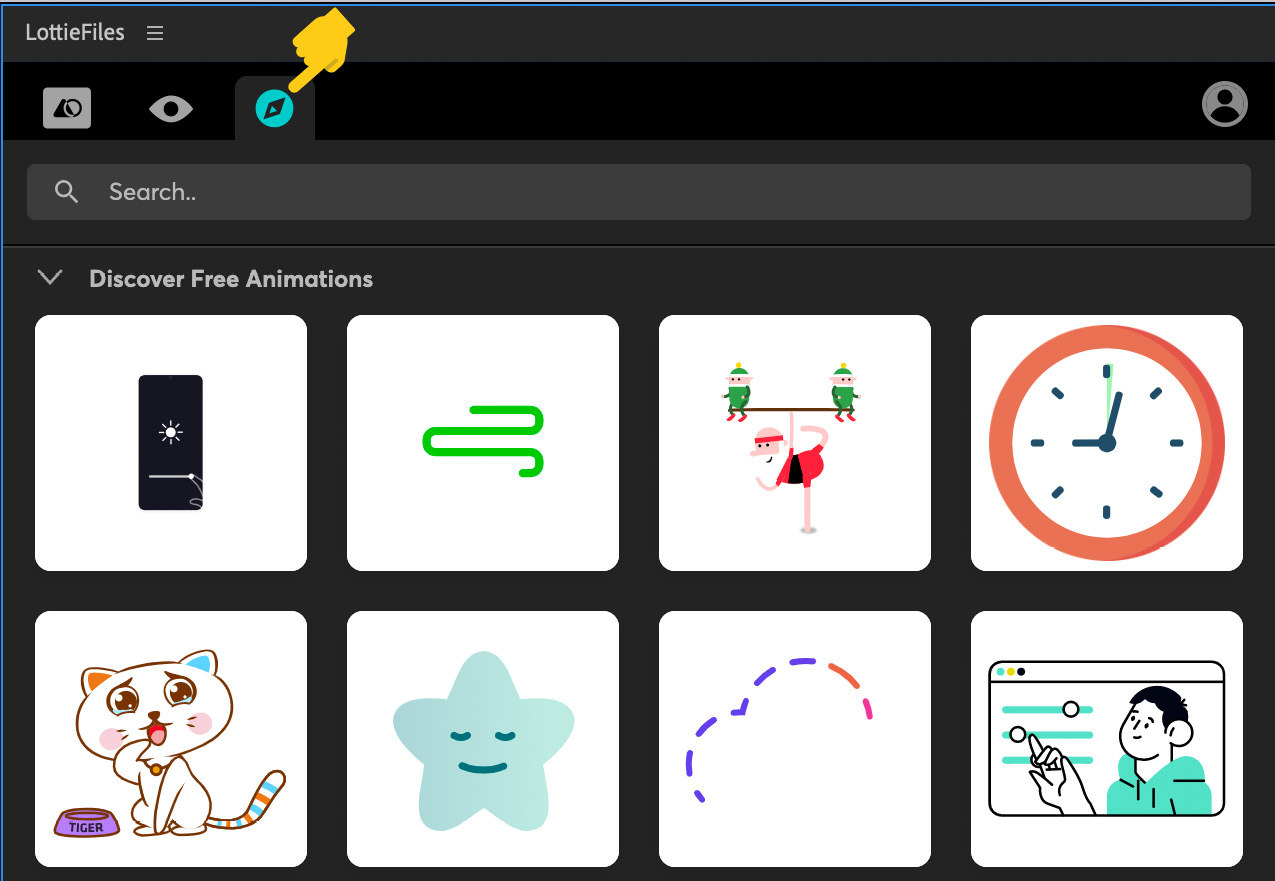
Figure 5.11 – LottieFiles panel – Discover Free Animations view
I sometimes look for an animation to use as a starting point of what I have in mind, to check how it was done, or just for style or timing inspiration.
Some of the animations in the LottieFiles library contain the .json file as well as the AE file, free to download and use. To know whether the animation can be downloaded as an AE file, you need to look for the ones that contain the Download AEP File button:

Figure 5.12 – LottieFiles panel – Discover Free Animations detail
Now that we've been through the different LottieFiles panel options, such as the Composition, Preview, and Search panels, let's focus on exporting our animation.
To do that, execute the following steps:
- Let's click back on the Compositions panel view.
- Click on the arrow next to check_icon:

Figure 5.13 – LottieFiles panel compositions view
Our check_icon animation shows up in the panel.
- Now, we can save our file as a .json or .lottie file, which, as we mentioned earlier, is the same, or upload it to our previews:

Figure 5.14 – LottieFiles panel – successfully exported Lottie
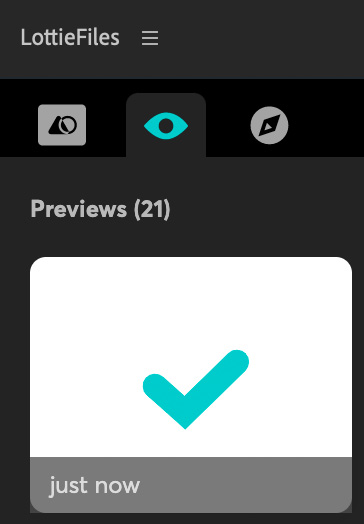
Figure 5.15 – LottieFiles panel – our new icon uploaded to the Previews view
Fantastic! We just exported our animation as a .json file, which means we have created our first ever Lottie!
Now that we know how to export our AE animated file to .json files either by using Bodymovin or LottieFiles plugins, let's move to get into the LottieFiles platform, and to do that, we are going to create a user. Let's go!
Creating a user account in LottieFiles
We've got our animation exported as a .json file and with that in hand, we could pass it over to the technical team or move ahead to the third part of this book, Adding Your Lottie Animations Into Mobile Apps, and learn how to implement our animation in our app.
But, let's not rush; the LottieFiles platform allows us to upload and test our animation before handing it off to the development team in no time, and that way, we ensure that everything is in place and we haven't used any feature that is not supported.
To do that, and as we've mentioned earlier, we need to sign up at the LottieFiles platform in order to be able to export our animations using the LottieFiles plugin for AE:
- Go to https://lottiefiles.com/ on your browser:
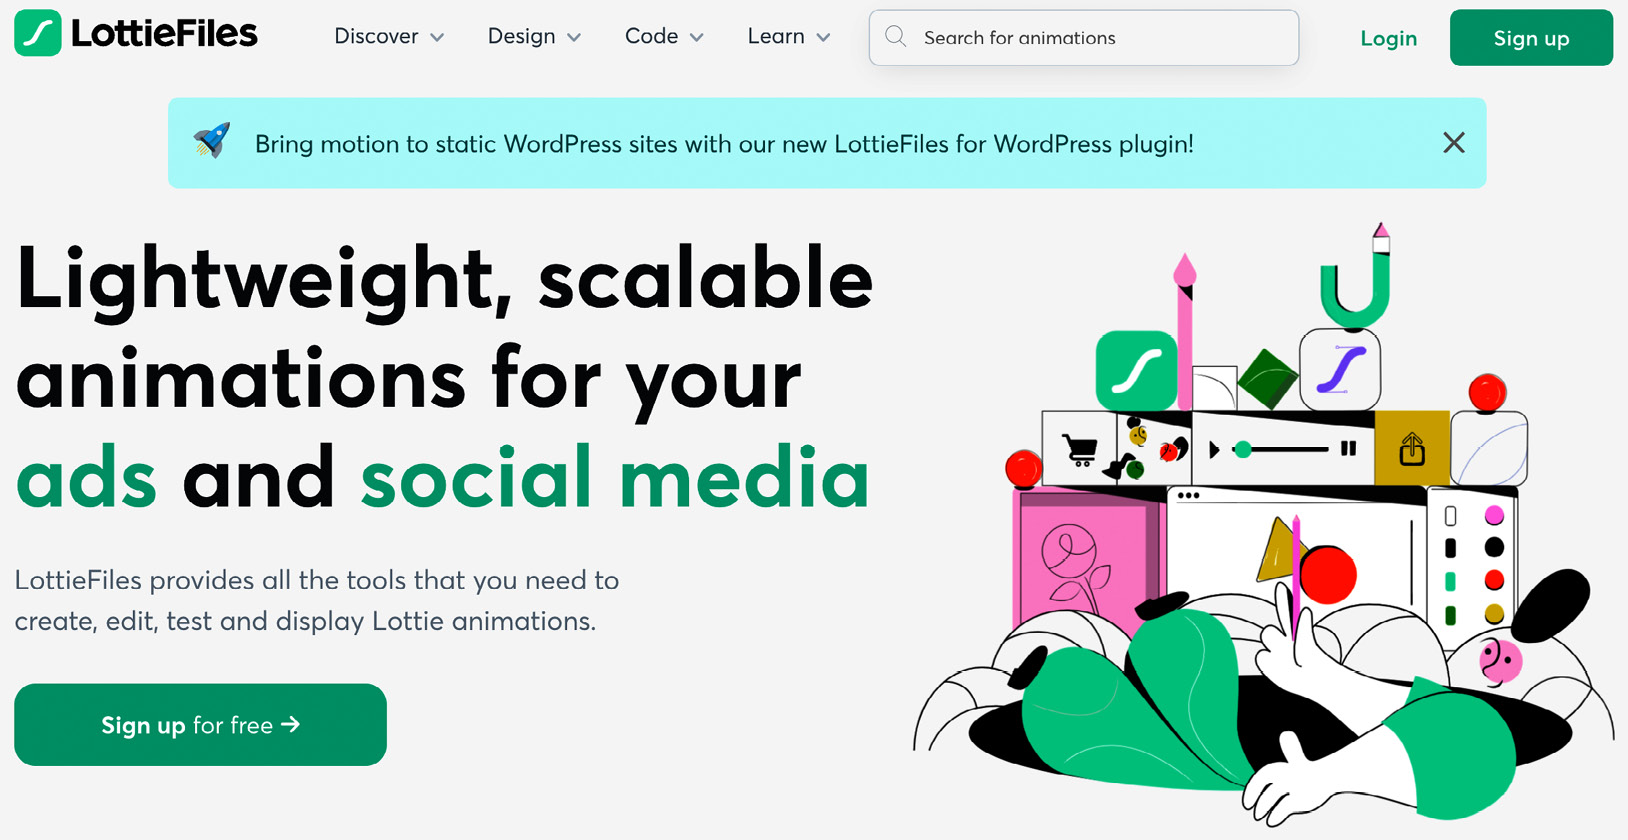
Figure 5.16 – lottiefiles.com desktop browser view
- Click on the Sign up for free button.
- Choose the option that best suits you to create your account, such as Facebook, Google, or email:
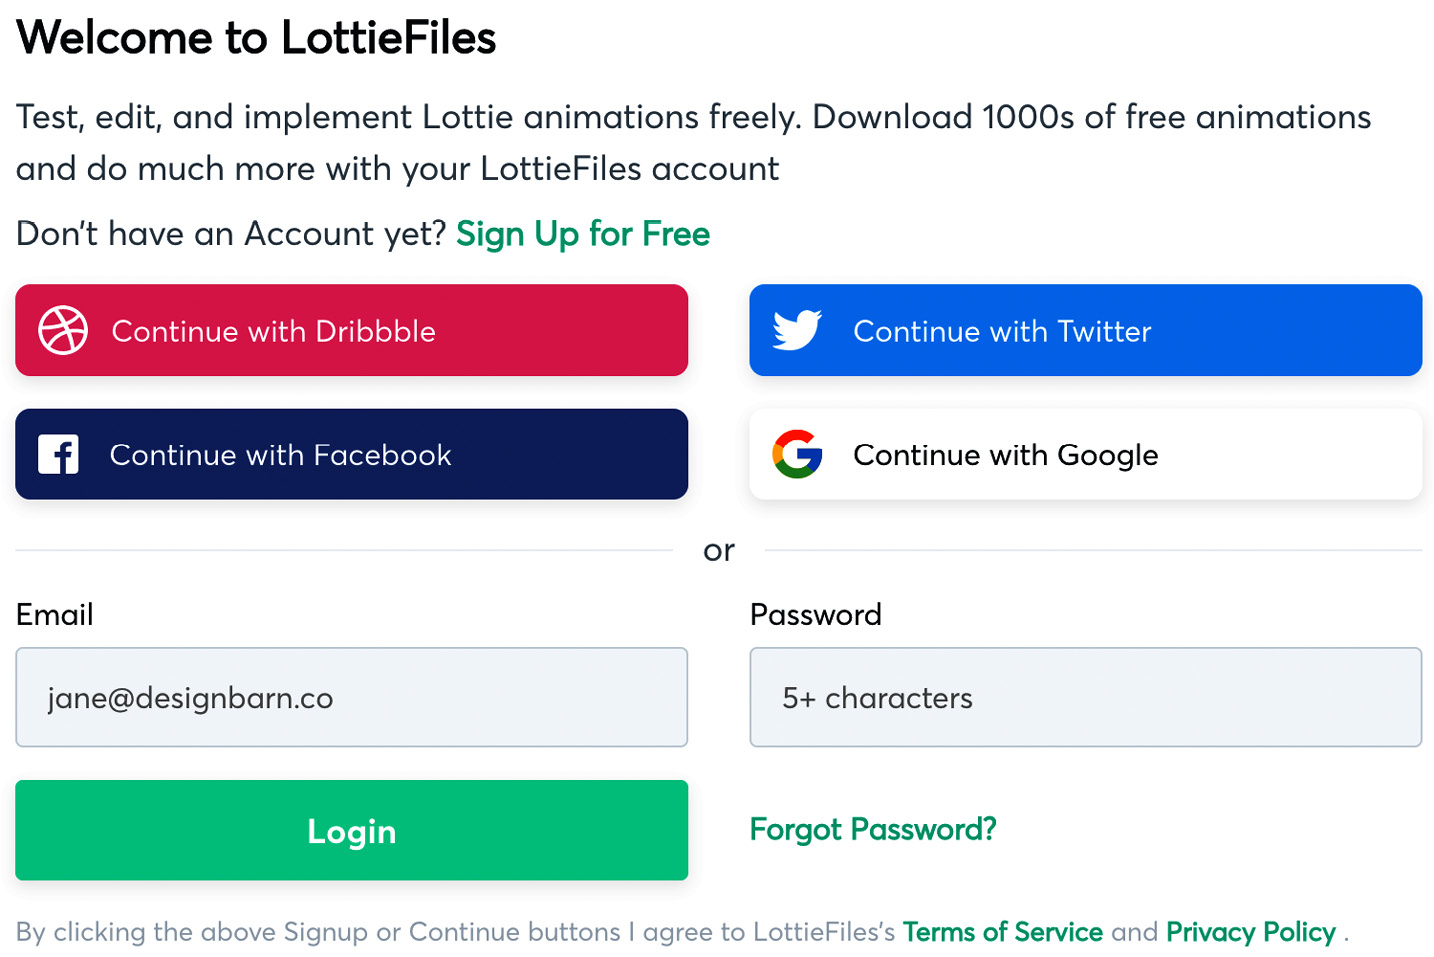
Figure 5.17 – LottieFiles login/sign up window
And, you are done!
As we mentioned in Chapter 1, Get Started With Lottie, there are plenty of things you can do on the LottieFiles desktop platform including searching for animations, hiring animators, buying or selling animations, and searching for plugins and tools. But, for now, we are going to be focusing on our user dashboard, as shown in Figure 5.18:
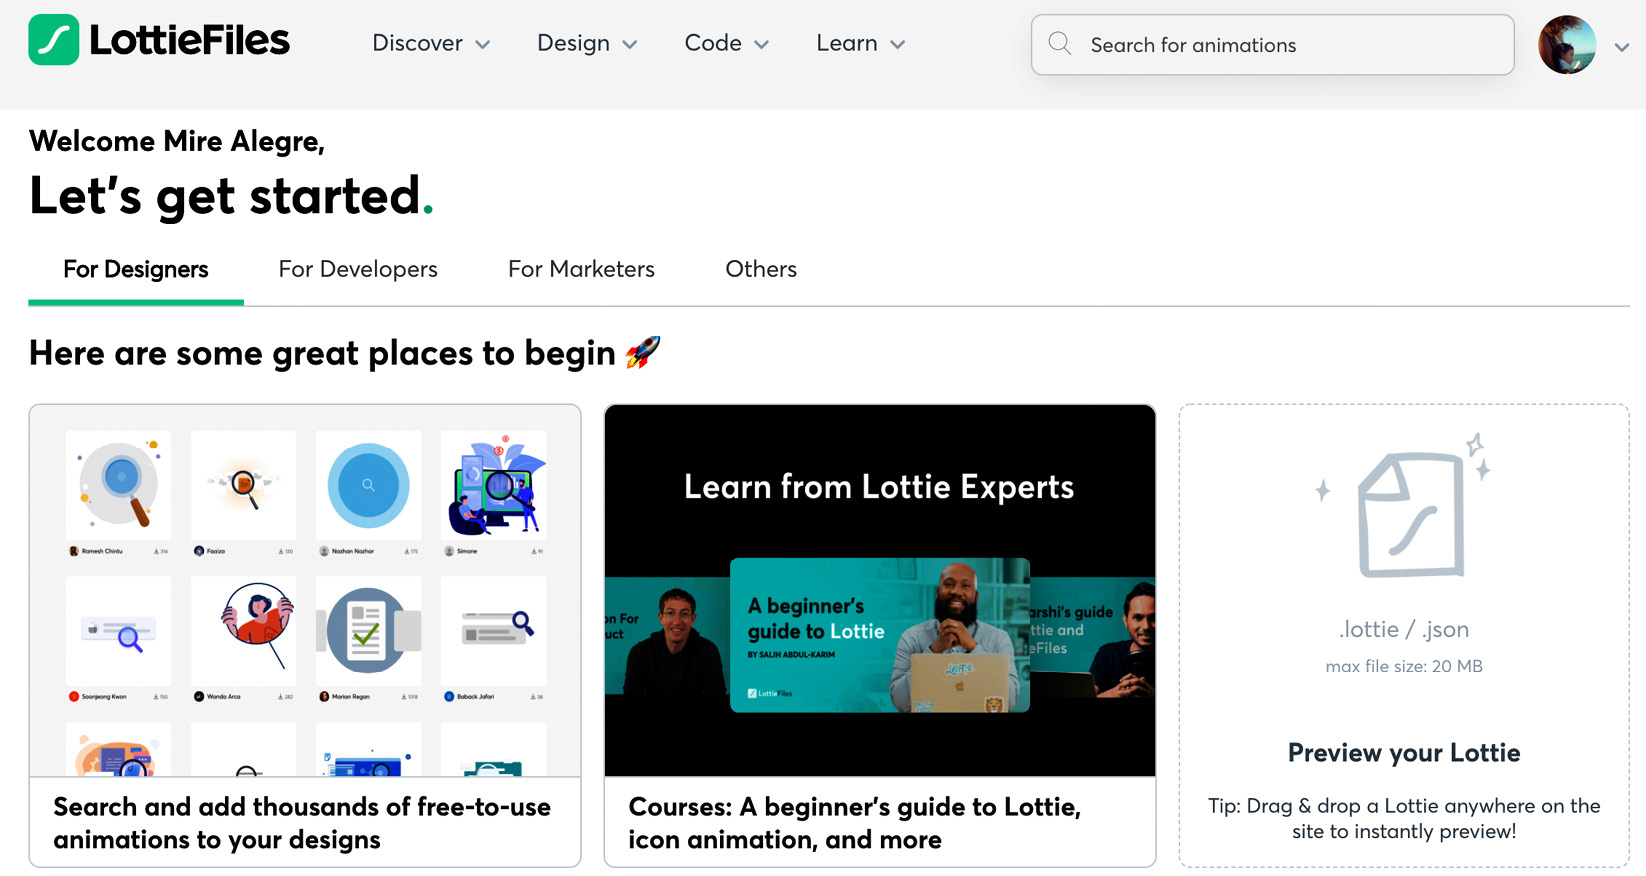
Figure 5.18 – LottieFiles platform home logged in view
Before we move to the next section to start exploring the LottieFiles platform, let me do a bit of a recap here. In this chapter, you just created your first LottieFiles account and exported the animation as a .json file using both Bodymovin and LottieFiles plugins for AE. There is just one step left for uploading and previewing our animated icon and sharing it with the world!
Exploring the LottieFiles dashboard
The LottieFiles platform allows us to upload, keep, and share our animations with developers, clients, and even with the world if we want to. And, not only that, but it also gives us the statistics about our public animations as well as information about likes, purchases, and more. How? Let's check it out. To do so, just hover over your avatar and select any of the options, such as, for example, the My Public Animations option:

Figure 5.19 – The My Dashboard menu view
Once we open up our dashboard, we can see a few different options listed on the left-hand side of the screen. There is also an empty central section in which we see a message encouraging us to upload our first animation:

Figure 5.20 – The My Dashboard menu view
As you will see, LottieFiles is a very intuitive and easy tool to use. But, let's have a quick overview of the menu on the left. Here, we see a few sections, which we will look at next.
My Downloads
The My Downloads section is the place where we find a list by date of any animation that we have downloaded from the LottieFiles platform. Any .json, .ae, .gif, or any other file format you have downloaded will appear here:

Figure 5.21 – My Downloads view
My Likes
In this section, we find a list of all the animations we have given likes to. I use it as a save for later kind of feature, so anytime I'm searching through LottieFiles and I see some animation that can work for me as a reference in the future, I give it a like so it gets saved in this section:
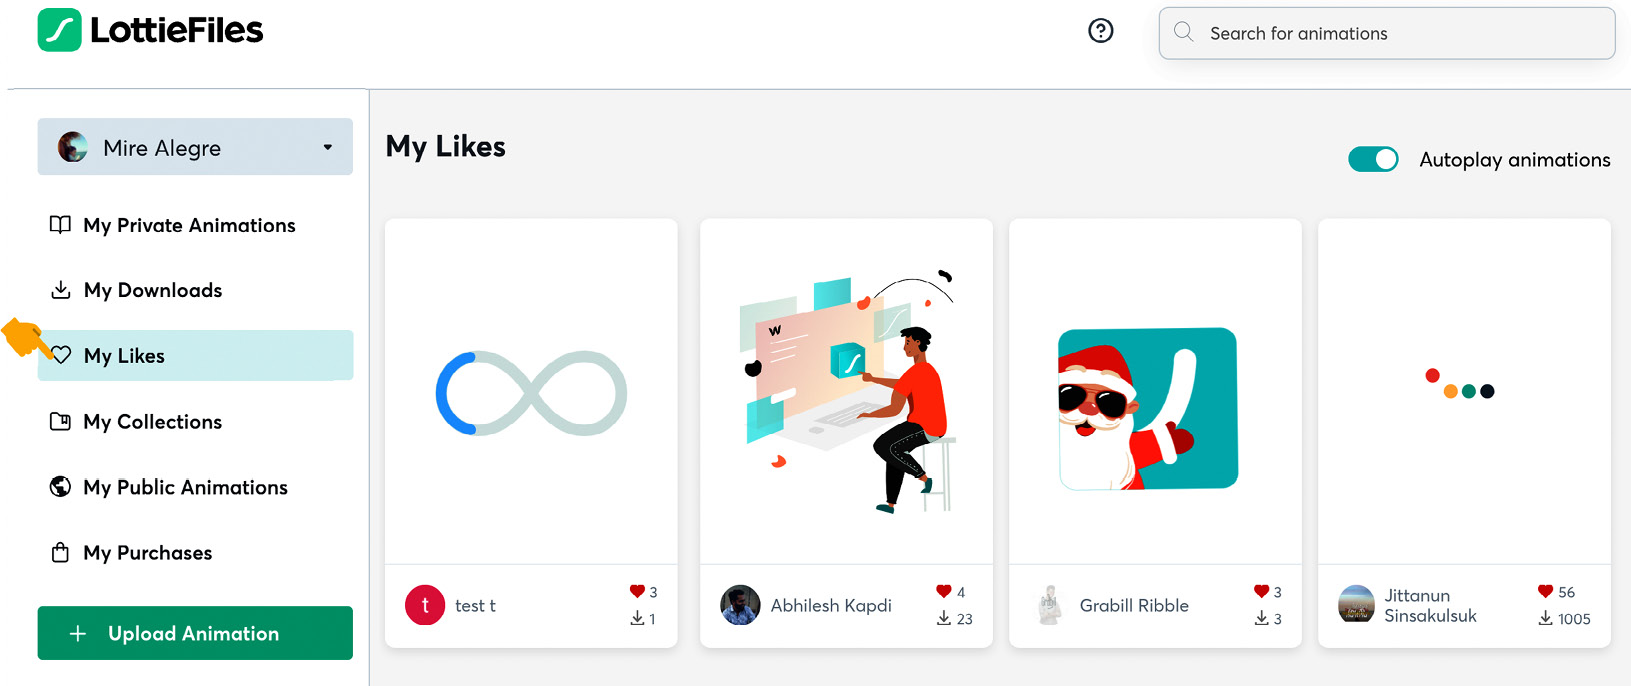
Figure 5.22 – My Likes view
My Public Animations
If you are up to sharing your animations with the public, this section is quite cool. Here, you'll find some statistics about likes other users have given you, the times your animations have been downloaded, and profile views. You'll also see a preview of all your published-to-the-public animations as well as the ones that are in review for sharing:
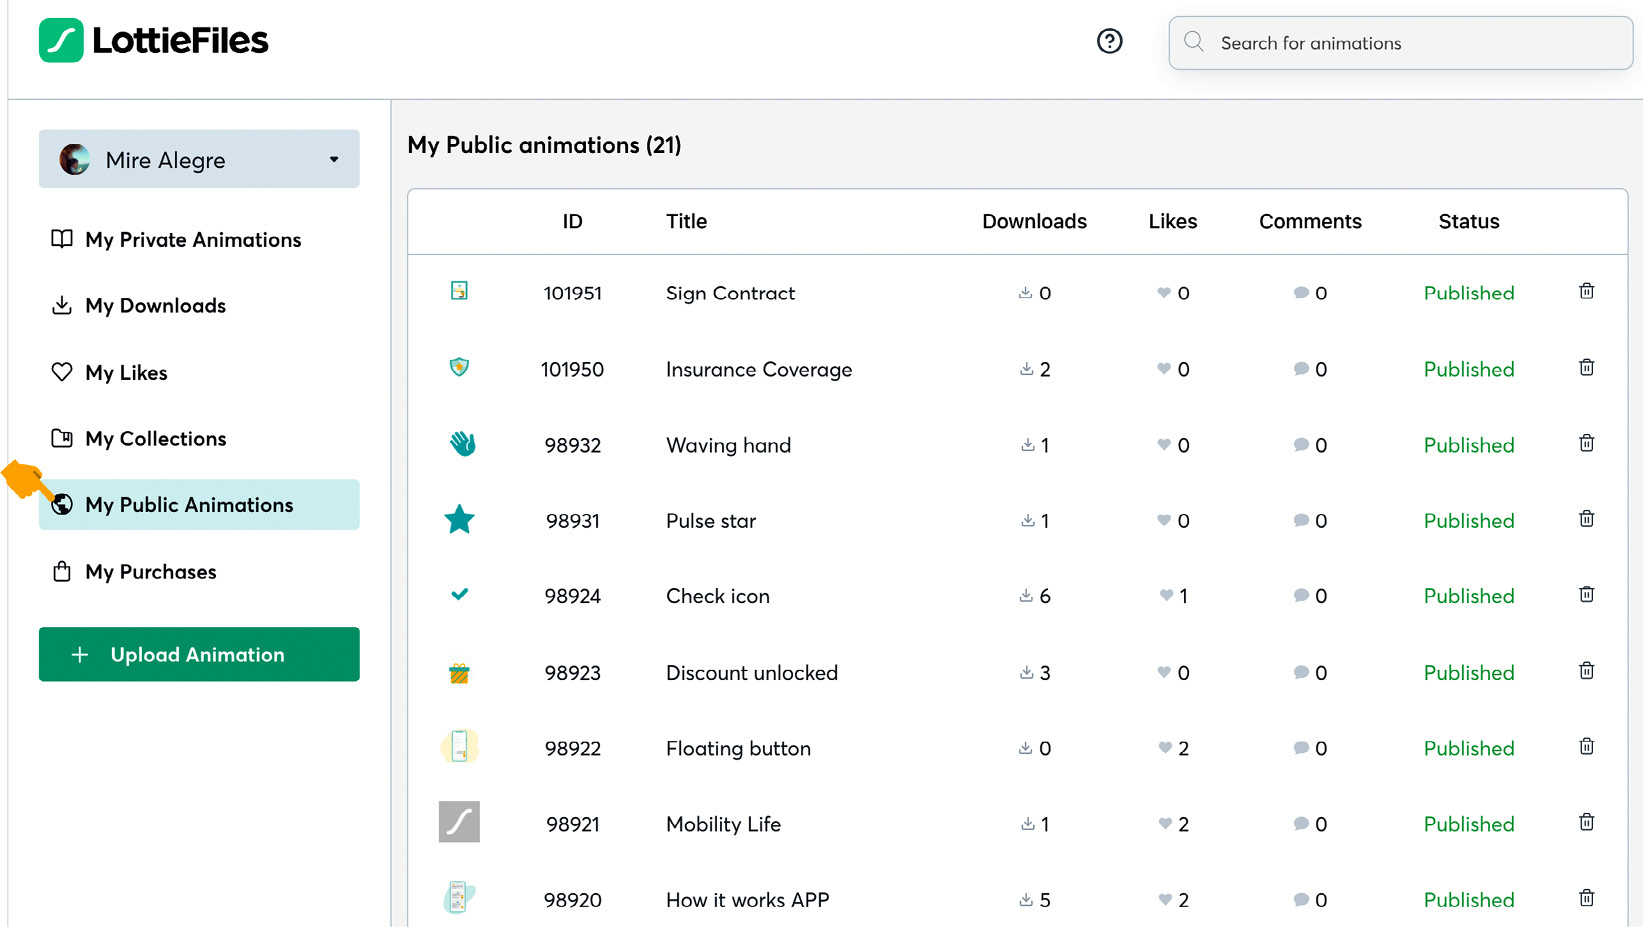
Figure 5.23 – My Public Animations view
My Purchases
Any time you purchase an animation, it will come up here. In my case, this area is empty, as I normally create my own animations, but I encourage you to have a quick look at the marketplace. It can provide inspiration as there are so many good animators out there:

Figure 5.24 – My Purchases view
My Private Animations
And finally, and for me, the one I use the most, is the My Private Animations section. Here is where you'll find all the animations you have previewed in the LottieFiles AE plugin or the ones you have uploaded through the LottieFiles desktop and mobile platforms:

Figure 5.25 – My Private Animations view
Now that we are familiar with our LottieFiles dashboard, let's start uploading our animation; just follow me to the next section where we will learn all about it.
The importance of testing in desktop and mobile LottieFiles platforms
And, here we are, about to upload our animations to LottieFiles and get them ready to hand off. This is a very exciting moment for me. I see three big milestones when animating for Lottie. First, when we render our animation in AE using Bodymovin or LottieFiles plugins and we check everything works; the second big moment is this, right here, right now, when we are about to upload it into the platform to check everything works fine, and the third one is when our animation is live! But, let's not hurry; let's upload our icon and check everything is working nicely.
There are three ways to preview our .json animations:
- In the preview window of the LottieFiles plugin for AE.
- Upload, preview, and handoff in the LottieFiles browser platform.
- Preview in the LottieFiles apps for Android and iOS.
Previewing .json files using the LottieFiles plugin for AE
As we've already seen earlier in this chapter, once we render our animation in the LottieFiles plugin for AE, we can automatically see a preview of it in the same plugin panel, in the Views section. That's not the only thing we can do here. We can also do the following:
- View more information about the file size.
- Change the background color for the preview.
- Save it as a .json or .lottie file.
- Upload the file to My Private Animations in the LottieFiles dashboard.
- Generate a QR code to scan it from our mobile devices to preview it there.
So, as you can see, the LottieFiles plugin allows us to render, preview, upload, and hand off our animation all from the same place.
That said, I highly recommend uploading and previewing .json files wherever they are going to be shown (web, iOS, and/or Android), even if my animation looks perfect in the LottieFiles plugin. You'll experience why I say that soon.
Uploading and previewing .json files on the LottieFiles platform
Let's see how to get to the next step; let's see how to upload and preview our .json animation. We have already rendered and saved our .json animation with Bodymovin or LottieFiles plugins and now I want to test my animation and double-check everything works as expected. How? On My Dashboard.
Let's upload our animation. It is as easy as clicking on the Upload Animation button, which we can find in our LottieFiles browser dashboard, as shown in Figure 5.26:
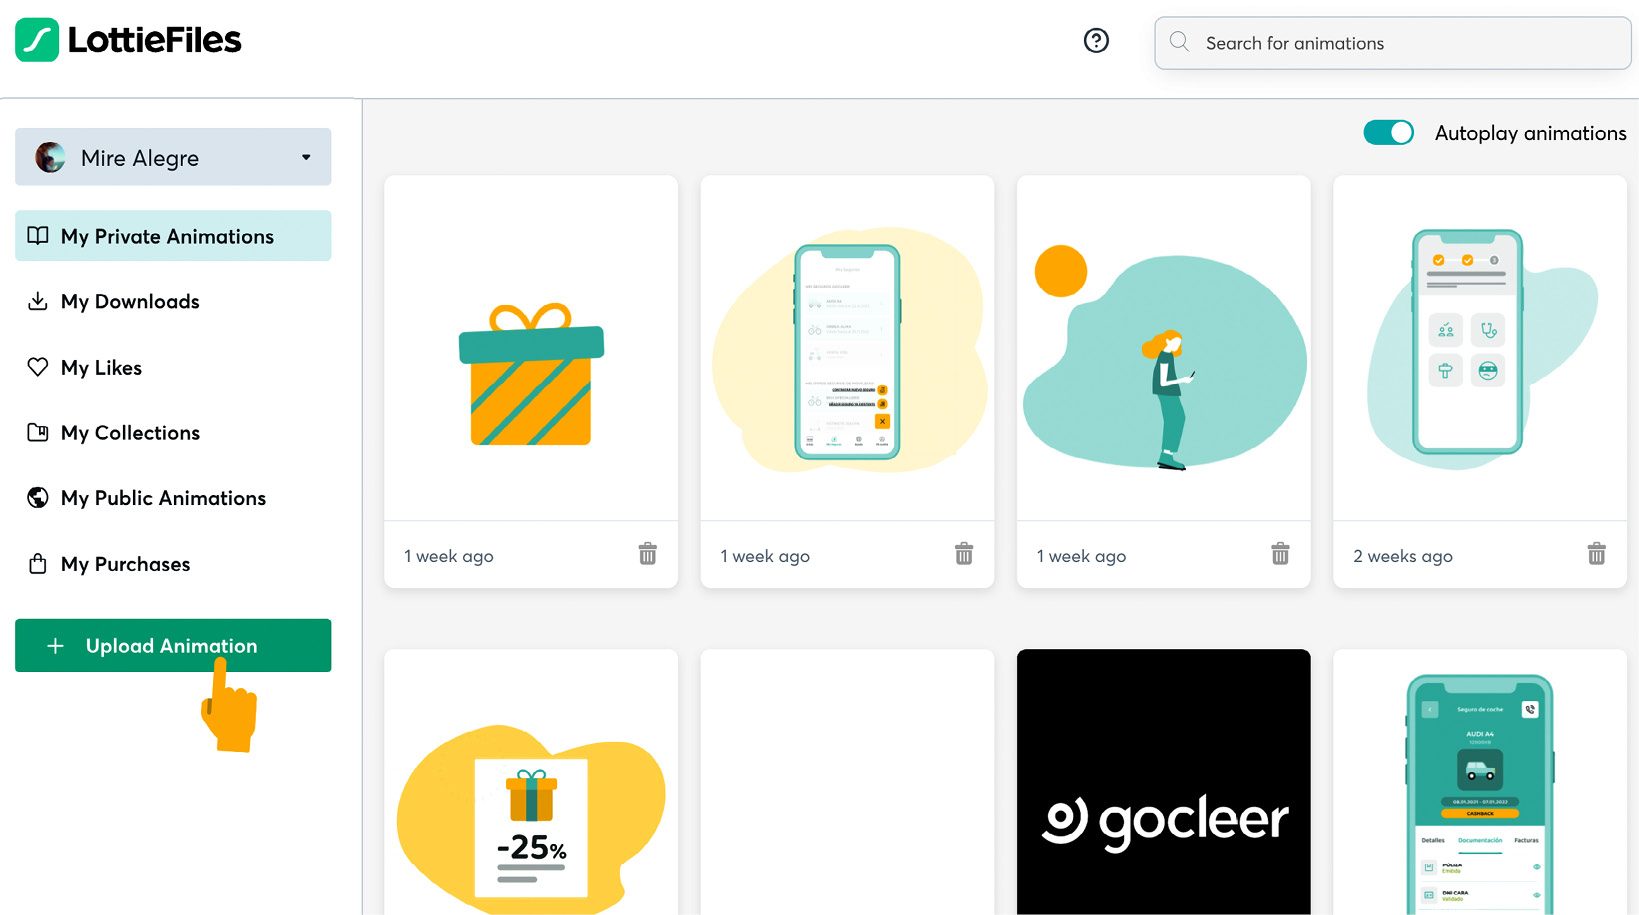
Figure 5.26 – Upload Animation button on the My Dashboards view
Once we click on the button to upload the file, a new window comes up. As you can see in the following screenshot, uploading our .json file is as easy as dragging it to the window:
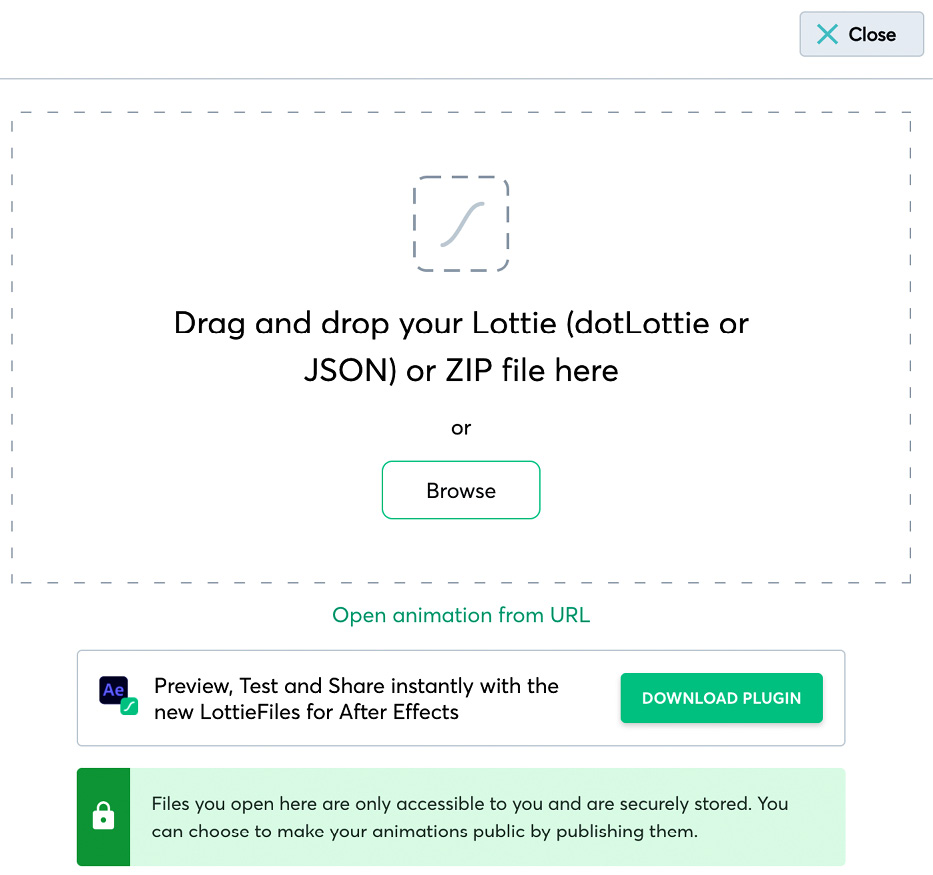
Figure 5.27 – Upload Animation drag and drop/browse screen
So, let's do that, let's drag our icon_check.json file here.
Once we do that, we will find a Preview window with our animation and also a few options that can be adjusted, such as background color and speed, for example:

Figure 5.28 – Preview window
As you can see, previewing and testing .json files in the LottieFiles dashboard is very easy and straightforward. Let's move to the next section to learn to do the same from a mobile device.
Previewing our Lottie animations in the mobile LottieFiles app
Previewing our animations is a smart thing to do and will avoid us handing off LottieFiles that don't work properly. Remember we mentioned earlier, back in Chapter 4, Move It! Animating Our First Lottie With After Effects, there are some features not supported for specific devices. For example, radial burst is not supported on iOS.
Supported Features
You can learn more about supported features of LottieFiles in Chapter 6, Don't Stop! Exploring Plugins and Resources That Will Keep You Going, in the Supported Lottie features for iOS, Android, and the web section.
Let's see what happens when we preview the animation in our iOS mobile app:
- Go back to AE.
- Open the LottieFiles panel and scroll down to the bottom, where you'll see a list of your available devices:
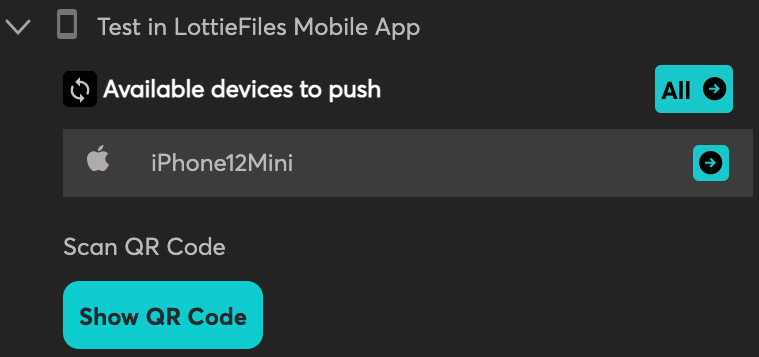
Figure 5.29 – Show QR Code button on the LottieFiles plugin for AE preview panel
- Select the one you want to test. In my case, I'm going to choose iPhone12Mini.
- Click on the Show QR Code button:
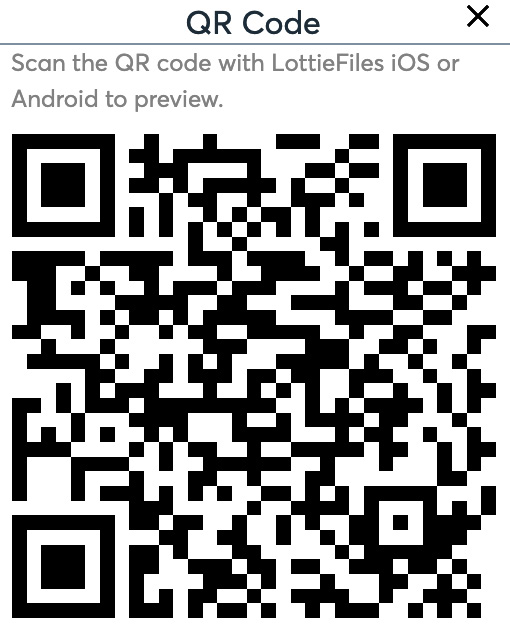
Figure 5.30 – Generated QR code on the LottieFiles plugin for AE preview panel
Now, let's grab your phone to finish the process:
- Open up the LottieFiles app.
- Click on Scan to scan the QR code and voilà, the animation shows up here!
If you are doing this from an iOS device, you'll notice something weird is happening, right? Radial burst is not showing correctly! Why? We've rendered our animations in AE using Bodymovin and LottieFiles plugins and it seemed to preview well. Also, when we uploaded it onto the LottieFiles dashboard, the animation showed properly, but not now, at least not on an iOS device (if you are checking this from an Android, you won't know what I'm talking about as it works perfectly well on Android, Windows, and the web).
But, why is that? Did we do something wrong? Well, not really, it's just because this feature is not supported on iOS. There, I've said it. Radial burst won't work on any iOS device. So, why have we done it in the first place? Of course, there is a list of supported features by device and platform, however, I wanted you to experience on your own how important it is to test things before handing them off. No matter how sure we are that something is going to work, sometimes, things just don't.
LottieFiles plugins and platforms are iterating constantly; one day things work, the next day, they don't, or vice versa. So, my suggestion here is to always test.
So, now what? Well, we can use our great animation with its radial burst effect for the web, Windows, and Android. But, what if we want to use it on iOS; do we have to go back to AE and redo things? Not really, LottieFiles allows us to tweak a few things in our animations without the need to go back to AE. So, stay with me, we are going to correct that in the blink of an eye.
Creating and editing a Lottie without using AE
That last section was a bit of a low kick; we were all really happy with our cool animation and now what? The nice effect won't show on iOS. Well, these things happen sometimes. We now have three choices:
- Complain about it.
- Go back to AE and add some little circles around our animation, one by one.
- Be lean and just remove the radial burst effect.
I'll go with the third option and you'll see how quick that is. We don't even need to go back to AE. Let's open Lottie Editor. To do that, follow these steps:
- Go to the LottieFiles web dashboard.
- Go to the left menu and select My Private Animations.
- Click on the check_icon animation.
- Click on the Edit Animation button, as highlighted in Figure 5.31:
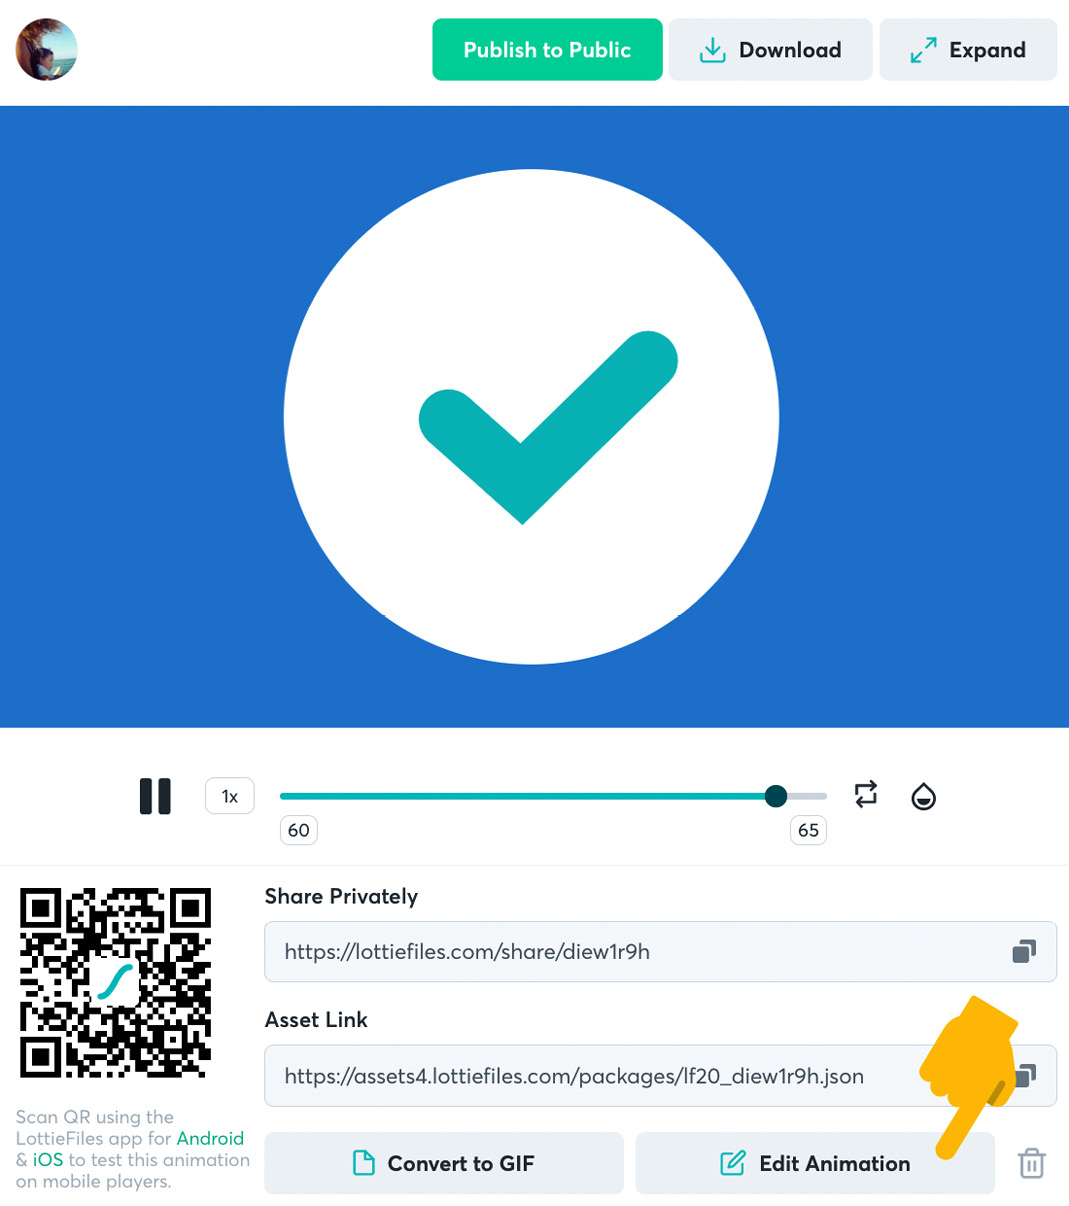
Figure 5.31 – Edit Animation button in LottieFiles desktop dashboard preview window
Lottie Editor appears and here is where we can also perform some magic. As we said, I'm going to keep my super cool sparkling icon for the web and Android and I'm going to adjust it for iOS.
Let's check the editor workspace view:

Figure 5.32 – Editor workspace view
On the left-hand side panel, we see LOTTIE URL, LOTTIE PROPERTIES, and LAYERS:

Figure 5.33 – Left-hand side editor panel
Lottie URL
The Lottie URL is the actual .json code itself. It contains all your animation's information and can be used to share your animation with the technical team. However, there are also some other more visual ways to share your animations, as we will soon see.
Lottie properties
When LOTTIE PROPERTIES is selected, a new panel opens up on the right-hand side of the screen, as shown in Figure 5.34. In this panel, we can change a few of our animation properties:
- ANIMATION PREFERENCES: This is the place where we can adjust DIMENSIONS, FRAME RATE, and DURATION of the animation.
- PLAYBACK SETTINGS: Lottie also allows us to change BACKGROUND COLOR but just for preview. So, since our animation is a white-over-white background, let's pick a different color. And, we can also adjust PLAYBACK SPEED to 1.5x, 2x, or 2.5x.
- GROUPED COLORS: Here is where the magic happens. The colors we can see listed are the ones contained in the animation. We can change them by just clicking on one of them and selecting a new one. This will change the color everywhere in our animation but, if you stay with me for a moment, I'll show you how to change it bit by bit.
- TELEGRAM STICKER EXPORT: Here is where you can effortlessly convert your animation for Telegram, but we will see that in a minute. Let's focus on the editor for now.
- EXPORT AS LOTTIE JSON: Once you are happy with your animation, you can export it just by clicking the blue button. Easy-peasy, right?
- UPLOAD TO LOTTIEFILES: We've seen that you can export your new animation as a Telegram sticker and as a .json file, but you could also upload it back as a new animation into your dashboard Previews section:
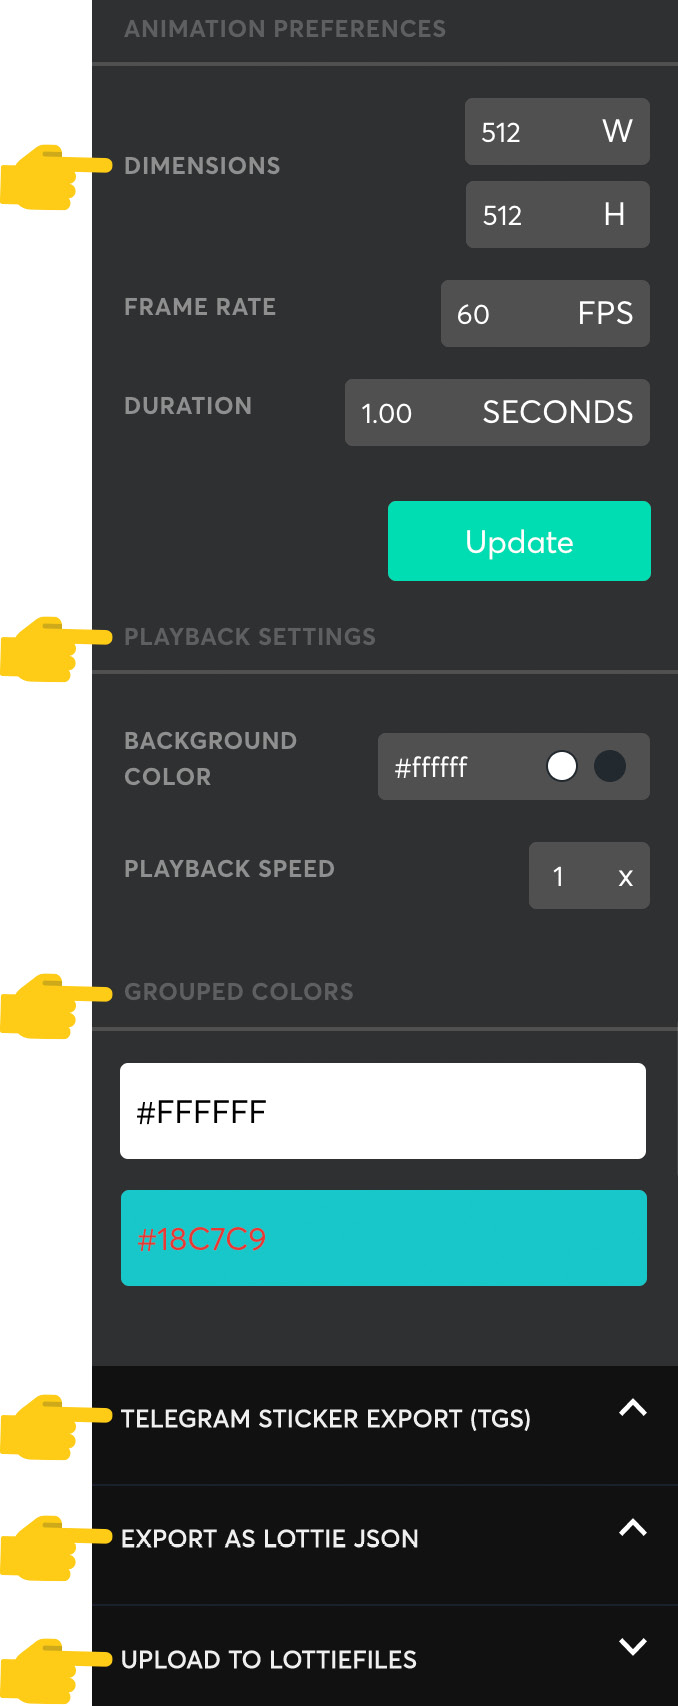
Figure 5.34 – Right-hand side editor panel
Now that we know how to change the main properties of our Lottie animation directly into Lottie Editor, let's see what else can be done.
Layers
We've just seen how to adjust some of the main properties of our animation, but Lottie Editor allows us to go a bit deeper into it thanks to layers.
As we can see on the left-hand side of the screen (Figure 5.35), there are three different layers contained in our animation, which are the same as we've got in our AE animation: check, Oval, and Sparks.
Now, let's select Layers | check and see what we can do with it:
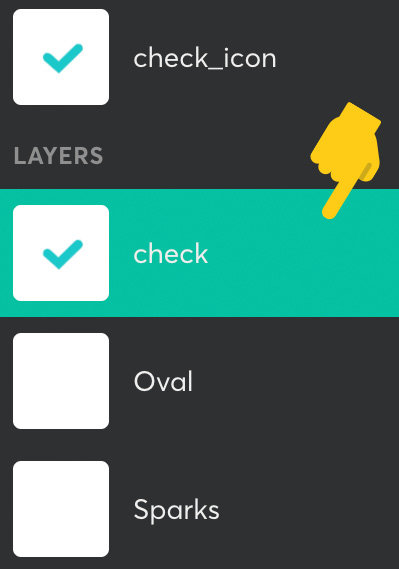
Figure 5.35 – Left-hand side panel, selected layer
When selecting the check layer, we notice on the right-hand side of the screen that the options change and new properties appear, such as the following:
- LAYER VISIBILITY: This property will allow us to hide the selected layer when clicking the little eye icon on the right. If a layer is hidden, it won't be exported in the .json file.
- COLORS: In here, we will find the colors used in each of the layers. In our case, we only see the blue color but if this layer had more colors, we would see them here and could change them by just clicking on the color and selecting a new one.
- EXPORT LAYER: With this option, we can just export the selected layer as a .json file without including anything else:

Figure 5.36 – Layer properties view
- PROPERTIES FOR TEXT LAYER: There is an extra option that we won't see in our icon example, which is PROPERTIES FOR TEXT LAYER. Although, if we had some text in our animation, we would see the text layer on the left-hand side of the screen, and when selecting it, we would see a different panel on the right-hand side of our working area, as shown in Figure 5.37. The property we can change here is the content itself, but apart from that, there is not much more we can do to it, at least not yet. Also, I wouldn't rely on it too much as sometimes updated content won't show up properly or even show up at all.
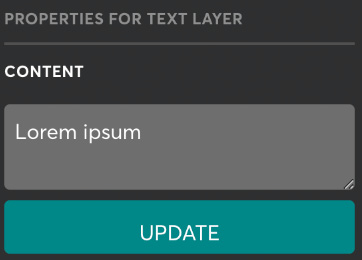
Figure 5.37 – Text properties view
So, having all that in mind, and depending on the project you are working on, it may come in handy to keep your layers as simple as possible in your AE project. Having a layer for each graphic may not be a bad idea as later on you can just come to Lottie Editor and adjust colors, show or hide them, or even change the content. Of course, that will depend on the project and the complexity of the animation, but it is always good to think in advance.
That said, let's go back to our icon. What do you think we need to do in order to have the icon working properly on iOS? Easy! Just hide the Sparks layer and export it again as a .json file under another name. Let's do it:
- Select the Sparks layer on the left-hand side of the screen.
- Click on the little eye icon that will appear on the right-hand side of the working area:
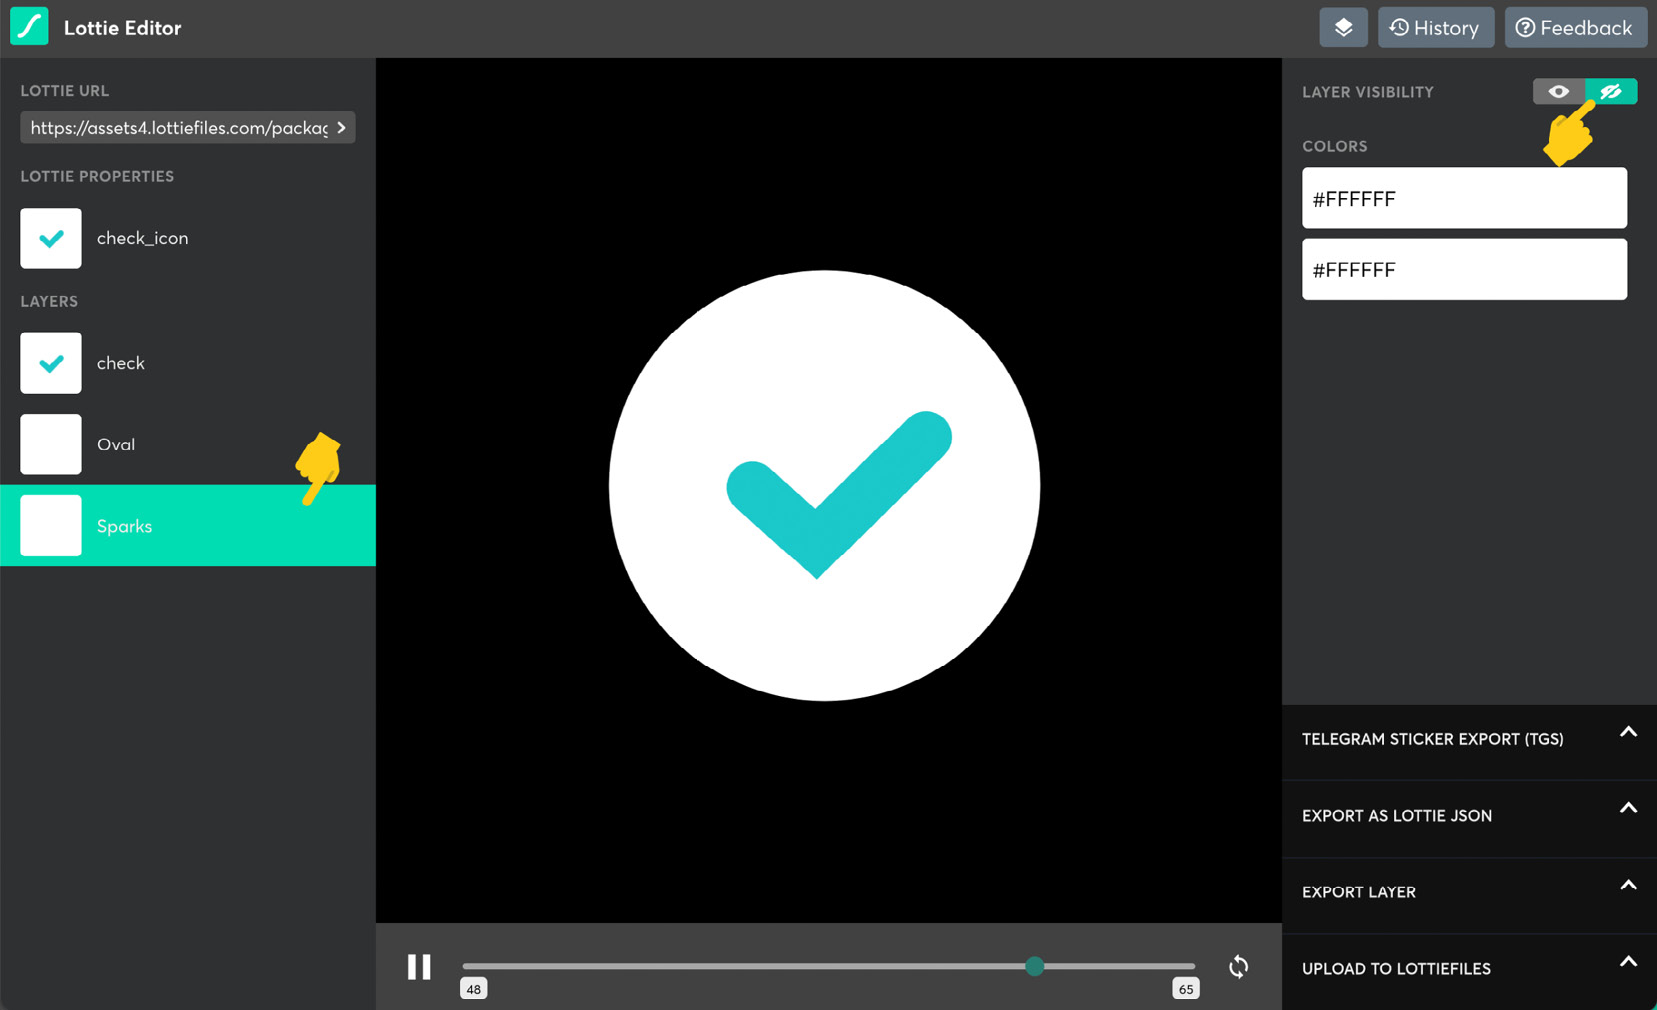
Figure 5.38 – Lottie Editor view – Sparks layer and hide icon highlighted
- Move to LOTTIE PROPERTIES and select check_icon.
- Export it again as a .json file.
- Save it under a new name, for example, check_icon_ios.json:

Figure 5.39 – Lottie Editor view with animation and Export as Lottie JSON button highlighted
And that's it! We have our specific icon ready to be implemented. One for Android and web, and the other for iOS. We are ready to hand it off to the developer's team and we can be sure our animation will look exactly as we designed it and animated it with no surprises.
Great! Now you know how to adjust the color, speed, and dimensions of a Lottie animation or its layers and are ready to move forward. But, don't go yet. There is still some stuff that can be done with LottieFiles that I'd like to show you. Let's move to the next section and learn how to build animations from a simple SVG without even using AE at all.
Converting SVGs to animated Lotties in seconds
Now that we've learned what we can achieve with Lottie Editor, such as changing colors, hiding or showing layers, exporting a single layer, and changing the content, dimensions, or speed of the animation, let's move to learn some other features the LottieFiles platform allows us to do with our animation in a single step. Let's forget about our check_icon, which is ready to be handed off to the development team. Let's see how easy and simple it is to animate an SVG file.
We talked about this feature back in Chapter 1, Get Started With Lottie but now we are going to show you how to convert your SVG files to Lottie:
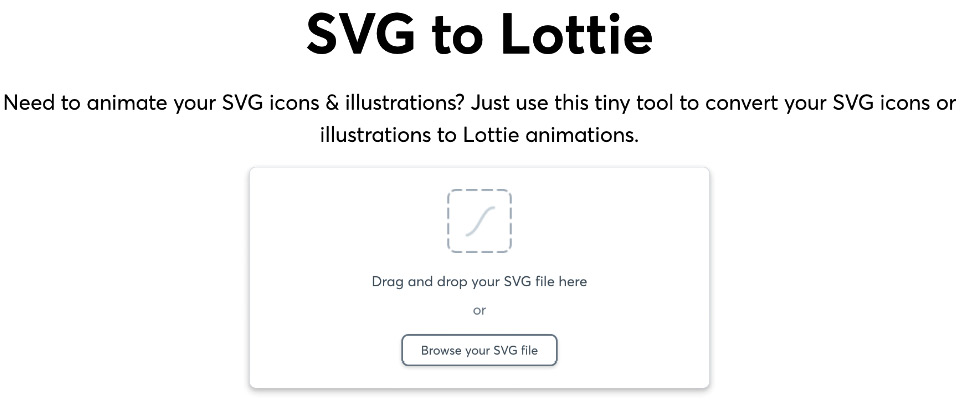
Figure 5.40 – SVG to Lottie feature view
- Click on the Browse your SVG file button.
- Browse for the lottie/chapter05/SVGtoLottie.svg file provided with this book.
- Open the SVGtoLottie.svg file.
Well done! You'll notice the screen has changed, right? Let's see what's this all about.
In the center of the screen, we can see our static SVG, the star. This is the SVG file we've just uploaded. To the left of the star, there is a window named Animations, which contains a bunch of already made animations, and to the right, we find the exporting options.
So, this is it. Let's do an example:
- Choose an animation you like from the animation window.
- Check the results on the central view.
- Do you like it? No? Try something else. Yes? Let's export it to .json.
- Click on the Download Lottie button, and there you have it!
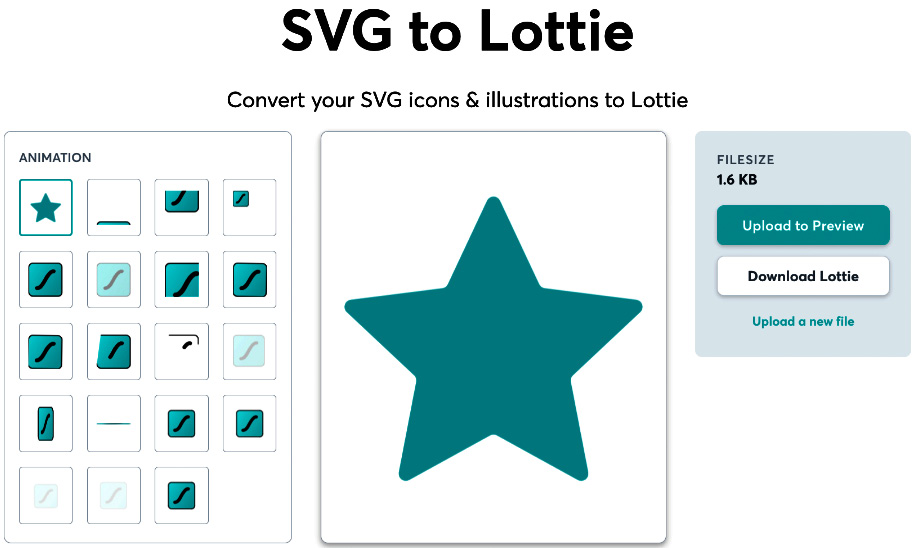
Figure 5.41 – SVG to Lottie main working area
As simple as that, you've just learned another way to create your own animations. Obviously, this is a very simple animation, but it can do the job sometimes.
So, now that you know how to animate an SVG, let's move on to converting Lottie to GIF.
Converting Lottie to GIF in just one click
If we are learning how to work with Lottie, it is because we want to avoid adding animated GIF files to our apps and websites as much as possible. As we said earlier in this book, GIF files can be very heavy file-size-wise, have low-quality images, and won't be responsive. However, sometimes, we may need this kind of format, for example, to use it for some social media posts.
LottieFiles gives us the option to convert the .json file to GIF in the blink of an eye, and here is how:
- Go to https://lottiefiles.com/lottie-to-gif.
- Browse for the lottie/chapter05/LottietoGIF.json file provided with this book (this is the Lottie we created in the Converting SVGs to animated Lotties in seconds section).
- Open the LottietoGIF.json file:
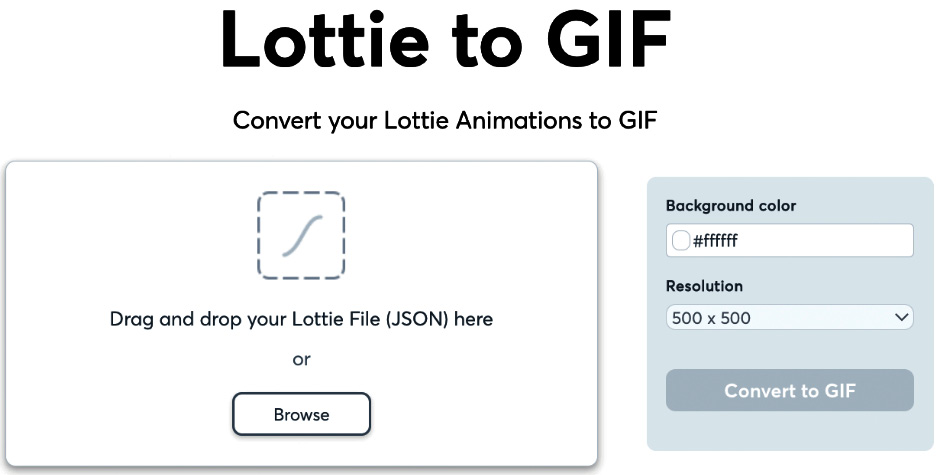
Figure 5.42 – Lottie to GIF feature view
Great! As you can see, it is pretty straightforward. We see our animated star in the center of the screen, and a couple of options such as Background color and Resolution on the right-hand side. So, this is it.
- Choose a background color for your star; I'll just go with white.
- Select a resolution; I think 500 x 500 works for me.
- Click on the Convert to GIF button:

Figure 5.43 – Lottie to GIF main working area
You'll notice the animation may take some time to be converted, especially if we are working with complex ones. Just be patient. Also, notice as well that once the conversion is done, the Convert to GIF button is replaced by the Download GIF button:

Figure 5.44 – Convert and Download GIF buttons view on GIF to Lottie working area
You have your .json animation converted into a GIF file ready to use anywhere.
So, now that you've learned how to convert your Lottie animation into a GIF file using LottieFiles features, let's move to the next section and see how to create Telegram stickers with LottieFiles Editor.
Creating your own personal stickers for Telegram
So, going back to Lottie Editor, remember we mentioned earlier that we can export our Lottie to be used as a Telegram sticker. Let's see how we do that. Don't be scared, it may look like a long process, but it is very straightforward:
- Go to https://lottiefiles.com/editor.
- Browse for the lottie/chapter05/telegram_sticker.json file provided with this book, which is a simple waving hand animation I did some time ago that I'm sharing here with you.
- Open the telegram_sticker.json file.
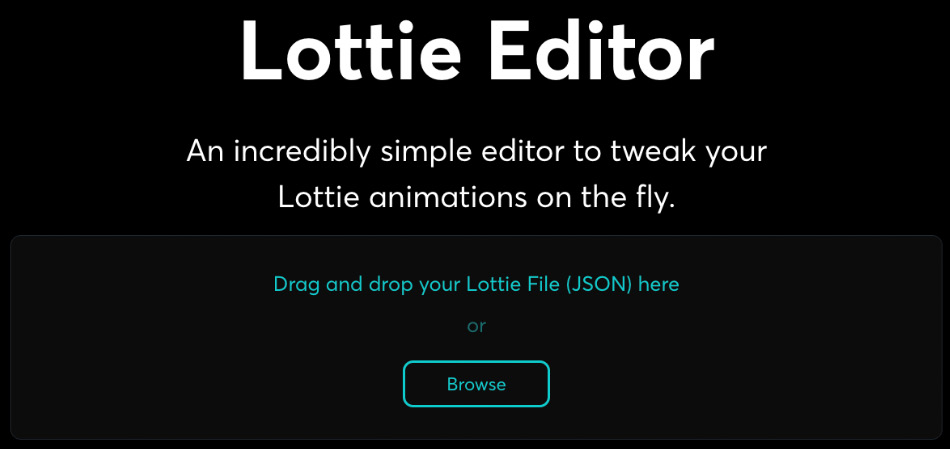
Figure 5.45 – Drag and drop or browse the Lottie Editor screen
Cool! Once the file is uploaded, you'll notice the view has changed and we are back to Lottie Editor, which we were working with earlier in this chapter. Notice the waving hand has loaded in the center of the screen, as shown in the following screenshot:

Figure 5.46 – Waving hand animation running in Lottie Editor
Now, let's continue to create the Telegram sticker.
There are two specs we have to review before exporting our animation as a Telegram sticker. These are DIMENSIONS and DURATION. DIMENSIONS has to be 512 by 512 exactly and DURATION cannot be longer than 3.00 seconds. However, remember we can always tweak this directly in Lottie Editor.
Since I'm reusing an old animation here, and by the time I made it, I wasn't thinking to use it for Telegram, we have to adjust the dimensions to 512. So, let's change that in Lottie Editor.
- Set H and W both to 512.
- Click the Update button.
The duration is okay, as it is just 3 seconds. The ANIMATION PREFERENCES panel is shown in the following screenshot:

Figure 5.47 – Waving hand preferences
Perfect, now that we've got everything sorted, let's move a little bit down on the same panel. We are looking for the TELEGRAM STICKER EXPORT tool. You should see it by scrolling down on the right-hand side panel.
- Click on the little blue button to download the waving hand as a Telegram sticker.
- A sticker.tgs file will be downloaded.
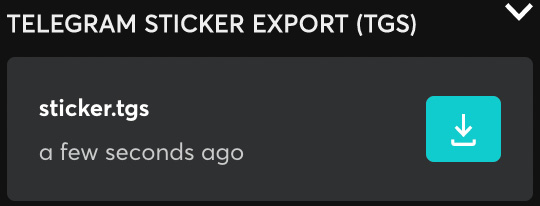
Figure 5.48 – Telegram sticker export panel view
- Open Telegram for desktop.
- In the search box, type Stickers.
- Click on the Stickers verified contact:
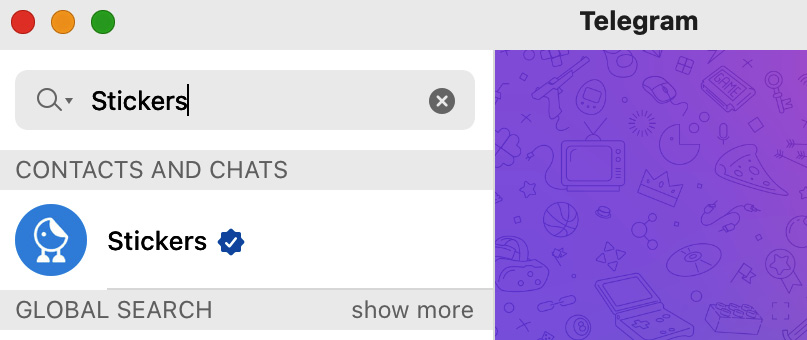
Figure 5.49 – Telegram for desktop searching for stickers bot chat
- Click on Start to start a conversation with the Stickers bot:
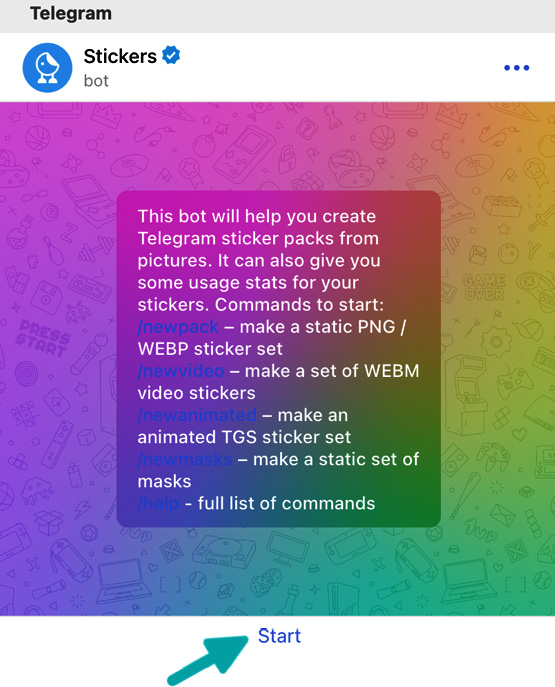
Figure 5.50 – The Stickers bot's Start a conversation button

Figure 5.51 – Stickers bot conversation view
Let's follow the instructions given by the Stickers bot:
- Let's give a name to our set of stickers (we have to do that even if we only have one sticker). I'll name mine My First Lottie Stickers.
- Drag and drop the sticker.tgs file we've just downloaded from Lottie Editor to the chat:

Figure 5.52 – Sending your sticker.tgs file
- Send an emoji to the bot. This will be the emoji that the waving hand will be related to. We can send as many emojis as we want but I would recommend sticking to one or two. I'll relate mine with the existing waving hand emoji, ?.
- Type /publish.
- Choose the My First Lottie Stickers sticker set:
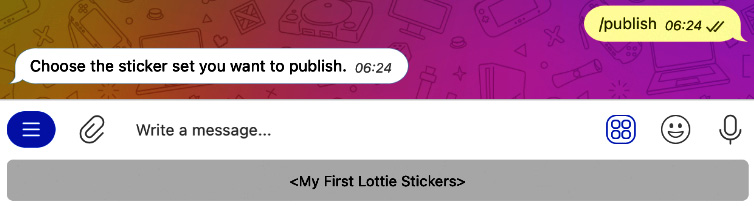
Figure 5.53 – Publish button on the Stickers bot
- Type /skip.
- Type a short name to create a URL to share. I've chosen hellolottie.
- The URL is created as https://t.me/addstickers/hellolottie, which you can share with friends!
Isn't that cool? Now you know how to create an animation, import it to Lottie Editor, download it as a Telegram sticker, and create your own set of stickers in Telegram for you to share. Congratulations! We've gone a long way!
Summary
Wow! That's a lot of stuff we have done here; great job! And you know the best part? You are ready to have some fun and start creating your own animations from scratch to hand off! So far, we've learned how to export our animations from AE as .json files using the Bodymovin and LottieFiles plugins. We've gone through the process to test the exported .json files in AE, desktop, and mobile and realized the importance of testing it on every device before handing it off to the development team.
We've also created an account in the LottieFiles platform and learned all about the LottieFiles dashboard, where you can keep all your animations together. We've discovered Lottie Editor and how to quickly tweak any .json animation by changing the colors, dimensions, speed, and content.
We've also learned how to create very simple but straightforward animations by using static SVG files and also how to convert Lotties to GIFs for our social media or other related content.
And finally, the most fun part of it, we've exported a Lottie animation as a Telegram sticker and learned how to create a Telegram sticker set using the Stickers bot.
So, are you ready to fly the nest? I bet you are and that you've already started thinking about all the big things you can achieve and how cool, consistent, and user-friendly your apps will look from now on.
But, before I leave you to it, I'd like to share some references, tips, and tricks that may help you with the process. So, follow me to the next chapter, where I will tell you all about them.