
4
Building a Social Website
In the preceding chapter, you learned how to implement a tagging system and how to recommend similar posts. You implemented custom template tags and filters. You also learned how to create sitemaps and feeds for your site, and you built a full-text search engine using PostgreSQL.
In this chapter, you will learn how to develop user account functionalities to create a social website, including user registration, password management, profile editing, and authentication. We will implement social features into this site in the next few chapters, to let users share images and interact with each other. Users will be able to bookmark any image on the internet and share it with other users. They will also be able to see activity on the platform from the users they follow and like/unlike the images shared by them.
This chapter will cover the following topics:
- Creating a login view
- Using the Django authentication framework
- Creating templates for Django login, logout, password change, and password reset views
- Extending the user model with a custom profile model
- Creating user registration views
- Configuring the project for media file uploads
- Using the messages framework
- Building a custom authentication backend
- Preventing users from using an existing email
Let’s start by creating a new project.
The source code for this chapter can be found at https://github.com/PacktPublishing/Django-4-by-example/tree/main/Chapter04.
All Python packages used in this chapter are included in the requirements.txt file in the source code for the chapter. You can follow the instructions to install each Python package in the following sections, or you can install all requirements at once with the command pip install -r requirements.txt.
Creating a social website project
We are going to create a social application that will allow users to share images that they find on the internet. We will need to build the following elements for this project:
- An authentication system for users to register, log in, edit their profile, and change or reset their password
- A follow system to allow users to follow each other on the website
- Functionality to display shared images and a system for users to share images from any website
- An activity stream that allows users to see the content uploaded by the people that they follow
This chapter will address the first point on the list.
Starting the social website project
Open the terminal and use the following commands to create a virtual environment for your project:
mkdir env
python -m venv env/bookmarks
If you are using Linux or macOS, run the following command to activate your virtual environment:
source env/bookmarks/bin/activate
If you are using Windows, use the following command instead:
.envookmarksScriptsactivate
The shell prompt will display your active virtual environment, as follows:
(bookmarks)laptop:~ zenx$
Install Django in your virtual environment with the following command:
pip install Django~=4.1.0
Run the following command to create a new project:
django-admin startproject bookmarks
The initial project structure has been created. Use the following commands to get into your project directory and create a new application named account:
cd bookmarks/
django-admin startapp account
Remember that you should add the new application to your project by adding the application’s name to the INSTALLED_APPS setting in the settings.py file.
Edit settings.py and add the following line highlighted in bold to the INSTALLED_APPS list before any of the other installed apps:
INSTALLED_APPS = [
    'account.apps.AccountConfig',
    'django.contrib.admin',
    'django.contrib.auth',
    'django.contrib.contenttypes',
    'django.contrib.sessions',
    'django.contrib.messages',
    'django.contrib.staticfiles',
]
Django looks for templates in the application template directories by order of appearance in the INSTALLED_APPS setting. The django.contrib.admin app includes standard authentication templates that we will override in the account application. By placing the application first in the INSTALLED_APPS setting, we ensure that the custom authentication templates will be used by default instead of the authentication templates contained in django.contrib.admin.
Run the following command to sync the database with the models of the default applications included in the INSTALLED_APPS setting:
python manage.py migrate
You will see that all initial Django database migrations get applied. Next, we will build an authentication system into our project using the Django authentication framework.
Using the Django authentication framework
Django comes with a built-in authentication framework that can handle user authentication, sessions, permissions, and user groups. The authentication system includes views for common user actions such as logging in, logging out, password change, and password reset.
The authentication framework is located at django.contrib.auth and is used by other Django contrib packages. Remember that we already used the authentication framework in Chapter 1, Building a Blog Application, to create a superuser for the blog application to access the administration site.
When we create a new Django project using the startproject command, the authentication framework is included in the default settings of our project. It consists of the django.contrib.auth application and the following two middleware classes found in the MIDDLEWARE setting of our project:
AuthenticationMiddleware: Associates users with requests using sessionsSessionMiddleware: Handles the current session across requests
Middleware is classes with methods that are globally executed during the request or response phase. You will use middleware classes on several occasions throughout this book, and you will learn how to create custom middleware in Chapter 17, Going Live.
The authentication framework also includes the following models that are defined in django.contrib.auth.models:
User: A user model with basic fields; the main fields of this model areusername,password,email,first_name,last_name, andis_activeGroup: A group model to categorize usersPermission: Flags for users or groups to perform certain actions
The framework also includes default authentication views and forms, which you will use later.
Creating a login view
We will start this section by using the Django authentication framework to allow users to log into the website. We will create a view that will perform the following actions to log in a user:
- Present the user with a login form
- Get the username and password provided by the user when they submit the form
- Authenticate the user against the data stored in the database
- Check whether the user is active
- Log the user into the website and start an authenticated session
We will start by creating the login form.
Create a new forms.py file in the account application directory and add the following lines to it:
from django import forms
class LoginForm(forms.Form):
    username = forms.CharField()
    password = forms.CharField(widget=forms.PasswordInput)
This form will be used to authenticate users against the database. Note that you use the PasswordInput widget to render the password HTML element. This will include type="password" in the HTML so that the browser treats it as a password input.
Edit the views.py file of the account application and add the following code to it:
from django.http import HttpResponse
from django.shortcuts import render
from django.contrib.auth import authenticate, login
from .forms import LoginForm
def user_login(request):
    if request.method == 'POST':
        form = LoginForm(request.POST)
        if form.is_valid():
            cd = form.cleaned_data
            user = authenticate(request,
                                username=cd['username'],
                                password=cd['password'])
            if user is not None:
                if user.is_active:
                    login(request, user)
                    return HttpResponse('Authenticated successfully')
                else:
                    return HttpResponse('Disabled account')
            else:
                return HttpResponse('Invalid login')
    else:
        form = LoginForm()
    return render(request, 'account/login.html', {'form': form})
This is what the basic login view does:
When the user_login view is called with a GET request, a new login form is instantiated with form = LoginForm(). The form is then passed to the template.
When the user submits the form via POST, the following actions are performed:
- The form is instantiated with the submitted data with
form = LoginForm(request.POST). - The form is validated with
form.is_valid(). If it is not valid, the form errors will be displayed later in the template (for example, if the user didn’t fill in one of the fields). - If the submitted data is valid, the user gets authenticated against the database using the
authenticate()method. This method takes therequestobject, theusername, and thepasswordparameters and returns theUserobject if the user has been successfully authenticated, orNoneotherwise. If the user has not been successfully authenticated, a rawHttpResponseis returned with an Invalid login message. - If the user is successfully authenticated, the user status is checked by accessing the
is_activeattribute. This is an attribute of Django’sUsermodel. If the user is not active, anHttpResponseis returned with a Disabled account message. - If the user is active, the user is logged into the site. The user is set in the session by calling the
login()method. An Authenticated successfully message is returned.
Note the difference between authenticate() and login(): authenticate() checks user credentials and returns a User object if they are correct; login() sets the user in the current session.
Now we will create a URL pattern for this view.
Create a new urls.py file in the account application directory and add the following code to it:
from django.urls import path
from . import views
urlpatterns = [
    path('login/', views.user_login, name='login'),
]
Edit the main urls.py file located in your bookmarks project directory, import include, and add the URL patterns of the account application, as follows. New code is highlighted in bold:
from django.contrib import admin
from django.urls import path, include
urlpatterns = [
    path('admin/', admin.site.urls),
    path('account/', include('account.urls')),
]
The login view can now be accessed by a URL.
Let’s create a template for this view. Since there are no templates in the project yet, we will start by creating a base template that will be extended by the login template.
Create the following files and directories inside the account application directory:
templates/
    account/
        login.html
    base.html
Edit the base.html template and add the following code to it:
{% load static %}
<!DOCTYPE html>
<html>
<head>
  <title>{% block title %}{% endblock %}</title>
  <link href="{% static "css/base.css" %}" rel="stylesheet">
</head>
<body>
  <div id="header">
    <span class="logo">Bookmarks</span>
  </div>
  <div id="content">
    {% block content %}
    {% endblock %}
  </div>
</body>
</html>
This will be the base template for the website. As you did in your previous project, include the CSS styles in the main template. You can find these static files in the code that comes with this chapter. Copy the static/ directory of the account application from the chapter’s source code to the same location in your project so that you can use the static files. You can find the directory’s contents at https://github.com/PacktPublishing/Django-4-by-Example/tree/master/Chapter04/bookmarks/account/static.
The base template defines a title block and a content block that can be filled with content by the templates that extend from it.
Let’s fill in the template for your login form.
Open the account/login.html template and add the following code to it:
{% extends "base.html" %}
{% block title %}Log-in{% endblock %}
{% block content %}
  <h1>Log-in</h1>
  <p>Please, use the following form to log-in:</p>
  <form method="post">
    {{ form.as_p }}
    {% csrf_token %}
    <p><input type="submit" value="Log in"></p>
  </form>
{% endblock %}
This template includes the form that is instantiated in the view. Since your form will be submitted via POST, you will include the {% csrf_token %} template tag for cross-site request forgery (CSRF) protection. You learned about CSRF protection in Chapter 2, Enhancing Your Blog with Advanced Features.
There are no users in the database yet. You will need to create a superuser first to access the administration site to manage other users.
Execute the following command in the shell prompt:
python manage.py createsuperuser
You will see the following output. Enter your desired username, email, and password, as follows:
Username (leave blank to use 'admin'): admin
Email address: [email protected]
Password: ********
Password (again): ********
Then you will see the following success message:
Superuser created successfully.
Run the development server using the following command:
python manage.py runserver
Open http://127.0.0.1:8000/admin/ in your browser. Access the administration site using the credentials of the user you just created. You will see the Django administration site, including the User and Group models of the Django authentication framework.
It will look as follows:

Figure 4.1: The Django administration site index page including Users and Groups
In the Users row, click on the Add link.
Create a new user using the administration site as follows:

Figure 4.2: The Add user form on the Django administration site
Enter the user details and click on the SAVE button to save the new user in the database.
Then, in Personal info, fill in the First name, Last name, and Email address fields as follows and click on the Save button to save the changes:
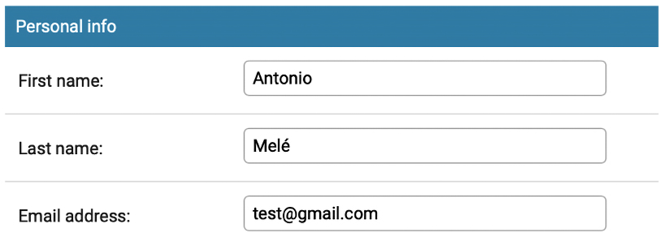
Figure 4.3: The user editing form in the Django administration site
Open http://127.0.0.1:8000/account/login/ in your browser. You should see the rendered template, including the login form:

Figure 4.4: The user Log-in page
Enter invalid credentials and submit the form. You should get the following Invalid login response:

Figure 4.5: The invalid login plain text response
Enter valid credentials; you will get the following Authenticated successfully response:

Figure 4.6: The successful authentication plain text response
You have learned how to authenticate users and create your own authentication view. You can build your own auth views but Django ships with ready-to-use authentication views that you can leverage.
Using Django authentication views
Django includes several forms and views in the authentication framework that you can use right away. The login view we have created is a good exercise to understand the process of user authentication in Django. However, you can use the default Django authentication views in most cases.
Django provides the following class-based views to deal with authentication. All of them are located in django.contrib.auth.views:
LoginView: Handles a login form and logs in a userLogoutView: Logs out a user
Django provides the following views to handle password changes:
PasswordChangeView: Handles a form to change the user’s passwordPasswordChangeDoneView: The success view that the user is redirected to after a successful password change
Django also includes the following views to allow users to reset their password:
PasswordResetView: Allows users to reset their password. It generates a one-time-use link with a token and sends it to a user’s email accountPasswordResetDoneView: Tells users that an email—including a link to reset their password—has been sent to themPasswordResetConfirmView: Allows users to set a new passwordPasswordResetCompleteView: The success view that the user is redirected to after successfully resetting their password
These views can save you a lot of time when building any web application with user accounts. The views use default values that can be overridden, such as the location of the template to be rendered, or the form to be used by the view.
You can get more information about the built-in authentication views at https://docs.djangoproject.com/en/4.1/topics/auth/default/#all-authentication-views.
Login and logout views
Edit the urls.py file of the account application and add the code highlighted in bold:
from django.urls import path
from django.contrib.auth import views as auth_views
from . import views
urlpatterns = [
    # previous login url
    # path('login/', views.user_login, name='login'),
    # login / logout urls
    path('login/', auth_views.LoginView.as_view(), name='login'),
    path('logout/', auth_views.LogoutView.as_view(), name='logout'),
]
In the preceding code, we have commented out the URL pattern for the user_login view that we created previously. We’ll now use the LoginView view of Django’s authentication framework. We have also added a URL pattern for the LogoutView view.
Create a new directory inside the templates/ directory of the account application and name it registration. This is the default path where the Django authentication views expect your authentication templates to be.
The django.contrib.admin module includes authentication templates that are used for the administration site, like the login template. By placing the account application at the top of the INSTALLED_APPS setting when configuring the project, we ensured that Django would use our authentication templates instead of the ones defined in any other application.
Create a new file inside the templates/registration/ directory, name it login.html, and add the following code to it:
{% extends "base.html" %}
{% block title %}Log-in{% endblock %}
{% block content %}
  <h1>Log-in</h1>
  {% if form.errors %}
    <p>
      Your username and password didn't match.
      Please try again.
    </p>
  {% else %}
    <p>Please, use the following form to log-in:</p>
  {% endif %}
  <div class="login-form">
    <form action="{% url 'login' %}" method="post">
      {{ form.as_p }}
      {% csrf_token %}
      <input type="hidden" name="next" value="{{ next }}" />
      <p><input type="submit" value="Log-in"></p>
    </form>
  </div>
{% endblock %}
This login template is quite similar to the one we created before. Django uses the AuthenticationForm form located at django.contrib.auth.forms by default. This form tries to authenticate the user and raises a validation error if the login is unsuccessful. We use {% if form.errors %} in the template to check whether the credentials provided are wrong.
We have added a hidden HTML <input> element to submit the value of a variable called next. This variable is provided to the login view if you pass a parameter named next to the request, for example, by accessing http://127.0.0.1:8000/account/login/?next=/account/.
The next parameter has to be a URL. If this parameter is given, the Django login view will redirect the user to the given URL after a successful login.
Now, create a logged_out.html template inside the templates/registration/ directory and make it look like this:
{% extends "base.html" %}
{% block title %}Logged out{% endblock %}
{% block content %}
  <h1>Logged out</h1>
  <p>
    You have been successfully logged out.
    You can <a href="{% url "login" %}">log-in again</a>.
  </p>
{% endblock %}
This is the template that Django will display after the user logs out.
We have added the URL patterns and templates for the login and logout views. Users can now log in and out using Django’s authentication views.
Now, we will create a new view to display a dashboard when users log into their accounts.
Edit the views.py file of the account application and add the following code to it:
from django.contrib.auth.decorators import login_required
@login_required
def dashboard(request):
    return render(request,
                  'account/dashboard.html',
                  {'section': 'dashboard'})
We have created the dashboard view, and we have applied to it the login_required decorator of the authentication framework. The login_required decorator checks whether the current user is authenticated.
If the user is authenticated, it executes the decorated view; if the user is not authenticated, it redirects the user to the login URL with the originally requested URL as a GET parameter named next.
By doing this, the login view redirects users to the URL that they were trying to access after they successfully log in. Remember that we added a hidden <input> HTML element named next in the login template for this purpose.
We have also defined a section variable. We will use this variable to highlight the current section in the main menu of the site.
Next, we need to create a template for the dashboard view.
Create a new file inside the templates/account/ directory and name it dashboard.html. Add the following code to it:
{% extends "base.html" %}
{% block title %}Dashboard{% endblock %}
{% block content %}
  <h1>Dashboard</h1>
  <p>Welcome to your dashboard.</p>
{% endblock %}
Edit the urls.py file of the account application and add the following URL pattern for the view. The new code is highlighted in bold:
urlpatterns = [
    # previous login url
    # path('login/', views.user_login, name='login'),
    # login / logout urls
    path('login/', auth_views.LoginView.as_view(), name='login'),
    path('logout/', auth_views.LogoutView.as_view(), name='logout'),
    path('', views.dashboard, name='dashboard'),
]
Edit the settings.py file of the project and add the following code to it:
LOGIN_REDIRECT_URL = 'dashboard'
LOGIN_URL = 'login'
LOGOUT_URL = 'logout'
We have defined the following settings:
LOGIN_REDIRECT_URL: Tells Django which URL to redirect the user to after a successful login if nonextparameter is present in the requestLOGIN_URL: The URL to redirect the user to log in (for example, views using thelogin_requireddecorator)LOGOUT_URL: The URL to redirect the user to log out
We have used the names of the URLs that we previously defined with the name attribute of the path() function in the URL patterns. Hardcoded URLs instead of URL names can also be used for these settings.
Let’s summarize what we have done so far:
- We have added the built-in Django authentication login and logout views to the project.
- We have created custom templates for both views and defined a simple dashboard view to redirect users after they log in.
- Finally, we have added settings for Django to use these URLs by default.
Now, we will add login and logout links to the base template. In order to do this, we have to determine whether the current user is logged in or not in order to display the appropriate link for each case. The current user is set in the HttpRequest object by the authentication middleware. You can access it with request.user. You will find a User object in the request even if the user is not authenticated. A non-authenticated user is set in the request as an instance of AnonymousUser. The best way to check whether the current user is authenticated is by accessing the read-only attribute is_authenticated.
Edit the templates/base.html template by adding the following lines highlighted in bold:
{% load static %}
<!DOCTYPE html>
<html>
<head>
  <title>{% block title %}{% endblock %}</title>
  <link href="{% static "css/base.css" %}" rel="stylesheet">
</head>
<body>
  <div id="header">
    <span class="logo">Bookmarks</span>
    {% if request.user.is_authenticated %}
      <ul class="menu">
        <li {% if section == "dashboard" %}class="selected"{% endif %}>
          <a href="{% url "dashboard" %}">My dashboard</a>
        </li>
        <li {% if section == "images" %}class="selected"{% endif %}>
          <a href="#">Images</a>
        </li>
        <li {% if section == "people" %}class="selected"{% endif %}>
          <a href="#">People</a>
        </li>
      </ul>
    {% endif %}
    <span class="user">
      {% if request.user.is_authenticated %}
        Hello {{ request.user.first_name|default:request.user.username }},
        <a href="{% url "logout" %}">Logout</a>
      {% else %}
        <a href="{% url "login" %}">Log-in</a>
      {% endif %}
    </span>
  </div>
  <div id="content">
    {% block content %}
    {% endblock %}
  </div>
</body>
</html>
The site’s menu is only displayed to authenticated users. The section variable is checked to add a selected class attribute to the menu <li> list item of the current section. By doing so, the menu item that corresponds to the current section will be highlighted using CSS. The user’s first name and a link to log out are displayed if the user is authenticated; a link to log in is displayed otherwise. If the user’s name is empty, the username is displayed instead by using request.user.first_name|default:request.user.username.
Open http://127.0.0.1:8000/account/login/ in your browser. You should see the Log-in page. Enter a valid username and password and click on the Log-in button. You should see the following screen:

Figure 4.7: The Dashboard page
The My dashboard menu item is highlighted with CSS because it has a selected class. Since the user is authenticated, the first name of the user is displayed on the right side of the header. Click on the Logout link. You should see the following page:

Figure 4.8: The Logged out page
On this page, you can see that the user is logged out, and, therefore, the menu of the website is not displayed. The link displayed on the right side of the header is now Log-in.
If you see the Logged out page of the Django administration site instead of your own Logged out page, check the INSTALLED_APPS setting of your project and make sure that django.contrib.admin comes after the account application. Both applications contain logged-out templates located in the same relative path. The Django template loader will go through the different applications in the INSTALLED_APPS list and use the first template it finds.
Change password views
We need users to be able to change their password after they log into the site. We will integrate the Django authentication views for changing passwords.
Open the urls.py file of the account application and add the following URL patterns highlighted in bold:
urlpatterns = [
    # previous login url
    # path('login/', views.user_login, name='login'),
    # login / logout urls
    path('login/', auth_views.LoginView.as_view(), name='login'),
    path('logout/', auth_views.LogoutView.as_view(), name='logout'),
    # change password urls
    path('password-change/',
         auth_views.PasswordChangeView.as_view(),
         name='password_change'),
    path('password-change/done/',
          auth_views.PasswordChangeDoneView.as_view(),
          name='password_change_done'),
    path('', views.dashboard, name='dashboard'),
]
The PasswordChangeView view will handle the form to change the password, and the PasswordChangeDoneView view will display a success message after the user has successfully changed their password. Let’s create a template for each view.
Add a new file inside the templates/registration/ directory of the account application and name it password_change_form.html. Add the following code to it:
{% extends "base.html" %}
{% block title %}Change your password{% endblock %}
{% block content %}
  <h1>Change your password</h1>
  <p>Use the form below to change your password.</p>
  <form method="post">
    {{ form.as_p }}
    <p><input type="submit" value="Change"></p>
    {% csrf_token %}
  </form>
{% endblock %}
The password_change_form.html template includes the form to change the password.
Now create another file in the same directory and name it password_change_done.html. Add the following code to it:
{% extends "base.html" %}
{% block title %}Password changed{% endblock %}
{% block content %}
  <h1>Password changed</h1>
  <p>Your password has been successfully changed.</p>
{% endblock %}
The password_change_done.html template only contains the success message to be displayed when the user has successfully changed their password.
Open http://127.0.0.1:8000/account/password-change/ in your browser. If you are not logged in, the browser will redirect you to the Log-in page. After you are successfully authenticated, you will see the following change password page:
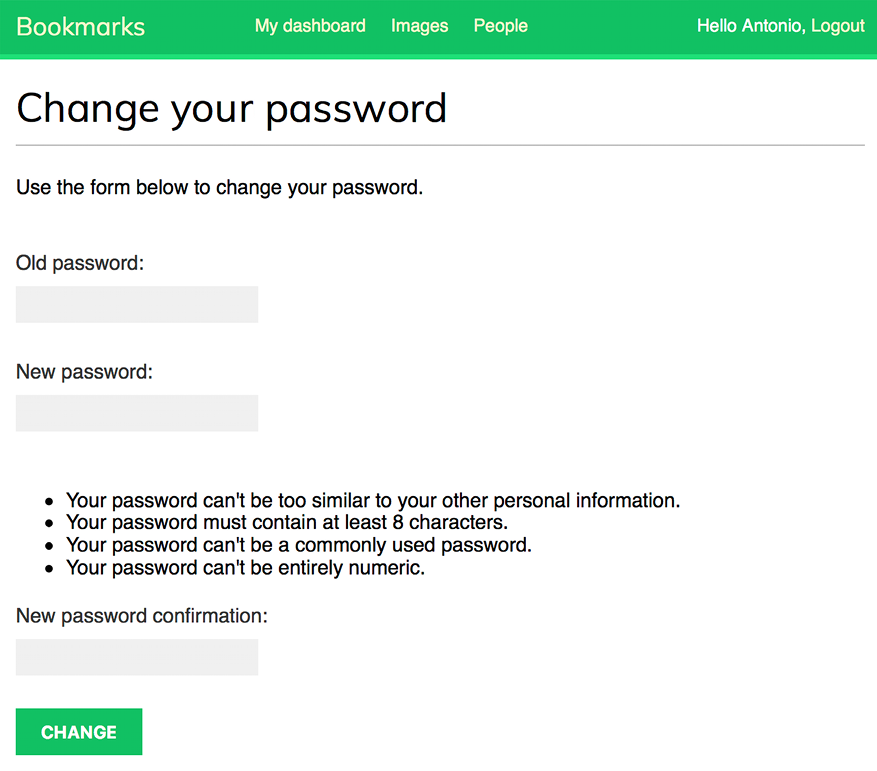
Figure 4.9: The change password form
Fill in the form with your current password and your new password and click on the CHANGE button. You will see the following success page:
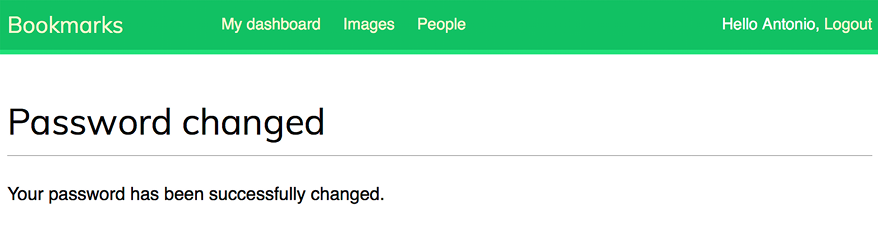
Figure 4.10: The successful password change page
Log out and log in again using your new password to verify that everything works as expected.
Reset password views
Edit the urls.py file of the account application and add the following URL patterns highlighted in bold:
urlpatterns = [
    # previous login url
    # path('login/', views.user_login, name='login'),
    # login / logout urls
    path('login/', auth_views.LoginView.as_view(), name='login'),
    path('logout/', auth_views.LogoutView.as_view(), name='logout'),

    # change password urls
    path('password-change/',
         auth_views.PasswordChangeView.as_view(),
         name='password_change'),
    path('password-change/done/',
          auth_views.PasswordChangeDoneView.as_view(),
          name='password_change_done'),
    # reset password urls
    path('password-reset/',
         auth_views.PasswordResetView.as_view(),
         name='password_reset'),
    path('password-reset/done/',
         auth_views.PasswordResetDoneView.as_view(),
         name='password_reset_done'),
    path('password-reset/<uidb64>/<token>/',
         auth_views.PasswordResetConfirmView.as_view(),
         name='password_reset_confirm'),
    path('password-reset/complete/',
         auth_views.PasswordResetCompleteView.as_view(),
         name='password_reset_complete'),
    path('', views.dashboard, name='dashboard'),
]
Add a new file in the templates/registration/ directory of the account application and name it password_reset_form.html. Add the following code to it:
{% extends "base.html" %}
{% block title %}Reset your password{% endblock %}
{% block content %}
  <h1>Forgotten your password?</h1>
  <p>Enter your e-mail address to obtain a new password.</p>
  <form method="post">
    {{ form.as_p }}
    <p><input type="submit" value="Send e-mail"></p>
    {% csrf_token %}
  </form>
{% endblock %}
Now create another file in the same directory and name it password_reset_email.html. Add the following code to it:
Someone asked for password reset for email {{ email }}. Follow the link below:
{{ protocol }}://{{ domain }}{% url "password_reset_confirm" uidb64=uid token=token %}
Your username, in case you've forgotten: {{ user.get_username }}
The password_reset_email.html template will be used to render the email sent to users to reset their password. It includes a reset token that is generated by the view.
Create another file in the same directory and name it password_reset_done.html. Add the following code to it:
{% extends "base.html" %}
{% block title %}Reset your password{% endblock %}
{% block content %}
  <h1>Reset your password</h1>
  <p>We've emailed you instructions for setting your password.</p>
  <p>If you don't receive an email, please make sure you've entered the address you registered with.</p>
{% endblock %}
Create another template in the same directory and name it password_reset_confirm.html. Add the following code to it:
{% extends "base.html" %}
{% block title %}Reset your password{% endblock %}
{% block content %}
  <h1>Reset your password</h1>
  {% if validlink %}
    <p>Please enter your new password twice:</p>
    <form method="post">
      {{ form.as_p }}
      {% csrf_token %}
      <p><input type="submit" value="Change my password" /></p>
    </form>
  {% else %}
    <p>The password reset link was invalid, possibly because it has already been used. Please request a new password reset.</p>
  {% endif %}
{% endblock %}
In this template, we confirm whether the link for resetting the password is valid by checking the validlink variable. The view PasswordResetConfirmView checks the validity of the token provided in the URL and passes the validlink variable to the template. If the link is valid, the user password reset form is displayed. Users can only set a new password if they have a valid reset password link.
Create another template and name it password_reset_complete.html. Enter the following code into it:
{% extends "base.html" %}
{% block title %}Password reset{% endblock %}
{% block content %}
  <h1>Password set</h1>
  <p>Your password has been set. You can <a href="{% url "login" %}">log in now</a></p>
{% endblock %}
Finally, edit the registration/login.html template of the account application, and add the following lines highlighted in bold:
{% extends "base.html" %}
{% block title %}Log-in{% endblock %}
{% block content %}
  <h1>Log-in</h1>
  {% if form.errors %}
    <p>
      Your username and password didn't match.
      Please try again.
    </p>
  {% else %}
    <p>Please, use the following form to log-in:</p>
  {% endif %}
  <div class="login-form">
    <form action="{% url 'login' %}" method="post">
      {{ form.as_p }}
      {% csrf_token %}
      <input type="hidden" name="next" value="{{ next }}" />
      <p><input type="submit" value="Log-in"></p>
    </form>
    <p>
      <a href="{% url "password_reset" %}">
        Forgotten your password?
      </a>
    </p>
  </div>
{% endblock %}
Now, open http://127.0.0.1:8000/account/login/ in your browser. The Log-in page should now include a link to the reset password page, as follows:
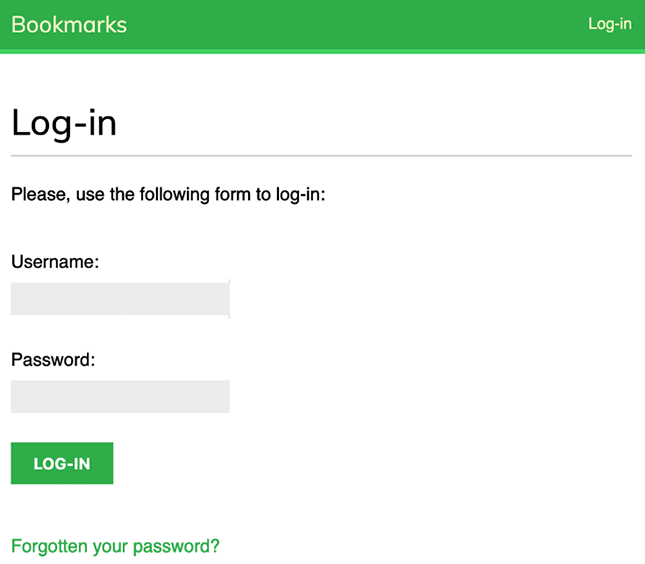
Figure 4.11: The Log-in page including a link to the reset password page
Click on the Forgotten your password? link. You should see the following page:

Figure 4.12: The restore password form
At this point, we need to add a Simple Mail Transfer Protocol (SMTP) configuration to the settings.py file of your project so that Django is able to send emails. You learned how to add email settings to your project in Chapter 2, Enhancing Your Blog with Advanced Features. However, during development, you can configure Django to write emails to the standard output instead of sending them through an SMTP server. Django provides an email backend to write emails to the console.
Edit the settings.py file of your project, and add the following line to it:
EMAIL_BACKEND = 'django.core.mail.backends.console.EmailBackend'
The EMAIL_BACKEND setting indicates the class that will be used to send emails.
Return to your browser, enter the email address of an existing user, and click on the SEND E-MAIL button. You should see the following page:
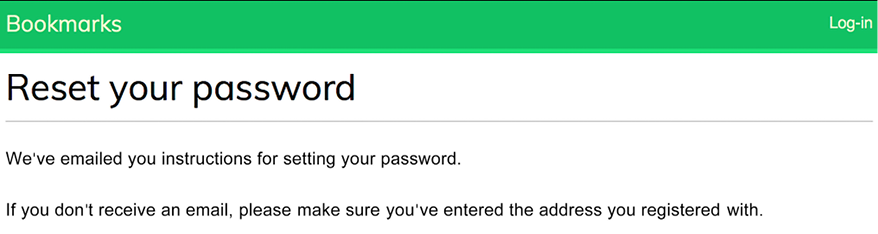
Figure 4.13: The reset password email sent page
Take a look at the shell prompt, where you are running the development server. You will see the generated email, as follows:
Content-Type: text/plain; charset="utf-8"
MIME-Version: 1.0
Content-Transfer-Encoding: 7bit
Subject: Password reset on 127.0.0.1:8000
From: webmaster@localhost
To: [email protected]
Date: Mon, 10 Jan 2022 19:05:18 -0000
Message-ID: <[email protected]>
Someone asked for password reset for email [email protected]. Follow the link below:
http://127.0.0.1:8000/account/password-reset/MQ/ardx0u-b4973cfa2c70d652a190e79054bc479a/
Your username, in case you've forgotten: test
The email is rendered using the password_reset_email.html template that you created earlier. The URL to reset the password includes a token that was generated dynamically by Django.
Copy the URL from the email, which should look similar to http://127.0.0.1:8000/account/password-reset/MQ/ardx0u-b4973cfa2c70d652a190e79054bc479a/, and open it in your browser. You should see the following page:

Figure 4.14: The reset password form
The page to set a new password uses the password_reset_confirm.html template. Fill in a new password and click on the CHANGE MY PASSWORD button. Django will create a new hashed password and save it into the database. You will see the following success page:

Figure 4.15: The successful password reset page
Now you can log back into the user account using the new password.
Each token to set a new password can be used only once. If you open the link you received again, you will get a message stating that the token is invalid.
We have now integrated the views of the Django authentication framework into the project. These views are suitable for most cases. However, you can create your own views if you need different behavior.
Django provides URL patterns for the authentication views that are equivalent to the ones we just created. We will replace the authentication URL patterns with the ones provided by Django.
Comment out the authentication URL patterns that you added to the urls.py file of the account application and include django.contrib.auth.urls instead, as follows. New code is highlighted in bold:
from django.urls import path, include
from django.contrib.auth import views as auth_views
from . import views
urlpatterns = [
    # previous login view
    # path('login/', views.user_login, name='login'),
    # path('login/', auth_views.LoginView.as_view(), name='login'),
    # path('logout/', auth_views.LogoutView.as_view(), name='logout'),
    # change password urls
    # path('password-change/',
    #      auth_views.PasswordChangeView.as_view(),
    #      name='password_change'),
    # path('password-change/done/',
    #       auth_views.PasswordChangeDoneView.as_view(),
    #       name='password_change_done'),
    # reset password urls
    # path('password-reset/',
    #      auth_views.PasswordResetView.as_view(),
    #      name='password_reset'),
    # path('password-reset/done/',
    #      auth_views.PasswordResetDoneView.as_view(),
    #      name='password_reset_done'),
    # path('password-reset/<uidb64>/<token>/',
    #      auth_views.PasswordResetConfirmView.as_view(),
    #      name='password_reset_confirm'),
    # path('password-reset/complete/',
    #      auth_views.PasswordResetCompleteView.as_view(),
    #      name='password_reset_complete'),
    path('', include('django.contrib.auth.urls')),
    path('', views.dashboard, name='dashboard'),
]
You can see the authentication URL patterns included at https://github.com/django/django/blob/stable/4.0.x/django/contrib/auth/urls.py.
We have now added all the necessary authentication views to our project. Next, we will implement user registration.
User registration and user profiles
Site users can now log in, log out, change their password, and reset their password. However, we need to build a view to allow visitors to create a user account.
User registration
Let’s create a simple view to allow user registration on your website. Initially, you have to create a form to let the user enter a username, their real name, and a password.
Edit the forms.py file located inside the account application directory and add the following lines highlighted in bold:
from django import forms
from django.contrib.auth.models import User
class LoginForm(forms.Form):
    username = forms.CharField()
    password = forms.CharField(widget=forms.PasswordInput)
class UserRegistrationForm(forms.ModelForm):
    password = forms.CharField(label='Password',
                               widget=forms.PasswordInput)
    password2 = forms.CharField(label='Repeat password',
                                widget=forms.PasswordInput)
    class Meta:
        model = User
        fields = ['username', 'first_name', 'email']
We have created a model form for the user model. This form includes the fields username, first_name, and email of the User model. These fields will be validated according to the validations of their corresponding model fields. For example, if the user chooses a username that already exists, they will get a validation error because username is a field defined with unique=True.
We have added two additional fields—password and password2—for users to set a password and to repeat it. Let’s add the field validation to check both passwords are the same.
Edit the forms.py file in the account application and add the following clean_password2() method to the UserRegistrationForm class. New code is highlighted in bold:
class UserRegistrationForm(forms.ModelForm):
    password = forms.CharField(label='Password',
                               widget=forms.PasswordInput)
    password2 = forms.CharField(label='Repeat password',
                                widget=forms.PasswordInput)
    class Meta:
        model = User
        fields = ['username', 'first_name', 'email']
    def clean_password2(self):
        cd = self.cleaned_data
        if cd['password'] != cd['password2']:
            raise forms.ValidationError('Passwords don't match.')
        return cd['password2']
We have defined a clean_password2() method to compare the second password against the first one and raise a validation error if the passwords don’t match. This method is executed when the form is validated by calling its is_valid() method. You can provide a clean_<fieldname>() method to any of your form fields in order to clean the value or raise form validation errors for a specific field. Forms also include a general clean() method to validate the entire form, which is useful to validate fields that depend on each other. In this case, we use the field-specific clean_password2() validation instead of overriding the clean() method of the form. This avoids overriding other field-specific checks that the ModelForm gets from the restrictions set in the model (for example, validating that the username is unique).
Django also provides a UserCreationForm form that resides in django.contrib.auth.forms and is very similar to the one we have created.
Edit the views.py file of the account application and add the following code highlighted in bold:
from django.http import HttpResponse
from django.shortcuts import render
from django.contrib.auth import authenticate, login
from django.contrib.auth.decorators import login_required
from .forms import LoginForm, UserRegistrationForm
# ...
def register(request):
    if request.method == 'POST':
        user_form = UserRegistrationForm(request.POST)
        if user_form.is_valid():
            # Create a new user object but avoid saving it yet
            new_user = user_form.save(commit=False)
            # Set the chosen password
            new_user.set_password(
                user_form.cleaned_data['password'])
            # Save the User object
            new_user.save()
            return render(request,
                          'account/register_done.html',
                          {'new_user': new_user})
    else:
        user_form = UserRegistrationForm()
    return render(request,
                  'account/register.html',
                  {'user_form': user_form})
The view for creating user accounts is quite simple. For security reasons, instead of saving the raw password entered by the user, we use the set_password() method of the User model. This method handles password hashing before storing the password in the database.
Django doesn’t store clear text passwords; it stores hashed passwords instead. Hashing is the process of transforming a given key into another value. A hash function is used to generate a fixed-length value according to a mathematical algorithm. By hashing passwords with secure algorithms, Django ensures that user passwords stored in the database require massive amounts of computing time to break.
By default, Django uses the PBKDF2 hashing algorithm with a SHA256 hash to store all passwords. However, Django not only supports checking existing passwords hashed with PBKDF2, but also supports checking stored passwords hashed with other algorithms such as PBKDF2SHA1, argon2, bcrypt, and scrypt.
The PASSWORD_HASHERS setting defines the password hashers that the Django project supports. The following is the default PASSWORD_HASHERS list:
PASSWORD_HASHERS = [
    'django.contrib.auth.hashers.PBKDF2PasswordHasher',
    'django.contrib.auth.hashers.PBKDF2SHA1PasswordHasher',
    'django.contrib.auth.hashers.Argon2PasswordHasher',
    'django.contrib.auth.hashers.BCryptSHA256PasswordHasher',
    'django.contrib.auth.hashers.ScryptPasswordHasher',
]
Django uses the first entry of the list, in this case PBKDF2PasswordHasher, to hash all passwords. The rest of the hashers can be used by Django to check existing passwords.
The scrypt hasher has been introduced in Django 4.0. It is more secure and recommended over PBKDF2. However, PBKDF2 is still the default hasher, as scrypt requires OpenSSL 1.1+ and more memory.
You can learn more about how Django stores passwords and about the password hashers included at https://docs.djangoproject.com/en/4.1/topics/auth/passwords/.
Now, edit the urls.py file of the account application and add the following URL pattern highlighted in bold:
urlpatterns = [
    # ...
    path('', include('django.contrib.auth.urls')),
    path('', views.dashboard, name='dashboard'),
    path('register/', views.register, name='register'),
]
Finally, create a new template in the templates/account/ template directory of the account application, name it register.html, and make it look as follows:
{% extends "base.html" %}
{% block title %}Create an account{% endblock %}
{% block content %}
  <h1>Create an account</h1>
  <p>Please, sign up using the following form:</p>
  <form method="post">
    {{ user_form.as_p }}
    {% csrf_token %}
    <p><input type="submit" value="Create my account"></p>
  </form>
{% endblock %}
Create an additional template file in the same directory and name it register_done.html. Add the following code to it:
{% extends "base.html" %}
{% block title %}Welcome{% endblock %}
{% block content %}
  <h1>Welcome {{ new_user.first_name }}!</h1>
  <p>
    Your account has been successfully created.
    Now you can <a href="{% url "login" %}">log in</a>.
  </p>
{% endblock %}
Open http://127.0.0.1:8000/account/register/ in your browser. You will see the registration page you have created:

Figure 4.16: The account creation form
Fill in the details for a new user and click on the CREATE MY ACCOUNT button.
If all fields are valid, the user will be created, and you will see the following success message:

Figure 4.17: The account is successfully created page
Click on the log in link and enter your username and password to verify that you can access your newly created account.
Let’s add a link to register on the login template. Edit the registration/login.html template and find the following line:
<p>Please, use the following form to log-in:</p>
Replace it with the following lines:
<p>
  Please, use the following form to log-in.
  If you don't have an account <a href="{% url "register" %}">register here</a>.
</p>
Open http://127.0.0.1:8000/account/login/ in your browser. The page should now look as follows:

Figure 4.18: The Log-in page including a link to register
We have made the registration page accessible from the Log-in page.
Extending the user model
When dealing with user accounts, you will find that the User model of the Django authentication framework is suitable for most common cases. However, the standard User model comes with a limited set of fields. You may want to extend it with additional information that is relevant to your application.
A simple way to extend the User model is by creating a profile model that contains a one-to-one relationship with the Django User model, and any additional fields. A one-to-one relationship is similar to a ForeignKey field with the parameter unique=True. The reverse side of the relationship is an implicit one-to-one relationship with the related model instead of a manager for multiple elements. From each side of the relationship, you access a single related object.
Edit the models.py file of your account application and add the following code highlighted in bold:
from django.db import models
from django.conf import settings
class Profile(models.Model):
    user = models.OneToOneField(settings.AUTH_USER_MODEL,
                                on_delete=models.CASCADE)
    date_of_birth = models.DateField(blank=True, null=True)
    photo = models.ImageField(upload_to='users/%Y/%m/%d/',
                              blank=True)
    def __str__(self):
        return f'Profile of {self.user.username}'
In order to keep your code generic, use the get_user_model() method to retrieve the user model and the AUTH_USER_MODEL setting to refer to it when defining a model’s relationship with the user model, instead of referring to the auth user model directly. You can read more information about this at https://docs.djangoproject.com/en/4.1/topics/auth/customizing/#django.contrib.auth.get_user_model.
Our user profile will include the user’s date of birth and an image of the user.
The one-to-one field user will be used to associate profiles with users. With on_delete=models.CASCADE, we force the deletion of the related Profile object when a User object gets deleted.
The date_of_birth field is a DateField. We have made this field optional with blank=True, and we allow null values with null=True.
The photo field is an ImageField. We have made this field optional with blank=True. An ImageField field manages the storage of image files. It validates the file provided is a valid image, stores the image file in the directory indicated with the upload_to parameter, and stores the relative path to the file in the related database field. An ImageField field is translated to a VARHAR(100) column in the database by default. A blank string will be stored if the value is left empty.
Installing Pillow and serving media files
We need to install the Pillow library to manage images. Pillow is the de facto standard library for image processing in Python. It supports multiple image formats and provides powerful image processing functions. Pillow is required by Django to handle images with ImageField.
Install Pillow by running the following command from the shell prompt:
pip install Pillow==9.2.0
Edit the settings.py file of the project and add the following lines:
MEDIA_URL = 'media/'
MEDIA_ROOT = BASE_DIR / 'media'
This will enable Django to manage file uploads and serve media files. MEDIA_URL is the base URL used to serve the media files uploaded by users. MEDIA_ROOT is the local path where they reside. Paths and URLs for files are built dynamically by prepending the project path or the media URL to them for portability.
Now, edit the main urls.py file of the bookmarks project and modify the code, as follows. New lines are highlighted in bold:
from django.contrib import admin
from django.urls import path, include
from django.conf import settings
from django.conf.urls.static import static
urlpatterns = [
    path('admin/', admin.site.urls),
    path('account/', include('account.urls')),
]
if settings.DEBUG:
    urlpatterns += static(settings.MEDIA_URL,
                          document_root=settings.MEDIA_ROOT)
We have added the static() helper function to serve media files with the Django development server during development (that is when the DEBUG setting is set to True).
The static() helper function is suitable for development but not for production use. Django is very inefficient at serving static files. Never serve your static files with Django in a production environment. You will learn how to serve static files in a production environment in Chapter 17, Going Live.
Creating migrations for the profile model
Open the shell and run the following command to create the database migration for the new model:
python manage.py makemigrations
You will get the following output:
Migrations for 'account':
  account/migrations/0001_initial.py
    - Create model Profile
Next, sync the database with the following command in the shell prompt:
python manage.py migrate
You will see an output that includes the following line:
Applying account.0001_initial... OK
Edit the admin.py file of the account application and register the Profile model in the administration site by adding the code in bold:
from django.contrib import admin
from .models import Profile
@admin.register(Profile)
class ProfileAdmin(admin.ModelAdmin):
    list_display = ['user', 'date_of_birth', 'photo']
    raw_id_fields = ['user']
Run the development server using the following command from the shell prompt:
python manage.py runserver
Open http://127.0.0.1:8000/admin/ in your browser. Now you should be able to see the Profile model on the administration site of your project, as follows:

Figure 4.19: The ACCOUNT block on the administration site index page
Click on the Add link of the Profiles row. You will see the following form to add a new profile:

Figure 4.20: The Add profile form
Create a Profile object manually for each of the existing users in the database.
Next, we will let users edit their profiles on the website.
Edit the forms.py file of the account application and add the following lines highlighted in bold:
# ...
from .models import Profile
# ...
class UserEditForm(forms.ModelForm):
    class Meta:
        model = User
        fields = ['first_name', 'last_name', 'email']
class ProfileEditForm(forms.ModelForm):
    class Meta:
        model = Profile
        fields = ['date_of_birth', 'photo']
UserEditForm: This will allow users to edit their first name, last name, and email, which are attributes of the built-in DjangoUsermodel.ProfileEditForm: This will allow users to edit the profile data that is saved in the customProfilemodel. Users will be able to edit their date of birth and upload an image for their profile picture.
Edit the views.py file of the account application and add the following lines highlighted in bold:
# ...
from .models import Profile
# ...
def register(request):
    if request.method == 'POST':
        user_form = UserRegistrationForm(request.POST)
        if user_form.is_valid():
            # Create a new user object but avoid saving it yet
            new_user = user_form.save(commit=False)
            # Set the chosen password
            new_user.set_password(
                user_form.cleaned_data['password'])
            # Save the User object
            new_user.save()
            # Create the user profile
            Profile.objects.create(user=new_user)
            return render(request,
                          'account/register_done.html',
                          {'new_user': new_user})
    else:
        user_form = UserRegistrationForm()
    return render(request,
                  'account/register.html',
                  {'user_form': user_form})
When users register on the site, a Profile object will be created and associated with the User object created.
Now, we will let users edit their profiles.
Edit the views.py file of the account application and add the following code highlighted in bold:
from django.http import HttpResponse
from django.shortcuts import render
from django.contrib.auth import authenticate, login
from django.contrib.auth.decorators import login_required
from .forms import LoginForm, UserRegistrationForm,
                   UserEditForm, ProfileEditForm
from .models import Profile
# ...
@login_required
def edit(request):
    if request.method == 'POST':
        user_form = UserEditForm(instance=request.user,
                                 data=request.POST)
        profile_form = ProfileEditForm(
                                    instance=request.user.profile,
                                    data=request.POST,
                                    files=request.FILES)
        if user_form.is_valid() and profile_form.is_valid():
            user_form.save()
            profile_form.save()
    else:
        user_form = UserEditForm(instance=request.user)
        profile_form = ProfileEditForm(
                                    instance=request.user.profile)
    return render(request,
                  'account/edit.html',
                  {'user_form': user_form,
                   'profile_form': profile_form})
We have added the new edit view to allow users to edit their personal information. We have added the login_required decorator to the view because only authenticated users will be able to edit their profiles. For this view, we use two model forms: UserEditForm to store the data of the built-in User model and ProfileEditForm to store the additional personal data in the custom Profile model. To validate the data submitted, we call the is_valid() method of both forms. If both forms contain valid data, we save both forms by calling the save() method to update the corresponding objects in the database.
Add the following URL pattern to the urls.py file of the account application:
urlpatterns = [
    #...
    path('', include('django.contrib.auth.urls')),
    path('', views.dashboard, name='dashboard'),
    path('register/', views.register, name='register'),
    path('edit/', views.edit, name='edit'),
]
Finally, create a template for this view in the templates/account/ directory and name it edit.html. Add the following code to it:
{% extends "base.html" %}
{% block title %}Edit your account{% endblock %}
{% block content %}
  <h1>Edit your account</h1>
  <p>You can edit your account using the following form:</p>
  <form method="post" enctype="multipart/form-data">
    {{ user_form.as_p }}
    {{ profile_form.as_p }}
    {% csrf_token %}
    <p><input type="submit" value="Save changes"></p>
  </form>
{% endblock %}
In the preceding code, we have added enctype="multipart/form-data" to the <form> HTML element to enable file uploads. We use an HTML form to submit both the user_form and profile_form forms.
Open the URL http://127.0.0.1:8000/account/register/ and register a new user. Then, log in with the new user and open the URL http://127.0.0.1:8000/account/edit/. You should see the following page:

Figure 4.21: The profile edit form
You can now add the profile information and save the changes.
We will edit the dashboard template to include links to the edit profile and change password pages.
Open the templates/account/dashboard.html template and add the following lines highlighted in bold:
{% extends "base.html" %}
{% block title %}Dashboard{% endblock %}
{% block content %}
  <h1>Dashboard</h1>
  <p>
    Welcome to your dashboard. You can <a href="{% url "edit" %}">edit your profile</a> or <a href="{% url "password_change" %}">change your password</a>.
  </p>
{% endblock %}
Users can now access the form to edit their profile from the dashboard. Open http://127.0.0.1:8000/account/ in your browser and test the new link to edit a user’s profile. The dashboard should now look like this:

Figure 4.22: Dashboard page content, including links to edit a profile and change a password
Using a custom user model
Django also offers a way to substitute the User model with a custom model. The User class should inherit from Django’s AbstractUser class, which provides the full implementation of the default user as an abstract model. You can read more about this method at https://docs.djangoproject.com/en/4.1/topics/auth/customizing/#substituting-a-custom-user-model.
Using a custom user model will give you more flexibility, but it might also result in more difficult integration with pluggable applications that interact directly with Django’s auth user model.
Using the messages framework
When users are interacting with the platform, there are many cases where you might want to inform them about the result of specific actions. Django has a built-in messages framework that allows you to display one-time notifications to your users.
The messages framework is located at django.contrib.messages and is included in the default INSTALLED_APPS list of the settings.py file when you create new projects using python manage.py startproject. The settings file also contains the middleware django.contrib.messages.middleware.MessageMiddleware in the MIDDLEWARE setting.
The messages framework provides a simple way to add messages to users. Messages are stored in a cookie by default (falling back to session storage), and they are displayed and cleared in the next request from the user. You can use the messages framework in your views by importing the messages module and adding new messages with simple shortcuts, as follows:
from django.contrib import messages
messages.error(request, 'Something went wrong')
You can create new messages using the add_message() method or any of the following shortcut methods:
success(): Success messages to display when an action was successfulinfo(): Informational messageswarning(): A failure has not yet occurred but it may be imminenterror(): An action was not successful or a failure occurreddebug(): Debug messages that will be removed or ignored in a production environment
Let’s add messages to the project. The messages framework applies globally to the project. We will use the base template to display any available messages to the client. This will allow us to notify the client with the results of any action on any page.
Open the templates/base.html template of the account application and add the following code highlighted in bold:
{% load static %}
<!DOCTYPE html>
<html>
<head>
  <title>{% block title %}{% endblock %}</title>
  <link href="{% static "css/base.css" %}" rel="stylesheet">
</head>
<body>
  <div id="header">
    ...
  </div>
  {% if messages %}
    <ul class="messages">
      {% for message in messages %}
        <li class="{{ message.tags }}">
          {{ message|safe }}
          <a href="#" class="close">x</a>
        </li>
      {% endfor %}
    </ul>
  {% endif %}
  <div id="content">
    {% block content %}
    {% endblock %}
  </div>
</body>
</html>
The messages framework includes the context processor django.contrib.messages.context_processors.messages, which adds a messages variable to the request context. You can find it in the context_processors list in the TEMPLATES setting of your project. You can use the messages variable in templates to display all existing messages to the user.
A context processor is a Python function that takes the request object as an argument and returns a dictionary that gets added to the request context. You will learn how to create your own context processors in Chapter 8, Building an Online Shop.
Let’s modify the edit view to use the messages framework.
Edit the views.py file of the account application and add the following lines highlighted in bold:
# ...
from django.contrib import messages
# ...
@login_required
def edit(request):
    if request.method == 'POST':
        user_form = UserEditForm(instance=request.user,
                                 data=request.POST)
        profile_form = ProfileEditForm(
                                    instance=request.user.profile,
                                    data=request.POST,
                                    files=request.FILES)
        if user_form.is_valid() and profile_form.is_valid():
            user_form.save()
            profile_form.save()
            messages.success(request, 'Profile updated '
                                      'successfully')
        else:
            messages.error(request, 'Error updating your profile')
    else:
        user_form = UserEditForm(instance=request.user)
        profile_form = ProfileEditForm(
                                    instance=request.user.profile)
    return render(request,
                  'account/edit.html',
                  {'user_form': user_form,
                   'profile_form': profile_form})
A success message is generated when users successfully update their profile. If any of the forms contain invalid data, an error message is generated instead.
Open http://127.0.0.1:8000/account/edit/ in your browser and edit the profile of the user. You should see the following message when the profile is successfully updated:

Figure 4.23: The successfully edited profile message
Enter an invalid date in the Date of birth field and submit the form again. You should see the following message:

Figure 4.24: The error updating profile message
Generating messages to inform your users about the results of their actions is really straightforward. You can easily add messages to other views as well.
You can learn more about the messages framework at https://docs.djangoproject.com/en/4.1/ref/contrib/messages/.
Now that we’ve built all the functionality related to user authentication and profile editing, we will dig deeper into customizing authentication. We will learn how to build custom backend authentication so that users can log into the site using their email address.
Building a custom authentication backend
Django allows you to authenticate users against different sources. The AUTHENTICATION_BACKENDS setting includes a list of authentication backends available in the project. The default value of this setting is the following:
['django.contrib.auth.backends.ModelBackend']
The default ModelBackend authenticates users against the database using the User model of django.contrib.auth. This is suitable for most web projects. However, you can create custom backends to authenticate your users against other sources, such as a Lightweight Directory Access Protocol (LDAP) directory or any other system.
You can read more information about customizing authentication at https://docs.djangoproject.com/en/4.1/topics/auth/customizing/#other-authentication-sources.
Whenever the authenticate() function of django.contrib.auth is used, Django tries to authenticate the user against each of the backends defined in AUTHENTICATION_BACKENDS one by one, until one of them successfully authenticates the user. Only if all of the backends fail to authenticate will the user not be authenticated.
Django provides a simple way to define your own authentication backends. An authentication backend is a class that provides the following two methods:
authenticate(): It takes therequestobject and user credentials as parameters. It has to return auserobject that matches those credentials if the credentials are valid, orNoneotherwise. Therequestparameter is anHttpRequestobject, orNoneif it’s not provided to theauthenticate()function.get_user(): It takes a user ID parameter and has to return auserobject.
Creating a custom authentication backend is as simple as writing a Python class that implements both methods. Let’s create an authentication backend to allow users to authenticate on the site using their email address instead of their username.
Create a new file inside the account application directory and name it authentication.py. Add the following code to it:
from django.contrib.auth.models import User
class EmailAuthBackend:
    """
    Authenticate using an e-mail address.
    """
    def authenticate(self, request, username=None, password=None):
        try:
            user = User.objects.get(email=username)
            if user.check_password(password):
                return user
            return None
        except (User.DoesNotExist, User.MultipleObjectsReturned):
            return None
    def get_user(self, user_id):
        try:
            return User.objects.get(pk=user_id)
        except User.DoesNotExist:
            return None
The preceding code is a simple authentication backend. The authenticate() method receives a request object and the username and password optional parameters. We could use different parameters, but we use username and password to make our backend work with the authentication framework views right away. The preceding code works as follows:
authenticate(): The user with the given email address is retrieved, and the password is checked using the built-incheck_password()method of the user model. This method handles the password hashing to compare the given password with the password stored in the database. Two different QuerySet exceptions are captured:DoesNotExistandMultipleObjectsReturned. TheDoesNotExistexception is raised if no user is found with the given email address. TheMultipleObjectsReturnedexception is raised if multiple users are found with the same email address. We will modify the registration and edit views later to prevent users from using an existing email address.get_user(): You get a user through the ID provided in theuser_idparameter. Django uses the backend that authenticated the user to retrieve theUserobject for the duration of the user session. pk is a short for primary key, which is a unique identifier for each record in the database. Every Django model has a field that serves as its primary key. By default, the primary key is the automatically generated id field. The primary key can be also referred to as pk in the Django ORM. You can find more information about automatic primary key fields at https://docs.djangoproject.com/en/4.1/topics/db/models/#automatic-primary-key-fields.
Edit the settings.py file of your project and add the following code:
AUTHENTICATION_BACKENDS = [
    'django.contrib.auth.backends.ModelBackend',
    'account.authentication.EmailAuthBackend',
]
In the preceding setting, we keep the default ModelBackend that is used to authenticate with the username and password and include our own email-based authentication backend EmailAuthBackend.
Open http://127.0.0.1:8000/account/login/ in your browser. Remember that Django will try to authenticate the user against each of the backends, so now you should be able to log in seamlessly using your username or email account.
The user credentials will be checked using ModelBackend, and if no user is returned, the credentials will be checked using EmailAuthBackend.
The order of the backends listed in the AUTHENTICATION_BACKENDS setting matters. If the same credentials are valid for multiple backends, Django will stop at the first backend that successfully authenticates the user.
Preventing users from using an existing email
The User model of the authentication framework does not prevent creating users with the same email address. If two or more user accounts share the same email address, we won’t be able to discern which user is authenticating. Now that users can log in using their email address, we have to prevent users from registering with an existing email address.
We will now change the user registration form, to prevent multiple users from registering with the same email address.
Edit the forms.py file of the account application and add the following lines highlighted in bold to the UserRegistrationForm class:
class UserRegistrationForm(forms.ModelForm):
    password = forms.CharField(label='Password',
                               widget=forms.PasswordInput)
    password2 = forms.CharField(label='Repeat password',
                                widget=forms.PasswordInput)
    class Meta:
        model = User
        fields = ['username', 'first_name', 'email']
    def clean_password2(self):
        cd = self.cleaned_data
        if cd['password'] != cd['password2']:
            raise forms.ValidationError('Passwords don't match.')
        return cd['password2']
    def clean_email(self):
        data = self.cleaned_data['email']
        if User.objects.filter(email=data).exists():
            raise forms.ValidationError('Email already in use.')
        return data
We have added validation for the email field that prevents users from registering with an existing email address. We build a QuerySet to look up existing users with the same email address. We check whether there are any results with the exists() method. The exists() method returns True if the QuerySet contains any results, and False otherwise.
Now, add the following lines highlighted in bold to the UserEditForm class:
class UserEditForm(forms.ModelForm):
    class Meta:
        model = User
        fields = ['first_name', 'last_name', 'email']
    def clean_email(self):
        data = self.cleaned_data['email']
        qs = User.objects.exclude(id=self.instance.id)
                         .filter(email=data)
        if qs.exists():
            raise forms.ValidationError(' Email already in use.')
        return data
In this case, we have added validation for the email field that prevents users from changing their existing email address to an existing email address of another user. We exclude the current user from the QuerySet. Otherwise, the current email address of the user would be considered an existing email address, and the form won’t validate.
Additional resources
The following resources provide additional information related to the topics covered in this chapter:
- Source code for this chapter – https://github.com/PacktPublishing/Django-4-by-example/tree/main/Chapter04
- Built-in authentication views – https://docs.djangoproject.com/en/4.1/topics/auth/default/#all-authentication-views
- Authentication URL patterns – https://github.com/django/django/blob/stable/3.0.x/django/contrib/auth/urls.py
- How Django manages passwords and available password hashers – https://docs.djangoproject.com/en/4.1/topics/auth/passwords/
- Generic user model and the
get_user_model()method – https://docs.djangoproject.com/en/4.1/topics/auth/customizing/#django.contrib.auth.get_user_model - Using a custom user model – https://docs.djangoproject.com/en/4.1/topics/auth/customizing/#substituting-a-custom-user-model
- The Django messages framework – https://docs.djangoproject.com/en/4.1/ref/contrib/messages/
- Custom authentication sources – https://docs.djangoproject.com/en/4.1/topics/auth/customizing/#other-authentication-sources
- Automatic primary key fields – https://docs.djangoproject.com/en/4.1/topics/db/models/#automatic-primary-key-fields
Summary
In this chapter, you learned how to build an authentication system for your site. You implemented all the necessary views for users to register, log in, log out, edit their password, and reset their password. You built a model for custom user profiles, and you created a custom authentication backend to let users log into your site using their email address.
In the next chapter, you will learn how to implement social authentication on your site using Python Social Auth. Users will be able to authenticate with their Google, Facebook, or Twitter accounts. You will also learn how to serve the development server over HTTPS using Django Extensions. You will customize the authentication pipeline to create user profiles automatically.
Join us on Discord
Read this book alongside other users and the author.
Ask questions, provide solutions to other readers, chat with the author via Ask Me Anything sessions, and much more. Scan the QR code or visit the link to join the book community.
