
5
Implementing Social Authentication
In the previous chapter, you built user registration and authentication into your website. You implemented password change, reset, and recovery functionalities, and you learned how to create a custom profile model for your users.
In this chapter, you will add social authentication to your site using Facebook, Google, and Twitter. You will use Django Social Auth to implement social authentication using OAuth 2.0, the industry-standard protocol for authorization. You will also modify the social authentication pipeline to create a user profile for new users automatically.
This chapter will cover the following points:
- Adding social authentication with Python Social Auth
- Installing Django Extensions
- Running the development server through HTTPS
- Adding authentication using Facebook
- Adding authentication using Twitter
- Adding authentication using Google
- Creating a profile for users that register with social authentication
The source code for this chapter can be found at https://github.com/PacktPublishing/Django-4-by-example/tree/main/Chapter05.
All Python packages used in this chapter are included in the requirements.txt file in the source code for the chapter. You can follow the instructions to install each Python package in the following sections, or you can install all requirements at once with the command pip install -r requirements.txt.
Adding social authentication to your site
Social authentication is a widely used feature that allows users to authenticate using their existing account of a service provider using Single Sign-on (SSO). The authentication process allows users to authenticate into the site using their existing account from social services like Google. In this section, we will add social authentication to the site using Facebook, Twitter, and Google.
To implement social authentication, we will use the OAuth 2.0 industry-standard protocol for authorization. OAuth stands for Open Authorization. OAuth 2.0 is a standard designed to allow a website or application to access resources hosted by other web apps on behalf of a user. Facebook, Twitter, and Google use the OAuth 2.0 protocol for authentication and authorization.
Python Social Auth is a Python module that simplifies the process of adding social authentication to your website. Using this module, you can let your users log in to your website using their accounts from other services. You can find the code for this module at https://github.com/python-social-auth/social-app-django.
This module comes with authentication backends for different Python frameworks, including Django. To install the Django package from the Git repository of the project, open the console and run the following command:
git+https://github.com/python-social-auth/social-app-django.git@20fabcd7bd9a8a41910bc5c8ed1bd6ef2263b328
This will install Python Social Auth from a GitHub commit that works with Django 4.1. At the writing of this book the latest Python Social Auth release is not compatible with Django 4.1 but a newer compatible release might have been published.
Then add social_django to the INSTALLED_APPS setting in the settings.py file of the project as follows:
INSTALLED_APPS = [
    # ...
    'social_django',
]
This is the default application to add Python Social Auth to Django projects. Now run the following command to sync Python Social Auth models with your database:
python manage.py migrate
You should see that the migrations for the default application are applied as follows:
Applying social_django.0001_initial... OK
Applying social_django.0002_add_related_name... OK
...
Applying social_django.0011_alter_id_fields... OK
Python Social Auth includes authentication backends for multiple services. You can find the list with all available backends at https://python-social-auth.readthedocs.io/en/latest/backends/index.html#supported-backends.
We will add social authentication to our project, allowing our users to authenticate with the Facebook, Twitter, and Google backends.
First, we need to add the social login URL patterns to the project.
Open the main urls.py file of the bookmarks project and include the social_django URL patterns as follows. New lines are highlighted in bold:
urlpatterns = [
    path('admin/', admin.site.urls),
    path('account/', include('account.urls')),
    path('social-auth/',
         include('social_django.urls', namespace='social')),
]
Our web application is currently accessible via the localhost IP to 127.0.0.1 or using the localhost hostname. Several social services will not allow redirecting users to 127.0.0.1 or localhost after successful authentication; they expect a domain name for the URL redirect. First, we need to use a domain name to make social authentication work. Fortunately, we can simulate serving our site under a domain name in our local machine.
Locate the hosts file of your machine. If you are using Linux or macOS, the hosts file is located at /etc/hosts. If you are using Windows, the hosts file is located at C:WindowsSystem32Driversetchosts.
Edit the hosts file of your machine and add the following line to it:
127.0.0.1 mysite.com
This will tell your computer to point the mysite.com hostname to your own machine.
Let’s verify that the hostname association worked. Run the development server using the following command from the shell prompt:
python manage.py runserver
Open http://mysite.com:8000/account/login/ in your browser. You will see the following error:

Figure 5.1: The invalid host header message
Django controls the hosts that can serve the application using the ALLOWED_HOSTS setting. This is a security measure to prevent HTTP host header attacks. Django will only allow the hosts included in this list to serve the application.
You can learn more about the ALLOWED_HOSTS setting at https://docs.djangoproject.com/en/4.1/ref/settings/#allowed-hosts.
Edit the settings.py file of the project and modify the ALLOWED_HOSTS setting as follows. New code is highlighted in bold:
ALLOWED_HOSTS = ['mysite.com', 'localhost', '127.0.0.1']
Besides the mysite.com host, we have explicitly included localhost and 127.0.0.1. This allows access to the site through localhost and 127.0.0.1, which is the default Django behavior when DEBUG is True and ALLOWED_HOSTS is empty.
Open http://mysite.com:8000/account/login/ again in your browser. Now, you should see the login page of the site instead of an error.
Running the development server through HTTPS
Some of the social authentication methods we are going to use require an HTTPS connection. The Transport Layer Security (TLS) protocol is the standard for serving websites through a secure connection. The TLS predecessor is the Secure Sockets Layer (SSL).
Although SSL is now deprecated, in multiple libraries and online documentation you will find references to both the terms TLS and SSL. The Django development server is not able to serve your site through HTTPS, since that is not its intended use. To test the social authentication functionality serving the site through HTTPS, we are going to use the RunServerPlus extension of the package Django Extensions. Django Extensions is a third-party collection of custom extensions for Django. Please note that you should never use this to serve your site in a real environment; this is only a development server.
Use the following command to install Django Extensions:
pip install git+https://github.com/django-extensions/django-extensions.git@25a41d8a3ecb24c009c5f4cac6010a091a3c91c8
This will install Django Extensions from a GitHub commit that includes support for Django 4.1. At the writing of this book the latest Django Extensions release is not compatible with Django 4.1 but a newer compatible release might have been published.
You will need to install Werkzeug, which contains a debugger layer required by the RunServerPlus extension of Django Extensions. Use the following command to install Werkzeug:
pip install werkzeug==2.2.2
Finally, use the following command to install pyOpenSSL, which is required to use the SSL/TLS functionality of RunServerPlus:
pip install pyOpenSSL==22.0.0
Edit the settings.py file of your project and add Django Extensions to the INSTALLED_APPS setting, as follows:
INSTALLED_APPS = [
    # ...
    'django_extensions',
]
Now, use the management command runserver_plus provided by Django Extensions to run the development server, as follows:
python manage.py runserver_plus --cert-file cert.crt
We have provided a file name to the runserver_plus command for the SSL/TLS certificate. Django Extensions will generate a key and certificate automatically.
Open https://mysite.com:8000/account/login/ in your browser. Now you are accessing your site through HTTPS. Note we are now using https:// instead of http://.
Your browser will show a security warning because you are using a self-generated certificate instead of a certificate trusted by a Certification Authority (CA).
If you are using Google Chrome, you will see the following screen:

Figure 5.2: The safety error in Google Chrome
In this case, click on Advanced and then click on Proceed to 127.0.0.1 (unsafe).
If you are using Safari, you will see the following screen:

Figure 5.3: The safety error in Safari
In this case, click on Show details and then click on visit this website.
If you are using Microsoft Edge, you will see the following screen:
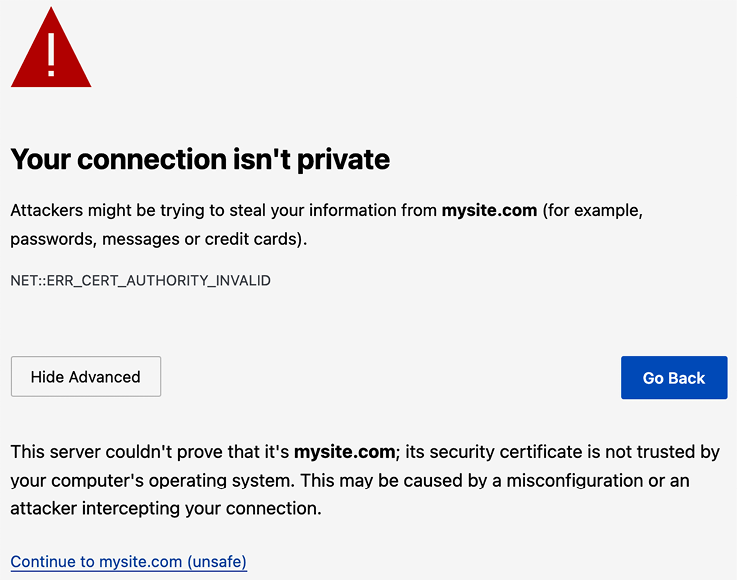
Figure 5.4: The safety error in Microsoft Edge
In this case, click on Advanced and then on Continue to mysite.com (unsafe).
If you are using any other browser, access the advanced information displayed by your browser and accept the self-signed certificate so that your browser trusts the certificate.
You will see that the URL starts with https:// and in some cases a lock icon that indicates that the connection is secure. Some browsers might display a broken lock icon because you are using a self-signed certificate instead of a trusted one. That won’t be a problem for our tests:

Figure 5.5: The URL with the secured connection icon
Django Extensions includes many other interesting tools and features. You can find more information about this package at https://django-extensions.readthedocs.io/en/latest/.
You can now serve your site through HTTPS during development to test social authentication with Facebook, Twitter, and Google.
Authentication using Facebook
To use Facebook authentication to log in to your site, add the following line highlighted in bold to the AUTHENTICATION_BACKENDS setting in the settings.py file of your project:
AUTHENTICATION_BACKENDS = [
    'django.contrib.auth.backends.ModelBackend',
    'account.authentication.EmailAuthBackend',
    'social_core.backends.facebook.FacebookOAuth2',
]
You will need a Facebook developer account and you will need to create a new Facebook application.
Open https://developers.facebook.com/apps/ in your browser. After creating a Facebook developer account, you will see a site with the following header:

Figure 5.6: The Facebook developer portal header
Click on Create App.
You will see the following form to choose an application type:

Figure 5.7: The Facebook create app form to select an application type
Under Select an app type, choose Consumer and click on Next.
You will see the following form to create a new application:

Figure 5.8: The Facebook form for application details
Enter Bookmarks as the Display name, add a contact email address, and click on Create App.
You will see the dashboard for your new application that displays different services that you can configure for the app. Look for the following Facebook Login box and click on Set Up:

Figure 5.9: The Facebook login product block
You will be asked to choose the platform, as follows:

Figure 5.10: Platform selection for Facebook login
Select the Web platform. You will see the following form:

Figure 5.11: Web platform configuration for Facebook login
Enter https://mysite.com:8000/ under Site URL and click the Save button. Then click Continue. You can skip the rest of the quick start process.
In the left-hand menu, click on Settings and then on Basic, as follows:

Figure 5.12: Facebook developer portal sidebar menu
You will see a form with data similar to the following one:

Figure 5.13: Application details for the Facebook application
Copy the App ID and App Secret keys and add them to the settings.py file of your project, as follows:
SOCIAL_AUTH_FACEBOOK_KEY = 'XXX' # Facebook App ID
SOCIAL_AUTH_FACEBOOK_SECRET = 'XXX' # Facebook App Secret
Optionally, you can define a SOCIAL_AUTH_FACEBOOK_SCOPE setting with the extra permissions you want to ask Facebook users for:
SOCIAL_AUTH_FACEBOOK_SCOPE = ['email']
Now, go back to the Facebook developer portal and click on Settings. Add mysite.com under App Domains, as follows:

Figure 5.14: Allowed domains for the Facebook application
You have to enter a public URL for the Privacy Policy URL and another one for the User Data Deletion Instructions URL. The following is an example using the Wikipedia page URL for Privacy Policy. Please note that you should use a valid URL:

Figure 5.15: Privacy policy and user data deletion instructions URLs for the Facebook application
Click on Save Changes. Then, in the left-hand menu under Products, click on Facebook Login and then Settings, as shown here:

Figure 5.16: The Facebook login menu
Ensure that only the following settings are active:
- Client OAuth Login
- Web OAuth Login
- Enforce HTTPS
- Embedded Browser OAuth Login
- Used Strict Mode for Redirect URIs
Enter https://mysite.com:8000/social-auth/complete/facebook/ under Valid OAuth Redirect URIs. The selection should look like this:

Figure 5.17: Client OAuth settings for Facebook login
Open the registration/login.html template of the account application and append the following code highlighted in bold at the bottom of the content block:
{% block content %}
  ...
  <div class="social">
    <ul>
      <li class="facebook">
        <a href="{% url "social:begin" "facebook" %}">
          Sign in with Facebook
        </a>
      </li>
    </ul>
  </div>
{% endblock %}
Use the management command runserver_plus provided by Django Extensions to run the development server, as follows:
python manage.py runserver_plus --cert-file cert.crt
Open https://mysite.com:8000/account/login/ in your browser. The login page will look now as follows:

Figure 5.18: The login page including the button for Facebook authentication
Click on the Sign in with Facebook button. You will be redirected to Facebook, and you will see a modal dialog asking for your permission to let the Bookmarks application access your public Facebook profile:

Figure 5.19: The Facebook modal dialog to grant application permissions
You will see a warning indicating that you need to submit the application for login review. Click on the Continue as … button.
You will be logged in and redirected to the dashboard page of your site. Remember that you have set this URL in the LOGIN_REDIRECT_URL setting. As you can see, adding social authentication to your site is pretty straightforward.
Authentication using Twitter
For social authentication using Twitter, add the following line highlighted in bold to the AUTHENTICATION_BACKENDS setting in the settings.py file of your project:
AUTHENTICATION_BACKENDS = [
    'django.contrib.auth.backends.ModelBackend',
    'account.authentication.EmailAuthBackend',
    'social_core.backends.facebook.FacebookOAuth2',
    'social_core.backends.twitter.TwitterOAuth',
]
You need a Twitter developer account. Open https://developer.twitter.com/ in your browser and click on Sign up.
After creating a Twitter developer account, access the Developer Portal Dashboard at https://developer.twitter.com/en/portal/dashboard. The dashboard should look as follows:
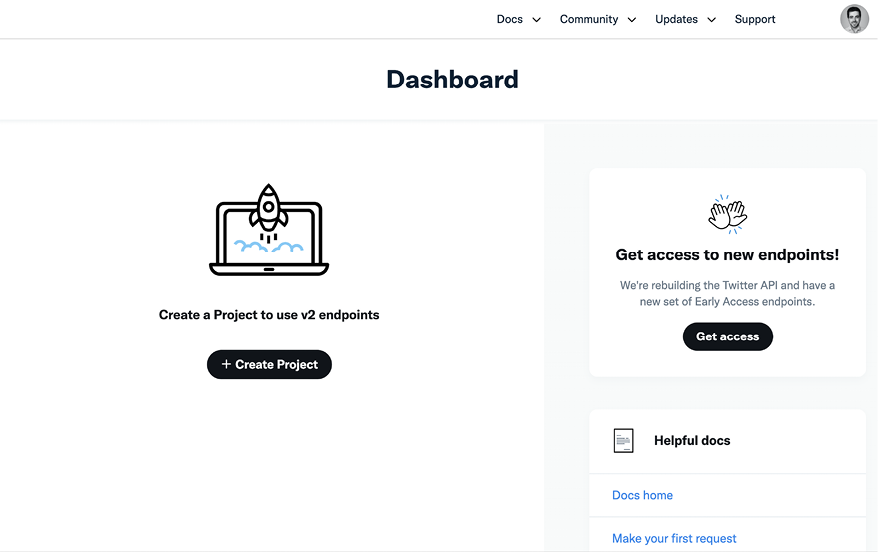
Figure 5.20: Twitter developer portal dashboard
Click on the Create Project button. You will see the following screen:

Figure 5.21: Twitter create project screen – Project name
Enter Bookmarks for the Project name and click on Next. You will see the following screen:
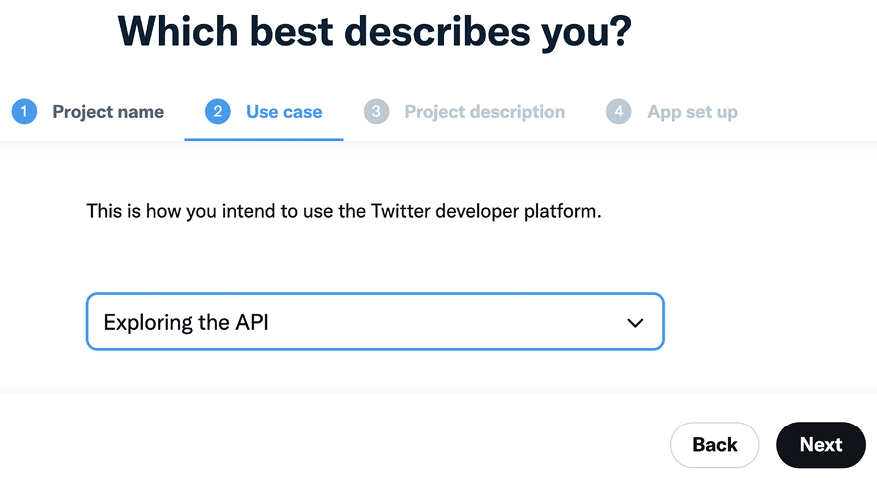
Figure 5.22: Twitter create project screen – Use case
Under Use case, select Exploring the API and click on Next. You can choose any other use case; it won’t affect the configuration. Then you will see the following screen:

Figure 5.23: Twitter create project screen – Project description
Enter a short description for your project and click on Next. The project is now created, and you will see the following screen:

Figure 5.24: Twitter application configuration
We will create a new application. Click on Create new. You will see the following screen to configure the new application:

Figure 5.25: Twitter application configuration - environment selection
Under App Environment, select Development and click on Next. We are creating a development environment for the application. You will see the following screen:
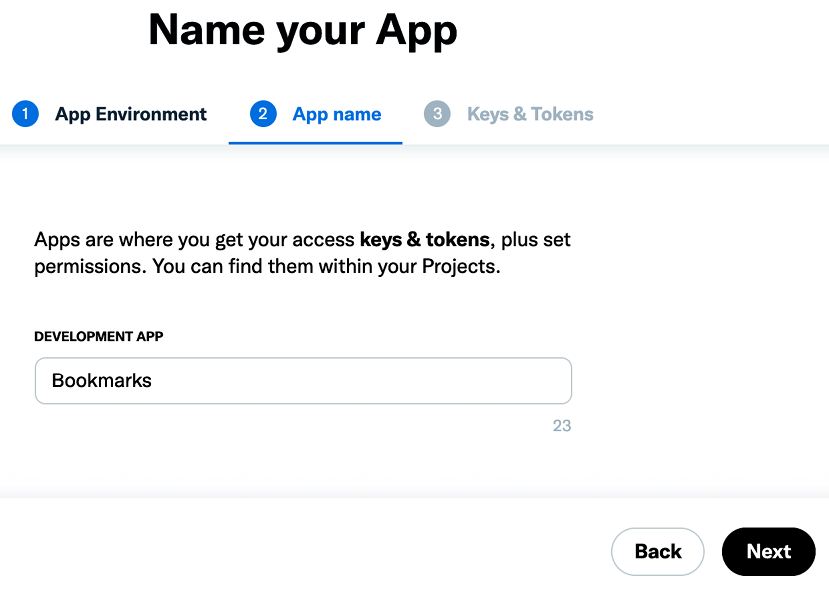
Figure 5.26: Twitter application configuration – App name
Under App name, enter Bookmarks followed by a suffix. Twitter won’t allow you to use the name of an existing developer app within Twitter, so you need to enter a name that might be available. Click Next. Twitter will show you an error if the name you try to use for your app is already taken.
After choosing a name that is available, you will see the following screen:

Figure 5.27: Twitter application configuration – generated API keys
Copy the API Key and API Key Secret into the following settings in the settings.py file of your project:
SOCIAL_AUTH_TWITTER_KEY = 'XXX' # Twitter API Key
SOCIAL_AUTH_TWITTER_SECRET = 'XXX' # Twitter API Secret
Then click on App settings. You will see a screen that includes the following section:

Figure 5.28: Twitter application user authentication setup
Under User authentication settings, click on Set up. You will see the following screen:

Figure 5.29: Twitter application OAuth 2.0 activation
Activate the OAuth 2.0 option. This is the OAuth version that we will use. Then, under OAuth 2.0 Settings, select Web App for Type of App as follows:

Figure 5.30: Twitter application OAuth 2.0 settings
Under General Authentication Settings, enter the following details of your application:
- Callback URI / Redirect URL:
https://mysite.com:8000/social-auth/complete/twitter/ - Website URL:
https://mysite.com:8000/
The settings should look as follows:

Figure 5.31: Twitter authentication URL configuration
Click on Save. Now, you will see the following screen including the Client ID and Client Secret:

Figure 5.32: Twitter application Client ID and Client Secret
You won’t need them for client authentication because you will be using the API Key and API Key Secret instead. However, you can copy them and store the Client Secret in a safe place. Click on Done.
You will see another reminder to save the Client Secret:

Figure 5.33: Twitter Client Secret reminder
Click on Yes, I saved it. Now you will see that OAuth 2.0 authentication has been turned on like in the following screen:

Figure 5.34: Twitter application authentication settings
Now edit the registration/login.html template and add the following code highlighted in bold to the <ul> element:
<ul>
  <li class="facebook">
    <a href="{% url "social:begin" "facebook" %}">
      Sign in with Facebook
    </a>
  </li>
  <li class="twitter">
    <a href="{% url "social:begin" "twitter" %}">
      Sign in with Twitter
    </a>
  </li>
</ul>
Use the management command runserver_plus provided by Django Extensions to run the development server, as follows:
python manage.py runserver_plus --cert-file cert.crt
Open https://mysite.com:8000/account/login/ in your browser. Now, the login page will look as follows:

Figure 5.35: The login page including the button for Twitter authentication
Click on the Sign in with Twitter link. You will be redirected to Twitter, where you will be asked to authorize the application as follows:

Figure 5.36: Twitter user authorization screen
Click on Authorize app. You will briefly see the following page while you are redirected to the dashboard page:

Figure 5.37: Twitter user authentication redirect page
You will then be redirected to the dashboard page of your application.
Authentication using Google
Google offers social authentication using OAuth2. You can read about Google’s OAuth2 implementation at https://developers.google.com/identity/protocols/OAuth2.
To implement authentication using Google, add the following line highlighted in bold to the AUTHENTICATION_BACKENDS setting in the settings.py file of your project:
AUTHENTICATION_BACKENDS = [
    'django.contrib.auth.backends.ModelBackend',
    'account.authentication.EmailAuthBackend',
    'social_core.backends.facebook.FacebookOAuth2',
    'social_core.backends.twitter.TwitterOAuth',
    'social_core.backends.google.GoogleOAuth2',
]
First, you will need to create an API key in your Google Developer Console. Open https://console.cloud.google.com/projectcreate in your browser. You will see the following screen:

Figure 5.38: The Google project creation form
Under Project name enter Bookmarks and click the CREATE button.
When the new project is ready, make sure the project is selected in the top navigation bar as follows:

Figure 5.39: The Google Developer Console top navigation bar
After the project is created, under APIs and services, click on Credentials as follows:

Figure 5.40: Google APIs and services menu
You will see the following screen:

Figure 5.41: Google API creation of API credentials
Then click on CREATE CREDENTIALS and click on OAuth client ID.
Google will ask you to configure the consent screen first, like this:

Figure 5.42: The alert to configure the OAuth consent screen
We will configure the page that will be shown to users to give their consent to access your site with their Google account. Click on the CONFIGURE CONSENT SCREEN button. You will be redirected to the following screen:

Figure 5.43: User type selection in the Google OAuth consent screen setup
Choose External for User Type and click the CREATE button. You will see the following screen:

Figure 5.44: Google OAuth consent screen setup
Under App name, enter Bookmarks and select your email for User support email.
Under Authorised domains, enter mysite.com as follows:

Figure 5.45: Google OAuth authorized domains
Enter your email under Developer contact information and click on SAVE AND CONTINUE.
In step 2. Scopes, don’t change anything and click on SAVE AND CONTINUE.
In step 3. Test users, add your Google user to Test users and click on SAVE AND CONTINUE as follows:
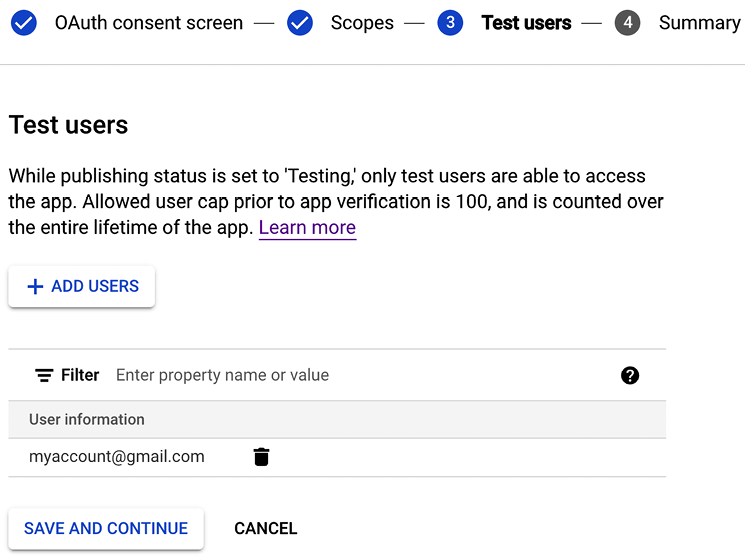
Figure 5.46: Google OAuth test users
You will see a summary of your consent screen configuration. Click on Back to dashboard.
In the menu on the left sidebar, click on Credentials and click again on Create credentials and then on OAuth client ID.
As the next step, enter the following information:
- Application type: Select Web application
- Name: Enter
Bookmarks - Authorised JavaScript origins: Add
https://mysite.com:8000/ - Authorised redirect URIs: Add
https://mysite.com:8000/social-auth/complete/google-oauth2/
The form should look like this:

Figure 5.47: The Google OAuth client ID creation form
Click the CREATE button. You will get Your Client ID and Your Client Secret keys:

Figure 5.48: Google OAuth Client ID and Client Secret
Add both keys to your settings.py file, like this:
SOCIAL_AUTH_GOOGLE_OAUTH2_KEY = 'XXX' # Google Client ID
SOCIAL_AUTH_GOOGLE_OAUTH2_SECRET = 'XXX' # Google Client Secret
Edit the registration/login.html template and add the following code highlighted in bold to the <ul> element:
<ul>
  <li class="facebook">
    <a href="{% url "social:begin" "facebook" %}">
      Sign in with Facebook
    </a>
  </li>
  <li class="twitter">
    <a href="{% url "social:begin" "twitter" %}">
      Sign in with Twitter
    </a>
  </li>
  <li class="google">
    <a href="{% url "social:begin" "google-oauth2" %}">
      Sign in with Google
    </a>
  </li>
</ul>
Use the management command runserver_plus provided by Django Extensions to run the development server, as follows:
python manage.py runserver_plus --cert-file cert.crt
Open https://mysite.com:8000/account/login/ in your browser. The login page should now look as follows:

Figure 5.49: The login page including buttons for Facebook, Twitter, and Google authentication
Click on the Sign in with Google button. You will see the following screen:

Figure 5.50: The Google application authorization screen
Click on your Google account to authorize the application. You will be logged in and redirected to the dashboard page of your website.
You have now added social authentication to your project with some of the most popular social platforms. You can easily implement social authentication with other online services using Python Social Auth.
Creating a profile for users that register with social authentication
When a user authenticates using social authentication, a new User object is created if there isn’t an existing user associated with that social profile. Python Social Auth uses a pipeline consisting of a set of functions that are executed in a specific order executed during the authentication flow. These functions take care of retrieving any user details, creating a social profile in the database, and associating it to an existing user or creating a new one.
Currently, a no Profile object is created when new users are created via social authentication. We will add a new step to the pipeline, to automatically create a Profile object in the database when a new user is created.
Add the following SOCIAL_AUTH_PIPELINE setting to the settings.py file of your project:
SOCIAL_AUTH_PIPELINE = [
    'social_core.pipeline.social_auth.social_details',
    'social_core.pipeline.social_auth.social_uid',
    'social_core.pipeline.social_auth.auth_allowed',
    'social_core.pipeline.social_auth.social_user',
    'social_core.pipeline.user.get_username',
    'social_core.pipeline.user.create_user',
    'social_core.pipeline.social_auth.associate_user',
    'social_core.pipeline.social_auth.load_extra_data',
    'social_core.pipeline.user.user_details',
]
This is the default authentication pipeline used by Python Social Auth. It consists of several functions that perform different tasks when authenticating a user. You can find more details about the default authentication pipeline at https://python-social-auth.readthedocs.io/en/latest/pipeline.html.
Let’s build a function that creates a Profile object in the database whenever a new user is created. We will then add this function to the social authentication pipeline.
Edit the account/authentication.py file and add the following code to it:
from account.models import Profile
def create_profile(backend, user, *args, **kwargs):
    """
    Create user profile for social authentication
    """
    Profile.objects.get_or_create(user=user)
The create_profile function takes two required arguments:
backend: The social auth backend used for the user authentication. Remember you added the social authentication backends to theAUTHENTICATION_BACKENDSsetting in your project.user: TheUserinstance of the new or existing user authenticated.
You can check the different arguments that are passed to the pipeline functions at https://python-social-auth.readthedocs.io/en/latest/pipeline.html#extending-the-pipeline.
In the create_profile function, we check that a user object is present and we use the get_or_create() method to look up a Profile object for the given user, creating one if necessary.
Now, we need to add the new function to the authentication pipeline. Add the following line highlighted in bold to the SOCIAL_AUTH_PIPELINE setting in your settings.py file:
SOCIAL_AUTH_PIPELINE = [
    'social_core.pipeline.social_auth.social_details',
    'social_core.pipeline.social_auth.social_uid',
    'social_core.pipeline.social_auth.auth_allowed',
    'social_core.pipeline.social_auth.social_user',
    'social_core.pipeline.user.get_username',
    'social_core.pipeline.user.create_user',
    'account.authentication.create_profile',
    'social_core.pipeline.social_auth.associate_user',
    'social_core.pipeline.social_auth.load_extra_data',
    'social_core.pipeline.user.user_details',
]
We have added the create_profile function after social_core.pipeline.create_user. At this point, a User instance is available. The user can be an existing user or a new one created in this step of the pipeline. The create_profile function uses the User instance to look up the related Profile object and create a new one if necessary.
Access the user list in the administration site at https://mysite.com:8000/admin/auth/user/. Remove any users created through social authentication.
Then open https://mysite.com:8000/account/login/ and perform social authentication for the user you deleted. A new user will be created and now a Profile object will be created as well. Access https://mysite.com:8000/admin/account/profile/ to verify that a profile has been created for the new user.
We have successfully added the functionality to create the user profile automatically for social authentication.
Python Social Auth also offers a pipeline mechanism for the disconnection flow. You can find more details at https://python-social-auth.readthedocs.io/en/latest/pipeline.html#disconnection-pipeline.
Additional resources
The following resources provide additional information related to the topics covered in this chapter:
- Source code for this chapter – https://github.com/PacktPublishing/Django-4-by-example/tree/main/Chapter05
- Python Social Auth – https://github.com/python-social-auth
- Python Social Auth’s authentication backends – https://python-social-auth.readthedocs.io/en/latest/backends/index.html#supported-backends
- Django allowed hosts setting – https://docs.djangoproject.com/en/4.1/ref/settings/#allowed-hosts
- Django Extensions documentation – https://django-extensions.readthedocs.io/en/latest/
- Facebook developer portal – https://developers.facebook.com/apps/
- Twitter apps – https://developer.twitter.com/en/apps/create
- Google’s OAuth2 implementation – https://developers.google.com/identity/protocols/OAuth2
- Google APIs credentials – https://console.developers.google.com/apis/credentials
- Python Social Auth pipeline – https://python-social-auth.readthedocs.io/en/latest/pipeline.html
- Extending the Python Social Auth pipeline – https://python-social-auth.readthedocs.io/en/latest/pipeline.html#extending-the-pipeline
- Python Social Auth pipeline for disconnection – https://python-social-auth.readthedocs.io/en/latest/pipeline.html#disconnection-pipeline
Summary
In this chapter, you added social authentication to your site so that users can use their existing Facebook, Twitter, or Google accounts to log in. You used Python Social Auth and implemented social authentication using OAuth 2.0, the industry-standard protocol for authorization. You also learned how to serve your development server through HTTPS using Django Extensions. Finally, you customized the authentication pipeline to create user profiles for new users automatically.
In the next chapter, you will create an image bookmarking system. You will create models with many-to-many relationships and customize the behavior of forms. You will learn how to generate image thumbnails and how to build AJAX functionalities using JavaScript and Django.