
6
Sharing Content on Your Website
In the previous chapter, you used Django Social Auth to add social authentication to your site using Facebook, Google, and Twitter. You learned how to run your development server with HTTPS on your local machine using Django Extensions. You customized the social authentication pipeline to create a user profile for new users automatically.
In this chapter, you will learn how to create a JavaScript bookmarklet to share content from other sites on your website, and you will implement AJAX features in your project using JavaScript and Django.
This chapter will cover the following points:
- Creating many-to-many relationships
- Customizing behavior for forms
- Using JavaScript with Django
- Building a JavaScript bookmarklet
- Generating image thumbnails using
easy-thumbnails - Implementing asynchronous HTTP requests with JavaScript and Django
- Building infinite scroll pagination
The source code for this chapter can be found at https://github.com/PacktPublishing/Django-4-by-example/tree/main/Chapter06.
All Python packages used in this chapter are included in the requirements.txt file in the source code for the chapter. You can follow the instructions to install each Python package in the following sections, or you can install all requirements at once with the command pip install -r requirements.txt.
Creating an image bookmarking website
We will now learn how to allow users to bookmark images that they find on other websites and share them on our site. To build this functionality, we will need the following elements:
- A data model to store images and related information
- A form and a view to handle image uploads
- JavaScript bookmarklet code that can be executed on any website. This code will find images across the page and allow users to select the image they want to bookmark
First, create a new application inside your bookmarks project directory by running the following command in the shell prompt:
django-admin startapp images
Add the new application to the INSTALLED_APPS setting in the settings.py file of the project, as follows:
INSTALLED_APPS = [
    # ...
    'images.apps.ImagesConfig',
]
We have activated the images application in the project.
Building the image model
Edit the models.py file of the images application and add the following code to it:
from django.db import models
from django.conf import settings
class Image(models.Model):
    user = models.ForeignKey(settings.AUTH_USER_MODEL,
                            related_name='images_created',
                            on_delete=models.CASCADE)
    title = models.CharField(max_length=200)
    slug = models.SlugField(max_length=200,
                            blank=True)
    url = models.URLField(max_length=2000)
    image = models.ImageField(upload_to='images/%Y/%m/%d/')
    description = models.TextField(blank=True)
    created = models.DateField(auto_now_add=True)
    class Meta:
        indexes = [
            models.Index(fields=['-created']),
        ]
        ordering = ['-created']
    def __str__(self):
        return self.title
This is the model that we will use to store images in the platform. Let’s take a look at the fields of this model:
user: This indicates theUserobject that bookmarked this image. This is a foreign key field because it specifies a one-to-many relationship: a user can post multiple images, but each image is posted by a single user. We have usedCASCADEfor theon_deleteparameter so that related images are deleted when a user is deleted.title: A title for the image.slug: A short label that contains only letters, numbers, underscores, or hyphens to be used for building beautiful SEO-friendly URLs.url: The original URL for this image. We usemax_lengthto define a maximum length of2000characters.image: The image file.description: An optional description for the image.created: The date and time that indicate when the object was created in the database. We have addedauto_now_addto automatically set the current datetime when the object is created.
In the Meta class of the model, we have defined a database index in descending order for the created field. We have also added the ordering attribute to tell Django that it should sort results by the created field by default. We indicate descending order by using a hyphen before the field name, such as -created, so that new images will be displayed first.
Database indexes improve query performance. Consider creating indexes for fields that you frequently query using filter(), exclude(), or order_by(). ForeignKey fields or fields with unique=True imply the creation of an index. You can learn more about database indexes at https://docs.djangoproject.com/en/4.1/ref/models/options/#django.db.models.Options.indexes.
We will override the save() method of the Image model to automatically generate the slug field based on the value of the title field. Import the slugify() function and add a save() method to the Image model, as follows. New lines are highlighted in bold:
from django.utils.text import slugify
class Image(models.Model):
    # ...
    def save(self, *args, **kwargs):
        if not self.slug:
            self.slug = slugify(self.title)
        super().save(*args, **kwargs)
When an Image object is saved, if the slug field doesn’t have a value, the slugify() function is used to automatically generate a slug from the title field of the image. The object is then saved. By generating slugs automatically from the title, users won’t have to provide a slug when they share images on our website.
Creating many-to-many relationships
Next, we will add another field to the Image model to store the users who like an image. We will need a many-to-many relationship in this case because a user might like multiple images and each image can be liked by multiple users.
Add the following field to the Image model:
users_like = models.ManyToManyField(settings.AUTH_USER_MODEL,
                       related_name='images_liked',
                       blank=True)
When we define a ManyToManyField field, Django creates an intermediary join table using the primary keys of both models. Figure 6.1 shows the database table that will be created for this relationship:

Figure 6.1: Intermediary database table for the many-to-many relationship
The images_image_users_like table is created by Django as an intermediary table that has references to the images_image table (Image model) and auth_user table (User model). The ManyToManyField field can be defined in either of the two related models.
As with ForeignKey fields, the related_name attribute of ManyToManyField allows you to name the relationship from the related object back to this one. ManyToManyField fields provide a many-to-many manager that allows you to retrieve related objects, such as image.users_like.all(), or get them from a user object, such as user.images_liked.all().
You can learn more about many-to-many relationships at https://docs.djangoproject.com/en/4.1/topics/db/examples/many_to_many/.
Open the shell prompt and run the following command to create an initial migration:
python manage.py makemigrations images
The output should be similar to the following one:
Migrations for 'images':
  images/migrations/0001_initial.py
    - Create model Image
    - Create index images_imag_created_d57897_idx on field(s) -created of model image
Now run the following command to apply your migration:
python manage.py migrate images
You will get an output that includes the following line:
Applying images.0001_initial... OK
The Image model is now synced to the database.
Registering the image model in the administration site
Edit the admin.py file of the images application and register the Image model into the administration site, as follows:
from django.contrib import admin
from .models import Image
@admin.register(Image)
class ImageAdmin(admin.ModelAdmin):
    list_display = ['title', 'slug', 'image', 'created']
    list_filter = ['created']
Start the development server with the following command:
python manage.py runserver_plus --cert-file cert.crt
Open https://127.0.0.1:8000/admin/ in your browser, and you will see the Image model in the administration site, like this:

Figure 6.2: The Images block on the Django administration site index page
You have completed the model to store images. Now you will learn how to implement a form to retrieve images by their URL and store them using the Image model.
Posting content from other websites
We will allow users to bookmark images from external websites and share them on our site. Users will provide the URL of the image, a title, and an optional description. We will create a form and a view to download the image and create a new Image object in the database.
Let’s start by building a form to submit new images.
Create a new forms.py file inside the images application directory and add the following code to it:
from django import forms
from .models import Image
class ImageCreateForm(forms.ModelForm):
    class Meta:
        model = Image
        fields = ['title', 'url', 'description']
        widgets = {
            'url': forms.HiddenInput,
        }
We have defined a ModelForm form from the Image model, including only the title, url, and description fields. Users will not enter the image URL directly in the form. Instead, we will provide them with a JavaScript tool to choose an image from an external site, and the form will receive the image’s URL as a parameter. We have overridden the default widget of the url field to use a HiddenInput widget. This widget is rendered as an HTML input element with a type="hidden" attribute. We use this widget because we don’t want this field to be visible to users.
Cleaning form fields
In order to verify that the provided image URL is valid, we will check that the filename ends with a .jpg, .jpeg, or .png extension to allow sharing JPEG and PNG files only. In the previous chapter, we used the clean_<fieldname>() convention to implement field validation. This method is executed for each field, if present, when we call is_valid() on a form instance. In the clean method, you can alter the field’s value or raise any validation errors for the field.
In the forms.py file of the images application, add the following method to the ImageCreateForm class:
def clean_url(self):
    url = self.cleaned_data['url']
    valid_extensions = ['jpg', 'jpeg', 'png']
    extension = url.rsplit('.', 1)[1].lower()
    if extension not in valid_extensions:
        raise forms.ValidationError('The given URL does not '
                                    'match valid image extensions.')
    return url
In the preceding code, we have defined a clean_url() method to clean the url field. The code works as follows:
- The value of the
urlfield is retrieved by accessing thecleaned_datadictionary of the form instance. - The URL is split to check whether the file has a valid extension. If the extension is invalid, a
ValidationErroris raised, and the form instance is not validated.
In addition to validating the given URL, we also need to download the image file and save it. We could, for example, use the view that handles the form to download the image file. Instead, let’s take a more general approach by overriding the save() method of the model form to perform this task when the form is saved.
Installing the Requests library
When a user bookmarks an image, we will need to download the image file by its URL. We will use the Requests Python library for this purpose. Requests is the most popular HTTP library for Python. It abstracts the complexity of dealing with HTTP requests and provides a very simple interface to consume HTTP services. You can find the documentation for the Requests library at https://requests.readthedocs.io/en/master/.
Open the shell and install the Requests library with the following command:
pip install requests==2.28.1
We will now override the save() method of ImageCreateForm and use the Requests library to retrieve the image by its URL.
Overriding the save() method of a ModelForm
As you know, ModelForm provides a save() method to save the current model instance to the database and return the object. This method receives a Boolean commit parameter, which allows you to specify whether the object has to be persisted to the database. If commit is False, the save() method will return a model instance but will not save it to the database. We will override the form’s save() method in order to retrieve the image file by the given URL and save it to the file system.
Add the following imports at the top of the forms.py file:
from django.core.files.base import ContentFile
from django.utils.text import slugify
import requests
Then, add the following save() method to the ImageCreateForm form:
def save(self, force_insert=False,
               force_update=False,
               commit=True):
    image = super().save(commit=False)
    image_url = self.cleaned_data['url']
    name = slugify(image.title)
    extension = image_url.rsplit('.', 1)[1].lower()
    image_name = f'{name}.{extension}'
    # download image from the given URL
    response = requests.get(image_url)
    image.image.save(image_name,
                     ContentFile(response.content),
                     save=False)
    if commit:
        image.save()
    return image
We have overridden the save() method, keeping the parameters required by ModelForm. The preceding code can be explained as follows:
- A new
imageinstance is created by calling thesave()method of the form withcommit=False. - The URL of the image is retrieved from the
cleaned_datadictionary of the form. - An image name is generated by combining the
imagetitle slug with the original file extension of the image. - The Requests Python library is used to download the image by sending an HTTP
GETrequest using the image URL. The response is stored in theresponseobject. - The
save()method of theimagefield is called, passing it aContentFileobject that is instantiated with the downloaded file content. In this way, the file is saved to the media directory of the project. Thesave=Falseparameter is passed to avoid saving the object to the database yet. - To maintain the same behavior as the original
save()method of the model form, the form is only saved to the database if thecommitparameter isTrue.
We will need a view to create an instance of the form and handle its submission.
Edit the views.py file of the images application and add the following code to it. New code is highlighted in bold:
from django.shortcuts import render, redirect
from django.contrib.auth.decorators import login_required
from django.contrib import messages
from .forms import ImageCreateForm
@login_required
def image_create(request):
    if request.method == 'POST':
        # form is sent
        form = ImageCreateForm(data=request.POST)
        if form.is_valid():
            # form data is valid
            cd = form.cleaned_data
            new_image = form.save(commit=False)
            # assign current user to the item
            new_image.user = request.user
            new_image.save()
            messages.success(request,
                             'Image added successfully')
            # redirect to new created item detail view
            return redirect(new_image.get_absolute_url())
    else:
        # build form with data provided by the bookmarklet via GET
        form = ImageCreateForm(data=request.GET)
    return render(request,
                  'images/image/create.html',
                  {'section': 'images',
                   'form': form})
In the preceding code, we have created a view to store images on the site. We have added the login_required decorator to the image_create view to prevent access to unauthenticated users. This is how this view works:
- Initial data has to be provided through a
GETHTTP request in order to create an instance of the form. This data will consist of theurlandtitleattributes of an image from an external website. Both parameters will be set in theGETrequest by the JavaScript bookmarklet that we will create later. For now, we can assume that this data will be available in the request. - When the form is submitted with a
POSTHTTP request, it is validated withform.is_valid(). If the form data is valid, a newImageinstance is created by saving the form withform.save(commit=False). The new instance is not saved to the database because ofcommit=False. - A relationship to the current user performing the request is added to the new
Imageinstance withnew_image.user = request.user. This is how we will know who uploaded each image. - The
Imageobject is saved to the database. - Finally, a success message is created using the Django messaging framework and the user is redirected to the canonical URL of the new image. We haven’t yet implemented the
get_absolute_url()method of theImagemodel; we will do that later.
Create a new urls.py file inside the images application and add the following code to it:
from django.urls import path
from . import views
app_name = 'images'
urlpatterns = [
    path('create/', views.image_create, name='create'),
]
Edit the main urls.py file of the bookmarks project to include the patterns for the images application, as follows. The new code is highlighted in bold:
urlpatterns = [
    path('admin/', admin.site.urls),
    path('account/', include('account.urls')),
    path('social-auth/',
         include('social_django.urls', namespace='social')),
    path('images/', include('images.urls', namespace='images')),
]
Finally, we need to create a template to render the form. Create the following directory structure inside the images application directory:
templates/
  images/
    image/
      create.html
Edit the new create.html template and add the following code to it:
{% extends "base.html" %}
{% block title %}Bookmark an image{% endblock %}
{% block content %}
  <h1>Bookmark an image</h1>
  <img src="{{ request.GET.url }}" class="image-preview">
  <form method="post">
    {{ form.as_p }}
    {% csrf_token %}
    <input type="submit" value="Bookmark it!">
  </form>
{% endblock %}
Run the development server with the following command in the shell prompt:
python manage.py runserver_plus --cert-file cert.crt
Open https://127.0.0.1:8000/images/create/?title=...&url=... in your browser, including the title and url GET parameters, providing an existing JPEG image URL in the latter. For example, you can use the following URL: https://127.0.0.1:8000/images/create/?title=%20Django%20and%20Duke&url=https://upload.wikimedia.org/wikipedia/commons/8/85/Django_Reinhardt_and_Duke_Ellington_%28Gottlieb%29.jpg.
You will see the form with an image preview, like the following:

Figure 6.3: The create a new image bookmark page
Add a description and click on the BOOKMARK IT! button. A new Image object will be saved in your database. However, you will get an error that indicates that the Image model has no get_absolute_url() method, as follows:

Figure 6.4: An error showing that the Image object has no attribute get_absolute_url
Don’t worry about this error for now; we are going to implement the get_absolute_url method in the Image model later.
Open https://127.0.0.1:8000/admin/images/image/ in your browser and verify that the new image object has been saved, like this:

Figure 6.5: The administration site image list page showing the Image object created
Building a bookmarklet with JavaScript
A bookmarklet is a bookmark stored in a web browser that contains JavaScript code to extend the browser’s functionality. When you click on the bookmark in the bookmarks or favorites bar of your browser, the JavaScript code is executed on the website being displayed in the browser. This is very useful for building tools that interact with other websites.
Some online services, such as Pinterest, implement their own bookmarklet to let users share content from other sites onto their platform. The Pinterest bookmarklet, named browser button, is available at https://about.pinterest.com/en/browser-button. The Pinterest bookmarklet is provided as a Google Chrome extension, a Microsoft Edge add-on, or a plain JavaScript bookmarklet for Safari and other browsers that you can drag and drop to the bookmarks bar of your browser. The bookmarklet allows users to save images or websites to their Pinterest account.

Figure 6.6: The Pin it bookmarklet from Pinterest
Let’s create a bookmarklet in a similar way for your website. For that, we will be using JavaScript.
This is how your users will add the bookmarklet to their browser and use it:
- The user drags a link from your site to their browser’s bookmarks bar. The link contains JavaScript code in its
hrefattribute. This code will be stored in the bookmark. - The user navigates to any website and clicks on the bookmark in the bookmarks or favorites bar. The JavaScript code of the bookmark is executed.
Since the JavaScript code will be stored as a bookmark, we will not be able to update it after the user has added it to their bookmarks bar. This is an important drawback that you can solve by implementing a launcher script. Users will save the launcher script as a bookmark, and the launcher script will load the actual JavaScript bookmarklet from a URL. By doing this, you will be able to update the code of the bookmarklet at any time. This is the approach that we will take to build the bookmarklet. Let’s start!
Create a new template under images/templates/ and name it bookmarklet_launcher.js. This will be the launcher script. Add the following JavaScript code to the new file:
(function(){
  if(!window.bookmarklet) {
    bookmarklet_js = document.body.appendChild(document.createElement('script'));
    bookmarklet_js.src = '//127.0.0.1:8000/static/js/bookmarklet.js?r='+Math.floor(Math.random()*9999999999999999);
    window.bookmarklet = true;
  }
  else {
    bookmarkletLaunch();
  }
})();
The preceding script checks whether the bookmarklet has already been loaded by checking the value of the bookmarklet window variable with if(!window.bookmarklet):
- If
window.bookmarkletis not defined or doesn’t have a truthy value (consideredtruein a Boolean context), a JavaScript file is loaded by appending a<script>element to the body of the HTML document loaded in the browser. Thesrcattribute is used to load the URL of thebookmarklet.jsscript with a random 16-digit integer parameter generated withMath.random()*9999999999999999. Using a random number, we prevent the browser from loading the file from the browser’s cache. If the bookmarklet JavaScript has been previously loaded, the different parameter value will force the browser to load the script from the source URL again. This way, we make sure the bookmarklet always runs the most up-to-date JavaScript code. - If
window.bookmarkletis defined and has a truthy value, the functionbookmarkletLaunch()is executed. We will definebookmarkletLaunch()as a global function in thebookmarklet.jsscript.
By checking the bookmarklet window variable, we prevent the bookmarklet JavaScript code from being loaded more than once if users click on the bookmarklet repeatedly.
You created the bookmarklet launcher code. The actual bookmarklet code will reside in the bookmarklet.js static file. Using launcher code allows you to update the bookmarklet code at any time without requiring users to change the bookmark they previously added to their browser.
Let’s add the bookmarklet launcher to the dashboard pages so that users can add it to the bookmarks bar of their browser.
Edit the account/dashboard.html template of the account application and make it look like the following. New lines are highlighted in bold:
{% extends "base.html" %}
{% block title %}Dashboard{% endblock %}
{% block content %}
  <h1>Dashboard</h1>
  {% with total_images_created=request.user.images_created.count %}
    <p>Welcome to your dashboard. You have bookmarked {{ total_images_created }} image{{ total_images_created|pluralize }}.</p>
  {% endwith %}
  <p>Drag the following button to your bookmarks toolbar to bookmark images from other websites → <a href="javascript:{% include "bookmarklet_launcher.js" %}" class="button">Bookmark it</a></p>
  <p>You can also <a href="{% url "edit" %}">edit your profile</a> or <a href="{% url "password_change" %}">change your password</a>.</p>
{% endblock %}
Make sure that no template tag is split into multiple lines; Django doesn’t support multiple-line tags.
The dashboard now displays the total number of images bookmarked by the user. We have added a {% with %} template tag to create a variable with the total number of images bookmarked by the current user. We have included a link with an href attribute that contains the bookmarklet launcher script. This JavaScript code is loaded from the bookmarklet_launcher.js template.
Open https://127.0.0.1:8000/account/ in your browser. You should see the following page:
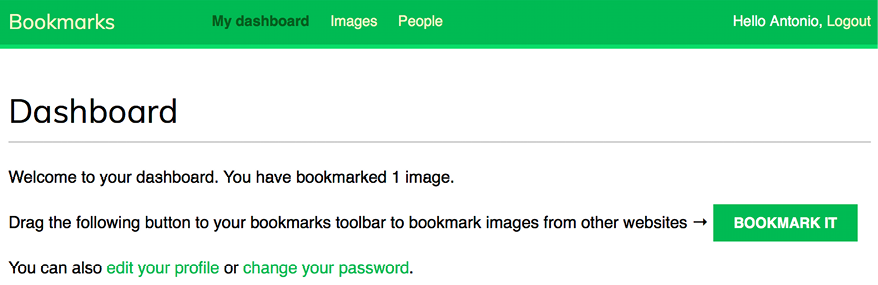
Figure 6.7: The dashboard page, including the total images bookmarked and the button for the bookmarklet
Now create the following directories and files inside the images application directory:
static/
  js/
    bookmarklet.js
You will find a static/css/ directory under the images application directory in the code that comes along with this chapter. Copy the css/ directory into the static/ directory of your code. You can find the contents of the directory at https://github.com/PacktPublishing/Django-4-by-Example/tree/main/Chapter06/bookmarks/images/static.
The css/bookmarklet.css file provides the styles for the JavaScript bookmarklet. The static/ directory should contain the following file structure now:
  css/
    bookmarklet.css
  js/
    bookmarklet.js
Edit the bookmarklet.js static file and add the following JavaScript code to it:
const siteUrl = '//127.0.0.1:8000/';
const styleUrl = siteUrl + 'static/css/bookmarklet.css';
const minWidth = 250;
const minHeight = 250;
You have declared four different constants that will be used by the bookmarklet. These constants are:
siteUrlandstaticUrl: The base URL for the website and the base URL for static files.minWidthandminHeight: The minimum width and height in pixels for the images that the bookmarklet will collect from the site. The bookmarklet will identify images that have at least250pxwidth and250pxheight.
Edit the bookmarklet.js static file and add the following code highlighted in bold:
const siteUrl = '//127.0.0.1:8000/';
const styleUrl = siteUrl + 'static/css/bookmarklet.css';
const minWidth = 250;
const minHeight = 250;
// load CSS
var head = document.getElementsByTagName('head')[0];
var link = document.createElement('link');
link.rel = 'stylesheet';
link.type = 'text/css';
link.href = styleUrl + '?r=' + Math.floor(Math.random()*9999999999999999);
head.appendChild(link);
This section loads the CSS stylesheet for the bookmarklet. We use JavaScript to manipulate the Document Object Model (DOM). The DOM represents an HTML document in memory and it is created by the browser when a web page is loaded. The DOM is constructed as a tree of objects that comprise the structure and content of the HTML document.
The previous code generates an object equivalent to the following JavaScript code and appends it to the <head> element of the HTML page:
<link rel="stylesheet" type="text/css" href= "//127.0.0.1:8000/static/css/bookmarklet.css?r=1234567890123456">
Let’s review how this is done:
- The
<head>element of the site is retrieved withdocument.getElementsByTagName(). This function retrieves all HTML elements of the page with the given tag. By using[0]we access the first instance found. We access the first element because all HTML documents should have a single<head>element. - A
<link>element is created withdocument.createElement('link'). - The
relandtypeattributes of the<link>element are set. This is equivalent to the HTML<link rel="stylesheet" type="text/css">. - The
hrefattribute of the<link>element is set with the URL of thebookmarklet.cssstylesheet. A 16-digit random number is used as a URL parameter to prevent the browser from loading the file from the cache. - The new
<link>element is added to the<head>element of the HTML page usinghead.appendChild(link).
Now we will create the HTML element to display a container on the website where the bookmarklet is executed. The HTML container will be used to display all images found on the site and let users choose the image they want to share. It will use the CSS styles defined in the bookmarklet.css stylesheet.
Edit the bookmarklet.js static file and add the following code highlighted in bold:
const siteUrl = '//127.0.0.1:8000/';
const styleUrl = siteUrl + 'static/css/bookmarklet.css';
const minWidth = 250;
const minHeight = 250;
// load CSS
var head = document.getElementsByTagName('head')[0];
var link = document.createElement('link');
link.rel = 'stylesheet';
link.type = 'text/css';
link.href = styleUrl + '?r=' + Math.floor(Math.random()*9999999999999999);
head.appendChild(link);
// load HTML
var body = document.getElementsByTagName('body')[0];
boxHtml = '
<div id="bookmarklet">
<a href="#" id="close">×</a>
<h1>Select an image to bookmark:</h1>
<div class="images"></div>
</div>';
body.innerHTML += boxHtml;
With this code the <body> element of the DOM is retrieved and new HTML is added to it by modifying its property innerHTML. A new <div> element is added to the body of the page. The <div> container consists of the following elements:
- A link to close the container defined with
<a href="#" id="close">×</a>. - A title defined with
<h1>Select an image to bookmark:</h1>. - An
<div>element to list the images found on the site defined with<div class="images"></div>. This container is initially empty and will be filled with the images found on the site.
The HTML container, including the previously loaded CSS styles, will look like Figure 6.8:

Figure 6.8: The image selection container
Now let’s implement a function to launch the bookmarklet. Edit the bookmarklet.js static file and add the following code at the bottom:
function bookmarkletLaunch() {
  bookmarklet = document.getElementById('bookmarklet');
  var imagesFound = bookmarklet.querySelector('.images');
  // clear images found
  imagesFound.innerHTML = '';
  // display bookmarklet
  bookmarklet.style.display = 'block';
  // close event
  bookmarklet.querySelector('#close')
             .addEventListener('click', function(){
               bookmarklet.style.display = 'none'
             });
}
// launch the bookmkarklet
bookmarkletLaunch();
This is the bookmarkletLaunch() function. Before the definition of this function, the CSS for the bookmarklet is loaded and the HTML container is added to the DOM of the page. The bookmarkletLaunch() function works as follows:
- The bookmarklet main container is retrieved by getting the DOM element with the ID
bookmarkletwithdocument.getElementById(). - The
bookmarkletelement is used to retrieve the child element with the classimages. ThequerySelector()method allows you to retrieve DOM elements using CSS selectors. Selectors allow you to find DOM elements to which a set of CSS rules applies. You can find a list of CSS selectors at https://developer.mozilla.org/en-US/docs/Web/CSS/CSS_Selectors and you can read more information about how to locate DOM elements using selectors at https://developer.mozilla.org/en-US/docs/Web/API/Document_object_model/Locating_DOM_elements_using_selectors. - The
imagescontainer is cleared by setting itsinnerHTMLattribute to an empty string and the bookmarklet is displayed by setting thedisplayCSS property toblock. - The
#closeselector is used to find the DOM element with the IDclose. Aclickevent is attached to the element with theaddEventListener()method. When users click the element, the bookmarklet main container is hidden by setting itsdisplayproperty tonone.
The bookmarkletLaunch() function is executed after its definition.
After loading the CSS styles and the HTML container of the bookmarklet, you have to find image elements in the DOM of the current website. Images that have the minimum required dimension have to be added to the HTML container of the bookmarklet. Edit the bookmarklet.js static file and add the following code highlighted in bold to the bottom of the bookmarklet() function:
function bookmarkletLaunch() {
  bookmarklet = document.getElementById('bookmarklet');
  var imagesFound = bookmarklet.querySelector('.images');
  // clear images found
  imagesFound.innerHTML = '';
  // display bookmarklet
  bookmarklet.style.display = 'block';
  // close event
  bookmarklet.querySelector('#close')
             .addEventListener('click', function(){
               bookmarklet.style.display = 'none'
             });
  // find images in the DOM with the minimum dimensions
  images = document.querySelectorAll('img[src$=".jpg"], img[src$=".jpeg"], img[src$=".png"]');
  images.forEach(image => {
    if(image.naturalWidth >= minWidth
       && image.naturalHeight >= minHeight)
    {
      var imageFound = document.createElement('img');
      imageFound.src = image.src;
      imagesFound.append(imageFound);
    }
  })
}
// launch the bookmkarklet
bookmarkletLaunch();
The preceding code uses the img[src$=".jpg"], img[src$=".jpeg"], and img[src$=".png"] selectors to find all <img> DOM elements whose src attribute finishes with .jpg, .jpeg, or, .png respectively. Using these selectors with document.querySelectorAll() allows you to find all images with the JPEG and PNG format displayed on the website. Iteration over the results is performed with the forEach() method. Small images are filtered out because we don’t consider them to be relevant. Only images with a size larger than the one specified with the minWidth and minHeight variables are used for the results. A new <img> element is created for each image found, where the src source URL attribute is copied from the original image and added to the imagesFound container.
For security reasons, your browser will prevent you from running the bookmarklet over HTTP on a site served through HTTPS. That’s the reason we keep using RunServerPlus to run the development server using an auto-generated TLS/SSL certificate. Remember that you learned how to run the development server through HTTPS in Chapter 5, Implementing Social Authentication.
In a production environment, a valid TLS/SSL certificate will be required. When you own a domain name, you can apply for a trusted Certification Authority (CA) to issue a TLS/SSL certificate for it, so that browsers can verify its identity. If you want to obtain a trusted certificate for a real domain, you can use the Let’s Encrypt service. Let’s Encrypt is a nonprofit CA that simplifies obtaining and renewing trusted TLS/SSL certificates for free. You can find more information at https://letsencrypt.org.
Run the development server with the following command from the shell prompt:
python manage.py runserver_plus --cert-file cert.crt
Open https://127.0.0.1:8000/account/ in your browser. Log in with an existing user, then click and drag the BOOKMARK IT button to the bookmarks bar of your browser, as follows:

Figure 6.9: Adding the BOOKMARK IT button to the bookmarks bar
Open a website of your own choice in your browser and click on the Bookmark it bookmarklet in the bookmarks bar. You will see that a new white overlay appears on the website, displaying all JPEG and PNG images found with dimensions higher than 250×250 pixels. Figure 6.10 shows the bookmarklet running on https://amazon.com/:

Figure 6.10: The bookmarklet loaded on amazon.com
If the HTML container doesn’t appear, check the RunServer shell console log. If you see a MIME type error, it is most likely that your MIME map files are incorrect or need to be updated. You can apply the correct mapping for JavaScript and CSS files by adding the following lines to the settings.py file:
if DEBUG:
    import mimetypes
    mimetypes.add_type('application/javascript', '.js', True)
    mimetypes.add_type('text/css', '.css', True)
The HTML container includes the images that can be bookmarked. We will now implement the functionality for users to click on the desired image to bookmark it.
Edit the js/bookmarklet.js static file and add the following code at the bottom of the bookmarklet() function:
function bookmarkletLaunch() {
  bookmarklet = document.getElementById('bookmarklet');
  var imagesFound = bookmarklet.querySelector('.images');
  // clear images found
  imagesFound.innerHTML = '';
  // display bookmarklet
  bookmarklet.style.display = 'block';
  // close event
  bookmarklet.querySelector('#close')
             .addEventListener('click', function(){
               bookmarklet.style.display = 'none'
             });
  // find images in the DOM with the minimum dimensions
  images = document.querySelectorAll('img[src$=".jpg"], img[src$=".jpeg"], img[src$=".png"]');
  images.forEach(image => {
    if(image.naturalWidth >= minWidth
       && image.naturalHeight >= minHeight)
    {
      var imageFound = document.createElement('img');
      imageFound.src = image.src;
      imagesFound.append(imageFound);
    }
  })
  // select image event
  imagesFound.querySelectorAll('img').forEach(image => {
    image.addEventListener('click', function(event){
      imageSelected = event.target;
      bookmarklet.style.display = 'none';
      window.open(siteUrl + 'images/create/?url='
                  + encodeURIComponent(imageSelected.src)
                  + '&title='
                  + encodeURIComponent(document.title),
                  '_blank');
    })
  })
}
// launch the bookmkarklet
bookmarkletLaunch();
The preceding code works as follows:
- A
click()event is attached to each image element within theimagesFoundcontainer. - When the user clicks on any of the images, the image element clicked is stored in the variable
imageSelected. - The bookmarklet is then hidden by setting its
displayproperty tonone. - A new browser window is opened with the URL to bookmark a new image on the site. The content of the
<title>element of the website is passed to the URL in thetitleGETparameter and the selected image URL is passed in theurlparameter.
Open a new URL with your browser, for example, https://commons.wikimedia.org/, as follows:

Figure 6.11: The Wikimedia Commons website
Figures 6.11 to 6.14 image: A flock of cranes (Grus grus) in Hula Valley, Northern Israel by Tomere (Licence: Creative Commons Attribution-Share Alike 4.0 International: https://creativecommons.org/licenses/by-sa/4.0/deed.en)
Click on the Bookmark it bookmarklet to display the image selection overlay. You will see the image selection overlay like this:

Figure 6.12: The bookmarklet loaded on an external website
If you click on an image, you will be redirected to the image creation page, passing the title of the website and the URL of the selected image as GET parameters. The page will look as follows:

Figure 6.13: The form to bookmark an image
Congratulations! This is your first JavaScript bookmarklet, and it is fully integrated into your Django project. Next, we will create the detail view for images and implement the canonical URL for images.
Creating a detail view for images
Let’s now create a simple detail view to display images that have been bookmarked on the site. Open the views.py file of the images application and add the following code to it:
from django.shortcuts import get_object_or_404
from .models import Image
def image_detail(request, id, slug):
    image = get_object_or_404(Image, id=id, slug=slug)
    return render(request,
                  'images/image/detail.html',
                  {'section': 'images',
                   'image': image})
This is a simple view to display an image. Edit the urls.py file of the images application and add the following URL pattern highlighted in bold:
urlpatterns = [
    path('create/', views.image_create, name='create'),
    path('detail/<int:id>/<slug:slug>/',
         views.image_detail, name='detail'),
]
Edit the models.py file of the images application and add the get_absolute_url() method to the Image model, as follows:
from django.urls import reverse
class Image(models.Model):
    # ...
    def get_absolute_url(self):
        return reverse('images:detail', args=[self.id,
                                              self.slug])
Remember that the common pattern for providing canonical URLs for objects is to define a get_absolute_url() method in the model.
Finally, create a template inside the /templates/images/image/ template directory for the images application and name it detail.html. Add the following code to it:
{% extends "base.html" %}
{% block title %}{{ image.title }}{% endblock %}
{% block content %}
  <h1>{{ image.title }}</h1>
  <img src="{{ image.image.url }}" class="image-detail">
  {% with total_likes=image.users_like.count %}
    <div class="image-info">
      <div>
        <span class="count">
          {{ total_likes }} like{{ total_likes|pluralize }}
        </span>
      </div>
      {{ image.description|linebreaks }}
    </div>
    <div class="image-likes">
      {% for user in image.users_like.all %}
        <div>
          {% if user.profile.photo %}
            <img src="{{ user.profile.photo.url }}">
          {% endif %}
          <p>{{ user.first_name }}</p>
        </div>
      {% empty %}
        Nobody likes this image yet.
      {% endfor %}
    </div>
  {% endwith %}
{% endblock %}
This is the template to display the detail view of a bookmarked image. We have used the {% with %} tag to create the total_likes variable with the result of a QuerySet that counts all user likes. By doing so, we avoid evaluating the same QuerySet twice (first to display the total number of likes, then to use the pluralize template filter). We have also included the image description and we have added a {% for %} loop to iterate over image.users_like.all to display all the users who like this image.
Whenever you need to repeat a query in your template, use the {% with %} template tag to avoid additional database queries.
Now, open an external URL in your browser and use the bookmarklet to bookmark a new image. You will be redirected to the image detail page after you post the image. The page will include a success message, as follows:

Figure 6.14: The image detail page for the image bookmark
Great! You completed the bookmarklet functionality. Next, you will learn how to create thumbnails for images.
Creating image thumbnails using easy-thumbnails
We are displaying the original image on the detail page, but dimensions for different images may vary considerably. The file size for some images may be very large, and loading them might take too long. The best way to display optimized images in a uniform manner is to generate thumbnails. A thumbnail is a small image representation of a larger image. Thumbnails will load faster in the browser and are a great way to homogenize images of very different sizes. We will use a Django application called easy-thumbnails to generate thumbnails for the images bookmarked by users.
Open the terminal and install easy-thumbnails using the following command:
pip install easy-thumbnails==2.8.1
Edit the settings.py file of the bookmarks project and add easy_thumbnails to the INSTALLED_APPS setting, as follows:
INSTALLED_APPS = [
    # ...
    'easy_thumbnails',
]
Then, run the following command to sync the application with your database:
python manage.py migrate
You will see an output that includes the following lines:
Applying easy_thumbnails.0001_initial... OK
Applying easy_thumbnails.0002_thumbnaildimensions... OK
The easy-thumbnails application offers you different ways to define image thumbnails. The application provides a {% thumbnail %} template tag to generate thumbnails in templates and a custom ImageField if you want to define thumbnails in your models. Let’s use the template tag approach.
Edit the images/image/detail.html template and consider the following line:
<img src="{{ image.image.url }}" class="image-detail">
The following lines should replace the preceding one:
{% load thumbnail %}
<a href="{{ image.image.url }}">
  <img src="{% thumbnail image.image 300x0 %}" class="image-detail">
</a>
We have defined a thumbnail with a fixed width of 300 pixels and a flexible height to maintain the aspect ratio by using the value 0. The first time a user loads this page, a thumbnail image will be created. The thumbnail is stored in the same directory as the original file. The location is defined by the MEDIA_ROOT setting and the upload_to attribute of the image field of the Image model. The generated thumbnail will then be served in the following requests.
Run the development server with the following command from the shell prompt:
python manage.py runserver_plus --cert-file cert.crt
Access the image detail page for an existing image. The thumbnail will be generated and displayed on the site. Right-click on the image and open it in a new browser tab as follows:

Figure 6.15: Open the image in a new browser tab
Check the URL of the generated image in your browser. It should look as follows:

Figure 6.16: The URL of the generated image
The original filename is followed by additional details of the settings used to create the thumbnail. For a JPEG image, you will see a filename like filename.jpg.300x0_q85.jpg, where 300x0 are the size parameters used to generate the thumbnail, and 85 is the value for the default JPEG quality used by the library to generate the thumbnail.
You can use a different quality value using the quality parameter. To set the highest JPEG quality, you can use the value 100, like this: {% thumbnail image.image 300x0 quality=100 %}. A higher quality will imply a larger file size.
The easy-thumbnails application offers several options to customize your thumbnails, including cropping algorithms and different effects that can be applied. If you run into any issues generating thumbnails, you can add THUMBNAIL_DEBUG = True to the settings.py file to obtain the debug information. You can read the full documentation of easy-thumbnails at https://easy-thumbnails.readthedocs.io/.
Adding asynchronous actions with JavaScript
We are going to add a like button to the image detail page to let users click on it to like an image. When users click the like button, we will send an HTTP request to the web server using JavaScript. This will perform the like action without reloading the whole page. For this functionality, we will implement a view that allows users to like/unlike images.
The JavaScript Fetch API is the built-in way to make asynchronous HTTP requests to web servers from web browsers. By using the Fetch API, you can send and retrieve data from the web server without the need for a whole page refresh. The Fetch API was launched as a modern successor to the browser built-in XMLHttpRequest (XHR) object, used to make HTTP requests without reloading the page. The set of web development techniques to send and retrieve data from a web server asynchronously without reloading the page is also known as AJAX, which stands for Asynchronous JavaScript and XML. AJAX is a misleading name because AJAX requests can exchange data not only in XML format but also in formats such as JSON, HTML, and plain text. You might find references to the Fetch API and AJAX indistinctively on the Internet.
You can find information about the Fetch API at https://developer.mozilla.org/en-US/docs/Web/API/Fetch_API/Using_Fetch.
We will start by implementing the view to perform the like and unlike actions, and then we will add the JavaScript code to the related template to perform asynchronous HTTP requests.
Edit the views.py file of the images application and add the following code to it:
from django.http import JsonResponse
from django.views.decorators.http import require_POST
@login_required
@require_POST
def image_like(request):
    image_id = request.POST.get('id')
    action = request.POST.get('action')
    if image_id and action:
        try:
            image = Image.objects.get(id=image_id)
            if action == 'like':
                image.users_like.add(request.user)
            else:
                image.users_like.remove(request.user)
            return JsonResponse({'status': 'ok'})
        except Image.DoesNotExist:
            pass
    return JsonResponse({'status': 'error'})
We have used two decorators for the new view. The login_required decorator prevents users who are not logged in from accessing this view. The require_POST decorator returns an HttpResponseNotAllowed object (status code 405) if the HTTP request is not done via POST. This way, you only allow POST requests for this view.
Django also provides a require_GET decorator to only allow GET requests and a require_http_methods decorator to which you can pass a list of allowed methods as an argument.
This view expects the following POST parameters:
image_id: The ID of theimageobject on which the user is performing the actionaction: The action that the user wants to perform, which should be a string with the valuelikeorunlike
We have used the manager provided by Django for the users_like many-to-many field of the Image model in order to add or remove objects from the relationship using the add() or remove() methods. If the add() method is called passing an object that is already present in the related object set, it will not be duplicated. If the remove() method is called with an object that is not in the related object set, nothing will happen. Another useful method of many-to-many managers is clear(), which removes all objects from the related object set.
To generate the view response, we have used the JsonResponse class provided by Django, which returns an HTTP response with an application/json content type, converting the given object into a JSON output.
Edit the urls.py file of the images application and add the following URL pattern highlighted in bold:
urlpatterns = [
    path('create/', views.image_create, name='create'),
    path('detail/<int:id>/<slug:slug>/',
         views.image_detail, name='detail'),
    path('like/', views.image_like, name='like'),
]
Loading JavaScript on the DOM
We need to add JavaScript code to the image detail template. To use JavaScript in our templates, we will add a base wrapper in the base.html template of the project first.
Edit the base.html template of the account application and include the following code highlighted in bold before the closing </body> HTML tag:
<!DOCTYPE html>
<html>
<head>
 ...
</head>
<body>
  ...
  <script>
    document.addEventListener('DOMContentLoaded', (event) => {
      // DOM loaded
      {% block domready %}
      {% endblock %}
    })
  </script>
</body>
</html>
We have added a <script> tag to include JavaScript code. The document.addEventListener() method is used to define a function that will be called when the given event is triggered. We pass the event name DOMContentLoaded, which fires when the initial HTML document has been completely loaded and the Document Object Model (DOM) hierarchy has been fully constructed. By using this event, we make sure the DOM is fully constructed before we interact with any HTML elements and we manipulate the DOM. The code within the function will only be executed once the DOM is ready.
Inside the document-ready handler, we have included a Django template block called domready. Any template that extends the base.html template can use this block to include specific JavaScript code to execute when the DOM is ready.
Don’t get confused by the JavaScript code and Django template tags. The Django template language is rendered on the server side to generate the HTML document, and JavaScript is executed in the browser on the client side. In some cases, it is useful to generate JavaScript code dynamically using Django, to be able to use the results of QuerySets or server-side calculations to define variables in JavaScript.
The examples in this chapter include JavaScript code in Django templates. The preferred method to add JavaScript code to your templates is by loading .js files, which are served as static files, especially if you are using large scripts.
Cross-site request forgery for HTTP requests in JavaScript
You learned about cross-site request forgery (CSRF) in Chapter 2, Enhancing Your Blog with Advanced Features. With CSRF protection active, Django looks for a CSRF token in all POST requests. When you submit forms, you can use the {% csrf_token %} template tag to send the token along with the form. HTTP requests made in JavaScript have to pass the CSRF token as well in every POST request.
Django allows you to set a custom X-CSRFToken header in your HTTP requests with the value of the CSRF token.
To include the token in HTTP requests that originate from JavaScript, we will need to retrieve the CSRF token from the csrftoken cookie, which is set by Django if the CSRF protection is active. To handle cookies, we will use the JavaScript Cookie library. JavaScript Cookie is a lightweight JavaScript API for handling cookies. You can learn more about it at https://github.com/js-cookie/js-cookie.
Edit the base.html template of the account application and add the following code highlighted in bold at the bottom of the <body> element like this:
<!DOCTYPE html>
<html>
<head>
 ...
</head>
<body>
  ...
  <script src="//cdn.jsdelivr.net/npm/[email protected]/dist/js.cookie.min.js"></script>
  <script>
    const csrftoken = Cookies.get('csrftoken');
    document.addEventListener('DOMContentLoaded', (event) => {
      // DOM loaded
      {% block domready %}
      {% endblock %}
    })
  </script>
</body>
</html>
We have implemented the following functionality:
- The JS Cookie plugin is loaded from a public Content Delivery Network (CDN).
- The value of the
csrftokencookie is retrieved withCookies.get()and stored in the JavaScript constantcsrftoken.
We have to include the CSRF token in all JavaScript fetch requests that use unsafe HTTP methods, such as POST or PUT. We will later include the csrftoken constant in a custom HTTP header named X-CSRFToken when sending HTTP POST requests.
You can find more information about Django’s CSRF protection and AJAX at https://docs.djangoproject.com/en/4.1/ref/csrf/#ajax.
Next, we will implement the HTML and JavaScript code for users to like/unlike images.
Performing HTTP requests with JavaScript
Edit the images/image/detail.html template and add the following code highlighted in bold:
{% extends "base.html" %}
{% block title %}{{ image.title }}{% endblock %}
{% block content %}
  <h1>{{ image.title }}</h1>
  {% load thumbnail %}
  <a href="{{ image.image.url }}">
    <img src="{% thumbnail image.image 300x0 %}" class="image-detail">
  </a>
  {% with total_likes=image.users_like.count users_like=image.users_like.all %}
    <div class="image-info">
      <div>
        <span class="count">
        <span class="total">{{ total_likes }}</span>
        like{{ total_likes|pluralize }}
        </span>
        <a href="#" data-id="{{ image.id }}" data-action="{% if request.user in users_like %}un{% endif %}like"
    class="like button">
          {% if request.user not in users_like %}
            Like
          {% else %}
            Unlike
          {% endif %}
        </a>
      </div>
      {{ image.description|linebreaks }}
    </div>
    <div class="image-likes">
      {% for user in users_like %}
        <div>
          {% if user.profile.photo %}
            <img src="{{ user.profile.photo.url }}">
          {% endif %}
          <p>{{ user.first_name }}</p>
        </div>
      {% empty %}
        Nobody likes this image yet.
      {% endfor %}
    </div>
  {% endwith %}
{% endblock %}
In the preceding code, we have added another variable to the {% with %} template tag to store the results of the image.users_like.all query and avoid executing the query against the database multiple times. This variable is used to check if the current user is in this list with {% if request.user in users_like %} and then with {% if request.user not in users_like %}. The same variable is then used to iterate over the users that like this image with {% for user in users_like %}.
We have added to this page the total number of users who like the image and have included a link for the user to like/unlike the image. The related object set, users_like, is used to check whether request.user is contained in the related object set, to display the text Like or Unlike based on the current relationship between the user and this image. We have added the following attributes to the <a> HTML link element:
data-id: The ID of the image displayed.data-action: The action to perform when the user clicks on the link. This can be eitherlikeorunlike.
Any attribute on any HTML element with a name that starts with data- is a data attribute. Data attributes are used to store custom data for your application.
We will send the value of the data-id and data-action attributes in the HTTP request to the image_like view. When a user clicks on the like/unlike link, we will need to perform the following actions in the browser:
- Send an HTTP
POSTrequest to theimage_likeview, passing the imageidand theactionparameters to it. - If the HTTP request is successful, update the
data-actionattribute of the<a>HTML element with the opposite action (like/unlike), and modify its display text accordingly. - Update the total number of
likesdisplayed on the page.
Add the following domready block at the bottom of the images/image/detail.html template:
{% block domready %}
  const url = '{% url "images:like" %}';
  var options = {
    method: 'POST',
    headers: {'X-CSRFToken': csrftoken},
    mode: 'same-origin'
  }
  document.querySelector('a.like')
          .addEventListener('click', function(e){
    e.preventDefault();
    var likeButton = this;
  });
{% endblock %}
The preceding code works as follows:
- The
{% url %}template tag is used to build theimages:likeURL. The generated URL is stored in theurlJavaScript constant. - An
optionsobject is created with the options that will be passed to the HTTP request with the Fetch API. These are:method: The HTTP method to use. In this case, it’sPOST.headers: Additional HTTP headers to include in the request. We include theX-CSRFTokenheader with the value of thecsrftokenconstant that we defined in thebase.htmltemplate.mode: The mode of the HTTP request. We usesame-originto indicate the request is made to the same origin. You can find more information about modes at https://developer.mozilla.org/en-US/docs/Web/API/Request/mode.
- The
a.likeselector is used to find all<a>elements of the HTML document with thelikeclass usingdocument.querySelector(). - An event listener is defined for the
clickevent on the elements targeted with the selector. This function is executed every time the user clicks on thelike/unlikelink. - Inside the handler function,
e.preventDefault()is used to avoid the default behavior of the<a>element. This will prevent the default behavior of the link element, stopping the event propagation, and preventing the link from following the URL. - A variable
likeButtonis used to store the reference tothis, the element on which the event was triggered.
Now we need to send the HTTP request using the Fetch API. Edit the domready block of the images/image/detail.html template and add the following code highlighted in bold:
{% block domready %}
  const url = '{% url "images:like" %}';
  var options = {
    method: 'POST',
    headers: {'X-CSRFToken': csrftoken},
    mode: 'same-origin'
  }
  document.querySelector('a.like')
          .addEventListener('click', function(e){
    e.preventDefault();
    var likeButton = this;
    // add request body
    var formData = new FormData();
    formData.append('id', likeButton.dataset.id);
    formData.append('action', likeButton.dataset.action);
    options['body'] = formData;
    // send HTTP request
    fetch(url, options)
    .then(response => response.json())
    .then(data => {
      if (data['status'] === 'ok')
      {
      }
    })
  });
{% endblock %}
The new code works as follows:
- A
FormDataobject is created to construct a set of key/value pairs representing form fields and their values. The object is stored in theformDatavariable. - The
idandactionparameters expected by theimage_likeDjango view are added to theformDataobject. The values for these parameters are retrieved from thelikeButtonelement clicked. Thedata-idanddata-actionattributes are accessed withdataset.idanddataset.action. - A new
bodykey is added to theoptionsobject that will be used for the HTTP request. The value for this key is theformDataobject. - The Fetch API is used by calling the
fetch()function. Theurlvariable defined previously is passed as the URL for the request, and theoptionsobject is passed as the options for the request. - The
fetch()function returns a promise that resolves with aResponseobject, which is a representation of the HTTP response. The.then()method is used to define a handler for the promise. To extract the JSON body content we useresponse.json(). You can learn more about theResponseobject at https://developer.mozilla.org/en-US/docs/Web/API/Response. - The
.then()method is used again to define a handler for the data extracted to JSON. In this handler, thestatusattribute of the data received is used to check whether its value isok.
You added the functionality to send the HTTP request and handle the response. After a successful request, you need to change the button and its related action to the opposite: from like to unlike, or from unlike to like. By doing so, users are able to undo their action.
Edit the domready block of the images/image/detail.html template and add the following code highlighted in bold:
{% block domready %}
  var url = '{% url "images:like" %}';
  var options = {
    method: 'POST',
    headers: {'X-CSRFToken': csrftoken},
    mode: 'same-origin'
  }
  document.querySelector('a.like')
          .addEventListener('click', function(e){
    e.preventDefault();
    var likeButton = this;
    // add request body
    var formData = new FormData();
    formData.append('id', likeButton.dataset.id);
    formData.append('action', likeButton.dataset.action);
    options['body'] = formData;
    // send HTTP request
    fetch(url, options)
    .then(response => response.json())
    .then(data => {
      if (data['status'] === 'ok')
      {
        var previousAction = likeButton.dataset.action;
        // toggle button text and data-action
        var action = previousAction === 'like' ? 'unlike' : 'like';
        likeButton.dataset.action = action;
        likeButton.innerHTML = action;
        // update like count
        var likeCount = document.querySelector('span.count .total');
        var totalLikes = parseInt(likeCount.innerHTML);
        likeCount.innerHTML = previousAction === 'like' ? totalLikes + 1 : totalLikes - 1;
      }
    })
  });
{% endblock %}
The preceding code works as follows:
- The previous action of the button is retrieved from the
data-actionattribute of the link and it is stored in thepreviousActionvariable. - The
data-actionattribute of the link and the link text are toggled. This allows users to undo their action. - The total like count is retrieved from the DOM by using the selector
span.count.totaland the value is parsed to an integer withparseInt(). The total like count is increased or decreased according to the action performed (like or unlike).
Open the image detail page in your browser for an image that you have uploaded. You should be able to see the following initial likes count and the LIKE button, as follows:

Figure 6.17: The likes count and LIKE button in the image detail template
Click on the LIKE button. You will note that the total likes count increases by one and the button text changes to UNLIKE, as follows:

Figure 6.18: The likes count and button after clicking the LIKE button
If you click on the UNLIKE button, the action is performed, and then the button’s text changes back to LIKE and the total count changes accordingly.
When programming JavaScript, especially when performing AJAX requests, it is recommended to use a tool for debugging JavaScript and HTTP requests. Most modern browsers include developer tools to debug JavaScript. Usually, you can right-click anywhere on the website to open the contextual menu and click on Inspect or Inspect Element to access the web developer tools of your browser.
In the next section, you will learn how to use asynchronous HTTP requests with JavaScript and Django to implement infinite scroll pagination.
Adding infinite scroll pagination to the image list
Next, we need to list all bookmarked images on the website. We will use JavaScript requests to build an infinite scroll functionality. Infinite scroll is achieved by loading the next results automatically when the user scrolls to the bottom of the page.
Let’s implement an image list view that will handle both standard browser requests and requests originating from JavaScript. When the user initially loads the image list page, we will display the first page of images. When they scroll to the bottom of the page, we will retrieve the following page of items with JavaScript and append it to the bottom of the main page.
The same view will handle both standard and AJAX infinite scroll pagination. Edit the views.py file of the images application and add the following code highlighted in bold:
from django.http import HttpResponse
from django.core.paginator import Paginator, EmptyPage,
                                  PageNotAnInteger
# ...
@login_required
def image_list(request):
    images = Image.objects.all()
    paginator = Paginator(images, 8)
    page = request.GET.get('page')
    images_only = request.GET.get('images_only')
    try:
        images = paginator.page(page)
    except PageNotAnInteger:
        # If page is not an integer deliver the first page
        images = paginator.page(1)
    except EmptyPage:
        if images_only:
            # If AJAX request and page out of range
            # return an empty page
            return HttpResponse('')
        # If page out of range return last page of results
        images = paginator.page(paginator.num_pages)
    if images_only:
        return render(request,
                      'images/image/list_images.html',
                      {'section': 'images',
                       'images': images})
    return render(request,
                  'images/image/list.html',
                   {'section': 'images',
                    'images': images})
In this view, a QuerySet is created to retrieve all images from the database. Then, a Paginator object is created to paginate over the results, retrieving eight images per page. The page HTTP GET parameter is retrieved to get the requested page number. The images_only HTTP GET parameter is retrieved to know if the whole page has to be rendered or only the new images. We will render the whole page when it is requested by the browser. However, we will only render the HTML with new images for Fetch API requests, since we will be appending them to the existing HTML page.
An EmptyPage exception will be triggered if the requested page is out of range. If this is the case and only images have to be rendered, an empty HttpResponse will be returned. This will allow you to stop the AJAX pagination on the client side when reaching the last page. The results are rendered using two different templates:
- For JavaScript HTTP requests, that will include the
images_onlyparameter, thelist_images.htmltemplate will be rendered. This template will only contain the images of the requested page. - For browser requests, the
list.htmltemplate will be rendered. This template will extend thebase.htmltemplate to display the whole page and will include thelist_images.htmltemplate to include the list of images.
Edit the urls.py file of the images application and add the following URL pattern highlighted in bold:
urlpatterns = [
    path('create/', views.image_create, name='create'),
    path('detail/<int:id>/<slug:slug>/',
         views.image_detail, name='detail'),
    path('like/', views.image_like, name='like'),
    path('', views.image_list, name='list'),
]
Finally, you need to create the templates mentioned here. Inside the images/image/ template directory, create a new template and name it list_images.html. Add the following code to it:
{% load thumbnail %}
{% for image in images %}
  <div class="image">
    <a href="{{ image.get_absolute_url }}">
      {% thumbnail image.image 300x300 crop="smart" as im %}
      <a href="{{ image.get_absolute_url }}">
        <img src="{{ im.url }}">
      </a>
    </a>
    <div class="info">
      <a href="{{ image.get_absolute_url }}" class="title">
        {{ image.title }}
      </a>
    </div>
  </div>
{% endfor %}
The preceding template displays the list of images. You will use it to return results for AJAX requests. In this code, you iterate over images and generate a square thumbnail for each image. You normalize the size of the thumbnails to 300x300 pixels. You also use the smart cropping option. This option indicates that the image has to be incrementally cropped down to the requested size by removing slices from the edges with the least entropy.
Create another template in the same directory and name it images/image/list.html. Add the following code to it:
{% extends "base.html" %}
{% block title %}Images bookmarked{% endblock %}
{% block content %}
  <h1>Images bookmarked</h1>
  <div id="image-list">
    {% include "images/image/list_images.html" %}
  </div>
{% endblock %}
The list template extends the base.html template. To avoid repeating code, you include the images/image/list_images.html template for displaying images. The images/image/list.html template will hold the JavaScript code for loading additional pages when scrolling to the bottom of the page.
Edit the images/image/list.html template and add the following code highlighted in bold:
{% extends "base.html" %}
{% block title %}Images bookmarked{% endblock %}
{% block content %}
  <h1>Images bookmarked</h1>
  <div id="image-list">
    {% include "images/image/list_images.html" %}
  </div>
{% endblock %}
{% block domready %}
  var page = 1;
  var emptyPage = false;
  var blockRequest = false;
  window.addEventListener('scroll', function(e) {
    var margin = document.body.clientHeight - window.innerHeight - 200;
    if(window.pageYOffset > margin && !emptyPage && !blockRequest) {
      blockRequest = true;
      page += 1;
      fetch('?images_only=1&page=' + page)
      .then(response => response.text())
      .then(html => {
        if (html === '') {
          emptyPage = true;
        }
        else {
          var imageList = document.getElementById('image-list');
          imageList.insertAdjacentHTML('beforeEnd', html);
          blockRequest = false;
        }
      })
    }
  });
  // Launch scroll event
  const scrollEvent = new Event('scroll');
  window.dispatchEvent(scrollEvent);
{% endblock %}
The preceding code provides the infinite scroll functionality. You include the JavaScript code in the domready block that you defined in the base.html template. The code is as follows:
- You define the following variables:
page: Stores the current page number.empty_page: Allows you to know whether the user is on the last page and retrieves an empty page. As soon as you get an empty page, you will stop sending additional HTTP requests because you will assume that there are no more results.block_request: Prevents you from sending additional requests while an HTTP request is in progress.
- You use
window.addEventListener()to capture thescrollevent and to define a handler function for it. - You calculate the
marginvariable to get the difference between the total document height and the window inner height, because that’s the height of the remaining content for the user to scroll. You subtract a value of200from the result so that you load the next page when the user is closer than 200 pixels to the bottom of the page. - Before sending an HTTP request, you check that:
- The offset
window.pageYOffsetis higher than the calculated margin. - The user didn’t get to the last page of results (
emptyPagehas to befalse). - There is no other ongoing HTTP request (
blockRequesthas to befalse).
- The offset
- If the previous conditions are met, you set
blockRequesttotrueto prevent thescrollevent from triggering additional HTTP requests, and you increase thepagecounter by1to retrieve the next page. - You use
fetch()to send an HTTPGETrequest, setting the URL parametersimage_only=1to retrieve only the HTML for images instead of the whole HTML page, andpagefor the requested page number. - The body content is extracted from the HTTP response with
response.text()and the HTML returned is treated accordingly:- If the response has no content: You got to the end of the results, and there are no more pages to load. You set
emptyPagetotrueto prevent additional HTTP requests. - If the response contains data: You append the data to the HTML element with the
image-listID. The page content expands vertically, appending results when the user approaches the bottom of the page. You remove the lock for additional HTTP requests by settingblockRequesttofalse.
- If the response has no content: You got to the end of the results, and there are no more pages to load. You set
- Below the event listener, you simulate an initial
scrollevent when the page is loaded. You create the event by creating a newEventobject, and then you launch it withwindow.dispatchEvent(). By doing this, you ensure that the event is triggered if the initial content fits the window and has no scroll.
Open https://127.0.0.1:8000/images/ in your browser. You will see the list of images that you have bookmarked so far. It should look similar to this:

Figure 6.19: The image list page with infinite scroll pagination
Figure 6.19 image attributions:
- Chick Corea by ataelw (license: Creative Commons Attribution 2.0 Generic: https://creativecommons.org/licenses/by/2.0/)
- Al Jarreau – Düsseldorf 1981 by Eddi Laumanns aka RX-Guru (license: Creative Commons Attribution 3.0 Unported: https://creativecommons.org/licenses/by/3.0/)
- Al Jarreau by Kingkongphoto & www.celebrity-photos.com (license: Creative Commons Attribution-ShareAlike 2.0 Generic: https://creativecommons.org/licenses/by-sa/2.0/)
Scroll to the bottom of the page to load additional pages. Ensure that you have bookmarked more than eight images using the bookmarklet, because that’s the number of images you are displaying per page.
You can use your browser developer tools to track the AJAX requests. Usually, you can right-click anywhere on the website to open the contextual menu and click on Inspect or Inspect Element to access the web developer tools of your browser. Look for the panel for network requests. Reload the page and scroll to the bottom of the page to load new pages. You will see the request for the first page and the AJAX requests for additional pages, like in Figure 6.20:

Figure 6.20: HTTP requests registered in the developer tools of the browser
In the shell where you are running Django, you will see the requests as well like this:
[08/Aug/2022 08:14:20] "GET /images/ HTTP/1.1" 200
[08/Aug/2022 08:14:25] "GET /images/?images_only=1&page=2 HTTP/1.1" 200
[08/Aug/2022 08:14:26] "GET /images/?images_only=1&page=3 HTTP/1.1" 200
[08/Aug/2022 08:14:26] "GET /images/?images_only=1&page=4 HTTP/1.1" 200
Finally, edit the base.html template of the account application and add the URL for the images item highlighted in bold:
<ul class="menu">
  ...
  <li {% if section == "images" %}class="selected"{% endif %}>
    <a href="{% url "images:list" %}">Images</a>
  </li>
  ...
</ul>
Now you can access the image list from the main menu.
Additional resources
The following resources provide additional information related to the topics covered in this chapter:
- Source code for this chapter – https://github.com/PacktPublishing/Django-4-by-example/tree/main/Chapter06
- Database indexes – https://docs.djangoproject.com/en/4.1/ref/models/options/#django.db.models.Options.indexes
- Many-to-many relationships – https://docs.djangoproject.com/en/4.1/topics/db/examples/many_to_many/
- Requests HTTP library for Python – https://docs.djangoproject.com/en/4.1/topics/db/examples/many_to_many/
- Pinterest browser button – https://about.pinterest.com/en/browser-button
- Static content for the account application – https://github.com/PacktPublishing/Django-4-by-Example/tree/main/Chapter06/bookmarks/images/static
- CSS selectors – https://developer.mozilla.org/en-US/docs/Web/CSS/CSS_Selectors
- Locate DOM elements using CSS selectors – https://developer.mozilla.org/en-US/docs/Web/API/Document_object_model/Locating_DOM_elements_using_selectors
- Let’s Encrypt free automated certificate authority – https://letsencrypt.org
- Django
easy-thumbnailsapp – https://easy-thumbnails.readthedocs.io/ - JavaScript Fetch API usage – https://developer.mozilla.org/en-US/docs/Web/API/Fetch_API/Using_Fetch
- JavaScript Cookie library – https://github.com/js-cookie/js-cookie
- Django’s CSRF protection and AJAX – https://docs.djangoproject.com/en/4.1/ref/csrf/#ajax
- JavaScript Fetch API Request mode – https://developer.mozilla.org/en-US/docs/Web/API/Request/mode
- JavaScript Fetch API Response – https://developer.mozilla.org/en-US/docs/Web/API/Response
Summary
In this chapter, you created models with many-to-many relationships and learned how to customize the behavior of forms. You built a JavaScript bookmarklet to share images from other websites on your site. This chapter has also covered the creation of image thumbnails using the easy-thumbnails application. Finally, you implemented AJAX views using the JavaScript Fetch API and added infinite scroll pagination to the image list view.
In the next chapter, you will learn how to build a follow system and an activity stream. You will work with generic relations, signals, and denormalization. You will also learn how to use Redis with Django to count image views and generate an image ranking.