
Lesson A: Cloning, Healing, and Content-Aware Fill
There are many tools for removing blemishes from an image, but three are especially important. We’ll use one image to discuss all three, from the eldest to the newest, and we’ll include some workflow tips to keep in mind when images need adjustment as well as retouching.
- From the “06 Retouching” folder, open the image “A retouching tools.psd.”

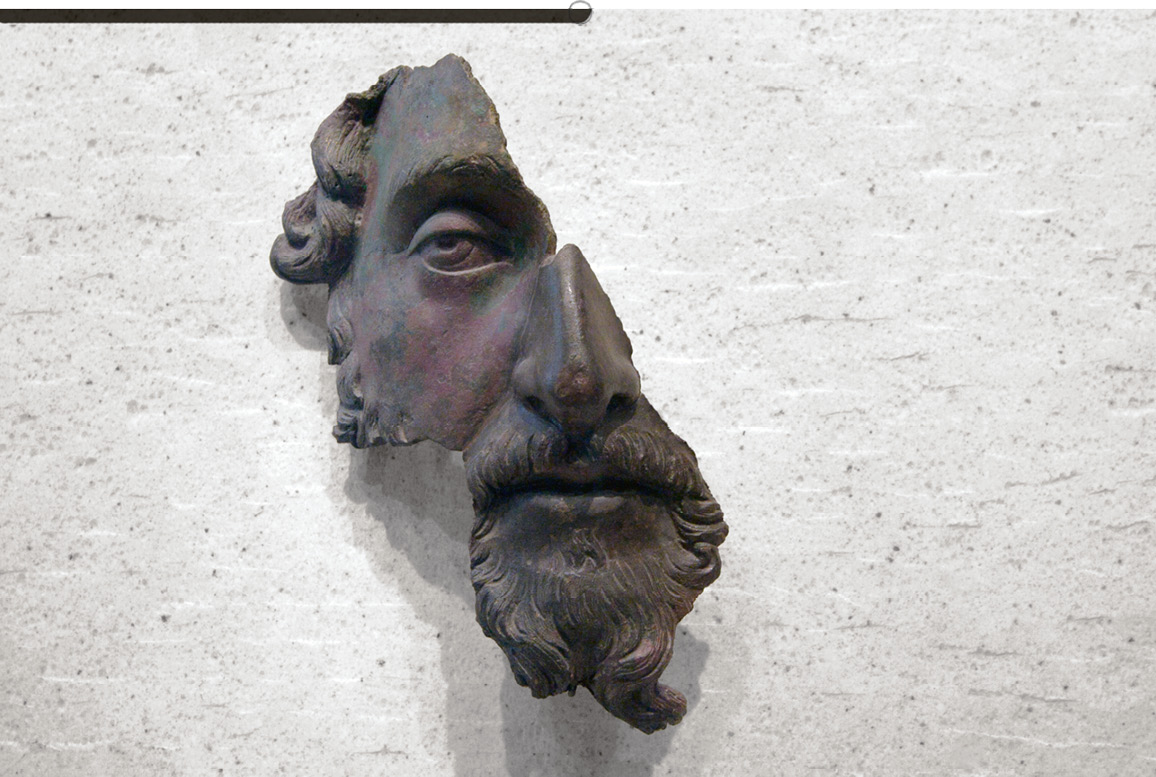
The image features a partial bronze face mounted on a marble surface pocked with distracting holes. If you look carefully, there is also a thin wedge in the upper left that shows the marble’s edge. We’re going to remove those holes and that wedge. Also, you should be aware that the marble is supposed to be white! This image is very badly discolored and dark, so we will have to deal with that too. In fact, let’s do that adjustment so we can see what we’re doing.
- Create a Curves adjustment layer by clicking on the Curves icon in the Adjustments panel. While holding down the option/Alt key, click the Auto button in the Properties panel so you can choose an algorithm and other options.
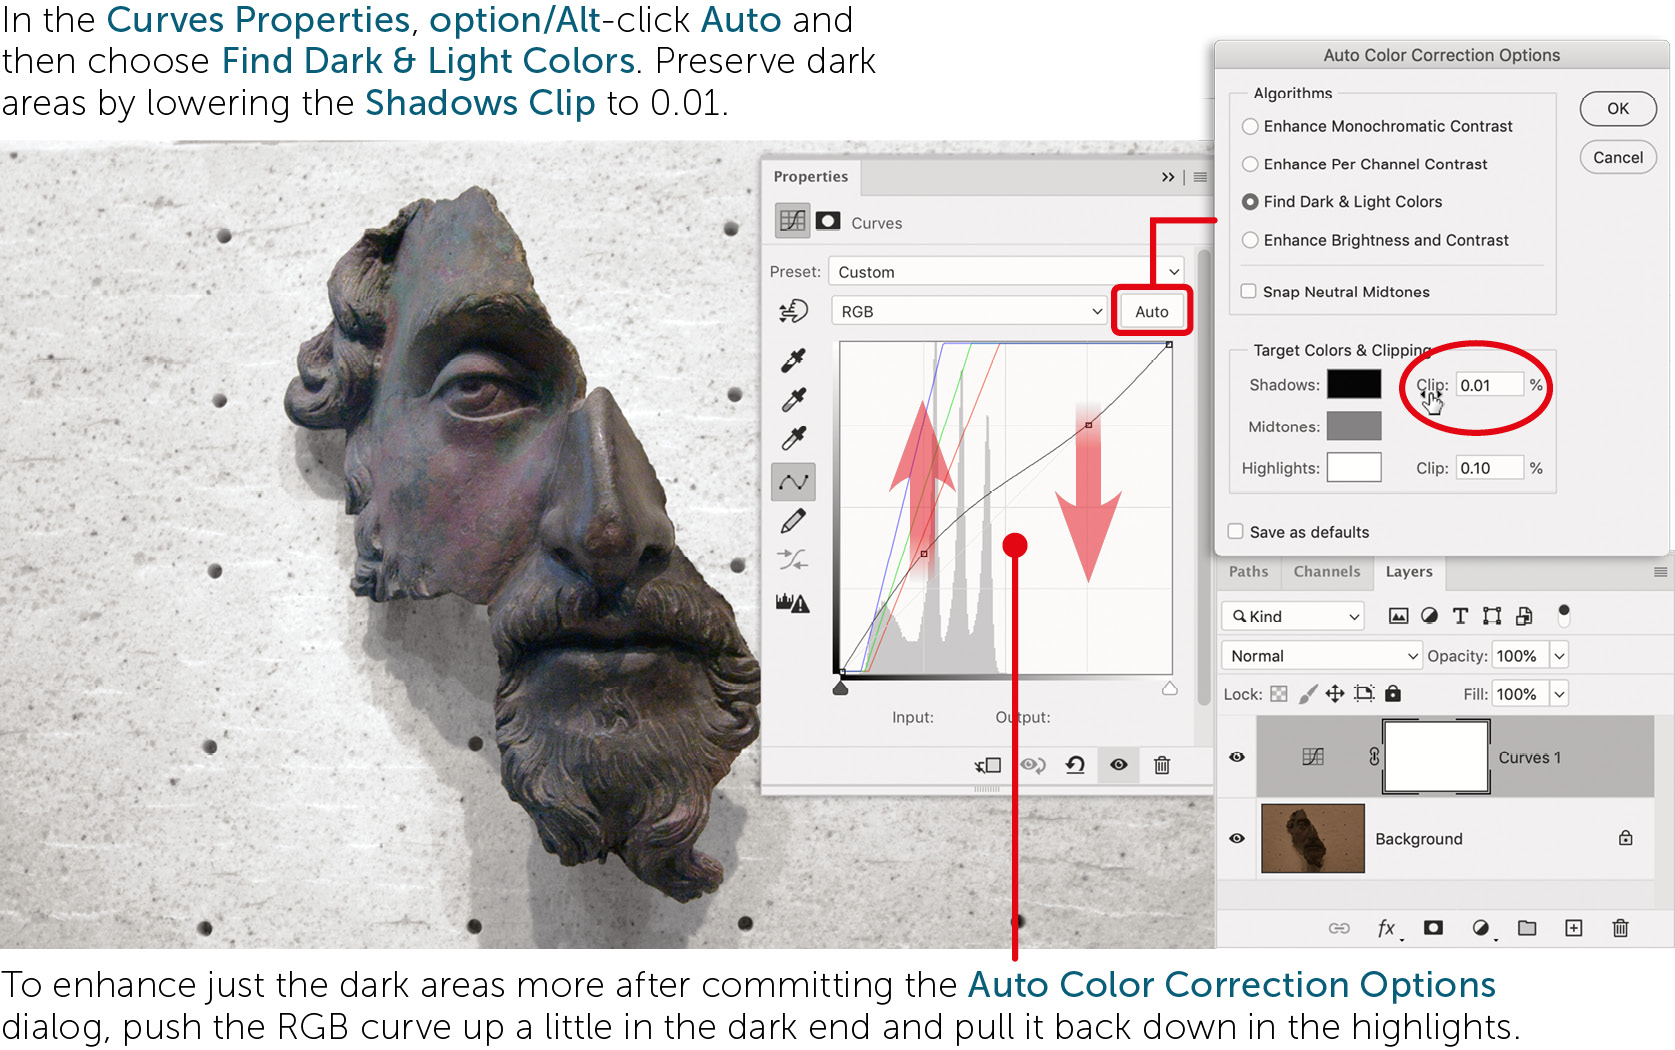
- To restore the light and color to something more accurate, choose Find Dark & Light Colors. The shadow areas will still be quite dark so, while still in that dialog, lower the Shadow Clip to its lowest nonzero value. Click OK.
- In the Properties panel, adjust the RGB curve a little bit. Create points at the quarter and three-quarter tones, pushing up on the one at the three-quarter tones (darker areas) to lighten the shadows a little.
The other point will keep the highlights intact. If you create a three-quarter-tones point and lift it in one go, you can drag the quarter-tones point down to the diagonal line to restore its position. Now we can see what’s going on to do blemish removal.
Create a Retouch Layer
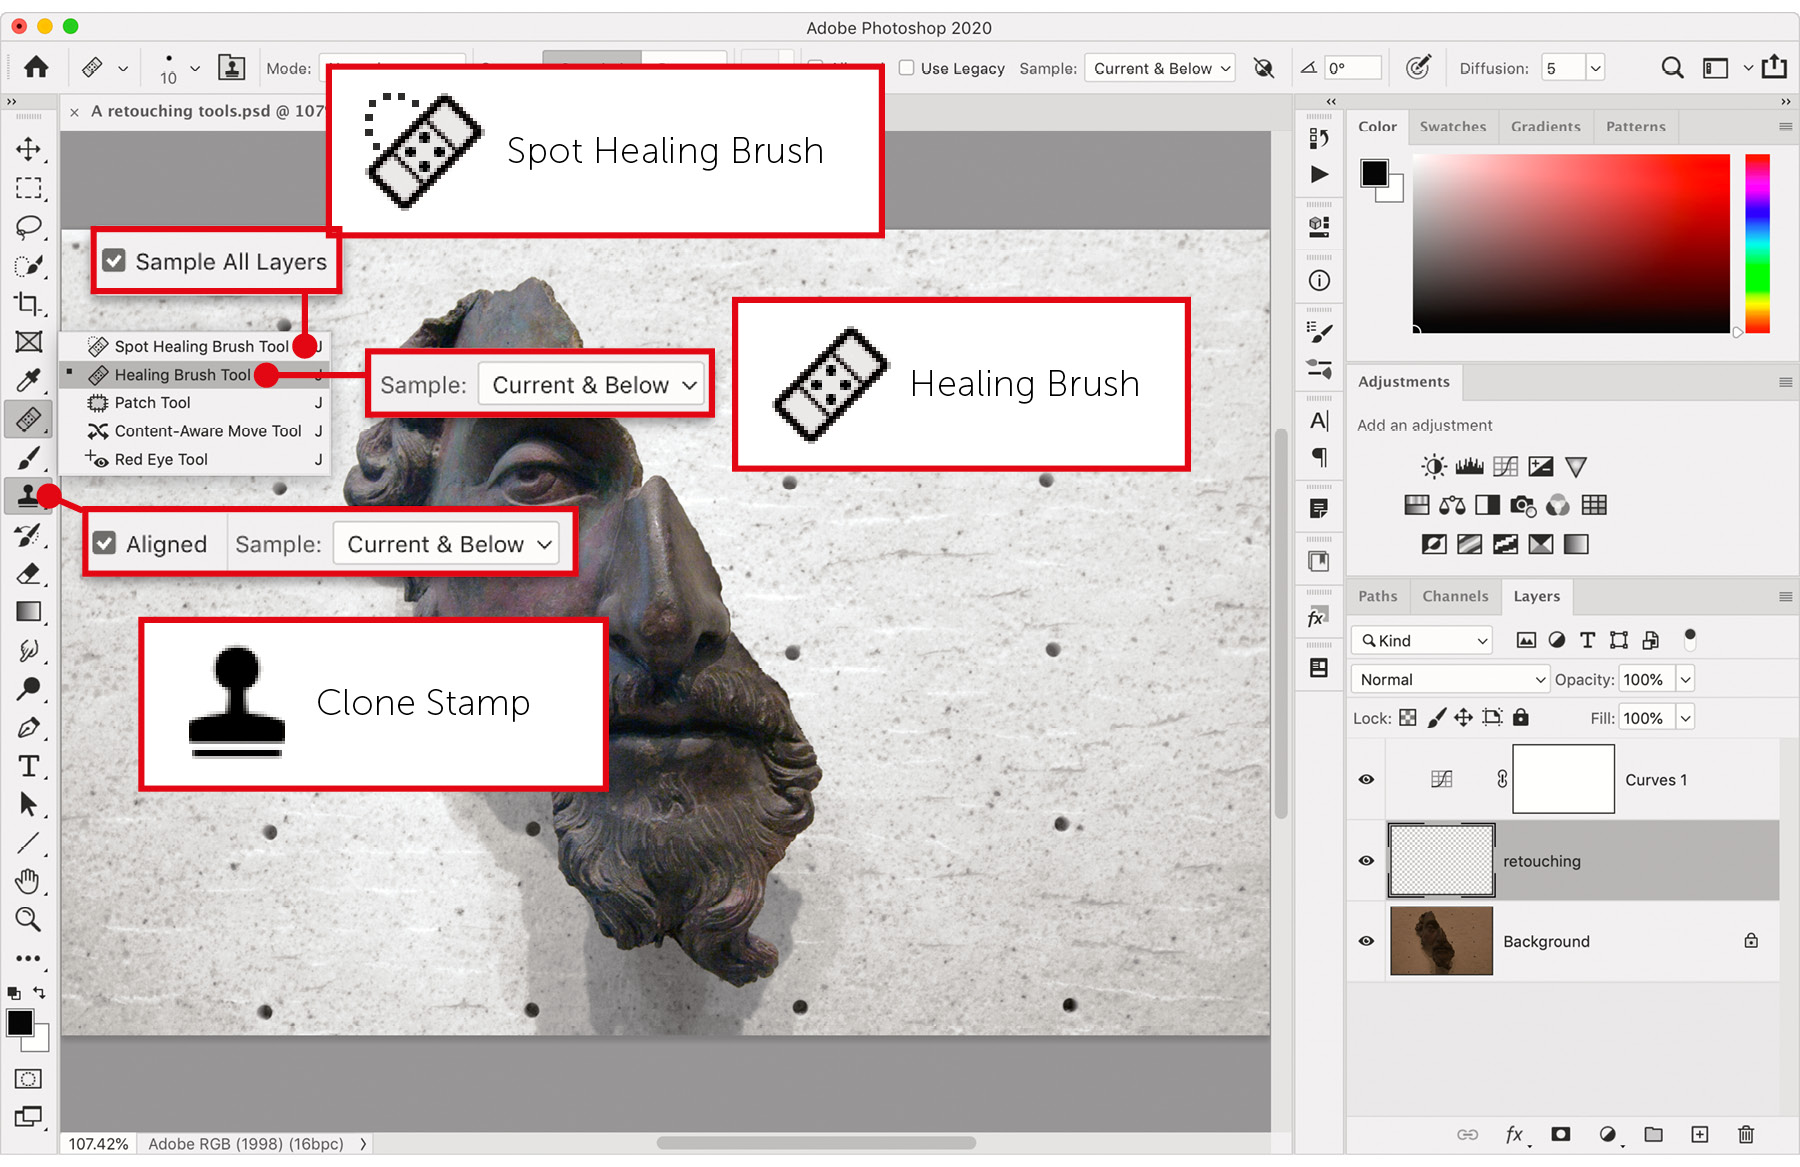
The big three retouching tools can all sample material from layers other than the one on which we use them to obscure flaws. In this case, that means they will pick up unpunctured marble from the Background layer, depositing that nice bit onto a layer above the Background to hide the holes. To do so, however, each tool will need its options set in the Options Bar.
- Highlight the Background layer, then create a new layer by opening the Layers panel menu and choosing New Layer…, or by pressing ⌘-shift-N/Ctrl-Shift-N. Name the new layer “retouching.” This new layer should be between the Background and the adjustment layer!
By putting this retouching layer below the adjustment, it is affected by the adjustment just as the Background is. As long as the new layer’s content has the same dark, dingy look as the Background, the repairs will work perfectly. In other words, if we edit, remove, or replace the adjustment, we won’t have to redo any retouching. For this to work, we will have to choose carefully when we set those options in the Options Bar.
Clone Stamp
We’ll use this tool for the three holes just to the right of the bronze head.
- Choose the Clone Stamp tool. In the Options Bar, set its Sample option to Current & Below so it can sample from anything you see but without being influenced by the adjustment layer above.
- Use the bracket keys ([ for smaller, ] for larger) to set the size of the brush to be a little larger than one of the holes.
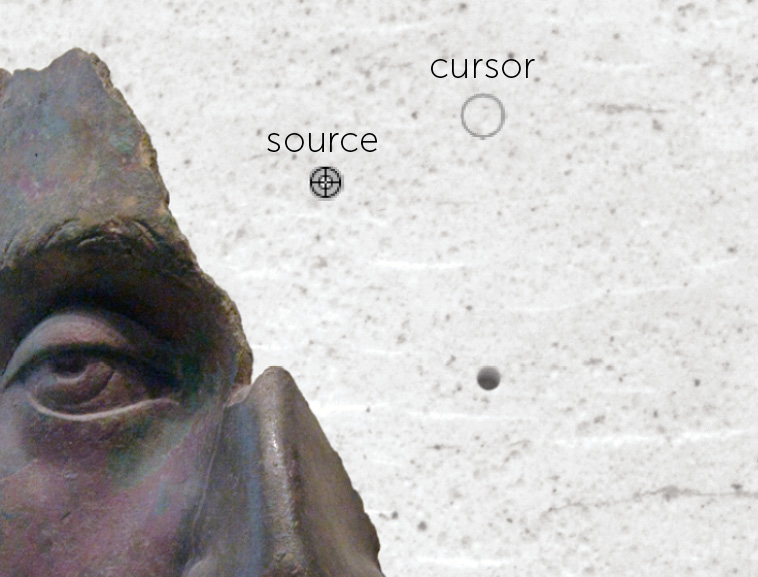
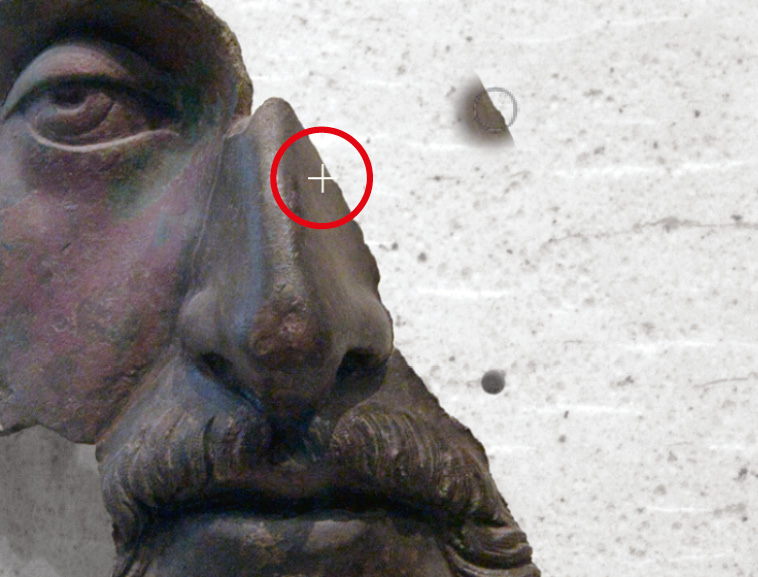
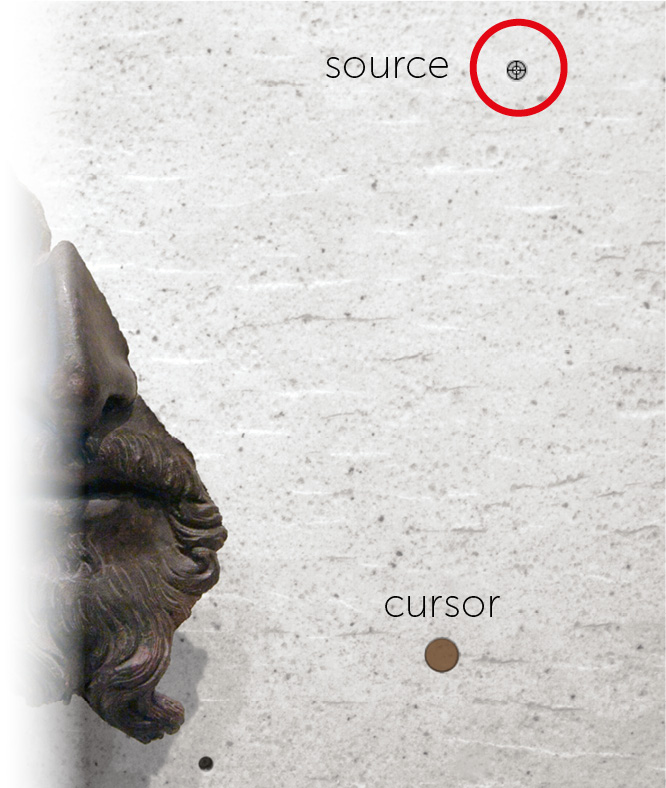
- Hold down option/Alt and click on a patch of intact marble below and to the left of the top centermost hole. You will now see that material in the cursor.
- With no keys held, paint over that hole with the Clone Stamp tool. Cover it over completely. Notice that only while you’re actively painting, a crosshair appears where you option/Alt-clicked. That’s the source point. The source can be in a different open image!
There is now an alignment between source and cursor. Since your first source point was down and to the left of the cursor, it will follow your cursor like a dog on a leash and will be below and to the left of anywhere you paint, until you set a new relationship by sampling a new source and applying it. The assumption is that desirable material will be near any blemish.
Now, I have intentionally sabotaged you for the sake of learning. Since the source is invisibly “aligned” to your cursor, as you attempt to remove the next hole, you’ll see something unfortunate.
- Paint over the hole below the first. As you do, look for the crosshair that indicates the position of the source. You’ll only see it while actively painting with the Clone Stamp tool. It’s likely picking up material from the bronze. It certainly will for the hole below.
- When this occurs, undo (⌘-Z/Ctrl-Z). Then set a new source/cursor relationship by option/Alt-clicking to the right of that second hole and then painting over it. Just paint on the third hole and it should pick up from a source position to the right of it. Success! But prepare for another undo…
- As an experiment (and justification for switching tools shortly), sample (option/Alt-click) an area near the top of the image and attempt to remove a hole near the bottom.
The light patch you see is there because the top of the image is lighter than the bottom, and the Clone Stamp tool makes literal clones or copies of your source. Imagine if you had no adequate source material to choose from.
A very common example is the occurrence of dust on the cheek of a person whose portrait you’re retouching. If you sample from a less well-lit cheek, you’d have a larger blemish on your hands (on their face, actually). We need a tool that contextualizes our source so it blends in to its new surroundings. And we have such a tool.
Healing Brush
- Choose the Healing Brush tool. In the Options Bar, set its Sample option to Current & Below so it can sample without being influenced by the adjustment layer above.
- Use the bracket keys ([ for smaller, ] for larger) to set the size of the brush to be a little larger than one of the holes.
- Hold down option/Alt and click on a patch of intact marble near the top of the image. You will now see that material in the cursor.
- With no keys held down, paint over all the holes on the right side of the image (excluding the one on the edge of the shadow at the bottom). Be sure that you cover one entire hole with each brush stroke.
- To impress yourself, paint on the cheek of the bronze. Now it has marble texture where you painted but retains the color and luminosity of the patina!
The Healing Brush tool applies the texture of the source, rather than a literal “clone,” but not the color or lightness of the source. It gets those elements from around the area where you paint with this tool.
It’s a lovely innovation. Still, you need to specify a source. If only there were a way for Photoshop to do that on its own. (We call that a segue in the teaching biz.)
Spot Healing Brush
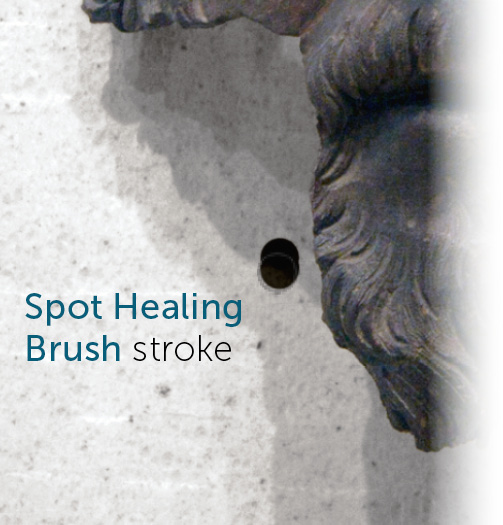
- Choose the Spot Healing Brush tool. In the Options Bar, check Sample All Layers. This tool is so smart, it knows how to deal with adjustments and much else.
- Use the bracket keys ([ for smaller, ] for larger) to set the size of the brush to be a little larger than one of the holes.
- There is no need to choose a source. Just paint over an entire hole in one stroke so Photoshop knows its extent. You’ll see translucent black while you paint. When you release the mouse, material compatible with that area is found and applied.
Any brush-using tool can make a straight line in any direction with just two clicks:
- For the little wedge in the image’s upper-left corner, click at one end of it, then shift-click at the other. Photoshop will paint a full stroke from one end to the other.
You can imagine how helpful this will be for unsightly stray hairs or power lines (if they’re reasonably straight).
- Save this image, but don’t close it just yet.
Content-Aware Fill
The technology that the Spot Healing Brush tool uses by default is called Content-Aware Fill. This is also a stand-alone function that enjoys many options that let you refine its result. When blemishes are larger, this command is more useful than the Spot Healing Brush tool.
The result of this function can be output to a new layer, but it has to be the one to create it. You must supply a single layer that holds the flaw for it to work.
For this exercise, we’ll choose the bronze head itself as the “flaw” that needs to be removed. In the end, we will have a photo of marble and nothing else.
- Highlight the top layer in the Layers panel (the adjustment layer).
- It’s time to learn a new shortcut (actually, a few). Use this one: ⌘-option-shift-E/Ctrl-Alt-Shift-E. This creates a new layer that is a merged copy of all the visible layers.
Note: ⌘-E/Ctrl-E merges a highlighted layer into the one below it. ⌘-option-E/Ctrl-Alt-E merges a copy of the highlighted layer into the one below. (Recall that option/Alt-moving something makes a copy.) ⌘-shift-E/Ctrl-Shift-E merges all visible layers. Every combination involving the letter “E” does some kind of merging, and if option/Alt is involved, a copy is made.
Now we have a layer that Content-Aware Fill (CAF) can use as source material. We’ll be able to delete it later after CAF creates yet another layer for the “repair.”
- Use the Quick Selection tool to make a selection of the bronze and its shadow but no more than that. If it’s a touch tight, we’ll be able to fix it shortly.
- Choose Edit > Content-Aware Fill….
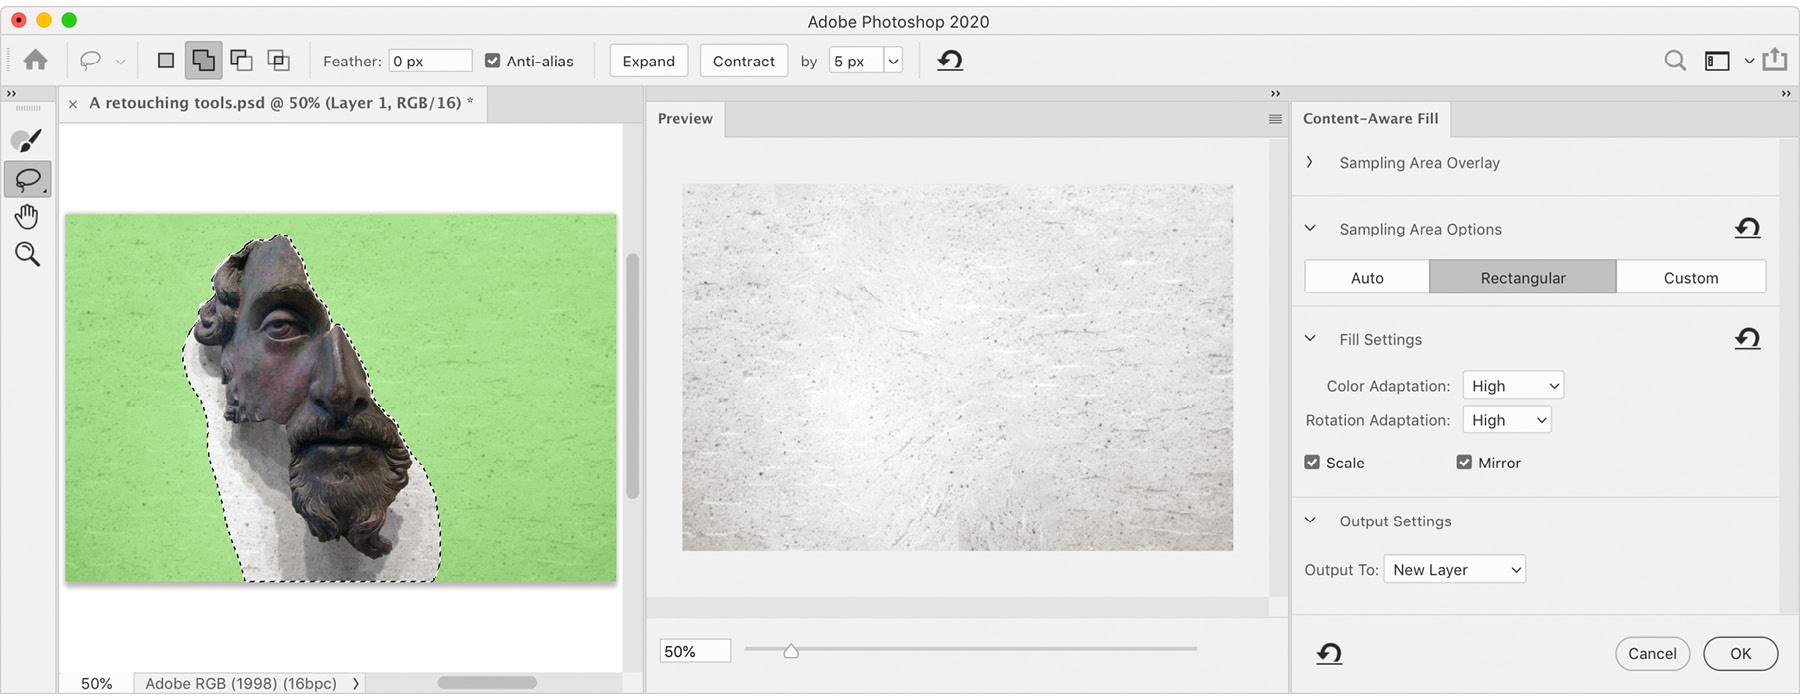
You’ll see a three-panel workspace. On the left is the image with its selection and an area in green around it. The Preview panel shows, after a delay, a first attempt at filling in the selected area. It has a zoom slider along its bottom. The third panel is the Content-Aware Fill panel. It has the controls needed to improve what we see in the preview.
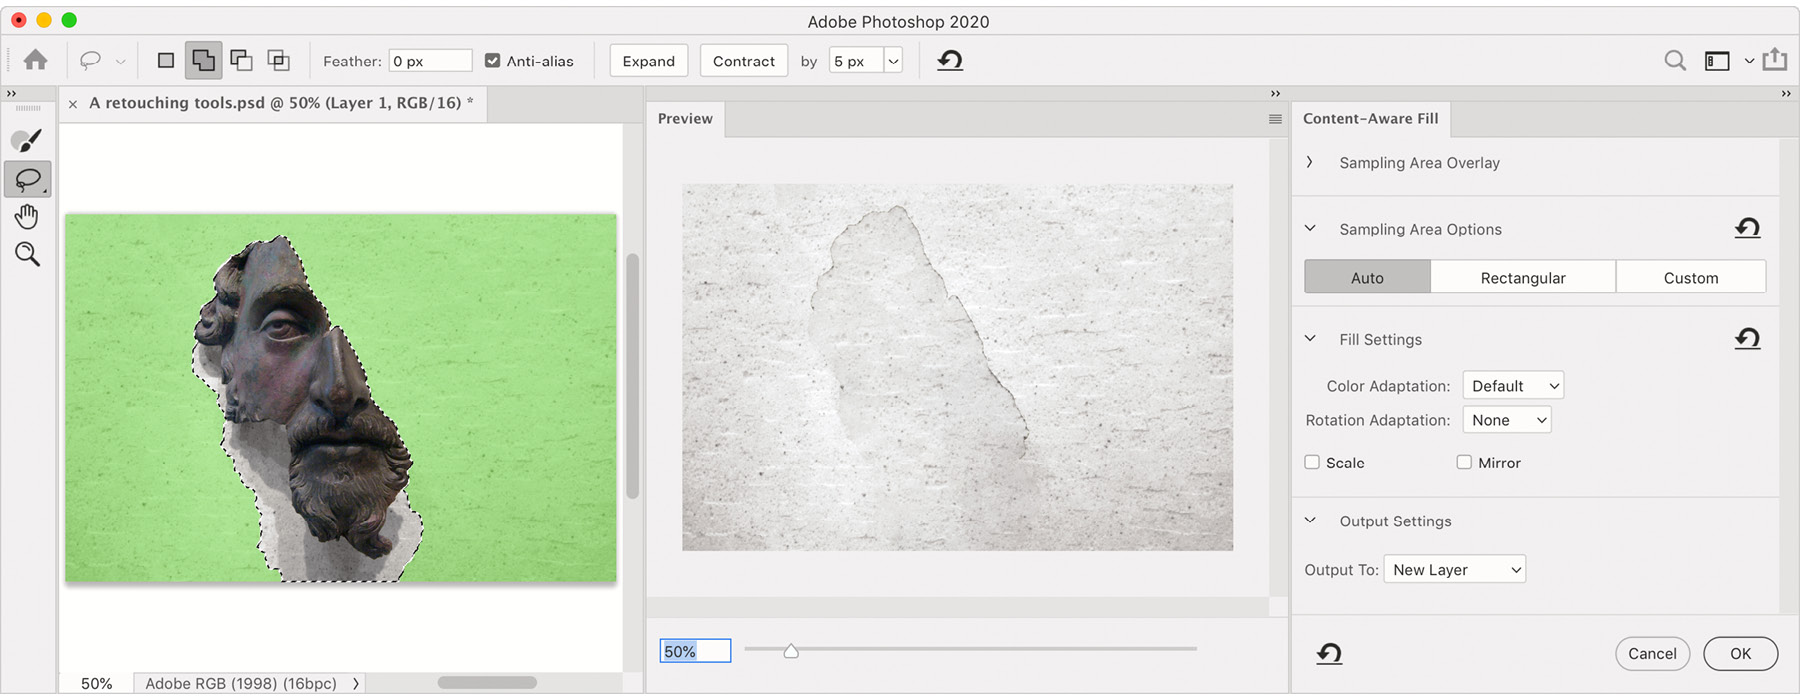
Sampling
The green overlay shows the region from which Photoshop is drawing material to fill the selected area. It will never include the selected area since it’s presumed that’s stuff we don’t want. In the Content-Aware Fill panel, note the three buttons in the Sampling Area Options section: Auto, Rectangular, and Custom. Auto works an amazing amount of the time and will get better with every release of Photoshop, thanks to artificial intelligence. Rectangular will use a strictly rectangular area, as you would have guessed. That’s useful in architectural imagery. Custom requires your intervention with the Sampling Brush tool (at the top of this workspace’s tool panel) to indicate exactly which areas should be sampled from. You paint with it to show areas to use, and option/Alt-paint to remove areas. In this case, either of the first two methods works well.
However, the selection we made was likely a little too snug. Luckily, this workspace has tools and options to adjust it!
- Activate the Lasso tool. In the Options Bar at the top, note the Expand and Contract buttons with a value field to their right. Set that value to about 5 pixels, then hit the Expand button. The fill gets better.
I needed to get my selection bigger still around the shadow. If you do, too, try the following:
- In this workspace, the Lasso tool is automatically in an “add” mode (it has a plus sign next to its cursor). Draw it around the lower parts of the current selection to make it a bit bigger.
I think you’ll agree the fill gets better still. But likely not yet good enough. There’s something we can do about that.
Fill Settings
In this portion of the Content-Aware Fill panel, we have means of making the sampled material better conform to its new home within our selection. Color Adaptation contextualizes the sampled stuff somewhat like the Healing Brush tool does. Rotation Adaptation twists and turns the sample material to better fit. Usually, I use this when I’m trying to fill a curved edge and I’m sampling from an area farther along that curve. In that case, the material needs to be turned to fit. Finally, the Scale and Mirror checkboxes give permission to resize and reflect some of the sampled material to fit. In this case, we may need all of this help.
- Try different settings for the Adaptations as well as the transformation checkboxes. I found that engaging both transformations and setting both Adaptations to high gave an acceptable result.
- Ensure that, in the Output Settings section, Output To is set to New Layer. Click OK.
- Your new content appears on a layer of its own. If you’d like, you might do a little touch up with the Spot Healing Brush tool.
- Save and close this document.