3D
Photoshop has had 3D features for a number of years. I tell my students that the interface for managing a 3D workflow in Photoshop is relatively simple for 3D programs, but very complex compared to the rest of Photoshop. There is always so much to manage: the lights, the environment, the camera, and the model or models. Models themselves are composed of materials that need consideration. Making or modifying any of these takes time, knowledge, skill, and (did I mention?) a lot of time.
However, many, if not most, users of these features have started paying attention to a new application called Adobe Dimension.
Adobe Dimension
Adobe has been somewhat quietly building another application that we can use as a companion to Photoshop. Adobe Dimension offers much of the 3D power that Photoshop has, but very little of its complication. The one thing that is missing (as of this writing) is the ability to make a model in Dimension. However, it comes with many models and allows us to import others from sources like Adobe Stock. You can even combine some of Dimension’s model “primitives” (spheres or cylinders, for example) to construct something more complex. Each part can be made of different materials too.
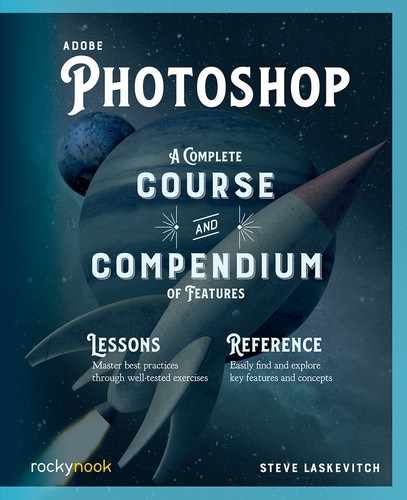
Photoshop is limited in model creation as well. I used Dimension’s model primitives and combined them for the cover of this book. The planets are spheres. The rocketship is several shapes of various materials pushed together to make the vehicle.
With Adobe’s acquisition of Substance, a 3D material engine, we can dress up these models so they look like anything from steel to beer, leather to glitter. In Dimension, like in Photoshop, we can use images as light. Unlike Photoshop, Dimension makes this very easy.
Finally, and relevant to this book, Dimension can render its 3D scenes to layered Photoshop documents. With those, we can then leverage all of our Photoshop skills to do much more.
Orientation
With a two-dimensional screen, it’s sometimes a little difficult to know which way something is oriented in the 3D space of a program. When you work with 3D items in Dimension or Photoshop, you’re shown the three spacial axes: X, Y, and Z. Interface elements that let you manipulate objects in each of those dimensions indicate which direction is which with colors: red, green, and blue, respectively. It’s assumed that we graphics people have that order wired into our neurons and can make the connection. Y is the up/down direction, while the X-Z plane is the ground.
Thus, if you want to move things, you’ll drag red, green, or blue arrows. Scaling has little blocks to drag in those colors. Rotation uses arcs or circles. Dimension has a nice nuance: it has some interface elements between the primary directions too. Thus, if you want to move something along the ground, you could drag a magenta (red + blue) handle.

Planning
I like to have a sense of my destination before I begin. I enjoy serendipity, too, but it’s best to have at least a vague plan before starting. If I have a photograph into which I’d like to drop a 3D model, I’ll get it handy, perhaps putting it and the model I’ll use in the same folder (unless it’s one of the included ones).
When you launch Dimension, its home screen has a Create New button. This will generate a document of some default size and you will view the empty scene from a default angle. As you add elements, like your own photo, these attributes can be adjusted.
Adding Elements
Simply dragging an image from your OS into Dimension yields helpful prompts. For example, when I dragged the scene pictured below into Dimension, it told me that it could match the size and/or shape of the picture, and match its perspective and possibly its lighting. In this case, the clouds made the latter harder, so I had to inform it that it’s outdoor sunlight that I’ll have to adjust a bit later.

You can add 3D models by drag-and-drop too. Here, I used an Adobe Stock model of a space exploration vehicle in Wavefront/OBJ format. There is a handy icon to click if the model comes in “off-camera” or scaled oddly.

Materials
Downloaded 3D models will likely come with materials already applied to them. But if you use some of the supplied models, you’ll likely want to try out some of the supplied (and pretty awesome) materials, lights, and possibly background images. Just click or drag from the Starter Assets panel on the left.

If you forego a background image, the Orbit tool is a good one to move the camera around your model to see how the materials look from different angles.
The Substance Materials often have Properties and Technical Parameters to be adjusted in the panels to the right, as they’re not simply images, but are generated algorithmically.
Rendering
Dimension has three workspaces: Home, Design, and Render. Render is where we generate a fully realized document we can share. Have a book nearby: High Quality takes a bit of time.

Simply swapping out the background image and clicking Match Image… can make a whole new composite very quickly. Remember, it’s easily edited in Photoshop after rendering!

