Lesson D: Blend If
This lesson has a couple of objectives. The first is to expose you to a cool but tricky masking technique. But the file’s content is a nontrivial example of the last two lessons combining layer styles and filters applied to Smart Objects. If you experiment with those “Smart Filters” and styles, be sure to save a copy!
Now That’s Shady
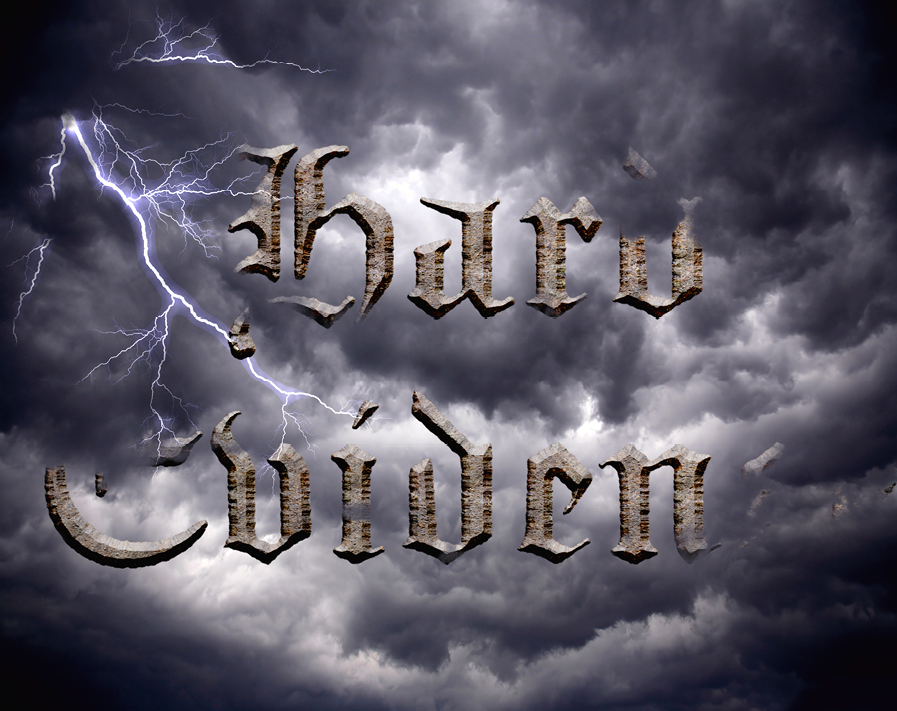
- Open the file “D Blend If.psd.” Don’t yet judge how silly it looks.
That lightning layer at the top is visible where it shouldn’t be: where it’s dark. I will admit that simply changing the blend mode from Normal to Screen or Color Dodge looks promising, and we may end up doing so, but for now leave the mode set to Normal.
- With the lightning layer highlighted, access the layer’s Blending Options either by using the fx menu at the bottom of the Layers panel or by double-clicking near (but not on) the layer’s name.
Note the sliders at the bottom in the Blend If area. If we read that instead as “Visible If,” then those sliders tell us that the lightning layer is visible where the shades of Gray on This Layer are between 0 and 255, and where the Underlying Layer’s grays are in that range too.
- Drag the black This Layer slider to the right a bit. Pretty nifty, eh?
Notice the numbers have changed. I dragged my black slider about a quarter of the way in to 60. This means that levels (shades) of 60 and lighter are visible, but those darker than 60 aren’t.
- Drag that slider back to 0. This time, hold down option/Alt as you drag the slider’s right half to the right just a little bit. The numbers now look something like “0/10 255.”
This means that there is a range of tones over which pixels become invisible. This will be more useful for the next slider. So for now…
- Move both halves of that slider to the right, again to about 60. It’s not critical that this one be “split.”
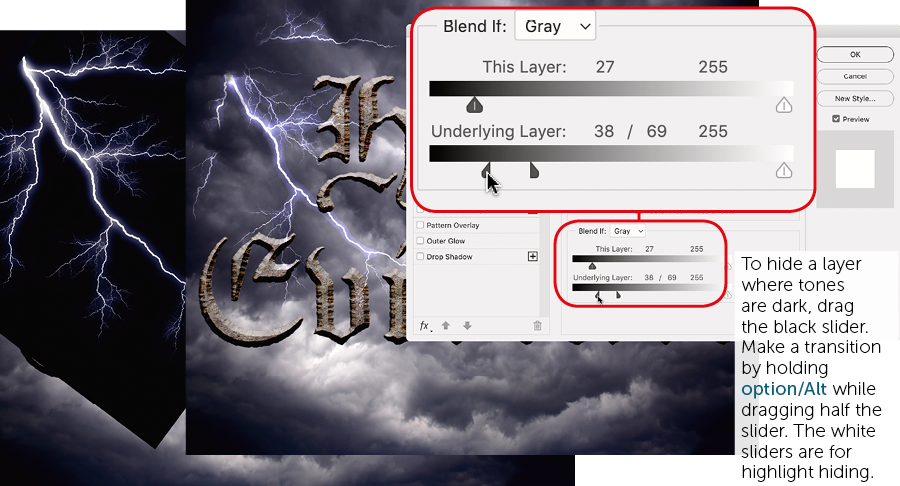
- Now slowly move the Underlying Layer black slider to the right.
Where the clouds or type are very dark, the lightning vanishes, as if it’s emanating from the clouds and zipping behind the letters in some spots. If those underlying layers ever got darker or lighter in places, our lightning would change where it’s visible.
- Option/Alt-drag the left half of the Underlying Layer black slider left to see a transition.
- Finally, for this layer, set the Blend Mode to Color Dodge.
- Click OK. The
 icon on the right side of the layer means you’ve set Advanced Blending Options. That’s helpful, otherwise later you’d wonder how you achieved that look.
 - Highlight the stony type layer and access its Blending Options.
- To entangle the words in the clouds, we’ll do something similar to what we just did: drag the Underlying Layer black slider to the right, maybe to about 100. Then option/Alt drag its left half leftward (to about 75, maybe).
- Click OK.
- Use the Move tool to drag that layer around the document a bit.
This layer is now very complex, so unless your computer is quite fast, there will be a noticeable lag. What’s making it so complex? On the right side of the layer, past its indicator icons, is a disclosure arrow. Click it and you’ll see that there are both Smart Filters and layer styles applied. Between those and our Blend If tweaks, Photoshop has a lot to calculate as you move that layer.
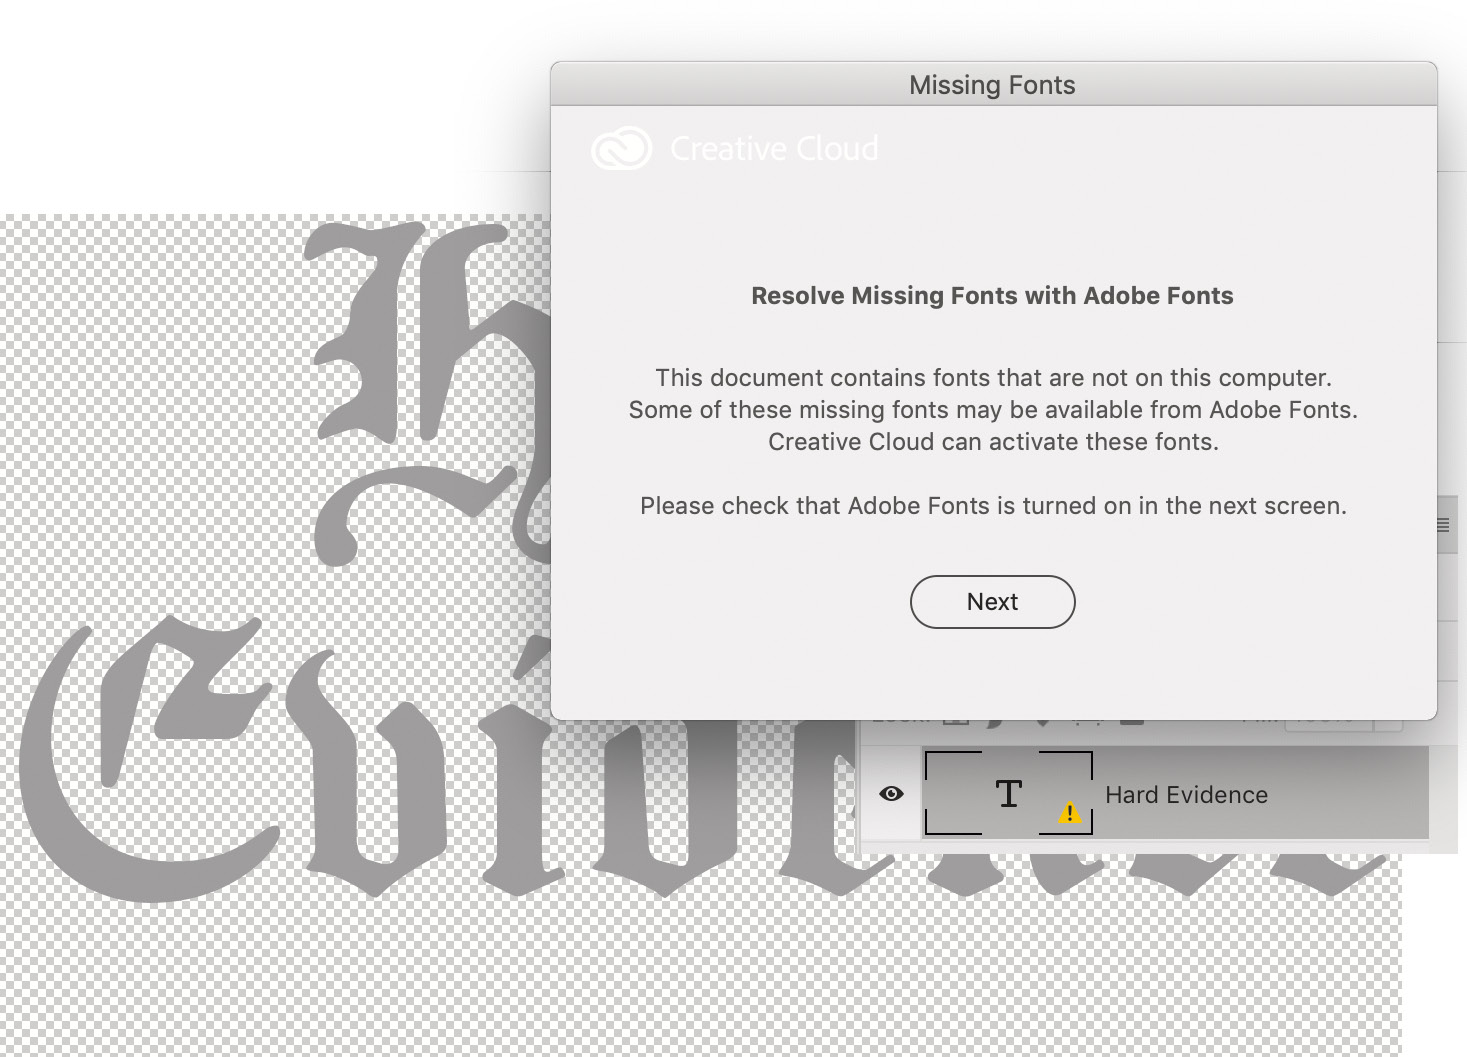
You may click the little eyes to hide each effect or filter. The Smart Object’s content is an actual type layer using a font you likely don’t have. If you don’t try to access the text, you can enjoy how it looks. However, if you attempt to edit the S.O.’s content, Photoshop will insist you get the font or live with a substitute from you computer. The good news is that I used a font from Adobe Fonts, so you can “Resolve Missing Fonts” if prompted.