STEP-BY-STEP PROJECT
WILD & FREE: PUDDLE/STRAIGHT POUR
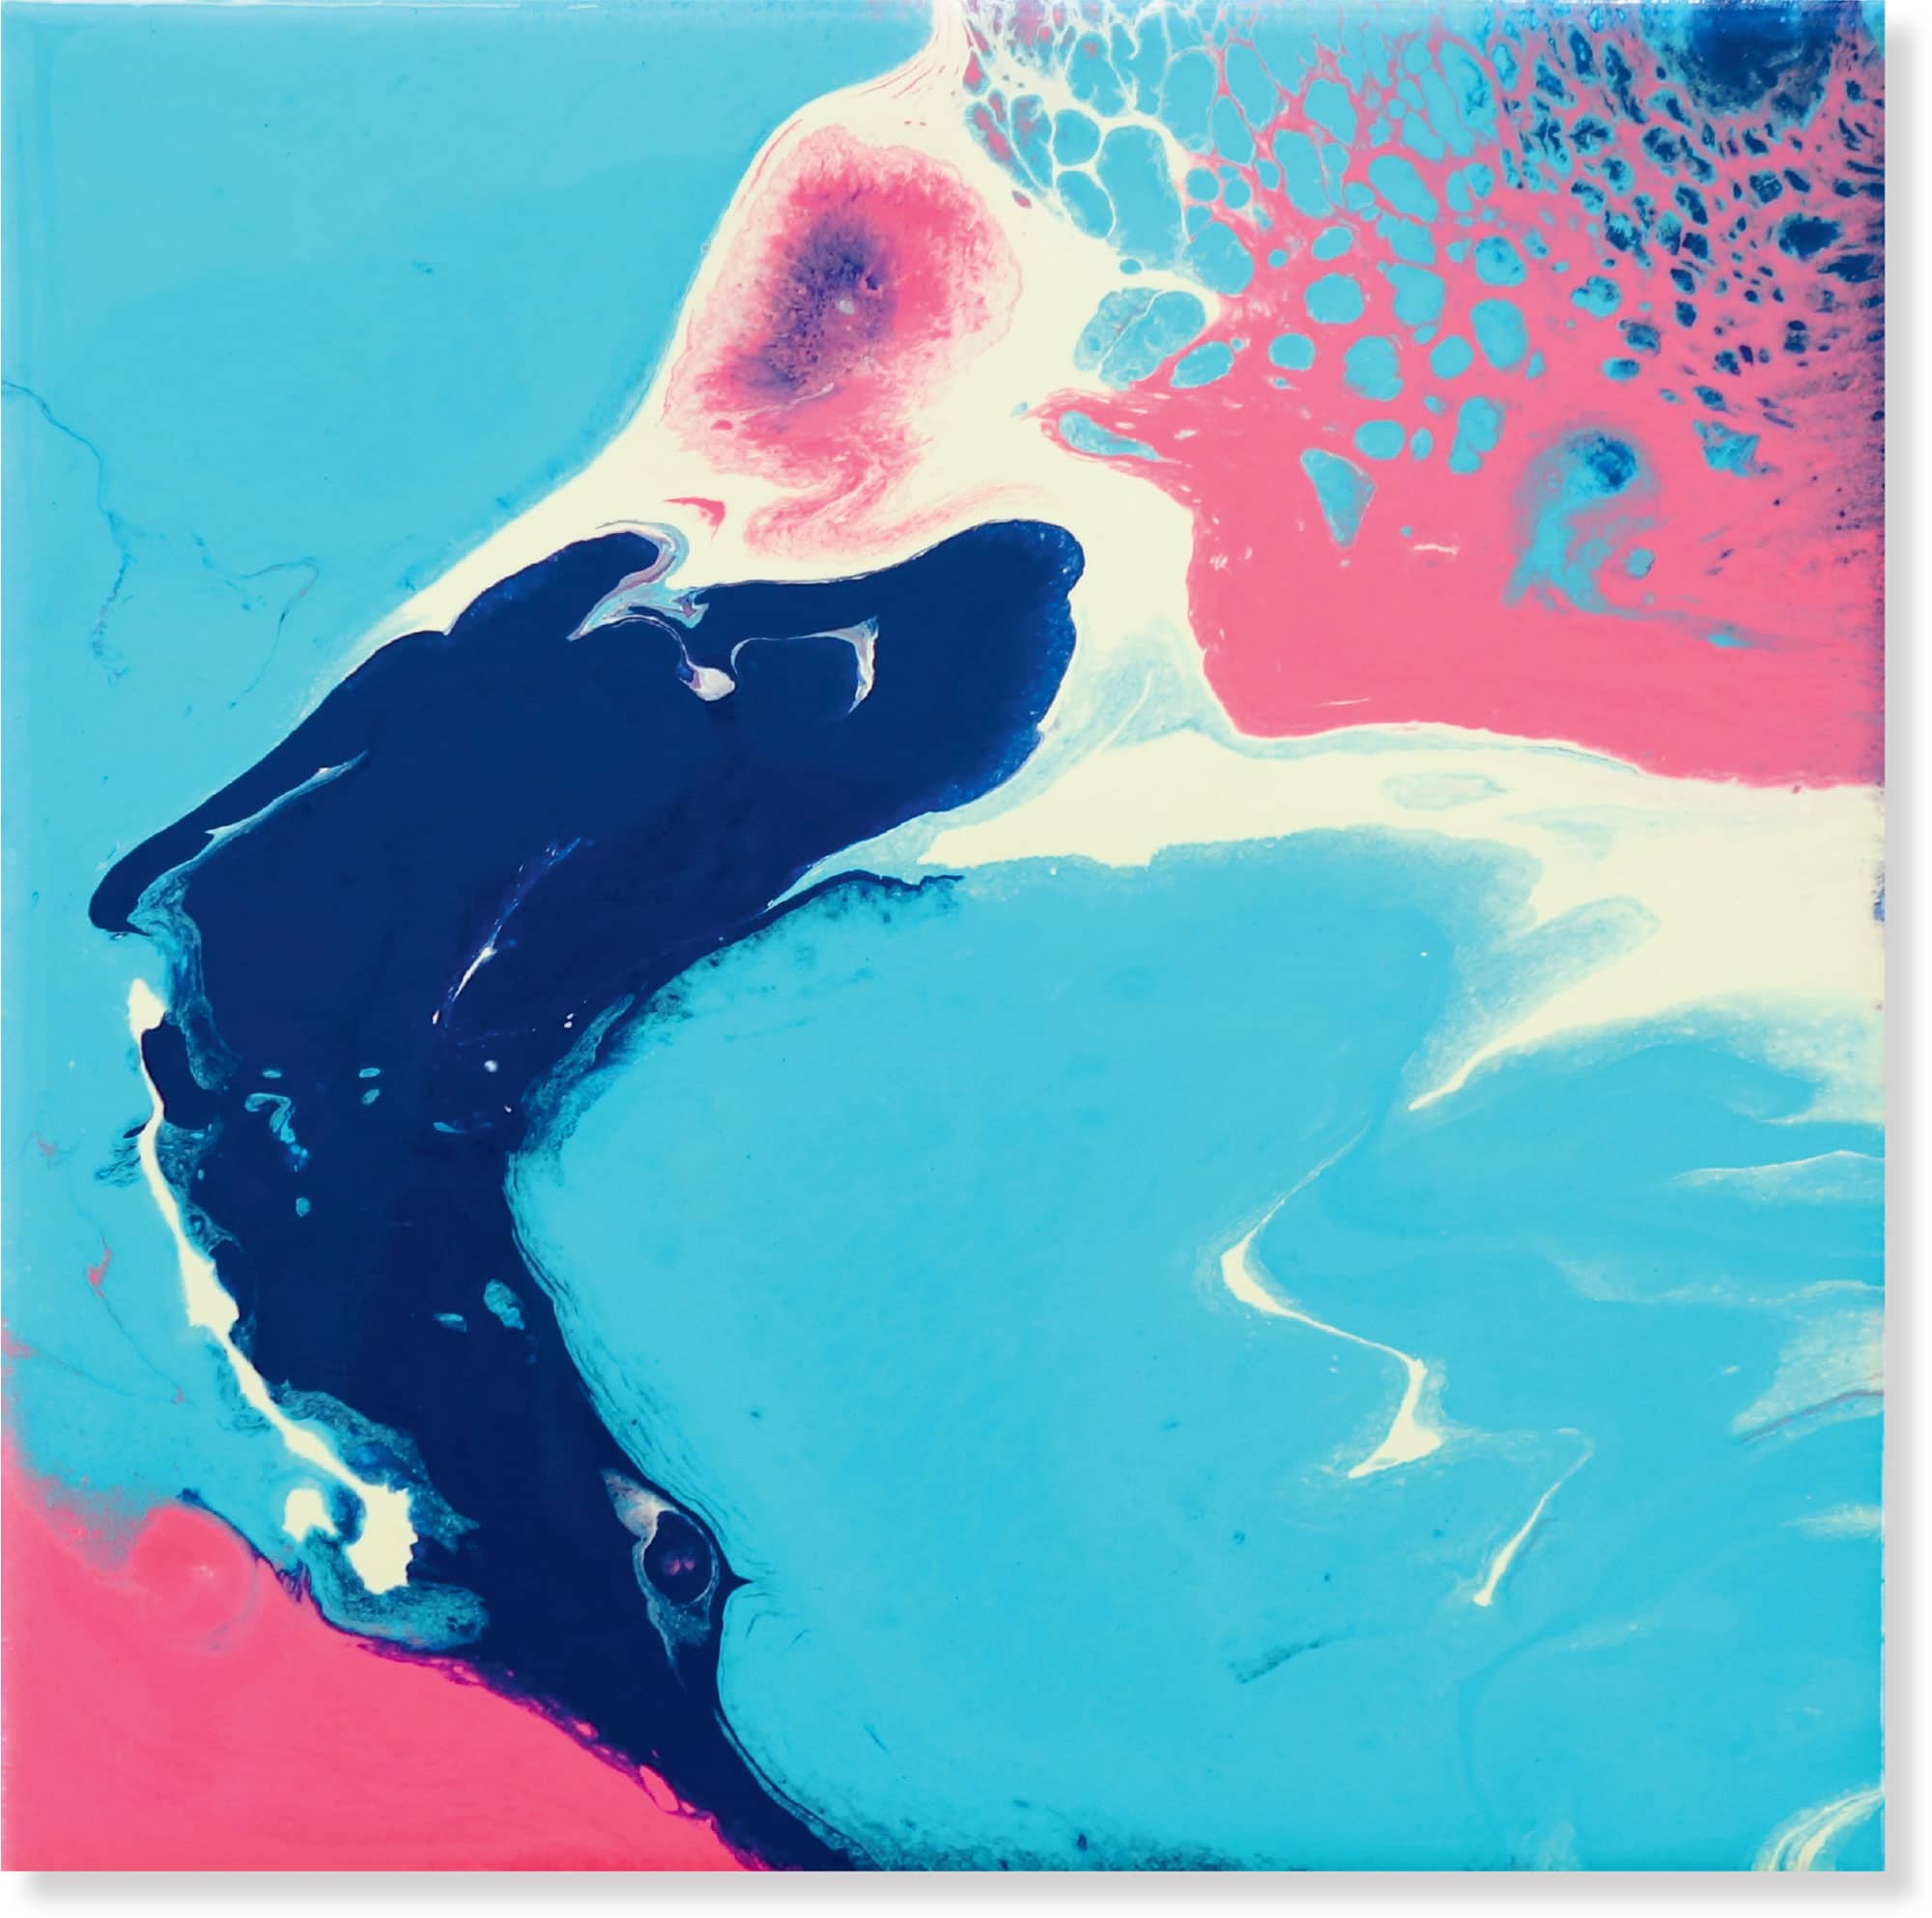
The puddle/straight pour is a unique pouring technique because it allows you to see the colors from your palette separately in the painting instead of all mixed together like in a dirty pour (shown here). Your child will enjoy controlling how much or how little of each color to use!
STEP 1
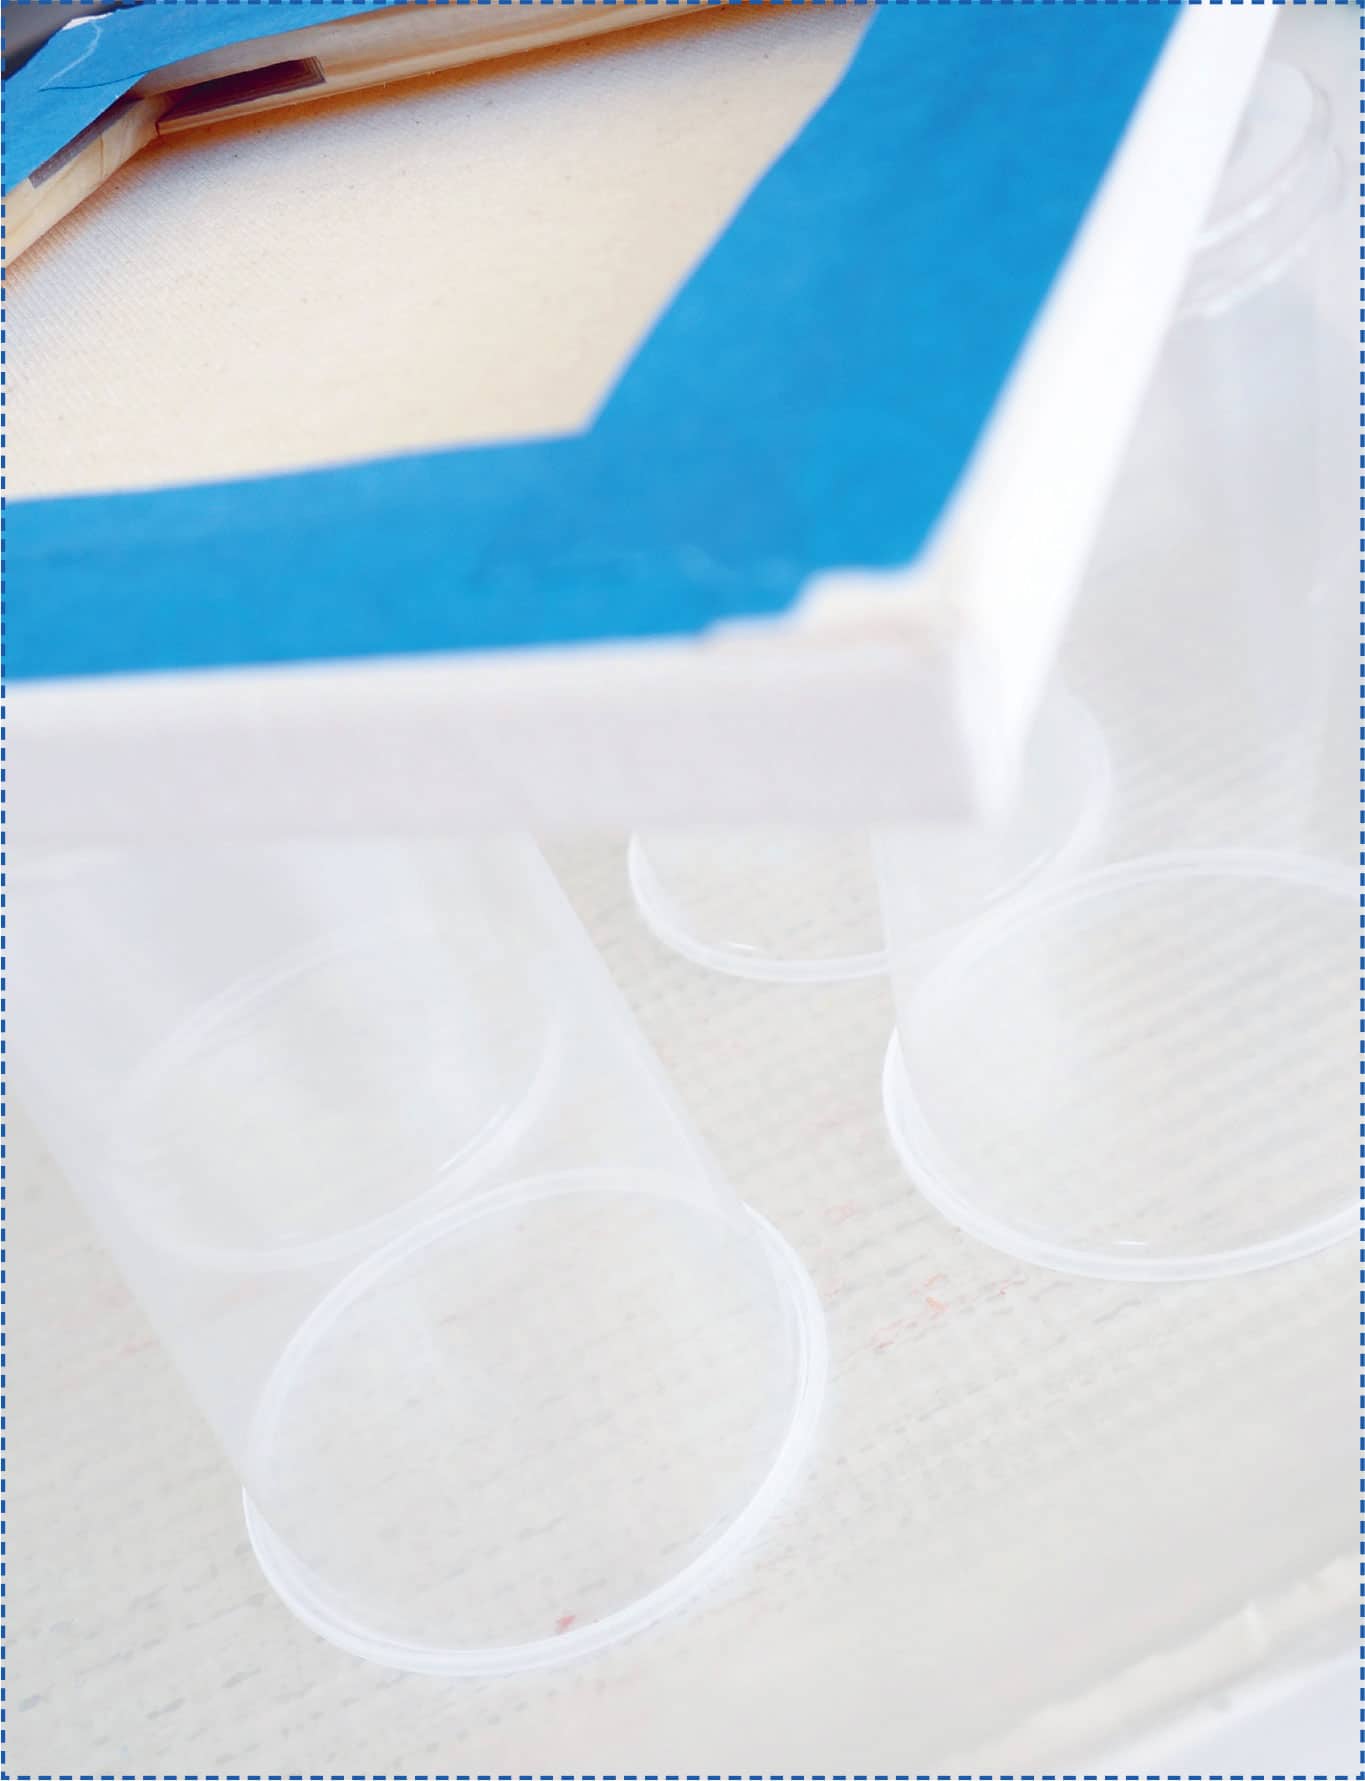
Your child can set up the creative space, making sure to cover the working surface with a drop cloth or vinyl tablecloth. Line a foil tray with a sheet of wax paper. On top of the wax paper, place four cups upside down; then lay the canvas or wood surface on the cups. Tape the back of the canvas to protect it from paint and other materials.
STEP 2
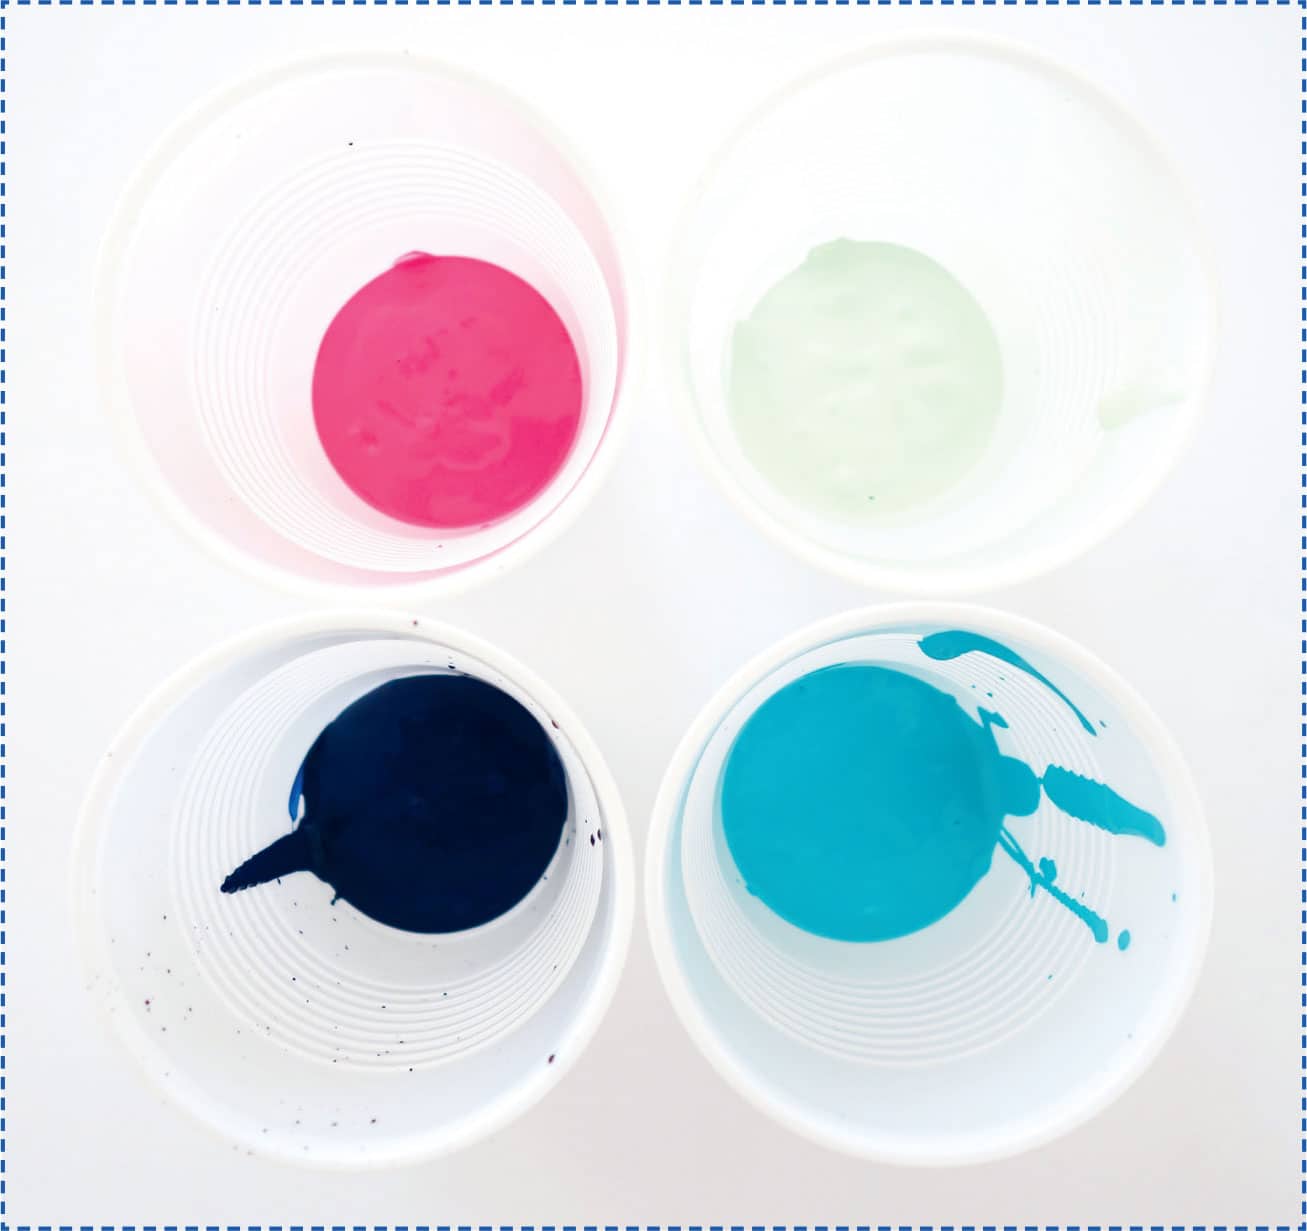
Have your child pour the paint colors into individual cups.
STEP 3
Next, add pouring medium to the cups of paint. We used 21/2 parts pouring medium to 1 part paint. Add a small splash of water and mix thoroughly, ensuring that there are no clumps in the paint.

STEP 4
Because this technique does not require mixing all the pouring colors into one cup beforehand, your child can start pouring immediately, so just dive in! You can pour the paint colors in any order.

STEP 5
Choose another color and pour it on top of or next to your first paint color. We chose to pour the paint mixtures in different spots on the canvas first before puddling, or layering, them over each other.
STEP 6
Once the canvas or wood piece is almost covered with paint, have your child gently pick it up and tilt the paint to cover the surface and its sides, causing new shapes to appear and the paint colors to flow together.

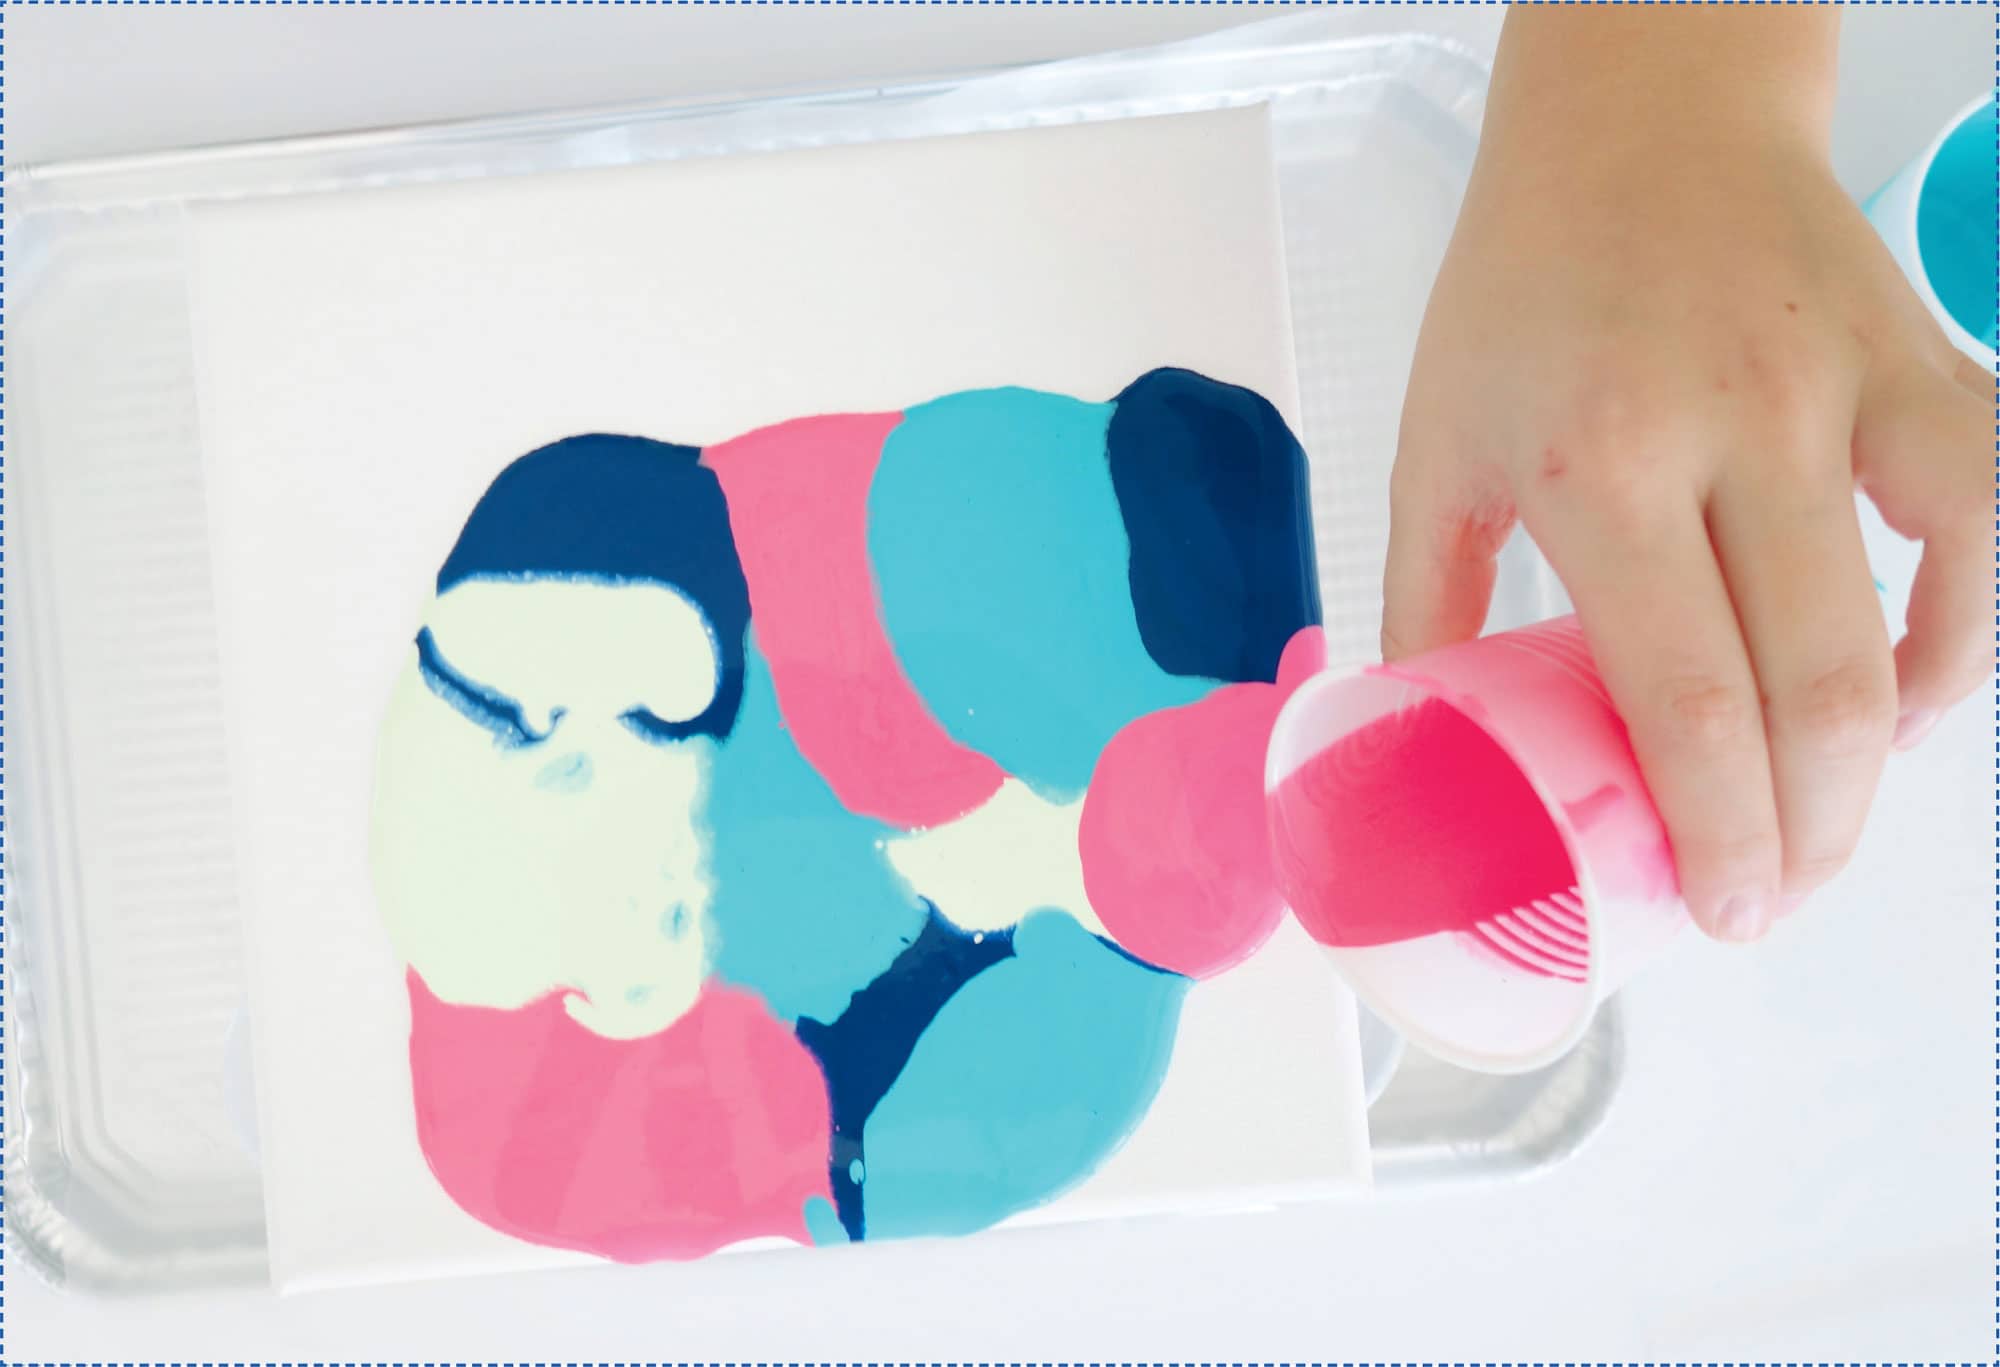
STEP 7
This last step can really change the look of a design. Pour any leftover paint on top of the design, focusing on the areas that you wish to make more defined and creating “puddles” or drops of paint to bring out your painting’s true personality! Have your child tip and tilt the surface some more until you’re both happy with the design. Then place the surface back on the cups to dry completely. If the surface is wood, lay it flat on a sheet of wax paper during the drying process to avoid warping.