![]()
Visual Basic for Applications for Excel, a Refresher
Of course, no advanced book on developing anything in Excel would be complete without a chapter on the interpreter language housed within Excel, Visual Basic for Applications (VBA).
This chapter won’t be an introduction to VBA but rather a review of VBA programming techniques and development principles found in this book and practiced throughout most of my career. What follows may appear unconventional at first. Indeed, it may differ somewhat from what you’ve been previously taught. However, I don’t leave you with a few instructions and no guidance. Instead, I’ll explain in detail why I believe what I believe—and why you should believe as I do. If you find that you don’t (and I certainly welcome disagreement), consider the other important—actually, more important—takeaway from this chapter: the code choices and styles you use should always follow from a set of principles, guidelines, and convention. When you code, do so with structure and meaning. Know why you believe what you believe.
But, the most important thing to do right now is to ready yourself to begin coding. This requires that you set the right conditions in your coding environment.
Making the Most of Your Coding Experience
I tend to get more done when I’m less frustrated. I’ll be so daring to suggest you’re probably the same way. And let’s not kid ourselves: coding in VBA can be a frustrating experience. For instance, have you ever been halfway through writing an IF statement and then realized you needed to fix something on another line? So, you click that other line and Excel stops everything to pop up a message box saying that you’ve written a syntax error, like in Figure 6-1. Chances are, you already knew that. In fact, you wanted to change an earlier line in the code to prevent another error from happening.

Figure 6-1. That all-too-annoying pop-up error box telling you what you likely already know
Tell Excel: Stop Annoying Me!
I mean, nobody’s perfect, but you don’t need this pop-up ruining your coding flow every time you click to another line. So, save yourself from unnecessary pop-ups by disabling Auto Syntax Check from the Options dialog box, which you access by selecting Tools ![]() Options (see Figure 6-2). This will only disable the pop-up. The offending syntax error is still highlighted in red; in other words, you don’t lose any functionality, just the annoyance.
Options (see Figure 6-2). This will only disable the pop-up. The offending syntax error is still highlighted in red; in other words, you don’t lose any functionality, just the annoyance.

Figure 6-2. Clear the Auto Syntax Check box for distraction-free coding
If you comment your code regularly—and you should—you’ve probably noticed comments don’t “stand out” very much. In fact, I’ll be the first to admit I’ve gone through code and missed comments because they’ve “blended in” with their surroundings. Figure 6-3 shows perhaps a more extreme example involving rather busy code, but the point remains: the two comment markers (') I’ve placed in the routine are not easily or immediately found.

Figure 6-3. Comment markers at 6 and 14 blend in with the code
Luckily, you don’t have to use the preset colors. In fact, you can make the comments stand out. Go back to the Options dialog box from the Tools menu. Click the Editor Format tab and select Comment Text from the Code Colors list box. Below the list box you can specify the foreground and background colors, which are the text color and highlight properties, respectively (see Figure 6-4). Personally, I like using a dark blue foreground and light blue background (see Figure 6-5). You’ll have to try this on your own to get the full effect; to that end and to preserve the formatting guidelines of this book, the highlight does not appear in the code listings throughout the book.

Figure 6-4. The Editor Format tab of the Options dialog box

Figure 6-5. Let your comments be heard with bold colors
Leave the Options dialog box open because you’ll need it once more. By default, Excel uses Courier New (Figure 6-6) as its default coding font. Again, this font, like the comment style defaults, doesn’t emphasize the clear readability. I prefer the font Consolas shown in Figure 6-7 because I think it does a much better job in this regard.

Figure 6-6. Sample code with Courier New as the font
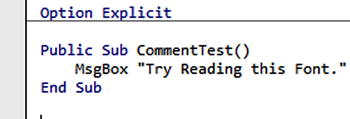
Figure 6-7. More readable text with Consolas
You can change the font by selecting Normal Text from the list box (Figure 6-4) and using the font drop-down on the side of the dialog box. Excel gives you lots of fonts to choose from, but the best fonts with which to code are those of fixed width. So if you choose something other Consolas or Courier New, make sure to pick a readable, fixed-width font.
Start Using the Immediate Window, Immediately
The Immediate window is like a handy scratchpad with many uses. If the Immediate window is not already open, go to View ![]() Immediate Window in the Visual Basic Editor. You can type calculations and expressions directly into the Immediate window using the print keyword. Figure 6-8 provides some examples of typing directly into the Immediate window.
Immediate Window in the Visual Basic Editor. You can type calculations and expressions directly into the Immediate window using the print keyword. Figure 6-8 provides some examples of typing directly into the Immediate window.

Figure 6-8. The Immediate window
In addition, you can also print the response of a loop or method directly into the Immediate window. To do this, use Debug.Print. Listing 6-1 shows you how.
VBA doesn’t require you to declare your variables before using them—that is, unless you place the words Option Explicit at the top of your code module. Without Option Explicit, the For loop from Listing 6-1 would run without problems. When you use Option Explicit, you must declare all variables before they are used. In Listing 6-2, I’ve used the Dim keyword to declare the integer i.
If you forgo Option Explicit, as I did in the first instance, Excel will simply create the variable i for you. However, that i won’t be an integer; rather, it will be of a variant type. This may not sound like such a bad thing at first, but letting Excel simply make variables for you is a recipe for trouble. What if you misspell a variable, like RecordCount, as I’ve done in Listing 6-3?
Excel won’t alert you to an error. Instead, it will simply create RecordCout as a new variable. Do you trust your ability to find misspellings in your code quickly?
In practice, I’ve found using Option Explicit alleviates many potential headaches. So, do yourself a favor; in the Option dialog box (Tools ![]() Options), set Require Variable Declaration to Excel to automatically (and proudly) display Option Explicit at the top of every module. And when the error in Figure 6-9 appears, give yourself a pat on the back for not having to scour your code to find your misspellings.
Options), set Require Variable Declaration to Excel to automatically (and proudly) display Option Explicit at the top of every module. And when the error in Figure 6-9 appears, give yourself a pat on the back for not having to scour your code to find your misspellings.

Figure 6-9. Breathe a sigh of relief! You have Option Explicit on the case!
Seriously, I can’t tell you how important Option Explicit is. I’d repeat “Always use Option Explicit!” 1,000 times here if I could. But I’ll just let Excel do it for me instead. Paste the following formula into an empty cell before moving to the next section:
=REPT("Always use Option Explicit! ",1000)
A naming convention is a common identification system for variables, constants, and objects. By definition, then, a good naming convention should be sufficiently descriptive about the content and nature of the thing named. In the next subsections, I’ll talk about two naming conventions. The first, Hungarian Notation, is the most common notation used for VBA coding. Indeed, I’m unaware of any book that has argued against its use—that is, until now. The second, my preferred notation, is what I call “loose” CamelCase notation, and it’s been the standard for just about all modern object-oriented languages.
In this section, I’ll talk about Hungarian Notation. In this notation, the variable name consists of a prefix—usually an abbreviated description the variable’s type—followed by one or two words describing the variable’s function (for example, its reason for existing). For example, in Listing 6-4, the s before Title is used to indicate the variable is of the String type. The term title, as I’m sure you can guess, describes the string’s function—in other words, its reason for existing.
Table 6-1 shows some suggested prefixes for common variables and classes.
Table 6-1. Prefixes Suggested by Hungarian Notation
|
Prefix |
Data Type |
|---|---|
|
B |
Boolean |
|
D |
Double |
|
I |
Integer |
|
S |
String |
|
V |
Variant |
|
Rng |
Excel.Range |
|
Obj |
Excel.Object |
|
Chrt |
Excel.Chart |
|
Ws |
Excel.Worksheet |
|
Wb |
Excel.Workbook |
In this book, I will discourage the use of Hungarian Notation in your code. I’m not here to tell you that Hungarian Notation is terrible because it does have its uses. For instance, VBA code isn’t known for having strict data type rules. This means you can assign integers to strings without casting from one type to the other. So, including the type in a variables name isn’t a terrible idea at all.
But much of this type confusion can be resolved by using descriptive and proper variables names, as you’ll see in the next few pages. For now, however, it’s a good idea to at least familiarize yourself with Hungarian Notation if you haven’t done so already. Hungarian Notation is still widely used in VBA to this day, so it’s important that you can read it proficiently even if you decide in this moment to never use it again. (Good choice!)
The fact is, Hungarian Notation is old. Indeed, in many ways, it’s a relic of a bygone era—namely, the era in which people still used Visual Basic 6.0. (Those were the days, right?) In fact, Microsoft’s Design Guidelines for .NET libraries has discouraged its use for more than decade. So, what I’m proposing in this next section might feel new, but it’s actually been around for quite some time.
In this section, I’ll talk about CamelCase notation as my preferred alternative. CamelCase notation begins with a description (with the first letter in lowercase when it’s a local, private variable) and usually ends with the object type unabbreviated. For example, the variable in Listing 6-5 refers to a chart on a worksheet for sales.
I’ll be honest and admit I’m not always such a stickler about that lowercase descriptor, which is why I call my use of this notation “loose.” The important takeaway when using this notation is to use very descriptive names. It’s unlikely a variable name like ChartTitle will be confused for an integer in your code. Whether it’s recordCount or RecordCount, you’ll likely understand that count refers to a non-negative integer. Variables that represent objects should end with the object name unabbreviated. Notice in Listing 6-5 that the variable name ends with Chart. Ranges should end with Range, and so on.
Descriptive names are important. Use a variable name that describes what the variable does so that when you come back to it later, you can remember what you did. If you have a test variable, then (please, for the love of God) call it test; don’t just call it t. It’s OK to use i in a For/Next loop where the i is simply an iterator and is not used later in the code, but don’t name variables used to count objects with short names like i, j, k, a, b, or c. Finally, there’s really no good reason to use an underscore in your variable names. They’re not easier to read.
As I said, naming convention goes beyond just VBA. Indeed, a proper naming convention should be applied to all Excel objects, including those that reside on a spreadsheet. Therefore, in this section, I’ll talk about naming objects on the spreadsheet in the form of named ranges.
It’s rather common to see Excel developers use the prefix val to refer to named cell ranges. This prefix is an attempt to extend the Hungarian Notation principles into the physical spreadsheet (as if you haven’t already had enough of it!). However, I still prefer a more modern approach. Specifically, what I like to do is combine the name of the tab and the function of the variable to be more object-oriented. Figure 6-10 shows a good example of what I mean.

Figure 6-10. An object-oriented-like naming convention for named ranges
In Figure 6-10, the name of the tab is combined with the variable. Aside from being more object-oriented-ish, this type of naming brings other distinct advantages. For one, you can more easily and logically group named ranges that exist on the same worksheet tab. In addition, as you’ll see in the next section, this type of convention works well when interfacing between named ranges and VBA.
In this section, I’ll focus on naming conventions for sheet objects. There’s one property of the sheet object that I’m a big fan of changing, and it’s the name of the object itself. When you change the name of a worksheet tab on the spreadsheet, you’re actually changing the name of the tab (think of it as changing a caption); you are not, in fact, changing the name of the worksheet object.
If for nothing else, changing the name of the worksheet object is a great way to clear up confusion when looking at the Project Explorer window. For example, Excel seems to have a problem keeping the names of worksheet tabs and the names of the objects themselves straight, as I’m sure you’ve noticed before. Take a look at Figure 6-11 to see what I mean.

Figure 6-11. The Project Explorer demonstrating a lack of consistency when it comes to worksheet object and tab names
The object name is the item outside the parentheses; the tab name is the one inside the parentheses. If I were to write MsgBox Sheet1.Name in the Immediate window, I would see a response of “Sheet2.”
To change the name of the object, go to the Properties window from within the editor (View ![]() Properties Window, if it’s not already visible) and change the line that says (Name). In Figure 6-12, my worksheet tab’s caption is Financial Data, so I’m going to change its object name to FinancialData.
Properties Window, if it’s not already visible) and change the line that says (Name). In Figure 6-12, my worksheet tab’s caption is Financial Data, so I’m going to change its object name to FinancialData.

Figure 6-12. The Properties window showing how to change the worksheet object’s name
YES, I KNOW IT’S CONFUSING
If you look at the Project Explorer (Figure 6-11), you’ll see that the worksheet object name comes first and the tab name follows in parentheses. The Properties window appears to do just the opposite; the first name in parentheses, “(name)”, refers to the object’s name, while the second name item (under Enable Selection) refers to its name as it appears on the tab. Why did Microsoft choose to do it this way? Your guess is as good as mine.
In this section, I’ll talk about referencing. Referencing refers to interacting with other worksheet elements from within VBA code and also on the worksheet. This is where a good naming convention and a proper coding style really make the difference.
Let’s take a made-up named range concerning cost of goods sold. Hungarian Notation proponents would give the named range something like valCoGS (CoGS = cost of goods sold). The notation I suggest would combine the tab name with a nicely descriptive title (you could make it shorter if you’d like, but I like long titles), something like IncomeStatement.CostOfGoodsSold. So, let’s take a look at why you might prefer a long named range such as this.
This section discusses shorthand references, a syntax you can use in your code to refer to a named range on a sheet. Here is where the advantage of the latter notation proves its worth. As you know, you can refer to a named range through the sheet object where the name resides (technically, you can refer to it through any sheet object, but only on the worksheet in which it was created will it return the correct information). So, the typical way to read from or assign to the COGS named range mentioned earlier using Hungarian Notation might look like this:
Worksheets("Income Statement").Range("valCoGS").Value
On the other hand, if you use my method, you can employ the shorthand range syntax as follows:
[IncomeStatement.CostOfGoodsSold].Value
That’s right! These two lines of code mean and do the same thing. Now, which do you think is easier to read and is more descriptive of what it represents? Which more easily captures the worksheet in which it resides? Which would you rather use in your code?
So, before you go off using the shorthand notation for everything, I should point out a significant caveat. Using the shorthand brackets method can become, in certain situations, slow. Technically, it’s a slower operation for Excel to complete than using a worksheet object. However, you would really notice this only if you used the shorthand notation during a long and computationally expensive loop. For typical code looping, you’re not likely to see the difference, but if you’re looking to speed things up in a loop, it’s best to forgo the shorthand.
In the previous section, I showed you how to change worksheet object names. In this section, you’ll see why I think it’s such a good idea.
Think about what you can do with this change. Because the new name reflects some descriptive information about the worksheet tab, you can use the object instead of the Worksheets() function to return the one you’re interested in. Confused? Let’s take a look. Here’s the old way, which takes in the worksheet’s tab name to return the worksheet object:
Worksheets("Income Statement").Range("A1")
And here’s what you can do instead:
IncomeStatement.Range("A1")
Again, which do you think easier to understand and work with?
In this section, I’ll talk about the benefit of changing sheet names on procedures. Once you’ve changed the procedure name, you can also place your macro into the sheet object.
Take a look at how cleanly these procedures appear in the Macro dialog box versus the ones housed in a sheet object with a default name in Figure 6-13. In addition, if you want to call a public procedure stored in a sheet object, you can simply write IncomeStatement.CalculateNetTotal from within the code of another sheet object (or module) in Excel. I’ll talk about the benefits of storing a procedure in a sheet object (versus a module) in the next section.

Figure 6-13. A demonstration of changing worksheet tab names and storing procedures therein
Development Styles and Principles
Now that you’ve set up your coding environment and I’ve talked about naming conventions, I need to talk about development styles and principles. The following sections cover simple coding guidelines that if you stick to, you’ll be creating self-contained, easy-to-follow code and designs in no time. The first principle follows naturally from the previous section.
Strive to Store Your Commonly Used Procedures in Relevant Worksheet Tabs
If you’re an avid user of the macro recorder, you know that Excel writes what you do to an open module. In many ways, a module feels like a natural place for a procedure. But ask yourself, is there any real reason why you’re storing the procedure there?
The problem with storing your procedures in a module is that it creates really sloppy code. I know what you’re thinking: how dare I say that! You separate your modules into different logical pieces. The items inside each of your well-named modules are relevant to one another. Chances are, though, the procedures in your model are used by only one or two spreadsheets. If that’s the case, why not store the procedures in the worksheet objects themselves?
Consider this example I’ve seen time and time again. You have a Main worksheet tab that acts as a menu to direct users to several other worksheet tabs. Then, in each of these tabs, you have a button that takes users to the Main worksheet. Let’s use the tabs from Figure 6-14 for this example.

Figure 6-14. A common spreadsheet layout in which Main acts a menu to take users to each tab
If you create this direction mechanism via the module method, you get ugly navigational code like in Listing 6-6. I also assume in Listing 6-6 that you’re doing some type of processing work where the user goes from a different worksheet tab back to Main.
What do I mean by ugly? Well, creating this mechanism in a module requires you to use funky procedure names to differentiate one from the other. And just take a look at what each of these procedures look like in the Macro dialog box (Figure 6-15). Each of these names looks so similar. It would be easy to accidentally assign the wrong macro. (Are you nodding your head because you’ve done it before? I know your pain.) In addition, even if you store procedures in separate modules, there’s nothing in the Macro dialog box to differentiate this type of organization.

Figure 6-15. A mess in the Macro dialog box
But now, let’s take a look at my suggested improvements (including changing the worksheet names shown previously). You can store the procedures that take you from the Main tab to other worksheet tabs in the Main worksheet object (Figure 6-16).

Figure 6-16. A view from Project Explorer when the worksheet object names are changed
As well, you can use much cleaner-looking procedure headings, as shown in Listing 6-7.
Next, in each separate worksheet object you would simply use something like the procedure in Listing 6-8. As a matter of proper style, you should use the same name, BackToMain, in each worksheet object. Remember, unlike in modules, procedure names in worksheet objects aren’t global. Because of this, you can use the same name across different worksheets.
Take a look at Figure 6-17. As you can see, each procedure is much easier to read and understand right away from within the Macro dialog box. In addition, notice how you’ve made the code more object-oriented-like. Each tab to which you can navigate from Main shares the same procedure. It’s as if they are of a similar class. When you add extra procedures to the worksheet (but keep the one sending users back home), you are inheriting the features of each sheet and then adding new ones to it.

Figure 6-17. The Macro dialog box showing a much cleaner presentation and organization of code and procedure names
And another thing . . .
You thought I was done complaining about putting procedures in modules, didn’t you? Well, I’m not. There’s another problem I need to address head-on in this section. So, let’s do that by taking a quick survey. Grab a pen to mark down your answers. If this is a library book, upon returning the book, tell them you found it this way.
THE ACTIVE OBJECT STRESS TEST
Circle all that apply.
I ran a macro that uses the Selection object. However, I (or the user) selected the wrong worksheet item (either manually or in the code) and accidentally made undoable changes to everything. This makes me feel
- Annoyed
- REPT("I want to scream!", 1000)
- Like I never want to use the Selection object again
I ran a macro that uses the ActiveSheet object, but accidentally I was looking at the wrong sheet before running the macro. Also, I forgot to save everything before running the macro, so now I have start over. I feel
- Exhausted
- REPT("I want to scream!", 1000)
- Totally done using ActiveSheet, forever
I ran a macro that uses ActiveCell, but the wrong cell was selected for some unforgivable reason. The code made changes to that cell and a whole bunch of cells around it. Unwittingly, I ended up making incorrect and undoable changes to the entire spreadsheet. I feel
- Terrible
- REPT("I want to scream!", 1000)
- So over using ActiveCell
Now take a look at your answers. If you circled C for any of the previous questions, you’re in luck. I have some really great news for you in the next section.
No More Using the ActiveSheet, ActiveCell, ActiveWorkbook, and Selection Objects
You don’t need these objects; in this section, you’ll see why. It’s often the case that coding inside a module encourages you to use these objects since the procedures themselves aren’t worksheet-specific. But if you’re already working inside the procedure (as I suggested earlier), you can use the Me object. Me is always the container object in which your code is housed. For example, if the following code were in Sheet1, the Me object refers to Sheet1.
Me.Range("A1").Value = "Hello, Me!"
That’s not all, either. You can use ThisWorkbook instead of ActiveWorkbook to ensure you are always modifying the workbook in which your code resides. If you want to modify a cell, address it directly like I’ve done in the previous code. If you want to refer to a chart or shape, why select it first? Which gets to the point more easily, Listing 6-9 or Listing 6-10?
Isn’t VBA great? It sure is but not for everything. That brings me to the next principle.
Render Unto Excel the Things That Are Excel’s and Unto VBA the Things That Require VBA
VBA lets you do a lot, but it’s not a great idea to do everything in VBA, especially when it involves reinventing the wheel. For instance, it’s tempting to store all your program’s global variables in a module. This method brings the advantage of total and complete accessibility: the variables can be accessed anywhere at any time by any procedure.
However, these variables are also “freed” from memory whenever your code errors out or whenever you tell Excel to “reset” (Figure 6-18). When this memory is dumped, you must start over—those variables once again become zeros or blanks. Often those who use this method must create an Initialize or Restore procedure to restore the correct values to these variables before you can do anything else in the spreadsheet.

Figure 6-18. Hitting OK will reset the values of all those public variables stored in procedures
There’s a better way, people. I don’t need to tell you that Excel is a giant storage closet. It’s a much better idea to store your application models on the spreadsheet instead of in the module where they are susceptible to being cleared out every time there’s an error. Just create a new tab to hold your backend variables. Name it something like Calculations, Variables, Constants—you get the picture. Then use the shorthand range syntax discussed earlier to access these ranges. It couldn’t be simpler. And it brings an additional benefit worth mentioning in my next principle.
Encapsulating Your Work
Encapsulation is a tenant of object-oriented programming that argues (1) associated data and procedures should be organized together and (2) access to and manipulation of the former items should be restricted or granted in only certain circumstances. By coupling together relevant procedures into a relevant worksheet tab, you fulfill the first item.
The second item is fulfilled when you store application variables on the worksheet. This is because the only way to change these variables is by either writing to them with code or updating them manually behind the scenes. Let’s say you have a named ranged called Calculate.Input. I can change this variable’s value in the code (see the following code), which requires I run a macro:
[Calculate.Input] = 1
Or I can change its value by finding it on the spreadsheet and typing in something new, as in Figure 6-19.

Figure 6-19. A worksheet named range variable called Calc.Input
However, if I want to access this variable somewhere else on the worksheet, I must access it through a formula, like this:
= Calc.Input – 1
Notice that this simply accesses the value stored in Calc.Input—it doesn’t change the value itself. However, it’s impossible with a formula to change the value of Calc.Input. Like I said earlier, there are only two ways to change its value, a macro or a human. This is an example of encapsulation.
The Last Word
In this chapter, I talked about how to set up your coding experience to make the most of it, proper naming conventions, and development styles and principles. Some of these suggestions were counterintuitive to what is commonly taught, but I explained why they were useful. I don’t expect you to leave this chapter entirely convinced, but ideally you see the value in developing good coding practices—and why sometimes doing things differently makes sense.