
Eclipse supports debugging your application on both the Android emulators as well as on real Android devices. When you press F11 in Eclipse, Eclipse will first determine whether an Android emulator instance is already running or a real device is connected. If at least one emulator (or device) is running, Eclipse will deploy the application onto the running emulator or the connected device. If there is no emulator running and no connected device, Eclipse will automatically launch an instance of the Android emulator and deploy the application onto it.
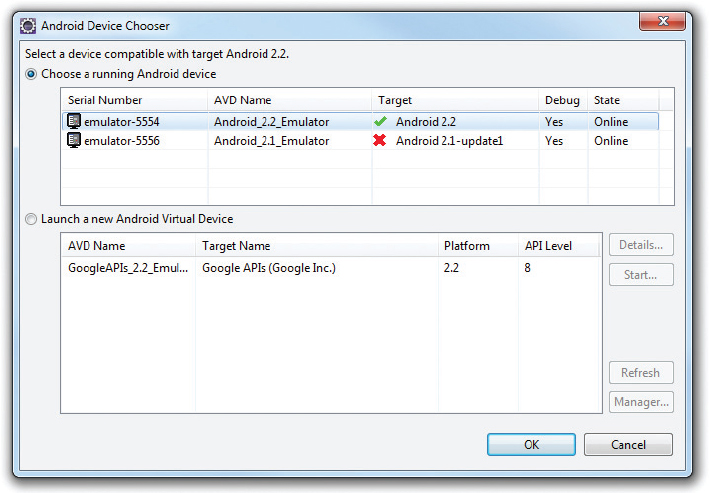
If you have more than one emulator or device connected, Eclipse will prompt you to select the target emulator/device on which to deploy the application (see Figure A-20). Select the target device you want to use and click OK.
If you want to launch a new emulator instance to test the application, select Window ⇒ Android SDK and AVD Manager to launch the AVD manager.
Setting Breakpoints
Setting breakpoints is a good way to temporarily pause the execution of the application and then examine the content of variables and objects.
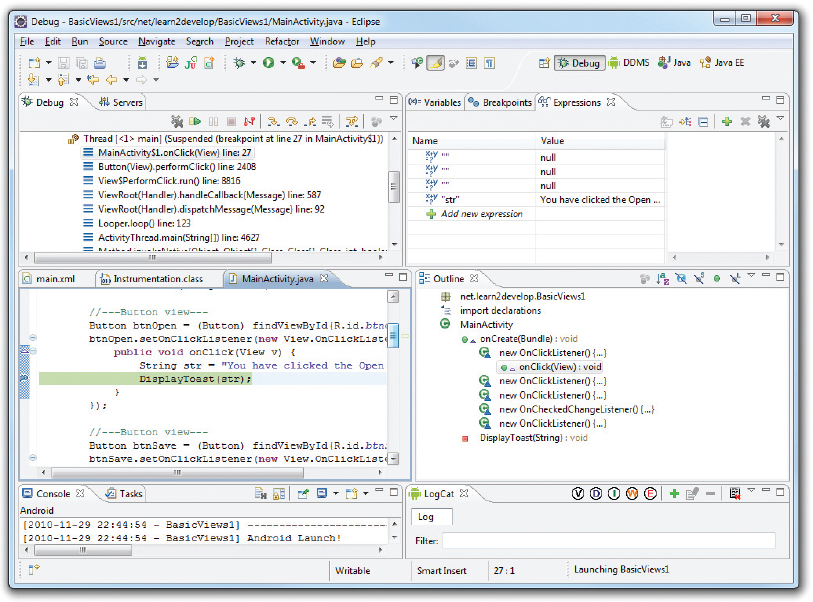
To set a breakpoint, double-click on the leftmost column in the code editor. Figure A-21 shows a breakpoint set on a particular statement.

When the application is running and the first breakpoint is reached, Eclipse will display a Confirm Perspective Switch dialog. Basically, it wants to switch to the Debug perspective. To prevent this window from appearing again, check the “Remember my decision” checkbox at the bottom and click Yes.
Eclipse now highlights the breakpoint (see Figure A-22).
At this point, you can right-click on any selected object/variable and view its content using the various options (Watch, Inspect, and Display) shown in Figure A-23.
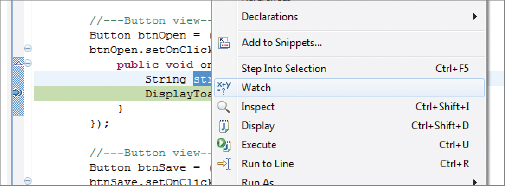
Figure A-24 shows the Inspect option displaying the content of the str variable.

There are several options at this point to continue the execution:
- Step Into — Press F5 to step into the next method call/statement.
- Step Over — Press F6 to step over the next method call without entering it.
- Step Return — Press F7 to return from a method that has been stepped into.
- Resume Execution — Press F8 to resume the execution.
Exceptions
As you develop in Android, you will encounter numerous run-time exceptions that prevent your program from continuing. Examples of run-time exceptions include the following:
- Null reference exception (accessing an object which is null)
- Failure to specify the required permissions required by your application
- Arithmetic operation exceptions
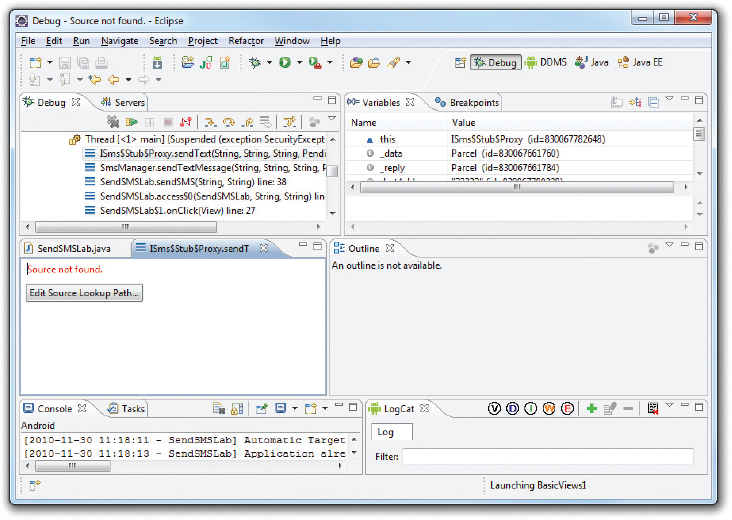
Figure A-25 shows the current state of an application when an exception occurred. In this example, I am trying to send an SMS message from my application and it crashes when the SMS message is about to be sent.
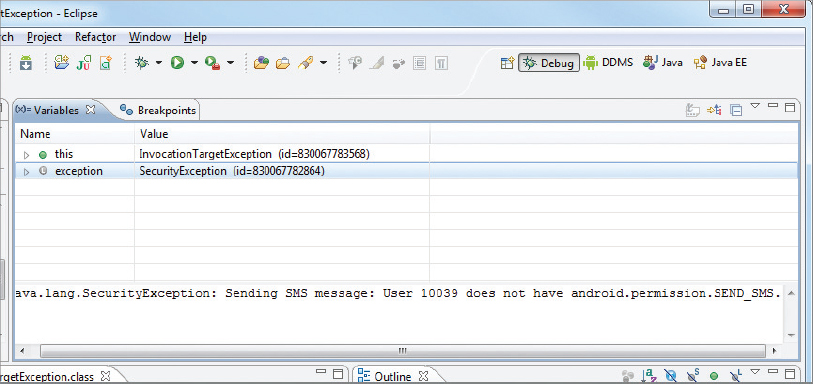
The various windows do not really identify the cause of the exception. To find out more, press F6 in Eclipse so that it can step over the current statement. The Variables window, shown in Figure A-26, indicates the cause of the exception. In this case, the SEND_SMS permission is missing.
To remedy this, all you need to do is to add the following permission statement in the AndroidManifest.xml file:
    <uses-permission
        android:name="android.permission.SEND_SMS"/>